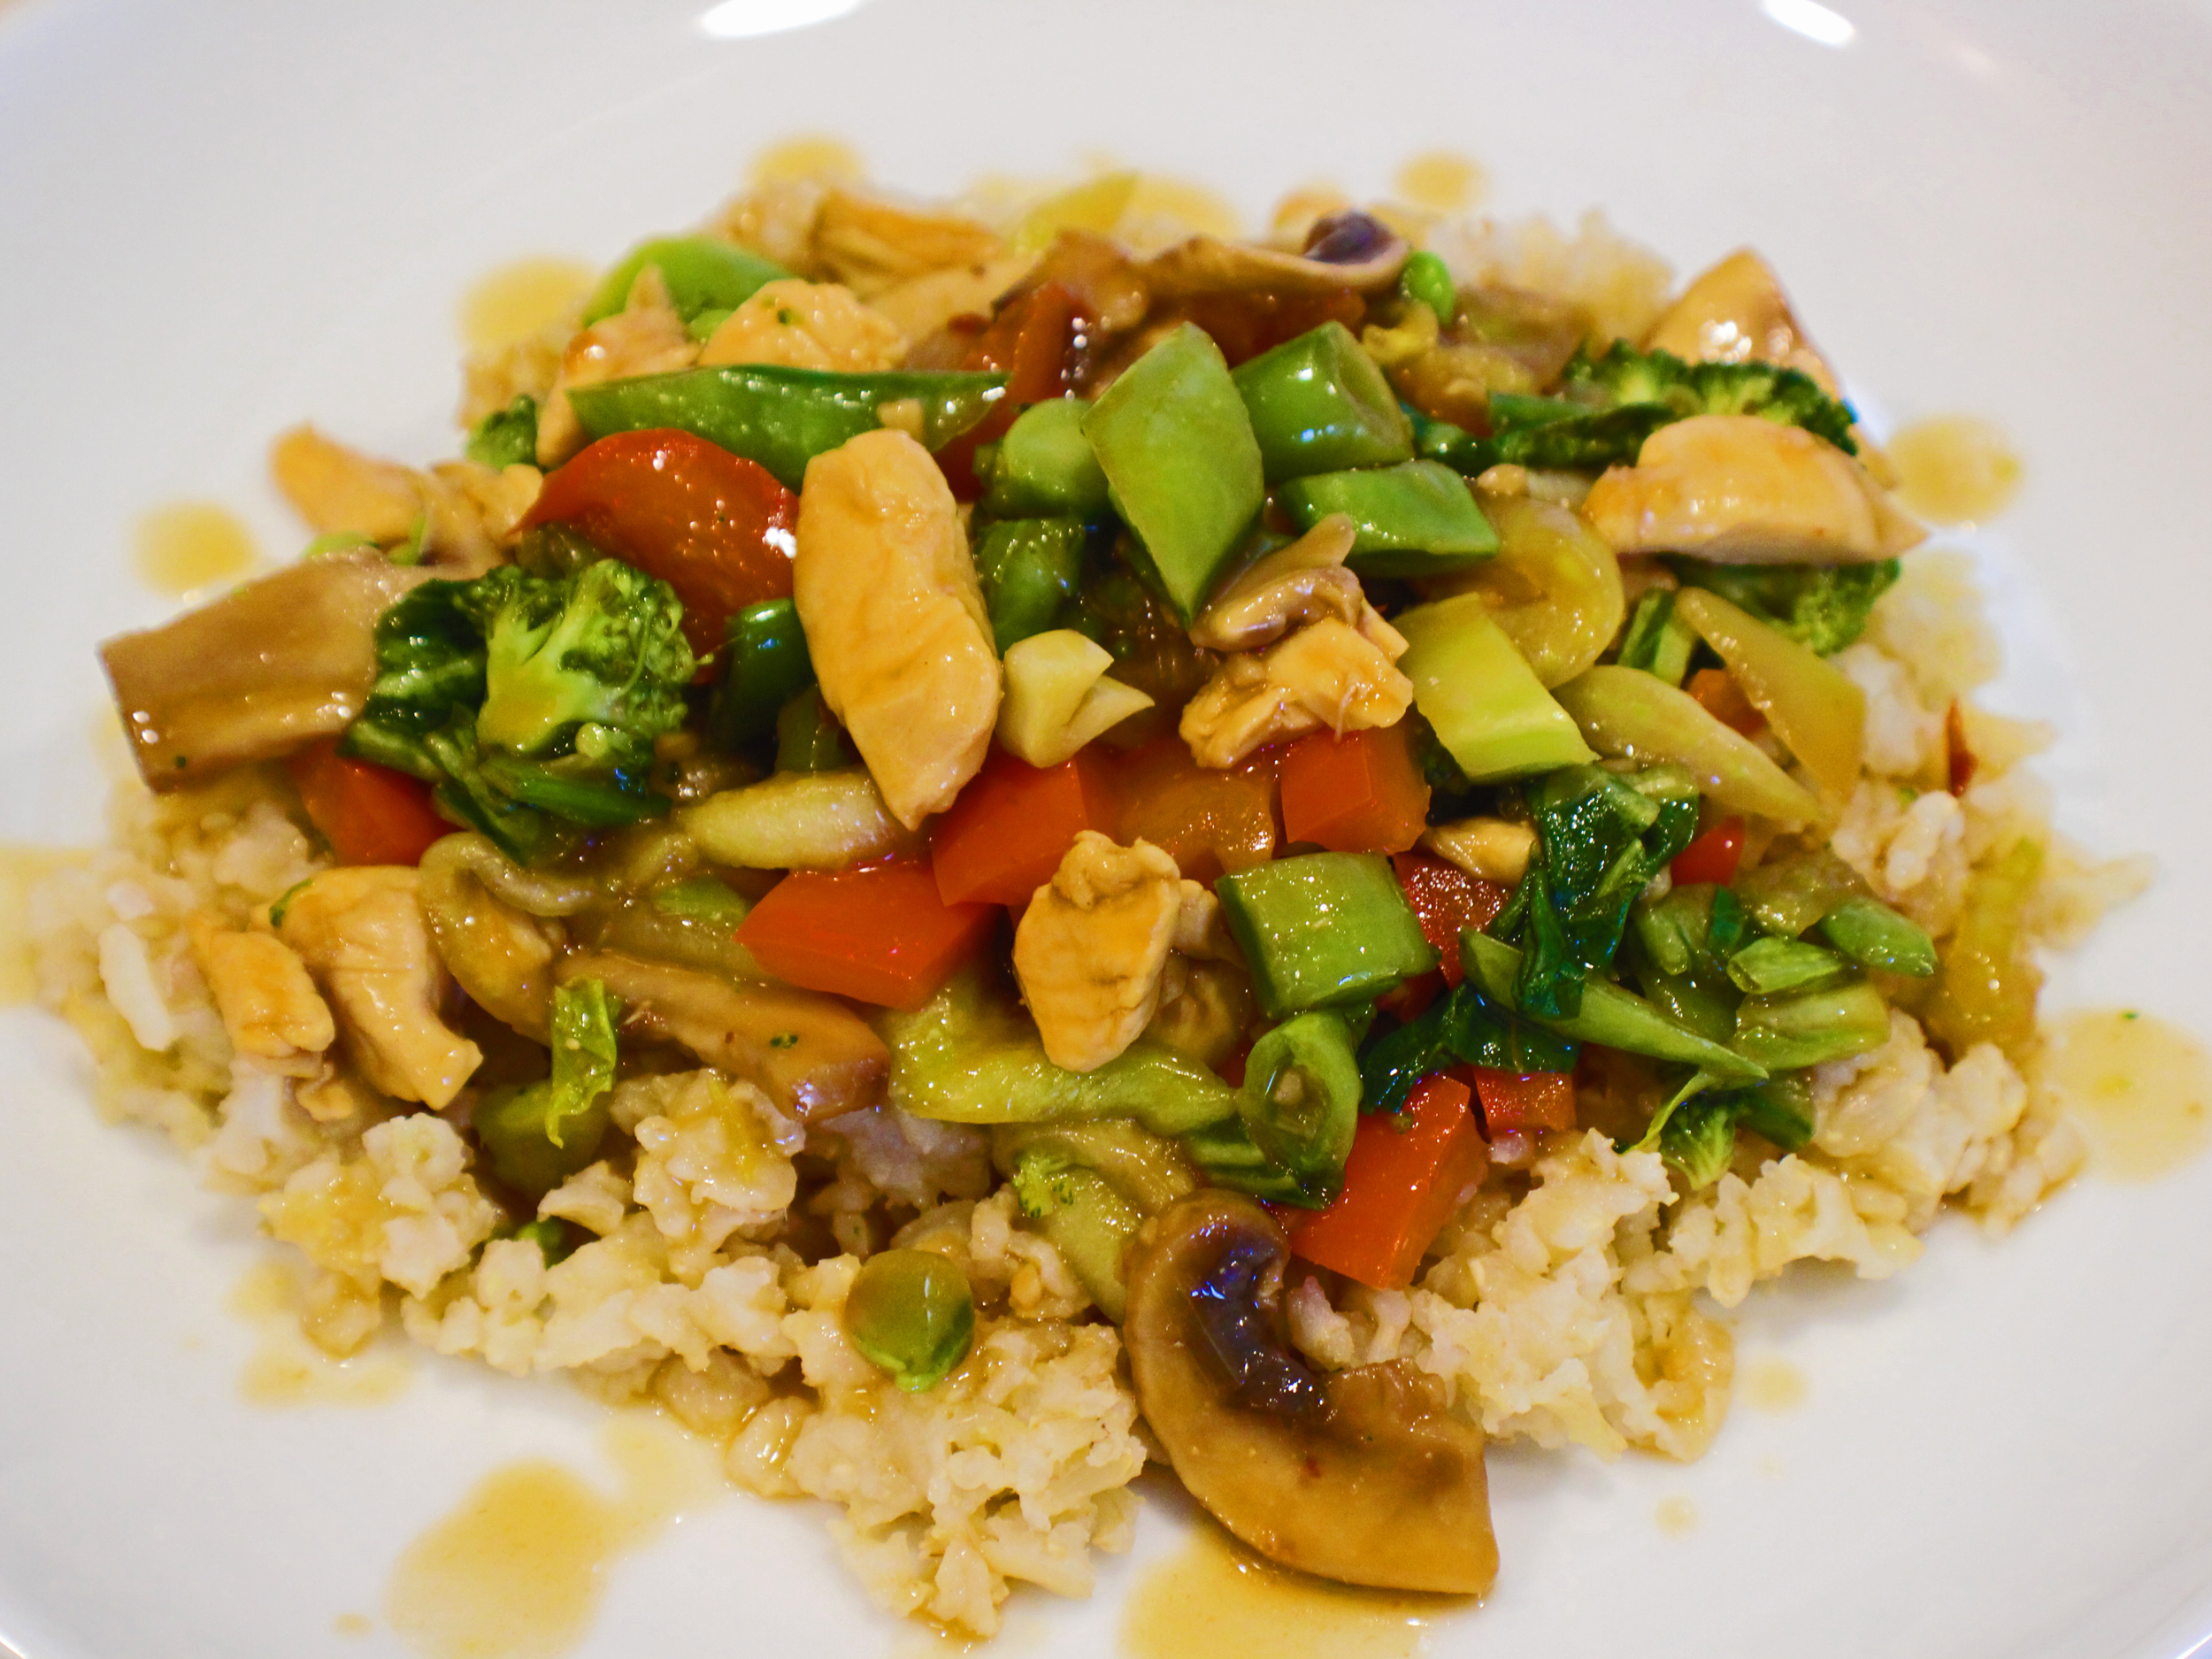
Orange Chicken

This Orange Chicken is quick and easy, but full of flavor. I often cook rice or quinoa on the weekend so I have it ready just to be heated up during the week to finish off a meal at some point during the week.

Try cooking Rice in the Slow Cooker.

First whisk your sauce ingredients together. Be sure to whisk the cornstarch in with a clear liquid, like chicken stock or soy sauce. Cornstarch tends to cling to chunky things which could make for a lumpy sauce. After whisking in the cornstarch, add the rest of the ingredients. It doesn’t matter if you use dark or light brown sugar. I always have dark on hand because I like the stronger flavor of dark brown sugar.
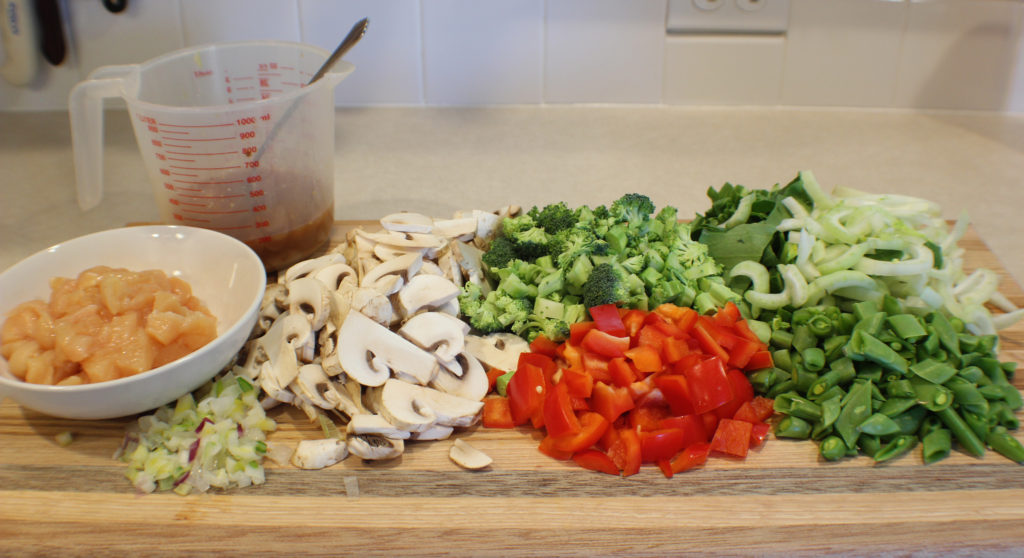
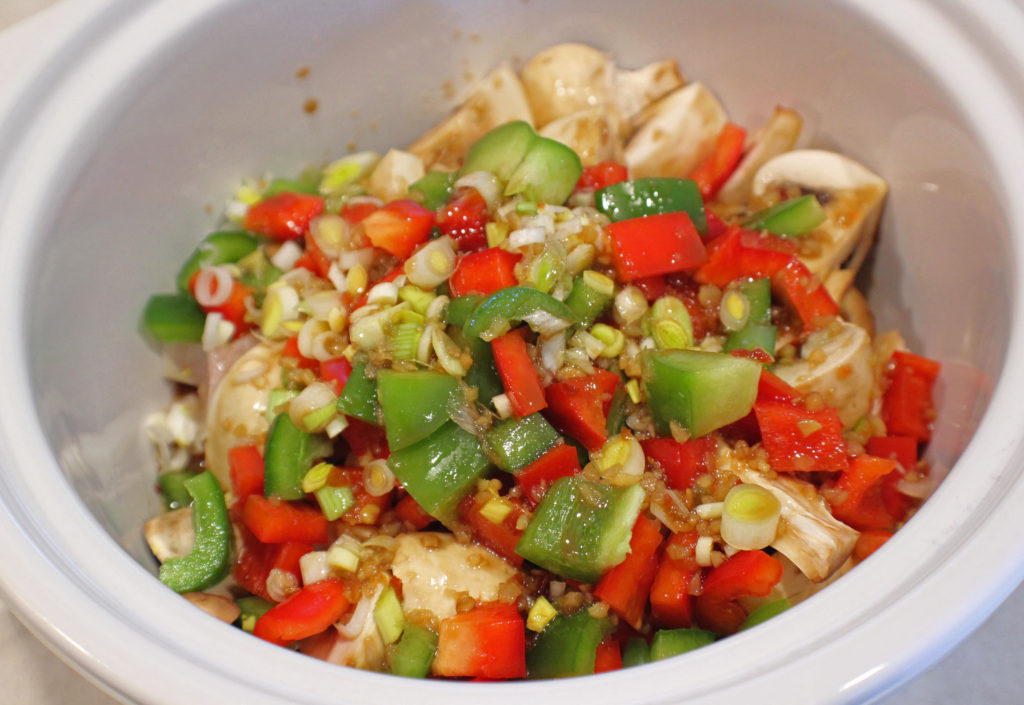
Next prep your veggies and chicken. You will want everything ready because this cooks fast.
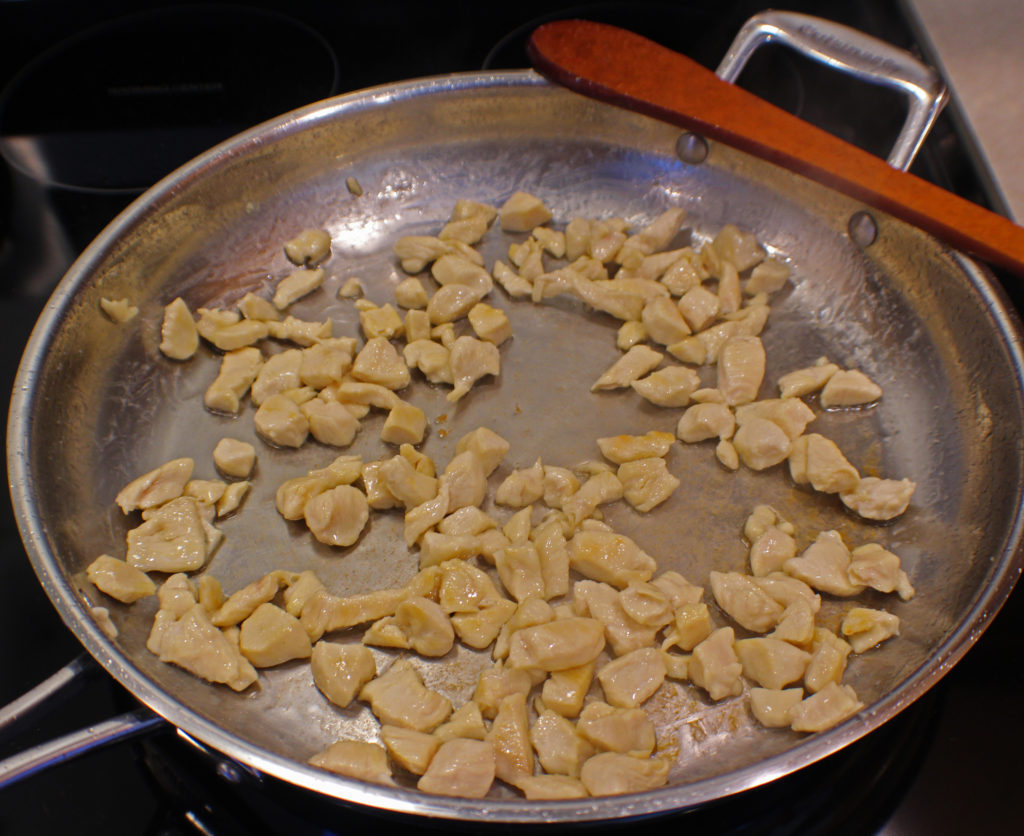
Now heat up a large saute pan on medium heat and add the peanut oil. You could use vegetable oil instead. Then add the chicken and saute for about 5 minutes until the chicken starts browning.

I use a stainless steel pan because it browns chicken and mushroom better than a non-stick pan. But if you prefer non-stick, by all means, go ahead and use that.
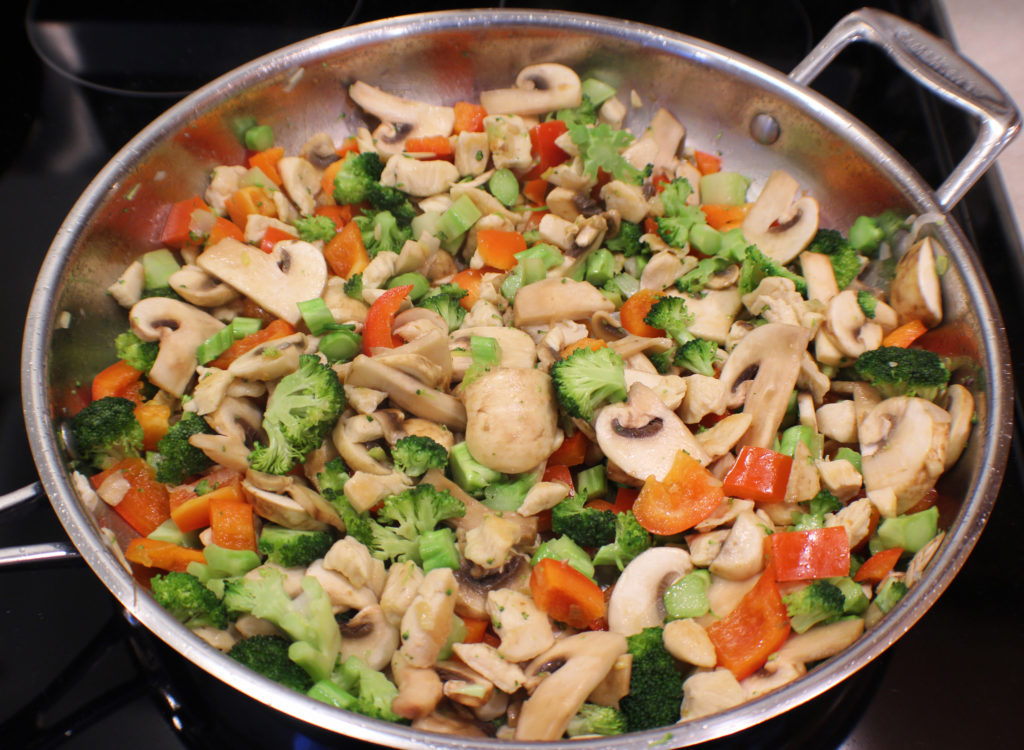
When the chicken is browned, add the bell pepper, broccoli, mushrooms, and onions to the pan and sauté for a few minutes until the broccoli start to soften.

Add the bok choy and sauce, and simmer for a few minutes until the sauce thickens and the bok choy softens.

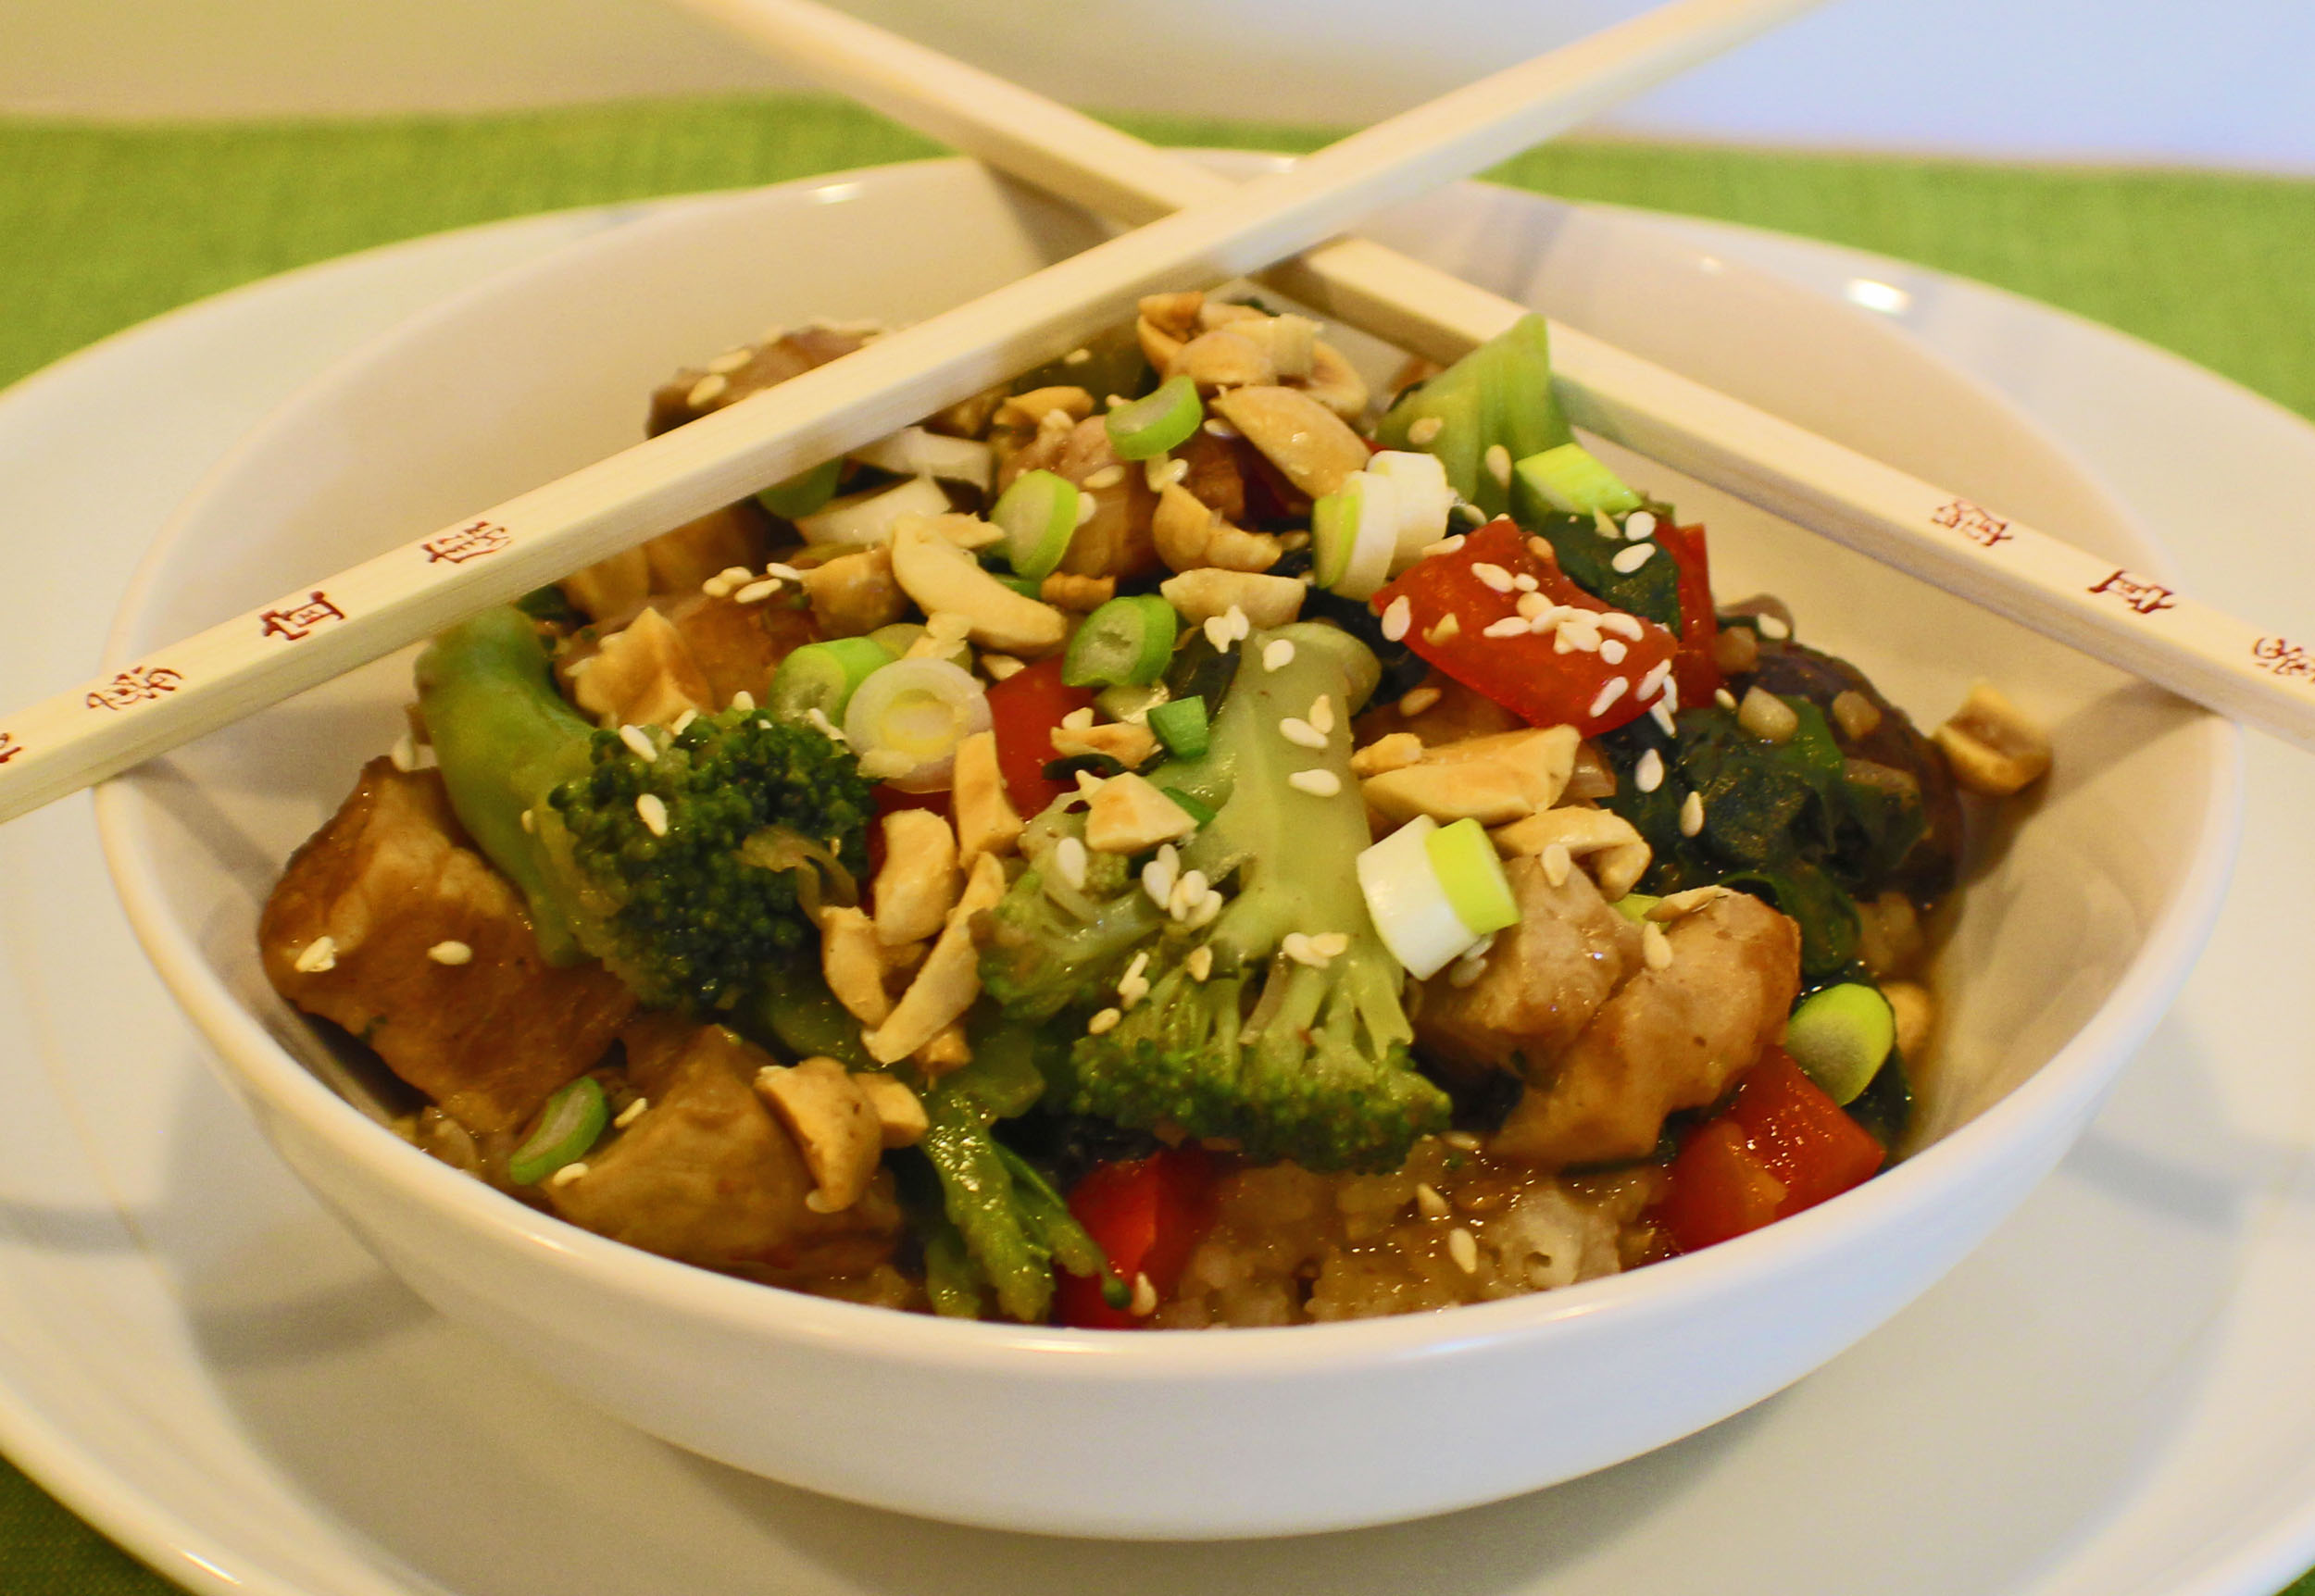
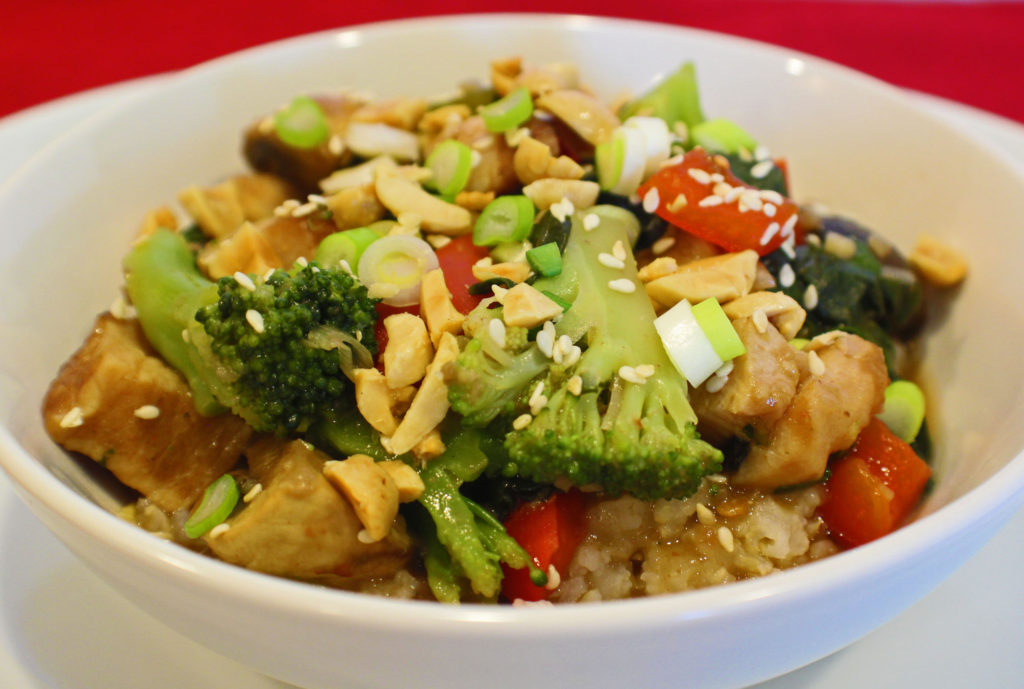
Serve this on some rice and top it with a couple tablespoons of chopped roasted peanuts and Naan Bread.

Enjoy!

Orange Chicken

This quick chicken dinner has a touch of orange and a touch of heat, served on a bed of rice, makes for a wonderful lunch or dinner.
Prep Time20 minutes
Cook Time15 minutes
Course: Dinner, Main Course
Cuisine: American, Asian
Keyword: Chicken, Dairyfree, Glutenfree, Orange Chicken, Whats for Dinner
Servings: 6 cups
Calories: 103kcal
Author: Eating With Deb

Equipment

  • Cutting board and knife
  • Large saute pan

Ingredients

  • 1 each chicken breast cubed
  • 2 tbsp peanut oil

Sauce

  • 1 each orange juice and zest
  • ¼ cup soy sauce or wheat-free tamari
  • 2 tbsp brown sugar
  • 1/3 cup chicken stock
  • 1 tbsp cornstarch
  • 2 tsp garlic fresh, minced
  • 2 tsp ginger fresh, minced
  • 1 tsp sambal Oelek or 1 tsp red pepper flakes

Veggies

  • 1 each red bell pepper chopped
  • 2 cups broccoli florets
  • 2 cups mushrooms sliced
  • ½ each yellow onion
  • 1 1/2 cups snap peas chopped
  • 1 each baby bok choy shredded

Instructions

  • Whisk cornstarch in chicken stock then whisk in orange juice, soy sauce, brown sugar, garlic, ginger, and sambal oelek. Set aside.
  • On medium heat, sauté chicken in peanut oil until brown, about 5 minutes.
  • Add bell pepper, broccoli, mushrooms, and onion to pan. Sauté until broccoli starts to soften but remains bright green, about 5 minutes.
  • Add sauce and bok choy. Simmer until sauce is thickened – about 5 minutes.
  • Serve on cooked rice topped with some chopped, roasted peanuts.
  • Enjoy!
Nutrition

Serving: 1cup | Calories: 103kcal | Carbohydrates: 12g | Protein: 4g | Fat: 5g | Saturated Fat: 1g | Cholesterol: 1mg | Sodium: 585mg | Potassium: 298mg | Fiber: 2g | Sugar: 7g | Vitamin A: 475IU | Vitamin C: 43mg | Calcium: 34mg | Iron: 1mg

Pumpkin Cookies

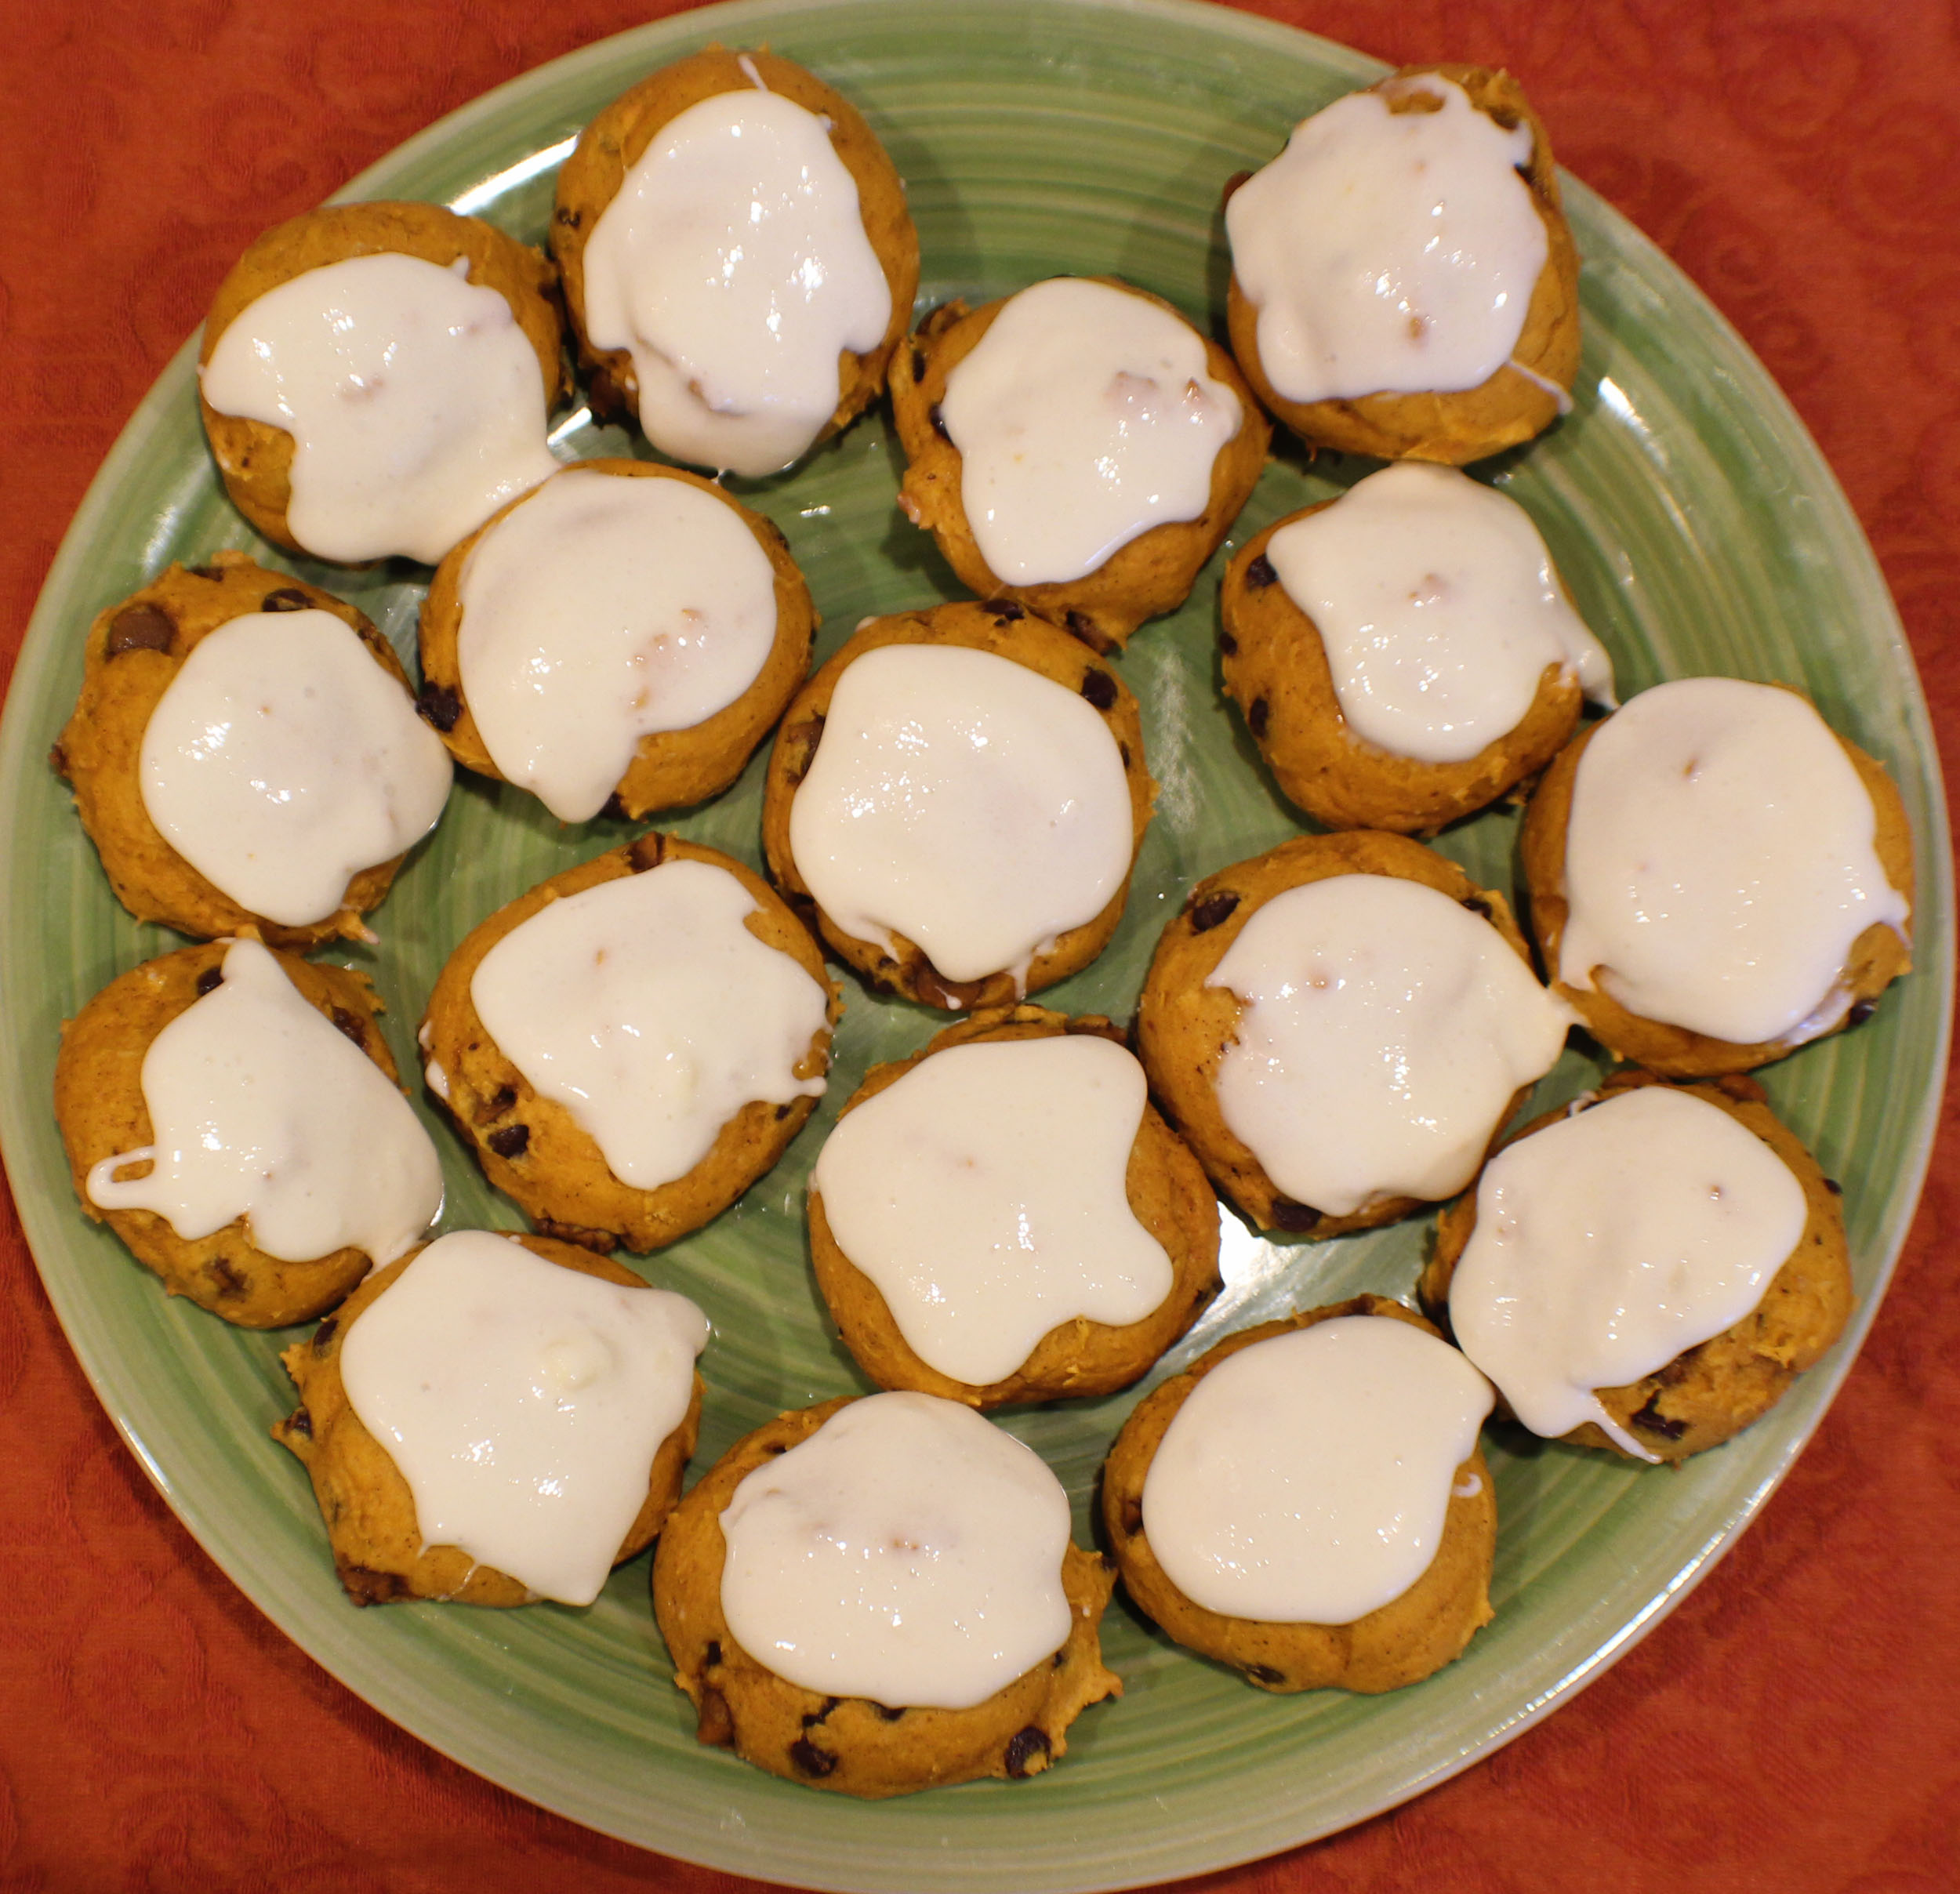
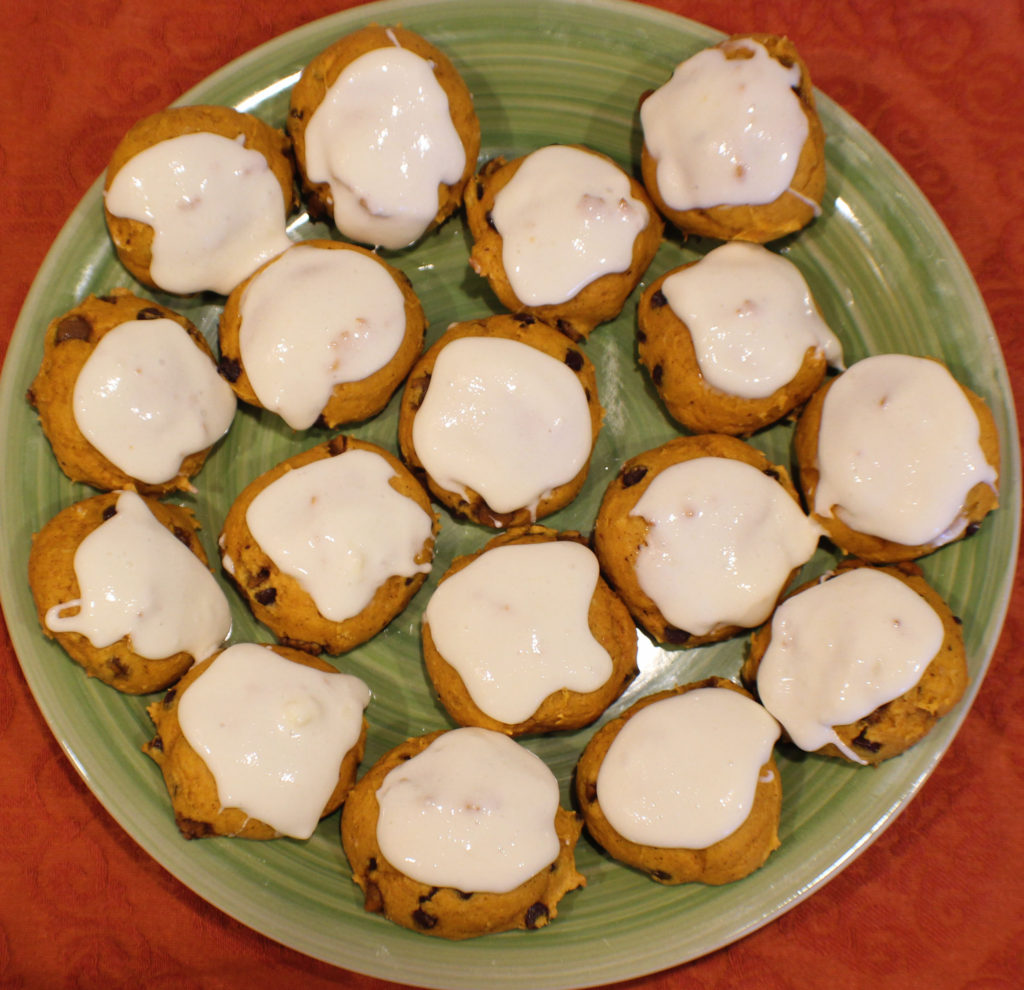
Pumpkin Cookies Iced

The sun is lower in the sky, the days are shorter, and the harvest has come and gone. That means it’s time to put pumpkin in just about anything you can imagine. Until recently I didn’t have much of a taste for pumpkin, but doing a little experimenting has changed my mind about that fall gourd.

I came up with a quick and simple (just the way I like recipes) cake mix pumpkin cookie recipe that is sure to become one of your winter favorites.

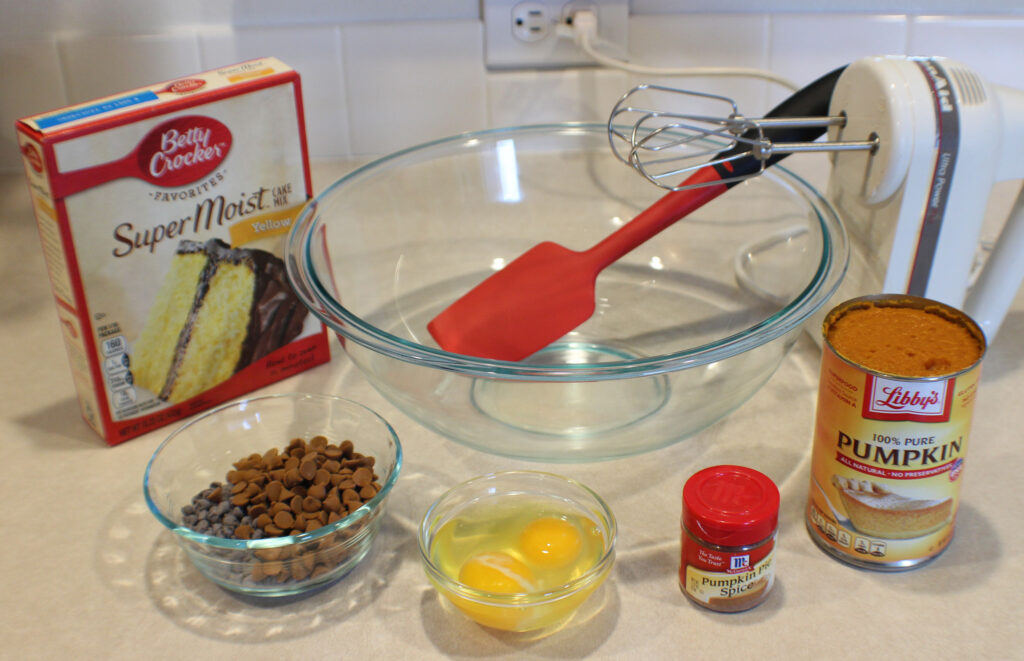
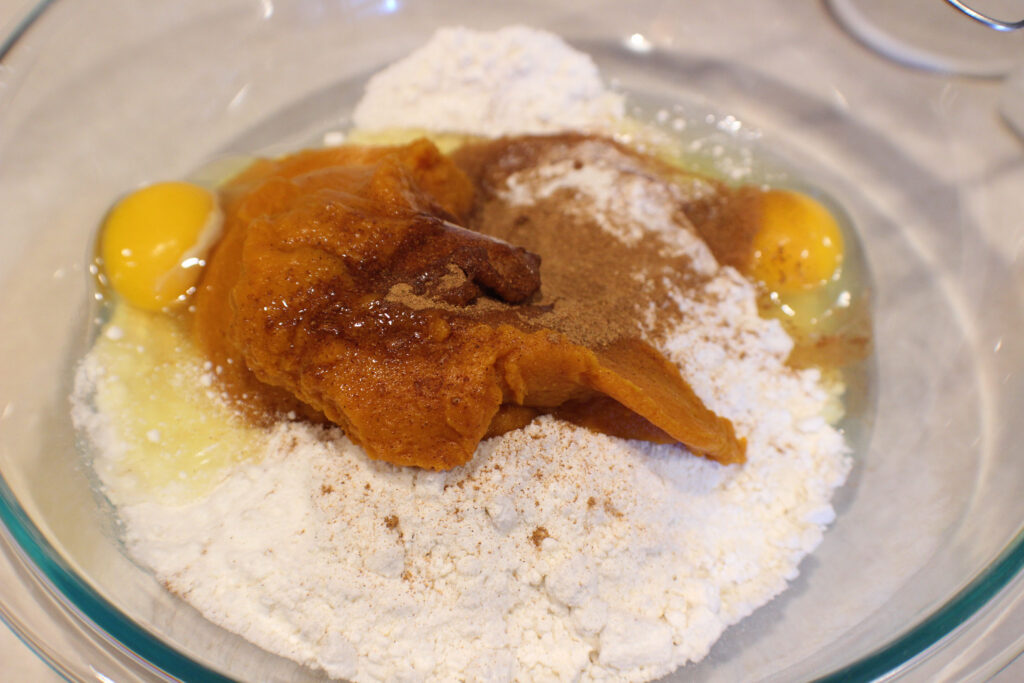
Pumpkin Cookie Ingredients

This is very simple to mix together using a hand mixer. 

Mixing Pumpkin Cookies

 Mix the cake mix, pumpkin, pumpkin spice, and eggs together. 

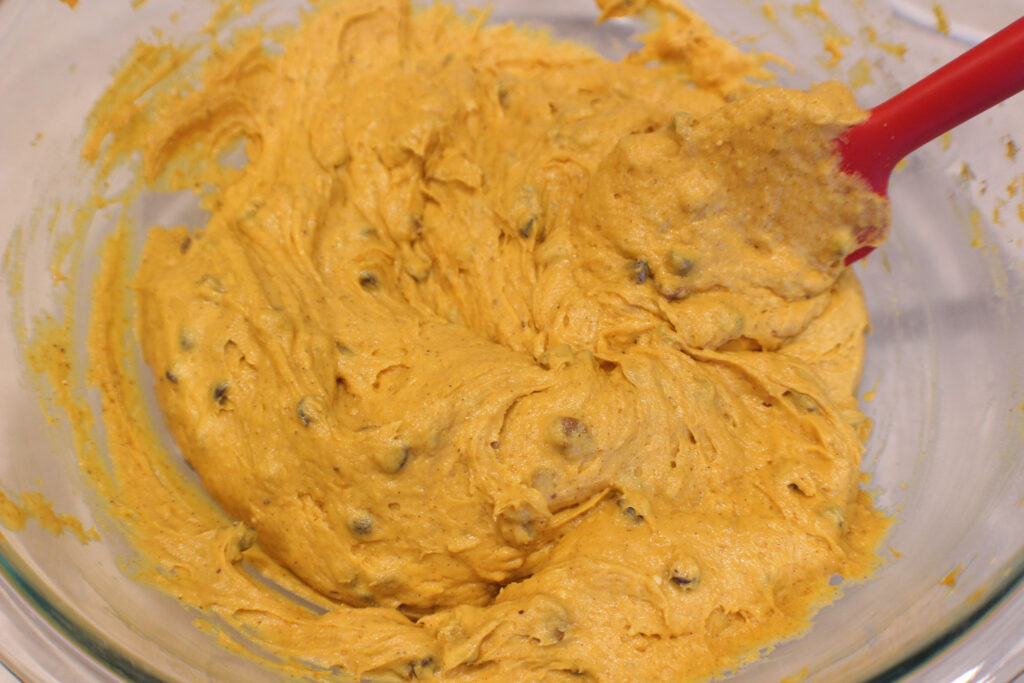
Then stir in the chocolate and/or cinnamon chips with a firm rubber spatula or spoon.

I have had a difficult time finding cinnamon chips, but they are well worth using. I have resorted to ordering them on Amazon. I have ordered them from a couple different suppliers on Amazon. One supplier I received the packages of chips and they appeared to have melted and solidified into a solid chunk. That particular company would not refund money. I have ordered Hersey’s Cinnamon Baking Chips from this supplier on Amazon and have not had an issue. Plus this company will issue a refund if there is a problem.

If you order from Nuts.com, I have seen them on that site as well.

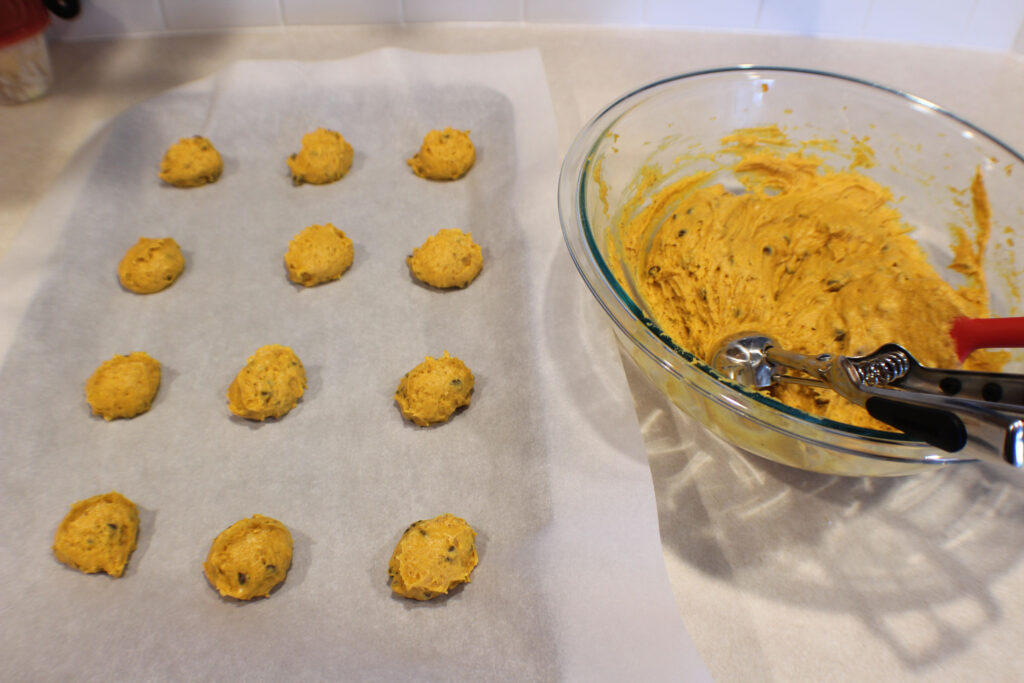
They are ready to scoop and bake.

I bought a small, inexpensive scooper from Walmart specifically for scooping cookie dough, but you could use a spoon to scoop the batter out and the back of a second spoon to push the batter off the first spoon onto the pan.

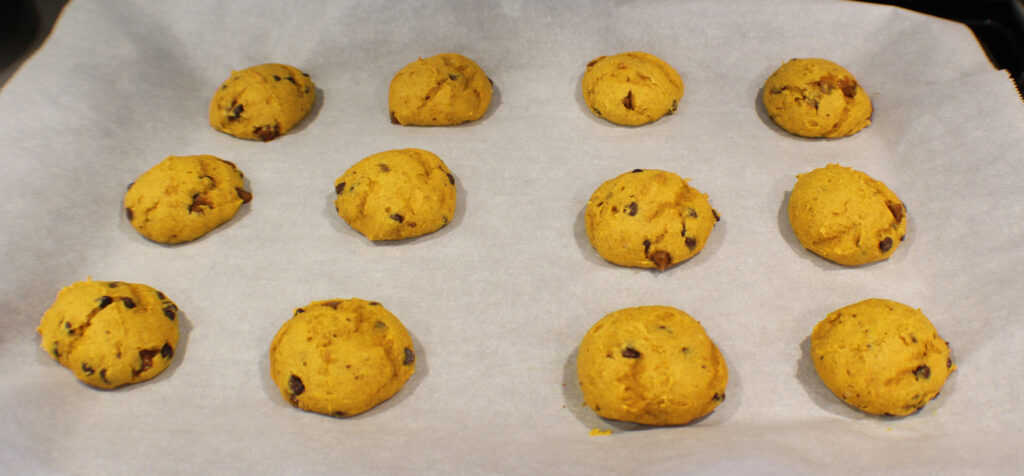
Pumpkin Cookies Baked

Sometimes I bake 1 tray at a time on the middle rack of my oven, but I often don’t want to deal with baking 4 trays separately. In that case I will try to center the oven racks as much as possible and put both cookie trays in and rotate from top to bottom and bottom to top half way through the cooking process.

Make sure when they are done to let them cool on the cookie tray for about 5 minutes before moving them to a cooling rack.

Pumpkin Cookies Iced

While the cookies are cooling I make my frosting with softened cream cheese, powdered sugar and a little bit of milk to thin it out slightly to make the frosting easier to spread.

These cake mix pumpkin cookies have become my new favorite cookie that I make whenever I get that pumpkin craving.

Enjoy!
Pumpkin Cookies

Use a cake mix and canned pumpkin for a quick, delicious fall cookie.
Prep Time5 minutes
Cook Time14 minutes
Total Time19 minutes
Course: Dessert, Sweet Treats
Cuisine: American
Keyword: Cookies, Fall Cookies, Pumpkin, Pumpkin Cookies, Sweet Treats
Servings: 48 cookies
Calories: 63kcal
Author: Eating With Deb

Equipment

  • 1 Large bowl and hand mixer Stand mixer with paddle attachment
  • 2 cookie trays
  • 1 rubber spatula
  • 1 cookie scoop 2 spoons

Ingredients

  • 1 box yellow cake mix
  • 15 ounce can pumpkin
  • 2 tsp pumpkin spice
  • 2 each eggs

Stir in:

  • 1/3 cup cinnamon baking chips
  • 1/3 cup dark chocolate chips

Frosting

  • 2 cups powder sugar
  • 3 tbsp cream cheese softened
  • 2 tbsp milk

Instructions

  • Preheat oven to 350 degrees.
  • Using a stand mixer or hand beaters, mix together cake mix, pumpkin, pumpkin spice, and eggs.
  • Stir in the cinnamon and chocolate chips.
  • Scoop out onto parchment lined sheet tray about 2 inches apart.
  • Bake for 12 to 14 minutes until firm and slightly brown.
  • Let sit on cookie tray for about 5 minutes before removing from pan to a rack to cool.
  • Whisk together frosting ingredients. May need to add a little more milk to reach a spreadable frosting.
  • Frost cooled cookies.

Notes

Don't overbake cookies. They will still be slightly soft when done. If you're not sure, stick a toothpick in them and if it comes out clean, they are done.
Before frosting, make sure cookies are completely cool. You can refrigerate them first before frosting, if desired.

Nutrition

Serving: 1cookie | Calories: 63kcal | Carbohydrates: 17g | Protein: 1g | Fat: 2g | Saturated Fat: 1g | Polyunsaturated Fat: 0.1g | Monounsaturated Fat: 0.4g | Trans Fat: 0.03g | Cholesterol: 1mg | Sodium: 86mg | Potassium: 43mg | Fiber: 1g | Sugar: 6g | Vitamin A: 1393IU | Vitamin C: 0.4mg | Calcium: 32mg | Iron: 0.5mg

Kung Pao Chicken (in the Slow Cooker)

Kung Pao Chicken

I make Kung Pao Chicken in a sauté pan on the stove top or in a slow cooker, it all depends on the time I have to prepare the meal. The slow cooker method allows me to be able to put all the ingredients in the slow cooker crock the day before and put it in my slow cooker the next day for a no fuss meal.

For the sauce, I whisk every thing together in a 4 cup measuring cup, that way I don’t have to dirty any other measuring cups and bowls. 

Be sure to mix the cornstarch in with just liquid, like water or soy sauce. Cornstarch likes to adhere to solids and you risk creating a lumpy sauce in the end. Once the cornstarch is dissolved in the liquid, mix in the rest of the ingredients.

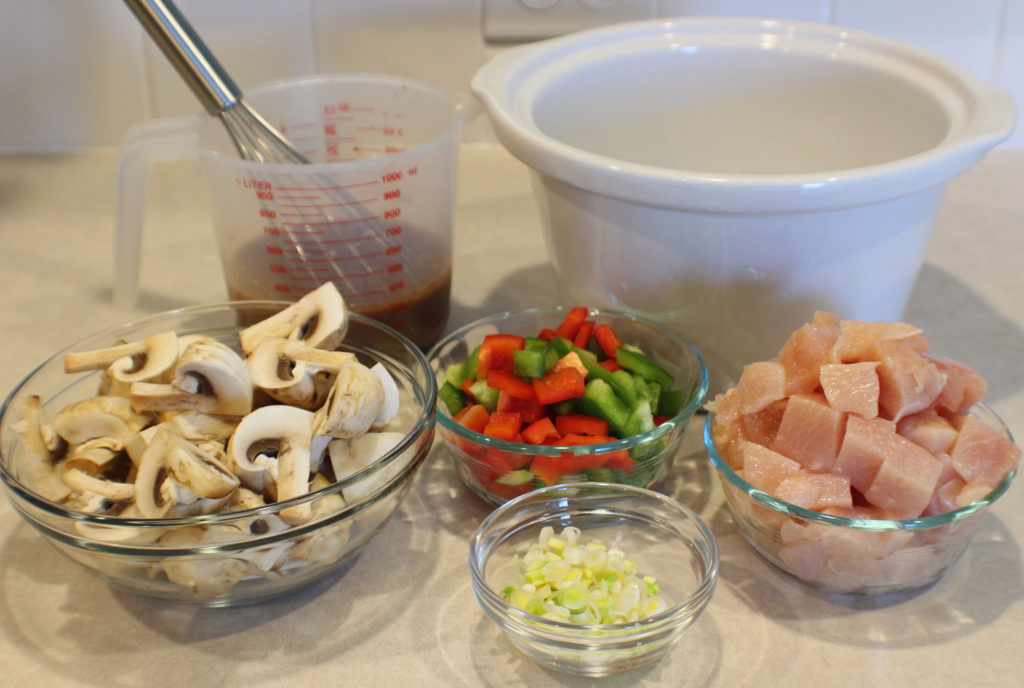
Get the rest of the ingredients ready. If using fresh broccoli or bok choy, have that ready to go now too. This time around I’m using frozen broccoli so I need to add it later, and I have some frozen chard from my garden that I’m using instead of bok choy, so that is going in later too. You could use fresh spinach or napa cabbage instead.

Now just put it in the crock of the slow cooker and stir it up a bit. If I’m going to cook this the next day or later the same day, I put the lid on it and put it in my refrigerator.

If using frozen broccoli or another green other than bok choy, after about 2 1/2 hours of cooking, stir it in and cook for another half hour or so.


I like this on rice, try making Rice in the Slow Cooker, or serve it on cooked Udon or Hokkien noodles, topped with roasted peanuts, sliced green onions, and toasted sesame seeds.

Enjoy!

Kung Pao Chicken (Slow Cooker)

Kung Pao Chicken is a saucy and spicy stir fry dish with vegetables. It can be done on the stove top, but for added convenience, I like to put it together the day before, store it in my refrigerator, and put it in the slow cooker the next day for an easy dinner.
Prep Time15 minutes
Cook Time3 hours
Total Time3 hours 15 minutes
Course: Dinner, Lunch, Main Course
Cuisine: Asian
Keyword: Chicken, Dinner Ideas, Kung Pao
Servings: 6 cups
Calories: 100kcal
Author: Eating With Deb

Equipment

  • 4 to 6 quart slow cooker
  • Cutting board and knife
  • 4 cup measuring cup and whisk

Ingredients

Chicken and Veggies

  • 1 each large chicken breast cubed
  • Sea salt and black pepper
  • ½ each red bell pepper bite size pieces
  • ½ each green bell pepper bite size pieces
  • 1 each small leek sliced, or ¼ yellow onion, diced
  • 10 each button mushrooms quartered
  • 2 cups broccoli florets fresh or frozen
  • 1 each baby bok choy or 2 handfuls fresh spinach or shredded napa cabbage

Sauce:

  • ½ cup soy sauce
  • 1/3 cup water
  • 1 tbsp sesame oil
  • 2 tbsp mirin or brown rice vinegar
  • 2 tbsp cornstarch
  • 3 tbsp honey
  • 1 tbsp fresh garlic minced
  • 1 tbsp Sambal Oelek
  • 2 tbsp fresh ginger minced

Garnish

  • Roasted peanuts
  • Roasted sesame seeds
  • Sliced green onions or chives

Instructions

  • For sauce, whisk together soy, water, oil, mirin, and cornstarch. Then add honey, garlic, sambal oelek, and ginger and set aside.
  • Cube chicken breast and put it in the slow cooker. Sprinkle with salt and black pepper
  • Add bell peppers, mushrooms, broccoli (if using fresh), bok choy (if using), and sauce.
  • Turn on cooker to low and cook for 2 ½ hours, stirring once or twice. If using frozen broccoli or spinach or napa cabbage, stir in now. Cook for another ½ hour.
  • Serve over rice or udon or hokkien noodles and garnish with peanuts, green onions (or chives), and sesame seeds.
  • Enjoy!
Notes

You can replace the honey with brown sugar.

Nutrition

Serving: 1cup | Calories: 100kcal | Carbohydrates: 18g | Protein: 3g | Fat: 3g | Saturated Fat: 1g | Cholesterol: 1mg | Sodium: 1169mg | Potassium: 173mg | Fiber: 1g | Sugar: 11g | Vitamin A: 219IU | Vitamin C: 28mg | Calcium: 23mg | Iron: 1mg

Kielbasa Skillet

Kielbasa Skillet with Egg

In recent years I have come to appreciate the versatility of Kielbasa sausage, and realize it isn’t just for grilling.

Kielbasa is milder than Andouille or Chorizo, comes in a long u-shape form, usually isn’t smoked, and is full of garlic. It works great in a variety of soups, stews (try it in Kielbasa Stew), and even chili, as well as sautéed with potatoes and vegetables, or used as a breakfast meat. Or grill it and put it on a bun with your favorite toppings.

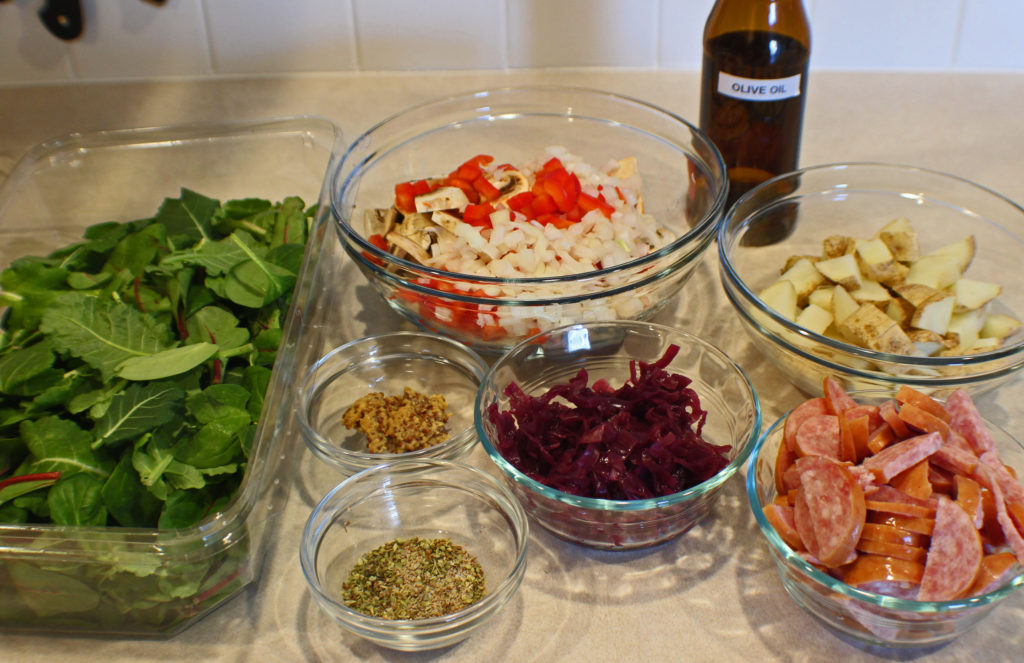
Kielbasa Skillet Ingredients

This skillet kielbasa meal is great for any time of the day and can be adapted to whatever you like. You could certainly add broccoli, or another vegetable of your choosing. I like to make this in the fall when I have a fresh garden harvest of potatoes, snap peas, bell peppers, tomatoes, spinach, and onions or chives.

Microwave the potatoes first to cut down on cooking time, then put them in the refrigerator to cool a bit before cutting them up. While the potatoes are cooling, I prepare the rest of my ingredients.

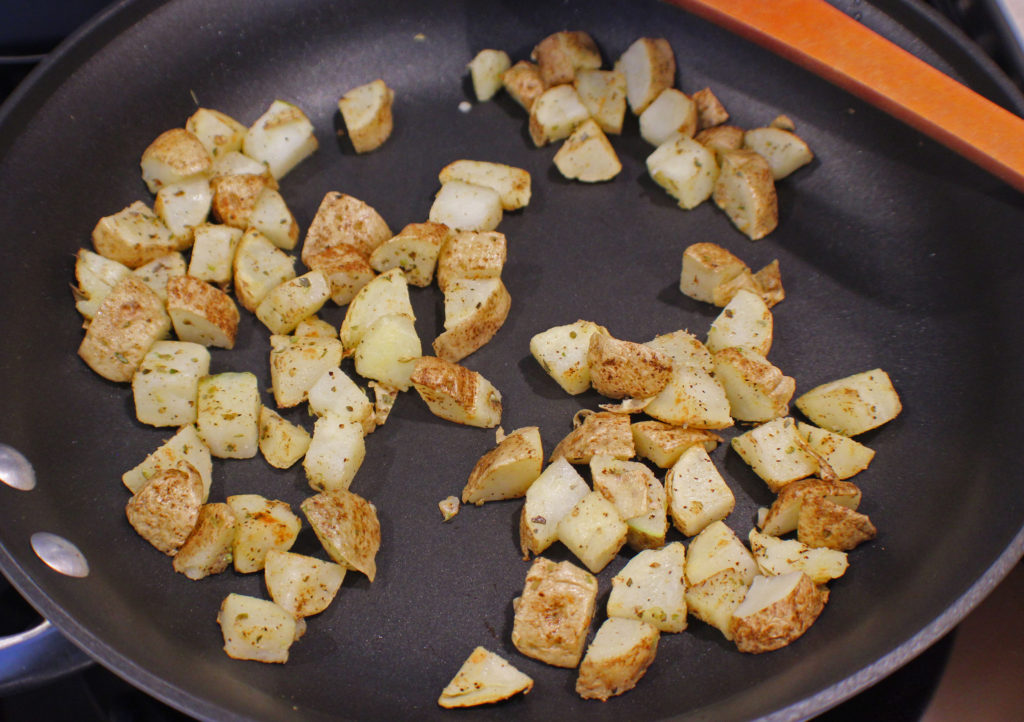
Kielbasa Skillet Potatoes

Use a nonstick pan when cooking potatoes since they tend to stick to stainless steel quite well. Medium heat seems to crisp them up perfectly in about 5 minutes, but you might need to turn it down to medium low after adding the sausage and other vegetables to prevent things from burning.

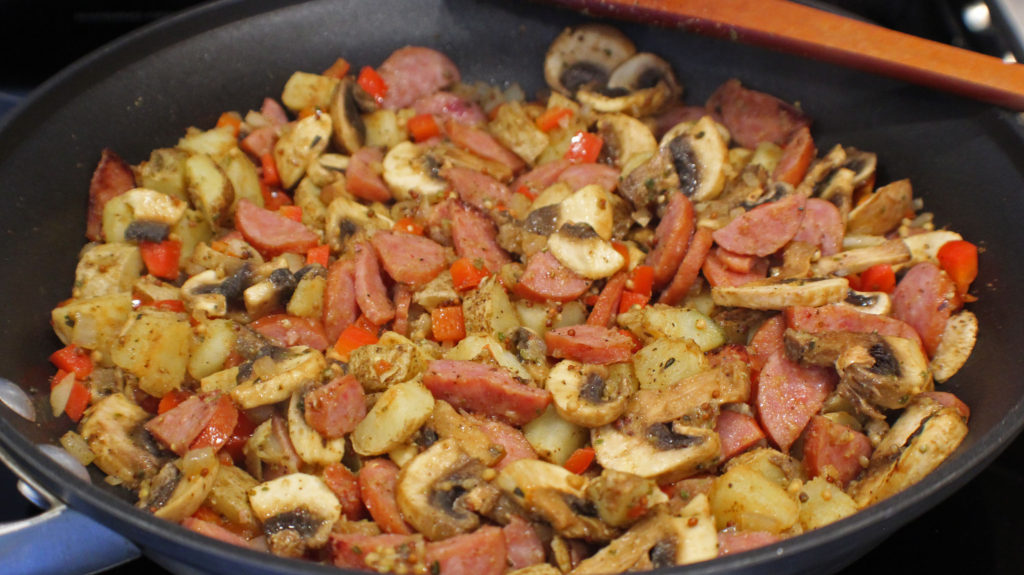
Kielbasa Skillet Spuds and Veg

When adding the sausage and veggies there is no need to add more oil since the sausage will render out fat.

It is also important to season in layers, so I add about half of the seasonings with my potatoes, and the other half with the sausage and veggies, as well the mustard with the sausage and veggies.

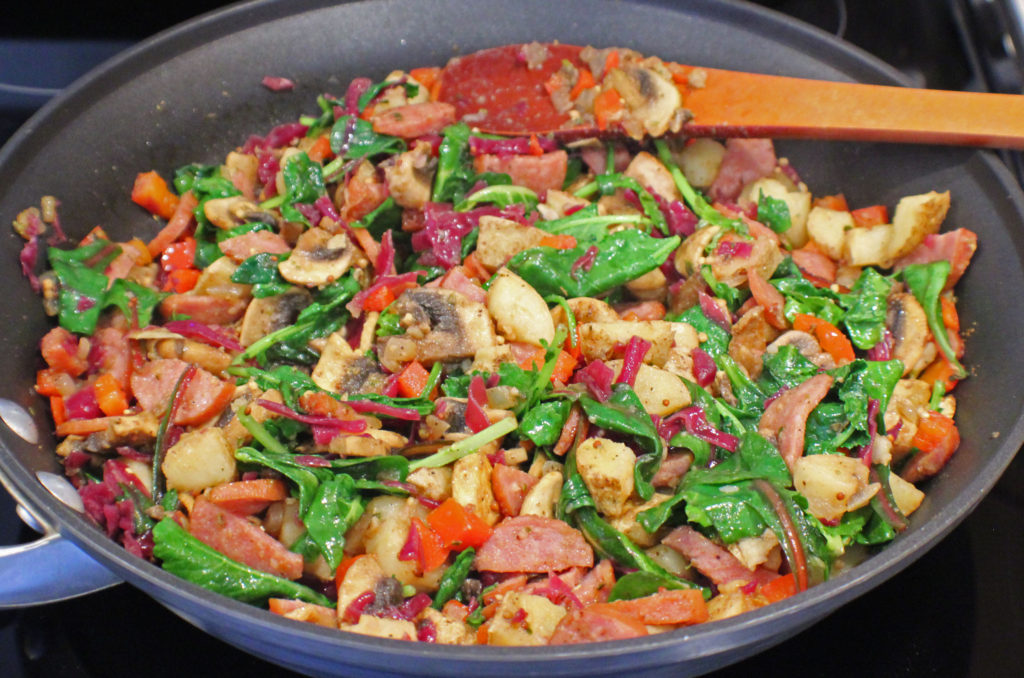
Kielbasa Skillet Greens and Kraut

In the last couple of minutes, stir in the greens and sauerkraut. If it’s not summer or fall, I have power greens from Earthbound Farm in my fridge, so I use that. The power greens mix has baby spinach, kale, and chard. But using just spinach or kale works too.

I also make my own sauerkraut using purple cabbage, so I have purple sauerkraut. But regular sauerkraut is just fine. Make sure you drain the sauerkraut first.

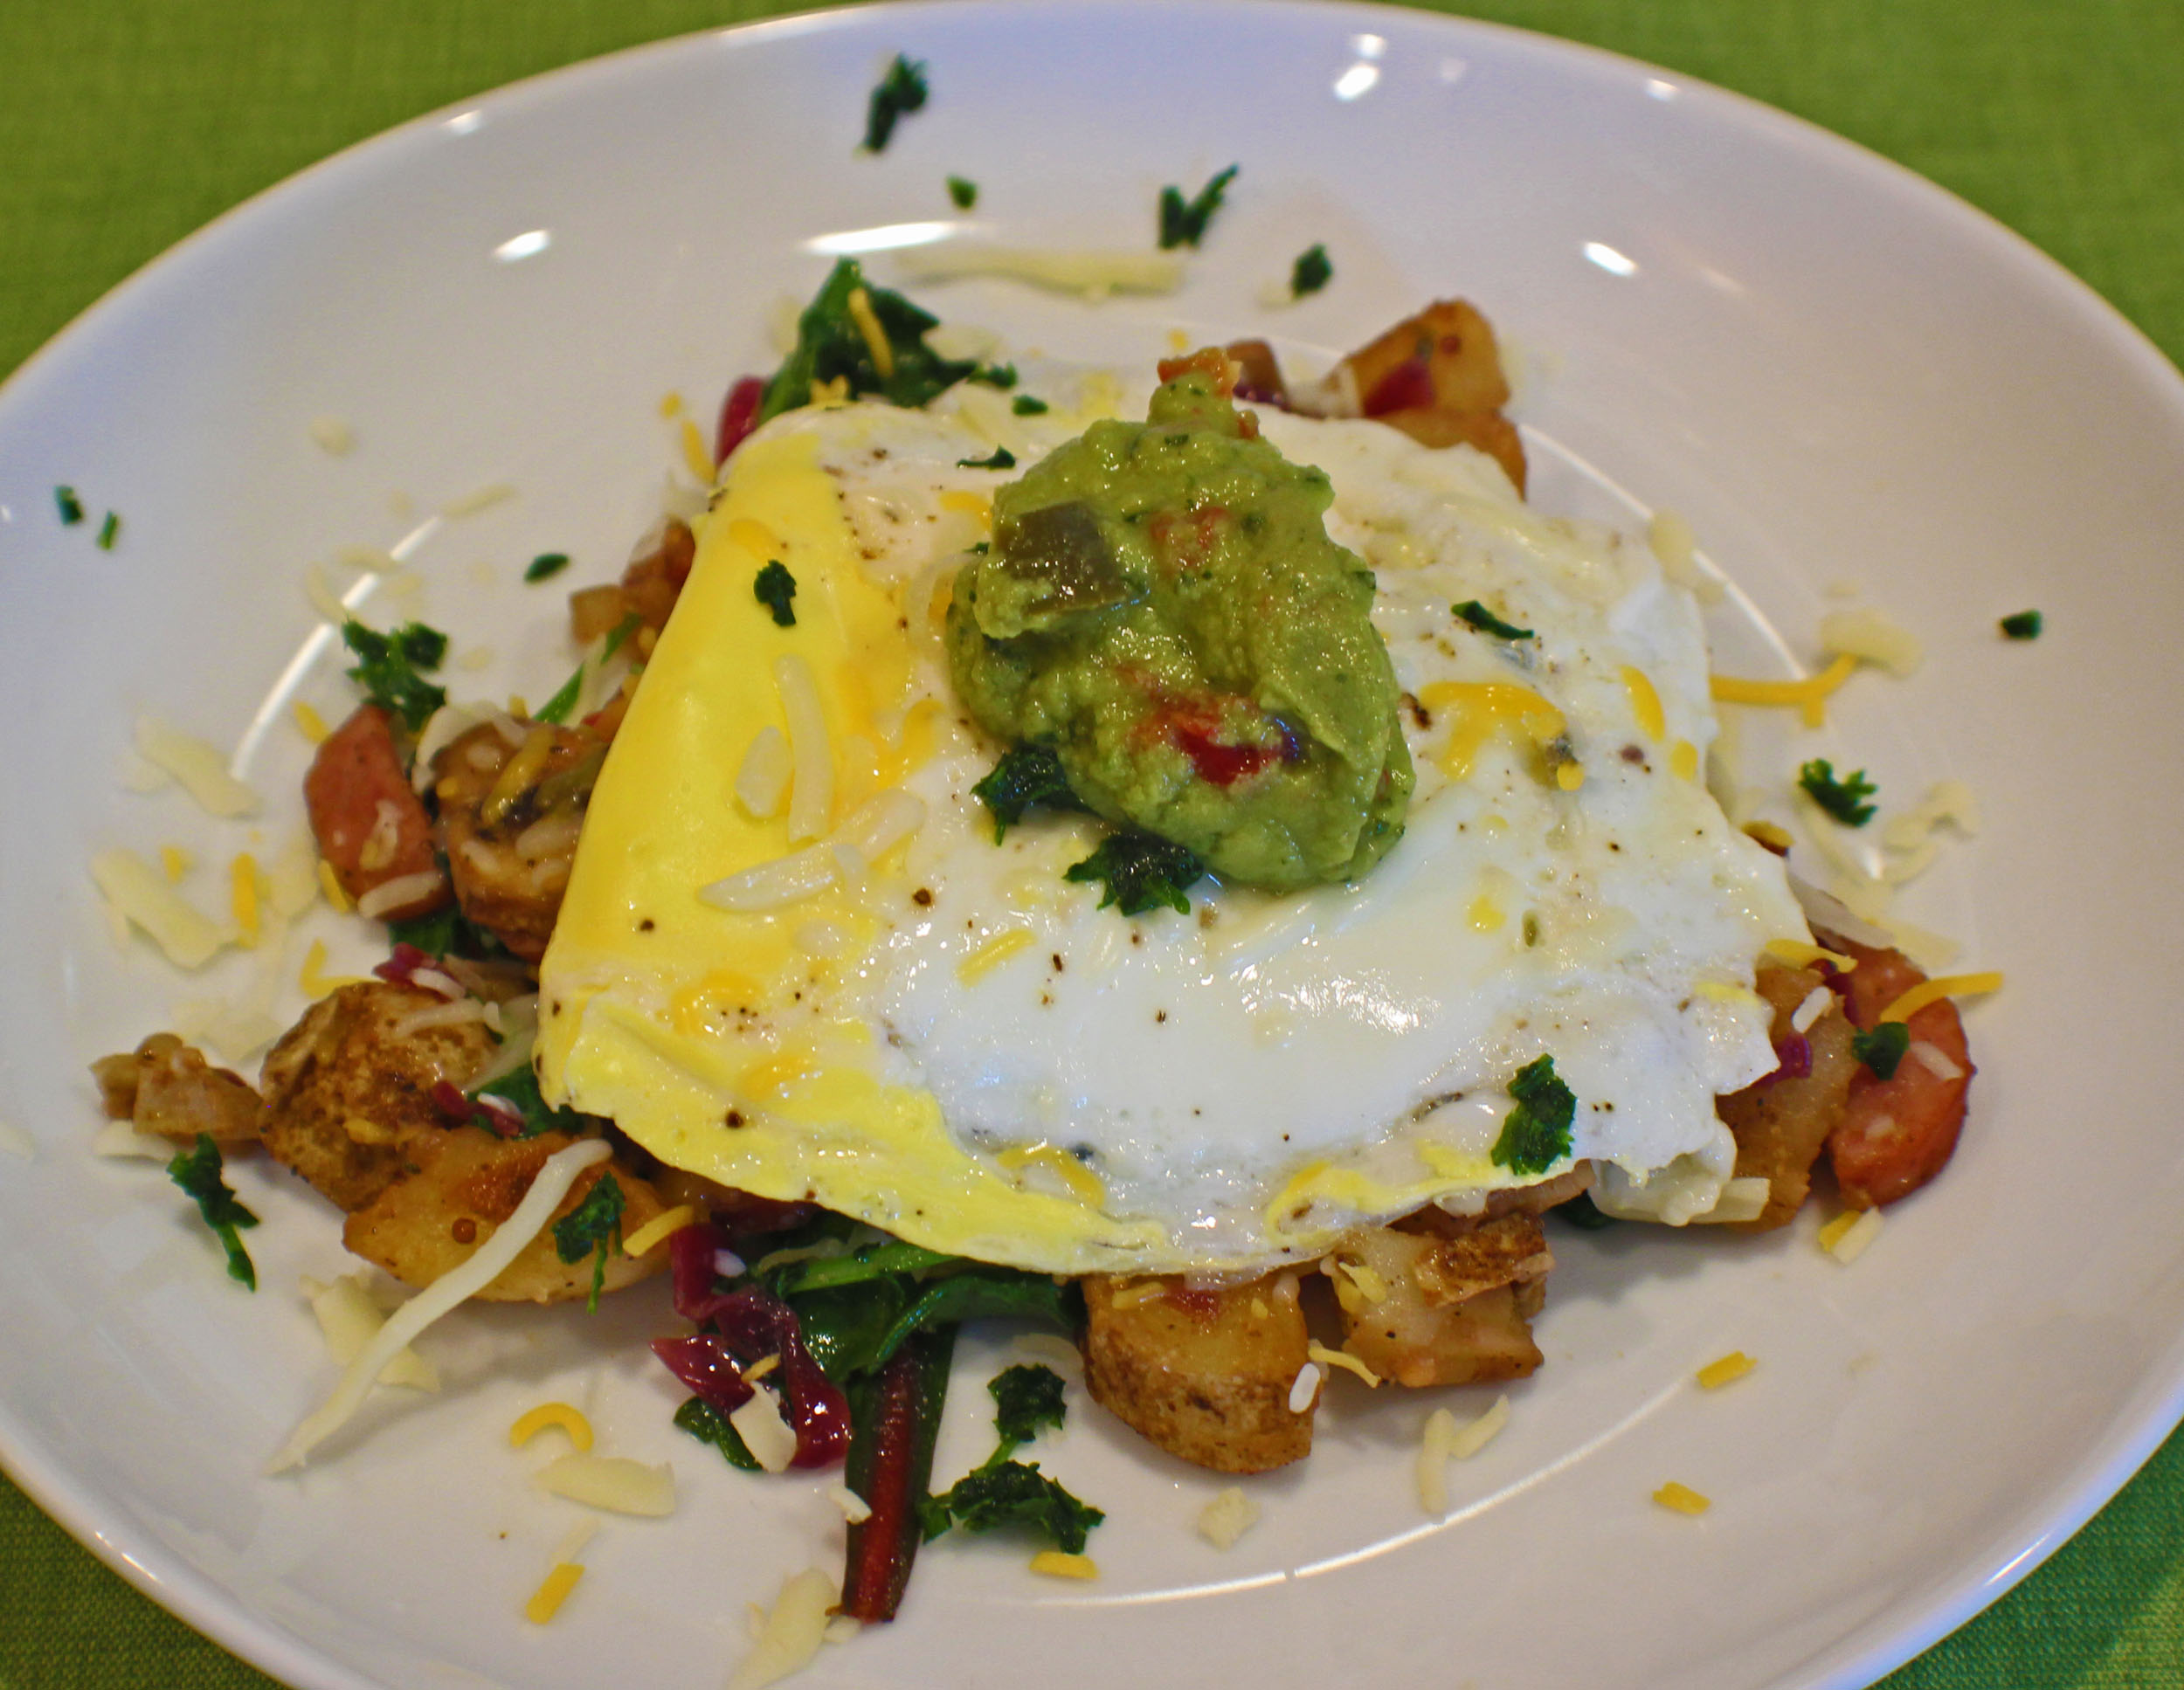
Now you are ready to eat. This is great as is, but you can top it with whatever you desire, cheese, avocado, a fried egg, fresh tomatoes…

Enjoy!

Kielbasa Skillet

A quick skillet meal that can be served for breakfast, brunch, lunch, or dinner. Full of vegetables and flavor!
Prep Time15 minutes
Cook Time15 minutes
Total Time30 minutes
Course: Breakfast, Brunch, Dinner, Lunch
Cuisine: American
Keyword: kielbasa, Kielbasa Skillet, Skillet Meals
Servings: 4 people
Calories: 237kcal
Author: Eating With Deb

Equipment

  • Cutting board and knife
  • Large nonstick sauté pan and heat resistant spoon

Ingredients

  • ½ pound kielbasa sausage sliced in ½ moons
  • ½ each red bell pepper diced
  • ¼ each yellow onion diced
  • 8 each button mushrooms sliced
  • 2 each russet potatoes
  • 1 cup sauerkraut
  • 4 cups fresh spinach or 4 handfuls
  • 1 tbsp olive oil
  • 1 tbsp Dijon mustard or brown mustard
  • 1 tsp oregano
  • ½ tsp black pepper
  • ½ tsp sea salt
  • ½ tsp granulated garlic
  • ¼ tsp chipotle pepper

Optional Toppings

  • Fried Egg
  • Avocado slices or Guacamole
  • Shredded cheese
  • Fresh diced tomatoes
  • Sour cream

Instructions

  • Wash the potatoes and stab several times with a fork. Microwave for 2 minutes, turn over and microwave for 2 more minutes. Put in the refrigerator.
  • Gather and prepare the rest of the ingredients, then dice the potatoes.
  • In a large nonstick sauté pan, heat over medium heat and add oil. Stir in the potatoes and abut half of the seasonings, and sauté for about 5 minutes to start crisping them.
  • Add the kielbasa, the vegetables, except the spinach and sauerkraut, Dijon mustard, and the rest of the seasonings.
  • Sauté for 5 minutes or so to soften the vegetables and crisp the sausage.
  • Stir in the spinach and sauerkraut and cook until it wilts, another 3 to 5 minutes.
  • Serve as is or top with your favorite skillet toppings.
  • Enjoy!

Nutrition

Calories: 237kcal | Carbohydrates: 5g | Protein: 10g | Fat: 20g | Saturated Fat: 6g | Polyunsaturated Fat: 2g | Monounsaturated Fat: 10g | Cholesterol: 40mg | Sodium: 1089mg | Potassium: 390mg | Fiber: 2g | Sugar: 1g | Vitamin A: 2836IU | Vitamin C: 15mg | Calcium: 59mg | Iron: 2mg

Jalapenos

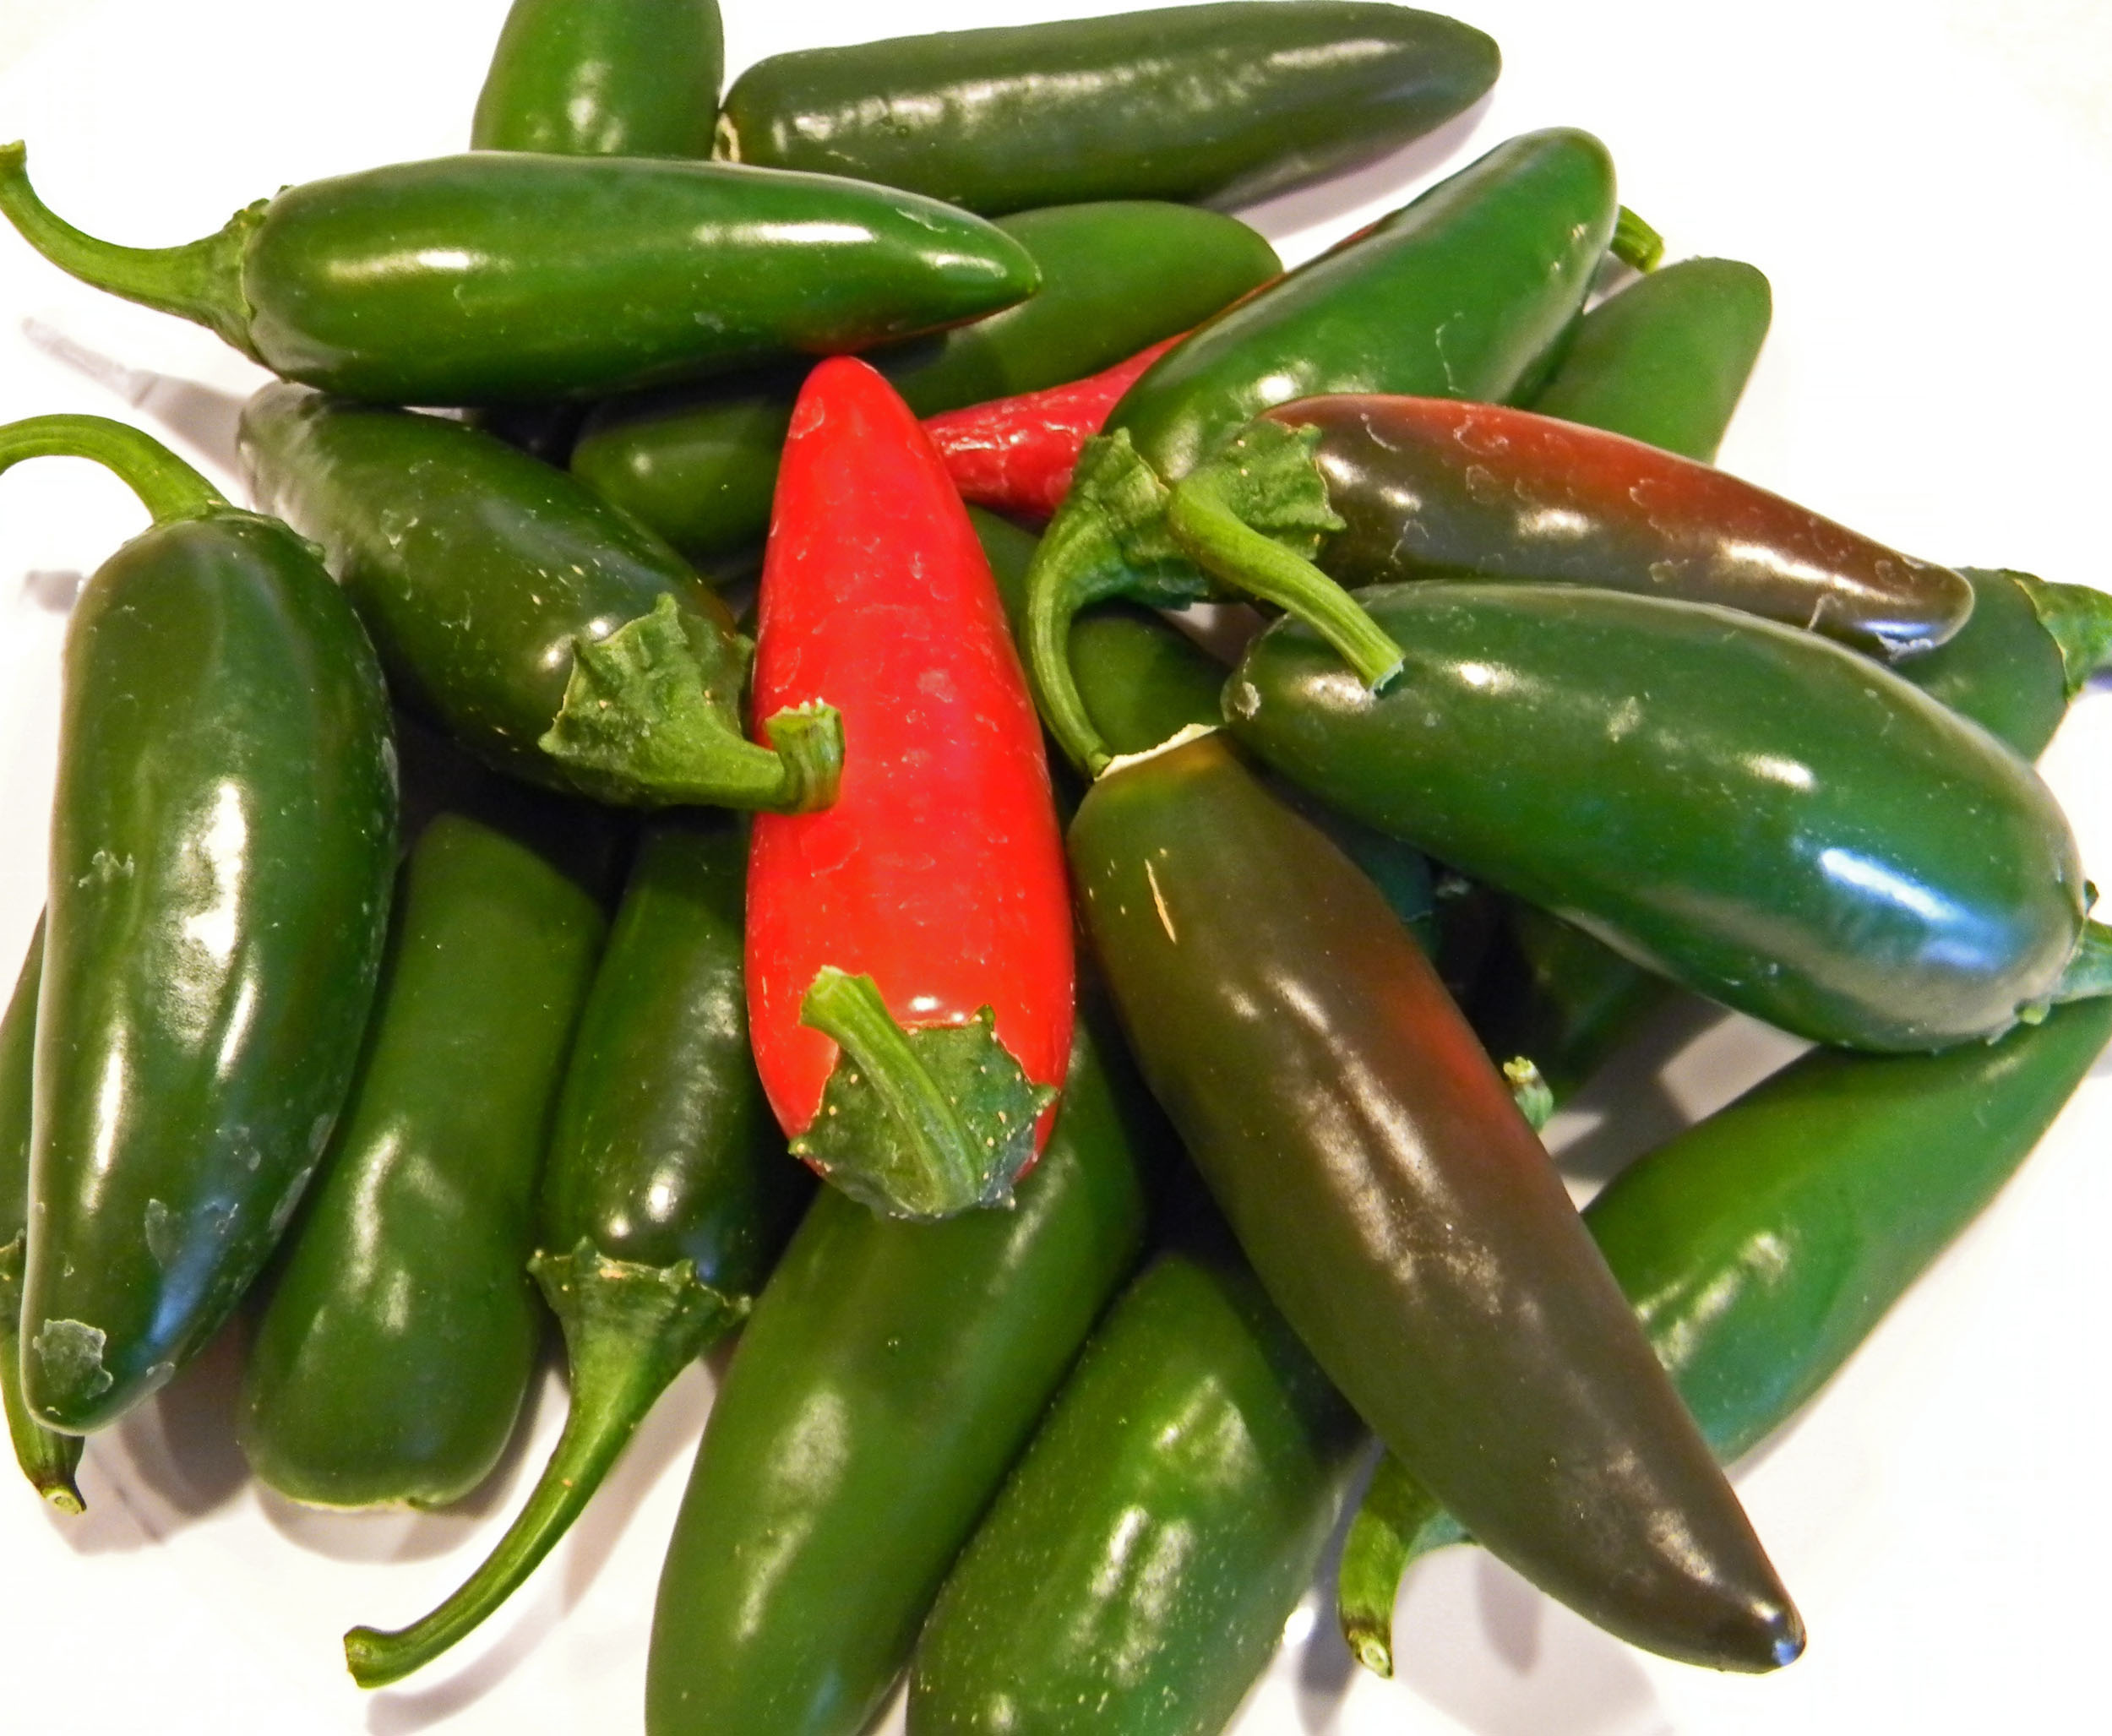
Jalapenos

I love growing jalapenos to use when making Pico de Gallo, Salsa, and Grilled Jalapeno Poppers in the summer time. I always end up with more than I can use during the summer and I want them to last throughout the winter. So I’ve come up with some ways to preserve more for winter use.

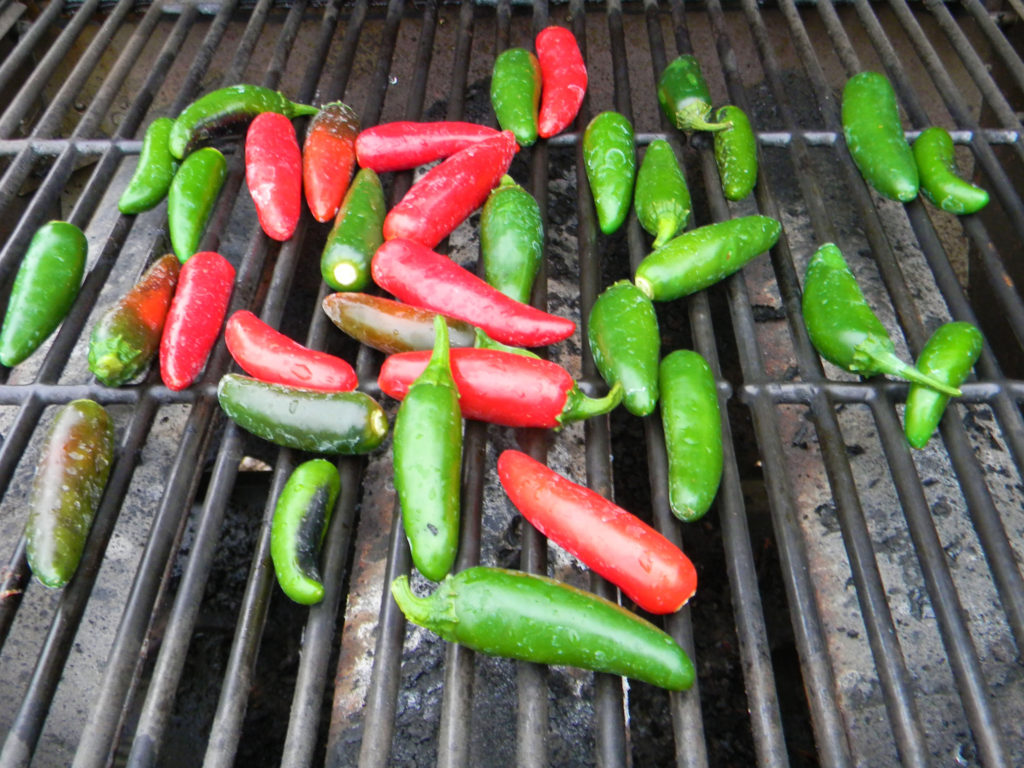
Jalapenos on the Grill

One thing I like to do before processing them for just about any use is grill them. Toss them in a little vegetable or canola oil and char them a bit on the grill. This gives them a nice smokiness that enhances the flavors in Salsa, Pico de Gallo, or Jalapeno Hot Sauce. I also grill them before I chop them up and freeze them so they are ready for immediate use when needed.

One key thing to remember when handling hot peppers, especially in large quantities, is to wear disposable gloves. The oils from the peppers seep into your skin and will stay there for some time. If you have any cuts, it will burn, and if you touch your eyes or any other sensitive areas, it won’t feel good!

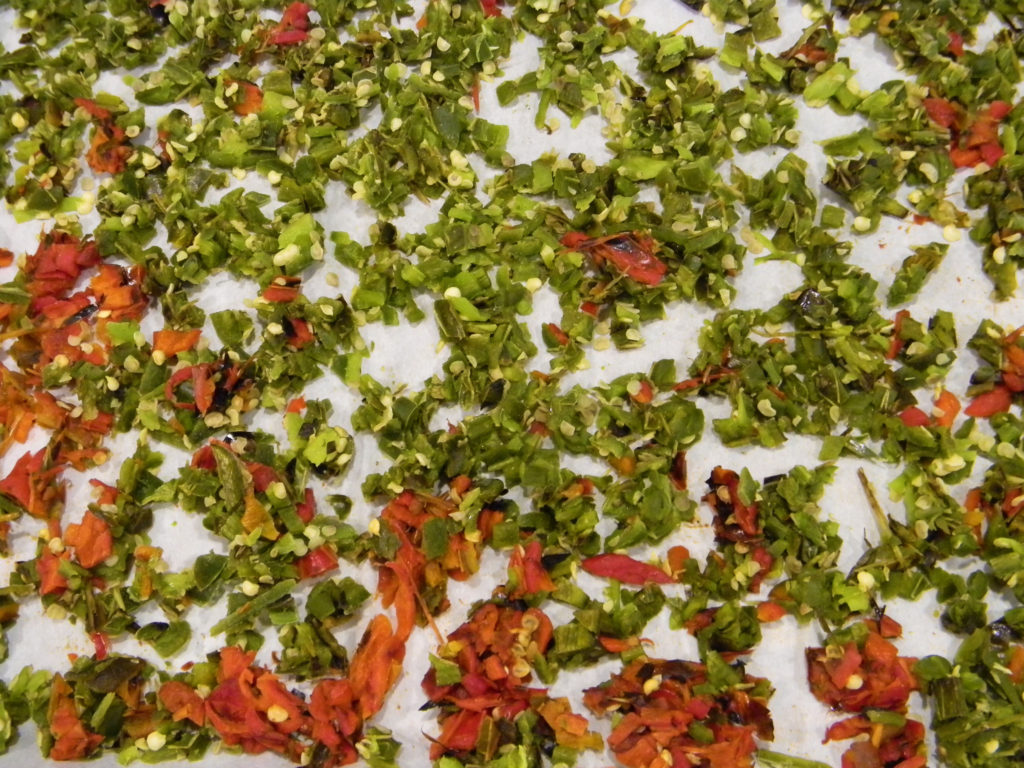
Processed Jalapenos

Once charred on the grill, I cut off the stems and put them in the food processor to chop up. I could hand chop them, but that takes a lot of time and there is the risk of getting the pepper oils on me.

Remove the seeds and ribs before chopping them will result in a milder pepper.

When they are all chopped up, I then lay them out on a sheet tray lined with parchment paper to freeze.

Frozen Jalapenos

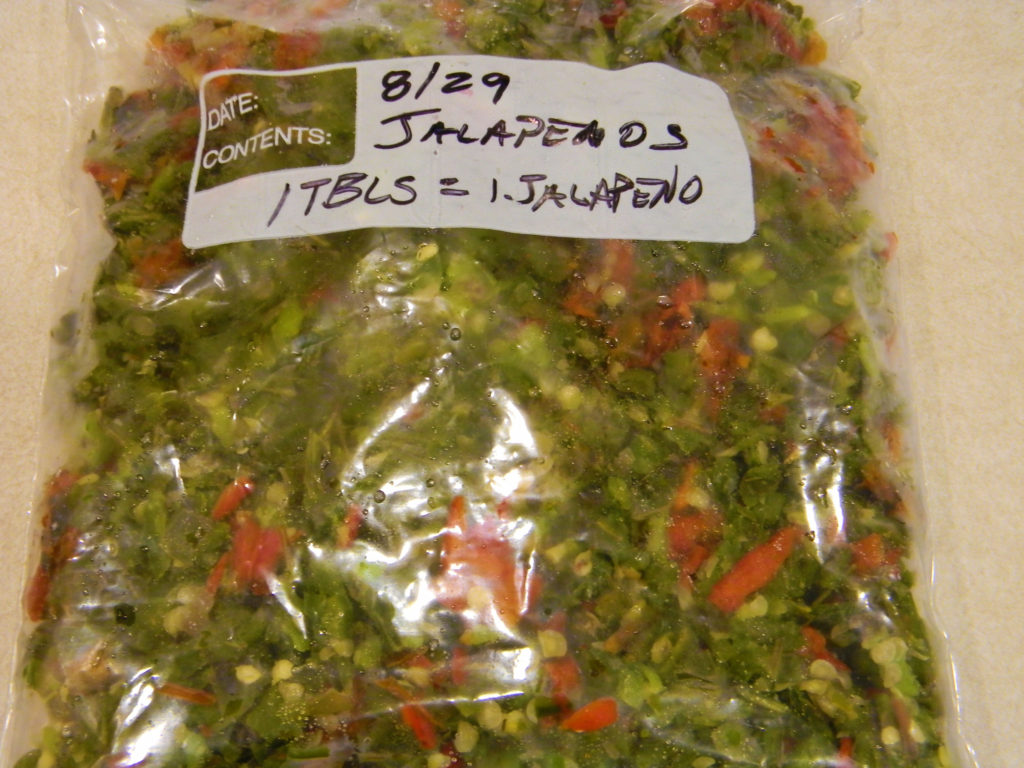
Once frozen, I bag them up and label the bag to put in the freezer for use throughout the winter.

I use this in place of green chiles in a recipe if I want a spicier dish, or for making a quick salsa, or any other recipe that calls for jalapenos. I usually make Jalapeno Popper Bites in the winter and I already have jalapenos in my freezer.

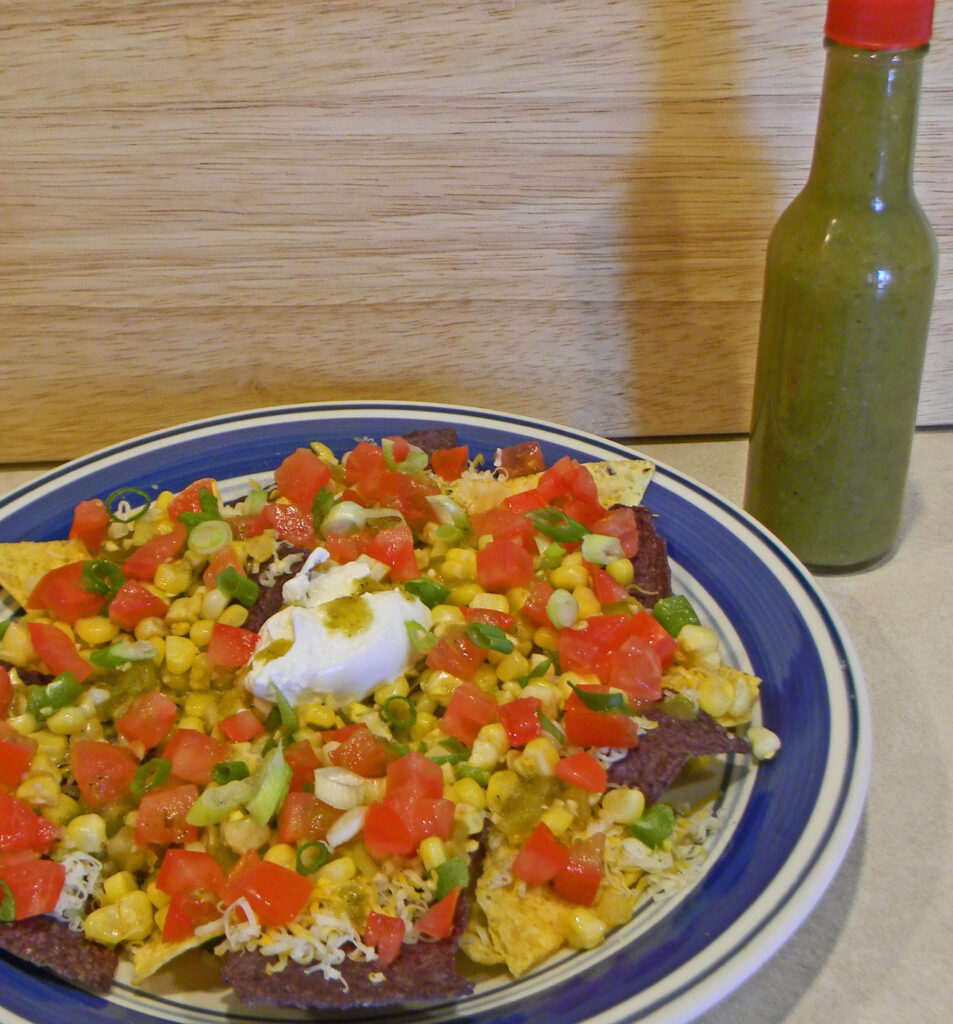
Jalapeno Hot Sauce on Nachos

I use some jalapenos to make a Jalapeno Hot Sauce which is good on anything you like hot sauce on.

Pickled Jalapenos

Another favorite thing to do is to make Pickled Jalapenos. I don’t do much cannning so I only make a jar or 2 to keep in the refrigerator. 

I would love to hear about your jalapenos!

Basil Coleslaw

Basil Coleslaw

I usually don’t like too many coleslaws, but I’ve learned that using purple cabbage makes a crisper, crunchier slaw. Add in some fresh basil and dried cranberries for a different, yet delicious coleslaw that you’d be happy to bring or serve at just about any barbecue.

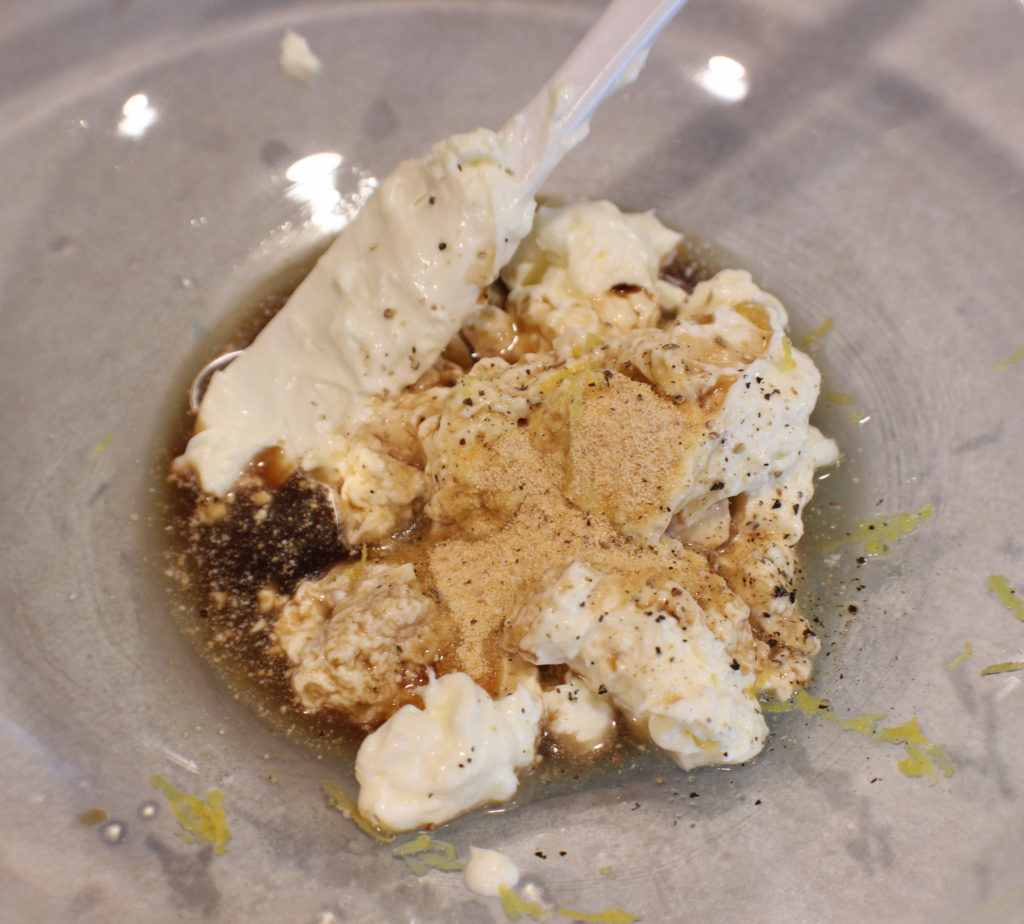
In a large bowl, mix together the dressing ingredients.

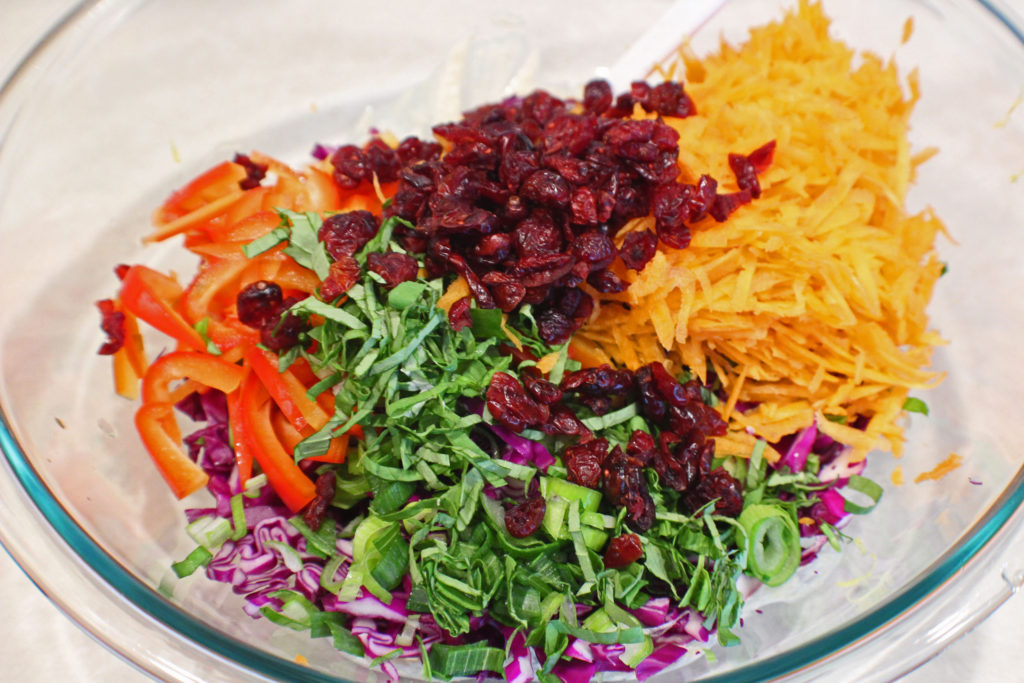
Basil Slaw Ingredients

Prep all your ingredients and put them in the bowl with the dressing.

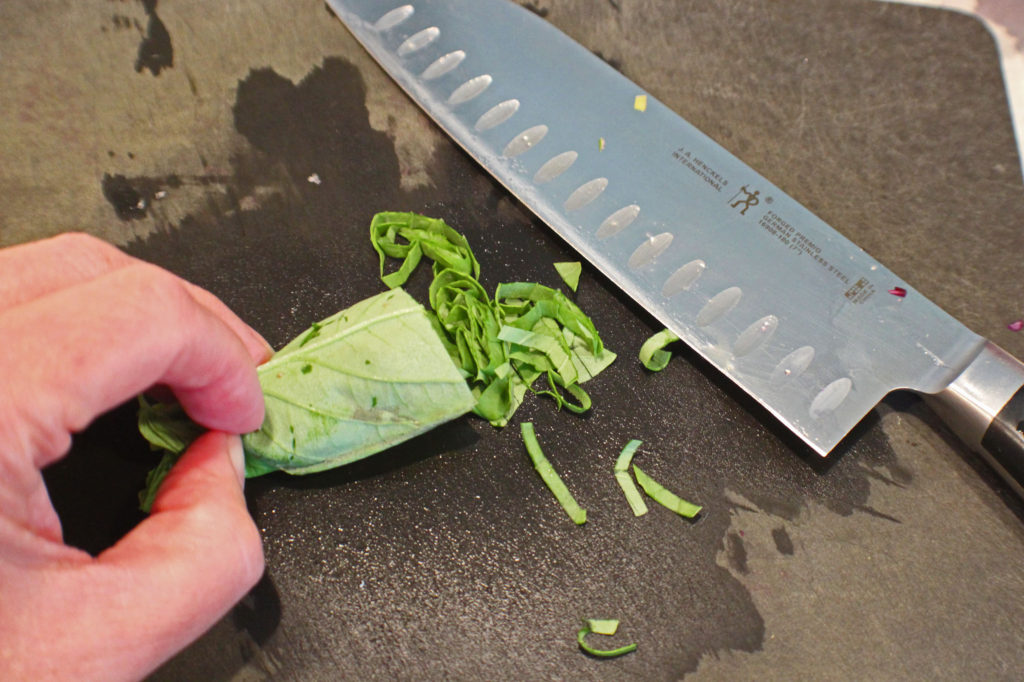
Basil Chiffonade

To slice the basil, or chiffonade the basil, stack the basil leaves and then roll them up. Gently slice through the rolled stack of leaves.

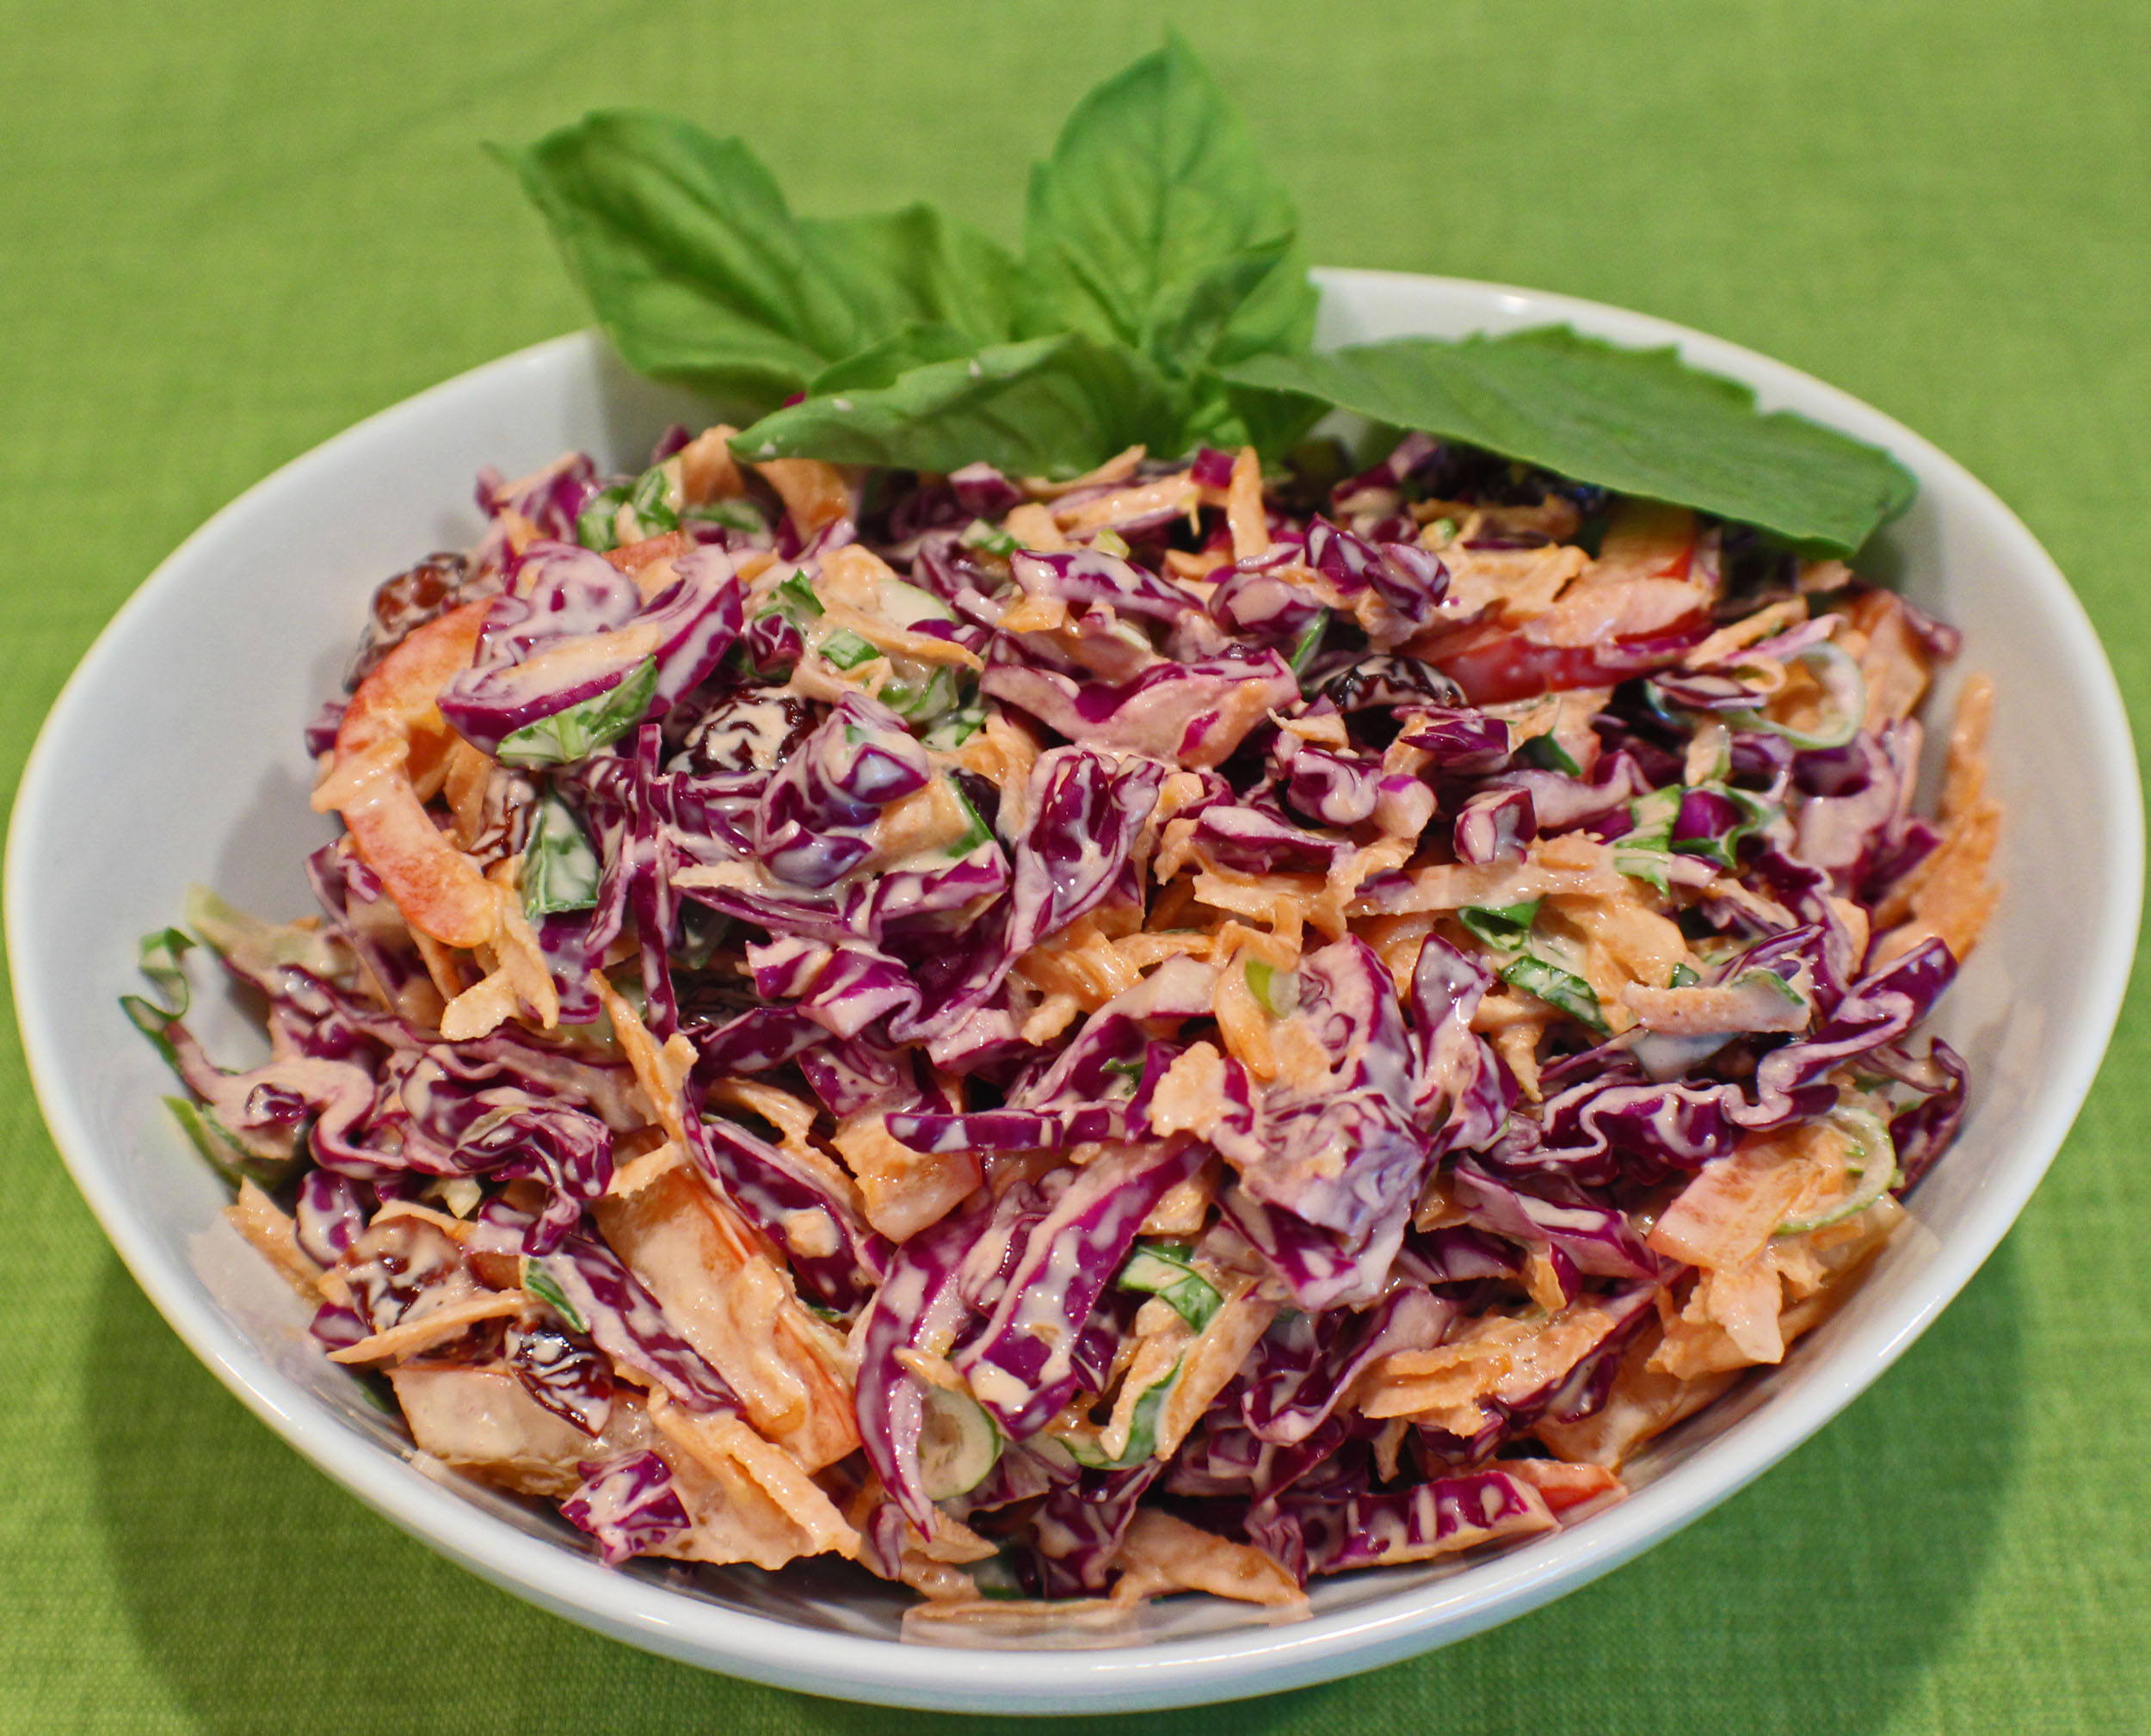
Just mix it all together and you have a quick and refreshing slaw.

Try with Pepper Burgers or Chile Lime Burgers or BBQ Rib Burgers.

Enjoy!

Basil Coleslaw

Coleslaw is a summertime favorite salad with picnics and barbecues. Use purple cabbage to make a crisp slaw and add fresh basil for a refreshing flavor.
Prep Time15 minutes
Cook Time0 minutes
Total Time15 minutes
Course: Salad, Side Dish
Cuisine: American
Keyword: Basil, Cabbage, Coleslaw
Servings: 6 cups
Calories: 219kcal
Author: Eating With Deb

Equipment

  • Large bowl and rubber spatula
  • Cutting board and knife
  • Citrus Zester

Ingredients

Slaw Ingredients

  • 4 cups purple cabbage shredded
  • 2 each carrot shredded, approximately 1 cup
  • 1 each red bell pepper julienned and cut down to about 1’ strips
  • 1 each green onion sliced
  • ¼ cup fresh basil chiffonade
  • ¾ cup cranberries dried

Dressing

  • ¾ cup mayonnaise
  • 1 tbsp balsamic vinegar
  • 1 tsp granulated garlic
  • ½ each lemon zest and juice
  • Sea salt and black pepper to taste

Instructions

  • Combine dressing ingredients and set aside.
  • Prepare veggies and add to dressing up to 1 hour before serving.
  • Enjoy!

Notes

To chiffonade basil, stack and roll the leaves into a tight roll. Gently slice through as basil bruises easily.
You can use green cabbage if you wish, I use purple because it holds up to the acid in the dressing longer so it stays crisper.

Nutrition

Serving: 1cup | Calories: 219kcal | Carbohydrates: 7g | Protein: 1g | Fat: 21g | Saturated Fat: 3g | Trans Fat: 1g | Cholesterol: 12mg | Sodium: 195mg | Potassium: 174mg | Fiber: 2g | Sugar: 4g | Vitamin A: 803IU | Vitamin C: 36mg | Calcium: 33mg | Iron: 1mg

Sweet Pepper Sauce

I really like food that tastes so good that you don’t need to add anything else, but there is something to be said about a great sauce. I came up with this sauce to use as a condiment on burgers, but have since used it as a salad dressing, a veggie dip, and a fry sauce.

This is super simple and only takes a few minutes to throw it together.

Start by gathering your ingredients. I had fresh garlic in my garden (pictured on the left). I also had some homemade mustard that I used instead of store-bought Dijon.

I pulled a couple limes out of the freezer 2 days prior to give them enough time to thaw. The morning I was going to make this sauce, I pulled the limes out of the refrigerator so they came to room temperature to ensure they gave me all the juice they had. Turned out I only needed 1 lime.

You can find jarred cherry peppers in the pickles and olives section in the grocery store.

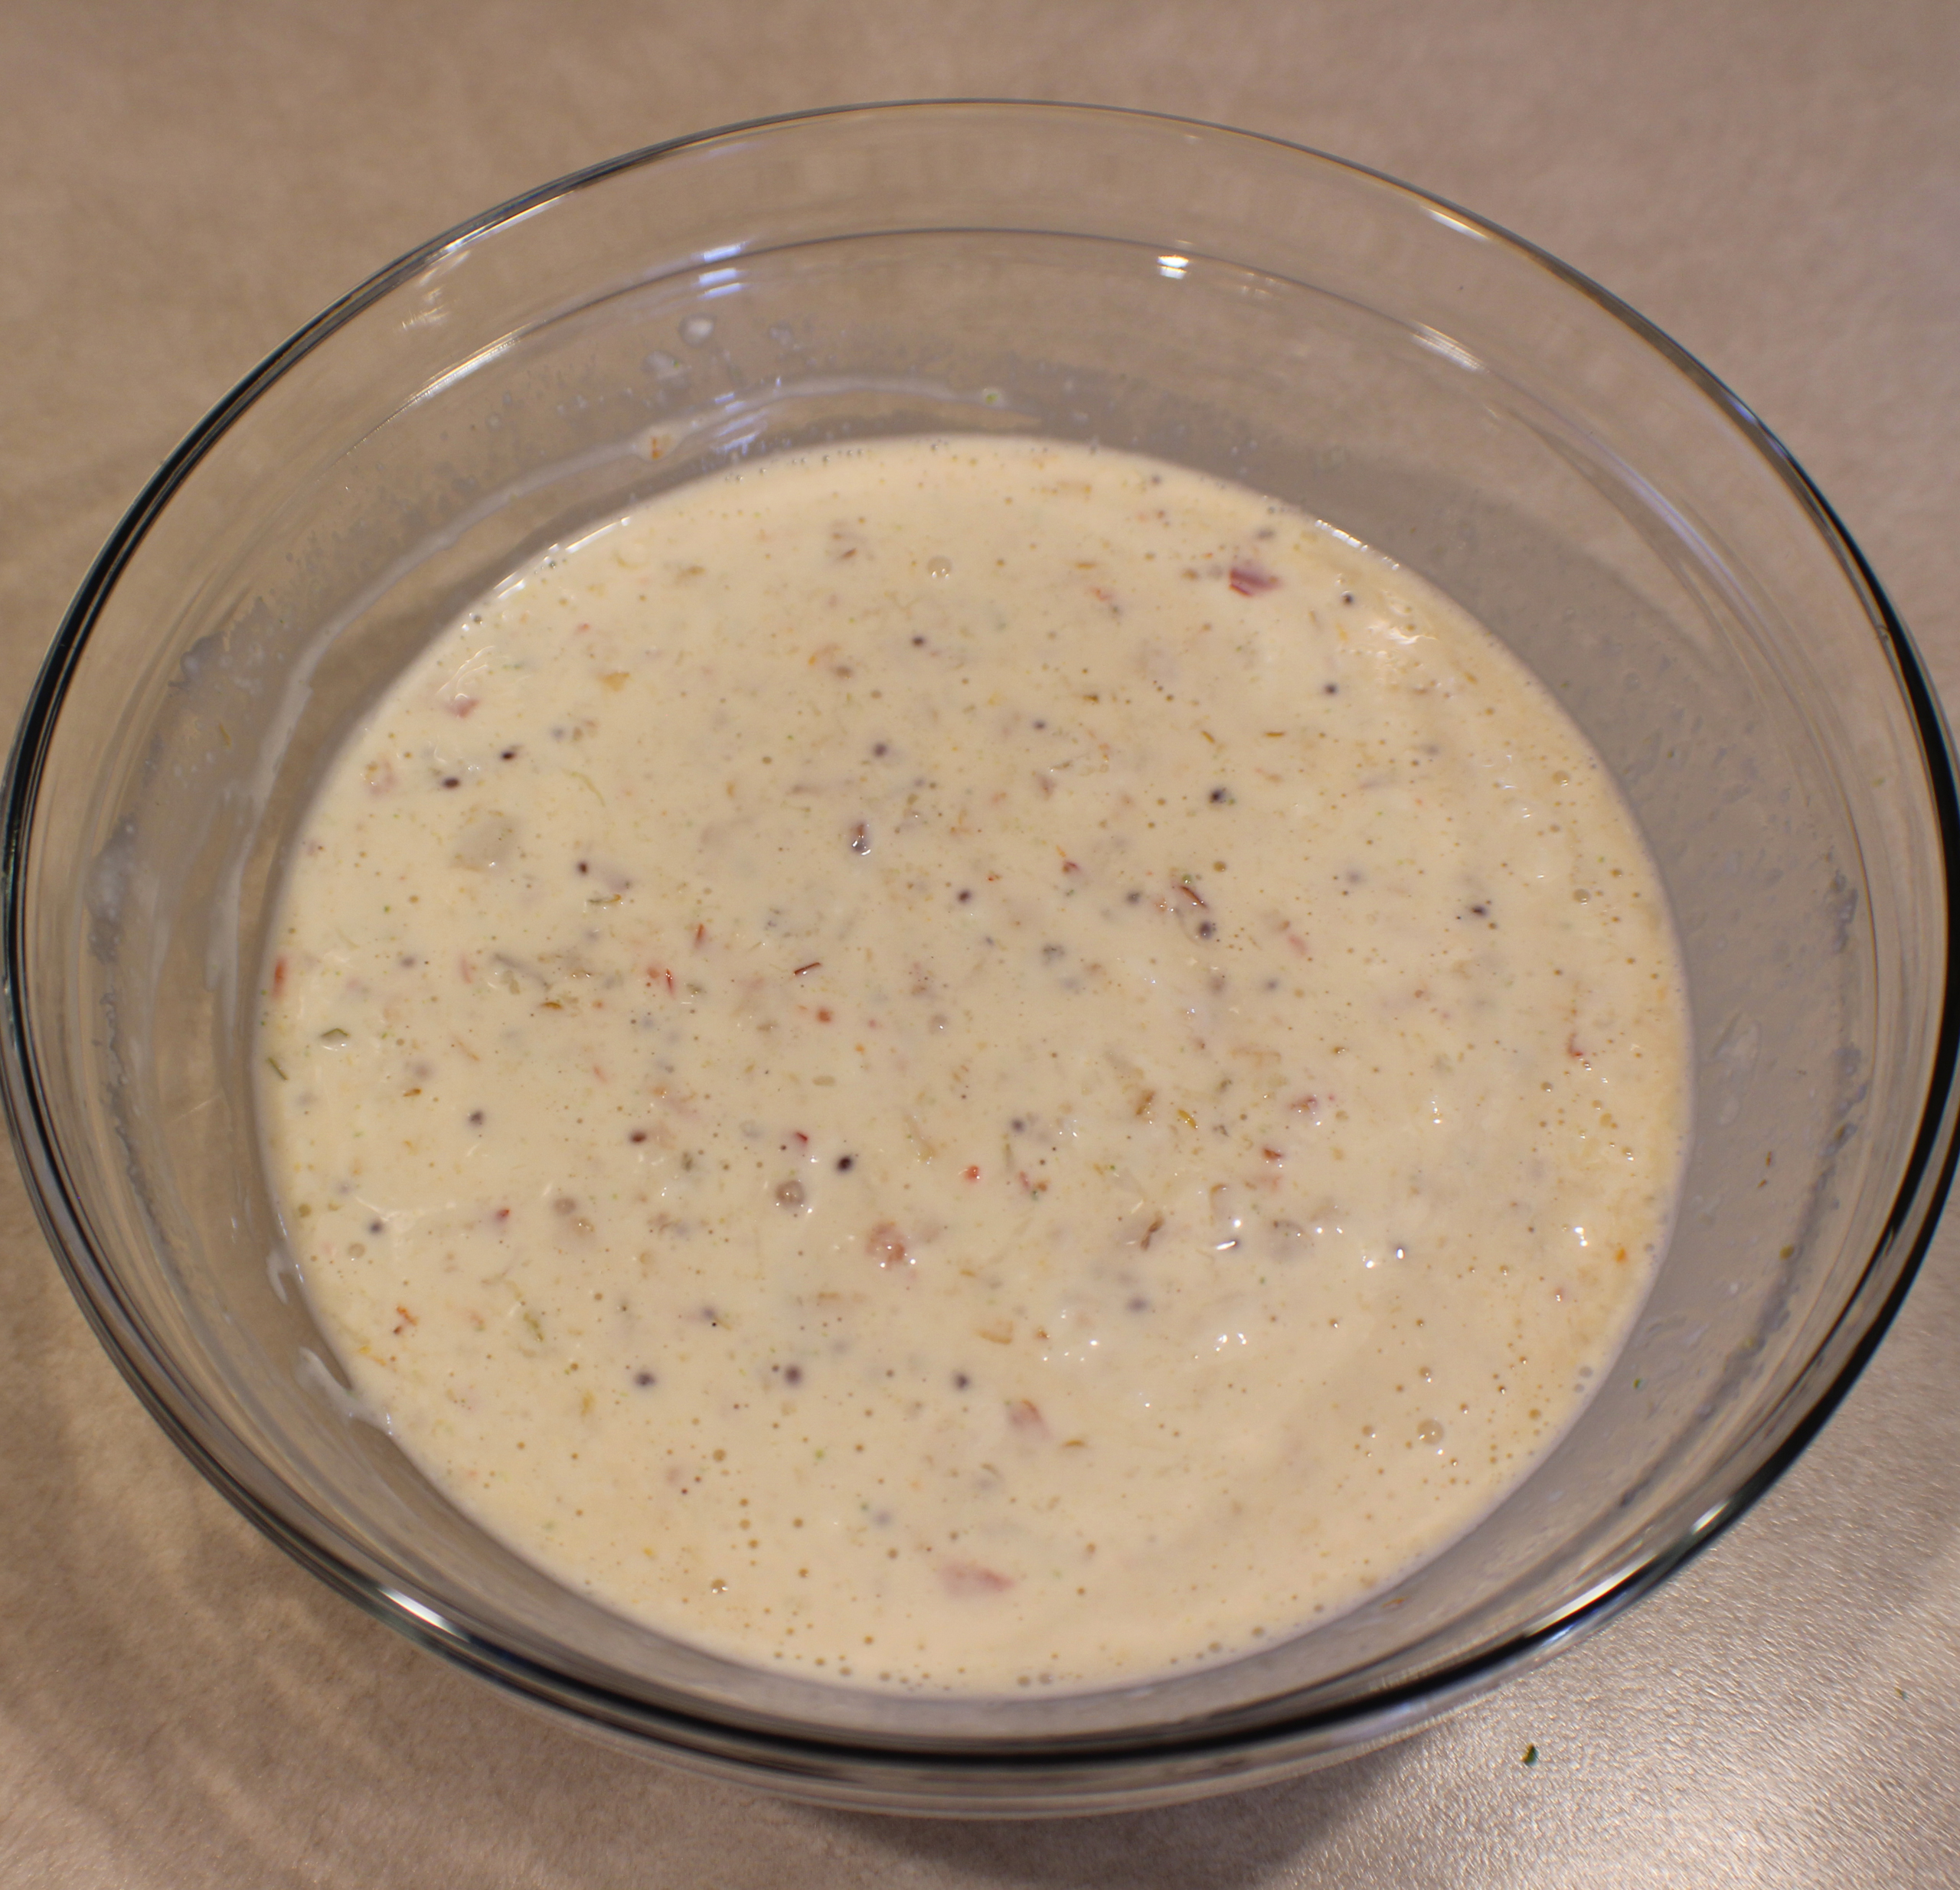
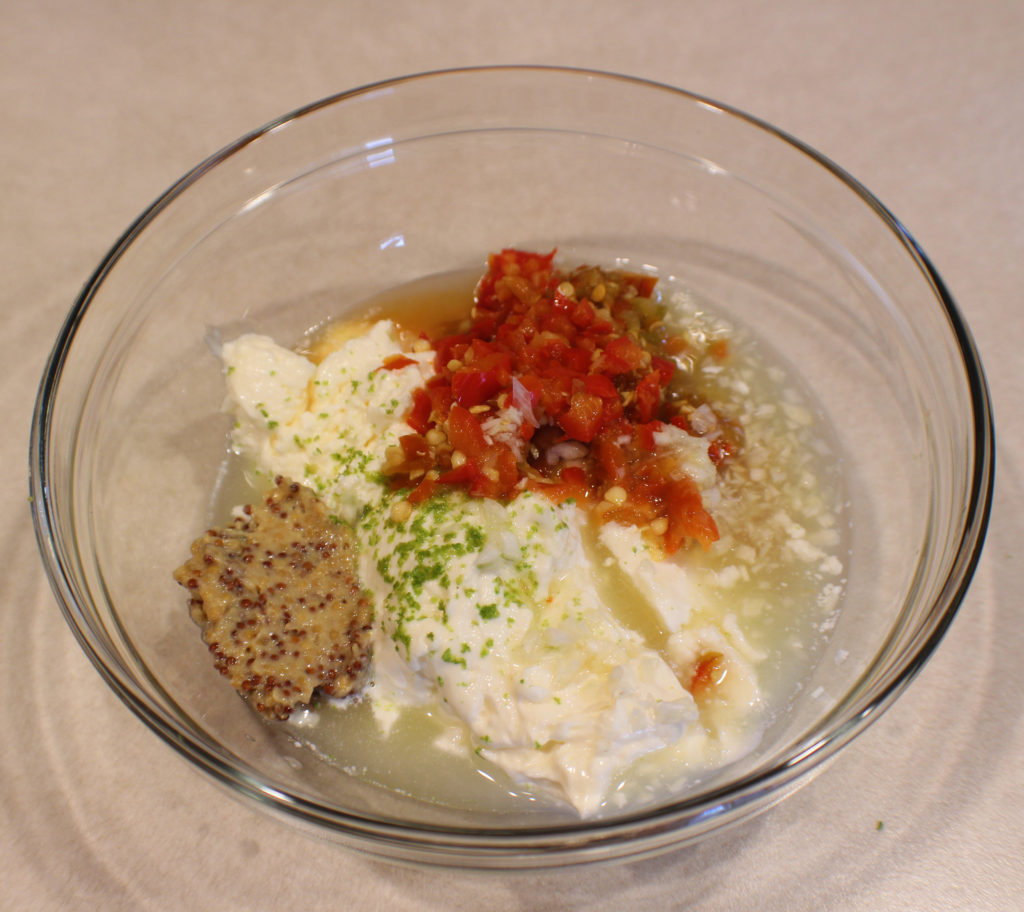
Put your mayo and mustard in a bowl. Zest and juice your lime into the bowl. Chop your garlic and peppers and add to the bowl plus some pepper juice from the jar.

Just mix it up and it’s ready to enjoy!

Try it as the condiment on Pepper Burgers.

Sweet Pepper Sauce

This slightly tangy yet sweet dipping sauce pairs well with all sorts of dishes. I use it on burgers, salads or as a fry dipping sauce. Recently I made a taco salad and instead of using salsa and sour cream I used this sauce.
Prep Time10 minutes
Cook Time0 minutes
0 minutes
Course: Condiments
Cuisine: American
Keyword: Condiments, Fry Sauce, Salad Dressing
Servings: 16 tablespoons
Calories: 97kcal
Author: Eating With Deb

Ingredients

  • 1 cup mayonnaise
  • 2 tbsp lime juice 1 lime + zest
  • 1 tbsp cherry pepper juice
  • 1 tbsp Dijon mustard
  • 3 tbsp sweet cherry peppers chopped
  • 1 tsp garlic minced

Instructions

  • In a medium bowl, add the mayonnaise, zest and juice from 1 lime, mustard, and cherry pepper juice.
  • Chop the garlic and cherry peppers and add to the mayonnaise mix.
  • Mix well.
  • Enjoy!

Notes

Serve as the sauce on burgers, like Pepper Burgers, as a dipping sauce for fries or tater tots, or as a veggie dip or salad dressing.

Nutrition

Calories: 97kcal | Carbohydrates: 1g | Protein: 1g | Fat: 11g | Saturated Fat: 2g | Cholesterol: 6mg | Sodium: 100mg | Potassium: 3mg | Fiber: 1g | Sugar: 1g | Vitamin A: 9IU | Vitamin C: 1mg | Calcium: 1mg | Iron: 1mg

Cucumber Roll Ups

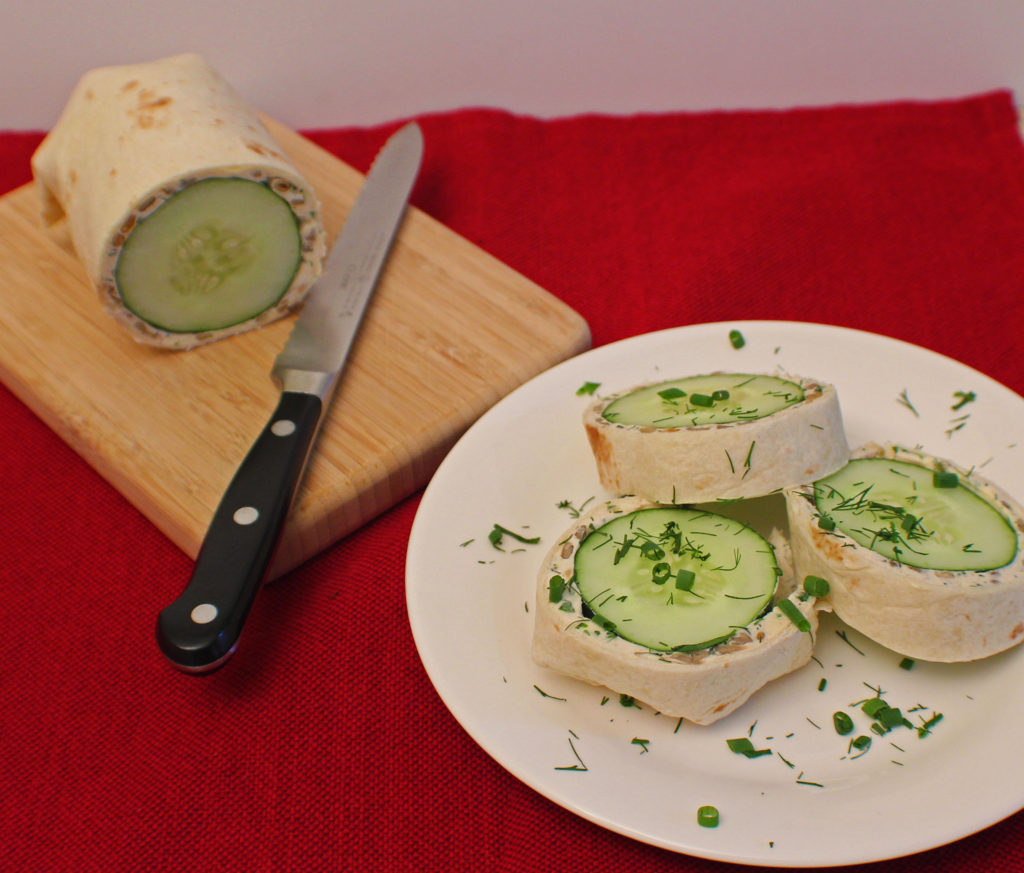
Cucumber Roll Ups

I look forward to fresh garden vegetables and cucumbers often are the first to harvest, after the garden greens of course. I usually end up with more than I can eat, and some years more than my family, friends, and neighbors can eat.

Unfortunately, freezing cucumbers isn’t an option, and there are only so many pickles I can eat, so getting creative and being able to use those delicious, fresh cucumbers is a top priority. This is just one way to use them in a different manner that enhances the flavor and makes an enjoyable snack or an appetizer for those backyard, or picnic summer get togethers.

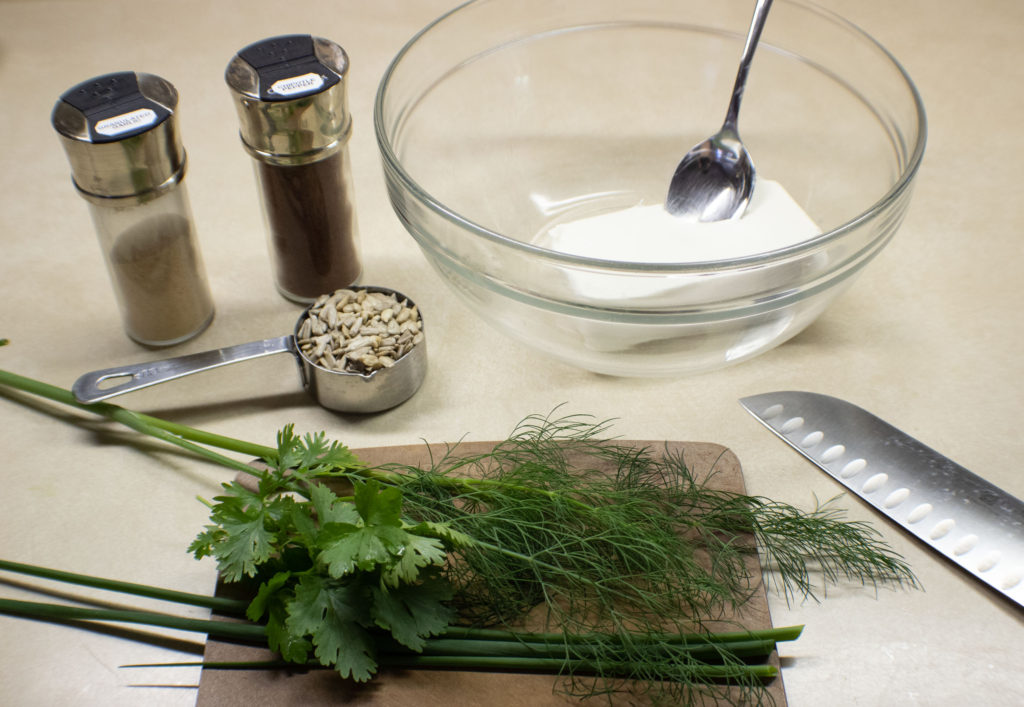
Cucumber Roll Up Ingredients

Fortunately, this is a very quick and simple recipe and it can be easily changed for the ingredients you have on hand or for your own tastes. This is what I usually use as the base. Sometimes I change up the herbs or add in some dried currents or dried, chopped cranberries. I like the chipotle powder for that little bit of heat and fresh cilantro would certainly work well with that flavor combination as well as pepitas instead of the sunflower seeds.

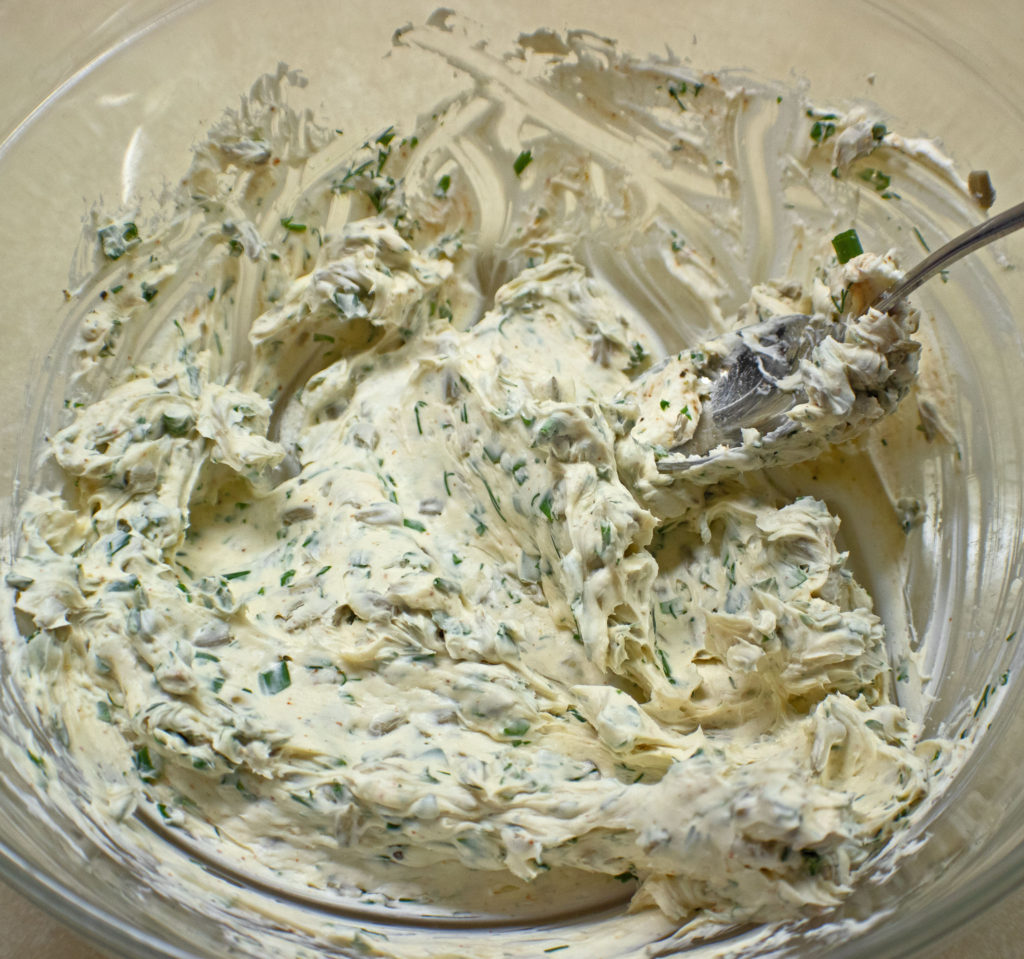
Cucumber Roll Up Cream Cheese

Mix in whatever dry seasonings you are using first to ensure they get mixed through the cream cheese. Then mix in the fresh herbs and seeds.

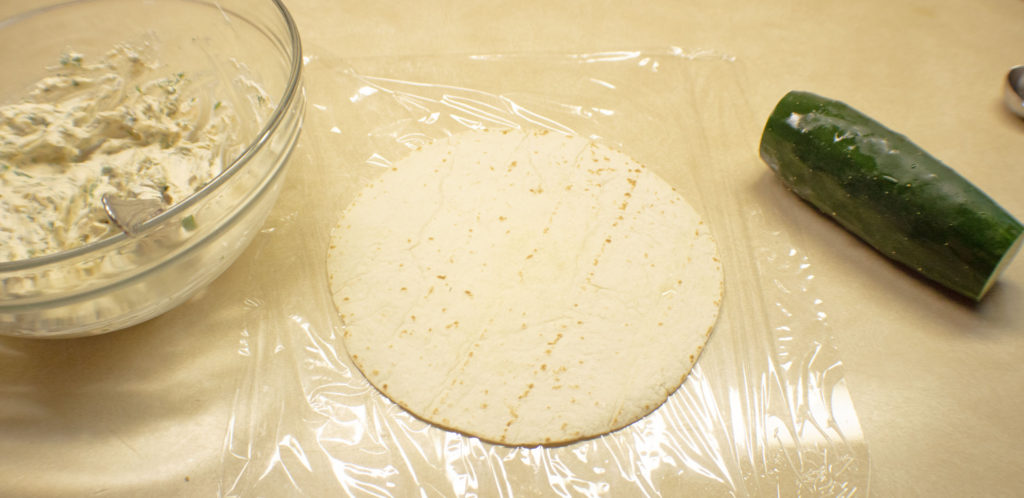
You are ready to put it all together. Lay out a piece of plastic wrap under the flour tortilla so you are ready to wrap it all up when done.

Cucumber Ready to Roll

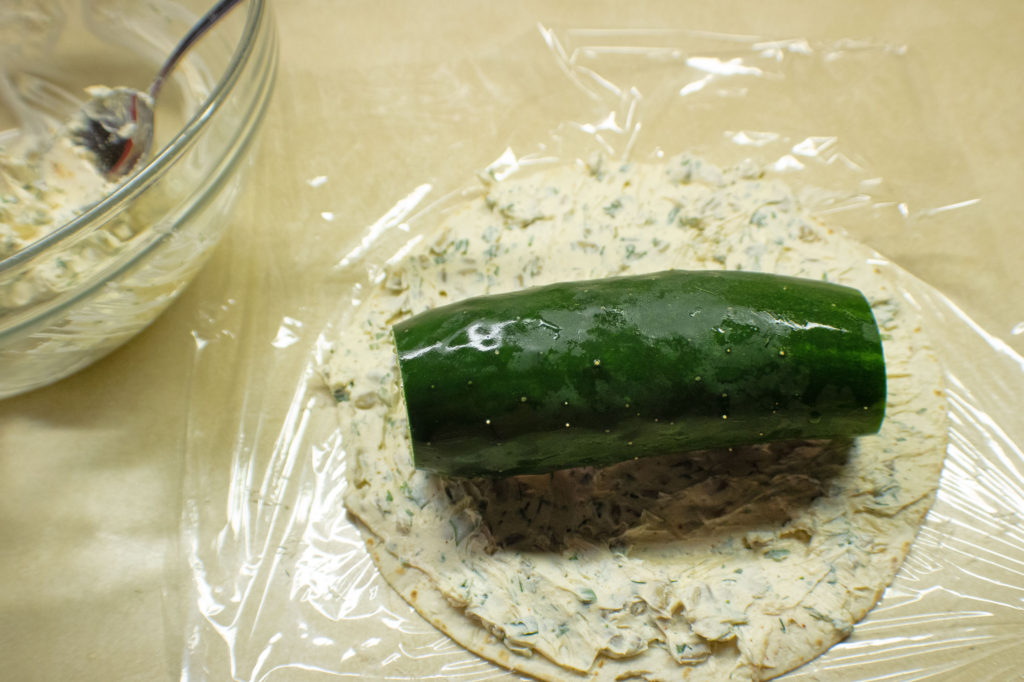
Using the back of a spoon, spread 1/2 of the cream cheese out on the tortilla. Make sure to spread it out to the edges. Cut off both ends of the cucumber and place it in the middle of the wrap. 

Note – if using a store bought cucumber that has wax on it, be sure to peel it. The wax prevents the cream cheese from sticking to the skin and when you slice this; it will fall apart.

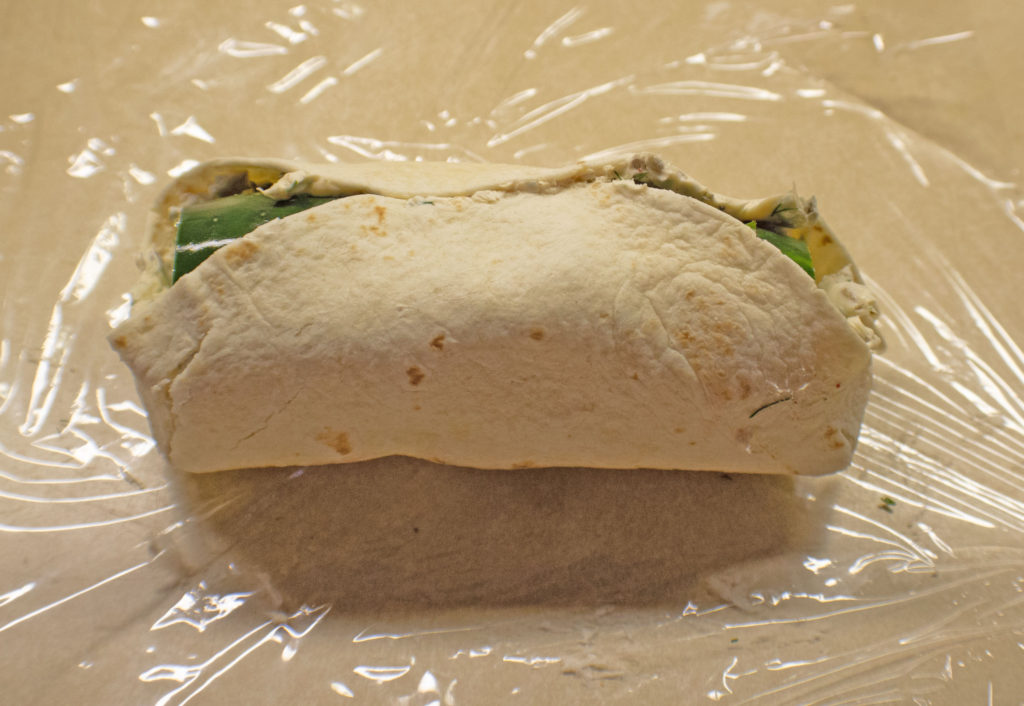
Wrap the tortilla around the cucumber and fold in the edges at the ends of the cucumber. This cucumber is a little fat, but that is ok.

Cucumber Roll Up Ready to Refrigerate

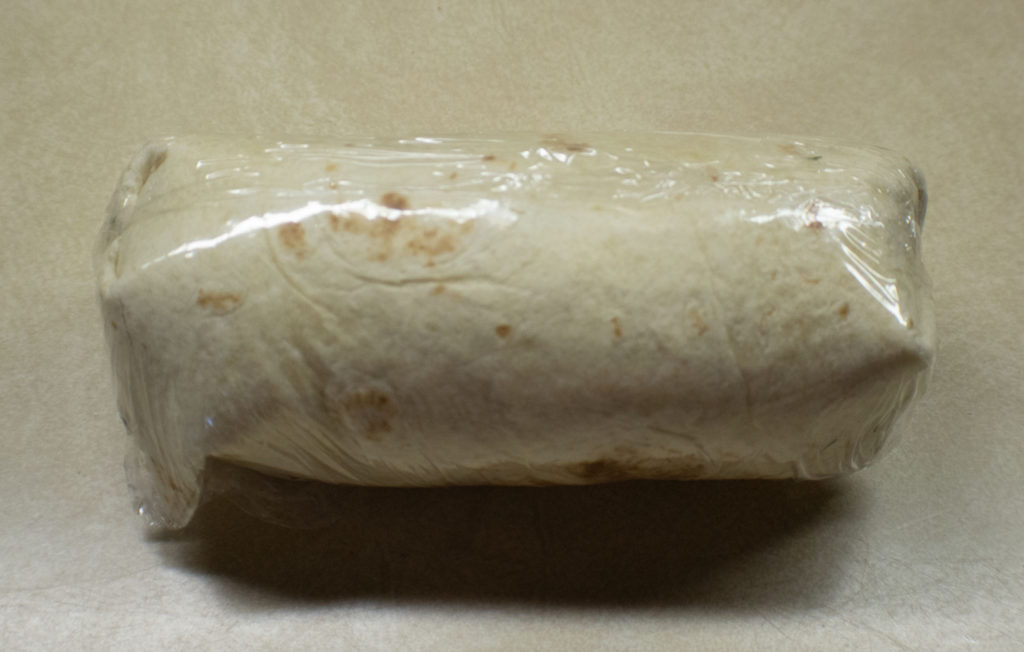
Wrap the plastic wrap around it and put it in the refrigerator for about 1/2 hour or so to firm up a bit before slicing.

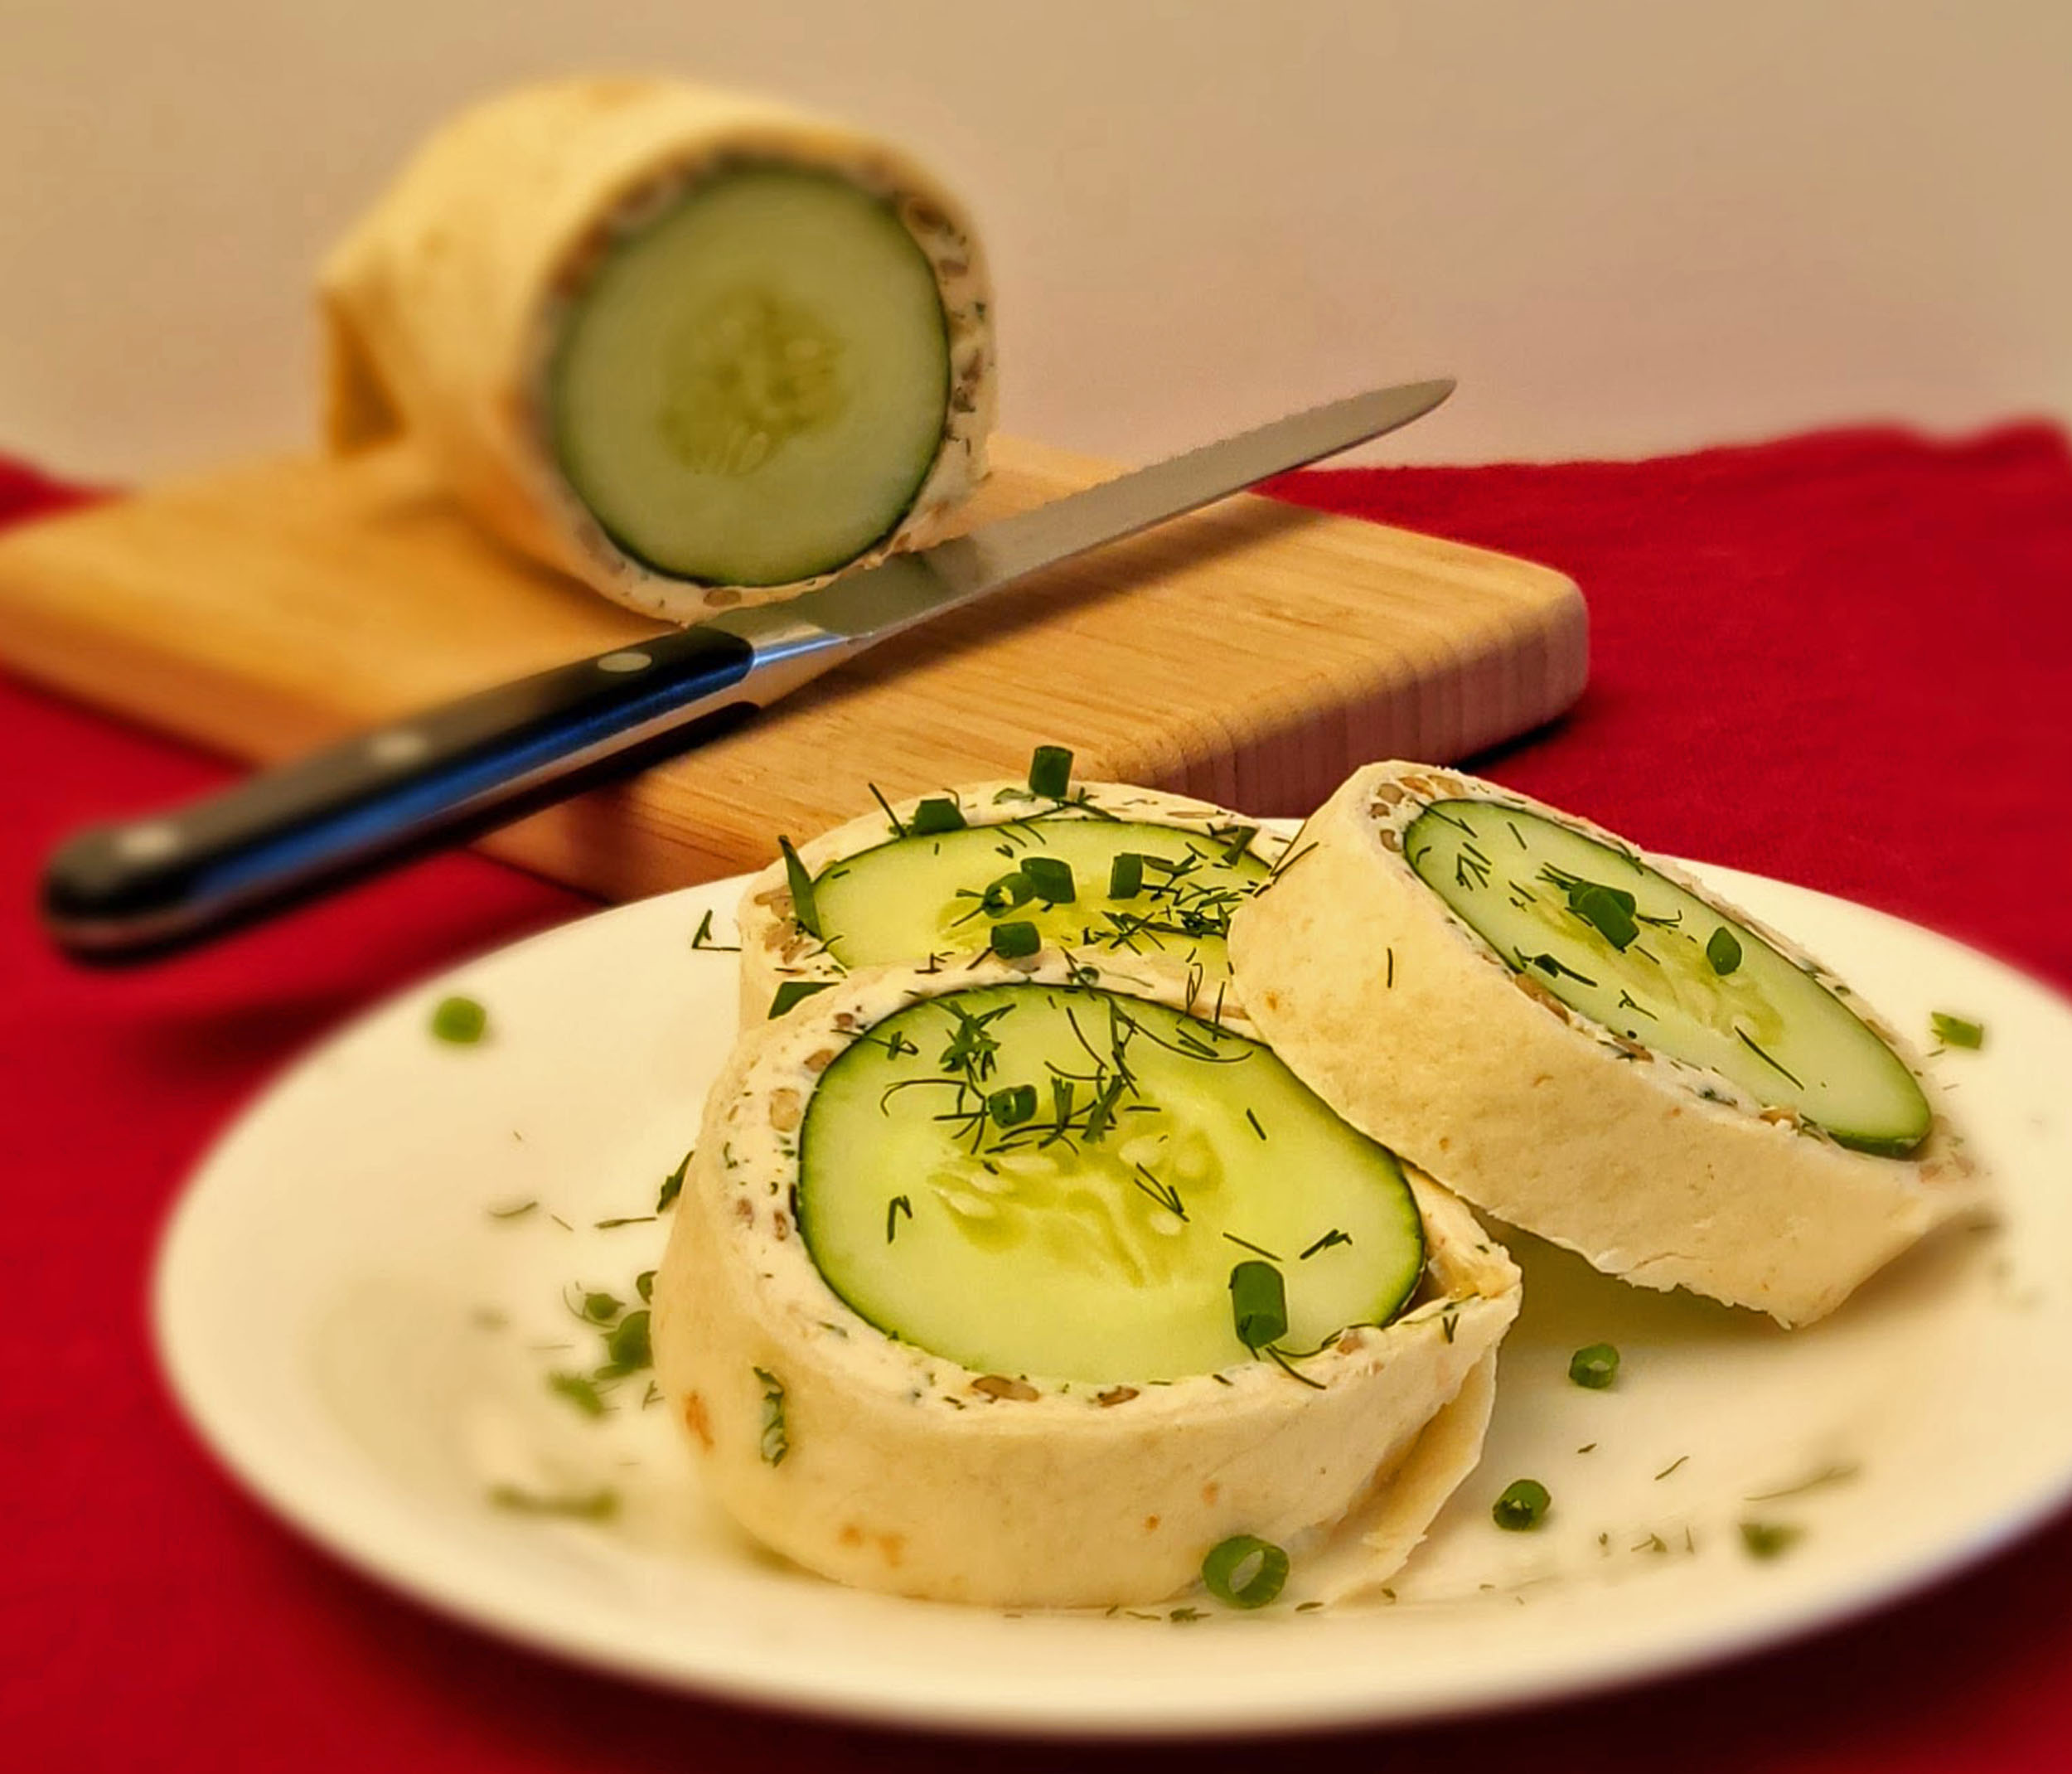
Cucumber Roll Up

If I make this for a snack, I only make 1 at a time and cut off slices to eat when wanted. If I do this for an appetizer or for a picnic, I’ll make as many as needed, slice and plate them up, and sprinkle some fresh chopped herbs that were used in the mix over the top.

Enjoy!

Cucumber Roll Ups

A delicious and different way to use all those wonderful garden cucumbers and fresh herbs that are abundant this time of year.
Prep Time10 minutes
Cook Time0 minutes
Resting Time30 minutes
Total Time40 minutes
Course: Appetizer, Snacks
Cuisine: American
Keyword: Cucumber Recipes, Cucumbers, Gardening
Servings: 12 slices
Calories: 91kcal
Author: Eating With Deb

Equipment

  • 1 Medium Bowl and Spoon

Ingredients

  • 1 package cream cheese or neufchatel, softened
  • 1/2 tsp granulated garlic
  • 1/4 tsp chipotle powder optional
  • 1/4 cup sunflower seeds roasted and salted
  • 2 tbsp chives chopped
  • 2 tbsp fresh parsley chopped
  • 1 tbsp fresh dill chopped
  • 2 each cucumbers medium
  • 2 each flour tortillas room temperature

Instructions

  • Put the softened cream cheese in a medium bowl and mix in the garlic and chipotle powder using the back of a spoon or a hand mixer.
  • Using the back of a spoon, mix in the fresh herbs, chives, and sunflower seeds.
  • Spread out a piece of plastic wrap and place a tortilla on the plastic.
  • Spread 1/2 of the cream cheese mixture on the tortilla. (You can do both tortillas at once or save the other half to make the second wrap later.)
  • Cut the ends off the cucumbers and place in the middle of the tortilla.
  • Roll the tortilla around the cucumber and fold in the ends.
  • Roll the cucumber wrap up in the plastic wrap and refrigerate for about 1/2 hour to firm up before slicing.
  • Slice in about 1/2 inch slices and enjoy!

Nutrition

Calories: 91kcal | Carbohydrates: 4g | Protein: 2g | Fat: 8g | Saturated Fat: 4g | Polyunsaturated Fat: 0.3g | Monounsaturated Fat: 2g | Cholesterol: 19mg | Sodium: 62mg | Potassium: 33mg | Fiber: 0.2g | Sugar: 3g | Vitamin A: 346IU | Vitamin C: 1mg | Calcium: 24mg | Iron: 0.2mg

Pepper Burgers

Nothing says summer like the smells coming off the barbecue. I will grill all year round – I’ve grilled filet mignon steaks for Christmas.

Of course hamburgers are one of the most often grilled item and with just a little bit of prep and a tip with the seasonings, you can have a gourmet burger at home.

I usually double my burger recipes, cook off what is needed and freeze the rest of them (flat on a lined sheet tray, then bag them up when frozen) so I can pull one out when I am in the mood.

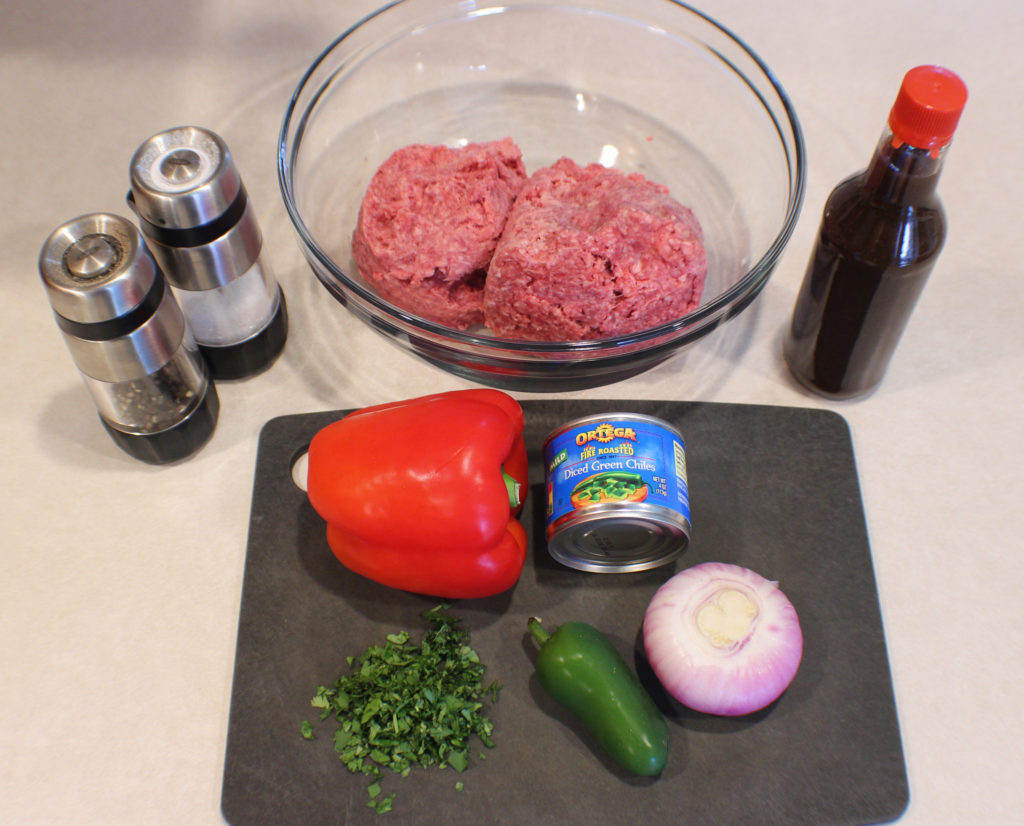
Start by gathering all of your ingredients. I used some cilantro the day before. I chopped up the whole bunch so it was ready for the next time I had use for it.

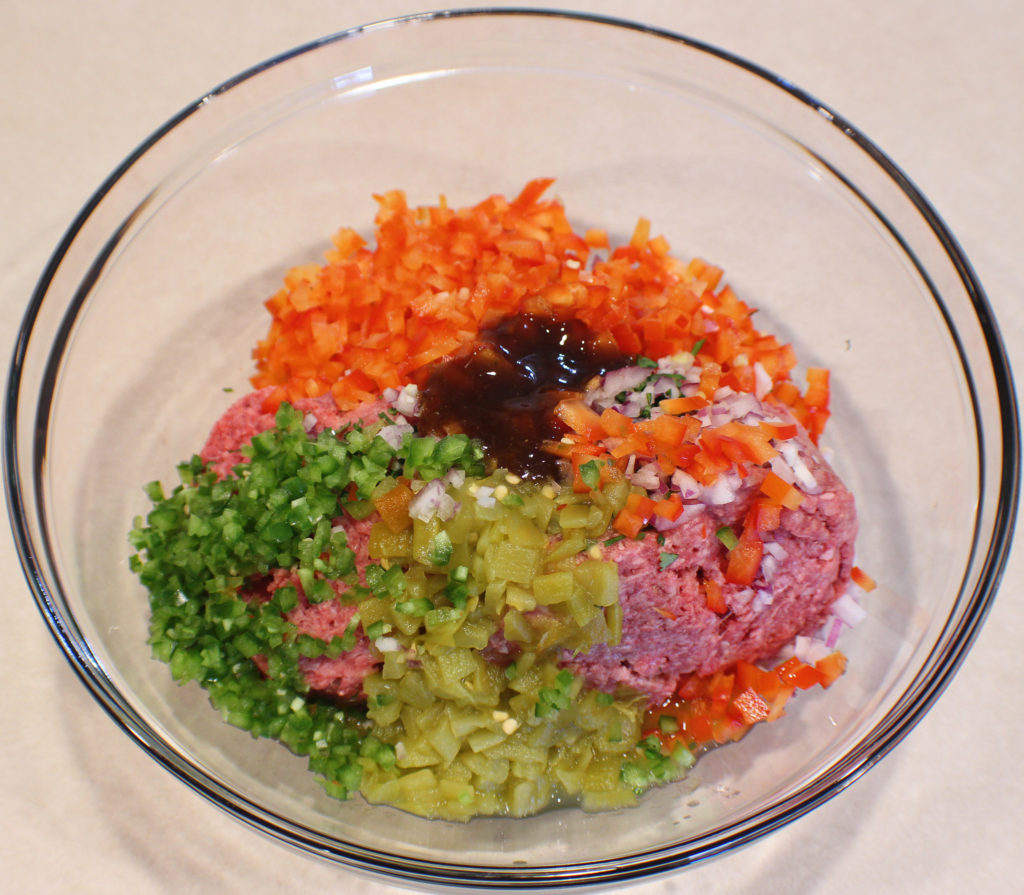
Chop your peppers, onion, and cilantro if you already have not. Put all of your ingredients in a bowl.

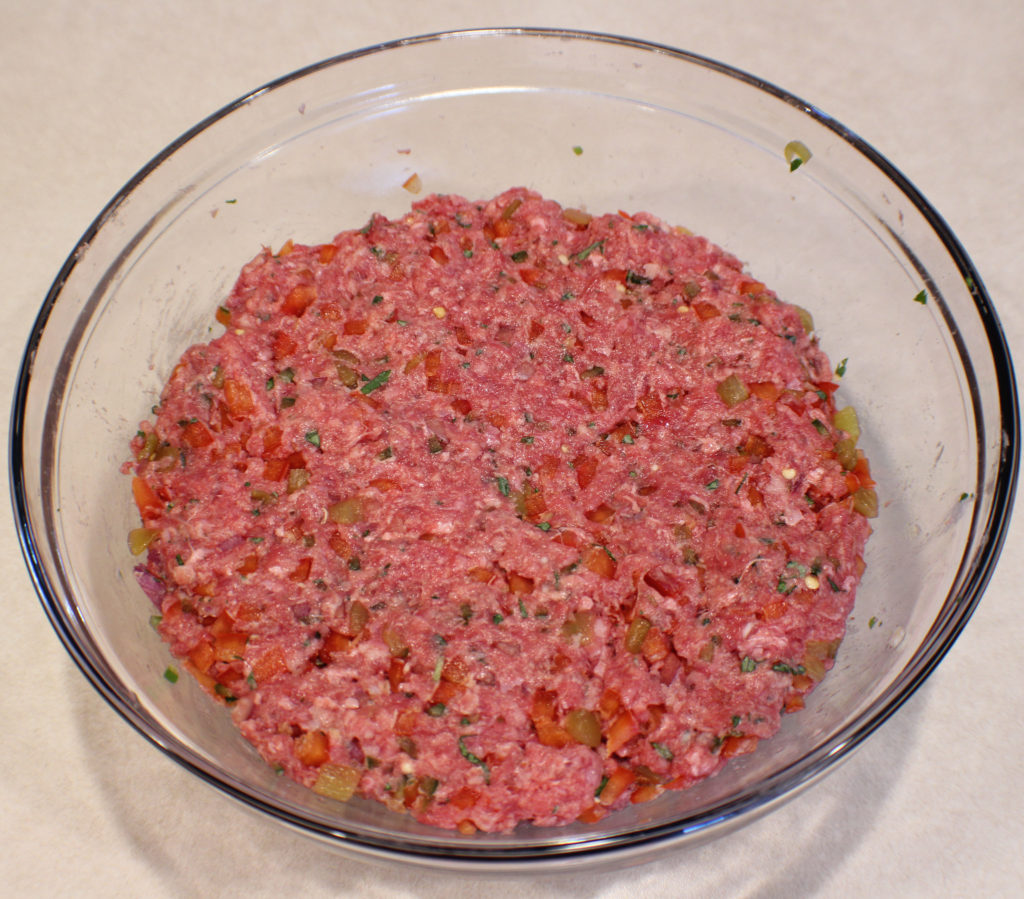
Mix it all together (no salt and pepper yet), and divide into how many burgers you want.

A note about mixing: mix only until the ingredients are all incorporated. Over mixing ground beef tends to make it tough.

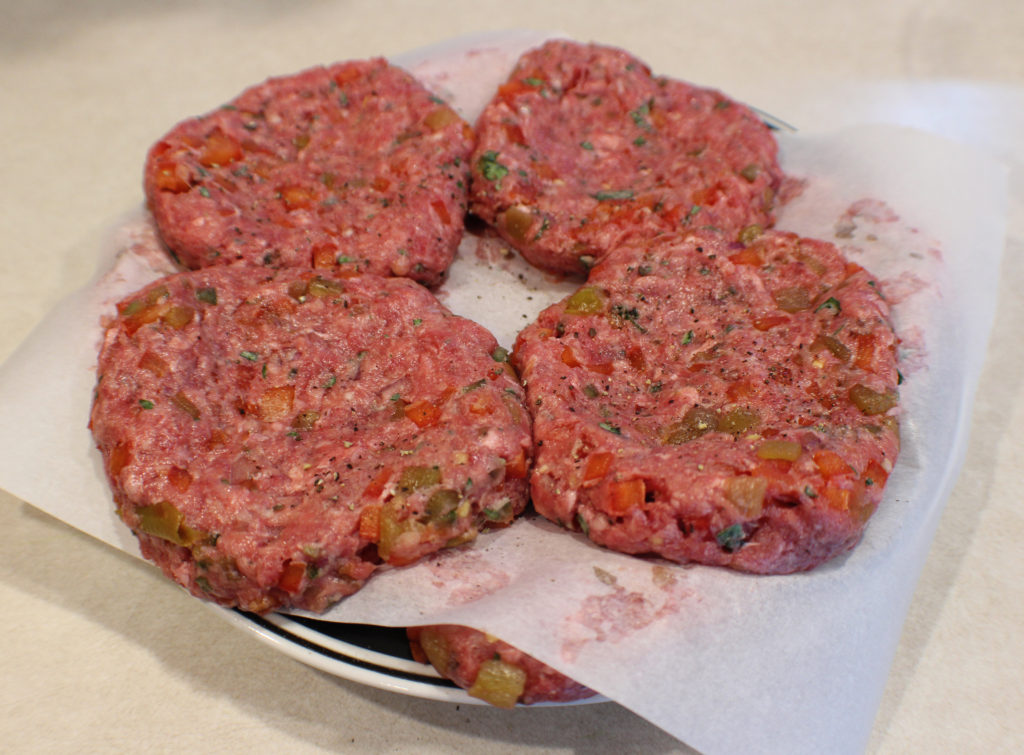
Start making your burger patties. When you form your patties, make sure the middle is thinner than the edges. When ground beef cooks, it pushes the juices to the middle, plumping up the middle of the patty. So, if your patties start out perfectly even in thickness all the way across, you will end up with swollen burgers in the middle.

Once your patties are formed, it is time to add the salt and pepper to both sides of the patties. By adding it to the outside of the meat, you get that really good restaurant grilled taste.

As I mentioned, I generally make double the amount of burgers I need and freeze what don’t get eaten for easy grilling later. Usually I will lay the burgers that I’m not going to cook on a lined sheet tray and freeze them until frozen, then bag them up.

This time I cooked all 8 burgers. Plus I made them the day before. To save space in my refrigerator, I decided to put these on a plate, but I needed to stack them. In order for them not to stick to one another, I put a piece of parchment paper in between the layers.

Ok, you are ready to cook your burgers. I will use a grill any day over a pan on the stove or in the oven. I prefer charcoal over gas, it just gives it a much better flavor. But use what you have available to you.

Today was really windy and cool and I have a small gas grill on the front patio that blocks the wind, so that’s where I cooked them.

Depending on how thick you made your burgers and how hot your grill is, depends on how long it will take to cook them. Generally it’s about 5 to 7 minutes per side with the lid closed.

Ok, I have to throw in the bit about food safety. Your burgers need to reach a minimum of 155 degrees to kill E-coli, which means your burgers will be cooked to medium.

If you are adding cheese, now is the time. Some people want cheese, some don’t, some are allergic to dairy. Some like pepper jack cheese, some like co-jack, mix it up and have fun with them.

Add your cheese and close the lid for the cheese to melt.

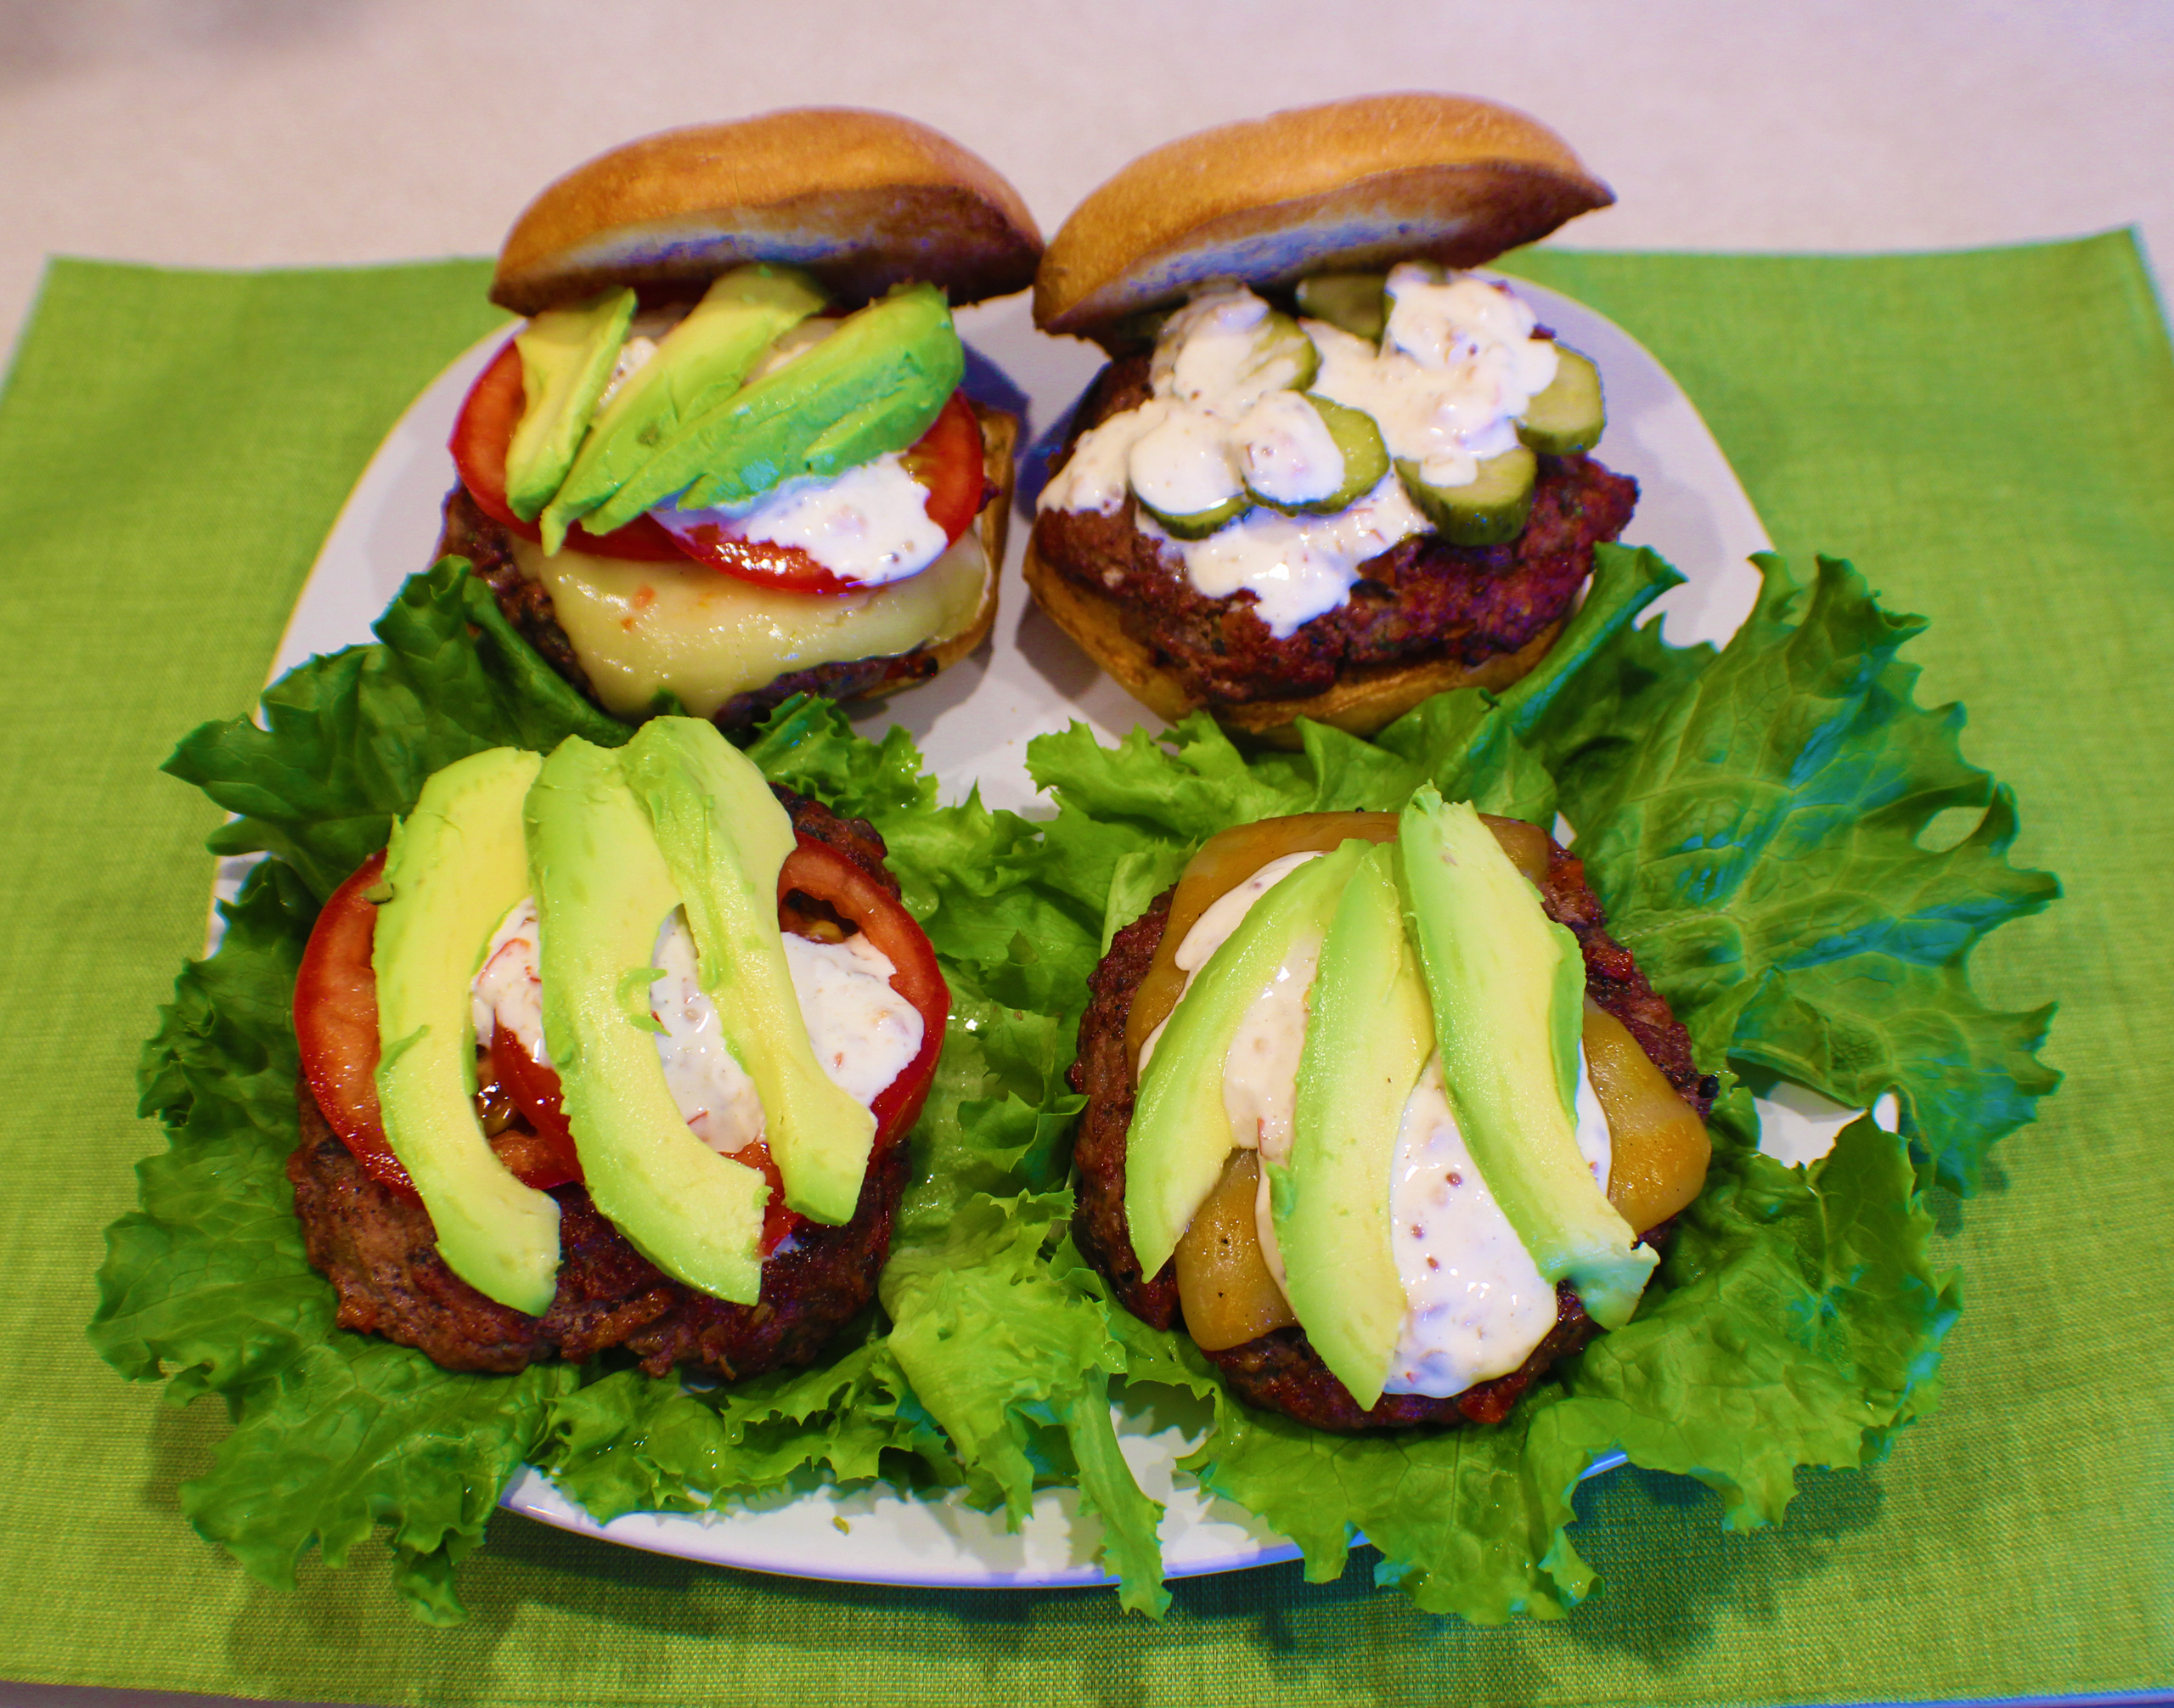
Now the fun part, the toppings. Get creative and add toppings that your really enjoy.

You can also wrap it in some lettuce for a bun-free (gluten-free) version. It’s a little more messy but a lot less filling.

I used my Sweet Pepper Sauce as my condiment on these Pepper Burgers.

Pepper Burger

If you like peppers and burgers, this one is for you! They have a well balanced pepper flavor and you control the heat by removing the seeds and ribs from the jalapeno pepper.
Prep Time15 minutes
Cook Time15 minutes
Course: Main Course
Cuisine: American, Tex-Mex
Keyword: Burgers
Servings: 4 Burgers
Calories: 303kcal
Author: Eating With Deb

Ingredients

  • 1 pound ground beef 80/20
  • 3 tbsp onion fine diced (sweet yellow or red works great)
  • ½ each bell pepper fine diced (whatever color you have on hand works)
  • ½ can diced green chilies
  • ½ each jalapeno minced, remove seeds and ribs
  • 1 tbsp Worcestershire
  • Sea salt and black pepper

Instructions

  • Chop onion, bell pepper and jalapeno.
  • In a large bowl, add the beef, chopped peppers and onions, green chilies, and Worcestershire. Mix until combined.
  • Split mixture into 4 and patty. Make sure the center of the patty is thinner than the edges.
  • Sprinkle both sides of the patties with sea salt and black pepper.
  • Grill patties until done to your prefered doneness (no less than medium is recommended). If desired, add cheese and melt.
  • Top with your favorite toppings.
  • Enjoy!

Notes

Topping ideas:
Pepperjack or Co-jack cheese
Tomatoes
Pickled Jalapenos
Greens
Avocado slices
Pickles
Sweet Pepper Sauce

Nutrition

Calories: 303kcal | Carbohydrates: 4g | Protein: 20g | Fat: 23g | Saturated Fat: 9g | Cholesterol: 81mg | Sodium: 123mg | Potassium: 448mg | Fiber: 1g | Sugar: 2g | Vitamin A: 60IU | Vitamin C: 6mg | Calcium: 41mg | Iron: 3mg

Chicken Cordon Bleu Burgers

Chicken Cordon Bleu Burger

Spring is here, but because the weather isn’t cooperating, there haven’t been many days that I’ve wanted to go outside and grill yet. I’m craving grilled burgers but still wanting some of the colder weather comfort food.

Making Chicken Cordon Bleu is a process, but a tasty dinner that’s well worth it. To make it a lot easier, I turned it into a burger that you can cook in a pan on the stove top with the wonderful flavors of Chicken Cordon Bleu and satisfies my burger and comfort food cravings.

This is a great burger to make in the spring, fall, or winter when you aren’t using your grill. The patties are a little soft and won’t hold up well on an outdoor barbecue.

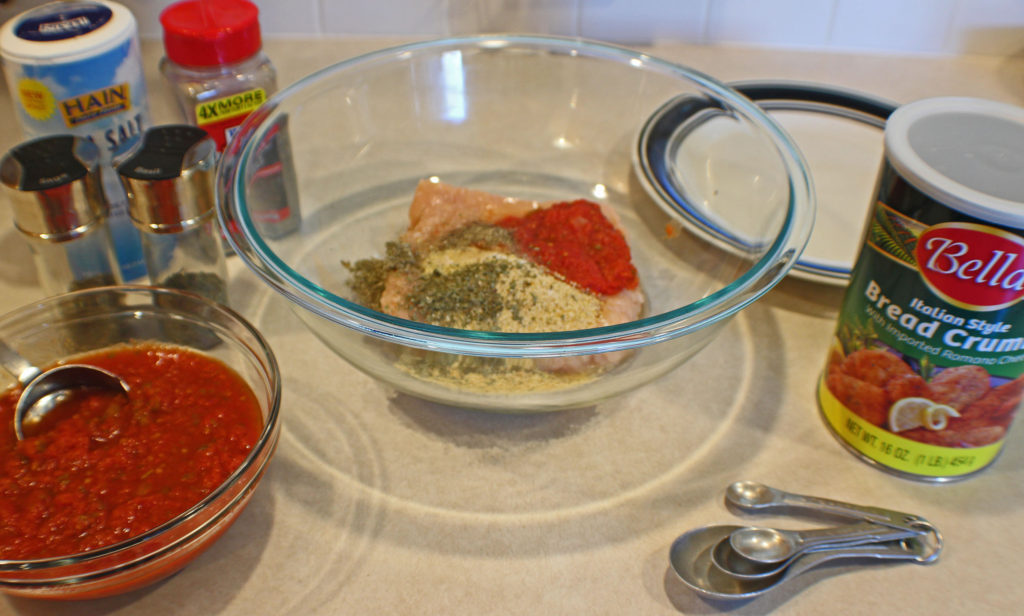
Chicken Cordon Bleu Burgers Ready to MIx

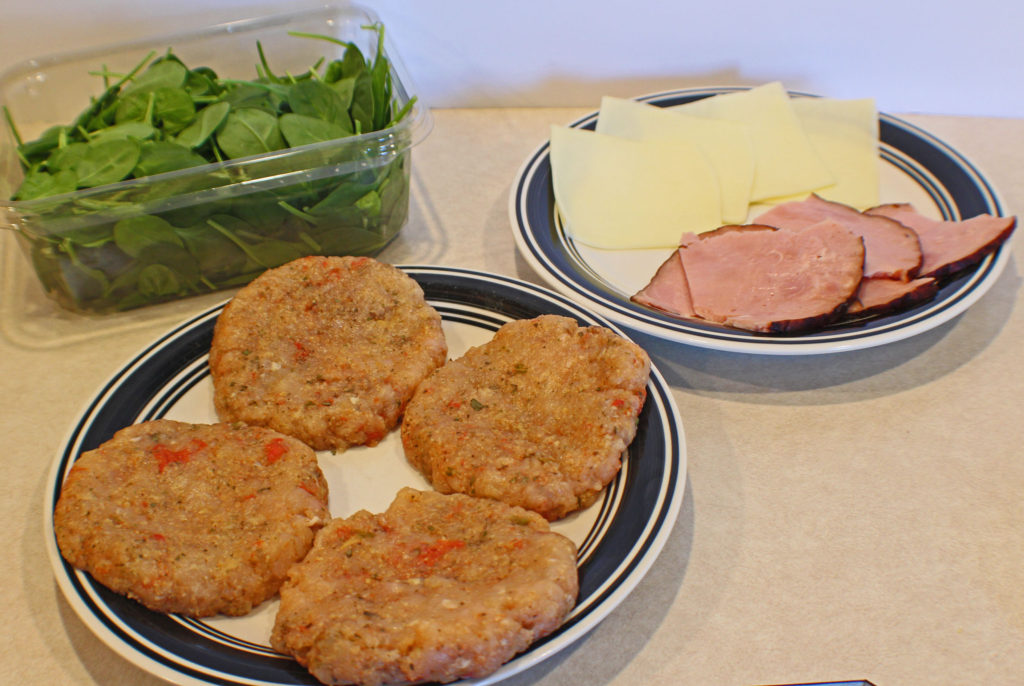
This is a very quick meal. Just mix the burger ingredients together and make 4 patties. Put those on a plate and collect your buns and toppings.

Chicken Cordon Bleu Burgers Ready to Cook

You could prepare everything the day before and come home to a dinner almost ready to eat.

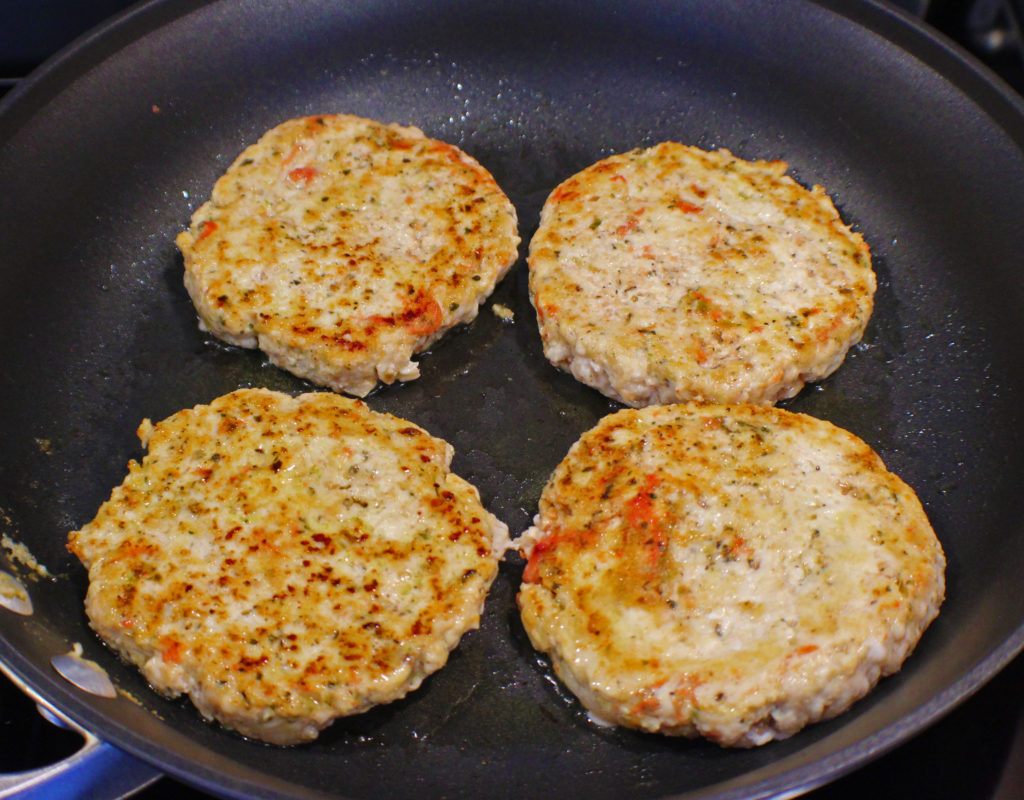
Chicken Cordon Bleu Burgers Cooking

When you are ready to cook these, heat up a large, nonstick pan over medium low heat and add a little olive oil.

Cook on each side about 4 to 5 minutes with a lid on the pan. The chicken patties should reach and internal temperature of 165 degrees.

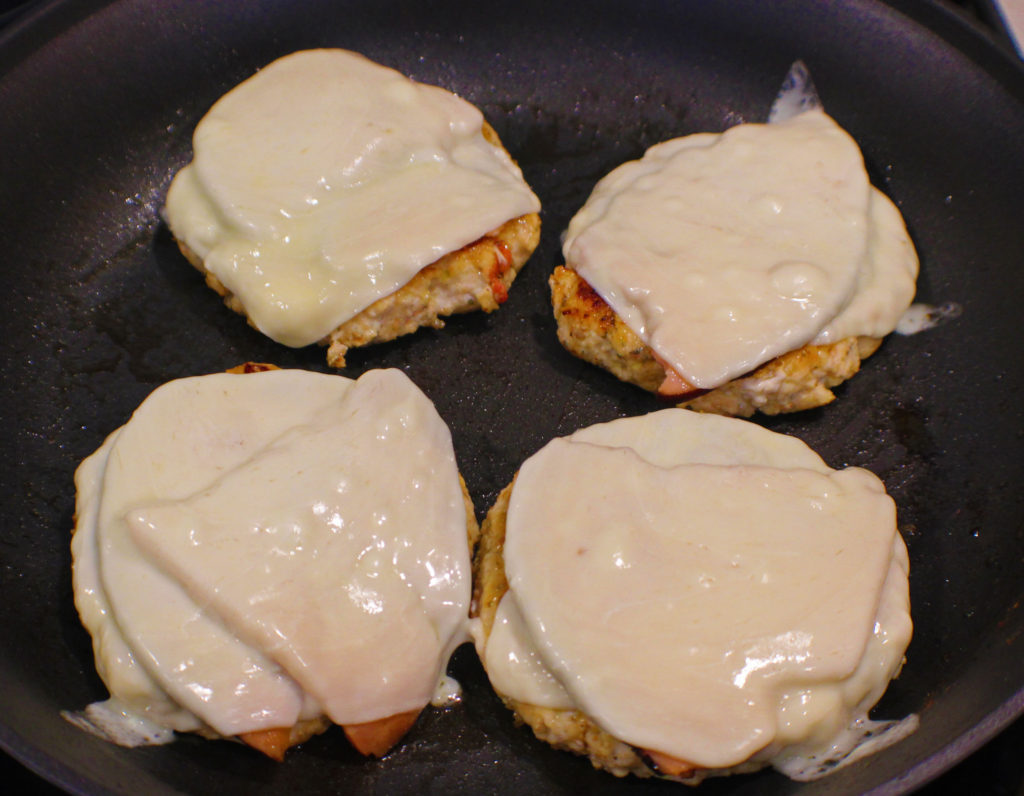
When your chicken patties are cooked, remove them from the pan and set aside for a minute or 2. Put your ham in the pan and cook on both sides for about 1 minute to heat through.

Put the ham on top of the chicken patties and return them to the pan. Top with cheese and put a lid on the pan. You can turn off the burner. It’ll only take a minute or so to melt the cheese.

I set this aside and toast the burger buns and heat up the marinara sauce in the microwave.

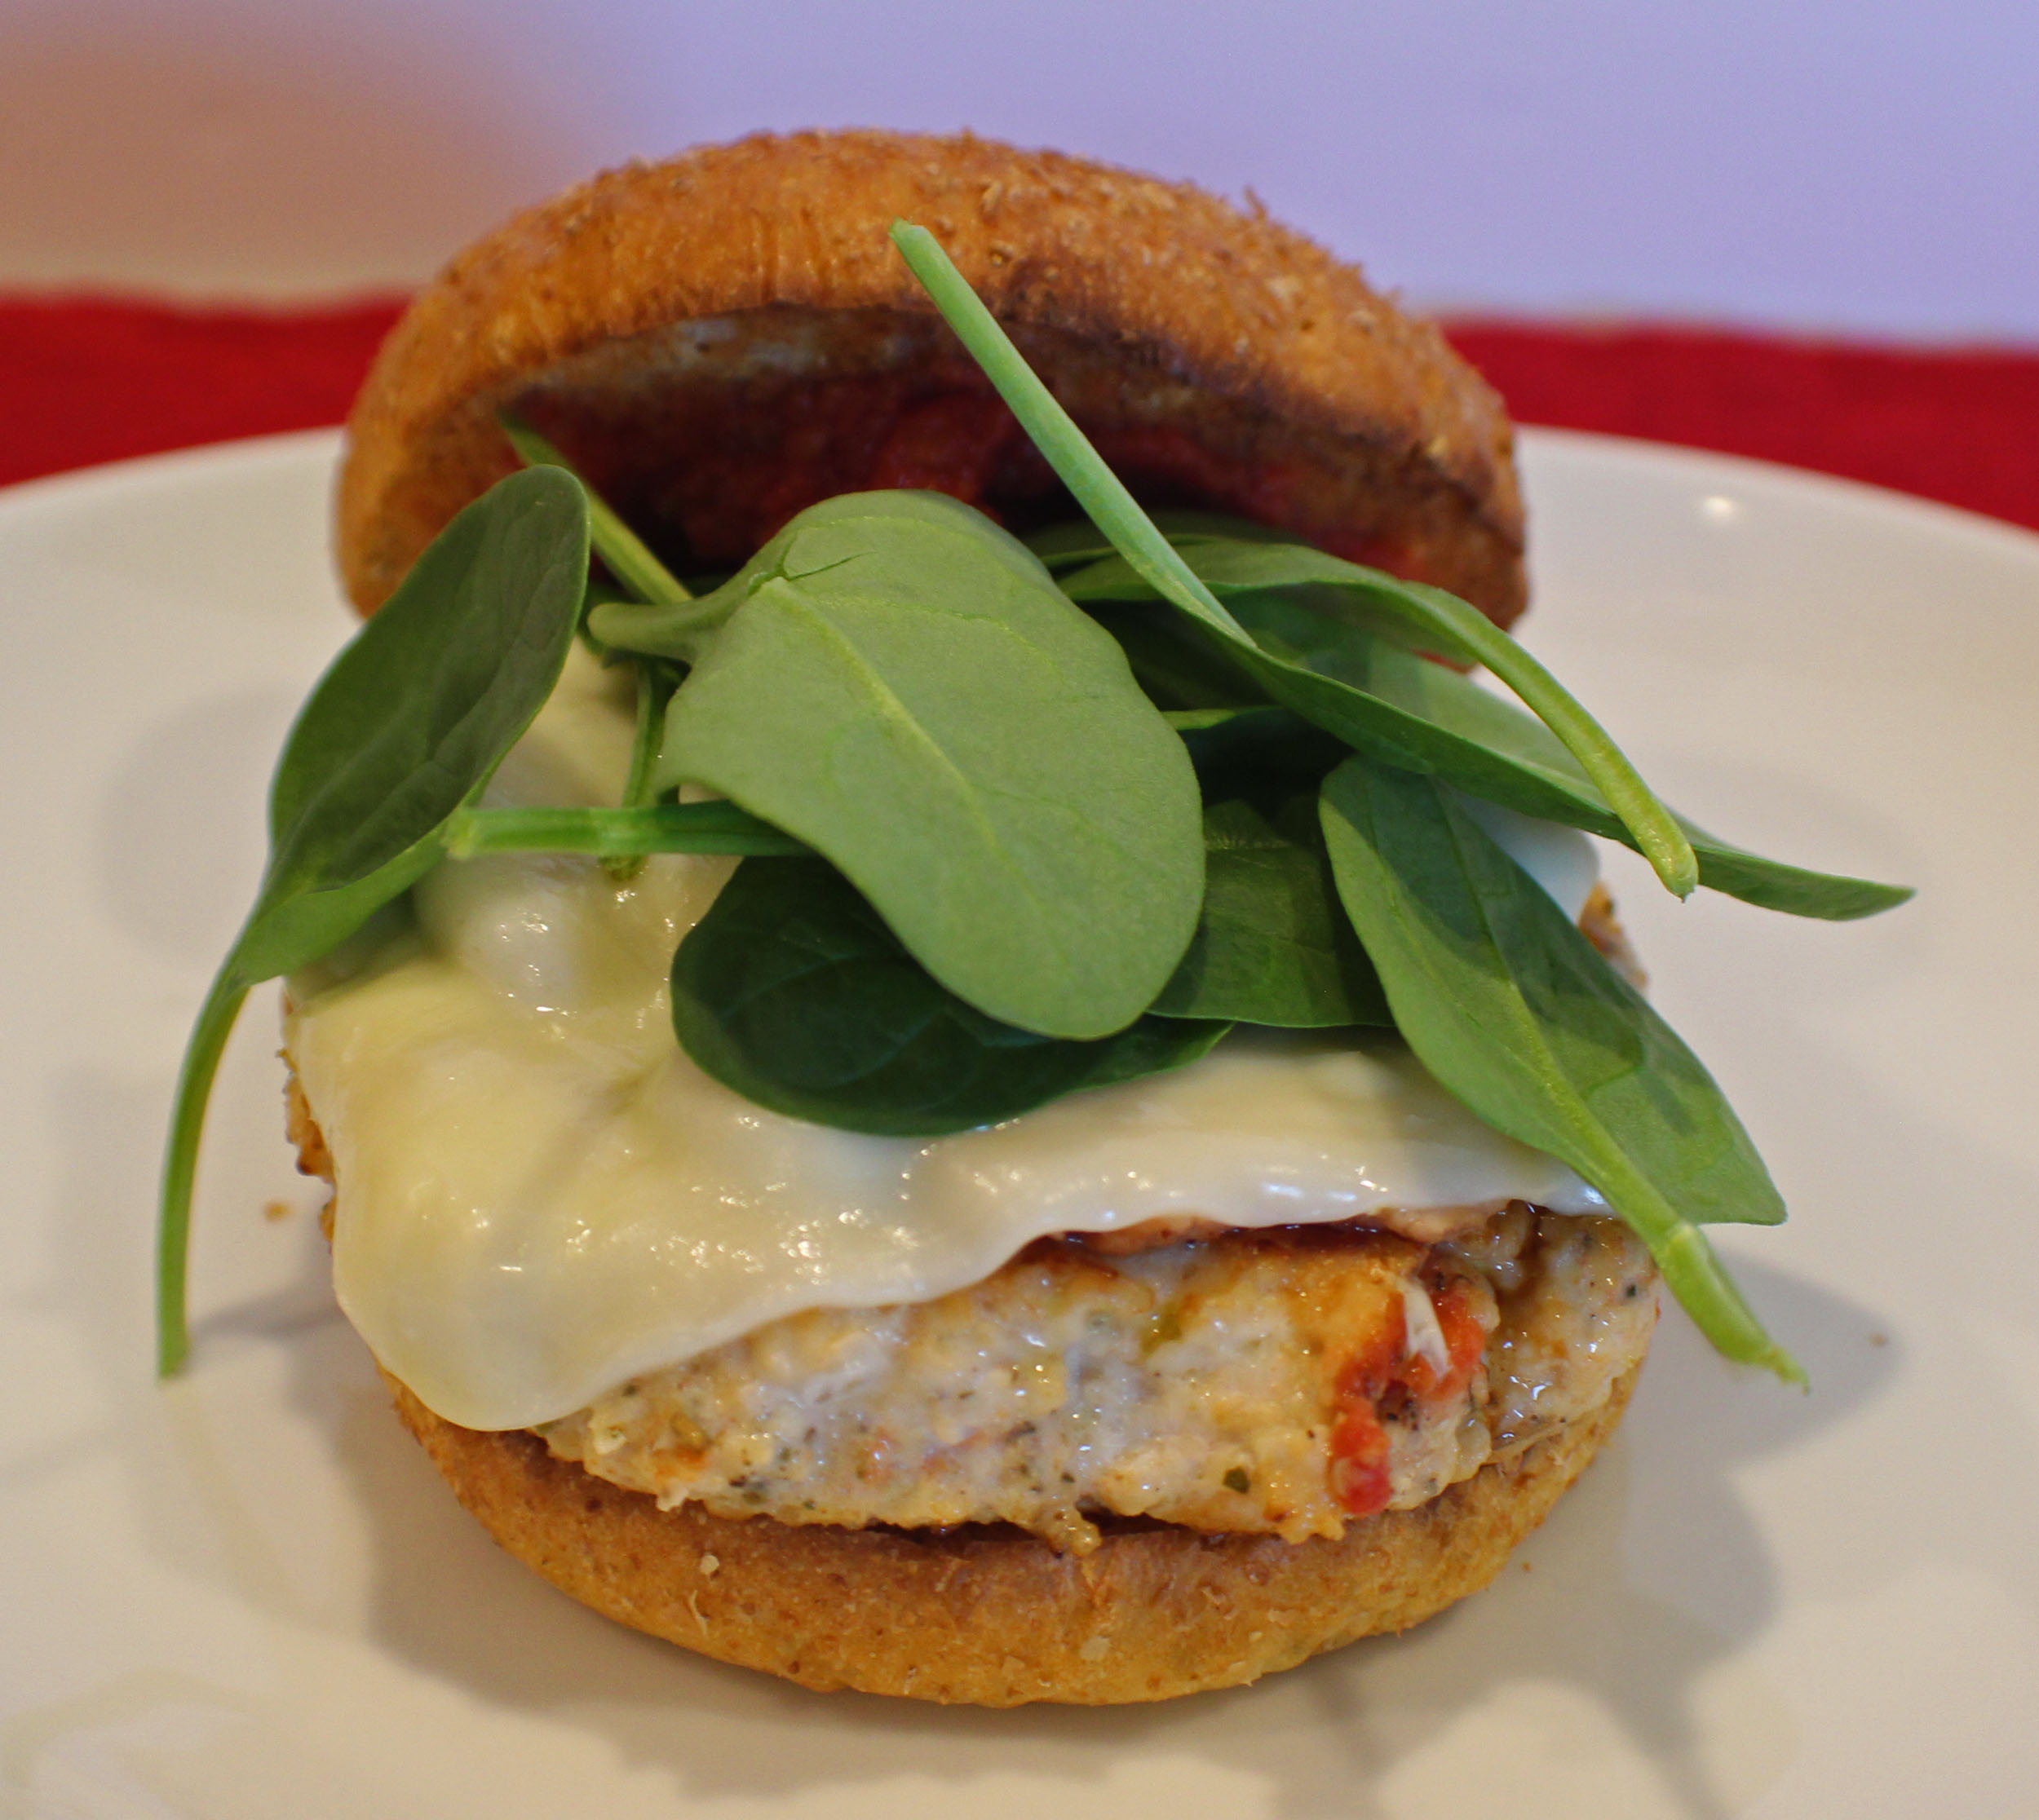
Build your burger and Enjoy!

Chicken Cordon Bleu Burger

This recipe combines my love of Chicken Cordon Bleu and Burgers. Perfect to make in the winter since it works best to cook these in a pan on the stove top.
Prep Time10 minutes
Cook Time12 minutes
Total Time22 minutes
Course: Dinner, Lunch
Cuisine: American
Keyword: Burgers, Chicken, Chicken Cordon Bleu, Cordon Bleu
Servings: 4 people
Calories: 388kcal
Author: Eating With Deb

Equipment

  • Large bowl
  • Large nonstick sauté pan and spatula

Ingredients

Burger Ingredients

  • 1 pound ground chicken
  • ¼ cup bread crumbs
  • ¼ cup marinara sauce
  • 1 tsp basil
  • 1 tsp sage
  • ¼ tsp sea salt
  • ¼ tsp black pepper

For Cooking:

  • 1 tbsp olive oil

Toppings:

  • 4 slices mozzarella
  • 4 slices ham thin sliced
  • 4 each burger buns
  • 8 tbsp marinara sauce warmed up
  • Fresh spinach

Instructions

  • Mix all burger ingredients together, divide into 4 patties.
  • Heat a large nonstick sauté pan on medium low heat and add 1 tablespoon olive oil to the pan. Add the 4 patties, top the pan with a lid, and cook on each side about 4 minutes, make sure patty reaches 165 degrees.
  • Remove from heat and set aside.
  • Add the ham to the pan and cook on both sides a minute or 2.
  • Put ham on top of the burger patties and return to the pan. Top with a slice of mozzarella, cover the pan, turn off heat and melt the cheese for a minute or 2.
  • Time to build the burgers.
  • Toast the burger buns and smear 1 tablespoon of marinara on each side of the bun.
  • Put the burger on the bottom bun, top with fresh spinach and the top bun.
  • Enjoy!

Nutrition

Calories: 388kcal | Carbohydrates: 9g | Protein: 34g | Fat: 24g | Saturated Fat: 9g | Polyunsaturated Fat: 3g | Monounsaturated Fat: 11g | Trans Fat: 1g | Cholesterol: 137mg | Sodium: 1015mg | Potassium: 862mg | Fiber: 1g | Sugar: 3g | Vitamin A: 390IU | Vitamin C: 3mg | Calcium: 176mg | Iron: 2mg