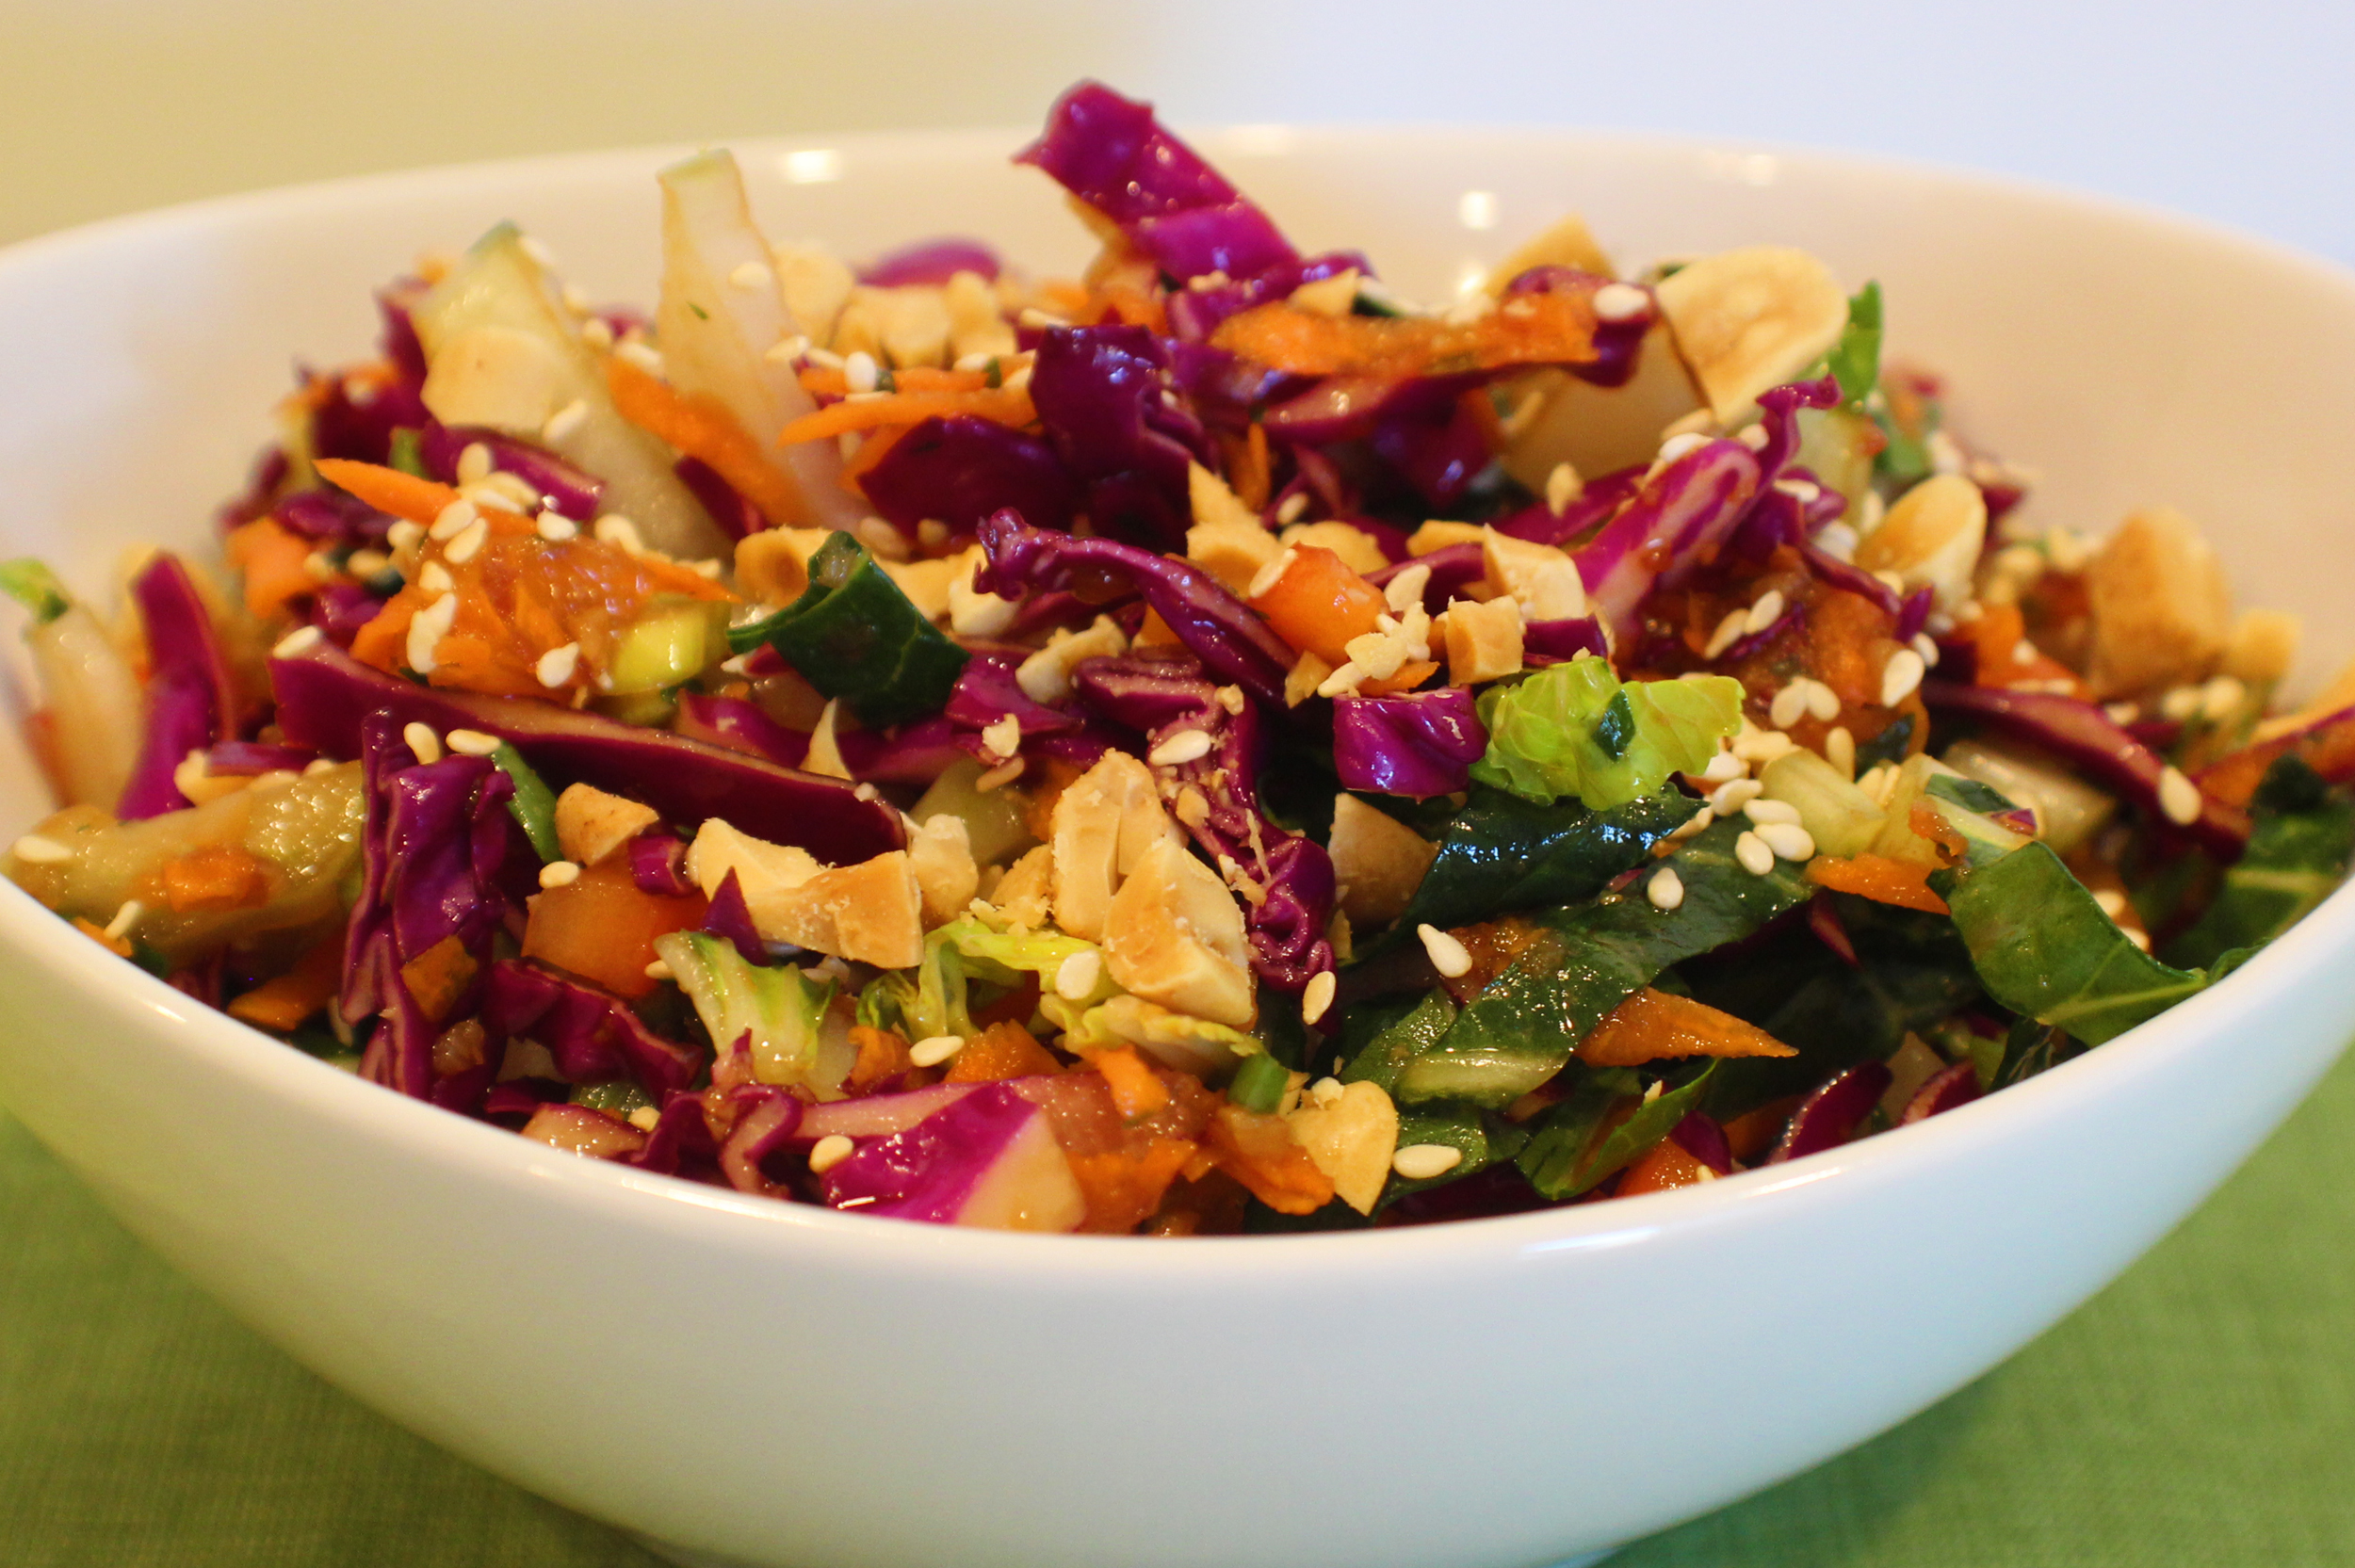
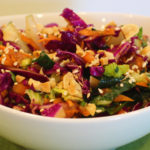
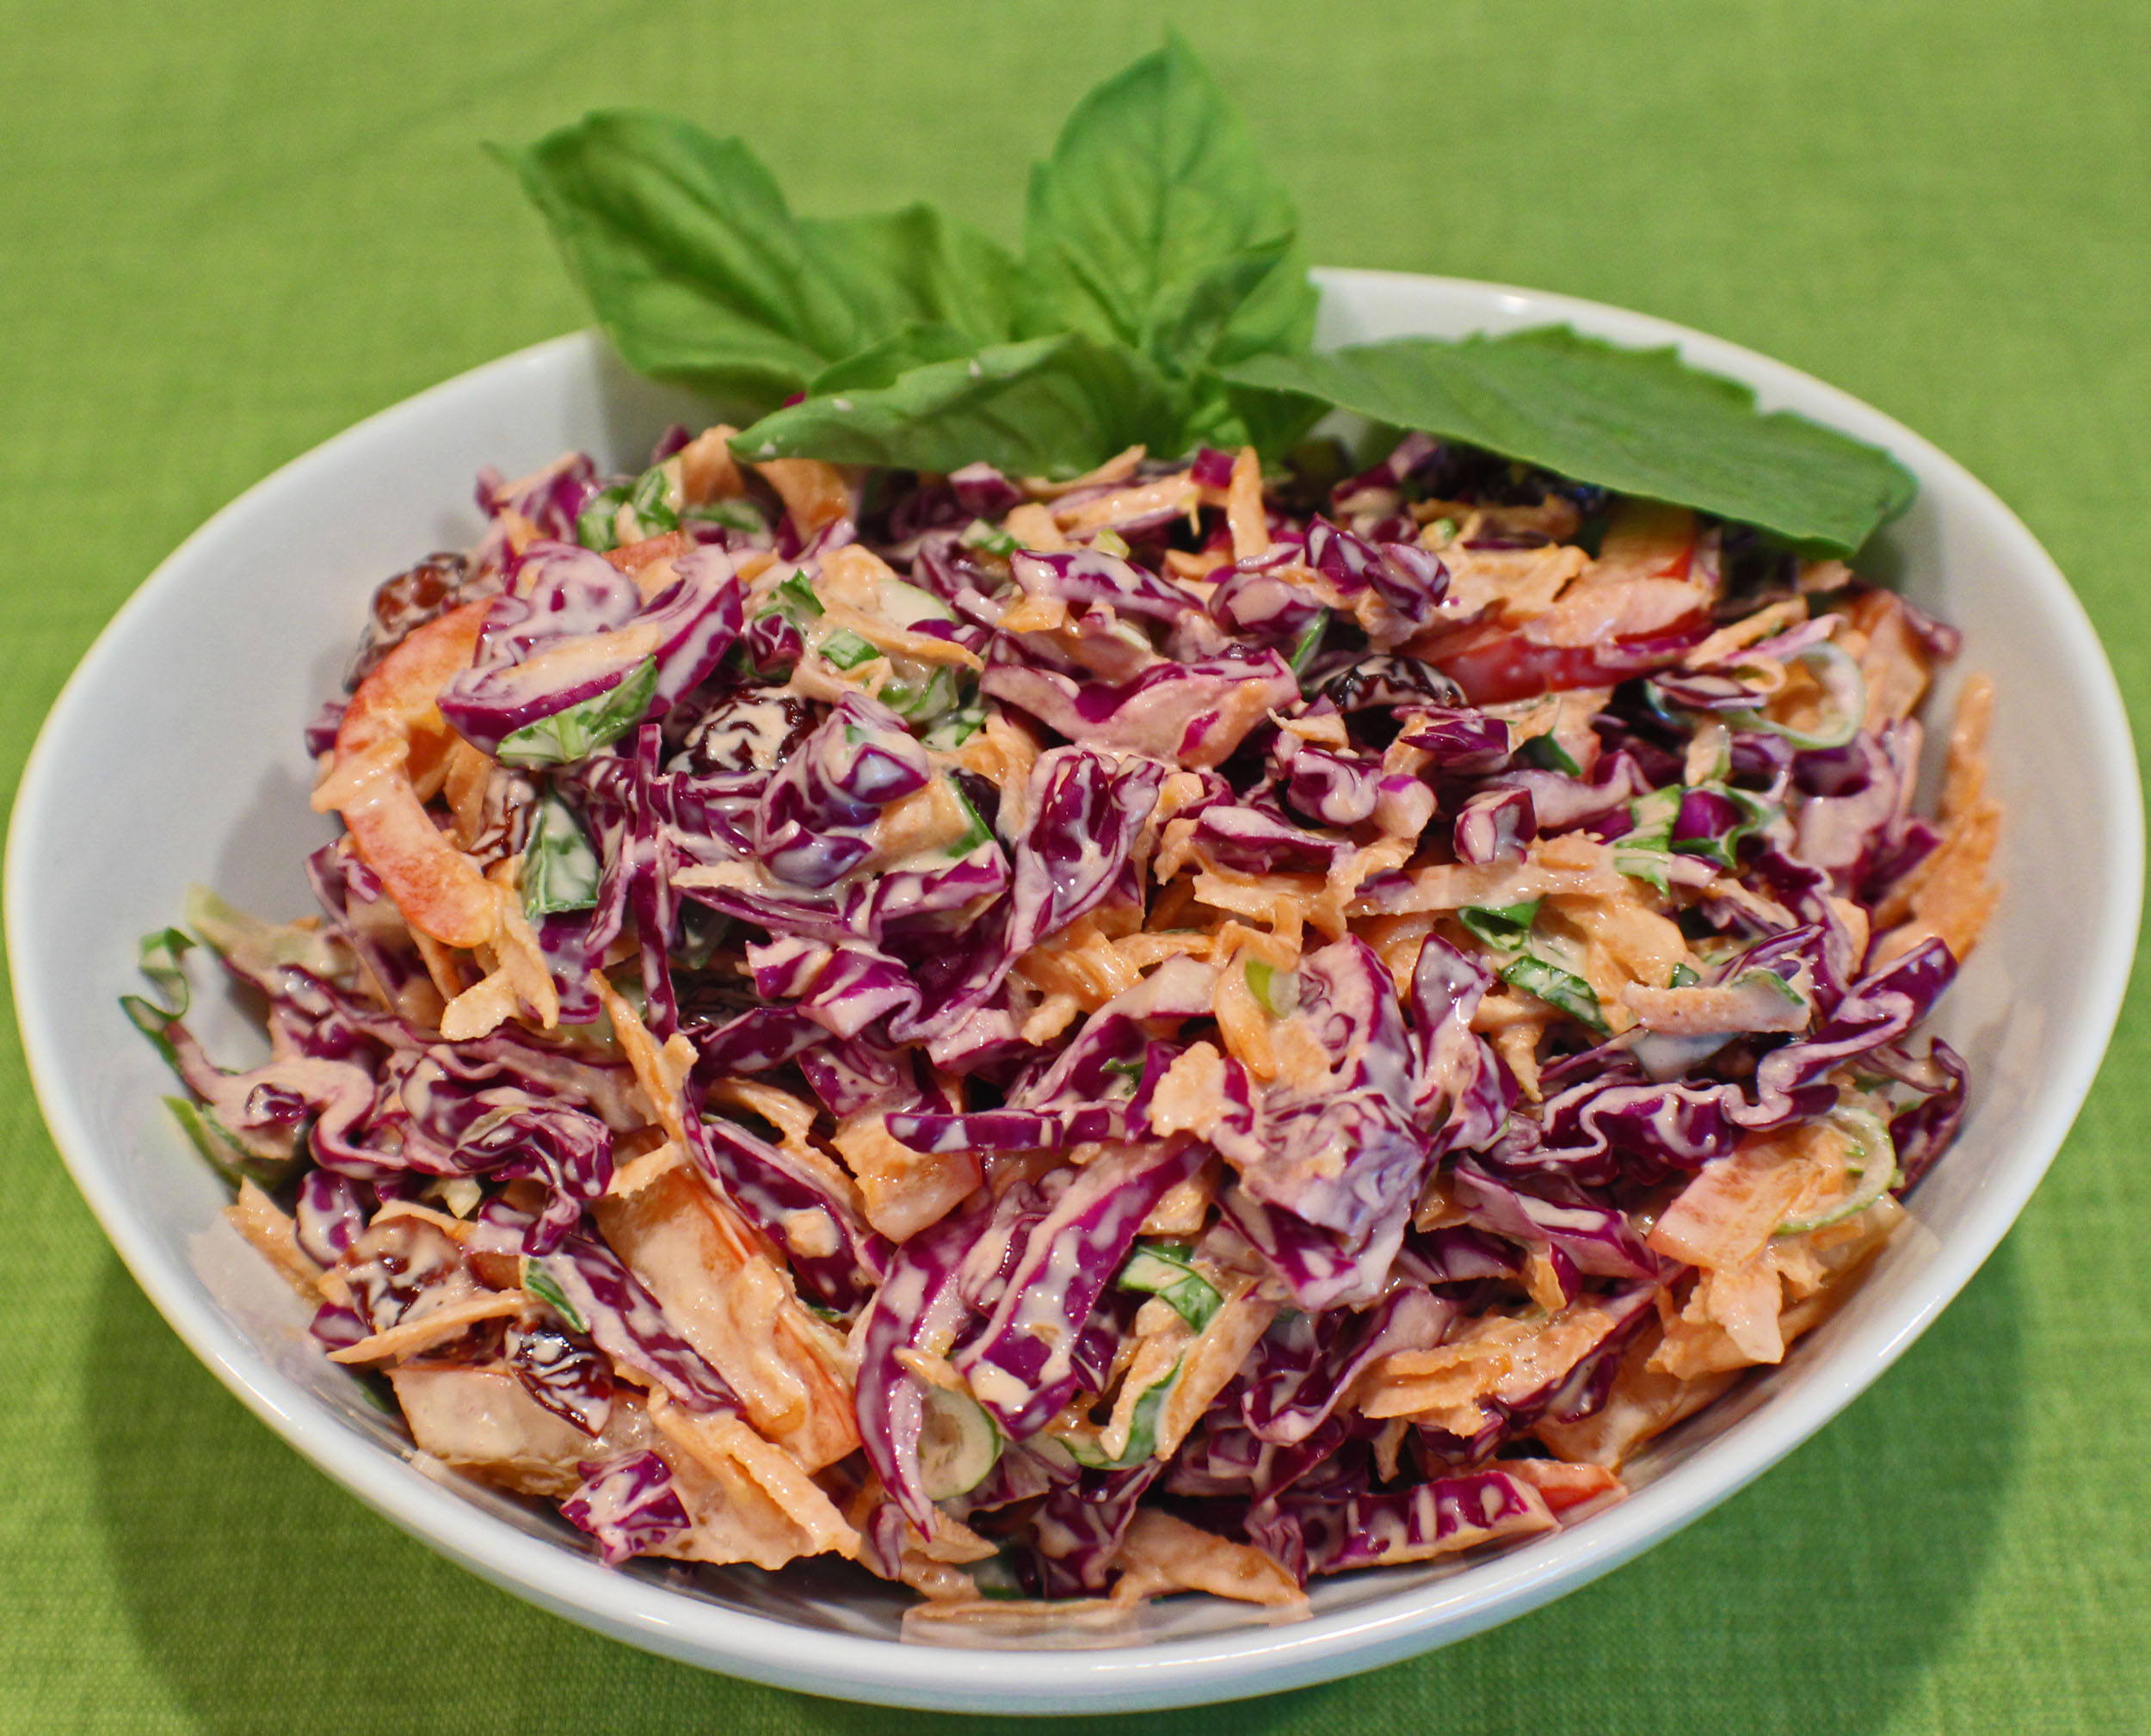
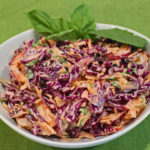
Basil Coleslaw

Basil Coleslaw

I usually don’t like too many coleslaws, but I’ve learned that using purple cabbage makes a crisper, crunchier slaw. Add in some fresh basil and dried cranberries for a different, yet delicious coleslaw that you’d be happy to bring or serve at just about any barbecue.

In a large bowl, mix together the dressing ingredients.

Basil Slaw Ingredients

Prep all your ingredients and put them in the bowl with the dressing.

Basil Chiffonade

To slice the basil, or chiffonade the basil, stack the basil leaves and then roll them up. Gently slice through the rolled stack of leaves.

Just mix it all together and you have a quick and refreshing slaw.

Try with Pepper Burgers or Chile Lime Burgers or BBQ Rib Burgers.

Enjoy!

Basil Coleslaw

Coleslaw is a summertime favorite salad with picnics and barbecues. Use purple cabbage to make a crisp slaw and add fresh basil for a refreshing flavor.
Prep Time15 minutes
Cook Time0 minutes
Total Time15 minutes
Course: Salad, Side Dish
Cuisine: American
Keyword: Basil, Cabbage, Coleslaw
Servings: 6 cups
Calories: 219kcal
Author: Eating With Deb

Equipment

  • Large bowl and rubber spatula
  • Cutting board and knife
  • Citrus Zester

Ingredients

Slaw Ingredients

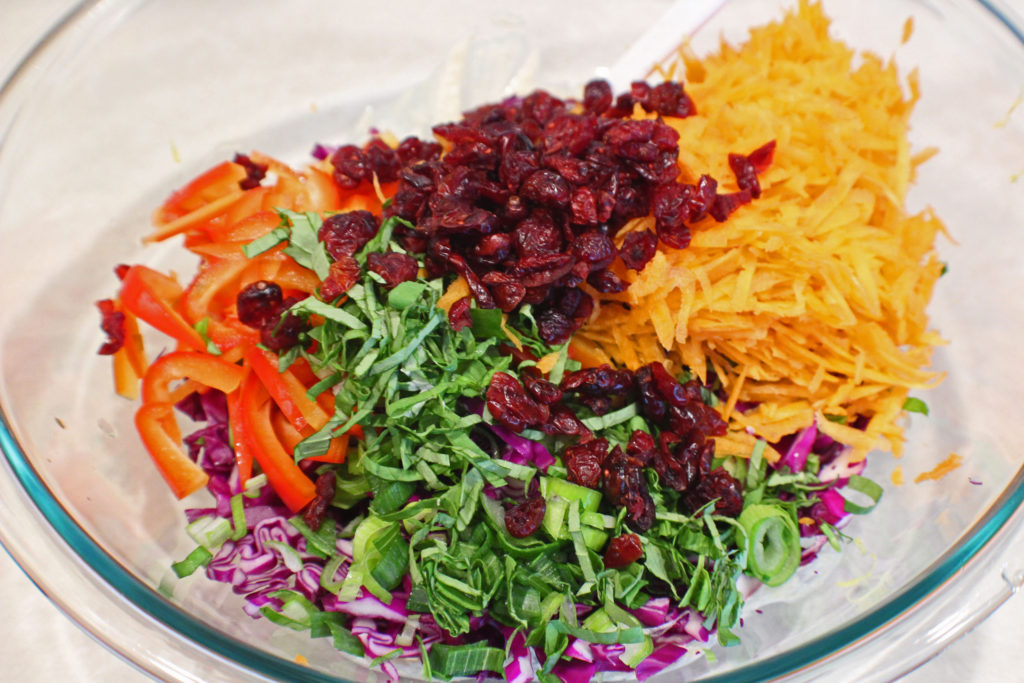
  • 4 cups purple cabbage shredded
  • 2 each carrot shredded, approximately 1 cup
  • 1 each red bell pepper julienned and cut down to about 1’ strips
  • 1 each green onion sliced
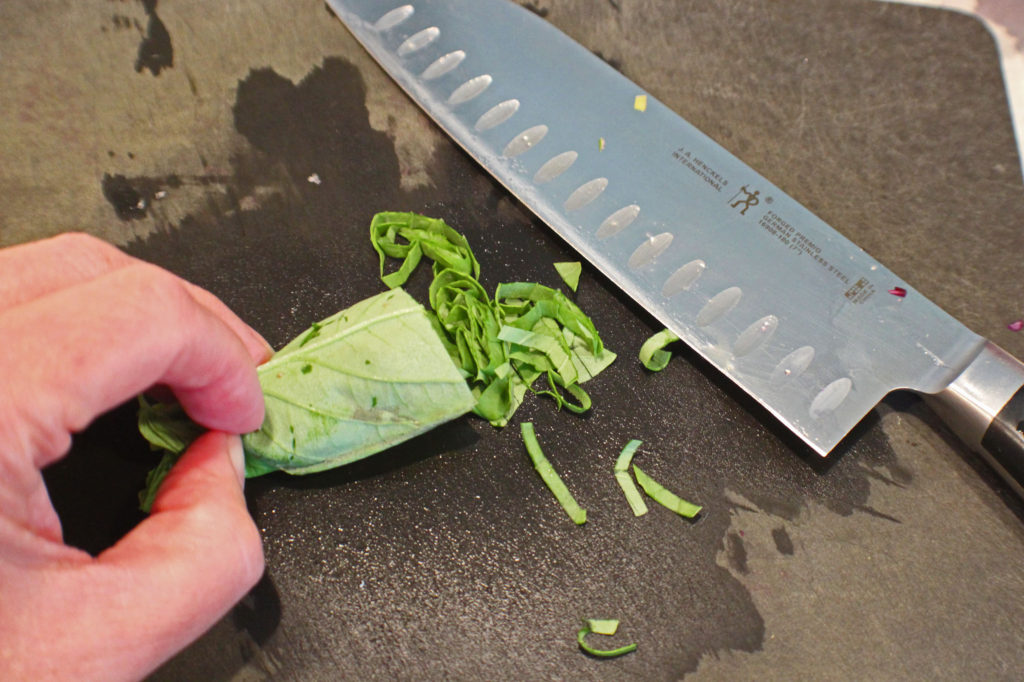
  • ¼ cup fresh basil chiffonade
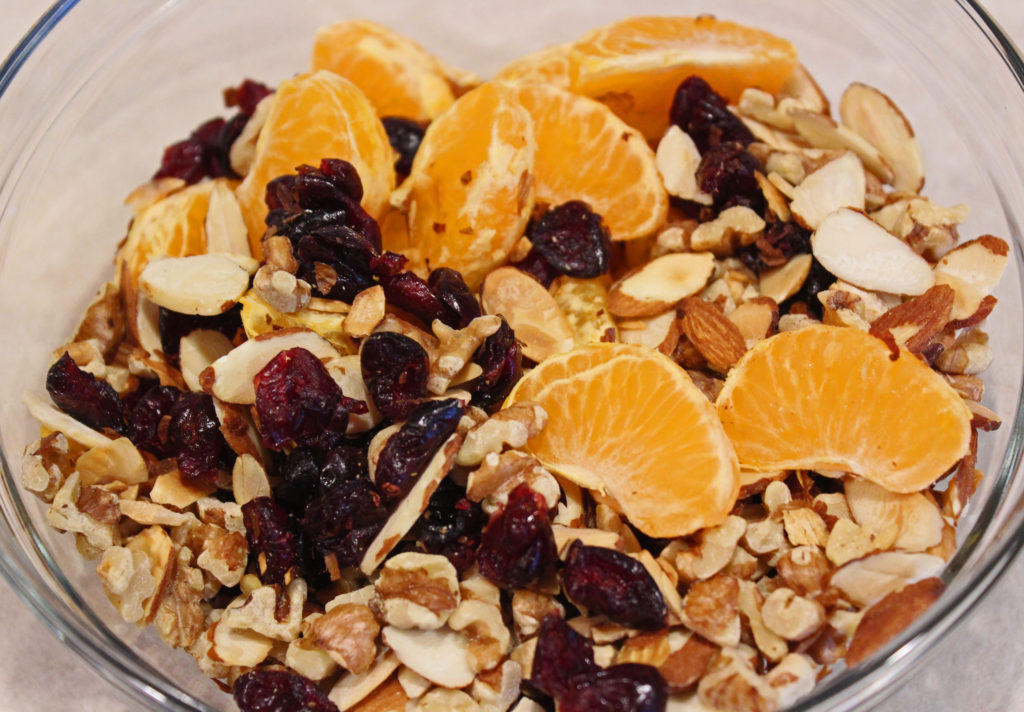
  • ¾ cup cranberries dried
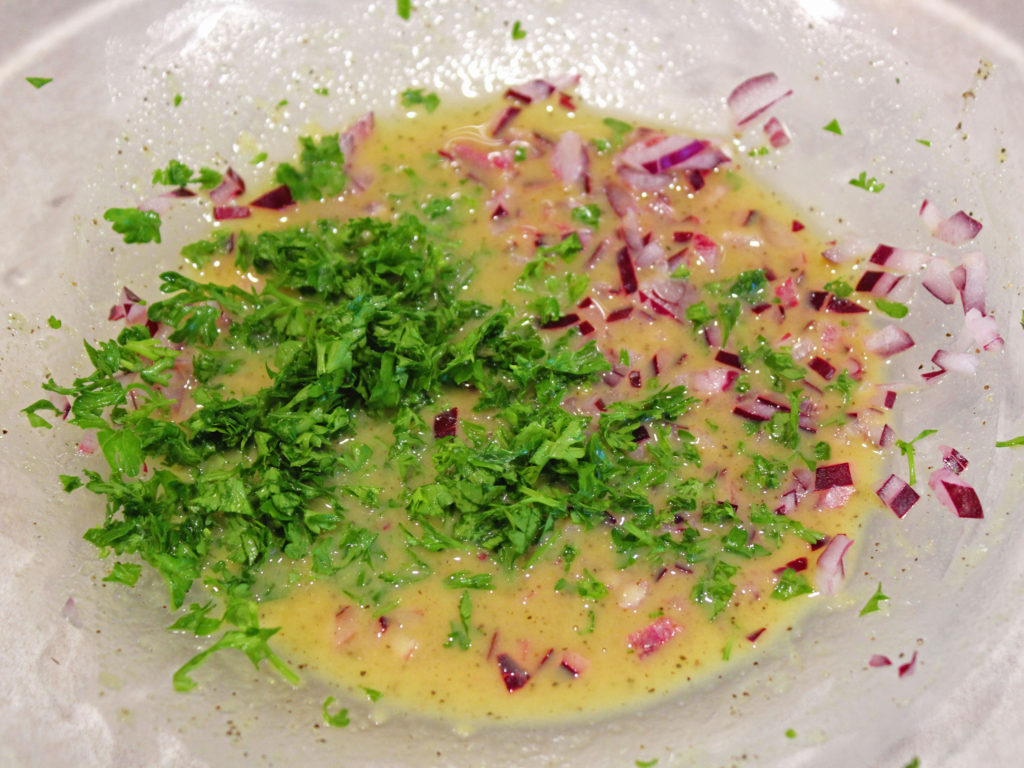
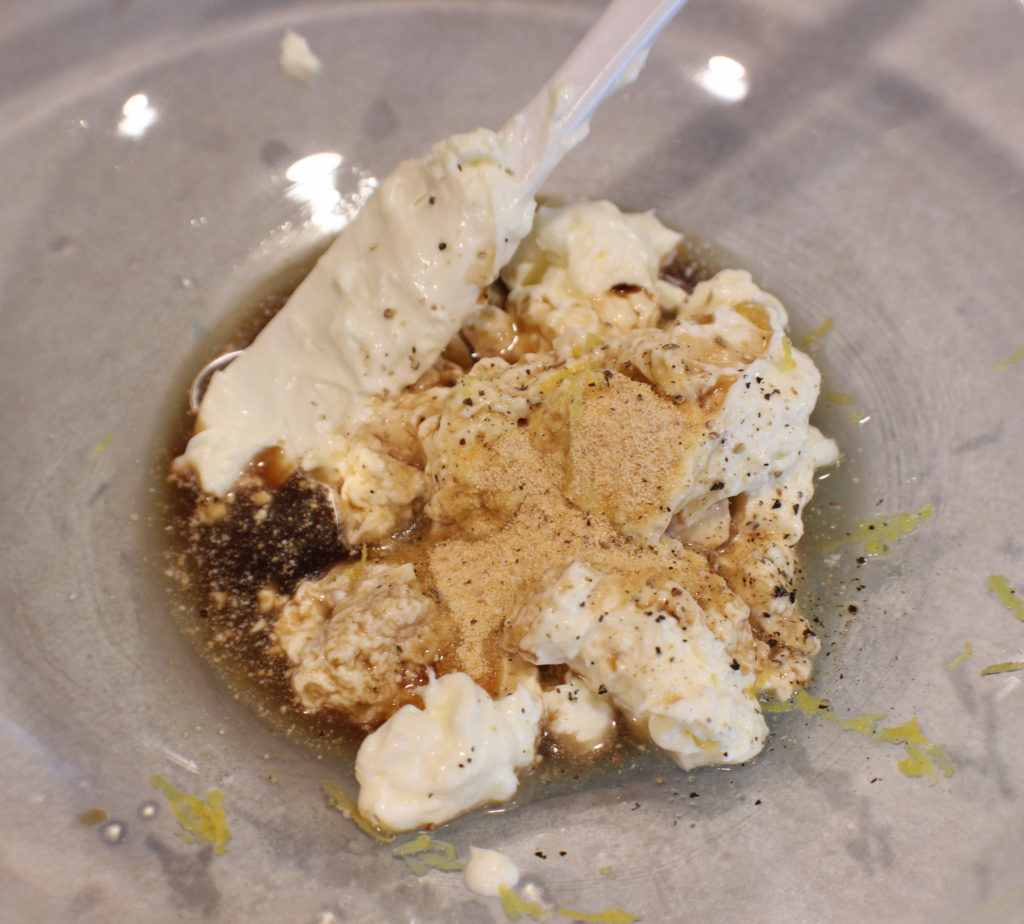
Dressing

  • ¾ cup mayonnaise
  • 1 tbsp balsamic vinegar
  • 1 tsp granulated garlic
  • ½ each lemon zest and juice
  • Sea salt and black pepper to taste

Instructions

  • Combine dressing ingredients and set aside.
  • Prepare veggies and add to dressing up to 1 hour before serving.
  • Enjoy!

Notes

To chiffonade basil, stack and roll the leaves into a tight roll. Gently slice through as basil bruises easily.
You can use green cabbage if you wish, I use purple because it holds up to the acid in the dressing longer so it stays crisper.

Nutrition

Serving: 1cup | Calories: 219kcal | Carbohydrates: 7g | Protein: 1g | Fat: 21g | Saturated Fat: 3g | Trans Fat: 1g | Cholesterol: 12mg | Sodium: 195mg | Potassium: 174mg | Fiber: 2g | Sugar: 4g | Vitamin A: 803IU | Vitamin C: 36mg | Calcium: 33mg | Iron: 1mg

Cucumber Roll Ups

Cucumber Roll Ups

I look forward to fresh garden vegetables and cucumbers often are the first to harvest, after the garden greens of course. I usually end up with more than I can eat, and some years more than my family, friends, and neighbors can eat.

Unfortunately, freezing cucumbers isn’t an option, and there are only so many pickles I can eat, so getting creative and being able to use those delicious, fresh cucumbers is a top priority. This is just one way to use them in a different manner that enhances the flavor and makes an enjoyable snack or an appetizer for those backyard, or picnic summer get togethers.

Cucumber Roll Up Ingredients

Fortunately, this is a very quick and simple recipe and it can be easily changed for the ingredients you have on hand or for your own tastes. This is what I usually use as the base. Sometimes I change up the herbs or add in some dried currents or dried, chopped cranberries. I like the chipotle powder for that little bit of heat and fresh cilantro would certainly work well with that flavor combination as well as pepitas instead of the sunflower seeds.

Cucumber Roll Up Cream Cheese

Mix in whatever dry seasonings you are using first to ensure they get mixed through the cream cheese. Then mix in the fresh herbs and seeds.

You are ready to put it all together. Lay out a piece of plastic wrap under the flour tortilla so you are ready to wrap it all up when done.

Cucumber Ready to Roll

Using the back of a spoon, spread 1/2 of the cream cheese out on the tortilla. Make sure to spread it out to the edges. Cut off both ends of the cucumber and place it in the middle of the wrap. 

Note – if using a store bought cucumber that has wax on it, be sure to peel it. The wax prevents the cream cheese from sticking to the skin and when you slice this; it will fall apart.

Wrap the tortilla around the cucumber and fold in the edges at the ends of the cucumber. This cucumber is a little fat, but that is ok.

Cucumber Roll Up Ready to Refrigerate

Wrap the plastic wrap around it and put it in the refrigerator for about 1/2 hour or so to firm up a bit before slicing.

Cucumber Roll Up

If I make this for a snack, I only make 1 at a time and cut off slices to eat when wanted. If I do this for an appetizer or for a picnic, I’ll make as many as needed, slice and plate them up, and sprinkle some fresh chopped herbs that were used in the mix over the top.

Enjoy!

Cucumber Roll Ups

A delicious and different way to use all those wonderful garden cucumbers and fresh herbs that are abundant this time of year.
Prep Time10 minutes
Cook Time0 minutes
Resting Time30 minutes
Total Time40 minutes
Course: Appetizer, Snacks
Cuisine: American
Keyword: Cucumber Recipes, Cucumbers, Gardening
Servings: 12 slices
Calories: 91kcal
Author: Eating With Deb

Equipment

  • 1 Medium Bowl and Spoon

Ingredients

  • 1 package cream cheese or neufchatel, softened
  • 1/2 tsp granulated garlic
  • 1/4 tsp chipotle powder optional
  • 1/4 cup sunflower seeds roasted and salted
  • 2 tbsp chives chopped
  • 2 tbsp fresh parsley chopped
  • 1 tbsp fresh dill chopped
  • 2 each cucumbers medium
  • 2 each flour tortillas room temperature

Instructions

  • Put the softened cream cheese in a medium bowl and mix in the garlic and chipotle powder using the back of a spoon or a hand mixer.
  • Using the back of a spoon, mix in the fresh herbs, chives, and sunflower seeds.
  • Spread out a piece of plastic wrap and place a tortilla on the plastic.
  • Spread 1/2 of the cream cheese mixture on the tortilla. (You can do both tortillas at once or save the other half to make the second wrap later.)
  • Cut the ends off the cucumbers and place in the middle of the tortilla.
  • Roll the tortilla around the cucumber and fold in the ends.
  • Roll the cucumber wrap up in the plastic wrap and refrigerate for about 1/2 hour to firm up before slicing.
  • Slice in about 1/2 inch slices and enjoy!

Nutrition

Calories: 91kcal | Carbohydrates: 4g | Protein: 2g | Fat: 8g | Saturated Fat: 4g | Polyunsaturated Fat: 0.3g | Monounsaturated Fat: 2g | Cholesterol: 19mg | Sodium: 62mg | Potassium: 33mg | Fiber: 0.2g | Sugar: 3g | Vitamin A: 346IU | Vitamin C: 1mg | Calcium: 24mg | Iron: 0.2mg

Holiday Wild Rice

Holiday Wild Rice

Wild rice is a wonderful accompaniment to a holiday meal. This salad has ingredients that remind me of the holiday season – cranberries, mandarin oranges, and nuts – dressed in a light and zippy dressing. It is served cold so it can easily be made a day or two in advance and not take up any precious stove or oven space or your time on the day of your gathering.

Wild Rice

Start with measuring out the rice and stock or water. I generally us a vegetable or chicken stock to impart flavor in the wild rice. To keep it vegetarian, use vegetable stock or plain water.

Toasting Wild Rice

While not a necessary step, I like to toast the wild rice first. It helps bring out a more nutty flavor. No need to use oil, just dry toast the rice over medium high heat for 3 to 5 minutes. You’ll hear it popping and see it starting to brown. Careful not to over toast, you don’t want it to taste burnt.

After toasting, add the stock or water. Be careful, the pan is already hot and the liquid will bubble and pop when you first start adding it to the pan.

Bring to a boil, reduce heat to a simmer and cover. Cook the rice for about 45 minutes until tender.

Wild Rice Dressing

While the wild rice is cooking, whisk together the dressing ingredients and toss in the onions and parsley.

Toasting Nuts

Over medium high heat, dry toast the nuts. This step is also not necessary, but toasting brings out the nutty flavor. Once the nuts start browning, remove from heat and set aside. 

You can also peel and segment the mandarin oranges, measure out the cranberries, add the nuts, and set this aside.

Wild Rice Cooked and Strained

When the rice is done, if there is still liquid in the pan you can just strain it.

Wild Rice Dressed

Mix the rice in with the dressing and put in the refrigerator for about an hour to cool down.

Holiday Wild Rice

Once the rice is cool, mix in the oranges, cranberries, and nuts. It’s ready to eat. This can be stored in the refrigerator for a day or 2 before you are ready to eat it. When you are ready for your holiday meal, put it in a serving container and pass it around.

Enjoy!

Holiday Wild Rice (or Nutty Wild Rice Salad)

This Nutty Wild Rice Salad is a great accompaniment to any holiday meal. It doesn’t take oven or stove top space and can be made up to a few days in advance. While vegetarian and mostly allergen free, the nuts could be omitted if necessary.
Prep Time15 minutes
Cook Time45 minutes
Resting Time1 hour
Total Time2 hours
Course: Side Dish
Cuisine: American
Keyword: holiday wild rice, wild rice
Servings: 6 people
Calories: 211kcal
Author: Eating With Deb

Equipment

  • Knife and cutting board
  • Large bowl and whisk
  • 4 to 6 quart stock pot
  • Small non-stick sauté pan

Ingredients

  • 1 cup wild rice uncooked
  • 3 cups vegetable stock water, or chicken stock
  • 4 each mandarin oranges
  • 1/3 cup walnuts chopped
  • 1/3 cup almonds sliced
  • ½ cup cranberries dried

Dressing

  • 2 tbsp apple cider vinegar
  • 2 tbsp Dijon mustard
  • ¼ tsp sea salt
  • ¼ tsp black pepper
  • 1 tbsp honey
  • 2 tsp ginger fresh, minced
  • 2 tbsp red onion minced
  • ¼ cup parsley chopped

Instructions

  • Put a 4 to 6 quart sauce pan on the stove and turn on heat to medium high. Add the rice and dry toast for 3 to 5 minutes to brown.
  • Add the water or stock and bring to a boil, reduce heat, cover, and simmer for about 45 minutes until rice is cooked. If there is excess liquid, drain rice.

While rice is cooking:

  • In a large bowl, whisk together sauce ingredients.

Prep the rest of the salad ingredients:

  • Dry toast (don’t use any oil) the nuts over medium heat for 3 to 5 minutes until they start to brown. Remove from heat immediately.
  • Peel and segment mandarin oranges and get ½ cup dried cranberries.
  • When the rice is done (strain it if there is any liquid left), add it to the dressing and mix well. Put in refrigerator for about 1 hour to cool down.
  • Add the rest of the salad ingredients and mix well.
  • Enjoy!

Notes

Makes 6 cups

Nutrition

Serving: 1cup | Calories: 211kcal | Carbohydrates: 29g | Protein: 7g | Fat: 9g | Saturated Fat: 1g | Polyunsaturated Fat: 4g | Monounsaturated Fat: 3g | Trans Fat: 1g | Sodium: 628mg | Potassium: 242mg | Fiber: 4g | Sugar: 6g | Vitamin A: 481IU | Vitamin C: 5mg | Calcium: 42mg | Iron: 1mg

Grilled Loaded Potatoes

Grilled Loaded Potatoes

I love loaded potatoes, but they can be a bit heavy in the summer. Slicing cooked potatoes and grilling them while grilling other items, is a wonderful way to bring loaded potatoes into any summer meal.

Loaded Potatoes Ready to Grill

I pre-cook the potatoes in the microwave for a couple of minutes before slicing and grilling. You’ll want to cool them down a little bit before slicing so you don’t burn yourself. I often cook them the day before and put them in the refrigerator overnight. If I don’t cook them the day before, after microwaving them I put them directly into the refrigerator for about 15 minutes to cool down before  slicing them.

Cook 1 potato per person. When slicing them cut off a little bit from each end so they will stay flat when they are on the grill. The thinner you slice, the more toppings you’ll have versus the potato ratio. Be careful not to slice too thin or they will be hard to keep together when grilling. I find about 1/2 inch thick works the best for me.

Get them ready with the oil and seasonings and have the toppings ready to go.

Grill potatoes over direct heat about 3 to 5 minutes per side. You want them nice and brown and a little crispy. Take them off direct heat and top with what ever toppings you like. I add my chives or green onions after I remove them from the grill.

Try with Smoked Ribs with a Cocoa Dry Rub, Maple Glazed Pork Chops or BBQ Rib Burgers.

Enjoy!

Grilled Loaded Potatoes

Grilling potatoes is a quick, easy way to make a tasty side dish for almost any outdoor grilling adventure. Whether you load them or not is your choice, you will end up with crispy potato slices.
Prep Time10 minutes
Cook Time14 minutes
Resting Time15 minutes
Total Time39 minutes
Course: Potatoes, Side Dish
Cuisine: American
Keyword: Grilled Potatoes, Loaded Potatoes
Servings: 4 people
Calories: 152kcal
Author: Eating With Deb

Equipment

  • Microwave
  • Cutting board and knife
  • Grill or Outdoor Barbeque
  • Small kitchen barbeque style brush

Ingredients

  • 4 each russet potatoes
  • 2 tbsp vegetable oil or canola oil

Seasoning Blend

  • ½ tsp sea salt
  • ½ tsp black pepper
  • ¼ tsp mustard dry
  • 1 tsp oregano
  • 1 tsp rosemary

Toppings

  • ¼ cup sour cream
  • 3 tbsp colby jack cheese or cheddar, shredded
  • 2 tbsp chives or green onions sliced
  • 2 tbsp bacon bits

Instructions

  • Stab the potatoes several times with a fork and cook in the microwave 2 minutes per side. Cool in the refrigerator for at least 15 minutes before slicing (I cook them the day before and put them in the refrigerator overnight).
  • Mix together the dry spices.
  • Slice potatoes ½ - 1 inch thick, cutting off the very ends so they will stay flat. Brush one side with oil and sprinkle with the seasoning blend. Turn slices over and repeat, making sure to get oil around the sides of the potato slices.
  • Grill over medium heat about 3 to 5 minutes per side (3 minutes if they weren’t cooled down overnight). In the last 2 minutes of cooking time, slide the potatoes to a cooler spot on the grill and top with the toppings. I like to smear the sour cream on, then sprinkle on the cheese and bacon bits. Reserve the green onions or chives for after they come off the grill.

Nutrition

Calories: 152kcal | Carbohydrates: 2g | Protein: 4g | Fat: 14g | Saturated Fat: 10g | Cholesterol: 18mg | Sodium: 435mg | Potassium: 58mg | Fiber: 1g | Sugar: 1g | Vitamin A: 276IU | Vitamin C: 1mg | Calcium: 107mg | Iron: 1mg

Asian Slaw

Asian Slaw

I’m all about the side dishes during the summer grilling season. This slaw goes well with about anything you are grilling, with or without an Asian flair.

When it comes to coleslaws, I always use purple cabbage, it’s firmer than the green cabbage, which means it stays crisper longer. But if you prefer green cabbage go ahead and use it.

Asian Slaw Ingredients

Prep your veggies and gather the dressing ingredients. For the cabbage, I cut the head in half, then one half in half again. Then I cut out the remaining core. I cut the cabbage in half again, then thin slice it.

This time I couldn’t get a baby bok choy, so I shredded a large bok choy, mixed it all together, and measured out about 3 cups worth. I’ll use the rest as part of my greens in salads this week. Or maybe I’ll make a chicken stir fry.

In a large bowl, mix together the dressing ingredients and toss in all the veggies. You could mix in the toasted sesame seeds and peanuts, or pass them around for everyone to add them if they desire.

I like this slaw on top of my Asian Burgers or as a side to Asian Beef and Veggie Kabobs, Spatchcock Chicken with Asian BBQ Sauce, or Ginger Soy Pork Chops.

Enjoy!

Asian Slaw

This slaw has a refreshing ginger flavor with a little heat from the Sambal Oelek. It’s a great summertime side when rocking that outdoor grill.
Prep Time15 minutes
Cook Time0 minutes
Course: Side Dish
Cuisine: Asian
Keyword: Asian Slaw, Cabbage, Slaw
Servings: 6 people
Calories: 130kcal
Author: Eating With Deb

Equipment

  • Large bowl and whisk
  • Cutting board and knife

Ingredients

Slaw

  • ¼ head purple cabbage shredded, about 3 cups
  • 1 each baby bok choy shredded, about 3 cups
  • 1 each carrot shredded
  • 3 each green onions sliced
  • ½ each red bell pepper chopped

Dressing

  • 1 tbsp toasted sesame oil
  • 1 tbsp mirin or brown rice vinegar
  • 2 tbsp soy sauce or wheat-free tamari
  • 2 tsp Samal Oelek chili sauce
  • 1 tbsp ginger fresh, minced
  • 1 tbsp garlic fresh, minced
  • 2 tbsp cilantro chopped

Toppings

  • ½ cup roasted peanuts chopped
  • 2 tbsp sesame seeds toasted

Instructions

  • Combine dressing ingredients in a large bowl and set aside.
  • Prep slaw ingredients and add to the dressing. Mix thoroughly.
  • Sprinkle on peanuts and sesame seeds.
  • Serve on top of Asian Style Burgers, Asian Beef and Veggie Kabobs, or with Ginger Soy Pork Chops.
  • Enjoy!

Notes

This recipe makes about 6 cups of slaw.

Nutrition

Calories: 130kcal | Carbohydrates: 8g | Protein: 5g | Fat: 10g | Saturated Fat: 1g | Sodium: 502mg | Potassium: 218mg | Fiber: 2g | Sugar: 2g | Vitamin A: 442IU | Vitamin C: 21mg | Calcium: 58mg | Iron: 1mg

Dilly Potato Salad with Radishes

Dilly Potato Salad with Radishes

Summer is a time for lighter, fresher foods; a time to use the barbecue and smoker. Potato salad is a staple when it comes to summer picnics and outdoor barbecue meals.

I like adding different, fresh ingredients from my garden. Radishes add a little zip and crunch to a traditional potato salad.

Dilly Potato Salad Dressing

After you get the potatoes chopped and simmering, mix together the dressing ingredients. You want this ready to add the warm potatoes when they are done cooking.

Potatoes Cooling in Dressing

Once the potatoes are done, but still firm, they will still cook a little bit while cooling in the dressing, drain and immediately mix into the dressing. The warm potatoes will absorb the flavors from the dressing.

Put this in the refrigerator for an hour. Potatoes are a high risk item for food poisoning, so you want to cool them right away.

Dilly Potato Salad Ready to Mix

After about an hour, prepare the rest of the potato salad ingredients and mix into the salad. Put the potato salad back into the refrigerator for another hour or so until cold.

Try serving this with BBQ Rib Burgers.

Enjoy!

Dilly Potato Salad with Radishes

Creamy potato salad is a summertime staple for picnics and barbecues. Add in some fresh dill and radishes to enhance a summer favorite.
Prep Time15 minutes
Cook Time8 minutes
Cooling Time2 hours
Total Time2 hours 23 minutes
Course: Salad, Side Dish
Cuisine: American
Keyword: Dill, Potato Salad, Potatoes, Radishes, Side Salad
Servings: 6 cups
Calories: 204kcal
Author: Eating With Deb

Equipment

  • 4 to 6 quart sauce pot
  • Cutting board and knife
  • Large bowl and rubber spatula

Ingredients

  • 4 each potatoes red and/or yellow
  • ½ cup dill pickles diced
  • 1 each rib celery diced
  • ½ each red bell pepper diced
  • 8 each red radishes sliced
  • 2 each hard-boiled eggs diced (optional)

Dressing:

  • ¾ cup mayonnaise or plain yogurt or sour cream
  • 1/3 cup Dijon
  • ½ tsp granulated garlic
  • 1 tbsp fresh dill chopped, or 1 tsp dry dill
  • 1 tbsp fresh chives chopped
  • ½ tsp celery seeds
  • ½ tsp sea salt
  • ½ tsp black pepper

Instructions

  • Cut potatoes into bite size pieces. Place in cold water and then bring to a boil. Simmer until fork tender, about 8 to 10 minutes.
  • In the meantime, prepare dressing and veggies. When the potatoes are ready, drain and add to dressing. It will appear that there is a lot of sauce but the warm potatoes will soak up the sauce and absorb the flavor.
  • Place in the refrigerator to cool for about an hour, stirring a couple of times.
  • Stir in the rest of the ingredients.
  • Cool in the refrigerator for another hour before eating.
  • Enjoy!

Notes

Potatoes are a high-risk food; when not cooled right away, potatoes can create a food-borne sickness that you really don’t want to have.

Nutrition

Serving: 1cup | Calories: 204kcal | Carbohydrates: 2g | Protein: 1g | Fat: 22g | Saturated Fat: 3g | Trans Fat: 1g | Cholesterol: 13mg | Sodium: 634mg | Potassium: 52mg | Fiber: 1g | Sugar: 1g | Vitamin A: 83IU | Vitamin C: 1mg | Calcium: 21mg | Iron: 1mg

Mediterranean Pasta Salad

Mediterranean Pasta Salad

One of the things I love about summer is coming up with new side dishes to serve with whatever I am grilling. This pasta salad goes well with many different grilled meats, meat alternatives, and veggies.

Start by getting your pasta cooking in boiling salted water. While the pasta is cooking, mix together the dressing ingredients so it is ready to add the pasta right when it is done.

Once the pasta is cooked to al dente, drain and add directly to the dressing. Mix it in. The warm pasta will absorb the flavors of the dressing. Put this in the refrigerator to start cooling down.

I always made this with sundried tomatoes that I reconstituted, then one time I decided to make it a little easier and bought them packed in oil. I didn’t take into account the additional oil when I made the dressing and my dish turned out too oily. This recipe is adjusted for sundried tomatoes packed in oil. So, if you decide to use dried tomatoes that you add hot water to soften them, you may need a little more oil in the dressing, but wait until the end to determine that.

Also, I usually use roasted red bell peppers because they are easier to find in jars in the grocery store, but I happened to have some roasted green peppers from my garden in the freezer that I needed to use up, so that’s what I used this time.

Once you have your ingredients ready, mix them in with the pasta and dressing.

Refrigerate for about an hour to cool down completely. 

Enjoy!

Mediterranean Pasta Salad

This salad is slightly tangy from the olives, artichoke hearts, and lemon juice, yet very fresh tasting. Goes great with just about any outdoor BBQ meal, pairs well with many meat entrees.
Prep Time15 minutes
Cook Time10 minutes
Cooling Time1 hour
Total Time1 hour 25 minutes
Course: Salad, Side Dish
Cuisine: Mediterranean
Keyword: Artichoke Hearts, Kalamata Olives, Pasta
Servings: 4 people
Calories: 351kcal
Author: Eating With Deb

Equipment

  • large saucepan
  • 1 large bowl and whisk
  • Cutting board and knife

Ingredients

  • 2 cups bowtie pasta uncooked
  • ½ cup sun-dried tomatoes jarred in oil, rough chopped
  • ½ cup kalamata olives pitted, rough chopped
  • 1 each roasted bell pepper red or green, diced
  • ½ cup artichoke hearts rough chopped
  • ½ cup pepitas raw pumpkin seeds
  • ¼ cup feta cheese crumbled
  • ¼ cup parmesan cheese shredded

Dressing

  • 2 tbsp olive oil
  • 2 tbsp balsamic vinegar
  • ½ each lemon juice and zest
  • 1 each leek small, cut in ½ moons
  • 5 each basil leaves fresh, sliced
  • ½ tsp granulated garlic
  • 1 pinch black pepper

Instructions

  • ring 4 to 6 cups of water to a boil, add a couple tablespoons of sea salt and pasta. Cook to al dente, about 10 minutes. Drain.
  • While pasta is cooking, combine dressing ingredients and start preparing the rest of the salad ingredients.
  • After pasta is drained, add to the dressing, mix in and put in the refrigerator.
  • Finish preparing the rest of the ingredients and mix into the pasta and dressing.
  • Refrigerate for 1 hour, stirring a couple of times.

Nutrition

Serving: 1cup | Calories: 351kcal | Carbohydrates: 36g | Protein: 13g | Fat: 18g | Saturated Fat: 5g | Trans Fat: 1g | Cholesterol: 13mg | Sodium: 754mg | Potassium: 640mg | Fiber: 5g | Sugar: 8g | Vitamin A: 348IU | Vitamin C: 6mg | Calcium: 159mg | Iron: 3mg

Minty Barley Salad

Minty Barley Salad

Barley is one grain that I feel doesn’t get used enough. It is chewy, very nutritious, and full of fiber. Hulled barley has the outer hull removed, retaining more nutritional content, whereas pearled barley has the outer husk as well as the bran removed. Pearled barley still has nutrients, just less so than hulled barley.

Hulled barley takes about 20 to 30 minutes more time to cook than pearled barley. Use whatever is your preference or whatever you have time to cook.

Cooked Barley

Start by cooking the barley. I like to cook it in vegetable or chicken stock to add additional flavor. Unfortunately, this adds additional sodium. so feel free to cook it in water. 

For pearled barley, start checking for doneness after about 20 minutes of simmering, and for hulled barley, about 40 minutes.

Minty Barley Salad Dressing Ingredients
Minty Barley Salad Dressing

While the barley is cooking, whisk together the dressing. I like to use champagne vinegar, but I didn’t have any this time around so I substituted  white wine vinegar (not distilled white wine vinegar). You could also use apple cider vinegar.

Minty Barley Salad Veggies

While the barley is cooking, you may have time to prepare the vegetables and herbs as well.

Once the barley is cooked, drain off any excess liquid and mix into the dressing. The warm barley will absorb more flavors from the dressing.

Adding all Veggies and Herbs

Add the veggies and herbs to the barley and put it in the refrigerator for about an hour to cool before serving.

Minty Barley Salad

Now you have a delicious, and nutritious barley salad ready to eat.

Enjoy! 

Minty Barley Salad

Barley tastes a little nutty and is very nutritious. Try buying hulled barley as opposed to pearled barley for more taste and nutrition content.
Prep Time15 minutes
Cook Time40 minutes
Cooling Time1 hour
Total Time1 hour 55 minutes
Course: Salad, Side Dish
Cuisine: American
Keyword: Barley, Mint, Side Salad
Servings: 6 cups
Calories: 166kcal
Author: Eating With Deb

Equipment

  • 3 quart saucepan
  • Cutting board and knife
  • Box grater
  • Large bowl, whisk, and spoon

Ingredients

Barley

  • 1 cup barley uncooked
  • 3 cups vegetable stock or water

Dressing

  • 1 each lime juice and zest
  • 2 tbsp olive oil
  • 2 tbsp champagne vinegar or white wine vinegar
  • 2 tbsp balsamic vinegar
  • 1 tbsp Dijon or brown mustard
  • ½ tsp sea salt
  • ½ tsp black pepper
  • 1/2 tsp granulated garlic

Salad Ingredients

  • 1 each each leek
  • 1/2 each red bell pepper diced
  • 1 each small cucumber fine diced
  • 2 each small carrots grated
  • 2 tbsp fresh parsley minced
  • 2 tbsp fresh mint minced
  • 1 each jalapeno ribs and seeds remove, minced

Instructions

  • Put barley in vegetable stock or salted water and bring to a boil. Reduce heat, cover and simmer. For pearled barley check for doneness after 25 minutes. For hulled barley, check at 40 minutes. Drain off excess liquid and add to dressing.
  • While barley is cooking, combine dressing ingredients and prepare vegetables.
  • Once barley is stirred into the dressing, stir in the vegetables.
  • Put in refrigerator for about an hour to cool before serving.

Nutrition

Serving: 1cup | Calories: 166kcal | Carbohydrates: 26g | Protein: 4g | Fat: 6g | Saturated Fat: 1g | Sodium: 699mg | Potassium: 174mg | Fiber: 6g | Sugar: 2g | Vitamin A: 506IU | Vitamin C: 3mg | Calcium: 21mg | Iron: 1mg

Italian Orzo Salad

Italian Orzo Salad

Orzo is a wonderful pasta to use when you don’t want a bulky pasta in a dish. It looks like flat rice and comes in plain or different colors. I try to always buy the tri-color orzo because it adds other colors to whatever dish I am making. I find it in the bulk section at my local grocery store. If not there, check the pasta aisle.

Start by bringing 2 cups of water to a boil, add the salt and orzo, reduce heat to a simmer and cook for 8 to 10 minutes. You want the orzo done, but not mushy. I find 9 minutes usually does the trick.

While the orzo is cooking, mix together the dressing ingredients.

When the orzo is done, drain the orzo but do not rinse and add it directly to the dressing. The warm orzo will wilt the arugula. Put this in the refrigerator while you are getting the rest of the ingredients ready.

Once you have the other ingredients ready, add those to the orzo and dressing, and mix together.

You could use a green bell pepper instead of a red, I find the red sweeter, so I like it in this dish.


Taste and see if you want to add any sea salt or black pepper. I find it is salty enough, but I usually add 4 or 5 turns of my pepper mill to this.

Put this in the refrigerator for about 30 minutes to cool down before eating.

Italian Orzo Salad

This is a light and refreshing salad that goes great with about any summer meal or barbecue.
Prep Time10 minutes
Cook Time10 minutes
Cooling Time30 minutes
Total Time50 minutes
Course: Salad, Side Dish
Cuisine: American, Italian
Keyword: Artichoke Hearts, Kalamata Olives, Orzo Pasta
Servings: 6 cups
Calories: 174kcal
Author: Eating With Deb

Equipment

  • 3 quart sauce pan
  • Cutting board and knife
  • Large bowl and spoon

Ingredients

  • 1 cup orzo uncooked
  • 2 each roma tomatoes diced
  • ½ each red bell pepper diced
  • 1 each carrot grated
  • ¾ cups Kalamata olives chopped
  • 1 cup artichoke hearts chopped

Dressing

  • 1 each small leek cut in ½ moons, or ½ red onion, diced
  • 6 each large leaves of fresh basil sliced
  • 2 handfuls arugula
  • ½ each lemon zest and juice
  • 1 tbsp white wine vinegar or white balsamic or champagne vinegar
  • 2 tsp olive oil
  • 1/3 cup parmesan shredded
  • Salt and pepper to taste

Instructions

  • Bring 2 cups of water to a boil, add 1 teaspoon sea salt and orzo. Reduce heat to medium high and cook until firm but not hard, about 8 to 10 minutes. Drain and stir into the dressing and arugula mixture (the warm orzo will wilt the arugula and help blend it into the salad). Put in the refrigerator while you are prepping the rest of the salad ingredients.
  • While the orzo is cooking, whisk together the lemon juice and zest, vinegar, and olive oil.
  • Stir in the leek, basil and arugula.
  • Prepare the rest of the salad ingredients and add to the orzo and dressing. Taste and add salt or pepper if desired.
  • Put in the refrigerator for another 30 minutes to cool completely.
  • Enjoy!

Nutrition

Serving: 1cup | Calories: 174kcal | Carbohydrates: 23g | Protein: 6g | Fat: 6g | Saturated Fat: 2g | Cholesterol: 4mg | Sodium: 681mg | Potassium: 98mg | Fiber: 3g | Sugar: 2g | Vitamin A: 357IU | Vitamin C: 1mg | Calcium: 93mg | Iron: 1mg

Cilantro Lime Rice

I don’t eat much rice, but when making a Tex-Mex or South of the Border meal, it is a necessity.

I usually use brown basmati rice if I am making a rice side dish. It cooks in about 30 minutes on the stovetop. I also use chicken or vegetable stock as my cooking liquid to infuse some flavor into the rice.

After you get the rice cooking, prepare the rest of the ingredients. This won’t take long to throw together once the rice is done.

Once the rice is done, or almost done, heat a large stainless steel saute pan on medium heat. Add the oil, bell pepper, and onions. Saute for about 2 minutes.

Reduce the heat to medium low and stir in the green chiles, jalapeno, cilantro, garlic, and oregano. Cook for about 2 minutes.

Now add the cooked rice, corn, lime juice and zest. Don’t worry if there is some cooking liquid left in the rice, add that too. It will just simmer down and add more flavor to the dish. Simmer for a couple minutes until the liquid is incorporated. Taste – be careful it’s hot – and add any salt or pepper you may desire. I usually do 3 or 4 turns of my pepper mill.

It’s ready to eat. I sprinkle on some crumble cotija cheese (it’s basically the Mexican style of feta cheese, technically Parmesan but it reminds me more of feta), some more fresh cilantro, and serve it with lime wedges.

Try this with Adobo Lime Chicken.

Enjoy!

Cilantro Lime Rice

A refreshing rice dish for any Tex-Mex meal.
Prep Time10 minutes
Cook Time35 minutes
Course: Dinner, Side Dish
Cuisine: Tex-Mex
Keyword: Cilantro, Lime, Rice
Servings: 4 people
Calories: 222kcal
Author: Eating With Deb

Equipment

  • 2 quart or larger sauce pan
  • Large stainless steel saute pan
  • Knife and cutting board

Ingredients

  • 2/3 cup brown basmati rice
  • 2 cups chicken or vegetable stock
  • 1 each red bell pepper chopped
  • 2 tbsp yellow onions fine chopped
  • 1 tbsp vegetable oil or canola or peanut oil
  • ½ can green chiles
  • 1 each jalapeno seeds and ribs removed, minced, optional
  • 1 tbsp cilantro fresh, chopped
  • 1 tsp garlic fresh, minced
  • ½ tsp oregano
  • 1 each lime zest and juice
  • ½ cup frozen corn thawed
  • Crumbled cotija cheese chopped cilantro and lime wedges for topping

Instructions

  • Put rice and stock in a sauce pan. Put on stove and bring to a boil. Reduce heat and add a lid. Cook for about 30 minutes, until done. Remove from heat and set aside. If there is broth left in the pot, you will simmer it down later.
  • While rice is cooking prep the veggies, cheese, lime and seasonings.
  • Heat a large stainless steel saute pan on medium heat. Add the oil, bell pepper, and onions. Cook for about 2 minutes.
  • Reduce heat to medium low and stir in the green chilies, jalapeno (if using), cilantro, garlic, and oregano and cook for 2 minutes.
  • Add the cooked rice, corn and lime juice and zest. Stir and cook for a minute or 2. Cook long enough to simmer out any stock that may have been left from cooking the rice. Taste and add any salt or pepper that you may desire. Do not add salt if you are topping with cotija or feta cheese.
  • Top with crumbled cotija (or feta) cheese, fresh cilantro and fresh squeezed lime juice.
  • Enjoy!

Notes

If I am serving this with something spicy, like Adobo Lime Chicken, I will omit the jalapeno pepper in the rice.

Nutrition

Serving: 1cup | Calories: 222kcal | Carbohydrates: 37g | Protein: 6g | Fat: 6g | Saturated Fat: 3g | Cholesterol: 4mg | Sodium: 299mg | Potassium: 287mg | Fiber: 3g | Sugar: 3g | Vitamin A: 26IU | Vitamin C: 8mg | Calcium: 22mg | Iron: 1mg