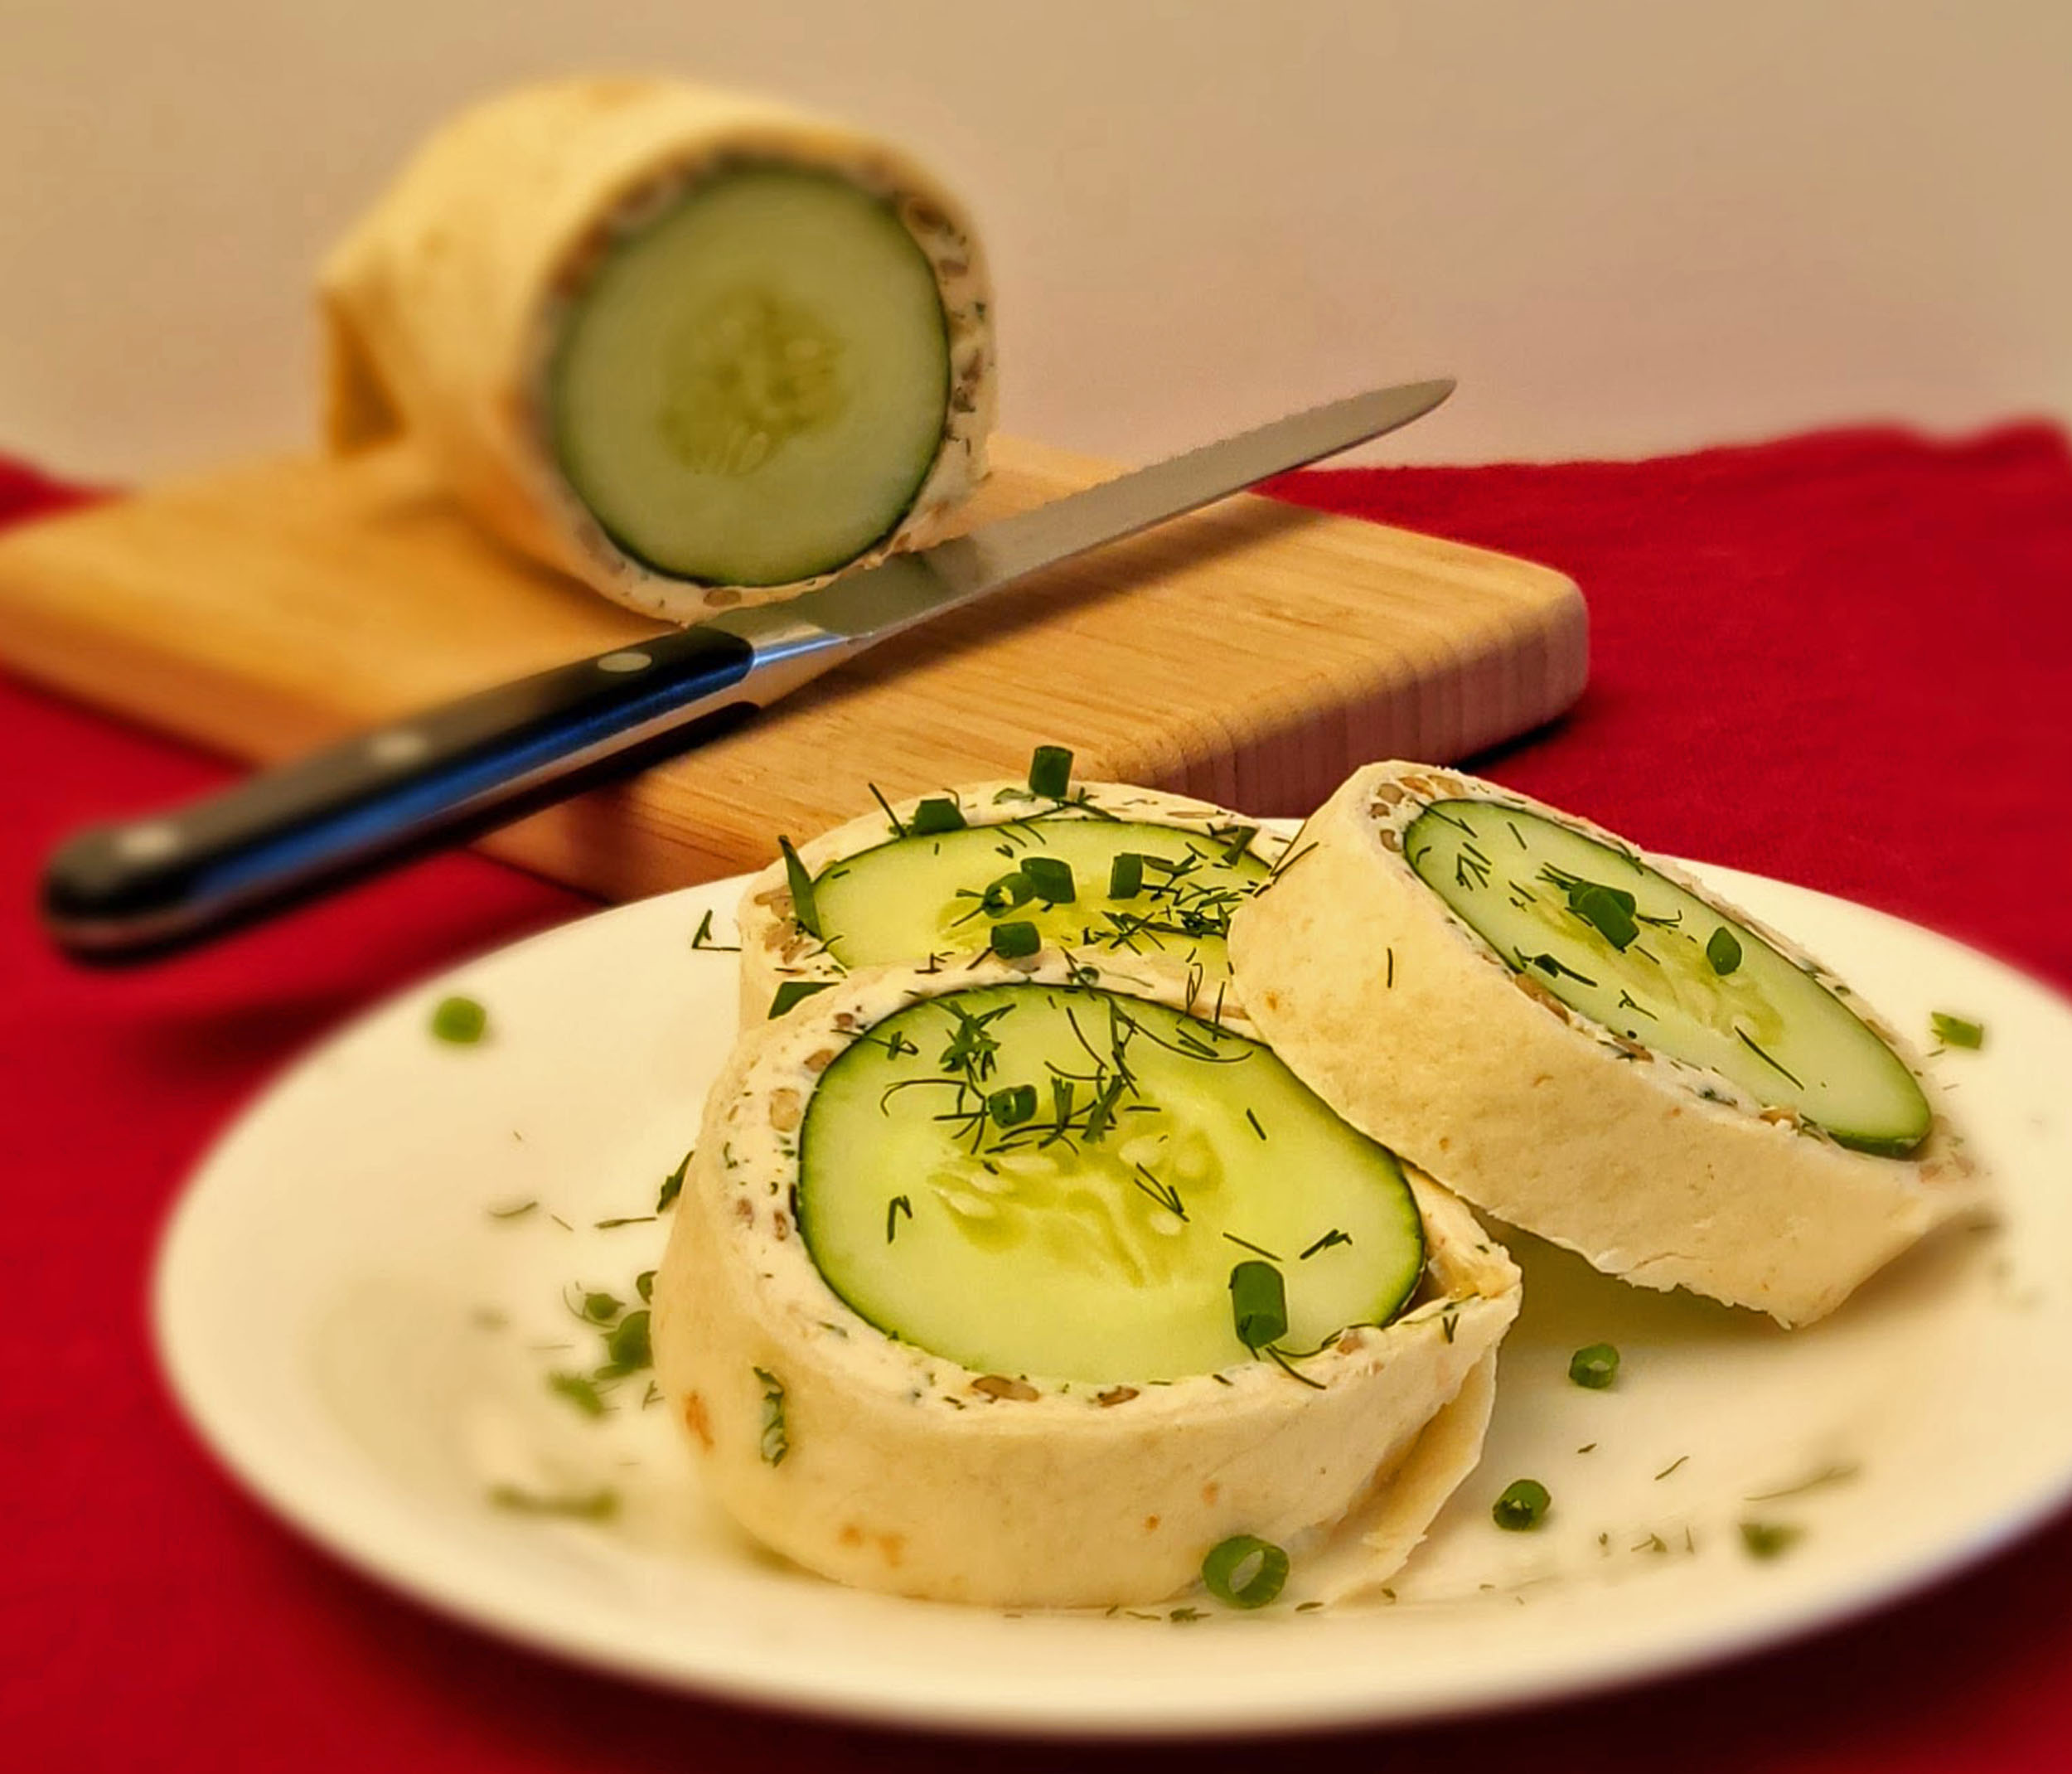
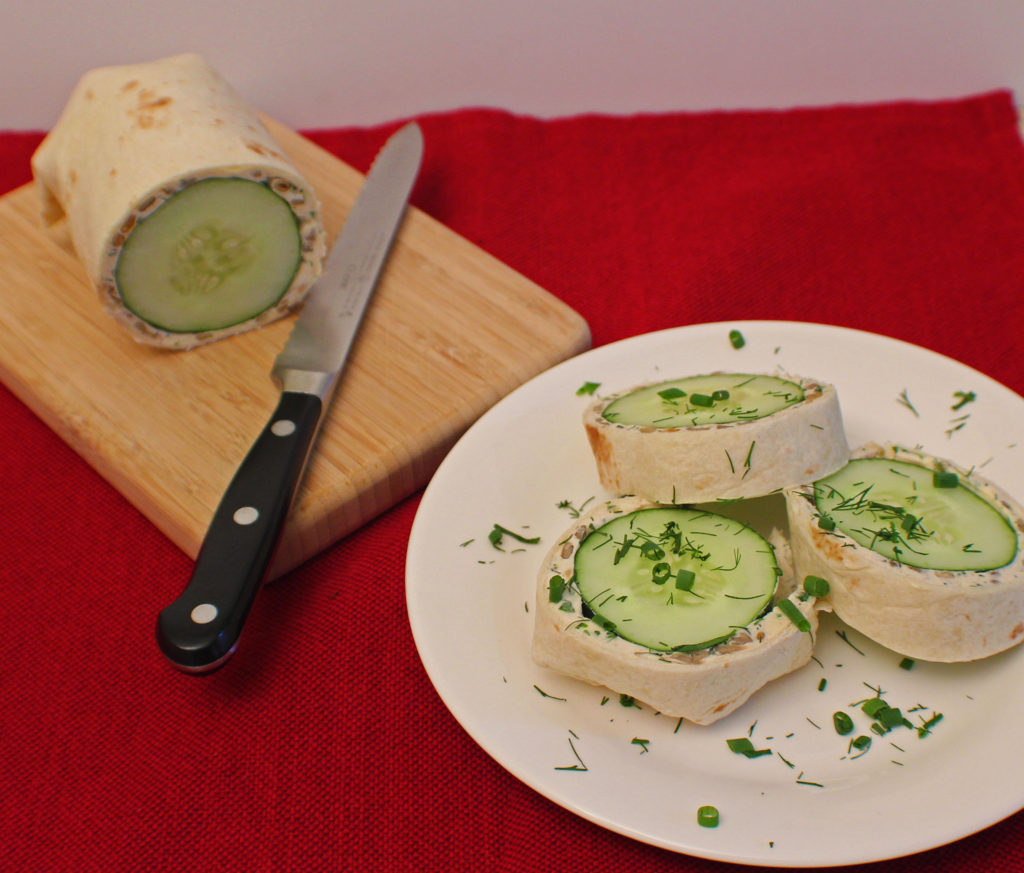
Cucumber Roll Ups

Cucumber Roll Ups

I look forward to fresh garden vegetables and cucumbers often are the first to harvest, after the garden greens of course. I usually end up with more than I can eat, and some years more than my family, friends, and neighbors can eat.

Unfortunately, freezing cucumbers isn’t an option, and there are only so many pickles I can eat, so getting creative and being able to use those delicious, fresh cucumbers is a top priority. This is just one way to use them in a different manner that enhances the flavor and makes an enjoyable snack or an appetizer for those backyard, or picnic summer get togethers.

Cucumber Roll Up Ingredients

Fortunately, this is a very quick and simple recipe and it can be easily changed for the ingredients you have on hand or for your own tastes. This is what I usually use as the base. Sometimes I change up the herbs or add in some dried currents or dried, chopped cranberries. I like the chipotle powder for that little bit of heat and fresh cilantro would certainly work well with that flavor combination as well as pepitas instead of the sunflower seeds.

Cucumber Roll Up Cream Cheese

Mix in whatever dry seasonings you are using first to ensure they get mixed through the cream cheese. Then mix in the fresh herbs and seeds.

You are ready to put it all together. Lay out a piece of plastic wrap under the flour tortilla so you are ready to wrap it all up when done.

Cucumber Ready to Roll

Using the back of a spoon, spread 1/2 of the cream cheese out on the tortilla. Make sure to spread it out to the edges. Cut off both ends of the cucumber and place it in the middle of the wrap. 

Note – if using a store bought cucumber that has wax on it, be sure to peel it. The wax prevents the cream cheese from sticking to the skin and when you slice this; it will fall apart.

Wrap the tortilla around the cucumber and fold in the edges at the ends of the cucumber. This cucumber is a little fat, but that is ok.

Cucumber Roll Up Ready to Refrigerate

Wrap the plastic wrap around it and put it in the refrigerator for about 1/2 hour or so to firm up a bit before slicing.

Cucumber Roll Up

If I make this for a snack, I only make 1 at a time and cut off slices to eat when wanted. If I do this for an appetizer or for a picnic, I’ll make as many as needed, slice and plate them up, and sprinkle some fresh chopped herbs that were used in the mix over the top.

Enjoy!

Cucumber Roll Ups

A delicious and different way to use all those wonderful garden cucumbers and fresh herbs that are abundant this time of year.
Prep Time10 minutes
Cook Time0 minutes
Resting Time30 minutes
Total Time40 minutes
Course: Appetizer, Snacks
Cuisine: American
Keyword: Cucumber Recipes, Cucumbers, Gardening
Servings: 12 slices
Calories: 91kcal
Author: Eating With Deb

Equipment

  • 1 Medium Bowl and Spoon
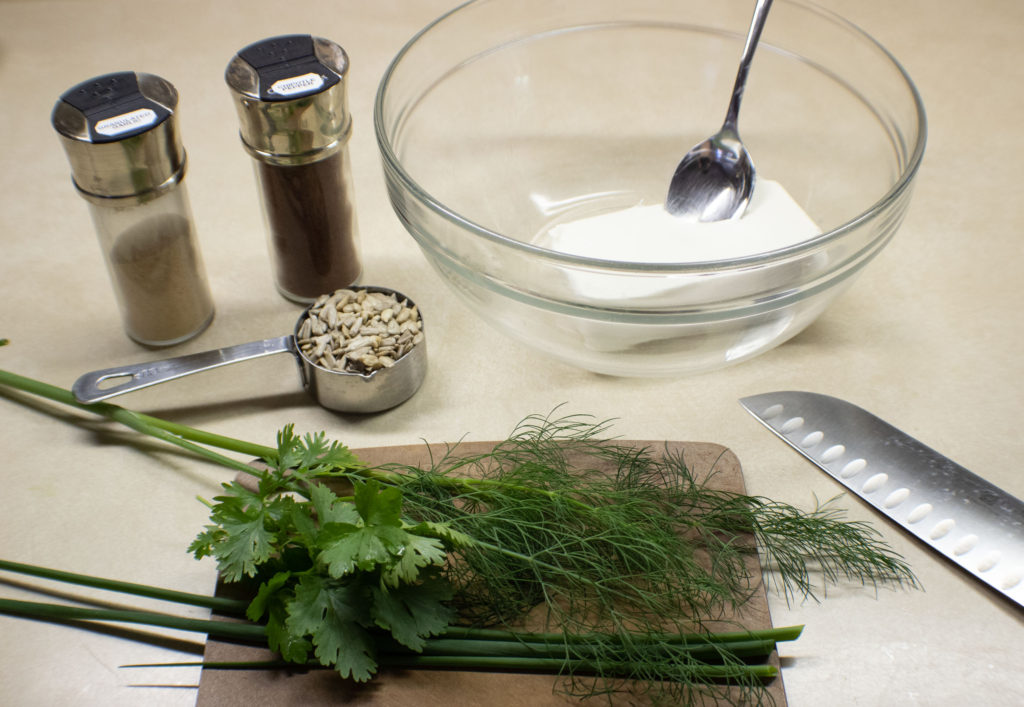
Ingredients

  • 1 package cream cheese or neufchatel, softened
  • 1/2 tsp granulated garlic
  • 1/4 tsp chipotle powder optional
  • 1/4 cup sunflower seeds roasted and salted
  • 2 tbsp chives chopped
  • 2 tbsp fresh parsley chopped
  • 1 tbsp fresh dill chopped
  • 2 each cucumbers medium
  • 2 each flour tortillas room temperature

Instructions

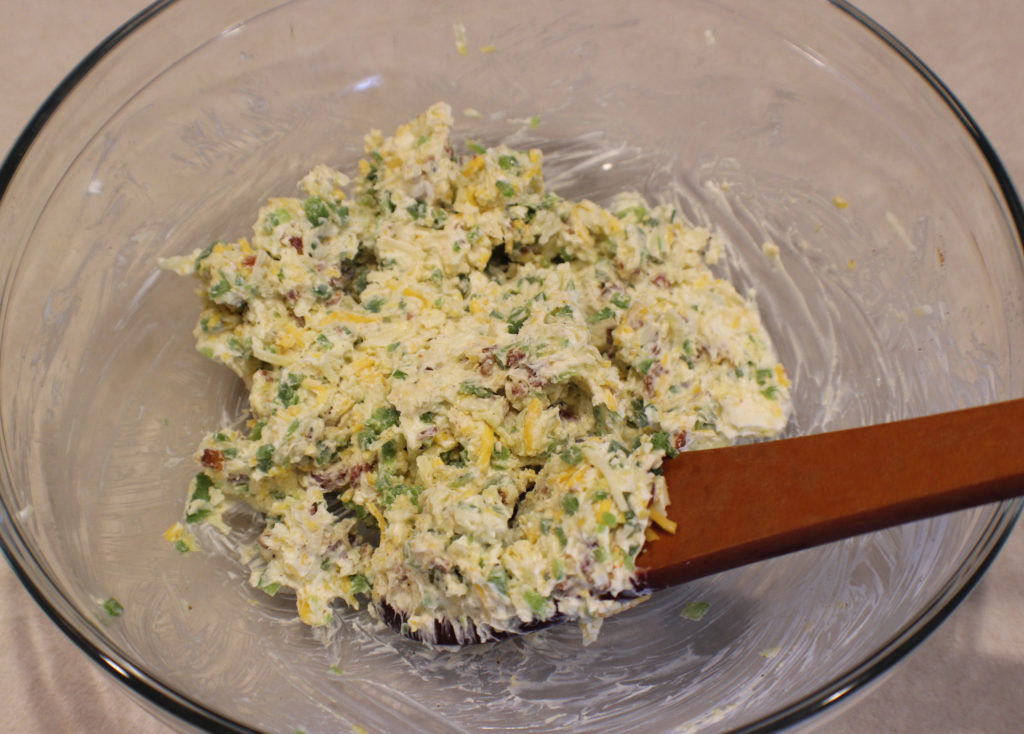
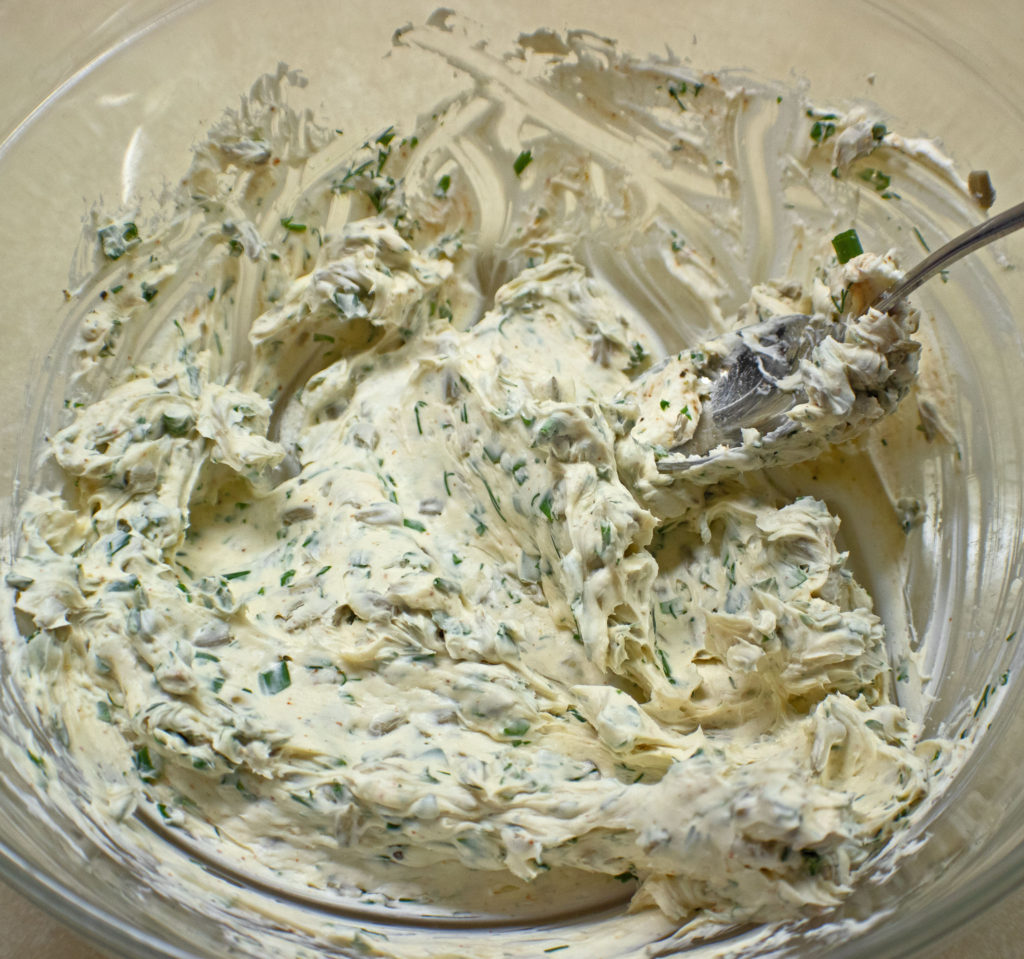
  • Put the softened cream cheese in a medium bowl and mix in the garlic and chipotle powder using the back of a spoon or a hand mixer.
  • Using the back of a spoon, mix in the fresh herbs, chives, and sunflower seeds.
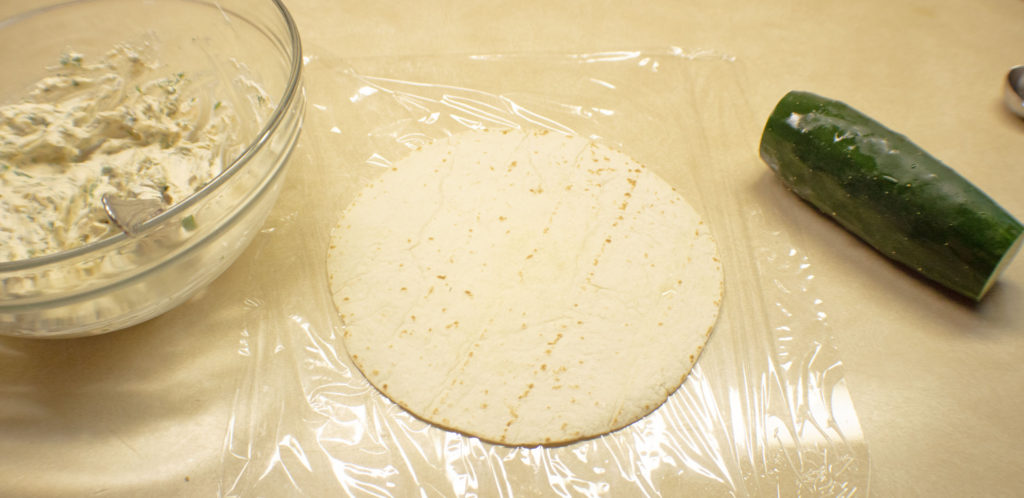
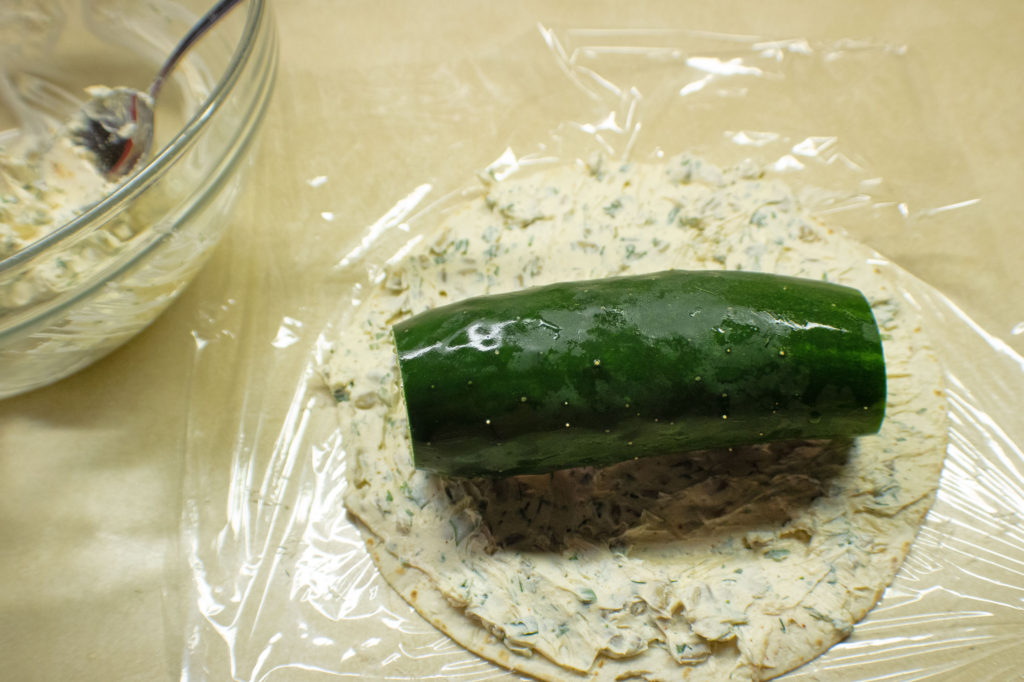
  • Spread out a piece of plastic wrap and place a tortilla on the plastic.
  • Spread 1/2 of the cream cheese mixture on the tortilla. (You can do both tortillas at once or save the other half to make the second wrap later.)
  • Cut the ends off the cucumbers and place in the middle of the tortilla.
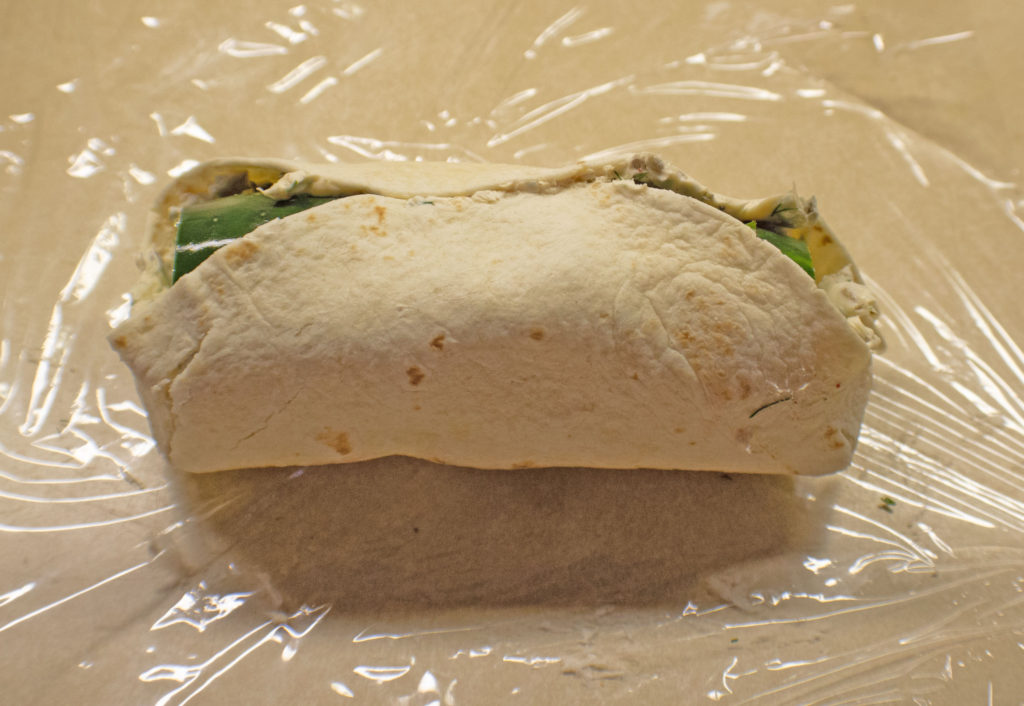
  • Roll the tortilla around the cucumber and fold in the ends.
  • Roll the cucumber wrap up in the plastic wrap and refrigerate for about 1/2 hour to firm up before slicing.
  • Slice in about 1/2 inch slices and enjoy!

Nutrition

Calories: 91kcal | Carbohydrates: 4g | Protein: 2g | Fat: 8g | Saturated Fat: 4g | Polyunsaturated Fat: 0.3g | Monounsaturated Fat: 2g | Cholesterol: 19mg | Sodium: 62mg | Potassium: 33mg | Fiber: 0.2g | Sugar: 3g | Vitamin A: 346IU | Vitamin C: 1mg | Calcium: 24mg | Iron: 0.2mg

Party Mix

Party Mix

The super bowl is on the way and the winter Olympics are upon us, that means it is snack season. I love a good party mix, and they are easy to make. Plus you can use whatever you like when you make your own. I generally hit up the bulk section in my supermarket when I buy the ingredients to make my snack mix.

Combine all your snacking stuff in a bowl. If you need it to be gluten-free, it is easy to do with the different corn and rice chex cereals as well as gluten-free pretzels. Don’t like mixed nuts, just use a nut you like.

Melt the butter, maple syrup, Worcestershire, and seasonings in a pan on low heat to ensure you don’t burn the butter. If you don’t want the little bit of heat the chipotle powder adds, go ahead and leave it out.

Pour the butter mixture over the party mix mix and stir it up to ensure even coating. Spread the mix out on 2 sheet trays lined with parchment paper and bake. You’ll need to stir it around a couple times while it is baking to ensure even cooking.

That’s all there is to it.

Enjoy!

Party Mix

Making a party mix is a fairly simple process and you can tweak it to match your tastes. Add a little more sweetener if you desire, add more, or less, chipotle to your tastes. This recipe is slightly sweet with a hint of warmth.
Prep Time15 minutes
Cook Time1 hour 30 minutes
Total Time1 hour 45 minutes
Course: Appetizer
Cuisine: American
Keyword: Chex Mix, Munchies, Party Mix
Servings: 18 cups
Calories: 586kcal
Author: Eating With Deb

Equipment

  • Large, heat-safe bowl
  • 2 parchment-lined sheet trays
  • Saucepan

Ingredients

  • 4 cups Chex cereal corn, rice, whatever is your favorite
  • 4 cups Honey Grahams or Cinnamon Squares cereal
  • 4 cups Goldfish or Cheddar Bunnies
  • 4 cups pretzels
  • 3 cups mixed nuts roasted
  • 1 stick butter
  • ½ cup maple syrup
  • ¼ cup Worcestershire
  • ½ tsp chipotle powder
  • ½ tsp granulated garlic
  • ¼ tsp sea salt
  • ¼ tsp black pepper

Instructions

  • Preheat oven to 250 degrees.
  • In a large, heat-safe bowl, mix together cereals, goldfish, pretzels, and mixed nuts.
  • In a saucepan, melt butter, maple syrup, Worcestershire, and seasonings.
  • Pour butter mixture over cereal mixture and mix well. Spread out on 2 parchment-lined sheet trays.
  • Bake for 30 minutes.
  • Remove from oven, stir, switch top pan with bottom pan and return to oven.
  • Cook 30 minutes, remove from oven and stir.
  • Switch top pan with bottom pan and return to oven. Cook 15 minutes.
  • Remove from oven, stir, switch top pan with bottom pan and return to oven.
  • Cook 15 minutes and remove from oven.
  • Cool. Store in a sealable container or bag.
  • Enjoy!

Notes

Makes 18 cups.

Nutrition

Serving: 1cup | Calories: 586kcal | Carbohydrates: 80g | Protein: 12g | Fat: 25g | Saturated Fat: 7g | Cholesterol: 31mg | Sodium: 907mg | Potassium: 265mg | Fiber: 5g | Sugar: 9g | Vitamin A: 434IU | Vitamin C: 4mg | Calcium: 128mg | Iron: 9mg

Sweet Orange Sriracha Glazed Wings

These spicy, yet slightly sweet and tangy are a must try for anyone who loves sriracha sauce.

They are quite simple to make and don’t require a deep fryer. I bake them most of the time, but they do turn out great in an air fryer if you have that option.

First toss your wings in some vegetable or canola oil, sea salt, and black pepper. You can do this in a bowl or in a closable bag. It can be done the day before or right before you are ready to bake them.

Then lay them out flat on a parchment-lined sheet tray.

Silicone baking mats work great, but for things that are going to produce some liquid, like grease, I use parchment paper to keep it from oozing onto my pan.

I happened to be making my Firecracker Wings at the same time so I used the same sheet tray.

In a 400 degree oven, bake the wings for 30 minutes. Flip them over and bake for another 15 to 20 minutes or until they are crispy.

If you have an air fryer, cook at 400 degrees for 12 minutes, flip them over and cook at 400 degrees for another 8 to 12 minutes, until crispy.

While your wings are cooking, put the orange juice, honey, and sriracha in a sauce pan and bring to a simmer. Mix your cornstarch with the water and whisk into sauce. Simmer until thickened. (Sorry, no fun pictures for this step.)

When the wings are crispy, toss in the sauce or put wings on a plate and pour sauce over the top. Sprinkle some chives or green onions on top.

Enjoy!

Sweet Orange Sriracha Glazed Wings

I love wings of all kinds and they are very easy to make at home without a deep fat fryer, and a tad healthier too. The sweetness of the honey and tanginess of the orange juice pairs well with the spicy sriracha sauce.
Prep Time20 minutes
Cook Time50 minutes
Course: Appetizer, Main Course
Cuisine: American
Keyword: Drummies, Wings
Servings: 12 pieces
Calories: 61kcal
Author: Eating With Deb

Equipment

  • Sheet tray lined with parchment paper
  • Sauce pan and whisk

Ingredients

  • 12 each wings and/or drummies
  • 2 tbsp vegetable oil
  • ½ tsp sea salt
  • ½ tsp black pepper
  • 1 cup OJ I prefer freshly squeezed oranges
  • 1/3 cup honey
  • 1 - 3 tbsp Sriracha*
  • 1 ½ tsp cornstarch
  • 1 tbsp cold water

Instructions

  • Toss wings in the oil, sea salt and black pepper. Lay flat on a parchment lined sheet pan and bake at 400° oven for 30 minutes. Flip over and bake another 15 – 20 minutes until crispy.
  • While baking, combine the OJ, honey and Sriracha in a sauce pan and melt the honey. Thoroughly mix the arrowroot or cornstarch in the water. While whisking the OJ sauce, slowly drizzle the cornstarch water into the sauce. Simmer until thickened.
  • When the wings are crispy, remove from oven and add them to the sauce. Toss well. Garnish with some sliced green onion and/or some orange zest.
  • Enjoy!

Notes

*If you don’t like a lot of spiciness, reduce the amount of Sriracha to 1 or 2 tablespoons. You can start with 1 and taste, add more until it is hot enough for your tastes.
If you have an air fryer and want to use it instead of the oven, put your wings in at 400 degrees, cook for 12 minutes. Flip them over and cook at 400 degrees for another 8 to 12 minutes - it all depends on how big are your wings and drummies.

Nutrition

Serving: 1piece | Calories: 61kcal | Carbohydrates: 10g | Protein: 1g | Fat: 2g | Saturated Fat: 2g | Cholesterol: 1mg | Sodium: 213mg | Potassium: 52mg | Fiber: 1g | Sugar: 10g | Vitamin A: 48IU | Vitamin C: 14mg | Calcium: 2mg | Iron: 1mg

Jalapeno Popper Bites

The regular season of the NFL is over and playoffs will be underway, then the Superbowl finale. While I won’t have the parties this year like in years past, there is no reason not to enjoy some of the more traditional Superbowl food.

Jalapeno poppers are good any way you make them. Most of the time I stick to the more traditional home method of hollowing out a jalpeno pepper, stuffing it with cream cheese and wrapping it in bacon. In restaurants you will get a cream cheese stuffed jalapeno, breaded and deep fried. These Popper Bites combine the 2 methods, and they hold up in the freezer so you can enjoy them when you have the popper craving.

Start by chopping up 2 slices of bacon and crisping in a pan. Drain off grease, and pat dry.

Or, if you’re like me, I cook up an entire package of bacon at a time and freeze the cooked, leftover slices to use at a future date. If this is the case, all you need to do is pull 2 slices out of the freezer and chop them up.

A note for my vegetarian friends and followers: as long as you eat cheese, omit the bacon or use vegetarian bacon bits so vegetarians and non-vegetarians can enjoy these! The vegetarian bacon bits have come a long way in flavor over the years and are probably healthier for you anyway.

In a large bowl, add room temperature cream cheese, shredded cheese, crispy bacon bits, a minced jalapeno (remove seeds and ribs or keep them in, whatever your spice level can handle), and a dash of chili powder.

Mix this all together using the back of a firm spoon or a firm rubber spatula.

Now it’s time to get ready to build your popper bites.

Line a sheet tray with parchment paper and spray it with cooking oil.

Beat your eggs or put the milk in a bowl. Put your bread crumbs in another bowl.

Get a small dish and add some cold water to it.

Open your package of wonton wrappers.

Lay out 4 to 6 wraps at a time, with 1 corner pointing toward you. Wet all around the edges with water. I use the tips of a finger or 2, works better for me than a pastry brush.

Put a dollop or cheese mixture (about 1 to 1 1/2 teaspoons) in the center of each wrap.

Get ready to roll!

Fold the corner that is pointing toward you in over the cheese mixture.

Now fold the 2 side corners in over each other.

For the final roll, you may need to brush some more water on the flap before rolling it over. This will make sure all edges stick and you will be less likely to have your poppers ooze out while you are baking them.

Put these on your lined sheet tray and continue rolling until cheese mixture is used up. You’ll get about 35 bites, give or take a few.

Now, let’s add the breading. You can certainly skip this step, but it adds texture, flavor, and makes them a little more like restaurant quality.

Roll a bite in the milk, or egg, then in the bread crumbs and return to the sheet tray.

Continue until they are all breaded.

Now put them in the freezer for at least an hour. This is key. If you cook them before they are frozen, you will end up with a pile poppers that have all oozed and lost their cheese.

Once your popper bites are frozen, you can bag them up and cook them later, cook them all, or cook just a few.

Preheat your oven to 400 degrees.

Pull your popper bites from the freezer, spray them all around with cooking spray, and put them directly into the oven. Cook for 5 minutes, flip them over and cook another 5 – 7 minutes. They should be golden brown at this point. If you cook much longer you run a greater risk of cheese oozing out.

I like to serve these as an appetizer with some veggie stick and ranch dressing.

I also freeze any leftovers and heat them up in my toaster oven.

Enjoy!

Jalapeno Popper Bites

Jalapeno poppers are very popular and fairly easy to make at home. This recipe takes all the ingredients and puts them into a wonton wrapper that you bread (like the poppers you get in a restaurant). They are the perfect, slightly spicy bite. Goes well with veggie sticks and ranch or bleu cheese dressing and they freeze well too.
Prep Time45 minutes
Cook Time10 minutes
Course: Appetizer, Snack
Cuisine: American
Keyword: Jalapeno Poppers
Servings: 35 bites
Calories: 31kcal
Author: Eating With Deb

Ingredients

  • 4 ounces cream cheese softened
  • 1 cup shredded cheese co-jack, cheddar, or mozzarella
  • 1 each jalapeno no seeds or ribs, minced
  • 2 slices bacon cooked, cut into bits (optional or use vegetarian bacon bits)
  • ¼ tsp chili powder
  • 35 each Wonton wrappers or egg roll wrappers cut into 4ths with a pizza cutter
  • ½ cup milk or 2 eggs*
  • 1//2 cup bread crumbs Italian seasoned tastes great

Instructions

  • Combine cheeses, jalapeno, bacon bits if using, and chili powder. I use the back of a spoon to mash it all together.
  • Beat the egg, if using, or put the milk in a bowl. Put the bread crumbs (they can be seasoned bread crumbs) on a plate or a bowl. Line a sheet tray with parchment paper and spray with cooking oil. Put some water in a small container.
  • Spread out wonton wrappers (4 – 6 at a time). Dampen edges with water. Put about 1 teaspoon of the cream cheese mixture in the center of the wrapper.
  • Fold 1 corner over the cream cheese mixture. Then fold over the 2 opposite sides, and roll it up. Make sure all edges are sealed against the wonton wrapper – you may need to brush more water on the wonton for the last fold to adhere. Place on a parchment-lined sheet tray (spray parchment first). Finish the rest of the cream cheese mixture.
  • Roll a jalapeno popper bite in the milk or egg then in the bread crumbs and return to the sheet tray. Continue until all are done. Freeze flat for at least 1 hour, until frozen through.**
  • Heat oven to 400°F. Spray each popper bite evenly with cooking spray. Cook for 5 minutes, flip over and cook another 5 to 7 minutes, no more or they tend to explode.
  • Serve with veggie sticks, ranch, and bleu cheese dressing.
  • Enjoy!

Notes

*I personally liked the texture of the finished bites with the milk instead of the egg, but both work. The egg seemed to make them a little more chewy.
** They need to be cooked frozen or they will be more likely to ooze. You still may get 1 or 2 that oozes. Once frozen you can bag them up and cook later. Make a big batch and pull out a few at a time when you want some.

Nutrition

Calories: 31kcal | Carbohydrates: 1g | Protein: 1g | Fat: 2g | Saturated Fat: 1g | Cholesterol: 7mg | Sodium: 46mg | Potassium: 14mg | Fiber: 1g | Sugar: 1g | Vitamin A: 77IU | Vitamin C: 1mg | Calcium: 24mg | Iron: 1mg

Breaded Pork Bites

I originally started making this recipe using whole pork chops, which you can do, just follow all steps except cutting up the pork chops. After a friend tried it, she suggested cutting the pork chop into smaller bites so there was more crunchy breading to enjoy. Once I started cutting the pork chops down, I haven’t gone back. These are great as a main course or an appetizer, dipped in marinara sauce, or just eat them as is.

This is a very quick and easy recipe to make; quick enough to throw together on a busy week night. Just mix the marinade ingredients together – olive oil, mayonnaise, Dijon, and Worcestershire sauce. Cut your pork chops into cubes, or not, and marinate the pork for about 30 minutes. If you are in a hurry, marinate long enough to get your bread crumb mixture ready and your air fryer out.

Next, combine the bread crumbs and Parmesan cheese. If there are allergen issues, there are gluten-free bread crumbs available and if it’s a dairy issue, omit the Parmesan or use a dairy-free Parmesan. Remove the pork from the marinade and roll around in the bread crumb mixture, pressing it into the pork. I like to set the breaded pork on a rack for another 30 minutes. This helps the breading stick to the pork after it’s cooked and you cut into it. Again, this step is not 100 percent necessary, or you can do everything up to this point and put your breaded pork, uncovered, in your refrigerator overnight.

Now it’s time to pull out that air fryer. Spray the bottom of the pan with non-stick cooking oil. Arrange the pork so it is not touching each other – you may have to do this in 2 batches. If you are making 4 whole pork chops, you will probably be able to fit all 4 in at once. Spray the tops with the cooking oil. Turn on your air fryer and set it to 360 degrees for 4 minutes and cook. Turn everything over and repeat – 360 degrees for 4 minutes. I’ve made these many times and they are done at this point, but check the temperature and make sure they have reached 155 degrees.

If you have to do this in 2 batches, put the first batch on a pan lined with parchment paper in a warm oven or a warm toaster oven until the second batch is done.

I usually eat this as a dinner, not an appetizer, generally serving it with Rosemary Parmesan Roasted Potatoes and a vegetable. I steamed some chard this time around.

Breaded Pork Bites

Marinating and breading pork, then cooking it in an air fryer gives you moist, tender, crispy, and delicious bites of pork. These are great as an appetizer dipped in marinara sauce or as the main part of your meal.
Prep Time20 minutes
Cook Time8 minutes
Resting Time1 hour
Total Time1 hour 28 minutes
Course: Appetizer, Entree, Main Course
Cuisine: American
Keyword: Air Fryer, Pork
Servings: 4 people
Calories: 320kcal
Author: Eating With Deb

Equipment

  • Air Fryer

Ingredients

  • 4 each pork chops
  • ¼ cup Worcestershire
  • ¼ cup olive oil
  • 4 tsp Dijon mustard
  • 4 tsp mayonnaise
  • 1 cup bread crumbs Italian seasoned
  • ½ cup parmesan cheese shredded

Instructions

  • Mix together Worcestershire, olive oil, mustard, and mayonnaise. Cut pork chops into bite size pieces and mix into marinade. Let sit at room temperature for 30 minutes.
  • In a separate bowl, combine bread crumbs and parmesan cheese.
  • Remove pork bites from marinade and toss a few at a time into bread crumbs and parmesan. Set aside on a wire rack for 30 minutes (not completely necessary but the drying out process will help the breading stick to the pork when it is cut).
  • Get air fryer ready by spraying the bottom of the basket with cooking spray.
  • Arrange pork bites in bottom of the basket taking care to not over-crowd the basket. You may have to cook in 2 batches. You can put your first batch in a warm oven or toaster oven to keep hot while you are cooking the second batch.
  • Set air fryer to 360 degress and cook for 4 minutes. Turn pork bites over and cook at 360 degrees for another 4 minutes. They should be done and crispy at this point. Double check by making sure the pork has reached an internal temperature of 150 degrees.
  • Enjoy!

Nutrition

Serving: 1each | Calories: 320kcal | Carbohydrates: 23g | Protein: 9g | Fat: 21g | Saturated Fat: 5g | Cholesterol: 11mg | Sodium: 649mg | Potassium: 202mg | Fiber: 1g | Sugar: 4g | Vitamin A: 111IU | Vitamin C: 2mg | Calcium: 219mg | Iron: 2mg

Firecracker Wings & Drummies

My love for chicken wings is well established. It doesn’t matter what kind, I will try them. Making them at home is a quick and simple process that doesn’t require a deep fryer or a pan of grease. I bake them in the oven until crispy, or throw them in my air fryer which takes a lot less time to bake.

Warning – as the name suggests these are a tad spicy!

Grab a sealable bag and add the canola or vegetable oil and seasonings.

Next add your wings and drummies, seal the bag (leave some air in it so you can mix it easier). Push your wings around in the oil and seasonings until they are well coated. Squeeze the air out of the bag and let sit for an hour to overnight so the seasonings permeate all through the meat. You can certainly cook them right away, but you will get a bolder flavor if you have the patience to let them sit,

When you are ready to bake, pre-heat your oven to 400 degrees. Lay your wings on a parchment-lined sheet tray so they are not touching. I happened to be baking 2 different kinds today and fit them on 1 pan.

Bake them for 30 minutes, flip them over and bake for another 20 minutes or so until they are nice and crispy. Enjoy them as is or the traditional way of carrots and celery sticks with some ranch or bleu cheese dressings.

Print Recipe
5 from 1 vote

Firecracker Wings & Drummies

I love wings of all flavors! Firecracker wings are one of my go-to wings. They pair well with a ranch or bleu cheese dressing or a raspberry sauce.
Prep Time5 minutes
Cook Time50 minutes
Course: Appetizer, Main Course
Cuisine: American
Keyword: Drummies, Wings
Servings: 12 pieces
Calories: 154kcal
Author: Eating With Deb

Ingredients

  • 12 wings & drummies
  • ¼ cup canola oil
  • 1 T chili powder
  • 1 ½ T oregano
  • 1 t cayenne
  • 1 t granulated garlic
  • 1 t cumin
  • ¼ t sea salt
  • ½ t black pepper

Instructions

  • Combine oil and seasonings and mix in wings & drummies (I generally do this in a resealable bag as it is easier to close and mix).
  • You can bake right away but if you let them sit for an hour or more the flavor will better permeate the meat.
  • Bake at 400 degrees for 30 minutes. Turn them over and bake for another 15 – 20 minutes until they are crispy. If you wish, sprinkle with a little chopped cilantro or chives for some added flavor.
  • Enjoy!

Nutrition

Calories: 154kcal | Carbohydrates: 1g | Protein: 9g | Fat: 13g | Saturated Fat: 3g | Cholesterol: 37mg | Sodium: 95mg | Potassium: 105mg | Fiber: 1g | Sugar: 1g | Vitamin A: 348IU | Vitamin C: 1mg | Calcium: 20mg | Iron: 1mg