Peanut Butter Brookies

Peanut Butter Brookies

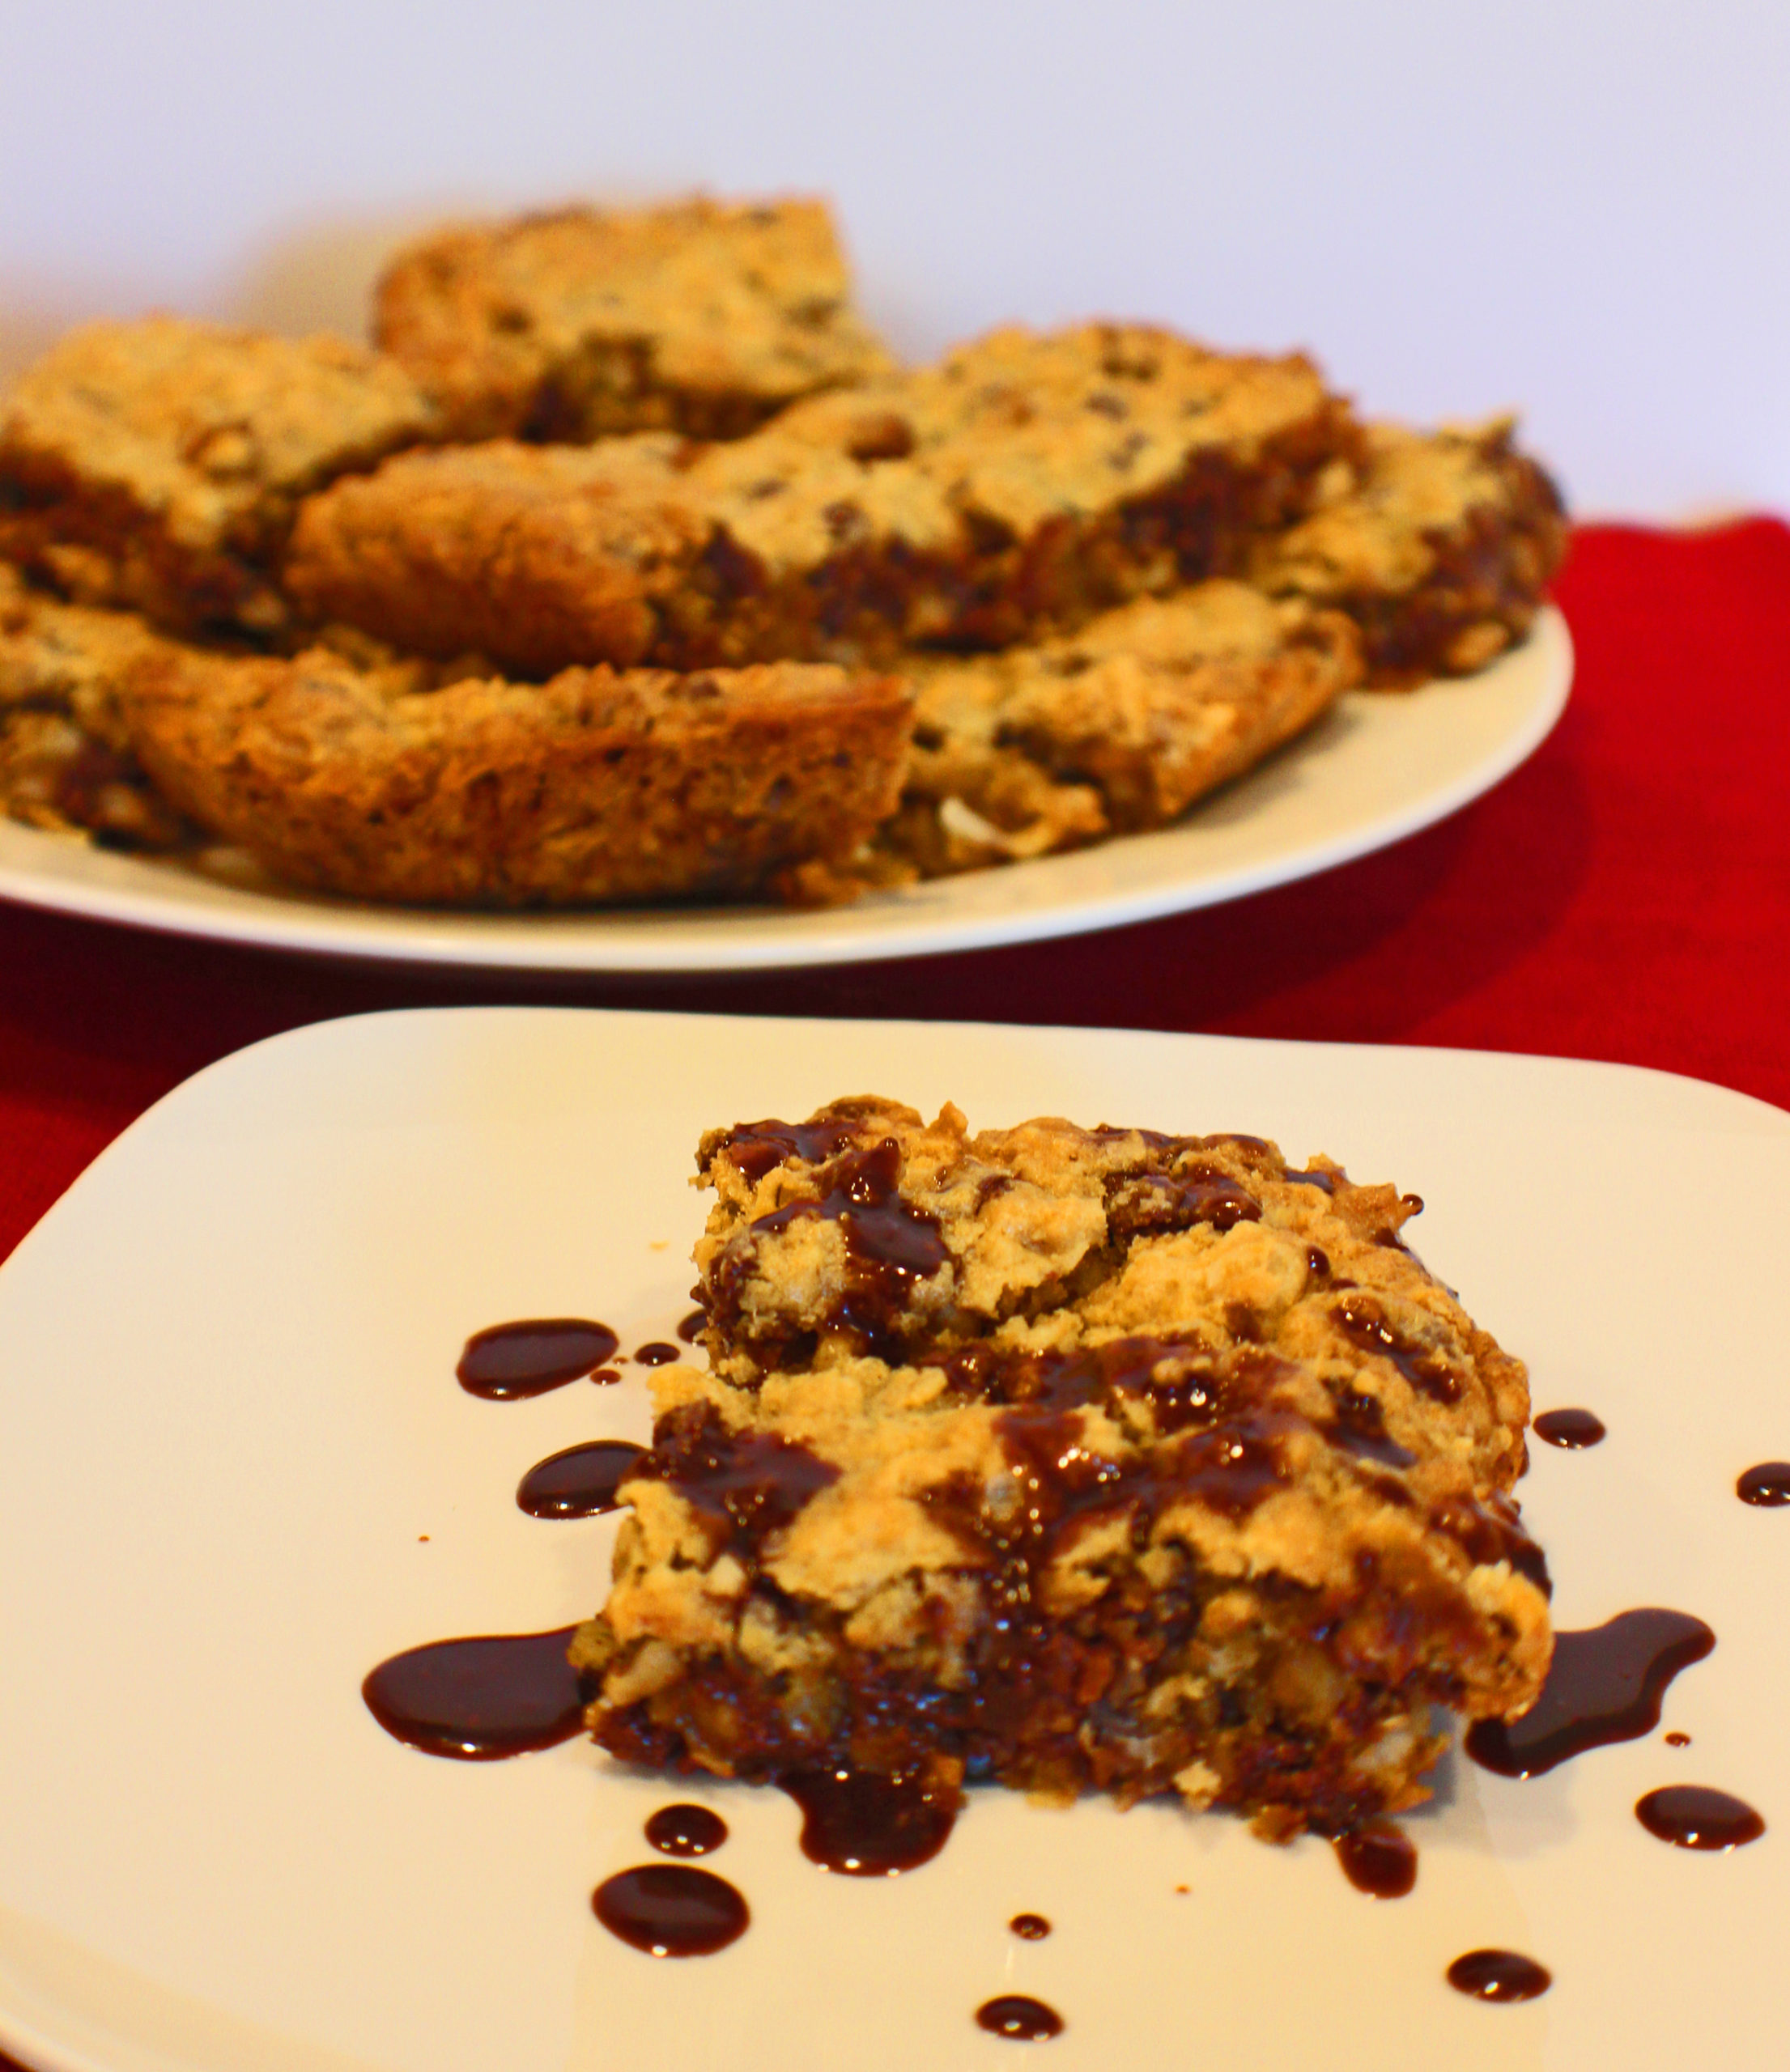
I love the smell of brownies and cookies baking and how it lingers in the house for several hours after. These brookies combine both scents with a little bit of peanut butter added in.

Need to make them gluten-free? I’ve tried it using Bob’s Red Mill 1 to 1 Baking Flour and they turn out great. 

I use my stand mixer with the paddle attachment, but if you don’t have one, beaters will work. 

Preheat oven to 350 degrees.

To make the batter, start by mixing the sugars, peanut butter, and butter together until well blended.

Then mix in the eggs and vanilla until just incorporated.
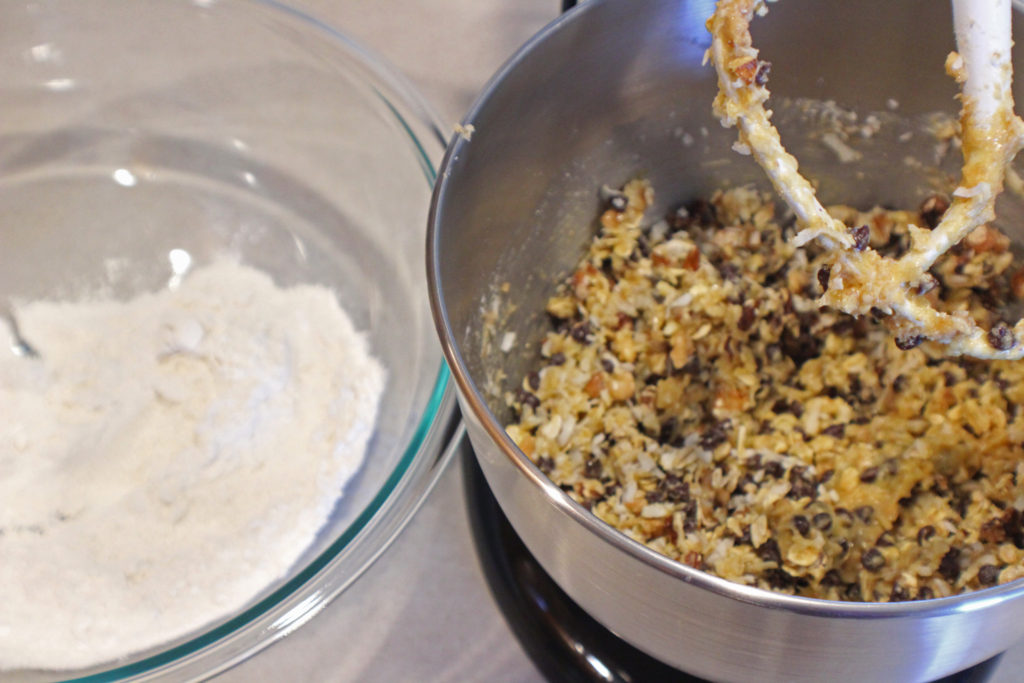
Then mix in the oats, chocolate chips, walnuts, and coconut flakes, if using.

Combine the flour and baking soda in a separate bowl.

Mix in the flour and baking soda. The dough has the consistency of a sticky cookie dough.

Spray a 9 x 13 inch baking dish with cooking spray and press batter into pan, spreading out evenly.

Bake for about 25 minutes, until a toothpick comes out clean of batter.

Now is the time to test your patience. The smells are amazing, but you need to wait to cut into them. I put them on a raised wire rack to cool. I recommend cooling for about 60 minutes, but I have been known to cut into them after about 30 minutes.

Enjoy!

Peanut Butter Brookies

This is a chewy, chocolatey brownie cookie that is rich and delicious warm with a scoop of vanilla ice cream and chocolate sauce.
Prep Time15 minutes
Cook Time25 minutes
Cooling Time1 hour
Total Time1 hour 40 minutes
Course: Dessert, Sweet Treats
Cuisine: American
Keyword: Bars, Brownies, Chocolate, Cookies, Peanut Butter
Servings: 15 bars
Calories: 329kcal
Author: Eating With Deb

Equipment

  • Mixing bowl and paddle attachment or beaters
  • 9 x 13 glass baking dish

Ingredients

  • ½ cup butter temp room, 1 stick
  • ½ cup white sugar
  • ½ cup brown sugar light or dark
  • ½ cup peanut butter creamy or chunky
  • 2 each eggs
  • 1 teaspoon vanilla extract
  • ½ cup oats
  • 1 cup chocolate chips
  • 1 cup sweetened coconut flakes optional
  • 1 cup chopped walnuts optional
  • 1 cup white flour
  • 1 teaspoon baking soda

Instructions

  • Pre-heat oven to 350°F.
  • Using a paddle attachment on a stand mixer or electric beaters, combine butter, sugars and peanut butter until the sugar is thoroughly mixed in.
  • Add the eggs and vanilla and mix until just blended in.
  • Add the oats, chocolate chips, coconut, and nuts (if using) and mix until just blended.
  • In a separate bowl combine the baking soda with the flour then add to the wet mixture and mix until combined. The dough is thick, like cookie dough.
  • Spray a 9 x 13” pan with cooking spray. Scrap dough into pan and smooth out.
  • Bake for 22 – 25 minutes until brown and a toothpick comes out clean. Bars should still be soft to the touch.
  • Let cool for 60 minutes before cutting.
  • Store in an air-tight container.
Notes

I like using the mini dark chocolate chips, but the larger milk or semi-sweet also work.
I have used Bob’s Red Mill 1 to 1 Gluten-free Baking Flour instead of regular flour and it works great.

Nutrition

Calories: 329kcal | Carbohydrates: 29g | Protein: 6g | Fat: 23g | Saturated Fat: 7g | Trans Fat: 1g | Cholesterol: 17mg | Sodium: 186mg | Potassium: 177mg | Fiber: 3g | Sugar: 17g | Vitamin A: 193IU | Vitamin C: 1mg | Calcium: 31mg | Iron: 1mg

Gingery Beans and Mushrooms

Gingery Beans and Mushrooms

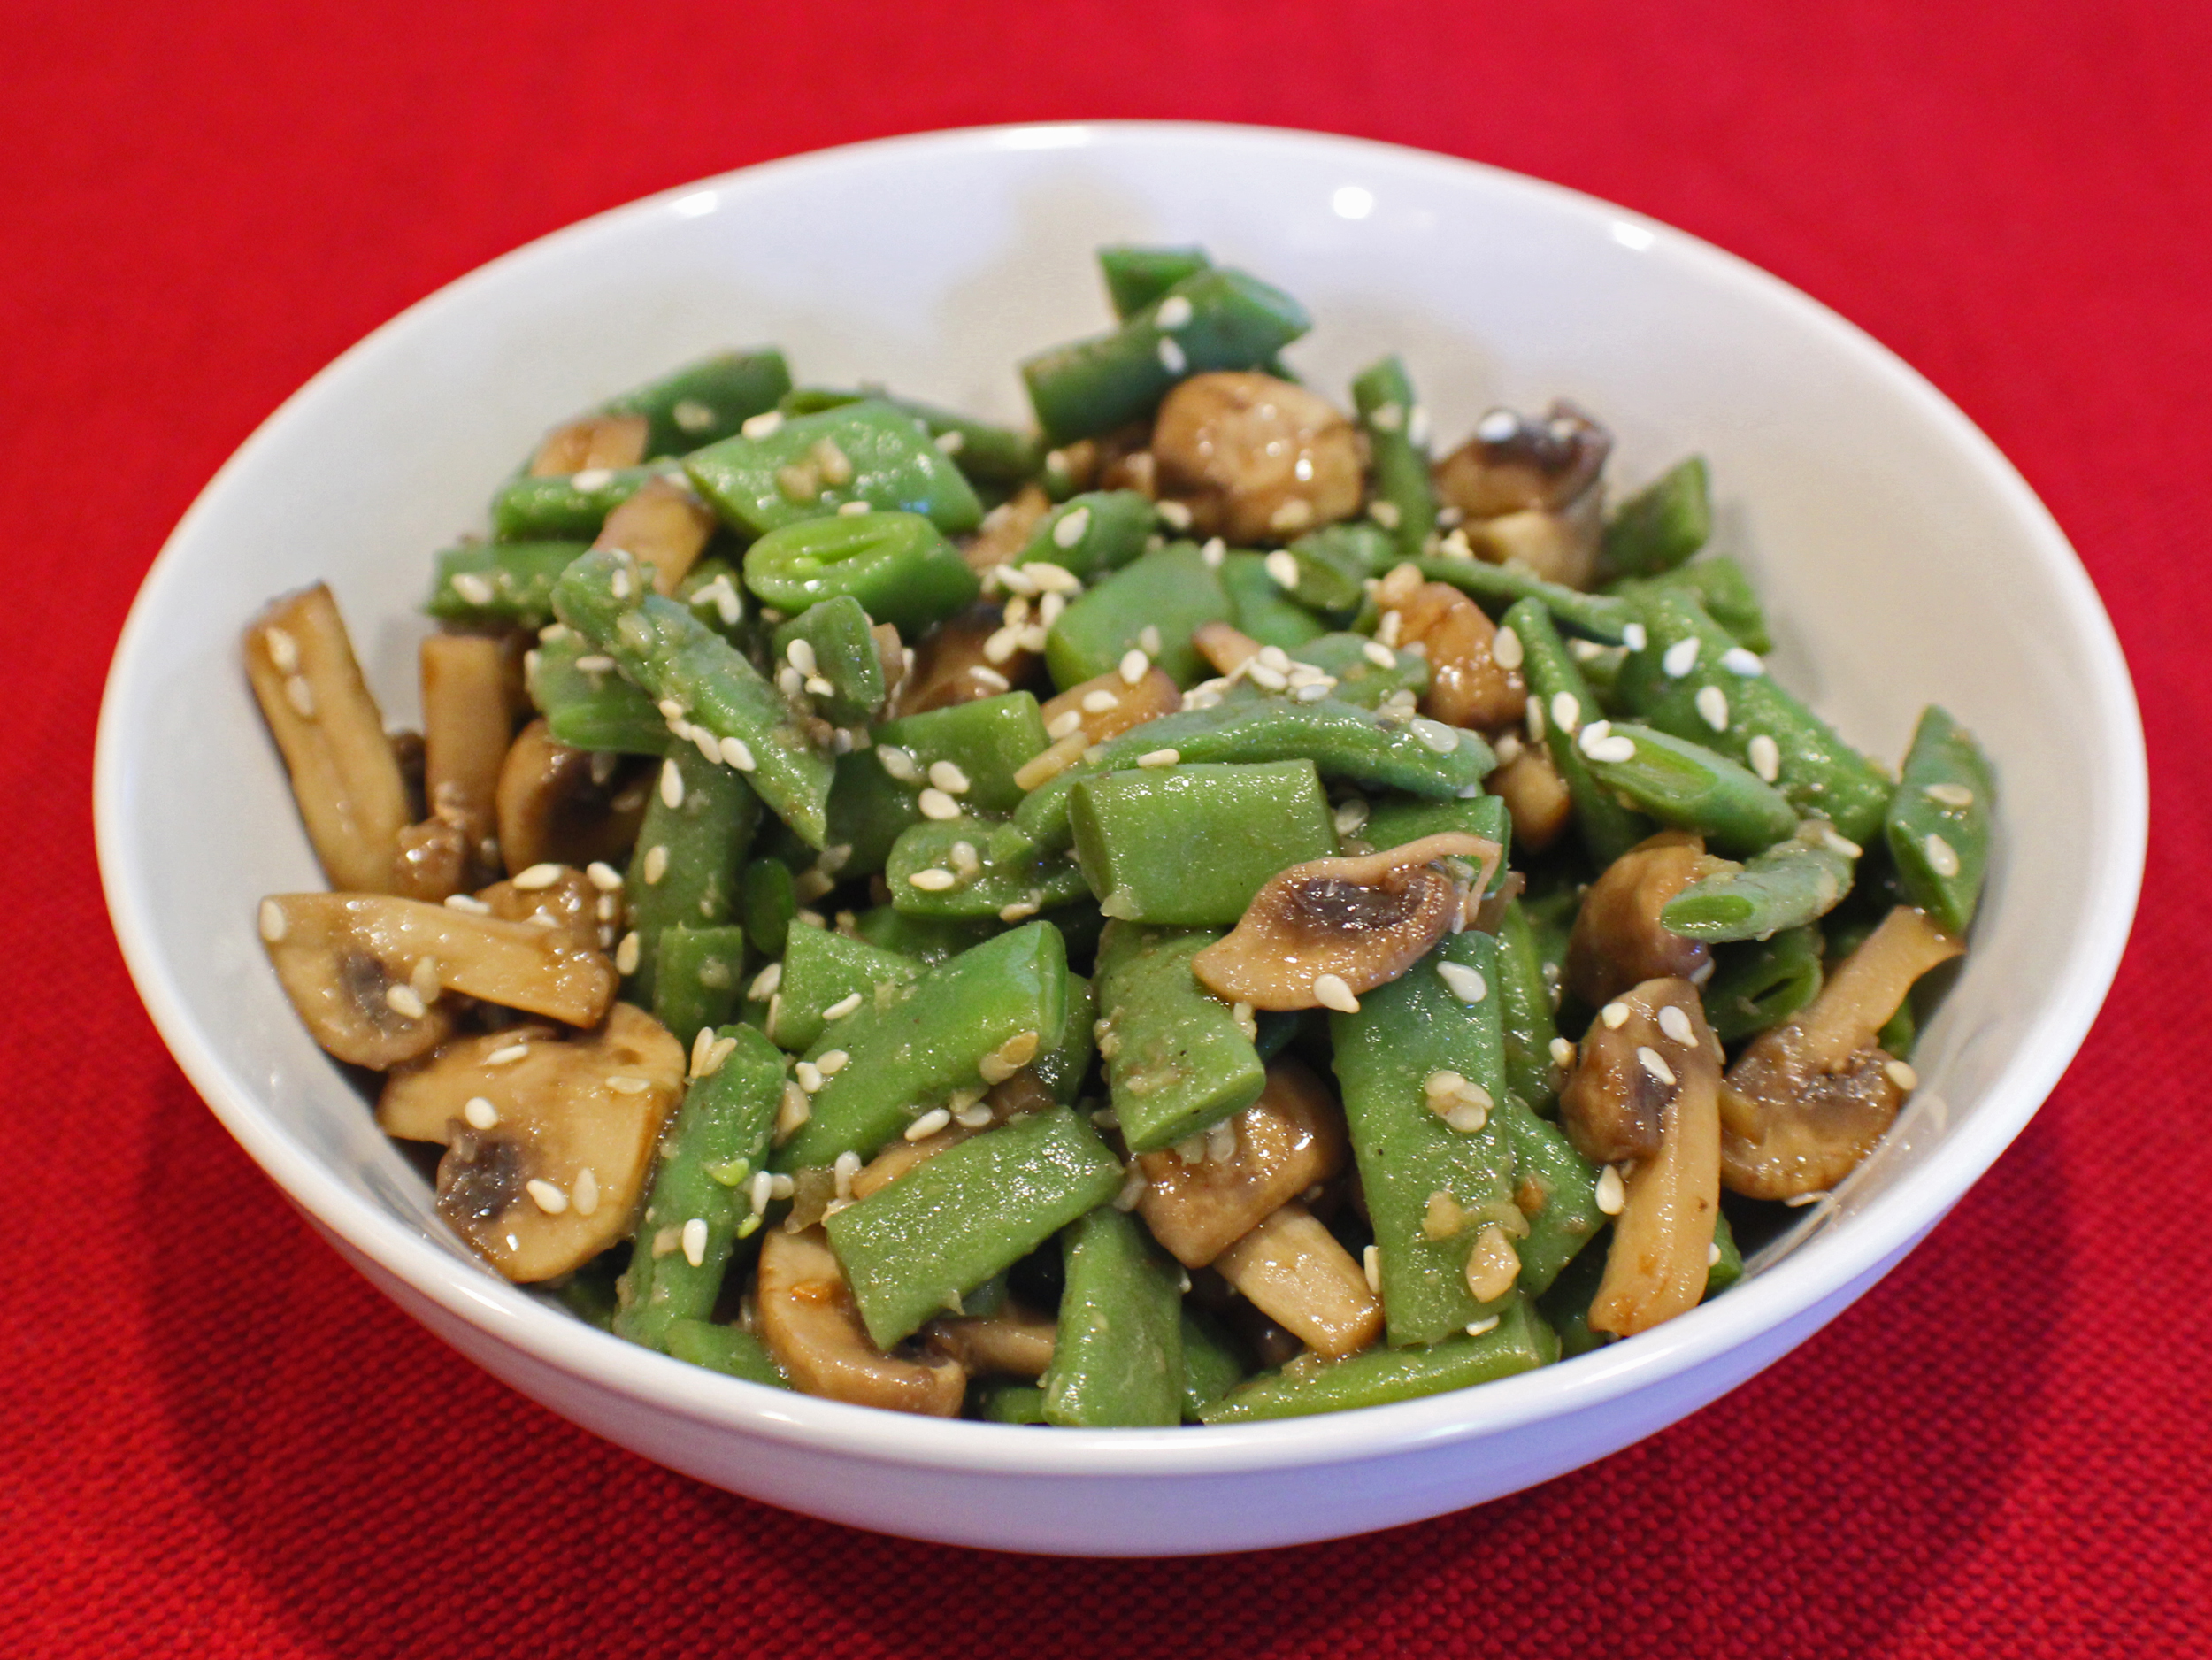
This is a very quick vegetable side dish that can be done in 10 minutes from gathering and preparing ingredients (using already prepared ginger and garlic) to finished cooking, using fresh or frozen green beans. Not a fan of green beans? Switch them out with broccoli or asparagus.

Frozen beans are ready, no need to thaw in advance, so all you need to do is quarter about 10 button mushrooms and you are ready to cook. I happen to have a package of beans from my garden last summer still in the freezer, so that’s what I used.

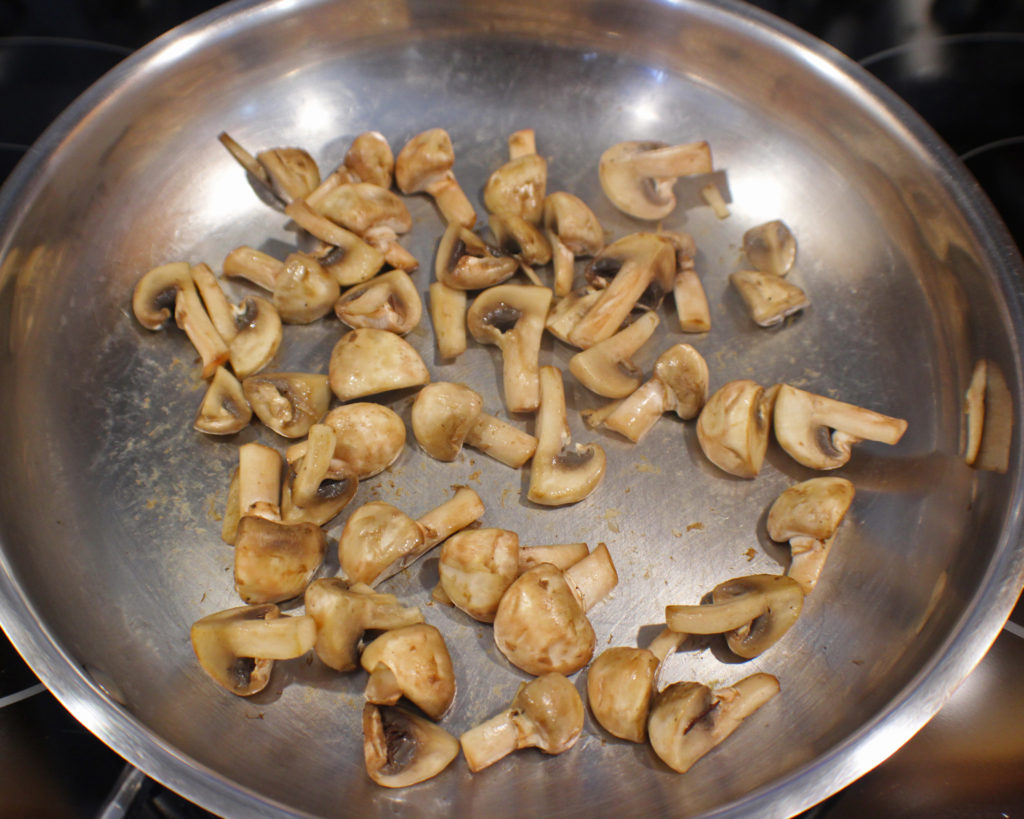
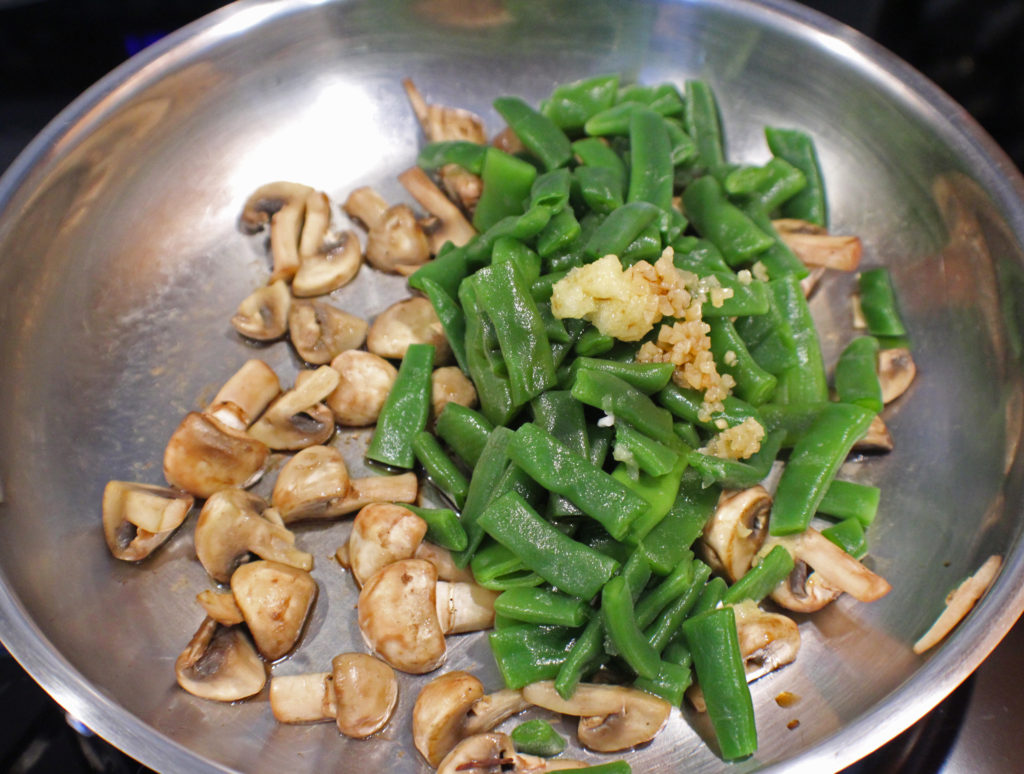
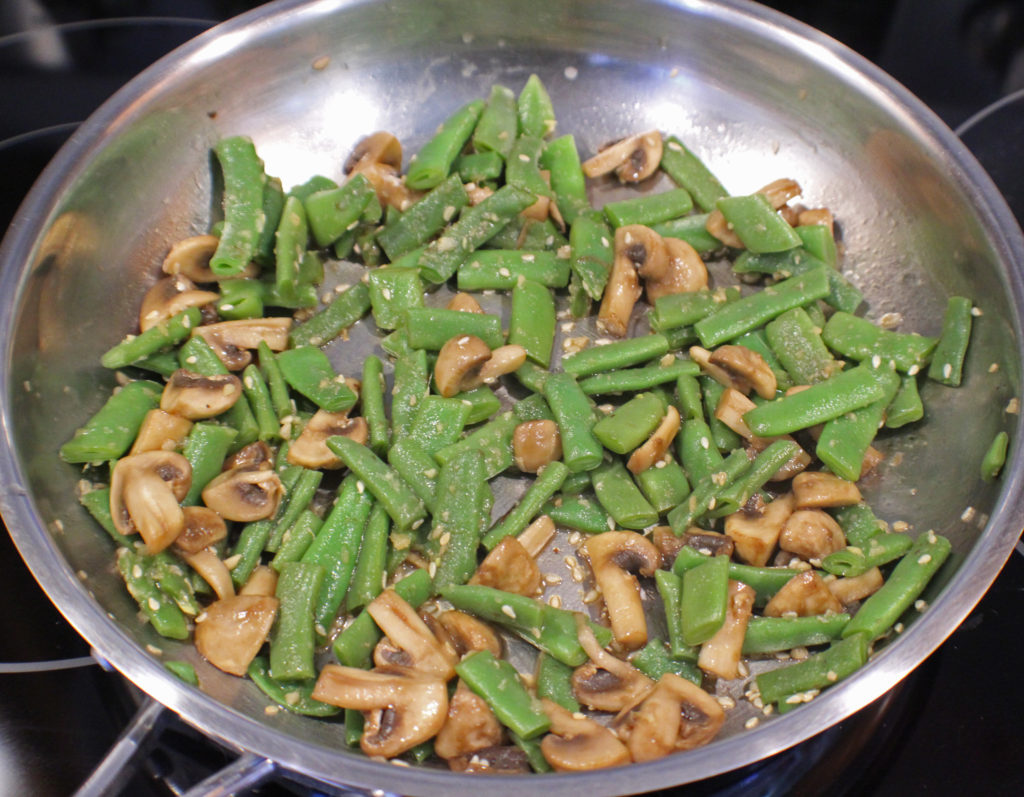
Heat a medium stainless steel saute pan on medium heat and add 1 teaspoon of the sesame oil and the mushrooms. Saute for about 3 minutes until they are nice and golden brown.

You could use a non-stick pan if that is your preference.

Gingery Beans and Mushrooms Sauteing

Now add the rest of the ingredients, including the other teaspoon of sesame oil. Saute for another couple of minutes, scraping up the bits that got stuck to the bottom of the pan.

Gingery Beans and Mushrooms Ready

That’s all there is to it.

Try this with Hazelnut Crusted Pork Medallions.

Enjoy!

Gingery Beans and Mushrooms

The refreshing flavor of ginger with a hint of sesame and soy permeate this delightful and quick vegetable side dish.
Prep Time5 minutes
Cook Time5 minutes
Course: Side Dish, Vegetable
Cuisine: American, Asian
Keyword: Ginger, Green Beans, Mushrooms
Servings: 4 people
Calories: 146kcal
Author: Eating With Deb

Equipment

  • Medium stainless steel saute pan and spoon
  • Cutting board and knife

Ingredients

  • 2 cups frozen beans
  • 2 cups button mushrooms quartered, about 10 mushrooms
  • 2 tsp toasted sesame oil
  • 2 tsp soy sauce or wheat free tamari
  • 2 tsp ginger fresh, minced
  • 1 tsp garlic fresh, minced
  • 2 tsp toasted sesame seeds

Instructions

  • Heat a medium stainless steel saute pan on medium heat. Add 1 teaspoon of the sesame oil and the mushrooms. Saute for about 3 minutes until the mushrooms are nice and golden brown.
  • Add the other teaspoon of sesame oil and the rest of the ingredients, scraping up the bits that are stuck to the bottom of the pan, and saute for another 2 or 3 minutes until the beans are heated through.
  • Enjoy!

Notes

For an alternative, switch out the beans with broccoli.

Nutrition

Calories: 146kcal | Carbohydrates: 23g | Protein: 8g | Fat: 3g | Saturated Fat: 1g | Sodium: 213mg | Potassium: 541mg | Fiber: 6g | Sugar: 1g | Vitamin A: 155IU | Vitamin C: 8mg | Calcium: 42mg | Iron: 2mg

Naan Bread

I make a lot of bread of all different kinds and styles. Naan was one I hadn’t tried until a couple of years ago. The first recipe I tried it called for sprinkling some cornmeal on a pizza stone and baking the bread in a very hot oven. After I cooked a few, the smoke detector went off. Turns out the high heat started burning the cornmeal on the pizza stone. So, the best method I have found is cooking it in a non-stick pan on the stovetop. It takes a little time but is well worth it.

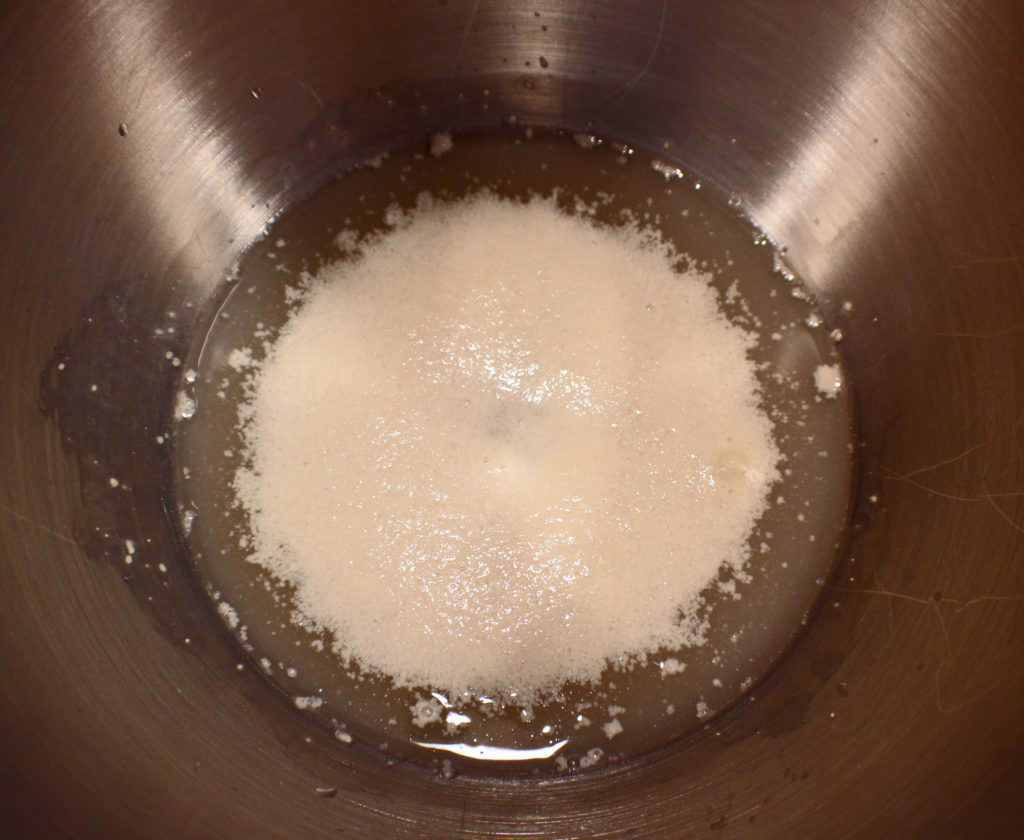
Start by combining the warm water, yeast, and sugar. Don’t add the salt in this stage, sugar feeds yeast and salt kills yeast. It should start frothing fairly quickly if the temperature of the water is just right.

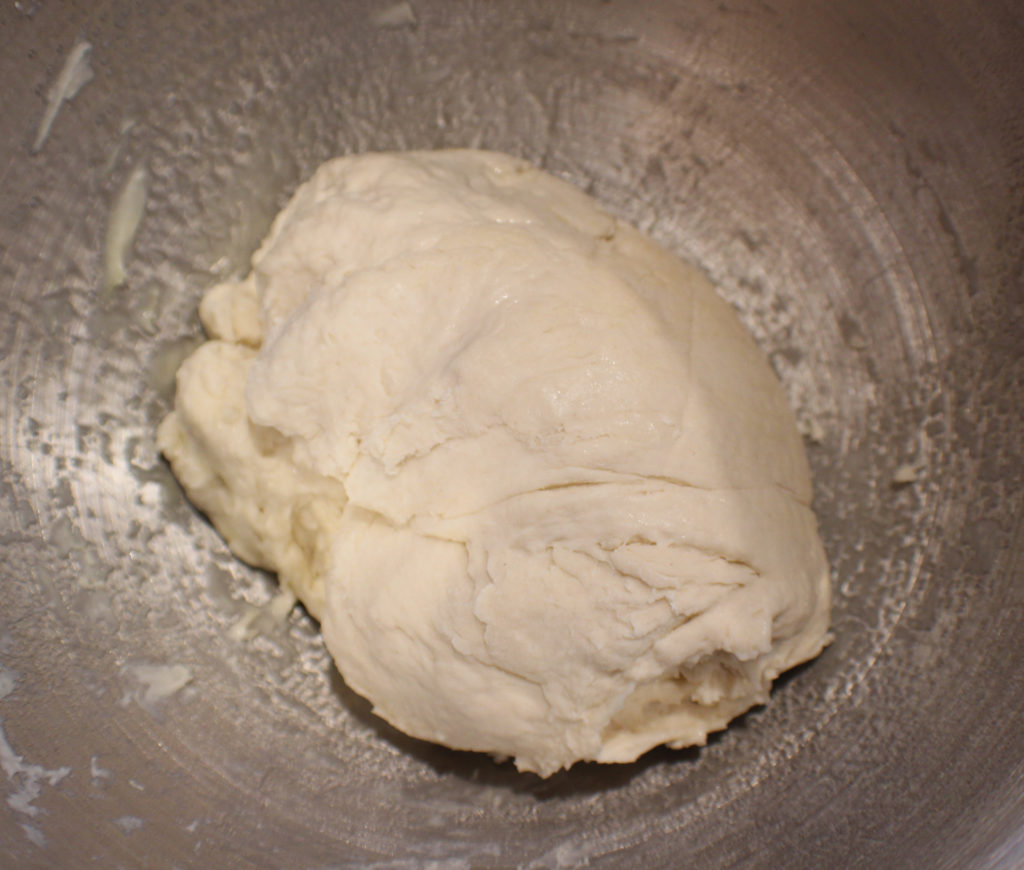
Now add 3 cups of flour and the salt. Mix that in. Add another 1/2 cup of flour and mix. If the dough is still sticky, add a couple tablespoons of flour at a time until the dough forms a ball and pulls away from the sides of the bowl.

Remove the dough, spray the bowl with cooking spray and put the dough back in the bowl. Cover and set aside until doubled, about 1 hour.

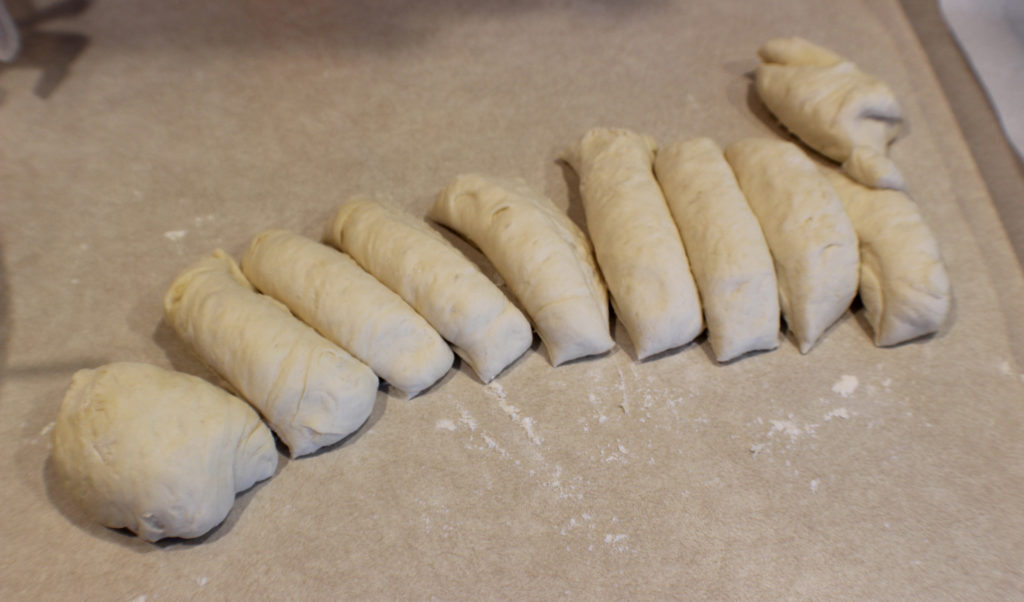
Line a sheet pan with parchment paper and spray with cooking oil. Punch down the dough and remove onto a lightly floured surface. I form the dough into a log and try to cut into somewhat equal portions.

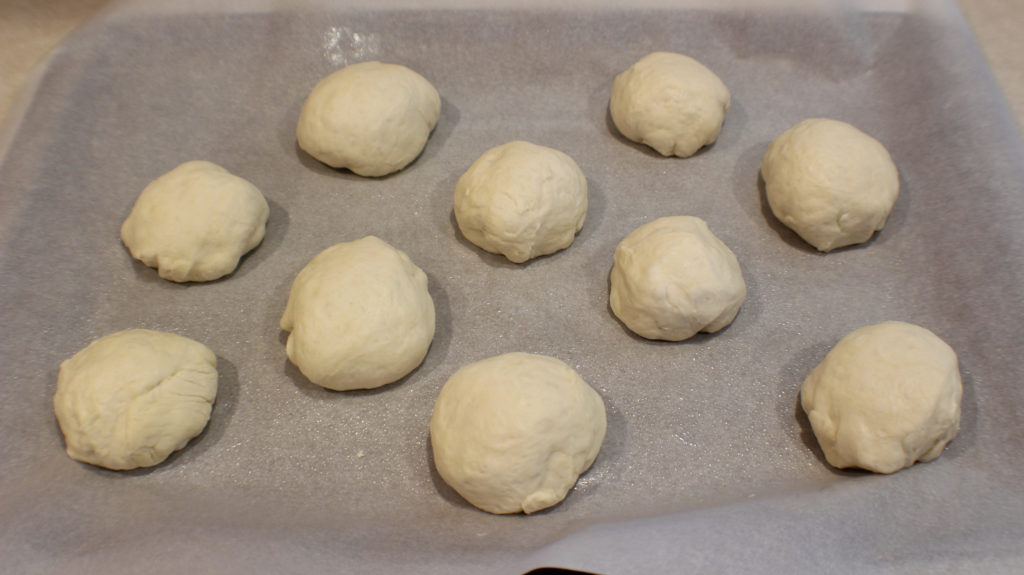
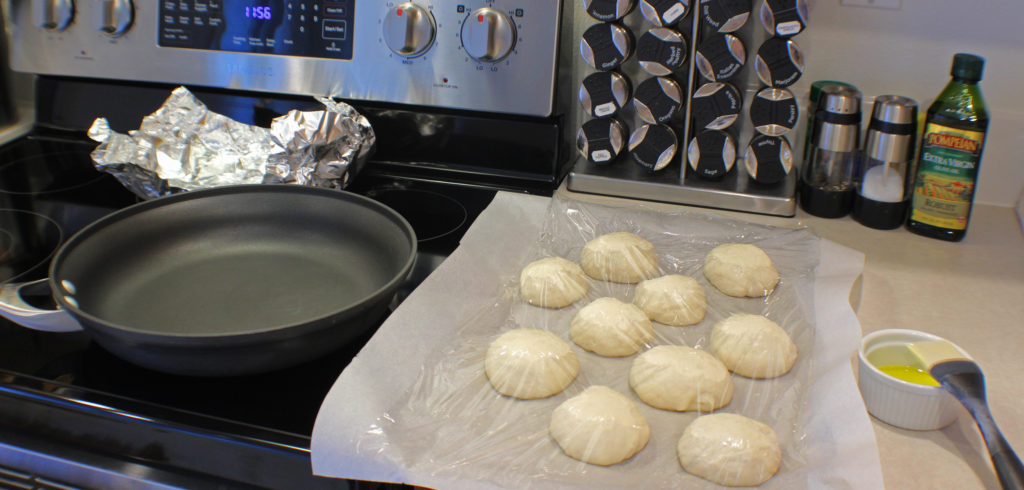
Roll the dough into balls and place on the parchment lined sheet tray. Spray the top of the dough balls and cover with plastic wrap. Let that sit for about 1/2 hour.

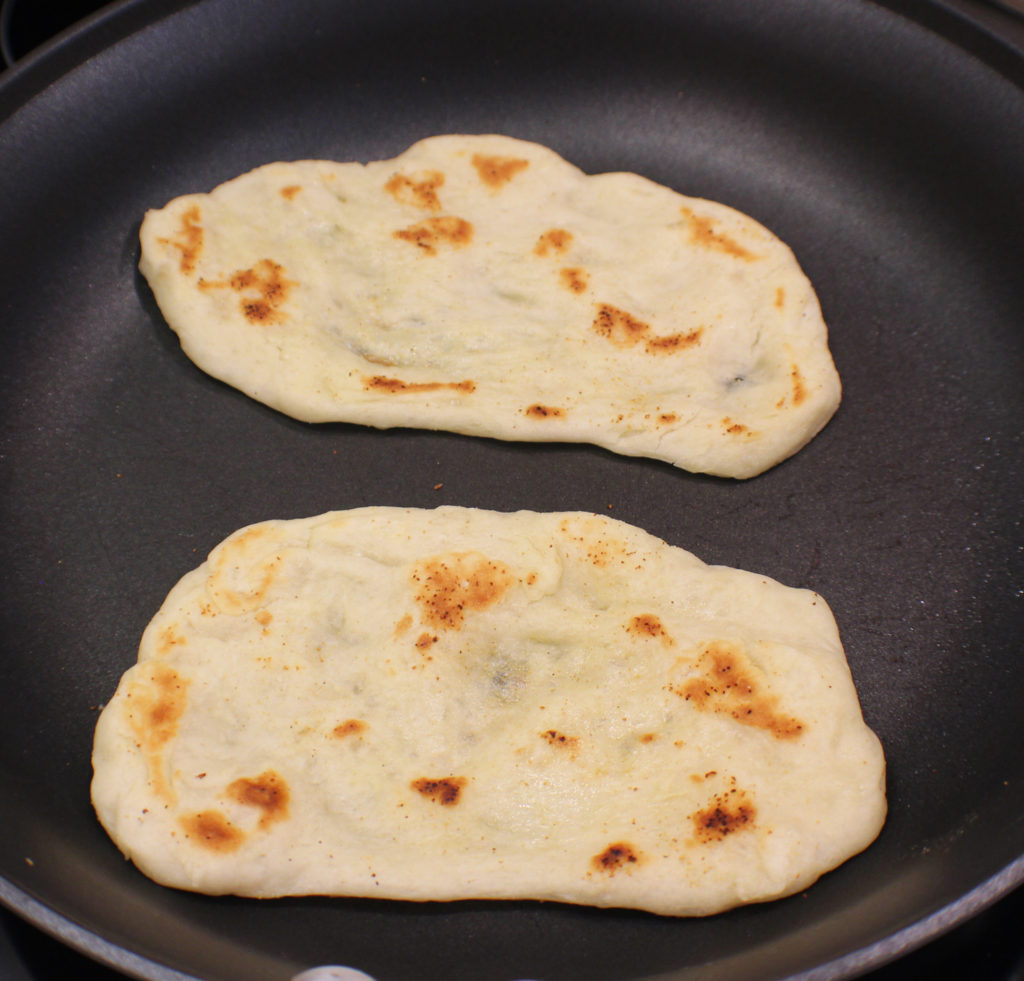
Now get your cooking set up ready. I have oil for brushing the dough, a pan heating up on the stove on medium low, some garlic for sprinkling on, and some foil to put the finished bread in so I can put it in my oven to keep warm while I’m cooking all of them. You are ready to start cooking.

This is the biggest non-stick pan I have, so I can only cook 2 at a time. Brush the bottom of your pan with a little olive oil; this step is not necessary, but it adds a good flavor.

For each ball, pick it up and stretch it with your fingers, kind of like pulling pizza dough. Don’t worry about the unevenness of the dough. Place the dough in the pan and brush to tops with a little olive oil and sprinkle on some granulated garlic if you desire.

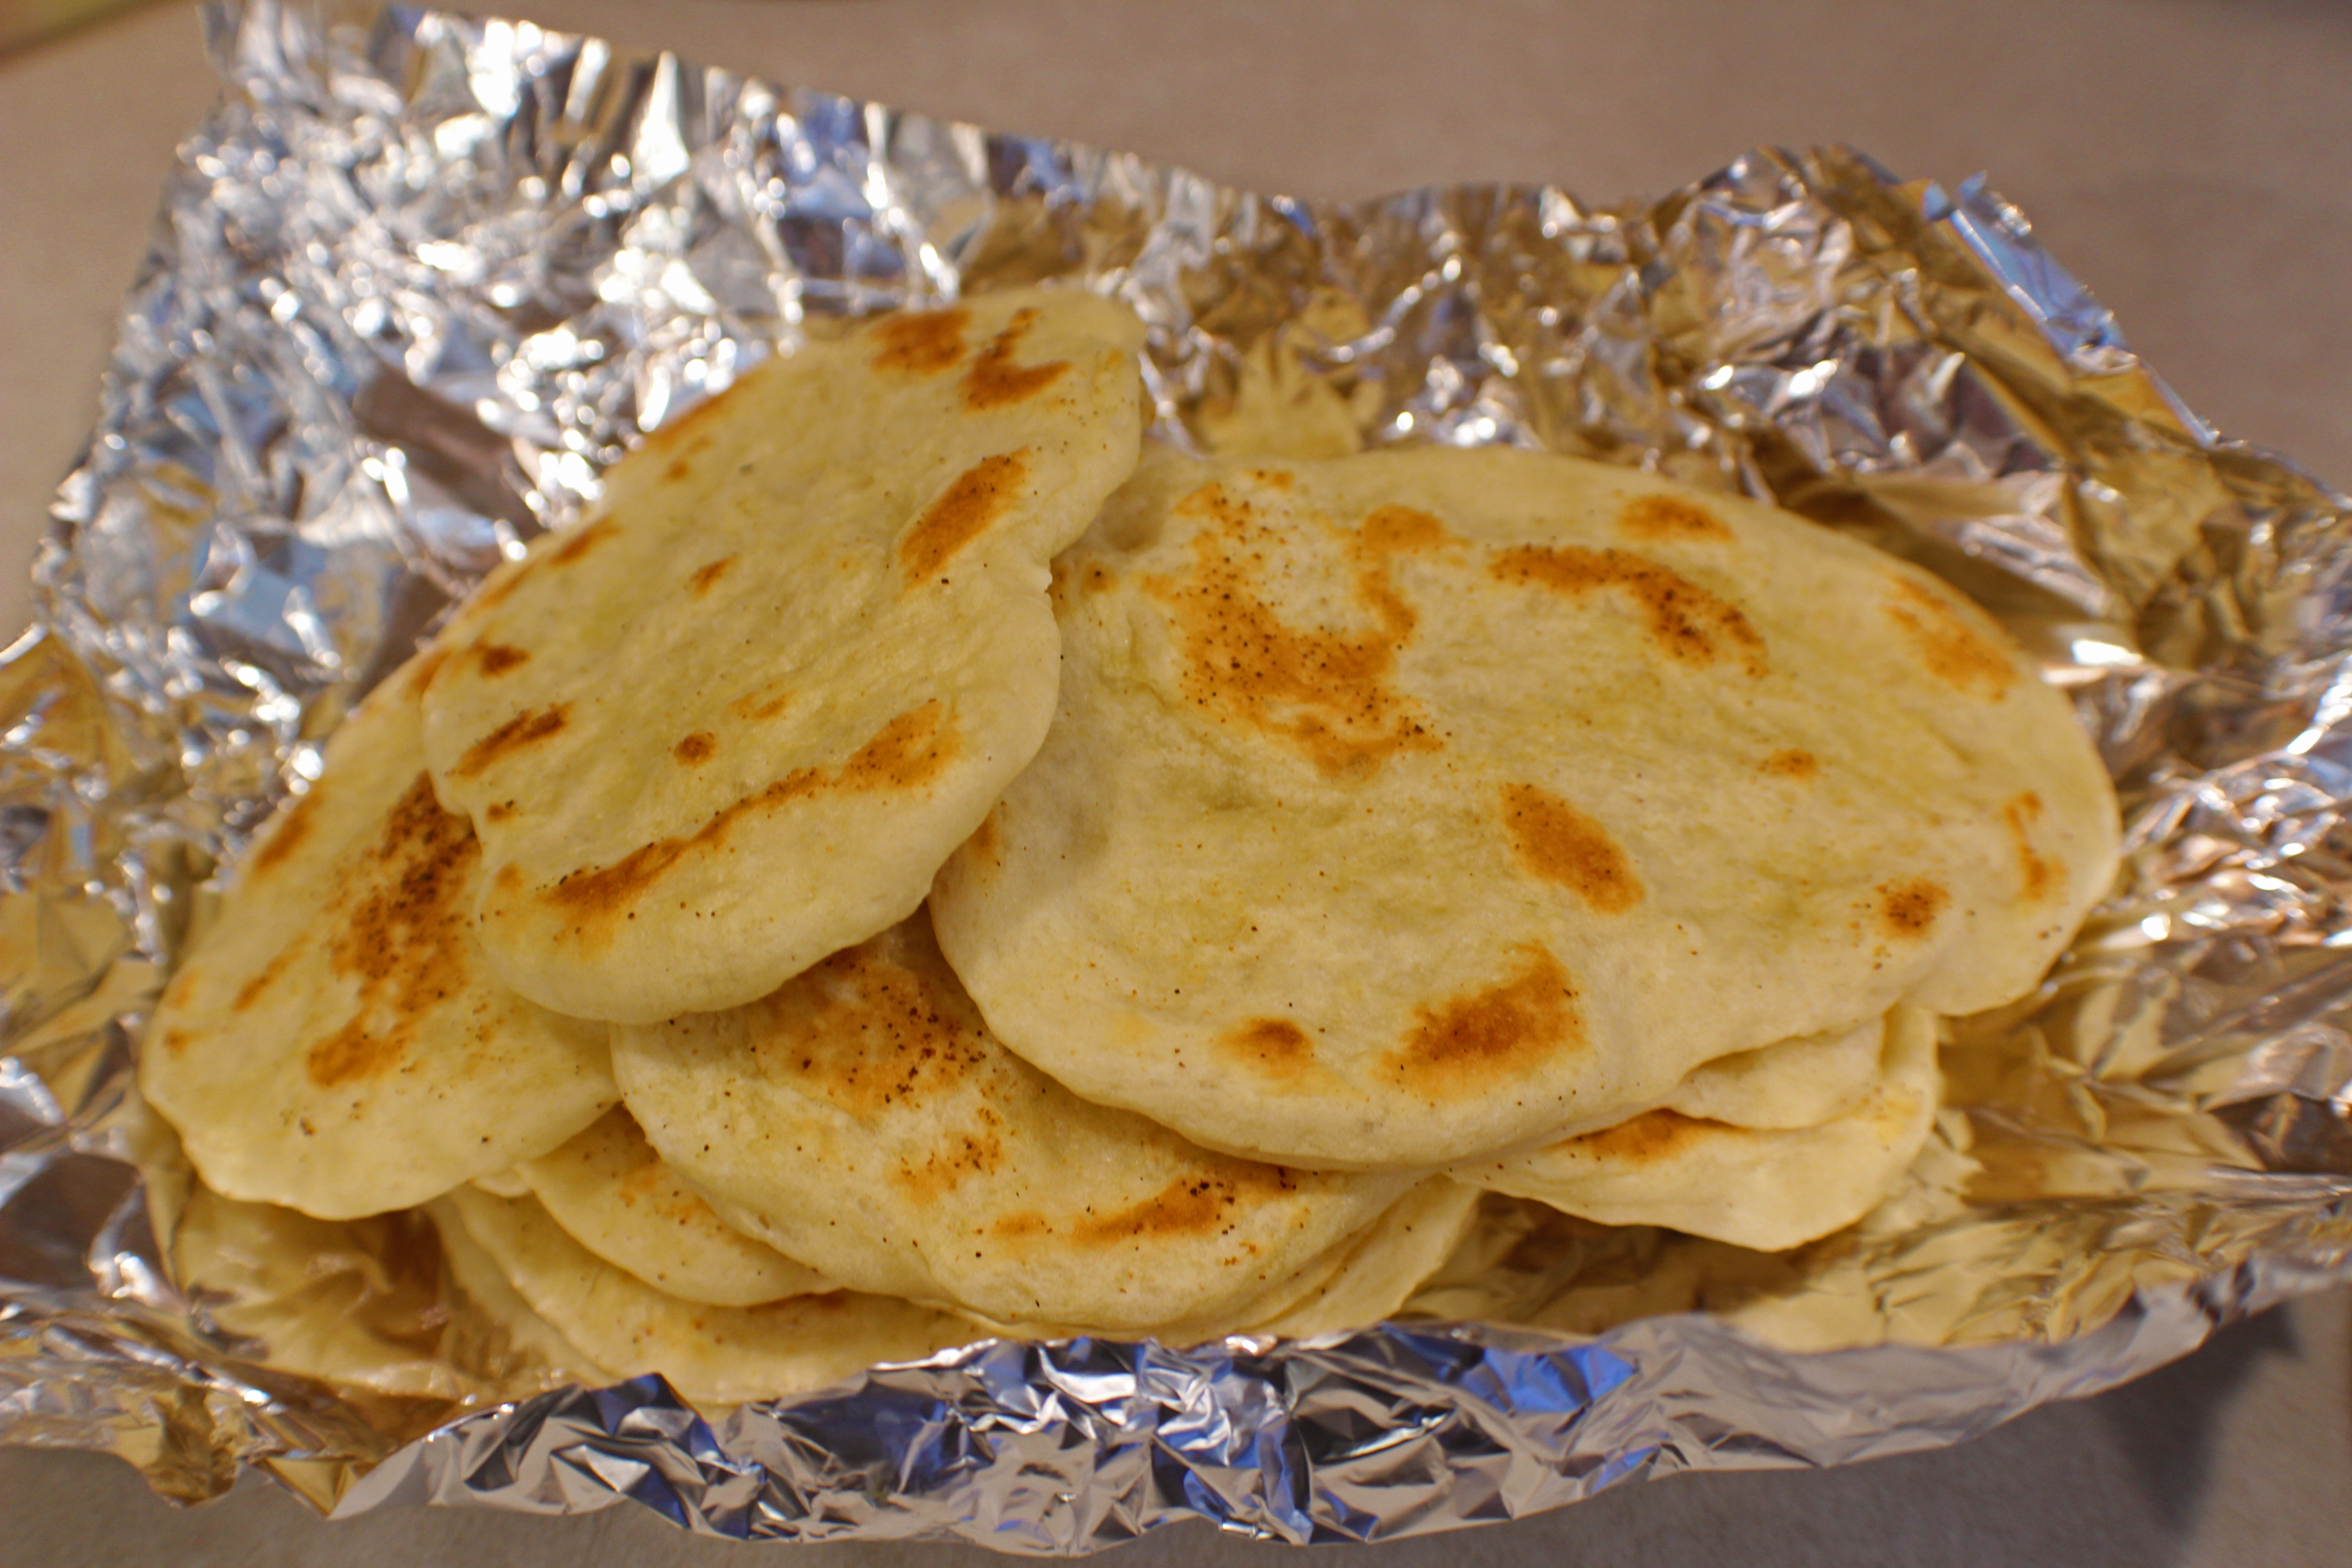
Flip after a couple of minutes and cook the other side. It’s ok to flip several times, I do that so I don’t burn my bread.

Watch the color of the dough, you can tell as it changes color if it is cooked.

Each one should take about 5 to 7 minutes to cook all the way through.

I have found that my pan gets hotter as I’m cooking so I have to turn down my burner during the cooking process. I start out with it on the 4 setting and end up finishing on 2 or 2 1/2.

It doesn’t matter what size you want to make your Naan, as this is a great pull off what you want to soak up the sauce or dip into whatever your are eating bread.

Enjoy!

Naan

Naan is an easy bread to make and pairs well with just about any Indian or Asian style foods as well as a lot of American foods that we eat with a bit of bread.
Prep Time10 minutes
Cook Time30 minutes
Resting Time1 hour 30 minutes
Total Time2 hours 10 minutes
Course: Bread
Cuisine: Asian, Indian
Keyword: Bread
Servings: 10 each
Calories: 175kcal
Author: Eating With Deb

Equipment

  • Stand Mixer
  • Large saute pan
  • Sheet tray lined with parchment paper

Ingredients

  • 1 ¼ cups water 110 115°
  • 1 tsp active dry yeast
  • ½ tsp sugar
  • 3 ¾ cups flour
  • 2 tsp sea salt
  • Olive oil for brushing
  • Granulated garlic for sprinkling

Instructions

  • In a large mixing bowl*, add water, sugar, and yeast. Mix and let stand until frothy (about 20 minutes).
  • Mix in 3 cups of flour and salt. Add another ½ cup of flour and mix. If dough is sticky keep adding flour a little at a time until it pulls away from the sides of the bowl and forms a ball.
  • Remove from bowl and spray bowl with non-stick cooking spray and return dough to the bowl. Cover bowl with plastic wrap and set aside until doubled in size (about 1 hour).
  • Line a sheet pan with parchment paper and spray with cooking oil. Punch down dough and form into golf ball size balls (or slightly larger). You may need some flour on your work surface while doing this step. Put the balls on the pan, spray the tops with cooking oil and cover with plastic wrap. Set aside for about ½ hour.
  • Using a non-stick pan, heat it on the stove top. Don’t turn burner on past about 4 or the dough will cook too fast, burn and be doughy. (I found after the first couple I had to turn down the burner to 2 or 2 1/2.) Depending on the size of your pan, will depend on how many you can cook at a time.
  • Brush bottom of pan with a little olive oil. Stretch each ball into an oblong shape and place in the pan, don’t crowd or let them touch. Brush tops with olive oil and sprinkle with a little bit of garlic, if desired. Using a spatula or tongs, flip after a couple minutes. You can keep flipping so they don’t burn. Total cook time will be about 5 to 7 minutes. Repeat until all dough is cooked.
  • Enjoy!

Notes

*I use my stand mixer and dough hook for all breads. This will need the dough for you, otherwise you will have to need the dough by hand for about 5 minutes once the flour and salt is added.
• You can make larger or smaller balls depending on the size of the final piece you want or the size of your pan
• I tried a recipe that cooked them in the oven on a pizza pan using cornmeal so they didn’t stick to the pan, but I set off the smoke alarm because the oven temp has to be at 500° and the cornmeal started burning
• You can set up a foil bowl or a pan in the oven on warm and as you cook them remove them to the oven to keep warm until done and ready to serve
• If made ahead, wrap bread in foil and put in a 350° oven until warm

Nutrition

Serving: 1slice | Calories: 175kcal | Carbohydrates: 36g | Protein: 5g | Fat: 1g | Saturated Fat: 1g | Sodium: 468mg | Potassium: 62mg | Fiber: 2g | Sugar: 1g | Vitamin C: 1mg | Calcium: 9mg | Iron: 2mg

Rice in the Slow Cooker

It doesn’t get much easier than cooking rice in a slow cooker. I have a 1-quart cooker that I use because I only need to make a little at a time for my small household. If you need to make more, it’s the same, just use a larger cooker.

Sometimes I still cook rice on the stovetop, but mostly I use the slow cooker method, especially when I’m making a stir fry. I can start the rice and not worry about it, then deal with prepping and cooking the rest of my dish.

The one thing I don’t have in this picture is cooking spray. I have forgotten to spray the inside of my crock and have had the rice stick a little bit. So spray it first. Add the broth and the rice and give it a stir. Put the lid on and turn it to high. Walk away for 2 hours.

Come back, and check the rice to see if it is done. It may take a little more liquid or longer cooking time for different rices and slow cookers, but this works every time for me with brown basmati rice, which is pretty much all I use when I want plain rice with a dish.

You can switch out the chicken broth with a low sodium one, or even a vegetable broth. It is important to have flavor in the cooking liquid in order to give your rice some flavor. But if you prefer just plain water, by all means, go ahead and use it.

Rice in the Slow Cooker

Rice is easy to make, but in the slow cooker, it's even easier. No boiling over on your stove top or worries about running out of liquid and burning it.
Prep Time3 minutes
Cook Time2 hours 30 minutes
Course: Dinner, Side Dish
Cuisine: American
Keyword: Rice, Slow Cooker
Servings: 3 cups
Calories: 316kcal
Author: Eating With Deb

Equipment

  • 1 quart slow cooker

Ingredients

  • 1 cup brown basmati rice
  • 3 cups chicken stock or veggie stock or water

Instructions

  • Spray slow cooker crock with non-stick cooking oil.
  • Add rice and stock and stir.
  • Turn on the cooker to high and cook for 2 to 2 ½ hours, depending on your slow cooker. If rice isn’t quite done you can add a little water or stock and continue cooking.

Nutrition

Calories: 316kcal | Carbohydrates: 57g | Protein: 11g | Fat: 5g | Saturated Fat: 1g | Cholesterol: 7mg | Sodium: 346mg | Potassium: 422mg | Fiber: 2g | Sugar: 4g | Vitamin A: 7IU | Vitamin C: 1mg | Calcium: 28mg | Iron: 2mg

Chicken Cordon Bleu Fingers

I love Chicken Cordon Bleu, but it is a lot of work to make, so when I do I make a lot and freeze them for future dinners. But I thought there must be an easier way. So I turned it into chicken strips wrapped with cheese and prosciutto and breaded before being cooked in an air fryer. This makes a great appetizer or entree for adults and kids alike!

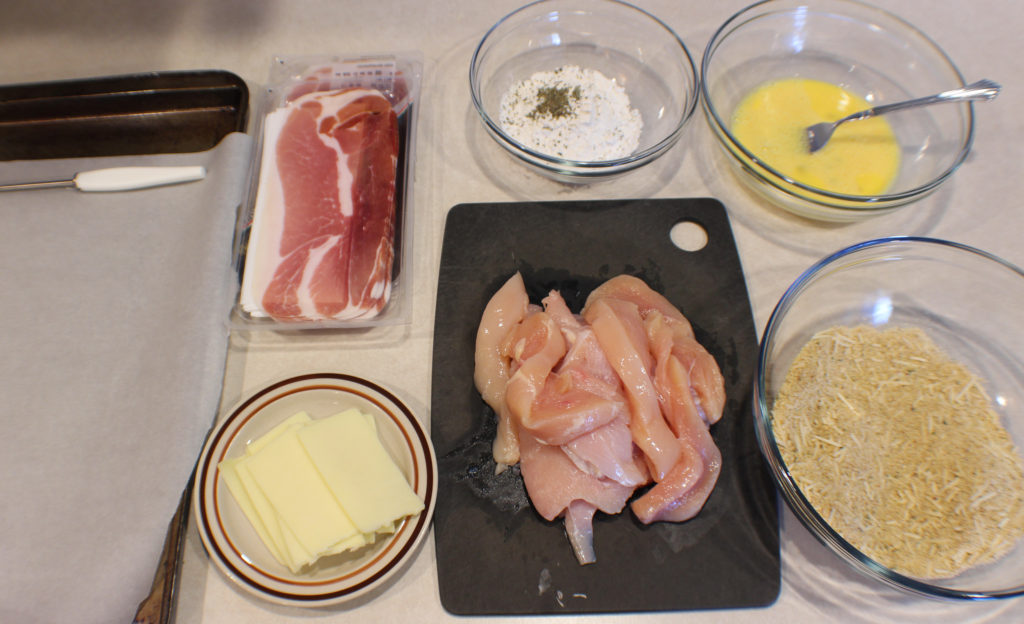
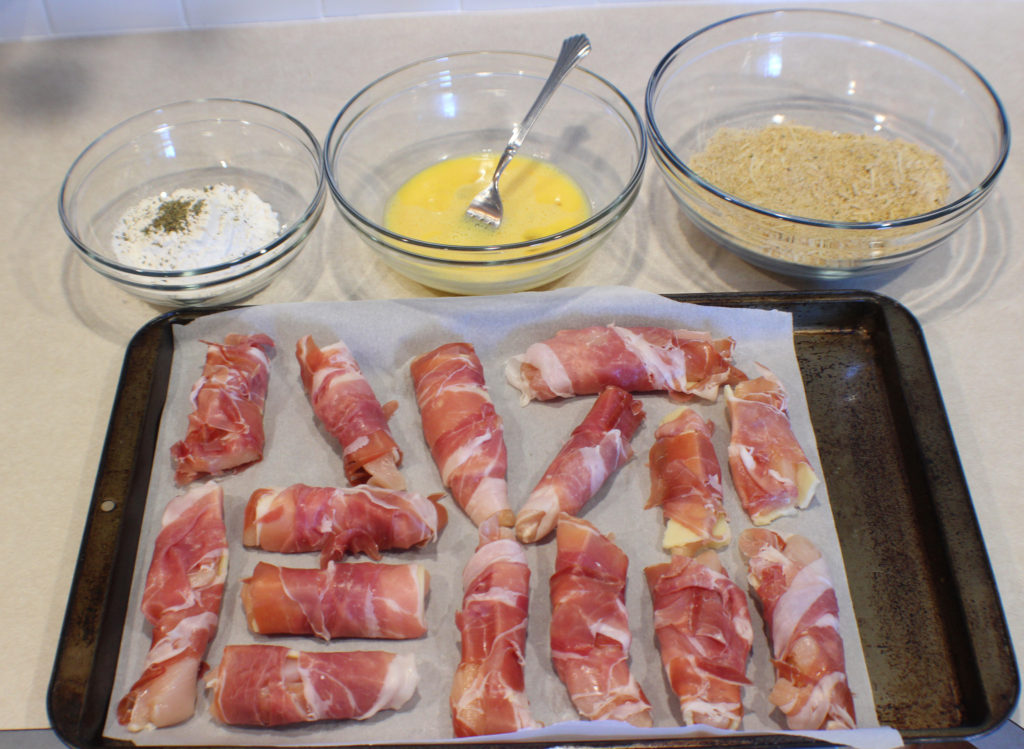
It’s fairly simple to gather and prep the ingredients. Just slice the chicken into strips, make sure your mozzarella cheese is sliced, combine the flour and seasonings, beat the eggs with water, and combine the parmesan with the bread crumbs. The prosciutto comes sliced and placed between sheets of paper.

Now place a slice of mozzarella on the a chicken strip, fold around the chicken if it’s too wide or break off some of the cheese. Then take a slice of prosciutto and wrap it around the chicken and mozzarella. Try to cover all of the cheese.

Now we are ready to bread them.

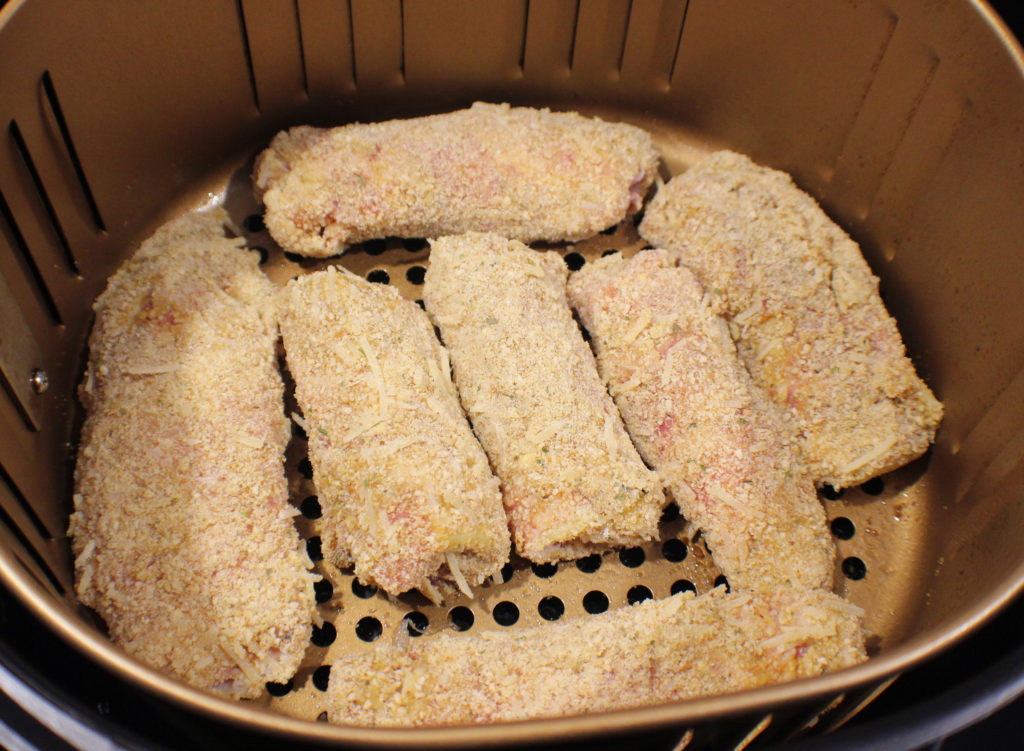
Dip in the flour, then the egg, then the bread crumbs. With each step make sure the chicken strip is fully coated. If I cannot enlist someone else’s help for this process, I use one hand to take the chicken from the flour through the egg and into the breading. Then I use the other hand just for the breading part. Otherwise you start getting a huge build-up of the flour, egg and breading on all of your fingers.

Ok, time to cook. I spray the bottom of my air fryer basket, put the strip in, this will take two batches, and then spray the top of the chicken. I recently learned that you should use a non-aerosol cooking spray for this. I guess with some air fryers, aerosol sprays will eventually chip the coating off of the air fryer basket.

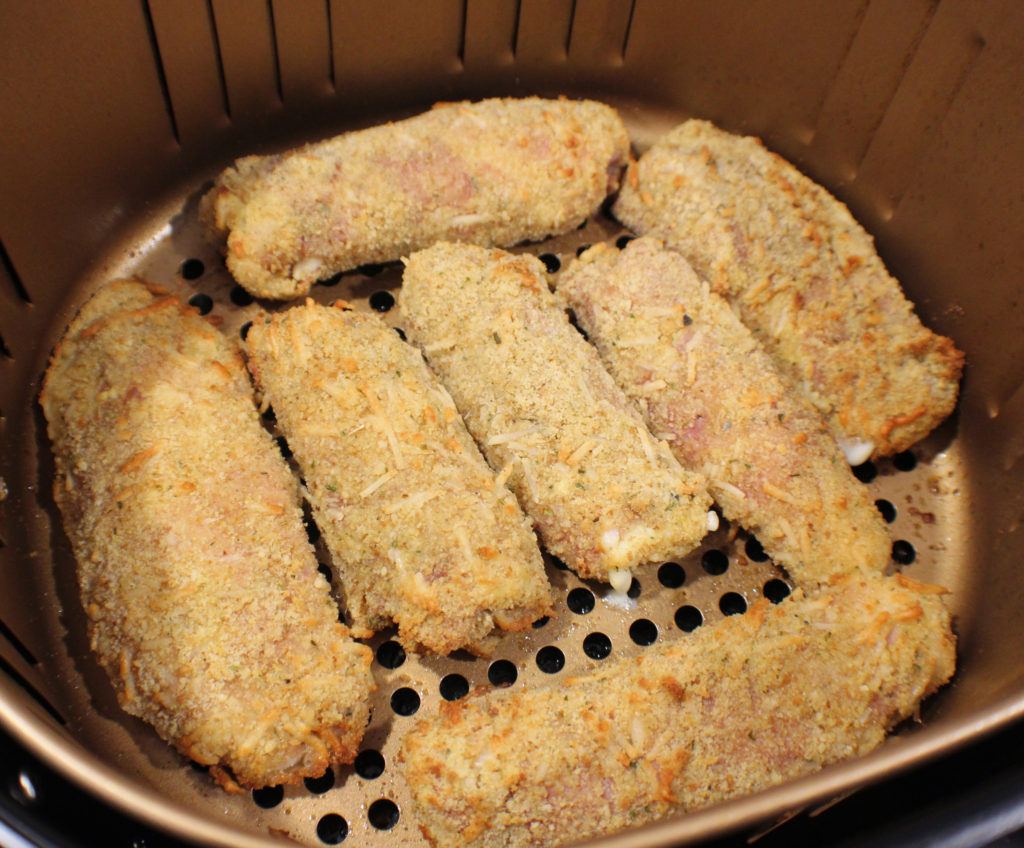
Put the basket in the air fryer, turn on to 360 degrees and cook for 5 minutes. I have a little mozzarella seeping out, but overall I did a good job getting it all coated. Flip the chicken over and cook at 360 degrees for another 5 minutes.

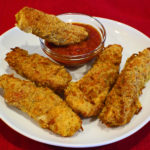
The chicken should be at 165 degrees at this point and is ready to eat. I like dipping them in warm marinara sauce.

Enjoy!

Chicken Cordon Bleu Fingers

Chicken Cordon Bleu is time consuming to make, so I turned it inside out and cooked it in an air fryer for a much quicker method to making one of my favorite chicken dinner recipes.
Prep Time15 minutes
Cook Time10 minutes
Course: Appetizer, Dinner
Cuisine: American, French
Keyword: Air Fryer, Chicken, Chicken Cordon Bleu
Servings: 4 people
Calories: 879kcal
Author: Eating With Deb

Equipment

  • Air Fryer
  • Knife and cutting board
  • 3 Medium to Large Bowls

Ingredients

  • 2 each chicken breasts
  • 24 slices mozzarella cheese
  • 12 slices prosciutto

Flour Mixture

  • ½ cup flour
  • 1 tsp Italian seasoning
  • 1 pinch sea salt
  • 1 pinch black pepper

Egg Wash

  • 2 each eggs
  • 2 tbsp water

Breading

  • 1 ½ cup bread crumbs Italian seasoned
  • ½ cup Parmesan cheese shredded

Instructions

  • Cut chicken breasts into strips, about 6 strips per breast.
  • Mix flour mixture.
  • Beat eggs and water.
  • Combine bread crumbs and cheese.
  • Put a slice of mozzarella cheese (break slices in ½ if they are too wide) on each side of the chicken strip and wrap with prosciutto. Set aside and finish the rest.
  • Dredge in flour mixture, eggs, and then bread crumbs. Set aside and finish the rest.
  • Spray bottom of air fryer basket with a non-aerosol cooking oil spray and place chicken strips in basket. Spray the top of the chicken strips.
  • Turn on air fryer to 360 degrees and cook for 5 minutes. Flip over, cook at 360 degrees for 5 minutes. Check temperature to see if the internal temp of the chicken has reached 165 degrees.
  • Serve with warm marinara as a dipping sauce.
  • Enjoy!

Notes

You may need a few more or fewer slices of mozzarella cheese or prosciutto depending on how you sliced your chicken. Just be sure to keep them separate so as to not cross-contaminate any leftovers with raw chicken. Better yet, if someone else is around, get a helper.
If the chicken slices are too long to wrap the prosciutto completely around it, cut them in half. It's important to seal the cheese under the prosciutto and breading to prevent cheese from seeping out during cooking.

Nutrition

Serving: 3slices | Calories: 879kcal | Carbohydrates: 46g | Protein: 52g | Fat: 53g | Saturated Fat: 28g | Trans Fat: 1g | Cholesterol: 161mg | Sodium: 1733mg | Potassium: 293mg | Fiber: 2g | Sugar: 4g | Vitamin A: 1267IU | Vitamin C: 1mg | Calcium: 1093mg | Iron: 4mg

Jamaican Jerk Beef and Vegetables

I love the bold flavors of Jerk dishes, but they can take time to make. Don’t let the cooking time on this recipe scare you away, most of that is the rice cooking time. This one has minimal hands-on prep, and time to let the beef and veggies marinate, all of which can be done while the rice is cooking.

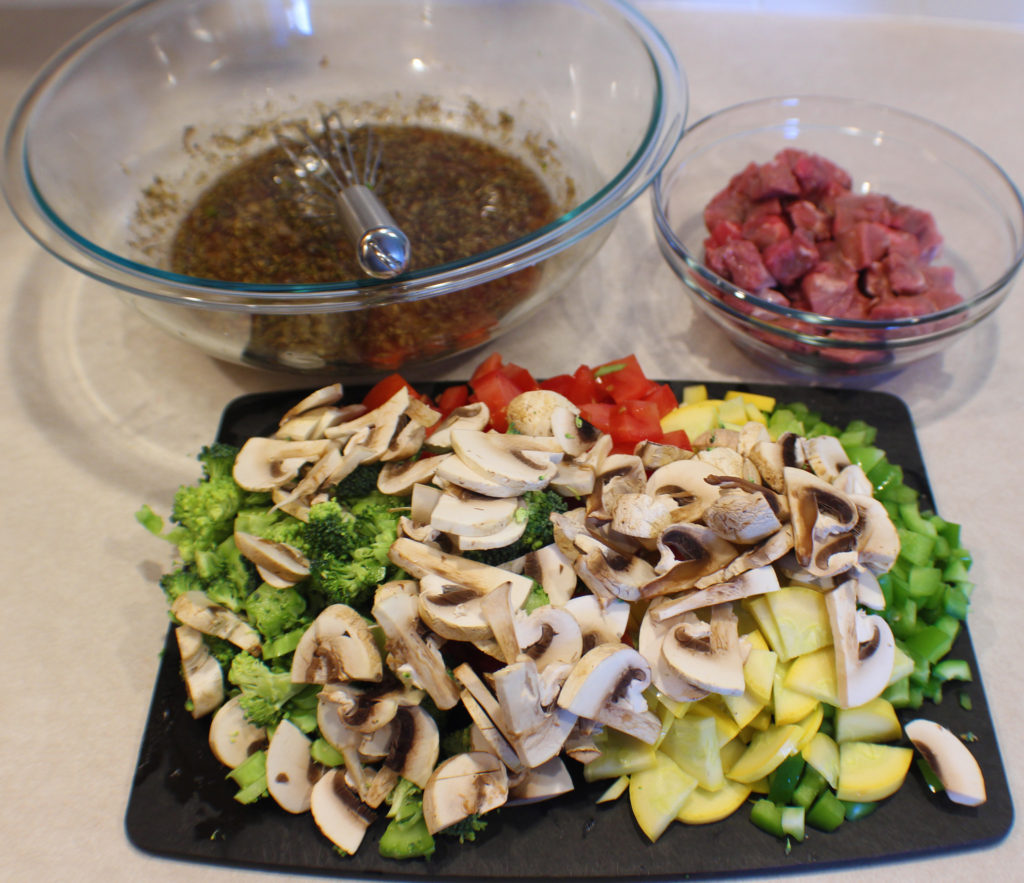
After you get your rice cooking, mix your marinade, trim and cube the beef and cut the vegetables.

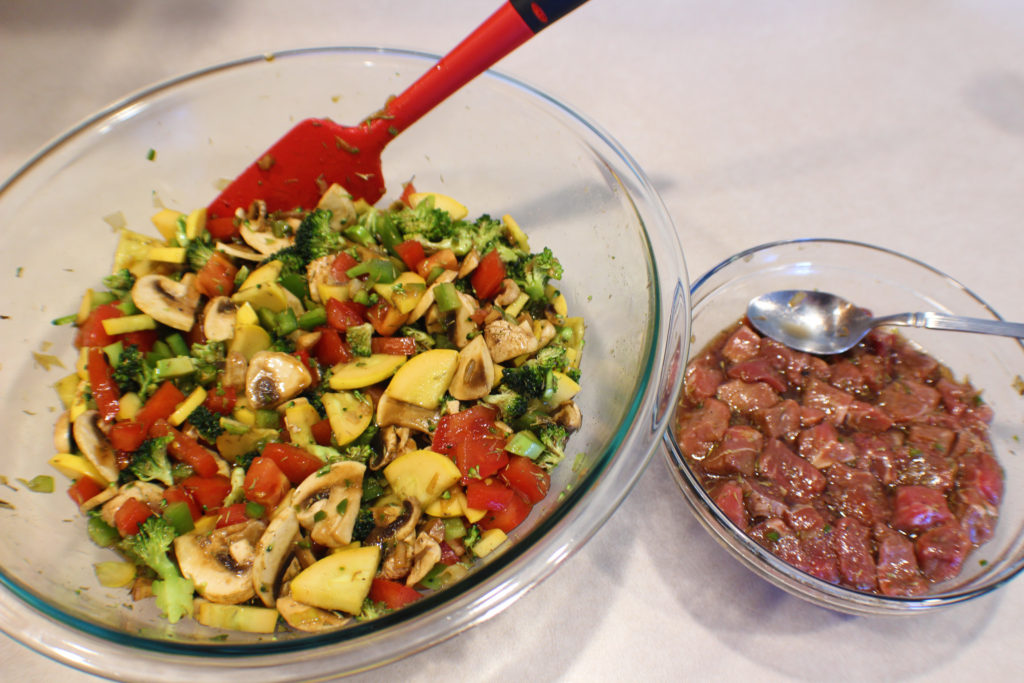
Remove 1/3 cup of the marinade and stir it in the beef. Then add your vegetables to the rest of the marinade and stir in.

Now set it aside and wait for about 30 minutes. Give each a stir once or twice while waiting.

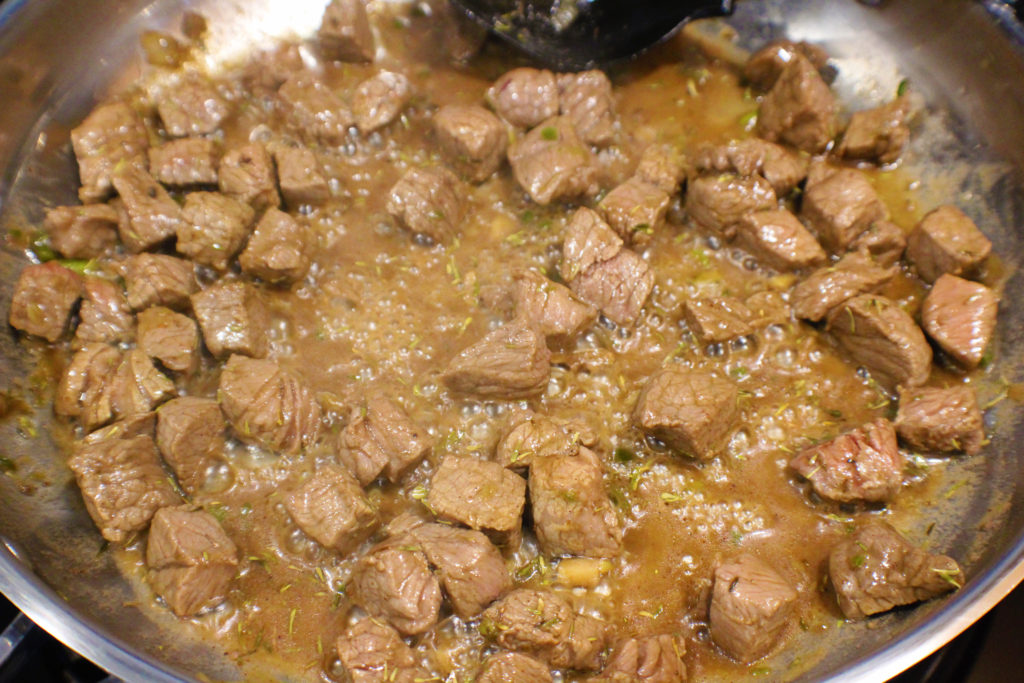
Heat a large saute pan, on medium high heat and add the beef and marinade. Saute for about 5 minutes until the beef is brown.

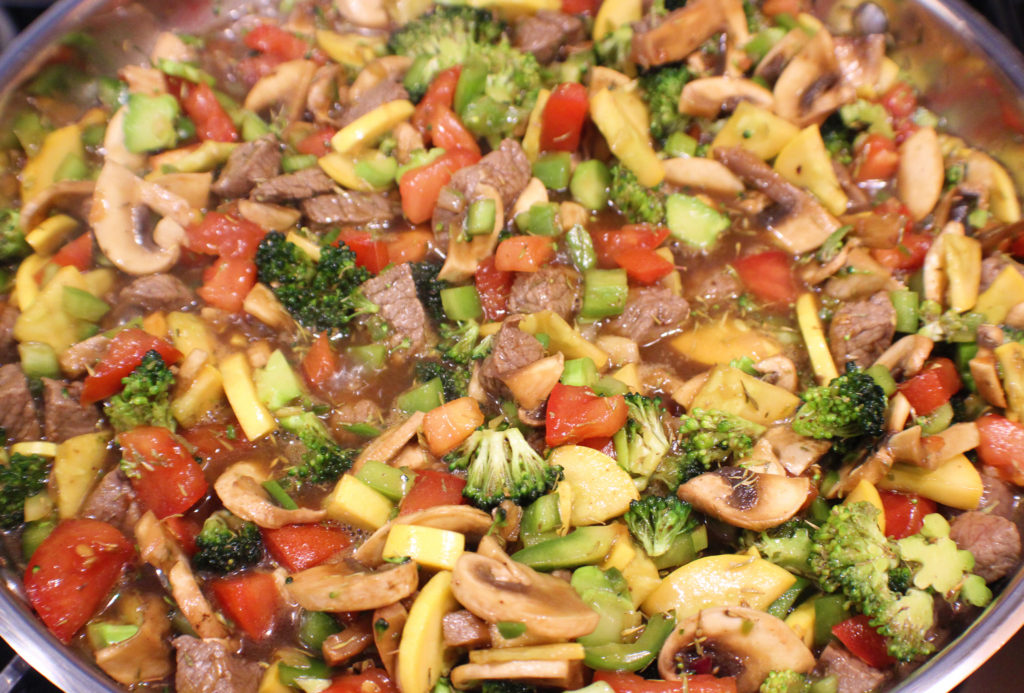
Reduce the heat to medium and add the veggies plus the marinade they were in. Stir and saute for 3 to 5 minutes until the sauce is thickened and veggies have slightly cooked but are still crunchy.

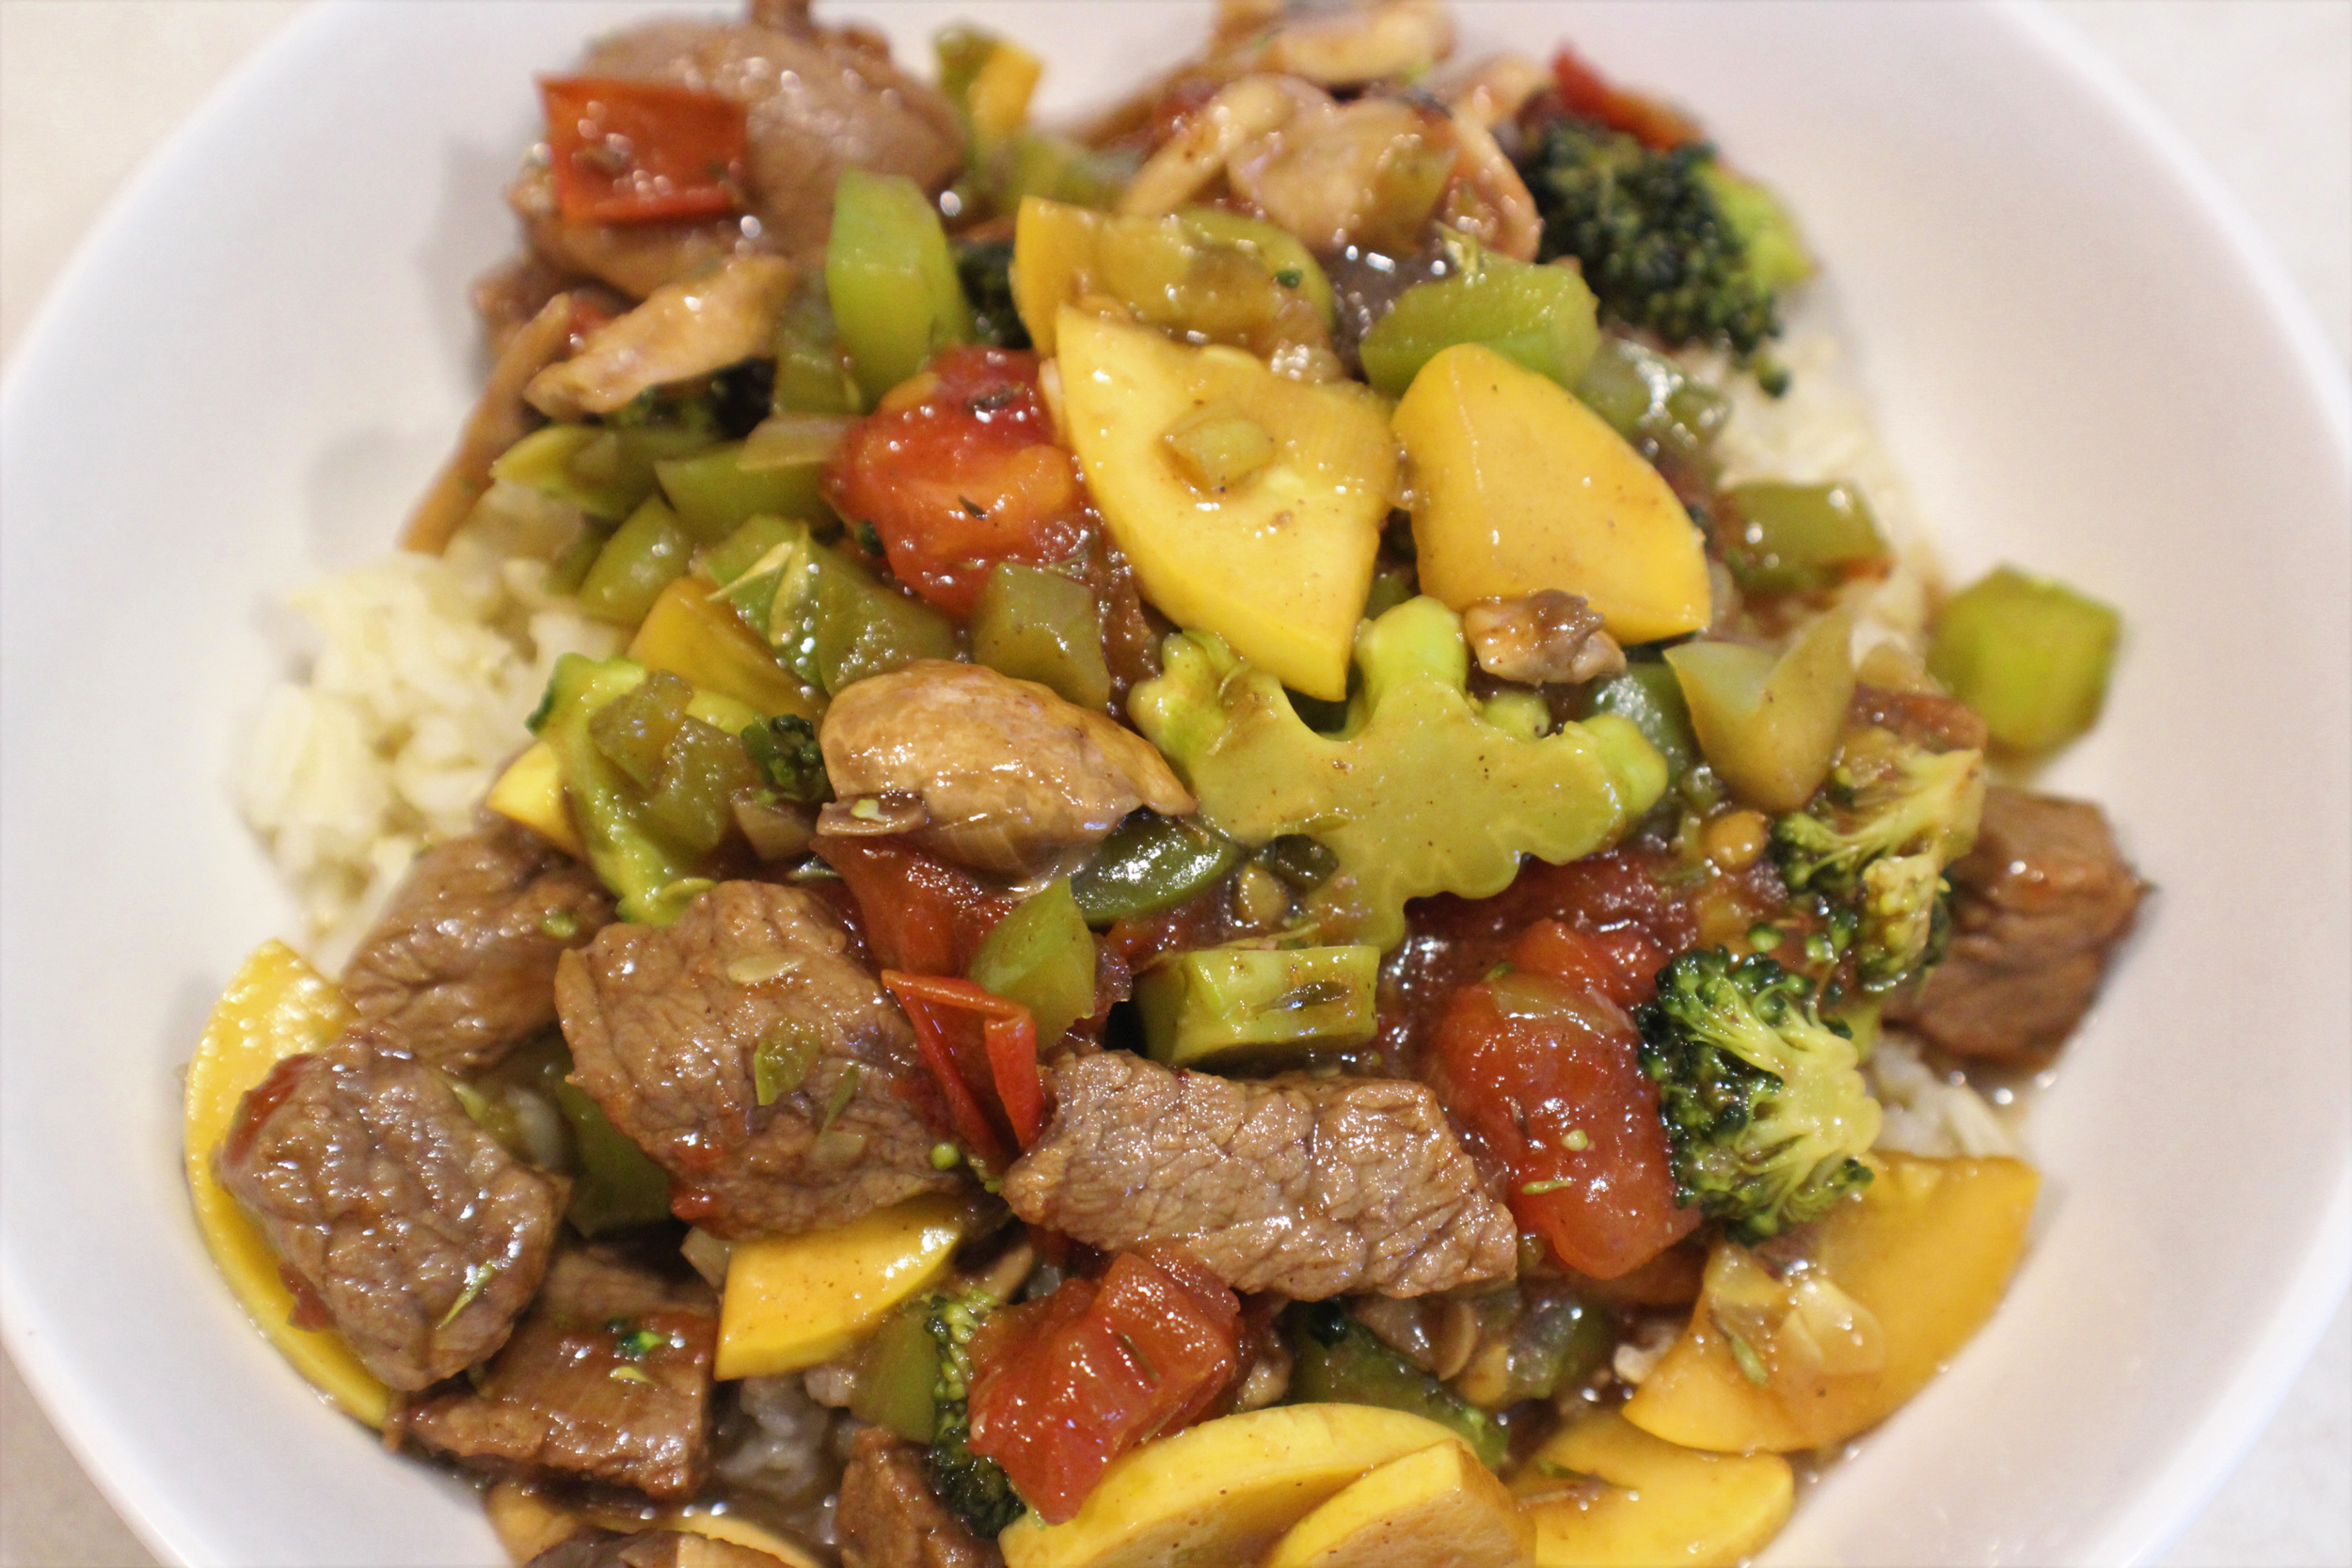
Put some rice in a bowl and top it with the beef, veggies, and sauce, and you have a one bowl, delicious, bold dinner.
Enjoy!

Jamaican Jerk Beef and Vegetables

Jerk dishes have very bold flavors that awaken the taste buds. Many of them are time consuming and require a lot of different seasonings. I made this simple, and most likely you have the seasonings in your pantry. Switch out any of the vegetables you may not like or replace the beef with turkey, or go vegetarian and replace it with seitan or portabello mushrooms.
Prep Time20 minutes
Cook Time55 minutes
Resting Time30 minutes
Total Time1 hour 10 minutes
Course: Dinner, Entree, Main Course
Cuisine: American, Jamaican
Keyword: Jamaican Jerk, Jamaican Jerk Beef, Jerk
Servings: 6 people
Calories: 417kcal
Author: Eating With Deb

Equipment

  • Large stainless steel saute pan
  • 4 quart sauce pan or larger
  • 1 large bowl
  • 1 medium bowl
  • Knife and cutting board

Ingredients

Marinade:

  • ½ cup soy sauce
  • 1/3 cup red wine vinegar
  • ¼ cup canola oil
  • ½ cup beef stock
  • 1 tbsp cornstarch
  • ¼ cup brown sugar
  • 1 1/2 tbsp thyme dried
  • ½ tsp. cloves
  • ½ tsp nutmeg
  • ½ tsp allspice
  • 1/2 each yellow onion diced
  • 2 each jalapeno peppers seeded & minced
  • 1 tbsp garlic fresh, minced

Beef and Veggies:

  • ½ pound beef cut into bite-size pieces
  • 1 each zucchini or yellow squash, cut into bite-size pieces
  • 1 each tomato cut into bite-size pieces
  • 1 each green bell pepper cut into bite-size pieces
  • 2 cups mushrooms sliced
  • 2 cups broccoli florets

Rice

  • 1 cup brown basmati rice
  • 3 cups chicken stock

Instructions

  • Put the rice and chicken stock in the saucepan, bring to a boil, reduce heat and simmer for 40 to 45 minutes until done.
  • After you've started the rice, it's time to make the marinade for the beef and veggies.
  • For the marinade, in a large bowl combine soy sauce, red wine vinegar, canola oil, beef stock and cornstarch. Whisk until the cornstarch is dissolved. Then mix in the rest of the ingredients.
  • Trim and cut beef steak into cubes and put in a bowl. Remove 1/3 cup of the marinade and toss it with the beef.
  • Prepare the veggies and add them to the other bowl with the rest of the marinade. Let the beef and veggies soak for about 30 minutes.
  • Heat a large, stainless steel sauté pan and add the beef along with the marinade. Sauté on medium high for about 5 minutes until the beef is brown.
  • Reduce heat to medium and add the vegetables and marinade. Stir in and sauté for 3 to 5 minutes until cooked through and everything is hot.
  • Serve over rice.
  • Enjoy!

Notes

If you are watching nutrition information, 1 cup of just the beef, veggies, and sauce without the rice cooked in chicken broth:
Calories: 120; Carbohydrates: 4g; Protein: 9g; Fat; 8g; Cholesterol; 27mg; Sodium; 39mg; Sugar 1g.
To reduce the amount of sodium, cook the rice in a low sodium chicken or vegetable broth.
I like to serve this on a bed of kale or spinach for a healthier/lighter meal.

Nutrition

Calories: 417kcal | Carbohydrates: 44g | Protein: 16g | Fat: 20g | Saturated Fat: 4g | Trans Fat: 1g | Cholesterol: 30mg | Sodium: 1335mg | Potassium: 631mg | Fiber: 3g | Sugar: 12g | Vitamin A: 284IU | Vitamin C: 32mg | Calcium: 64mg | Iron: 3mg

Tarragon Dijon Penne (with Chicken and Veggies)

If you’ve never tried tarragon, here is your chance. For spices I rarely use I buy in bulk at my local grocery store, that way I can buy the amount I need. Most grocery stores have a bulk spice section now, so I don’t clutter up my already cluttered spice cabinet and rack and I have fresh spices when I need them.

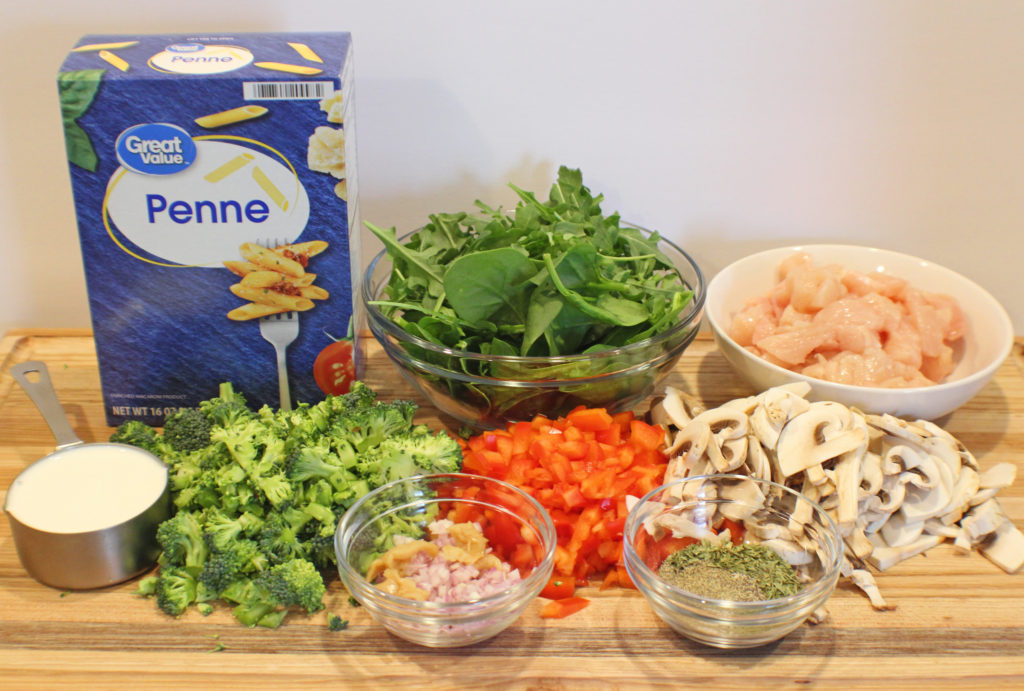
Cooking time is fairly fast once this gets started so you will want all your ingredients gathered and prepped before you start.

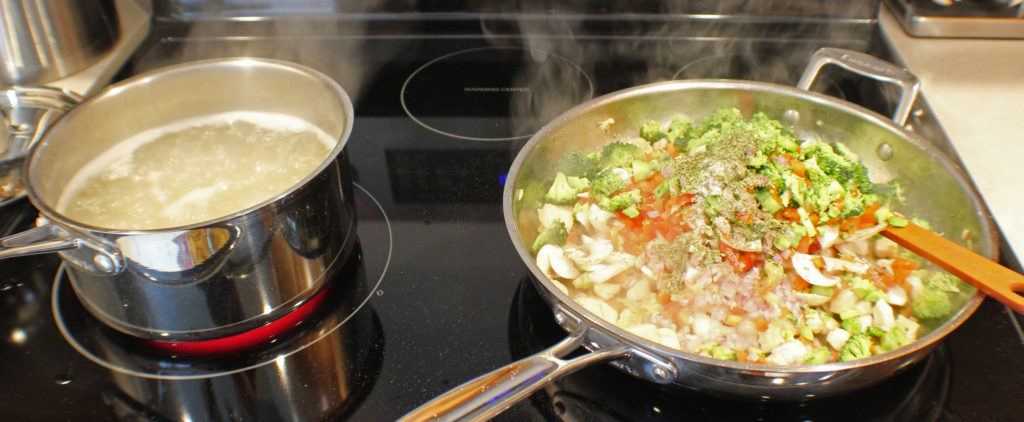
Then, bring a large pot of water to a boil, add a lot of sea salt and the penne pasta. You will need to cook pasta to al dente which will take about 12 to 15 minutes (check the package instructions).

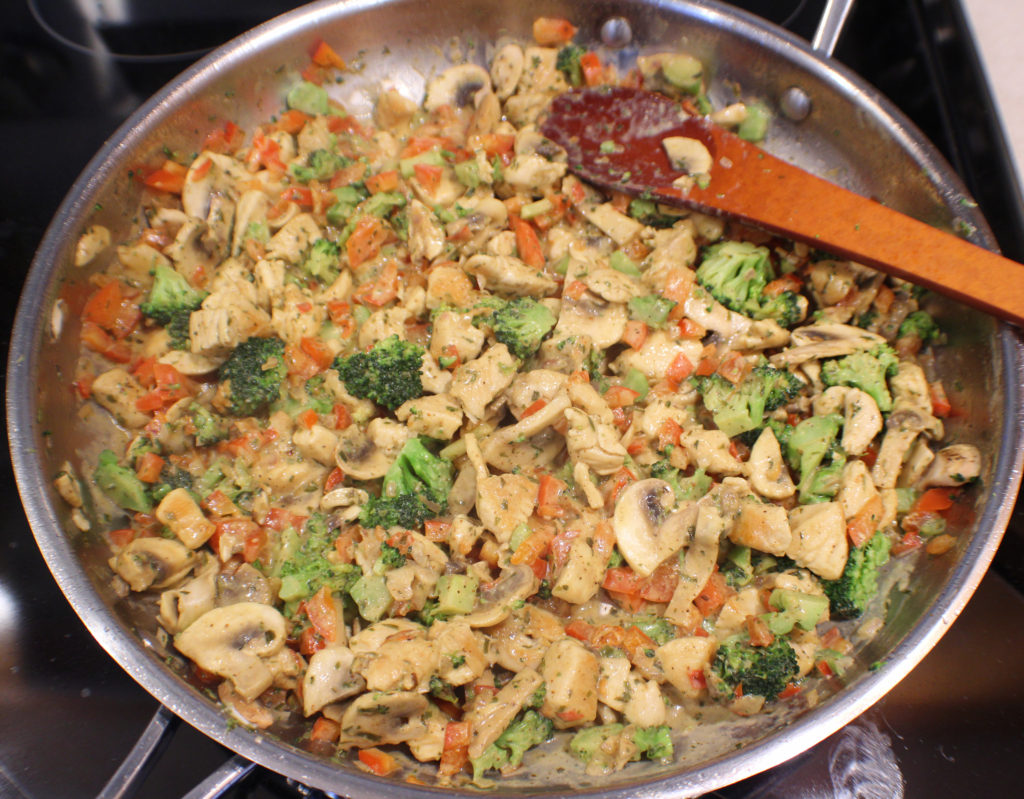
Once the pasta is in the water, heat up a large saute pan, add the oil and chicken. Saute the chicken until brown. Then add the veggies, except the spinach, shallots, garlic, and dry seasonings.

Stir and cook for about 5 minutes.

Then stir in the dijon and half and half. By now your pasta should be ready to be drained.

Drain your pasta, do not rinse, and reserve 1/2 cup of pasta water, you need it to bring your sauce together and make it more saucy.

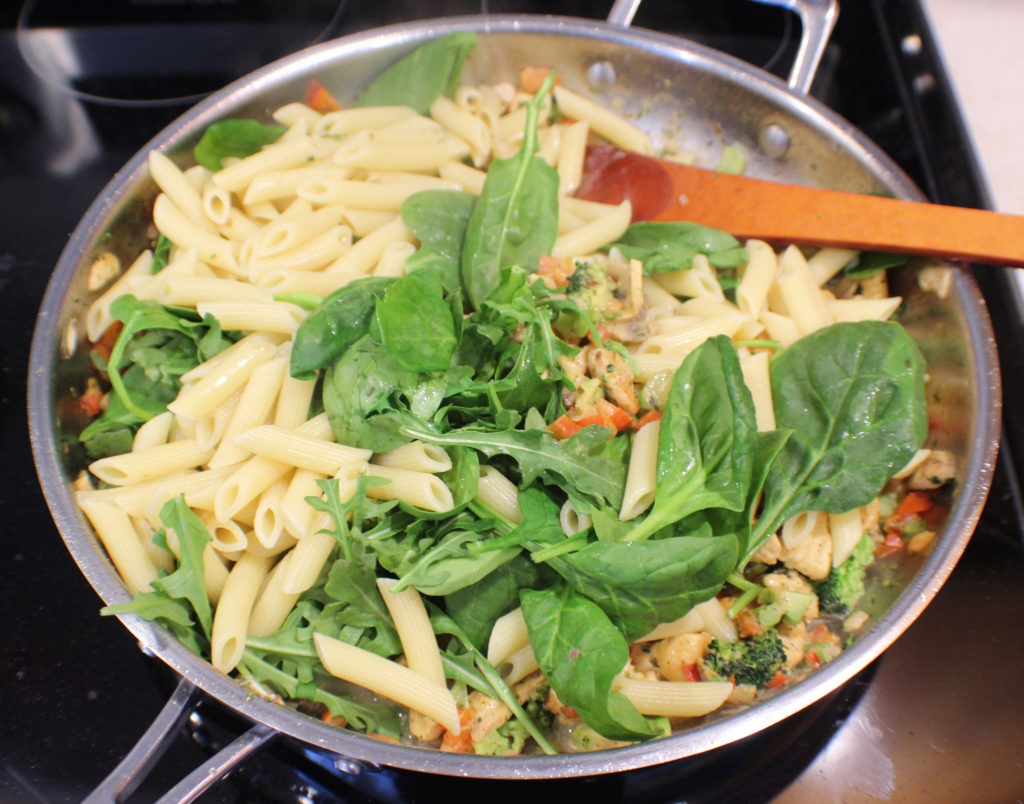
Add the pasta and spinach (I used some arugula this time also) to your pan and give it a good stir. Stir in the pasta water until you are happy with the consistency and sauce.

Cook just until the spinach is wilted.

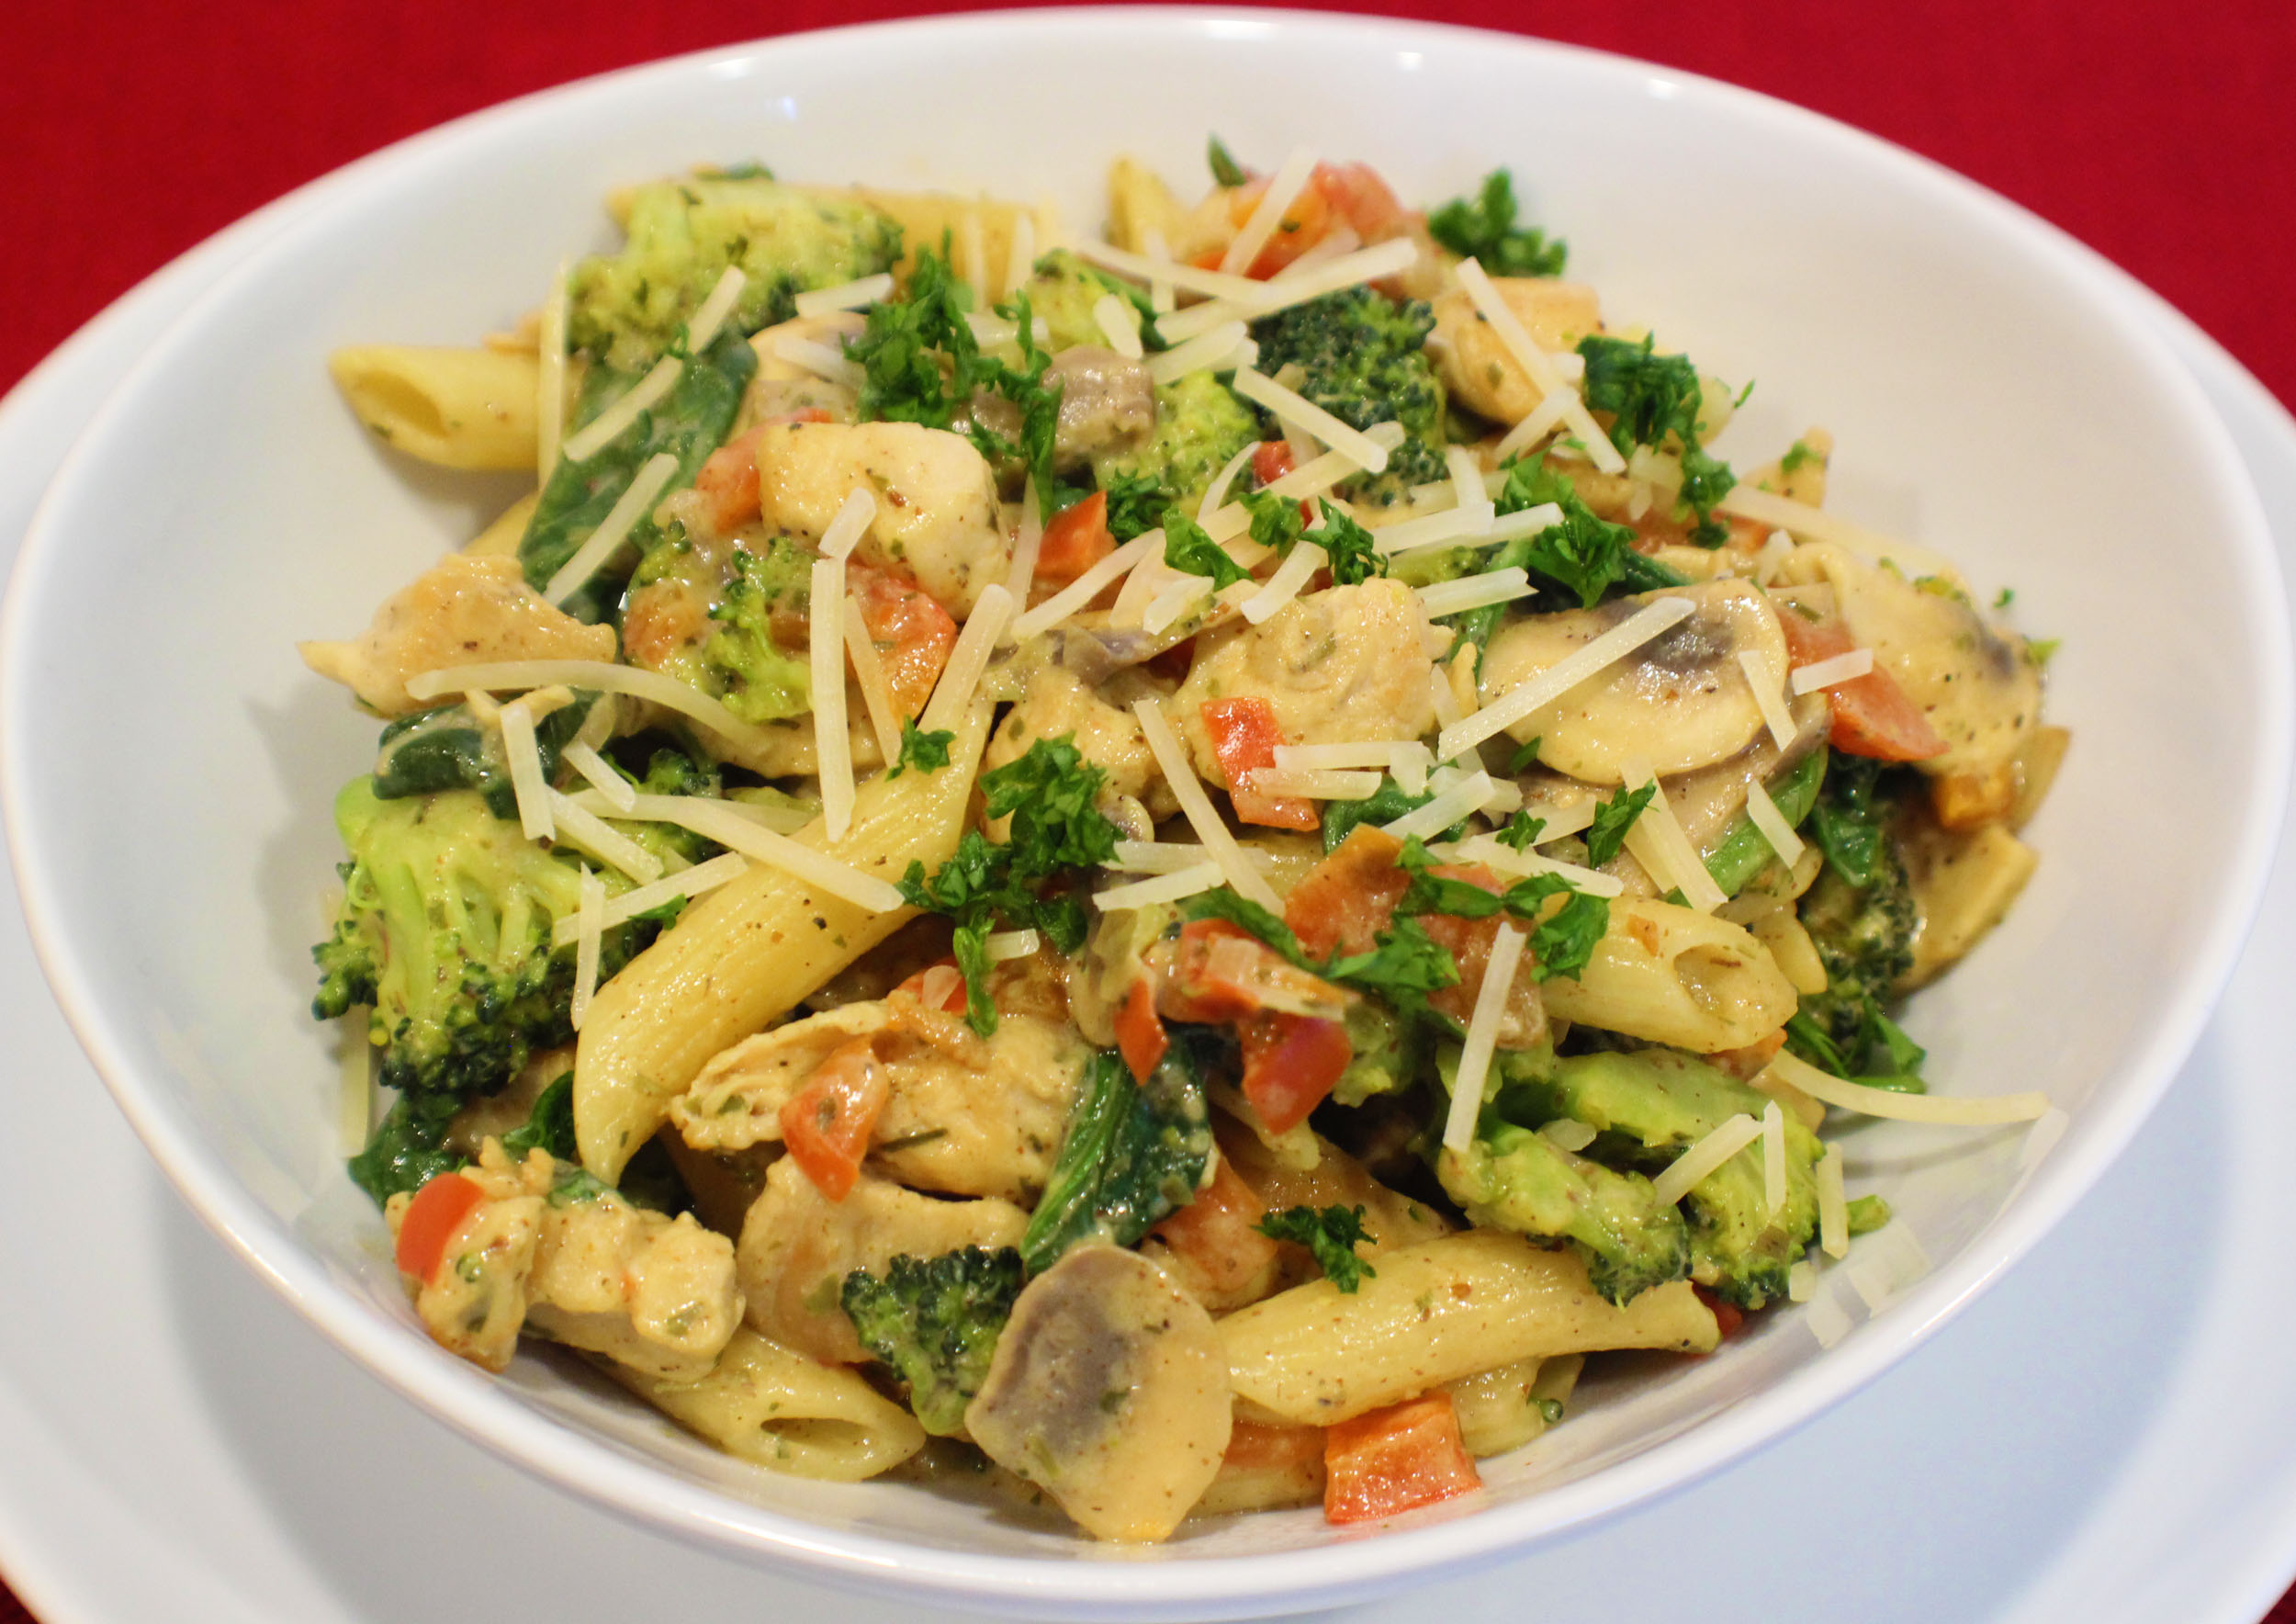
I like to top with with some shredded parmesan cheese.

Enjoy!

Tarragon Dijon Penne (with Chicken and Veggies)

This one bowl dinner is sure to be a hit with your family. You can keep it vegetarian by replacing the chicken with some chopped portabello mushrooms or seitan. Go dairy-free using a milk alternative, or even gluten-free with one of the good gluten-free pastas that are on the market. No need to stick to penne, bowtie pasta works well with this dish too.
Prep Time20 minutes
Cook Time20 minutes
Course: Dinner
Cuisine: American
Keyword: Chicken, Dijon, Pasta
Servings: 8 cups
Calories: 214kcal
Author: Eating With Deb

Equipment

  • Large stainless steel saute pan
  • Large Sauce Pan
  • Cutting board and knife

Ingredients

  • ½ pound penne pasta
  • 2 tbsp olive oil
  • 1/2 pound chicken breast cut into bite-size pieces
  • 1 each red bell pepper diced
  • 2 cups mushrooms sliced
  • 2 cups broccoli florets and stems, chopped
  • 3 handfuls spinach
  • 1 tbsp garlic fresh, minced
  • 2 tbsp shallots minced
  • 1 tbsp tarragon dry
  • ¾ tsp sea salt
  • ½ tsp black pepper
  • ½ cup half and half room temperature
  • 3 tbsp Dijon mustard
  • ½ cup reserved pasta water

Instructions

  • Gather and prep all ingredients. Measure half and half and leave out at room temperature.
  • Bring a large pot of water to a boil, add sea salt and penne. Cook according to package directions until al dente (about 12 to 15 minutes).
  • Once pasta is in the water, heat a large saute pan, add oil and chicken. Cook until the chicken is golden brown.
  • Add veggies (except spinach), shallots, garlic, and dry seasonings. Stir and cook for about 5 minutes. Add dijon and half and half.
  • By now the pasta should be ready. Remove ½ cup of the pasta water, drain and add pasta, spinach, and pasta water to the chicken mixture. Stir until the spinach is melted.
  • Top with some parmesan cheese.
  • Enjoy!

Nutrition

Serving: 1cup | Calories: 214kcal | Carbohydrates: 26g | Protein: 12g | Fat: 7g | Saturated Fat: 2g | Cholesterol: 24mg | Sodium: 341mg | Potassium: 441mg | Fiber: 2g | Sugar: 2g | Vitamin A: 1295IU | Vitamin C: 26mg | Calcium: 60mg | Iron: 1mg

Salisbury Steak

Back in my college days, I could buy 4 frozen Salisbury steaks with gravy for a dollar. I would toast a slice of bread, heat up a steak and gravy, and put it on top of the toast. I remember it being good, but, like most college students, I was also poor. My tastes have changed, however, I now make my own Salisbury steak at least once per year.

I also make larger batches of mashed potatoes and freeze what I don’t need at the time so I can have them almost ready to go when I need them. I know, when thawed they are very runny, just put the mashed potatoes in an ovenproof crock (sprayed with cooking oil), cover and cook at 350 degrees for 45 minutes to an hour. They will be ready by the time your steaks are done.

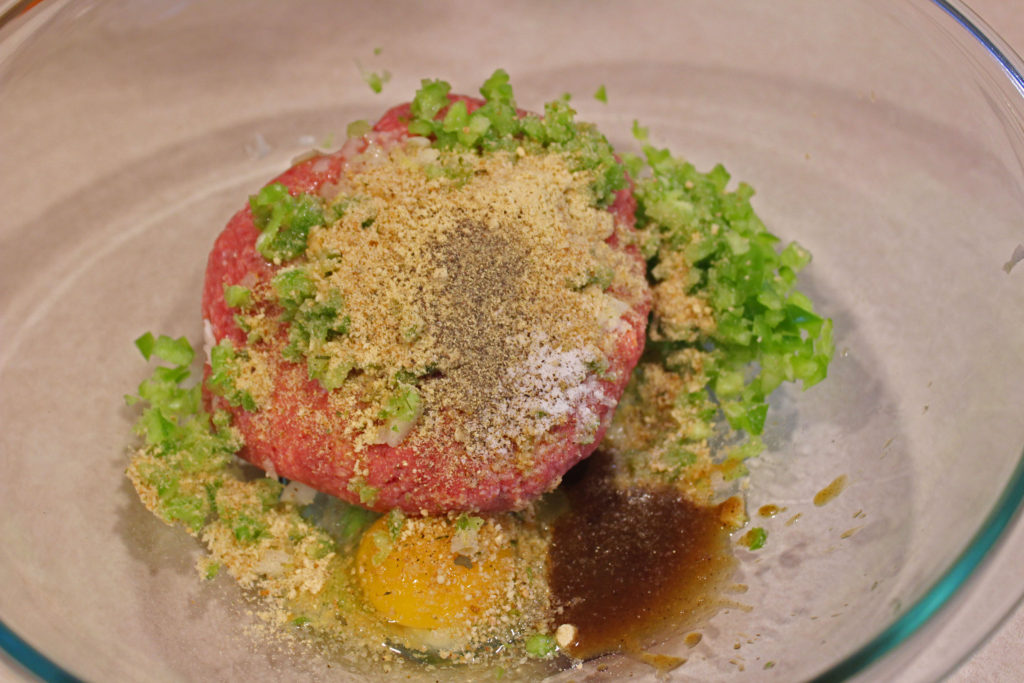
I start by getting my steaks ready to go. Mix the ground beef with the bell pepper, onion, bread crumbs, egg, Worcestershire, dry mustard, salt, and pepper. Be careful to mix only to the point where everything is just blended together. Over mixing results in a tough steak. Make 4 patties and set this aside.
Next slice your mushrooms. If you don’t like mushrooms, no worries, just omit them and go on.

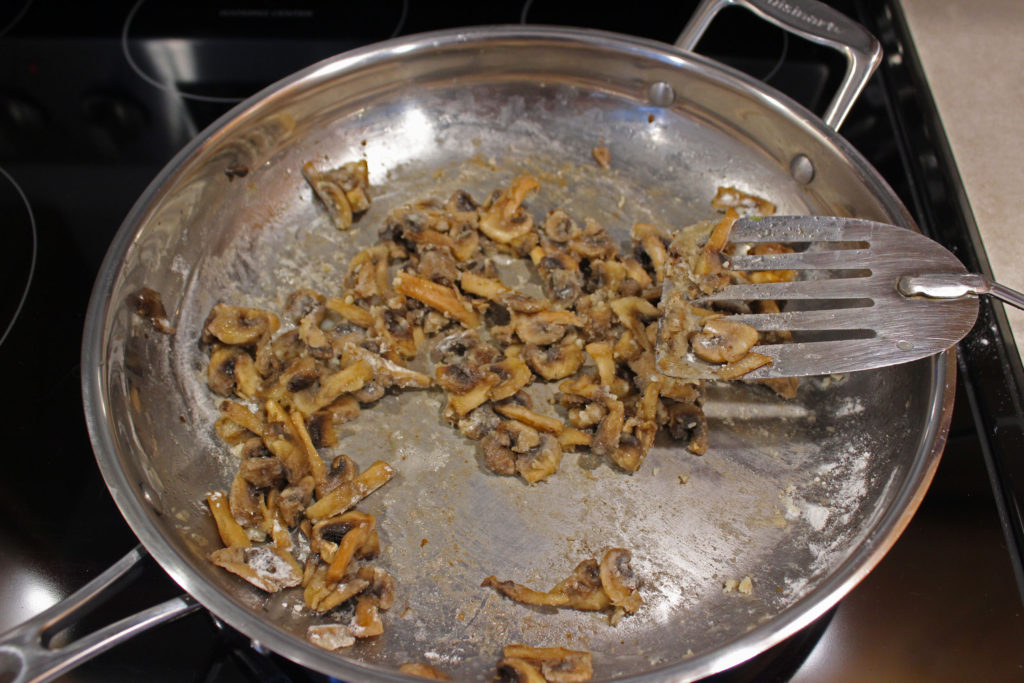
Heat a large saute pan and add 2 tablespoons of butter, then your mushrooms. Saute until they start turning brown. Then add the flour and thoroughly combine and cook for a minute or 2 to brown the flour a little bit.

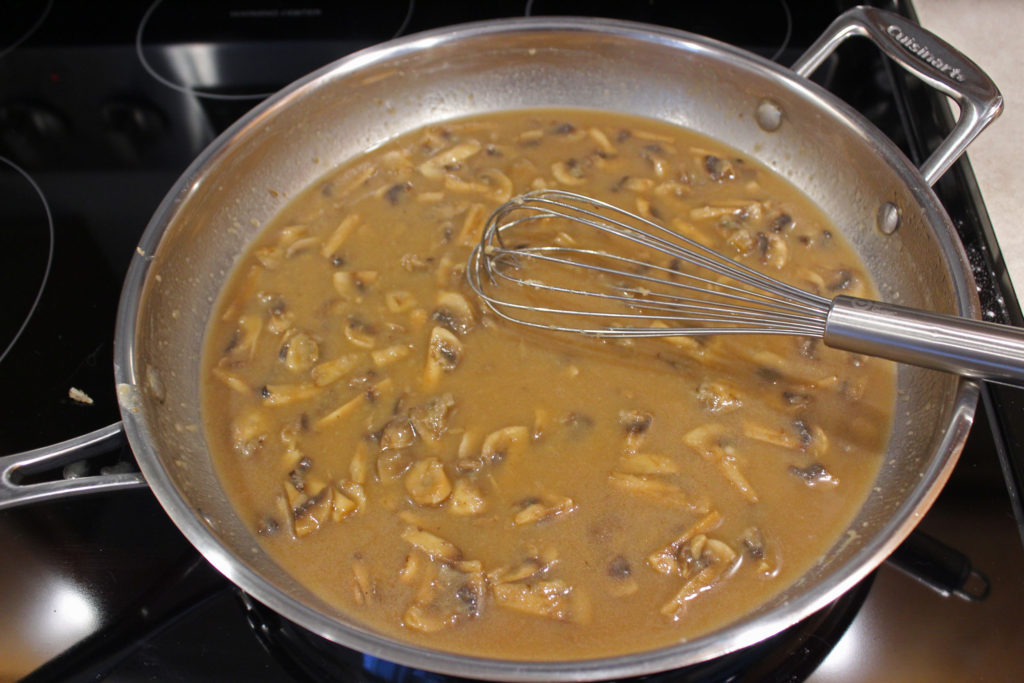
Now you want to slowly whisk in the beef stock. Only add about 1/2 cup at a time and whisk it in so you can get all the lumps out of the gravy. If you pour it in all at once, you run the risk of having a very lumpy gravy.

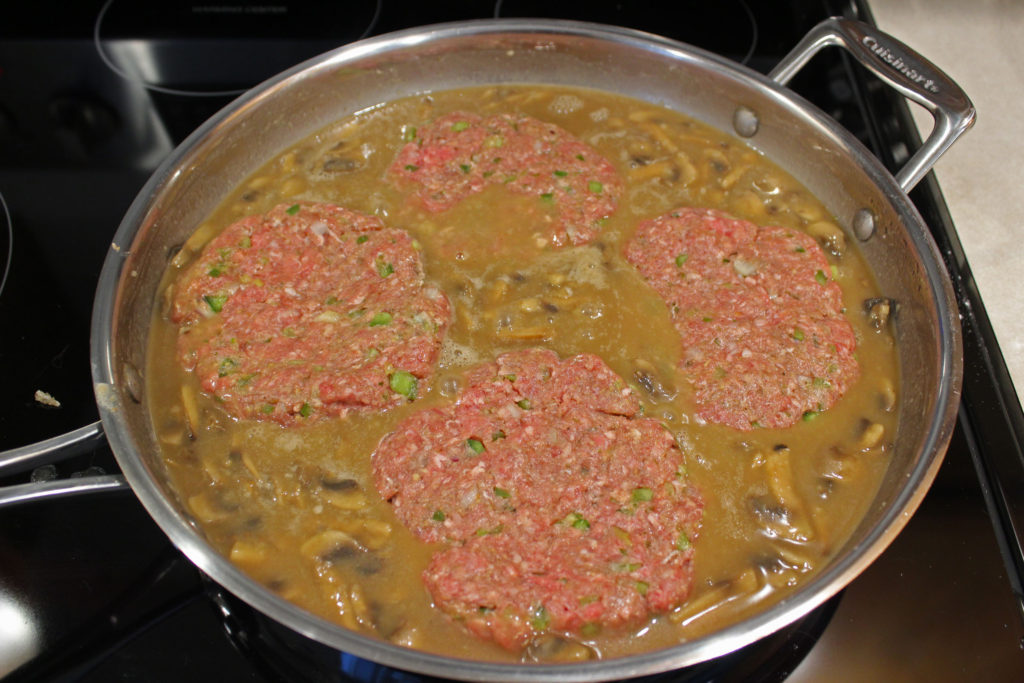
Now it’s as simple as adding your steak patties. Cover the pan and simmer for about 7 minutes. Flip the patties over, cover and simmer for another 7 minutes.

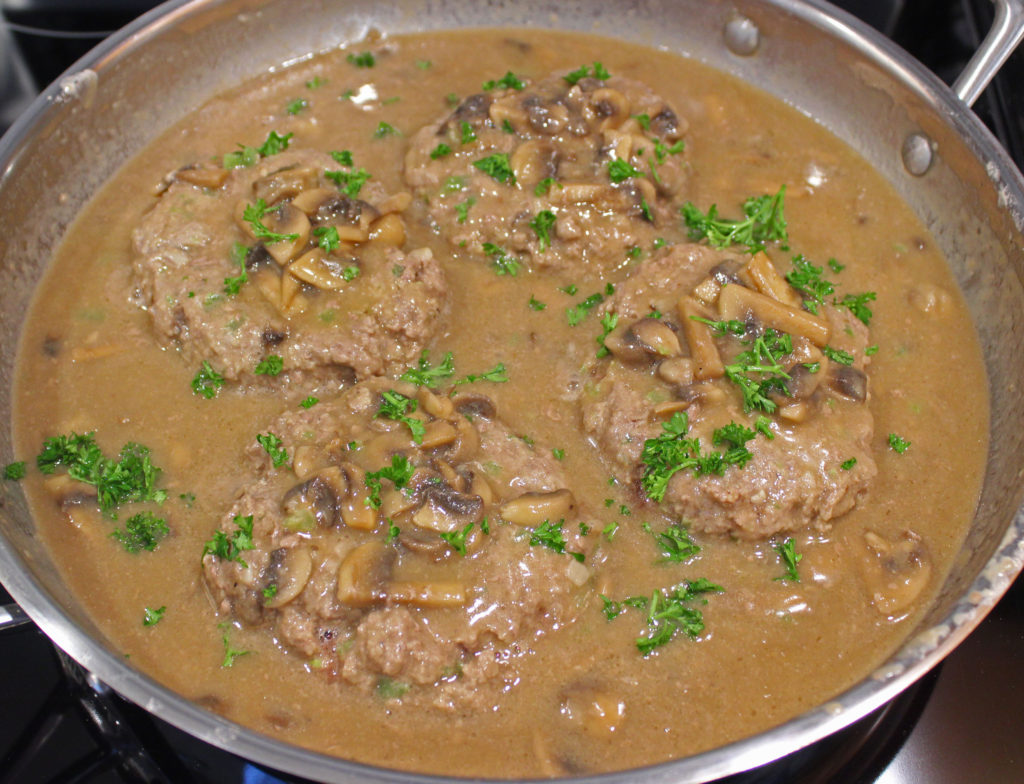
Taste the gravy – careful, it’s hot – and add some sea salt and/or black pepper if you desire.

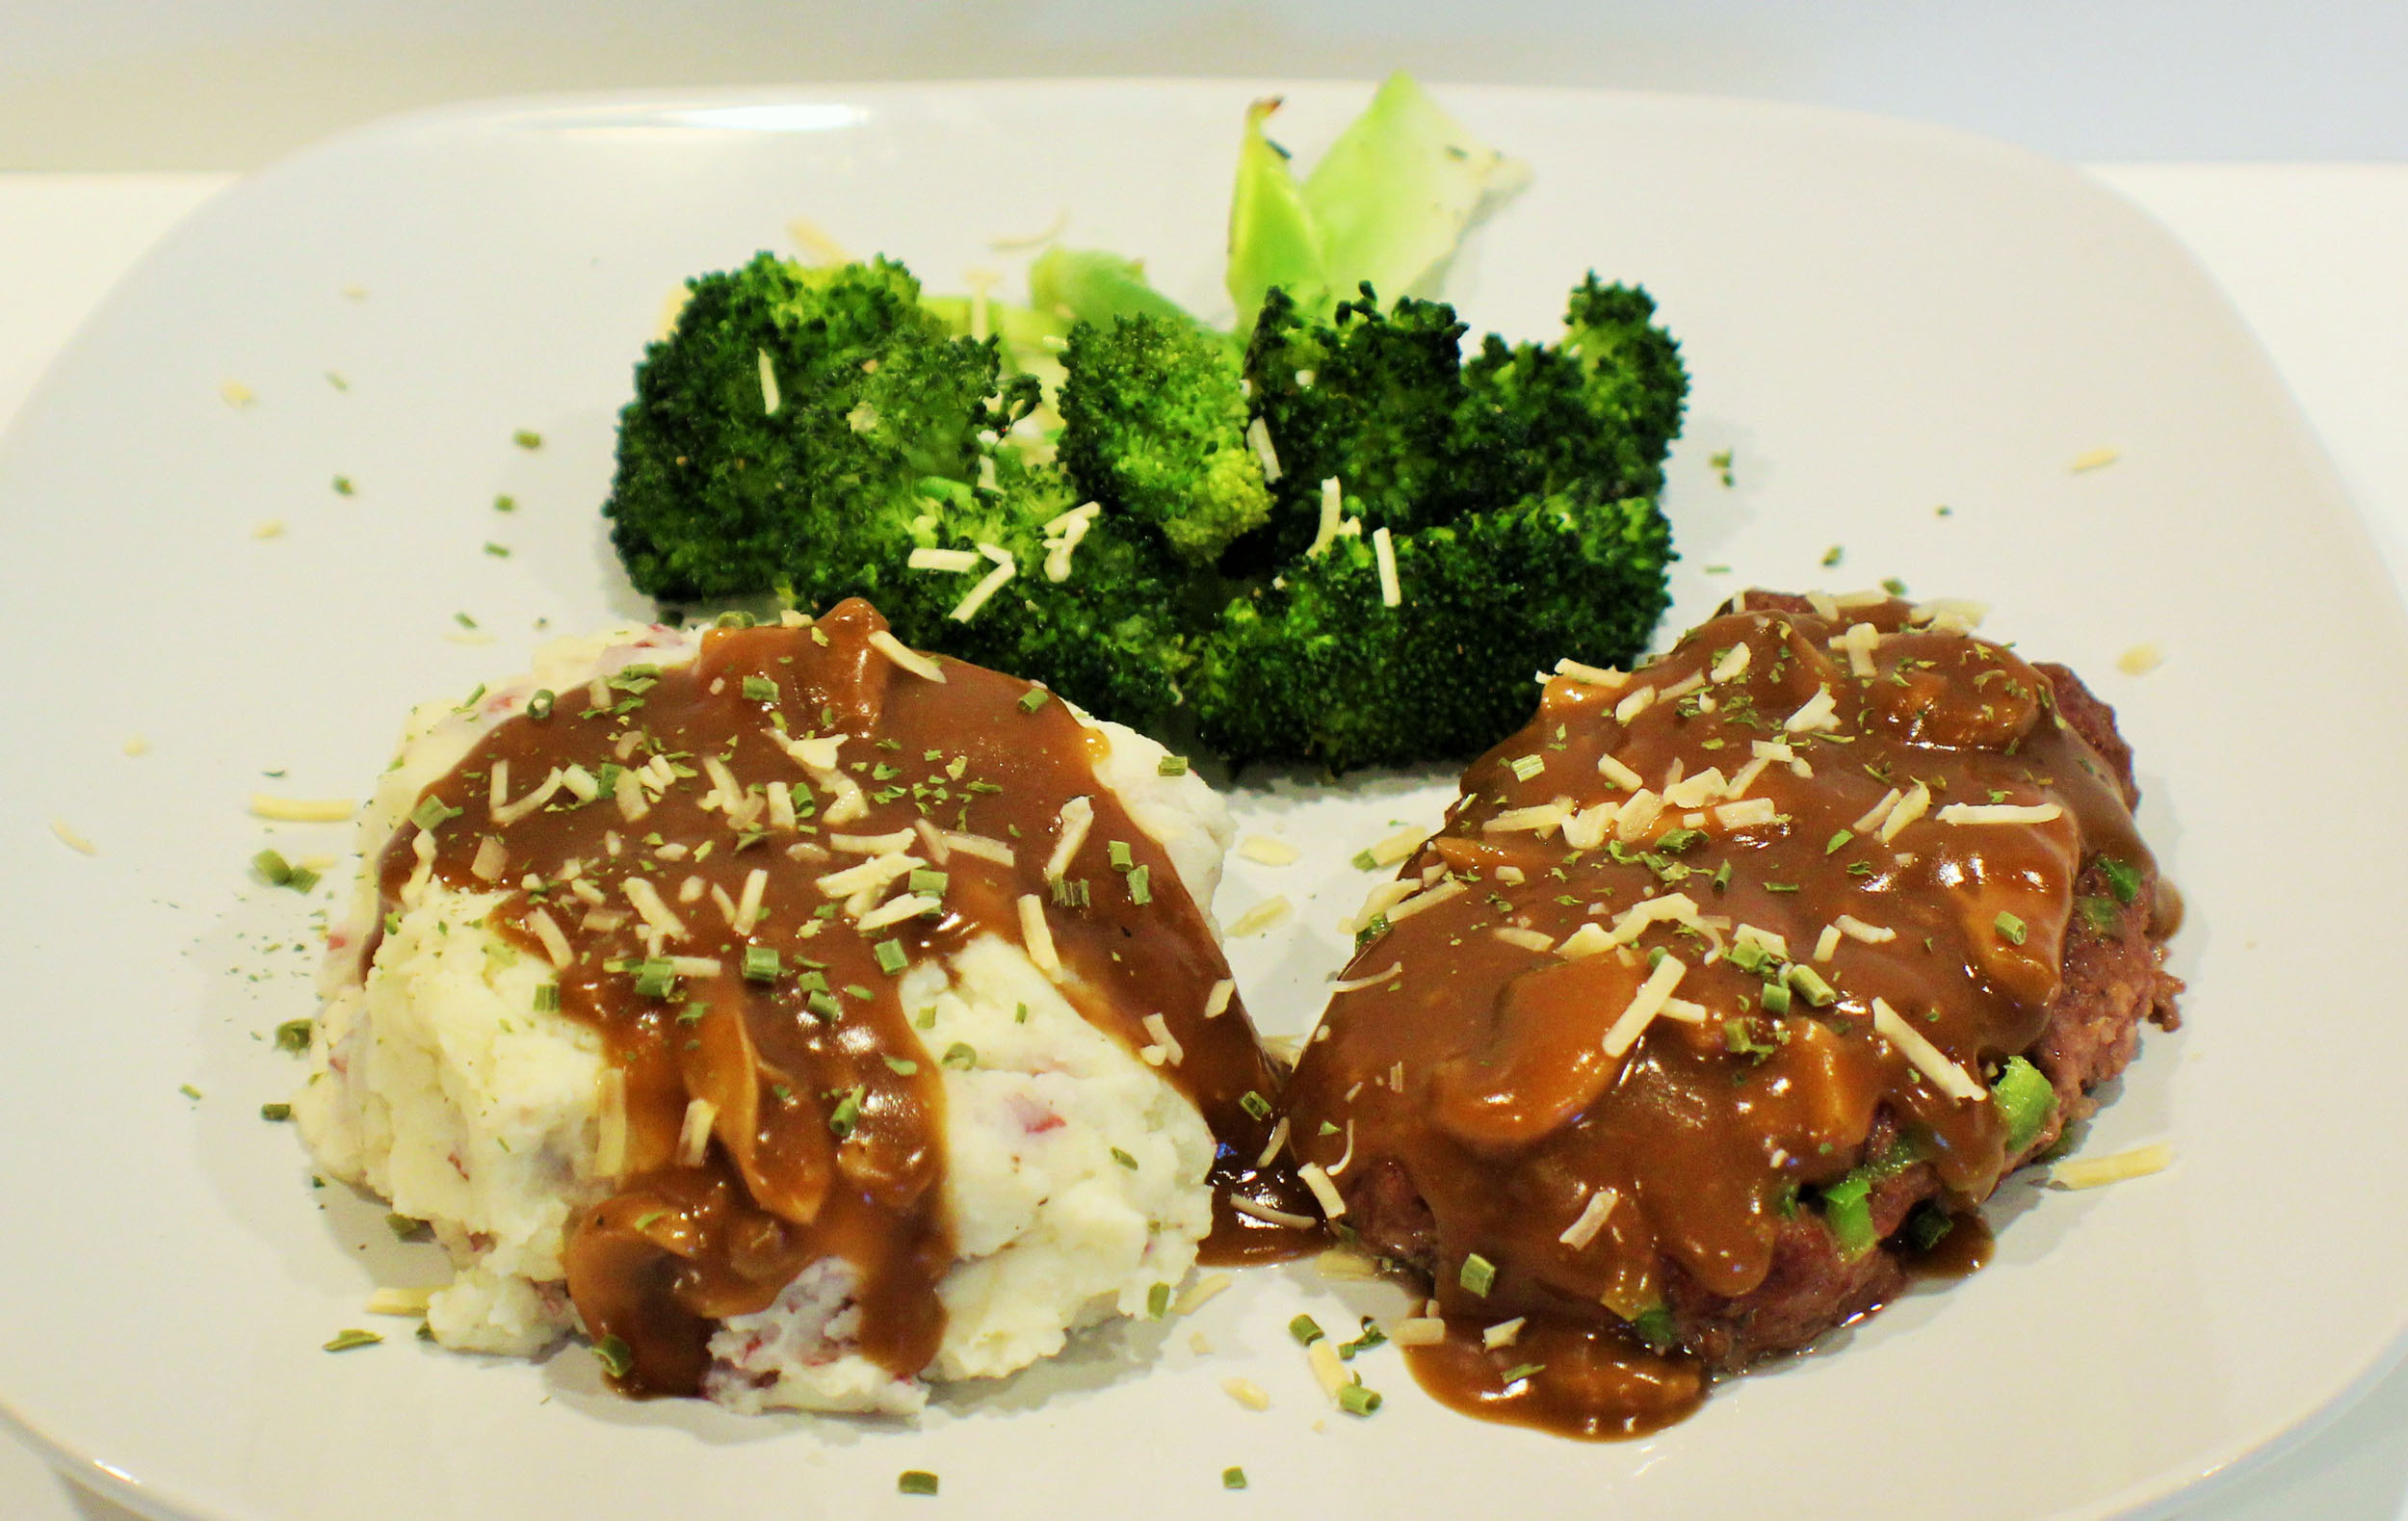
Served with mashed potatoes and a veggie, I’m ready for a cold, winter or fall evening!

Enjoy!

Salisbury Steak

Salisbury Steak with mashed potatoes, gravy, and a vegetable is a delicious comfort meal to warm you on a cold winter night
Prep Time20 minutes
Cook Time25 minutes
Course: Dinner, Main Course
Cuisine: American
Keyword: Hamburger, Salisbury Steak
Servings: 4 people
Calories: 299kcal
Author: Eating With Deb

Equipment

  • Large saute pan

Ingredients

  • 1 pound lean ground beef I like using ground chuck
  • ½ cup bell pepper fine diced (optional but adds a good flavor)
  • ¼ cup minced onion red or yellow
  • 3 tbsp bread crumbs Italian seasoned
  • 1 each egg
  • 1 tbsp Worcestershire
  • 1 tsp dry mustard
  • ½ tsp sea salt
  • ½ tsp black pepper

Gravy

  • 2 tbsp butter
  • 3 tbsp flour
  • 2 cups mushrooms sliced
  • 2 cups beef stock
  • Sea salt and black pepper to taste

Instructions

  • Mix all Salisbury steak ingredients until just combined. Do not over mix or they will be tough. Make 4 patties and set aside.
  • In a large sauté pan, melt butter, add mushrooms and sauté until they turn brown. Stir in flour and cook for a couple minutes to start browning the flour.
  • Slowly whisk in the beef stock, about ½ cup at a time. Make sure to thoroughly whisk in the stock with the mushroom mixture as you pour in to get all the lumps out.
  • Once beef stock is mixed in, add your beef patties, cover and simmer for 7 minutes or so. Flip patties, cover pan and simmer for another 7 minutes or so.
  • Taste gravy, add salt or pepper if needed. There is enough gravy to serve mashed potatoes with the steaks.
  • Enjoy!

Nutrition

Calories: 299kcal | Carbohydrates: 16g | Protein: 30g | Fat: 12g | Saturated Fat: 6g | Cholesterol: 87mg | Sodium: 755mg | Potassium: 870mg | Fiber: 2g | Sugar: 4g | Vitamin A: 761IU | Vitamin C: 26mg | Calcium: 38mg | Iron: 4mg

Chicken Cacciatore

Chicken Cacciatore is full of flavor and very versatile. It can be eaten as is or on rice or noodles. I even chop up some of the leftovers the next day and put it on some greens for a salad at lunchtime.

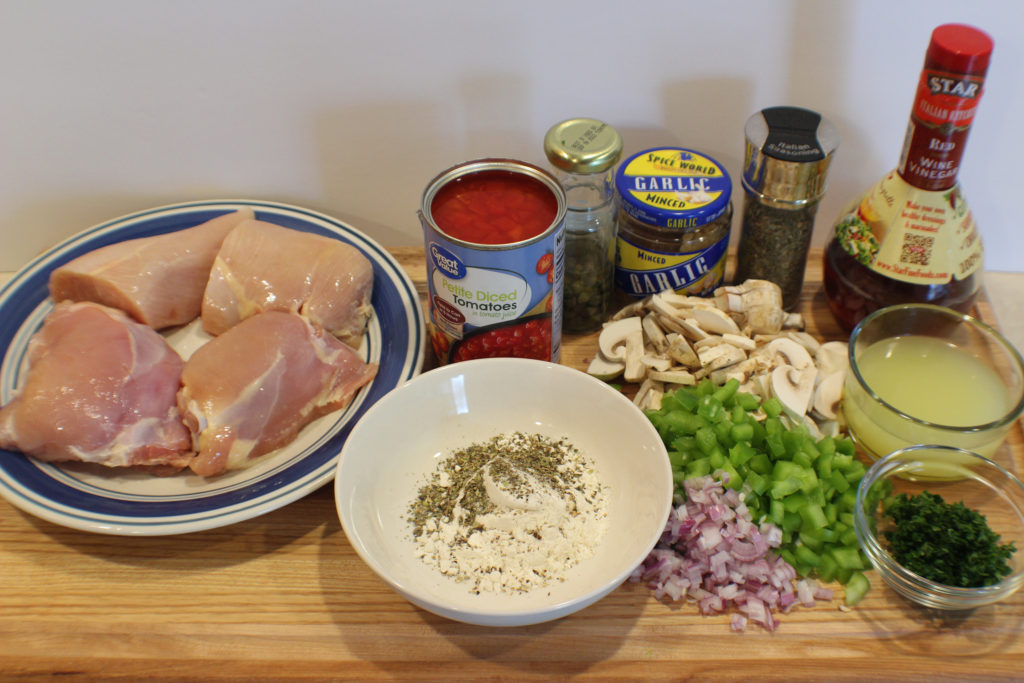
You can use thighs or breasts, bone-in or boneless, whatever you happen to have, just remove the skin if it is still on the chicken. This time around I had 2 bone-in thighs and 1 chicken breast that I cut in half.

First gather and prep all your ingredients. The next steps go fast so you want to have everything ready.

Remove the skin from the chicken, chop the veggies, mix the flour and seasonings and make sure you have chicken stock.

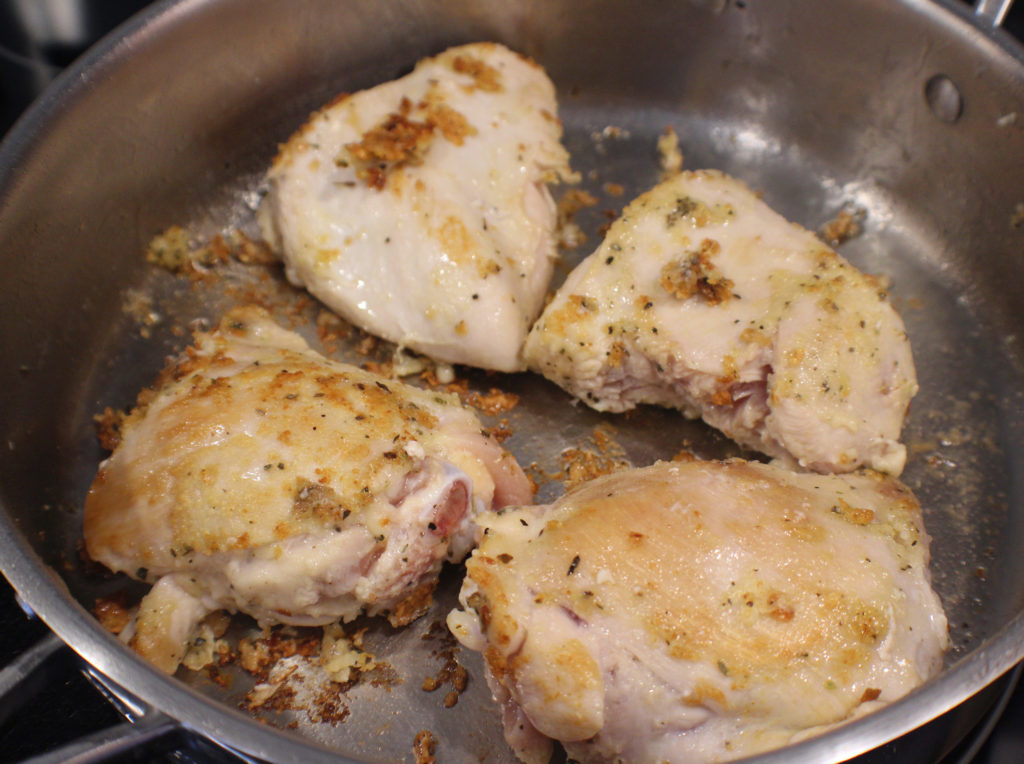
Heat the pan with the oil, dredge your chicken in the flour and seasoning mix and add it to the pan. Brown it on both sides, then remove from the pan. Don’t worry about any flour or chicken bits that may be left in the pan.

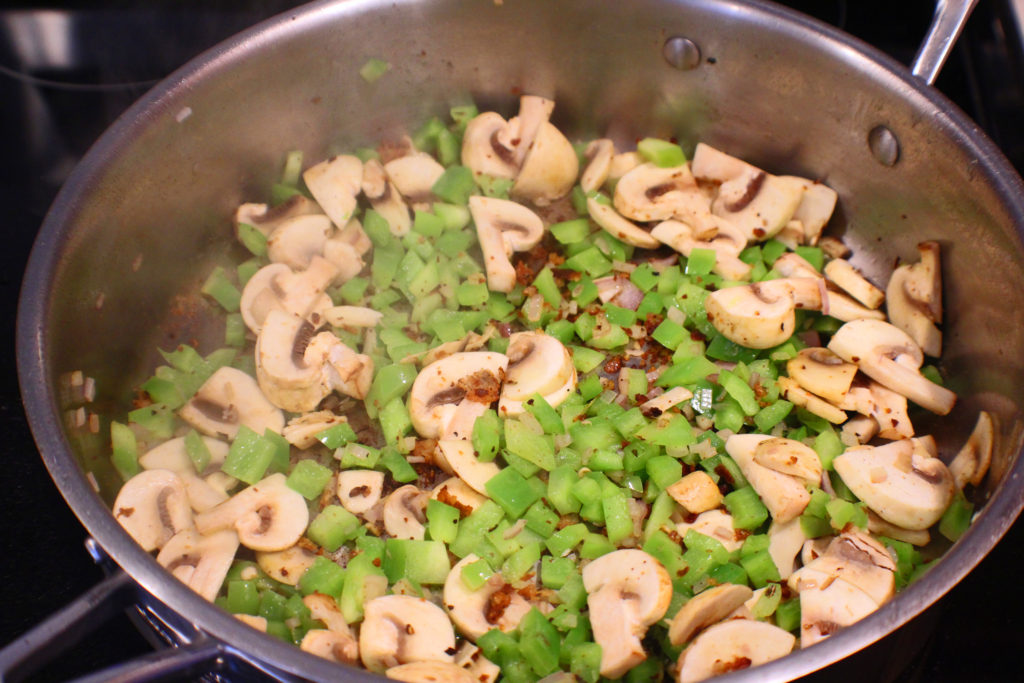
Lower the heat and add a little more oil then the onions, peppers, and mushrooms.Scrape the brown stuff off the bottom of the pan as you are sauteing the veggies for a few minutes. Don’t worry if you don’t get all the brown stuff off the bottom, you’ll get it in the next step.

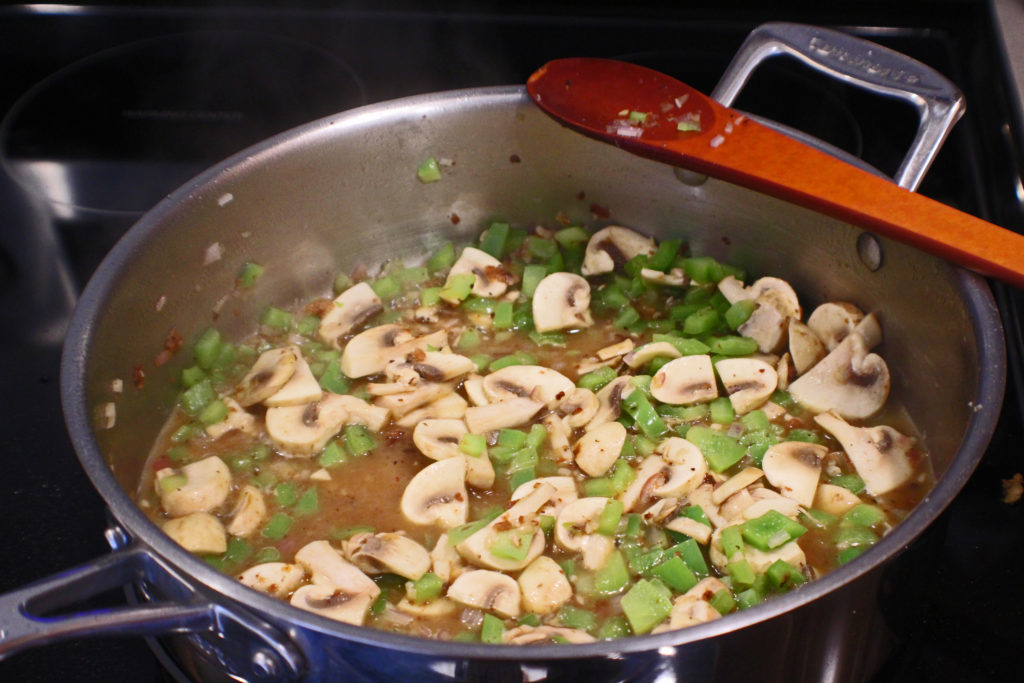
Now add your red wine or vinegar, chicken stock and garlic. This is when you want to make sure you really scrape the bottom of the pan to get anything off.

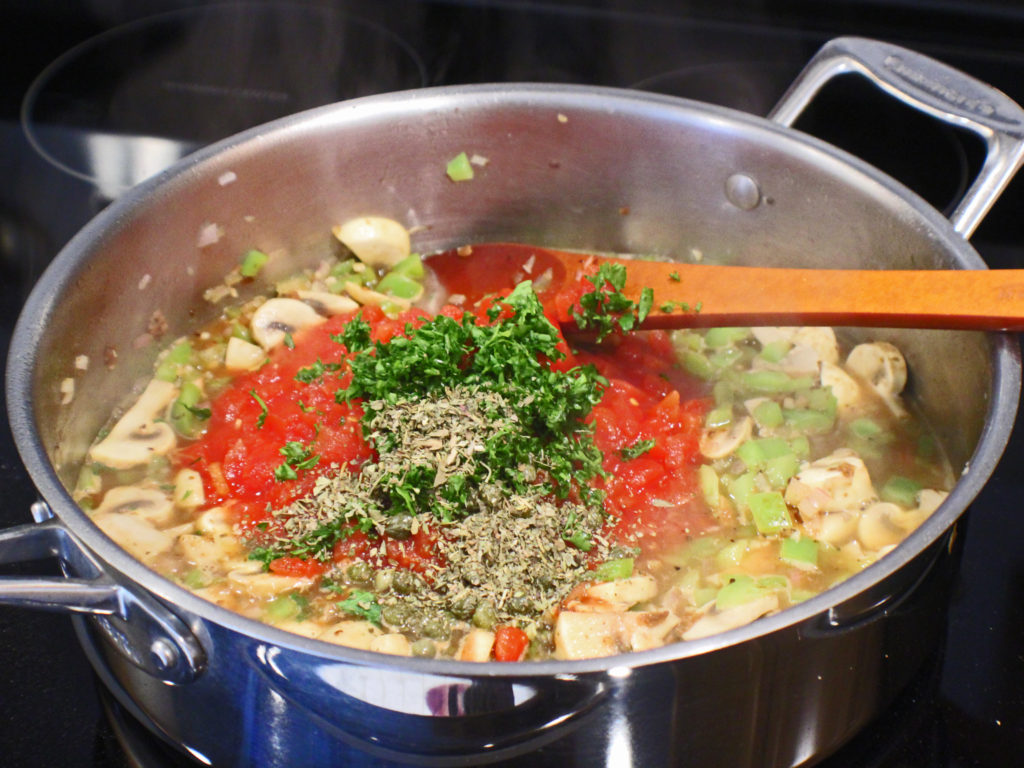
Now add the diced tomatoes, parsley, capers and Italian seasoning. Mix all of this together.

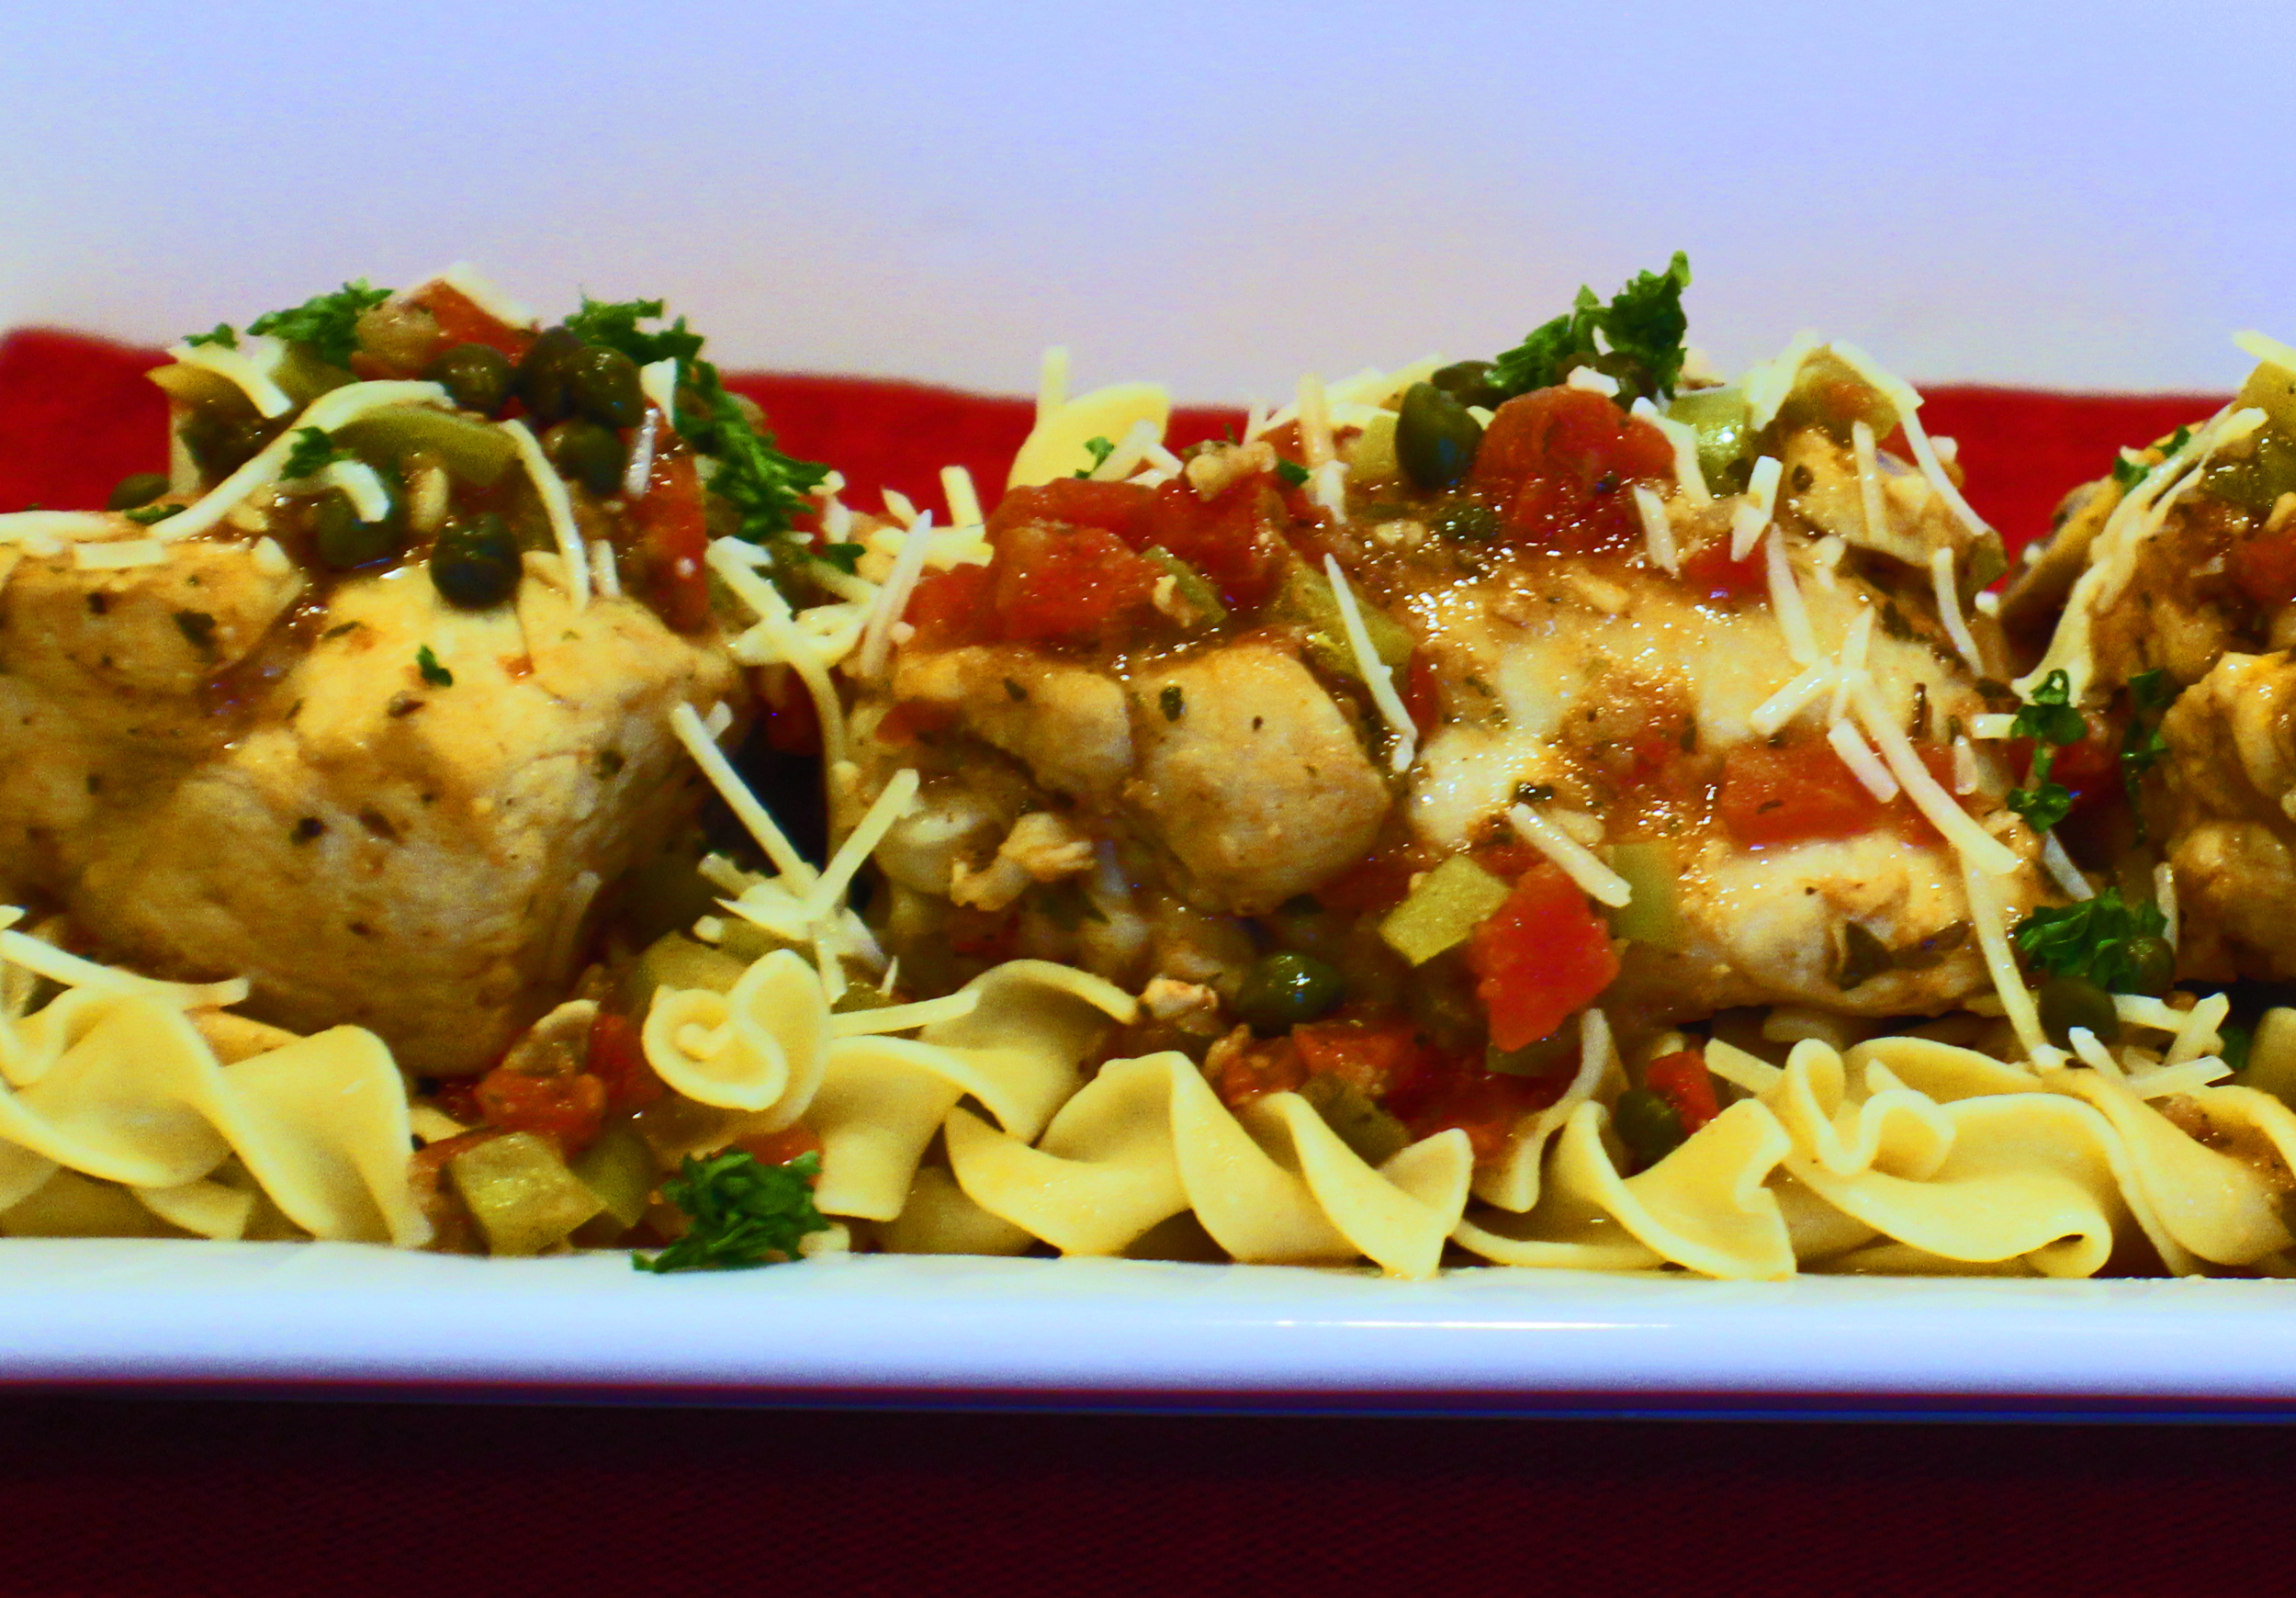
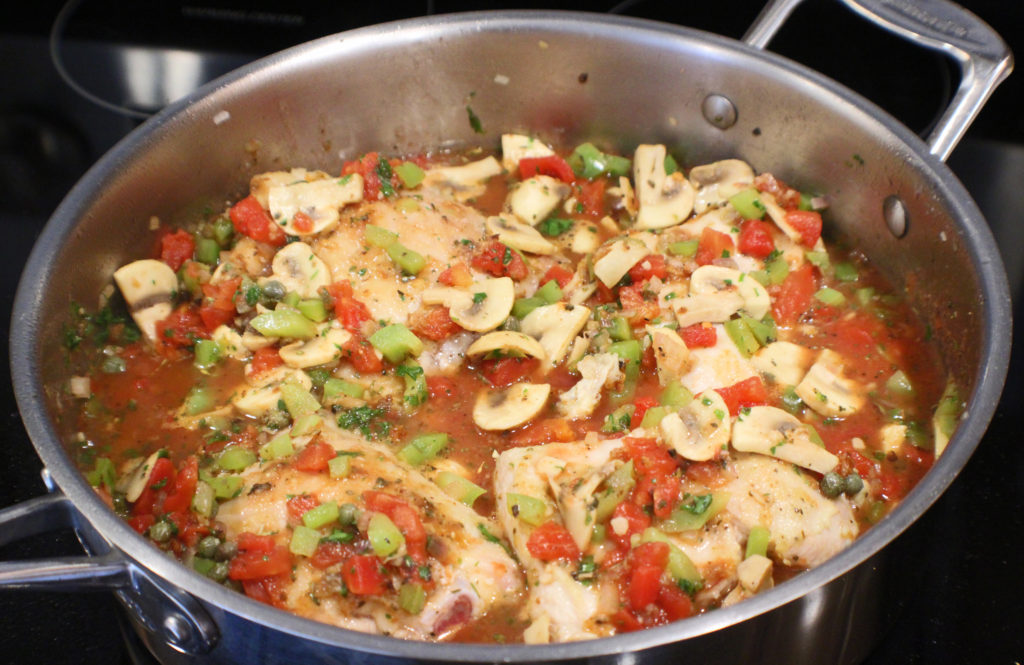
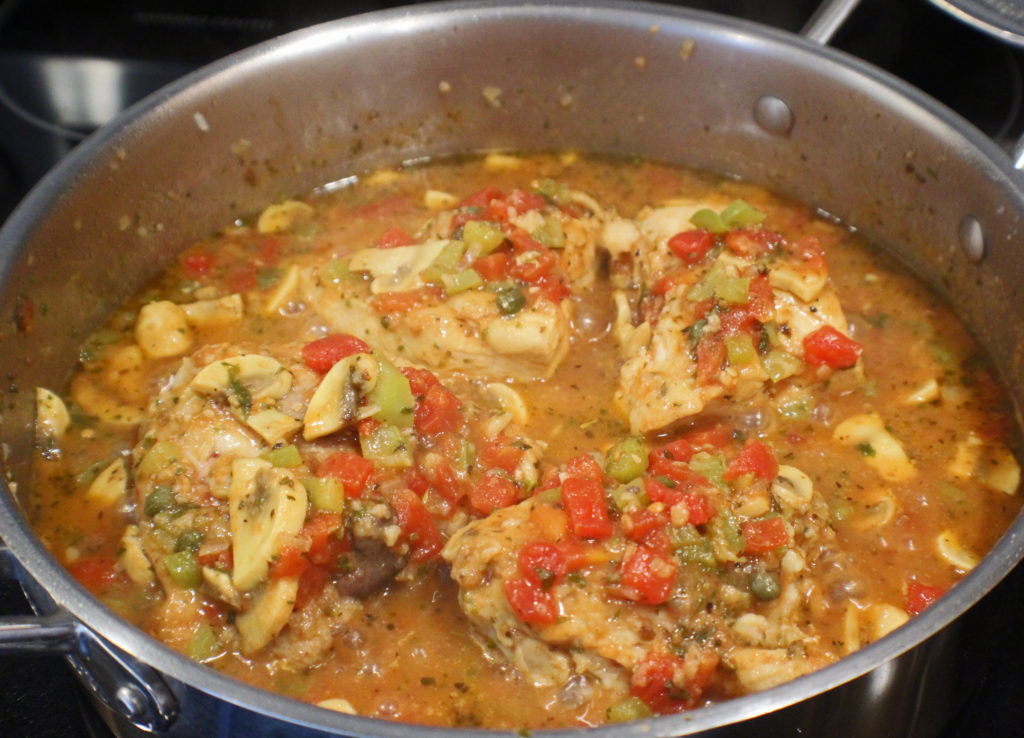
Now add the chicken back to the pan and get it all sunken into the sauce. Cover and simmer for about 10 minutes. Flip the chicken, cover and simmer for another 10 minutes. It should be done about now, but check to ensure the chicken has reached an internal temperature of 165 degrees.

Now it’s time to enjoy! Depending on my mood or how hungry I am I might have this on rice, in which case I’ll start cooking that before I start anything with the Cacciatore recipe. Or if I want it on noodles, I’ll cook those while my chicken is simmering. Sometimes I’ll just make some garlic toast to go with it.

Chicken Cacciatore means Hunter’s Chicken. In which case I think you could really add any vegetable you want to this and turn it more into a stew. Any way you make it and serve it, Chicken Cacciatore is very delicious!

Chicken Cacciatore

Chicken Cacciatore is an easy, yet delicious meal to make. You can serve it with just some garlic toast or put it on a bed of rice or egg noodles, topped with some Parmesan cheese.
Prep Time10 minutes
Cook Time40 minutes
Course: Dinner, Main Course
Cuisine: Italian
Keyword: Cacciatore, Chicken
Servings: 4 people
Calories: 200kcal
Author: Eating With Deb

Equipment

  • 4 to 6 quart stainless steel deep pan
  • Cutting board and knife

Ingredients

Chicken

  • 4 pieces chicken thighs bone-in, skinless or 2 chicken breasts cut in half
  • ¼ cup flour
  • 1 tsp Italian seasoning
  • ½ tsp sea salt
  • ½ tsp black pepper
  • 3 tbsp olive oil

Veggies and Sauce

  • 1 tbsp olive oil
  • ¼ cup red onion or shallot, diced
  • 1 each bell pepper chopped
  • 2 cups mushrooms sliced
  • 1 tbsp garlic fresh, minced
  • 2 tbsp red wine vinegar or red wine
  • 15 ounce can diced tomatoes in sauce
  • ½ cup chicken broth
  • 2 tbsp Italian parsley chopped
  • 3 tbsp capers
  • 2 tsp Italian seasoning

Instructions

  • Combine the flour and seasonings and dredge the chicken in the flour mixture. On medium high heat, heat a deep, wide bottom pan (a 4 quart pan will do) and add the olive oil. Add the chicken to the pan and brown on all sides, about 5 minutes – add more oil if you need to.
  • When the chicken is brown, lower heat to medium and remove chicken from the pan. Add 1 tbsp olive oil and the onions, peppers, and mushrooms. Sauté for a couple minutes then add the red wine vinegar, chicken broth, and garlic. Scrape all the brown stuff off the bottom of the pan (this is flavor and thickener for the sauce).
  • Reduce heat to medium low and add the diced tomatoes, parsley, capers, and Italian seasoning to the pan and combine. Return the chicken back to the pan, cover and simmer for 10 minutes.
  • Flip chicken over, cover and simmer another 10 minutes. Remove the lid, flip the chicken one more time, leave the lid off and simmer another 10 minutes to reduce sauce and finish cooking the chicken. Check the internal temperature of the chicken to ensure it reached 165 degrees.
  • Serve with a side of pasta in marinara sauce or on top of some cooked rice or egg noodles, and some garlic toast.
  • Enjoy!

Nutrition

Calories: 200kcal | Carbohydrates: 15g | Protein: 4g | Fat: 15g | Saturated Fat: 2g | Cholesterol: 1mg | Sodium: 723mg | Potassium: 448mg | Fiber: 3g | Sugar: 4g | Vitamin A: 338IU | Vitamin C: 18mg | Calcium: 74mg | Iron: 3mg

Hazelnut Crusted Pork Medallions

This past year has been a challenge, everything from how we work or learn to going out and special occasion dinners. Valentine’s Day is approaching and if you are unable to order a to-go meal from a local restaurant or have kids at home but you still want a nice meal, Hazelnut Crusted Pork Medallions happen to be quick to prepare and easy to make.

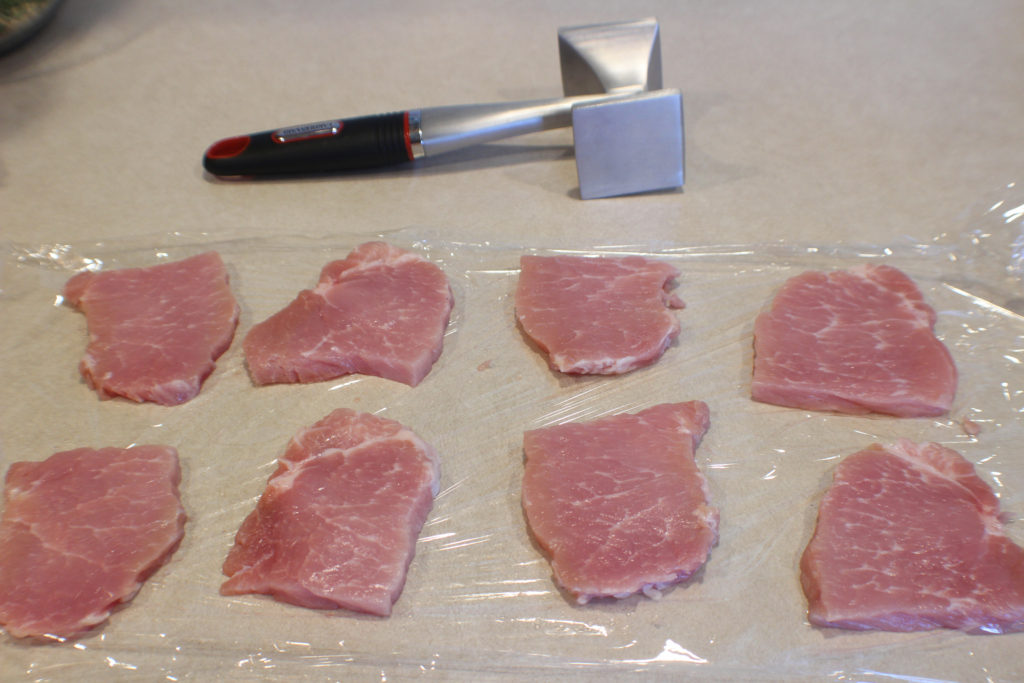
You are going to want about 1 pound of pork trimmed of fat. It can be boneless chops, loin, or tenderloin. I happened to have a pork loin this time so I cut it into 4 slices, then cut each slice in half.

I put the pork slices between 2 sheets of plastic wrap in order to prevent any kind of contamination of my counter or anything surrounding it while I flatten the medallions a little bit.

Use the flat side of your meat mallet and pound the medallions down to about 1/4 inch thick.

Remove the top layer of plastic wrap and sprinkle both sides of the pork with sea salt, black pepper, and granulated garlic.

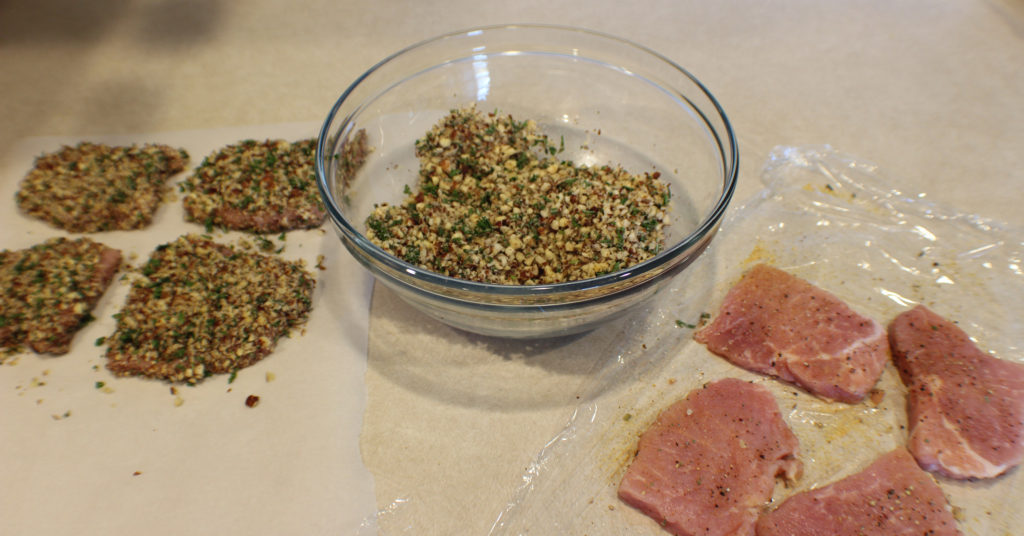
In a small food processor, chop the hazelnuts until fine. You don’t want to turn it into powder. Put them in a bowl and chop your rosemary and parsley. You could certainly hand chop everything. Then combine with the hazelnuts.

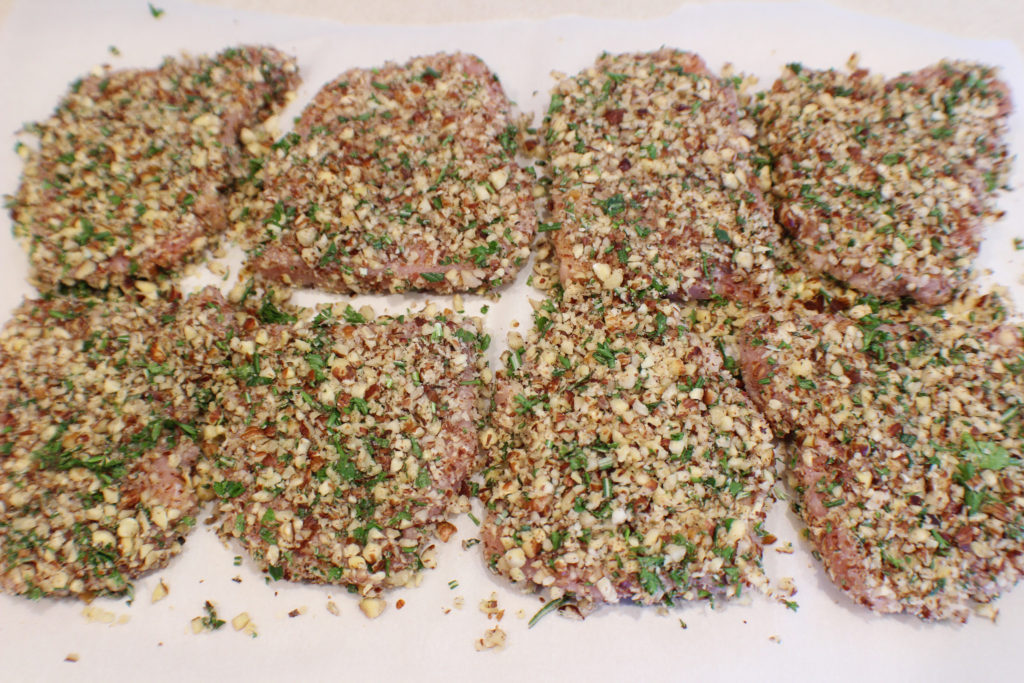
Take each medallion and press it into the hazelnut mixture. Make sure they are well coated. As I coat them, I set them aside on a piece of parchment paper.


After they are all coated, press each one with the palm of your hand, ensuring the hazelnut coating is well pressed into the pork. If you have any leftover coating in your bowl. sprinkle it on the medallions and press in.

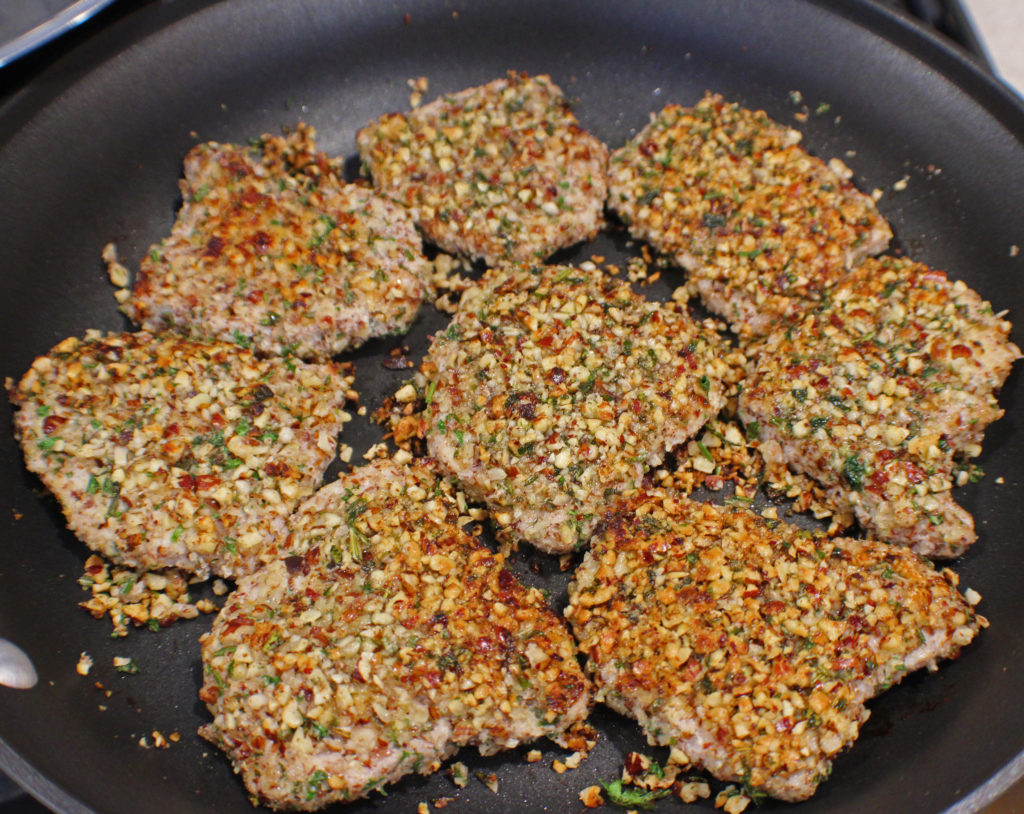
On medium to medium low heat, heat a large skillet and add the olive oil. I like to use a non-stick skillet for this. Add your pork medallions and cook, about 4 minutes per side, checking from time to time to ensure it isn’t burning. The pork should be at 145 degrees.

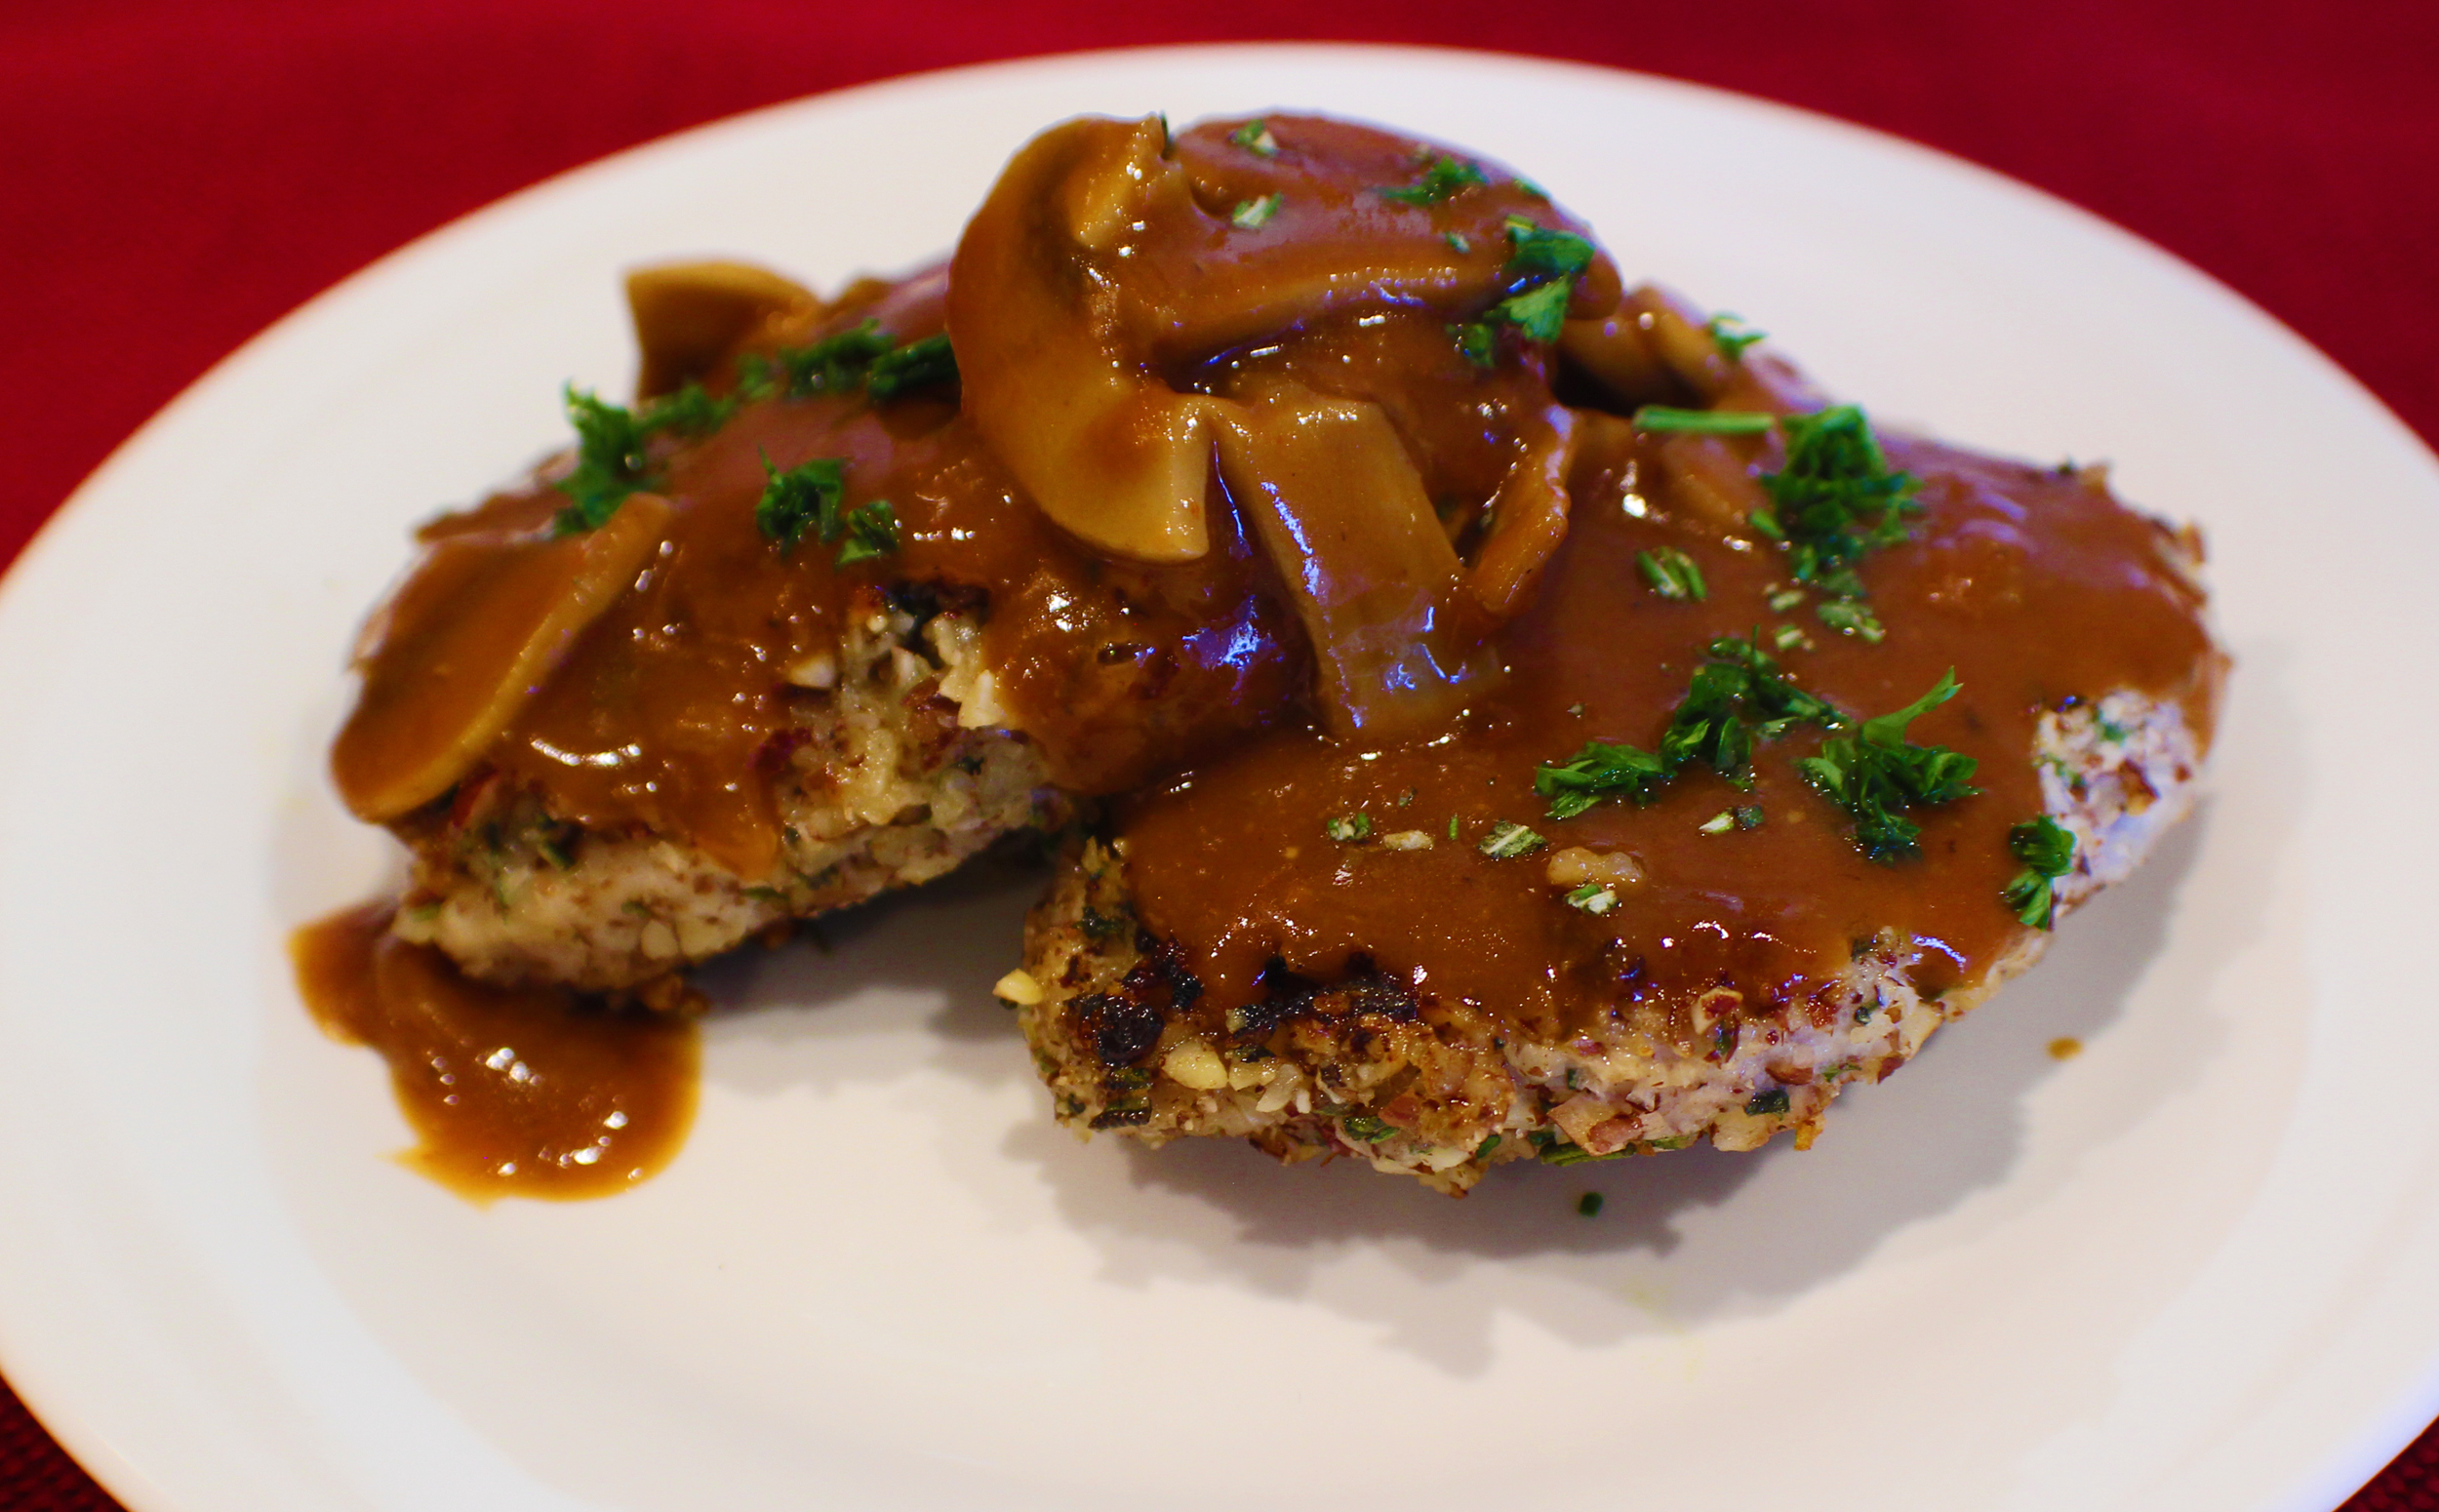
These are tasty as is, make a quick brown gravy to top them off, or turn your Hazelnut Crusted Pork Medallions into a fancy meal by making Mushroom Demi Glace and serve them with Rosemary Roasted Potatoes and Asparagus and Mushrooms in a Garlic Balsamic Reduction.

Hazelnut Crusted Pork Medallions

These restaurant quality pork medallions can be easily and quickly made at home to enjoy a nice meal with your loved ones.
Prep Time15 minutes
Cook Time8 minutes
Course: Dinner, Main Course
Cuisine: American
Keyword: Hazelnut Pork, Hazelnuts, Pork Medallions
Servings: 4 people
Calories: 405kcal
Author: Eating With Deb

Equipment

  • Cutting board and knife
  • Meat Mallet
  • Large saute pan
  • Small Food Proccessor - Optional

Ingredients

  • 1 pound pork loin or pork chops or tenderloin
  • 1 cup hazelnuts raw
  • 1 1/2 tbsp rosemary fresh
  • 2 tbsp parsley fresh
  • 2 tbsp olive oil
  • 1/2 tsp sea salt
  • 1/2 tsp black pepper
  • 1/2 tsp granulated garlic

Instructions

  • Trim fat off pork and cut into 4 even slices. Cut each slice in ½. If using a pork tenderloin, cut into 8 even slices.
  • Place pork in between 2 sheets of plastic wrap. Using the flat side of a meat mallet, lightly pound pork down to about ¼ inch thick.
  • Pull top sheet of plastic wrap off and sprinkle both sides with a little salt, pepper, and granulated garlic. Set aside.
  • In a food processor (or with a knife) fine chop the hazelnuts, and put in a bowl. Chop the rosemary and parsley and add to the hazelnuts.
  • Press hazelnut mixture into both sides of the pork medallions.
  • On medium to medium low heat, heat the olive oil in a skillet and add the medallions to the skillet and cook for about 4 minutes, turn and cook another 4 minutes. The pork will be done when it reaches and internal temperature of 145ºF.
  • Eat as is or top with a quick gravy or Mushroom Demi Glace.
  • Pairs well with Rosemary Roasted Potatoes , Asparagus and Mushrooms in a Garlic Balsamic Reduction, a steamed vegetable, or green salad.
  • Enjoy!

Nutrition

Calories: 405kcal | Carbohydrates: 6g | Protein: 30g | Fat: 30g | Saturated Fat: 4g | Cholesterol: 71mg | Sodium: 348mg | Potassium: 654mg | Fiber: 3g | Sugar: 1g | Vitamin A: 199IU | Vitamin C: 5mg | Calcium: 54mg | Iron: 2mg