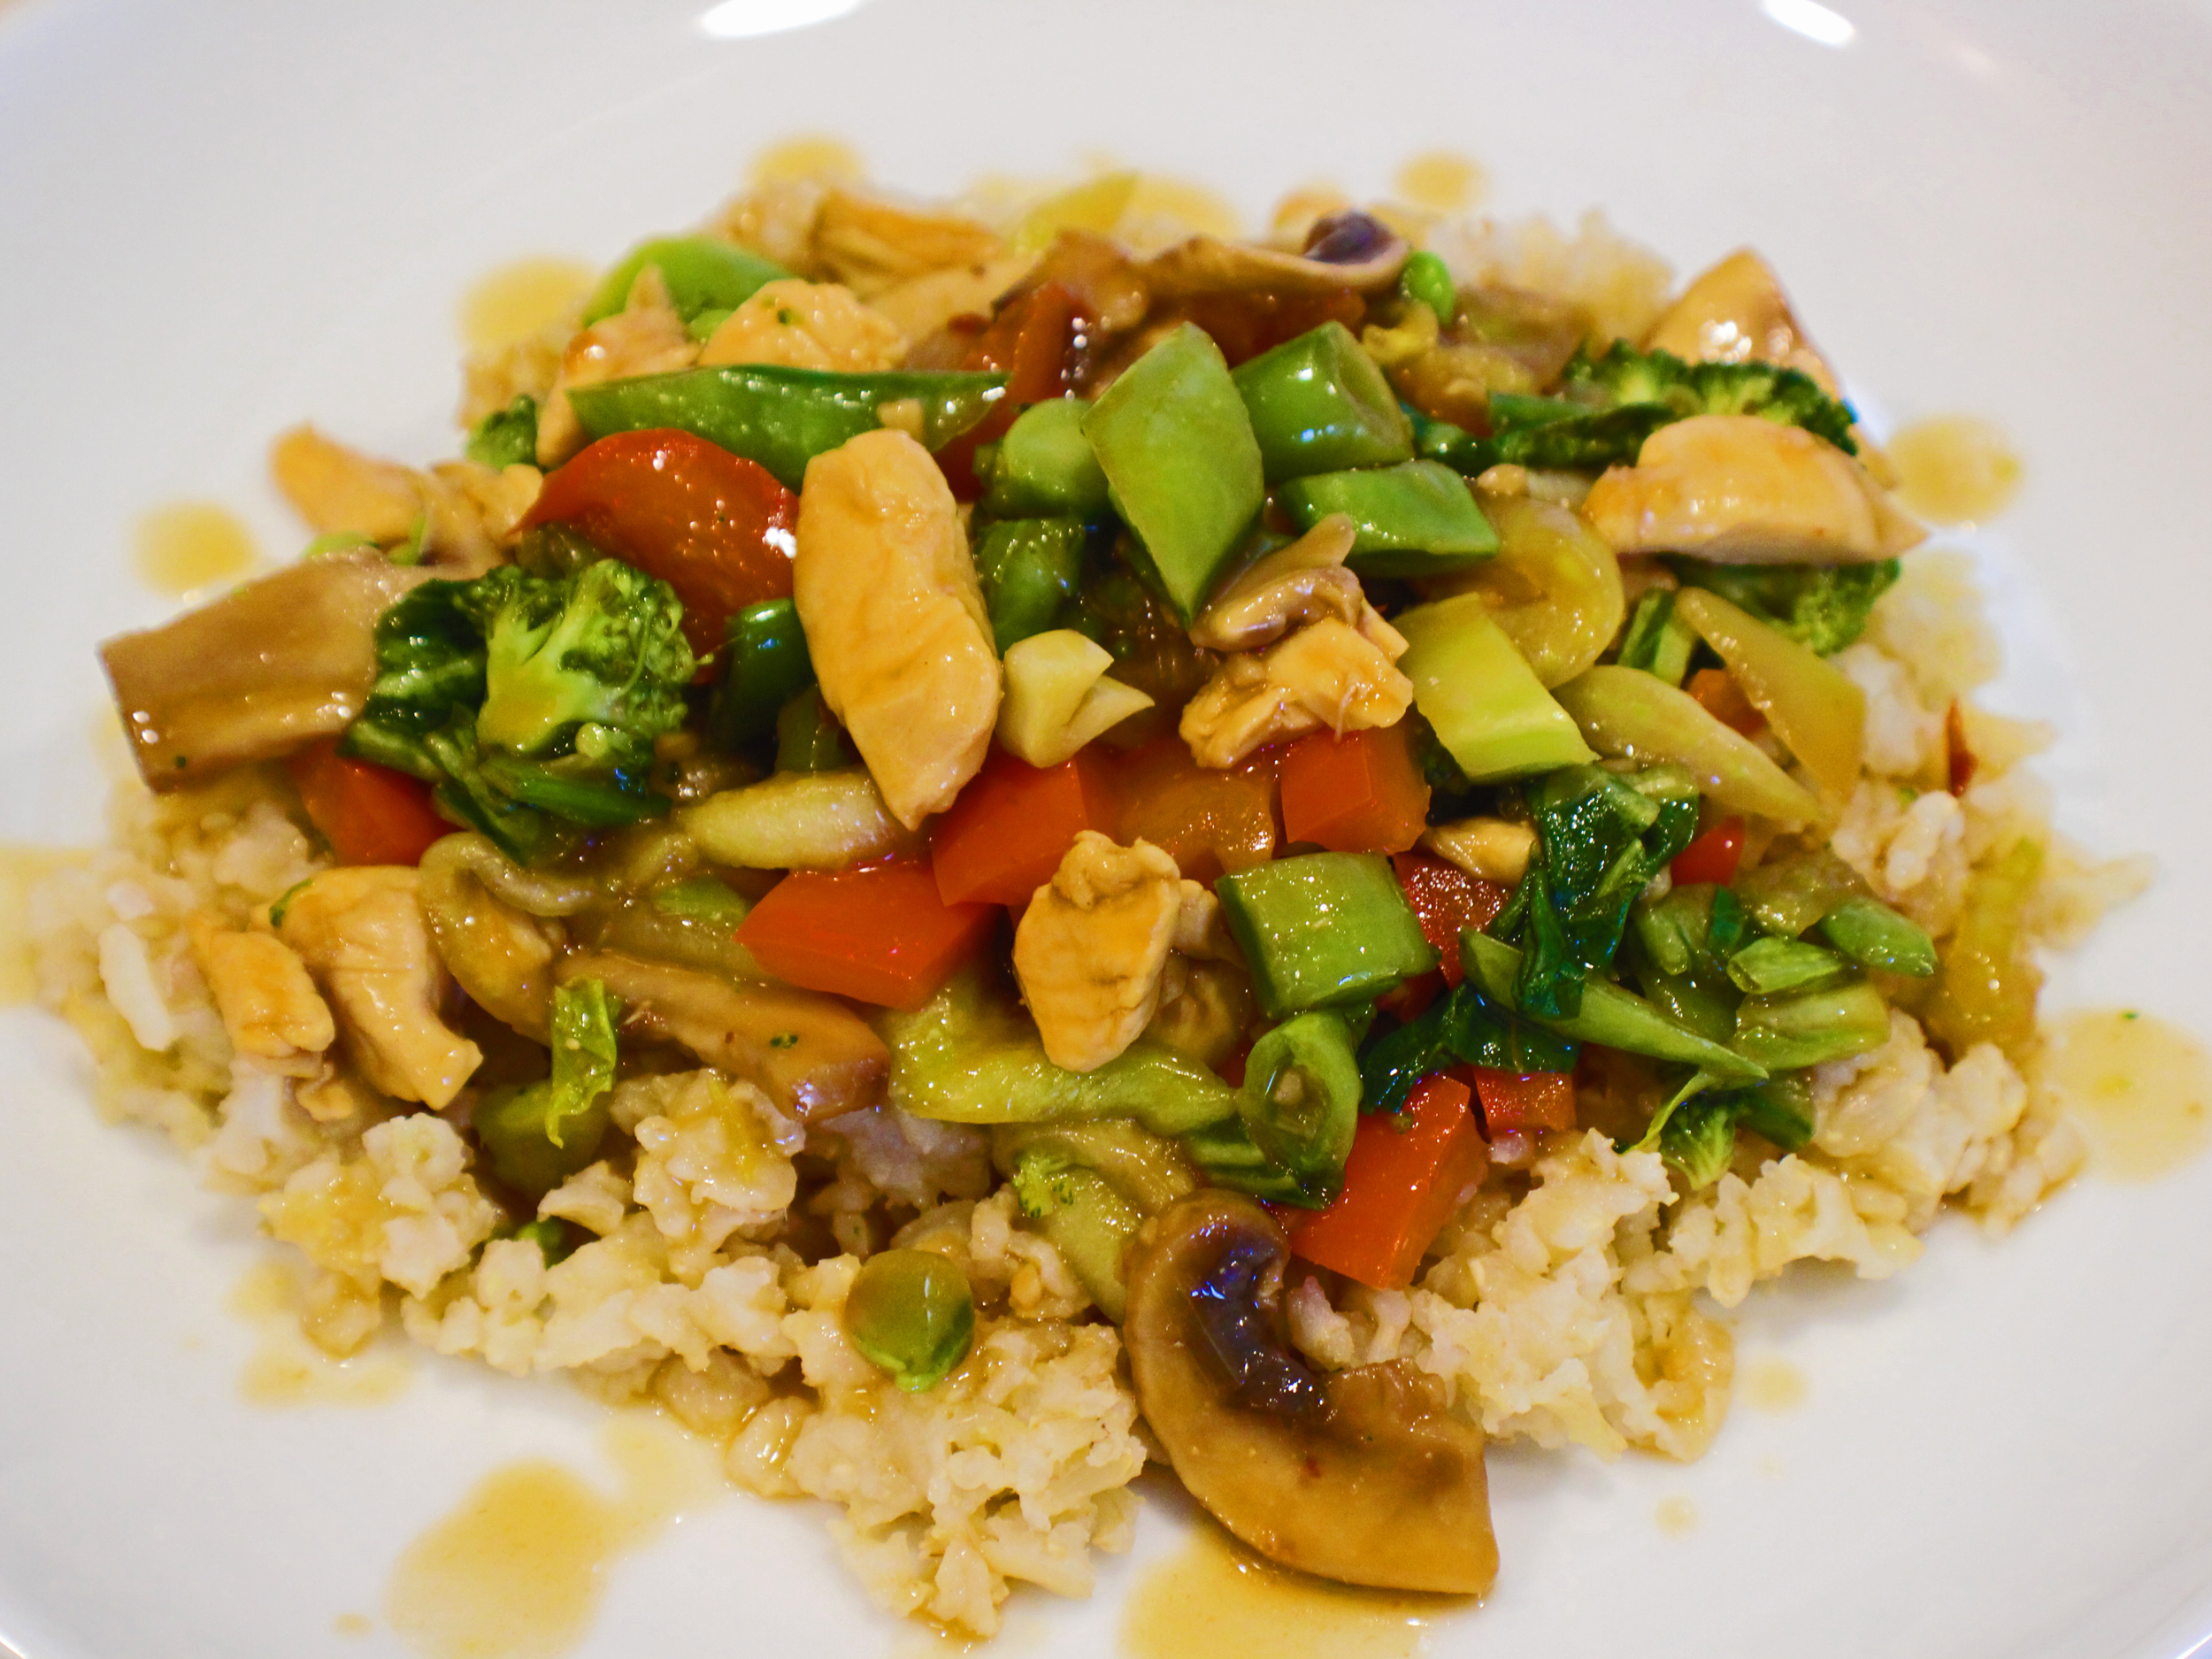
Orange Chicken

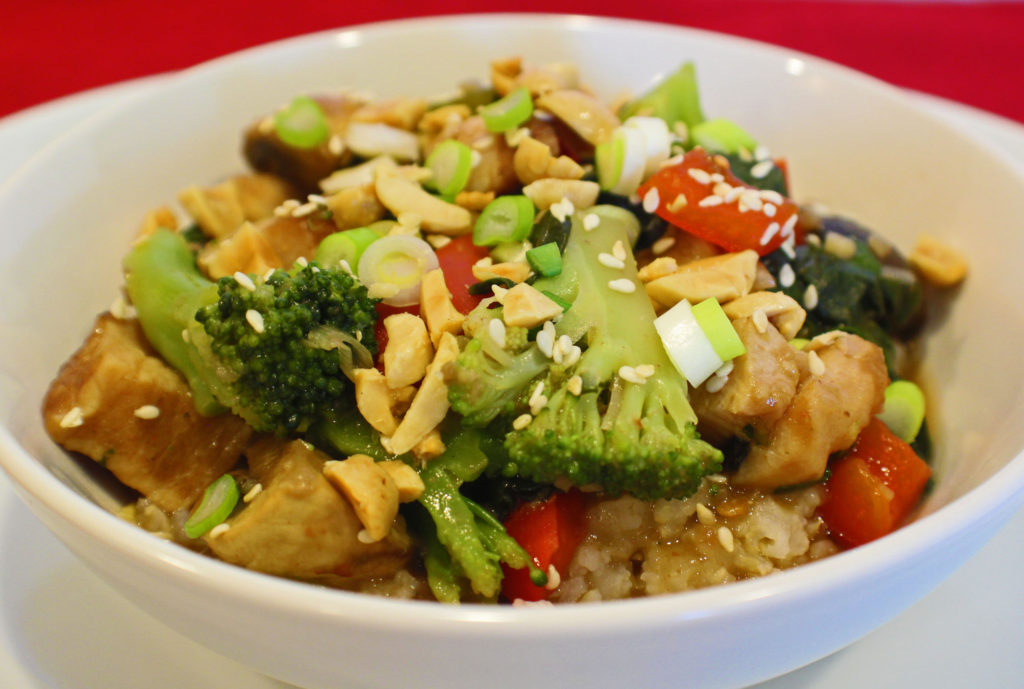
This Orange Chicken is quick and easy, but full of flavor. I often cook rice or quinoa on the weekend so I have it ready just to be heated up during the week to finish off a meal at some point during the week.

Try cooking Rice in the Slow Cooker.

First whisk your sauce ingredients together. Be sure to whisk the cornstarch in with a clear liquid, like chicken stock or soy sauce. Cornstarch tends to cling to chunky things which could make for a lumpy sauce. After whisking in the cornstarch, add the rest of the ingredients. It doesn’t matter if you use dark or light brown sugar. I always have dark on hand because I like the stronger flavor of dark brown sugar.
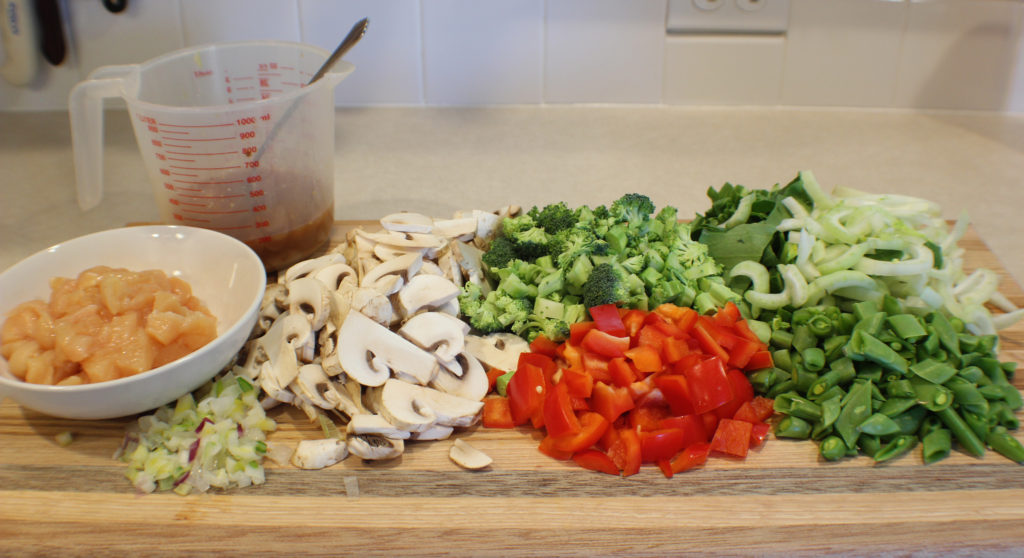
Next prep your veggies and chicken. You will want everything ready because this cooks fast.
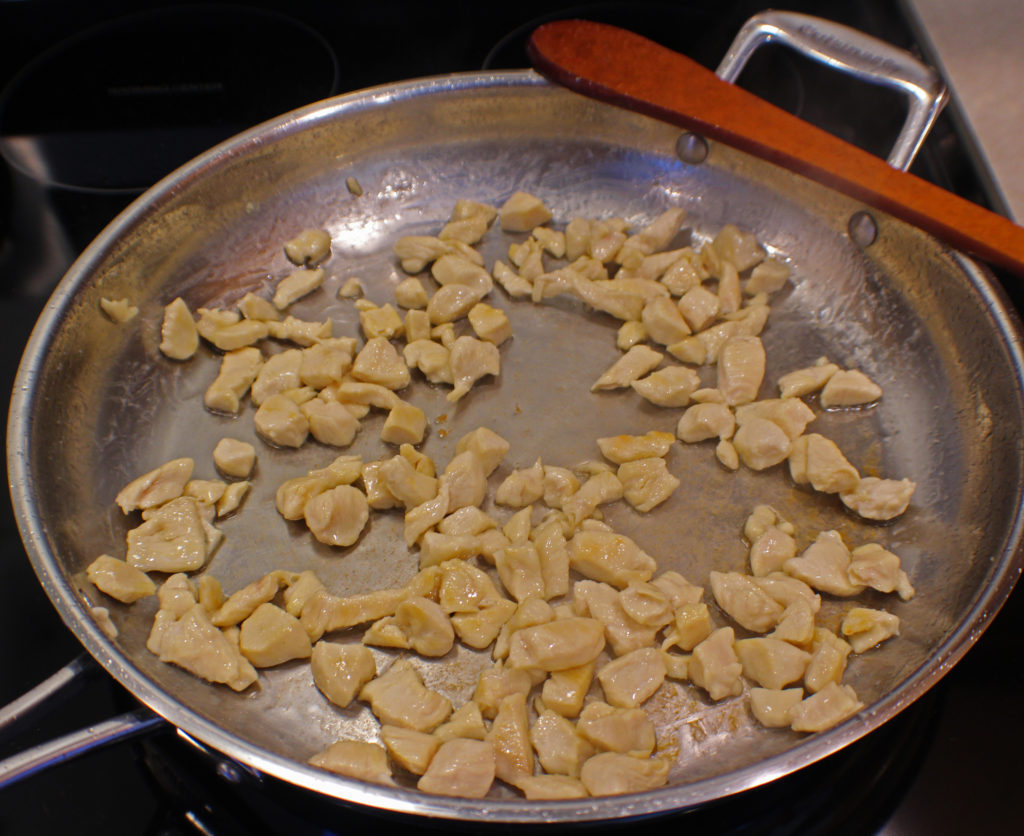
Now heat up a large saute pan on medium heat and add the peanut oil. You could use vegetable oil instead. Then add the chicken and saute for about 5 minutes until the chicken starts browning.

I use a stainless steel pan because it browns chicken and mushroom better than a non-stick pan. But if you prefer non-stick, by all means, go ahead and use that.
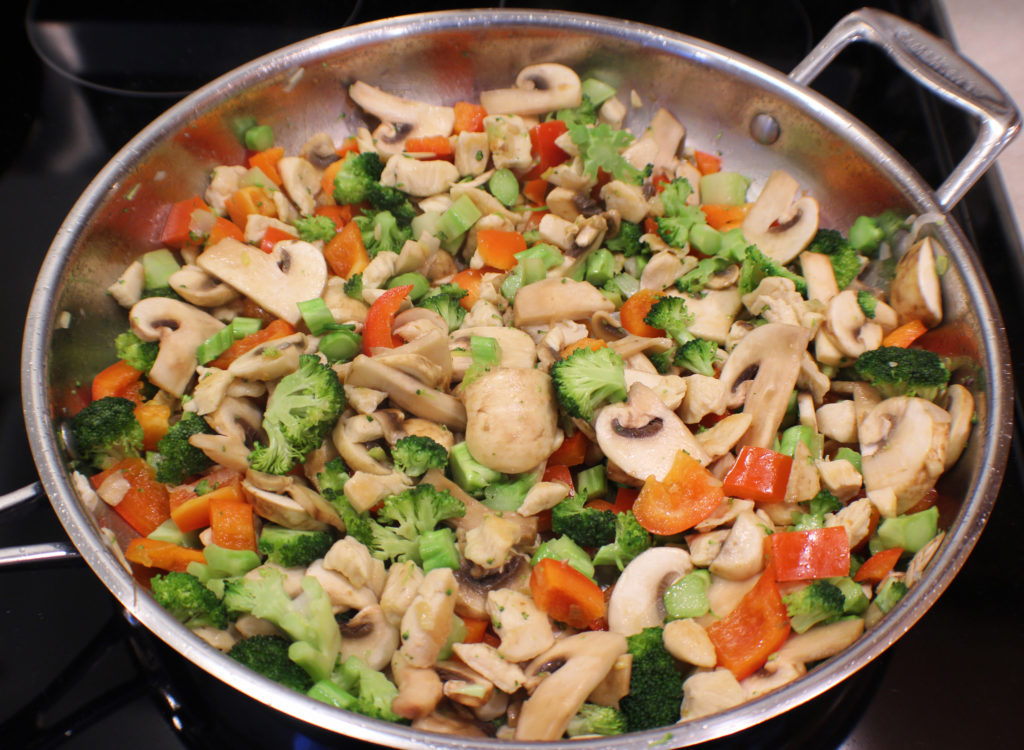
When the chicken is browned, add the bell pepper, broccoli, mushrooms, and onions to the pan and sauté for a few minutes until the broccoli start to soften.

Add the bok choy and sauce, and simmer for a few minutes until the sauce thickens and the bok choy softens.

Serve this on some rice and top it with a couple tablespoons of chopped roasted peanuts and Naan Bread.

Enjoy!
Orange Chicken

This quick chicken dinner has a touch of orange and a touch of heat, served on a bed of rice, makes for a wonderful lunch or dinner.
Prep Time20 minutes
Cook Time15 minutes
Course: Dinner, Main Course
Cuisine: American, Asian
Keyword: Chicken, Dairyfree, Glutenfree, Orange Chicken, Whats for Dinner
Servings: 6 cups
Calories: 103kcal
Author: Eating With Deb

Equipment

  • Cutting board and knife
  • Large saute pan

Ingredients

  • 1 each chicken breast cubed
  • 2 tbsp peanut oil

Sauce

  • 1 each orange juice and zest
  • ¼ cup soy sauce or wheat-free tamari
  • 2 tbsp brown sugar
  • 1/3 cup chicken stock
  • 1 tbsp cornstarch
  • 2 tsp garlic fresh, minced
  • 2 tsp ginger fresh, minced
  • 1 tsp sambal Oelek or 1 tsp red pepper flakes

Veggies

  • 1 each red bell pepper chopped
  • 2 cups broccoli florets
  • 2 cups mushrooms sliced
  • ½ each yellow onion
  • 1 1/2 cups snap peas chopped
  • 1 each baby bok choy shredded

Instructions

  • Whisk cornstarch in chicken stock then whisk in orange juice, soy sauce, brown sugar, garlic, ginger, and sambal oelek. Set aside.
  • On medium heat, sauté chicken in peanut oil until brown, about 5 minutes.
  • Add bell pepper, broccoli, mushrooms, and onion to pan. Sauté until broccoli starts to soften but remains bright green, about 5 minutes.
  • Add sauce and bok choy. Simmer until sauce is thickened – about 5 minutes.
  • Serve on cooked rice topped with some chopped, roasted peanuts.
  • Enjoy!
Nutrition

Serving: 1cup | Calories: 103kcal | Carbohydrates: 12g | Protein: 4g | Fat: 5g | Saturated Fat: 1g | Cholesterol: 1mg | Sodium: 585mg | Potassium: 298mg | Fiber: 2g | Sugar: 7g | Vitamin A: 475IU | Vitamin C: 43mg | Calcium: 34mg | Iron: 1mg

Kung Pao Chicken (in the Slow Cooker)

Kung Pao Chicken

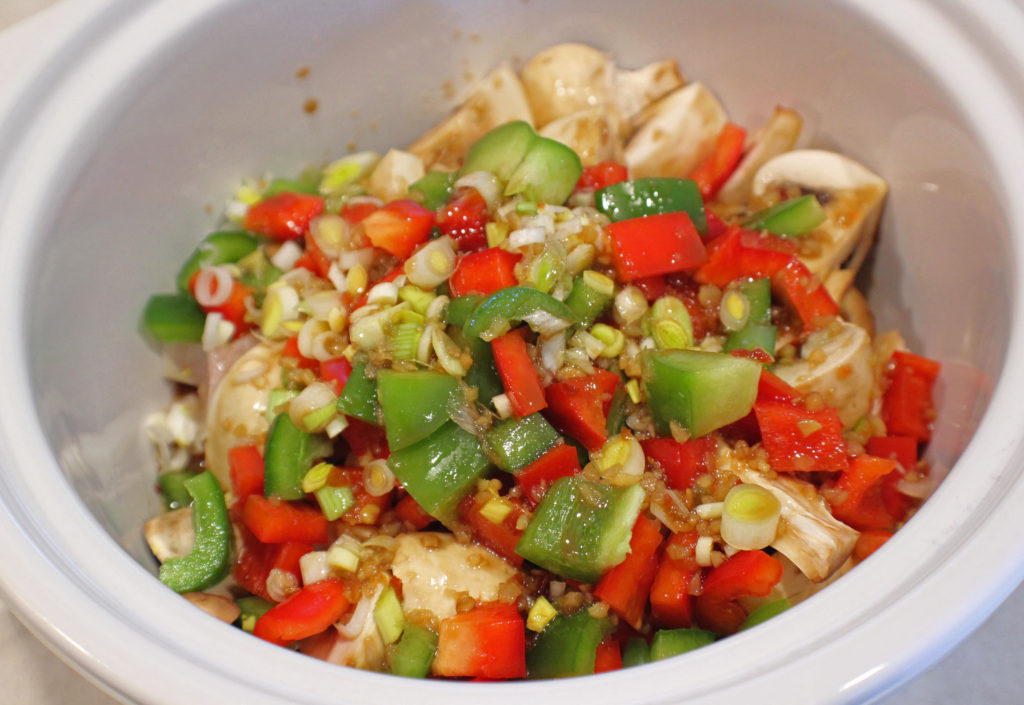
I make Kung Pao Chicken in a sauté pan on the stove top or in a slow cooker, it all depends on the time I have to prepare the meal. The slow cooker method allows me to be able to put all the ingredients in the slow cooker crock the day before and put it in my slow cooker the next day for a no fuss meal.

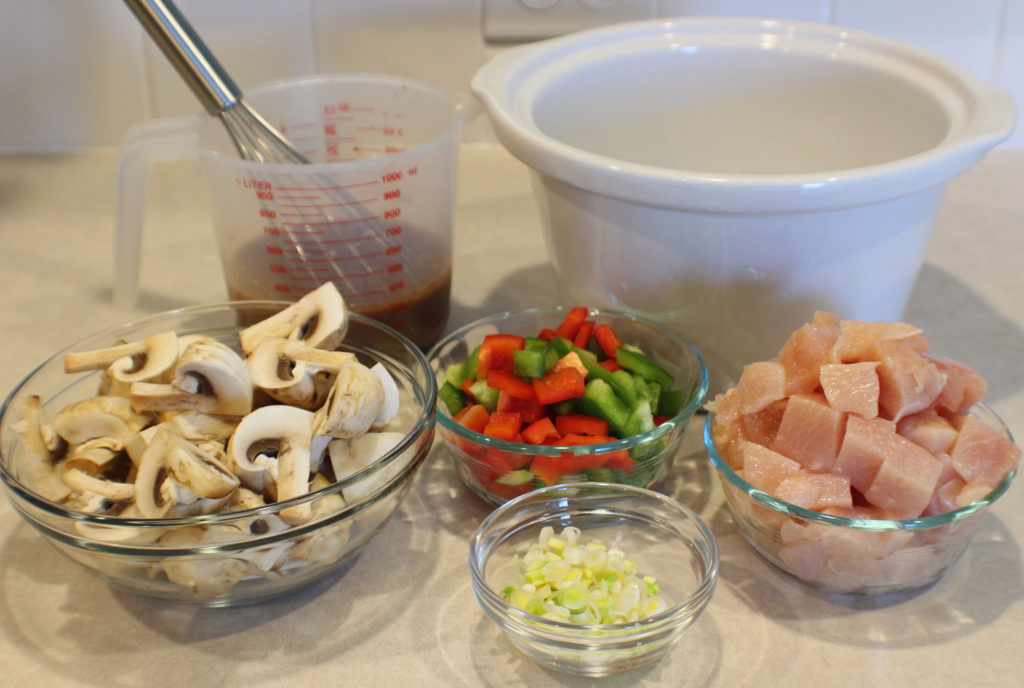
For the sauce, I whisk every thing together in a 4 cup measuring cup, that way I don’t have to dirty any other measuring cups and bowls. 

Be sure to mix the cornstarch in with just liquid, like water or soy sauce. Cornstarch likes to adhere to solids and you risk creating a lumpy sauce in the end. Once the cornstarch is dissolved in the liquid, mix in the rest of the ingredients.

Get the rest of the ingredients ready. If using fresh broccoli or bok choy, have that ready to go now too. This time around I’m using frozen broccoli so I need to add it later, and I have some frozen chard from my garden that I’m using instead of bok choy, so that is going in later too. You could use fresh spinach or napa cabbage instead.

Now just put it in the crock of the slow cooker and stir it up a bit. If I’m going to cook this the next day or later the same day, I put the lid on it and put it in my refrigerator.

If using frozen broccoli or another green other than bok choy, after about 2 1/2 hours of cooking, stir it in and cook for another half hour or so.


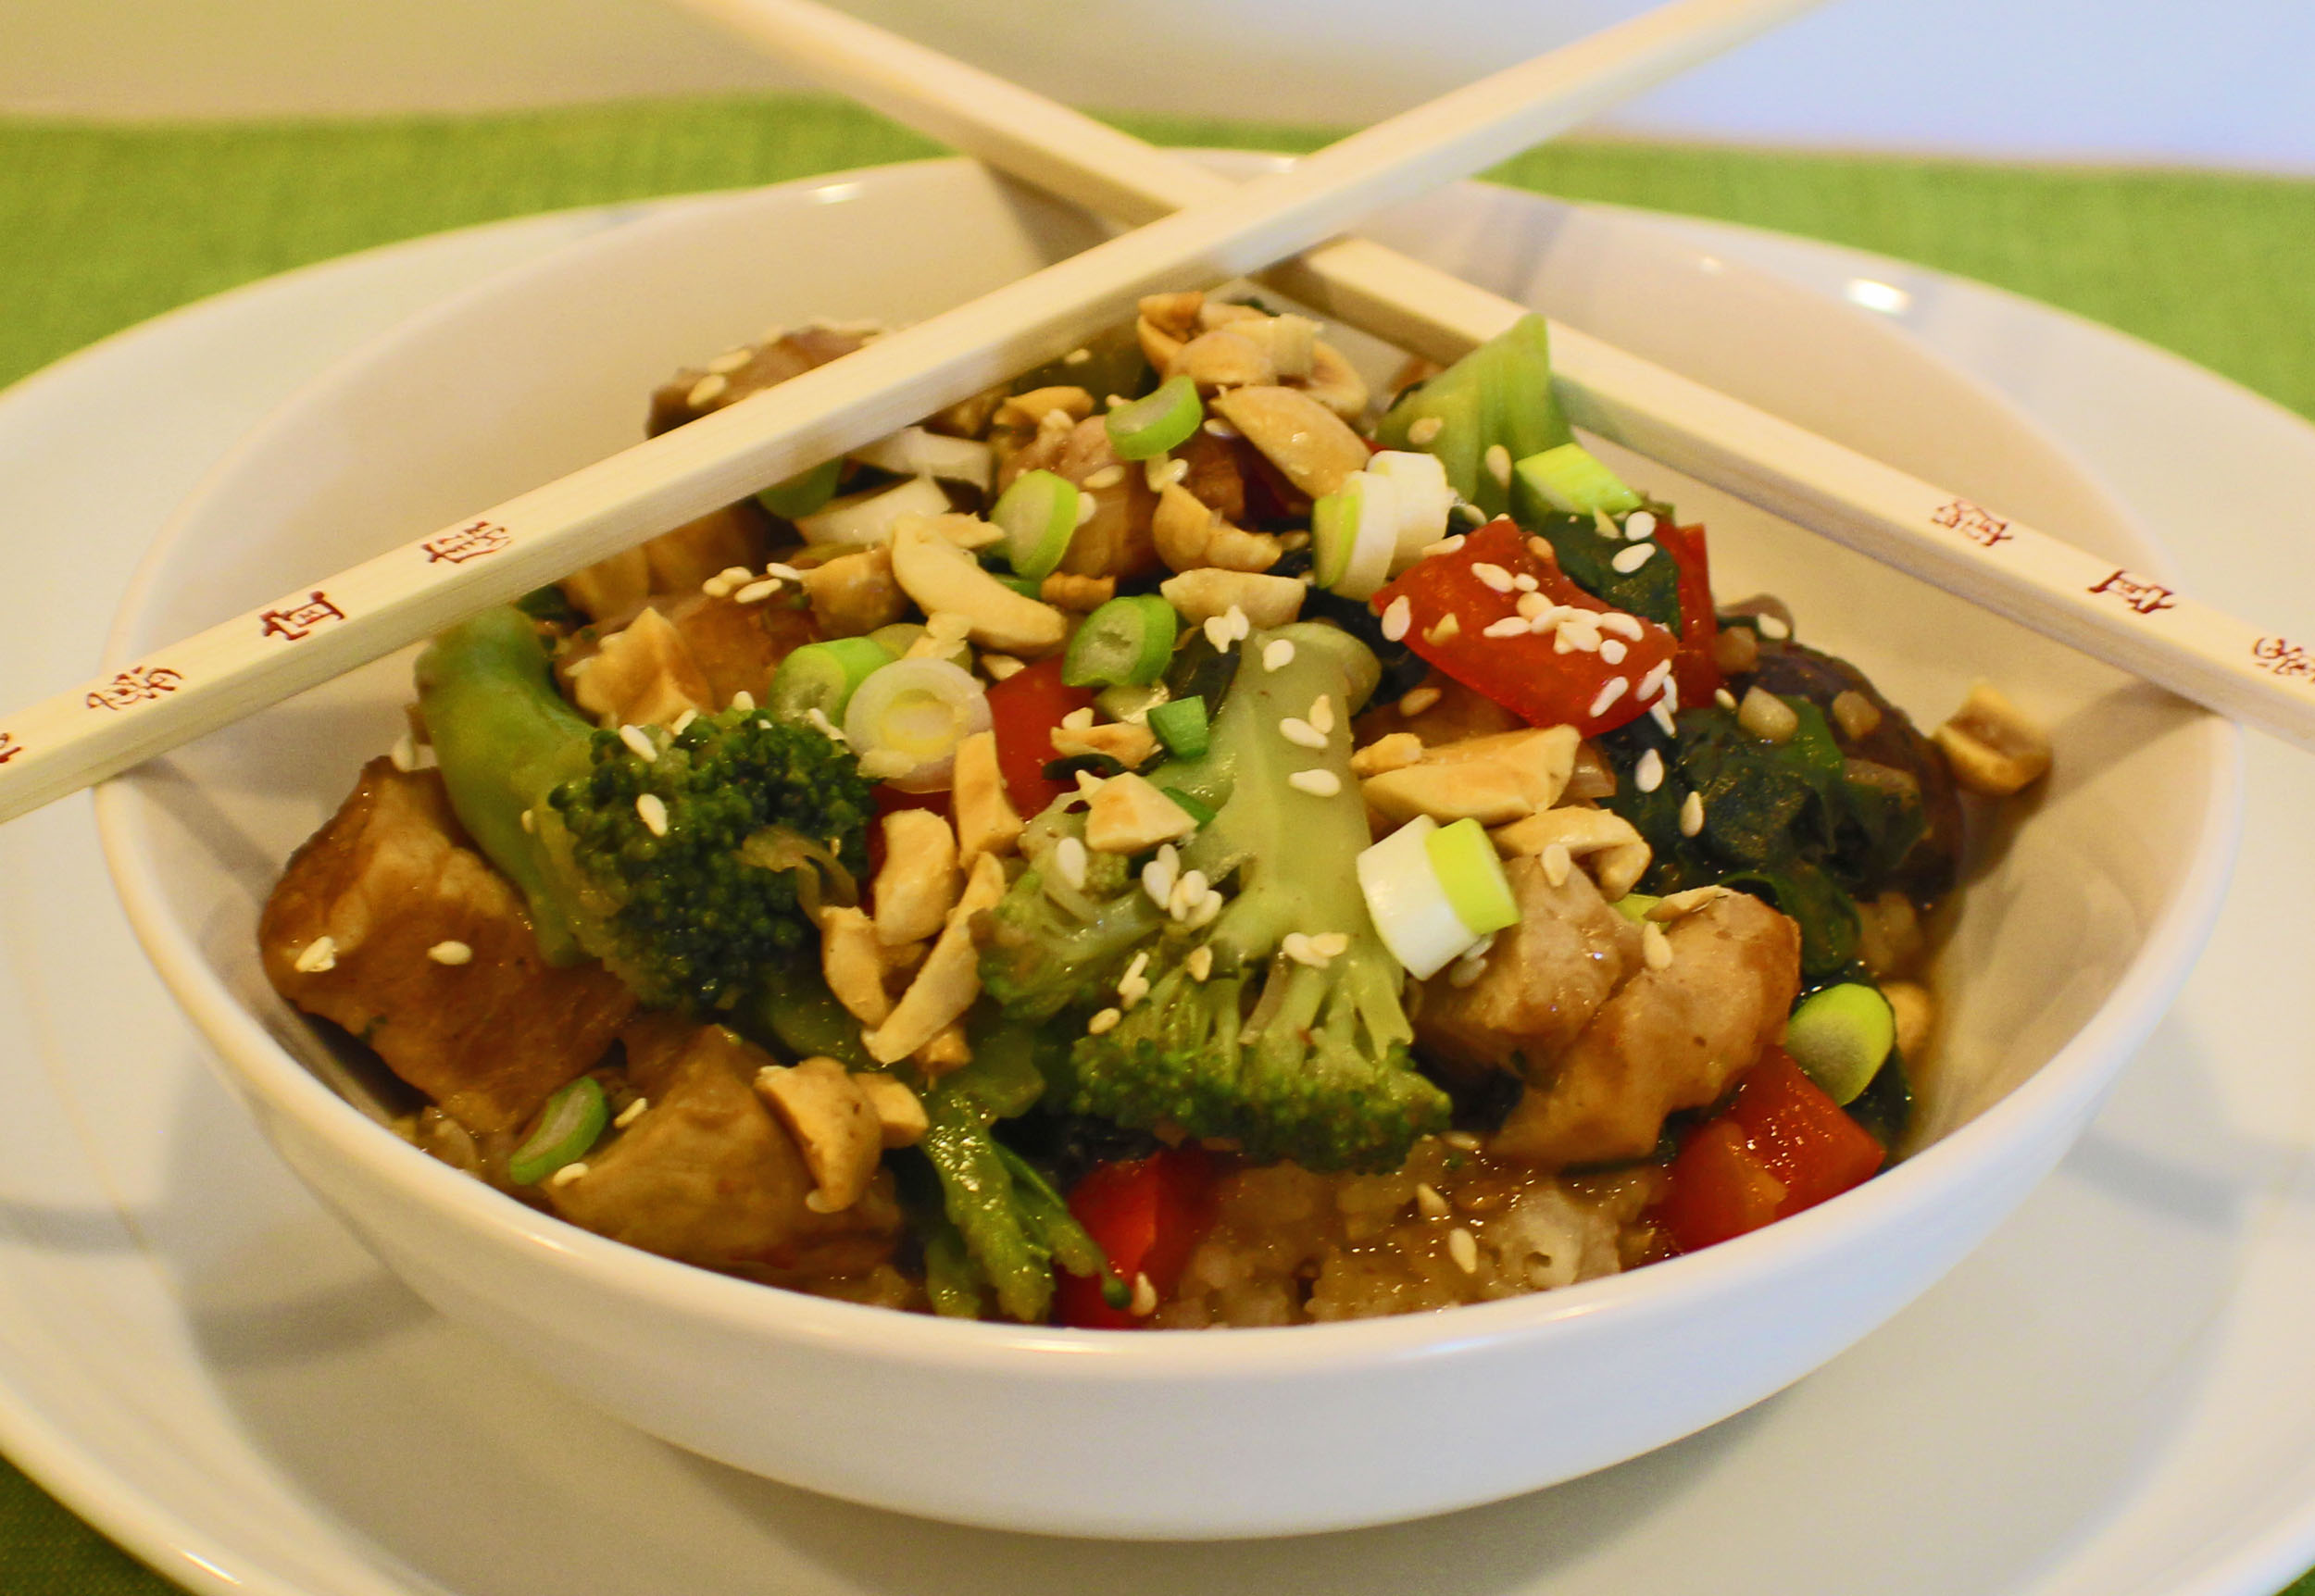
I like this on rice, try making Rice in the Slow Cooker, or serve it on cooked Udon or Hokkien noodles, topped with roasted peanuts, sliced green onions, and toasted sesame seeds.

Enjoy!
Kung Pao Chicken (Slow Cooker)

Kung Pao Chicken is a saucy and spicy stir fry dish with vegetables. It can be done on the stove top, but for added convenience, I like to put it together the day before, store it in my refrigerator, and put it in the slow cooker the next day for an easy dinner.
Prep Time15 minutes
Cook Time3 hours
Total Time3 hours 15 minutes
Course: Dinner, Lunch, Main Course
Cuisine: Asian
Keyword: Chicken, Dinner Ideas, Kung Pao
Servings: 6 cups
Calories: 100kcal
Author: Eating With Deb

Equipment

  • 4 to 6 quart slow cooker
  • Cutting board and knife
  • 4 cup measuring cup and whisk

Ingredients

Chicken and Veggies

  • 1 each large chicken breast cubed
  • Sea salt and black pepper
  • ½ each red bell pepper bite size pieces
  • ½ each green bell pepper bite size pieces
  • 1 each small leek sliced, or ¼ yellow onion, diced
  • 10 each button mushrooms quartered
  • 2 cups broccoli florets fresh or frozen
  • 1 each baby bok choy or 2 handfuls fresh spinach or shredded napa cabbage

Sauce:

  • ½ cup soy sauce
  • 1/3 cup water
  • 1 tbsp sesame oil
  • 2 tbsp mirin or brown rice vinegar
  • 2 tbsp cornstarch
  • 3 tbsp honey
  • 1 tbsp fresh garlic minced
  • 1 tbsp Sambal Oelek
  • 2 tbsp fresh ginger minced

Garnish

  • Roasted peanuts
  • Roasted sesame seeds
  • Sliced green onions or chives

Instructions

  • For sauce, whisk together soy, water, oil, mirin, and cornstarch. Then add honey, garlic, sambal oelek, and ginger and set aside.
  • Cube chicken breast and put it in the slow cooker. Sprinkle with salt and black pepper
  • Add bell peppers, mushrooms, broccoli (if using fresh), bok choy (if using), and sauce.
  • Turn on cooker to low and cook for 2 ½ hours, stirring once or twice. If using frozen broccoli or spinach or napa cabbage, stir in now. Cook for another ½ hour.
  • Serve over rice or udon or hokkien noodles and garnish with peanuts, green onions (or chives), and sesame seeds.
  • Enjoy!
Notes

You can replace the honey with brown sugar.

Nutrition

Serving: 1cup | Calories: 100kcal | Carbohydrates: 18g | Protein: 3g | Fat: 3g | Saturated Fat: 1g | Cholesterol: 1mg | Sodium: 1169mg | Potassium: 173mg | Fiber: 1g | Sugar: 11g | Vitamin A: 219IU | Vitamin C: 28mg | Calcium: 23mg | Iron: 1mg

Kielbasa Skillet

Kielbasa Skillet with Egg

In recent years I have come to appreciate the versatility of Kielbasa sausage, and realize it isn’t just for grilling.

Kielbasa is milder than Andouille or Chorizo, comes in a long u-shape form, usually isn’t smoked, and is full of garlic. It works great in a variety of soups, stews (try it in Kielbasa Stew), and even chili, as well as sautéed with potatoes and vegetables, or used as a breakfast meat. Or grill it and put it on a bun with your favorite toppings.

Kielbasa Skillet Ingredients

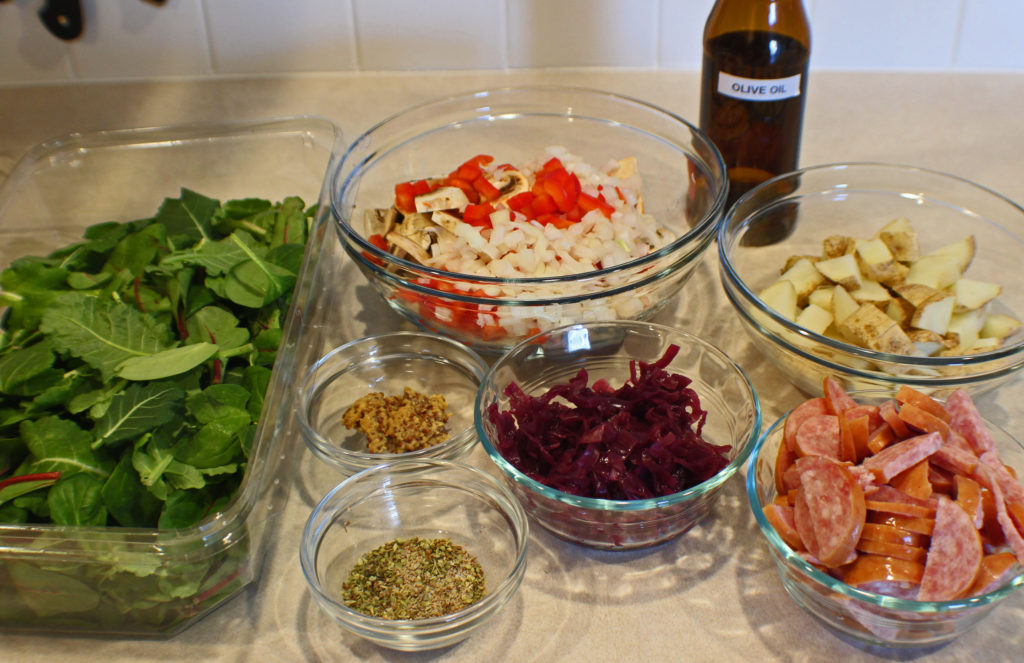
This skillet kielbasa meal is great for any time of the day and can be adapted to whatever you like. You could certainly add broccoli, or another vegetable of your choosing. I like to make this in the fall when I have a fresh garden harvest of potatoes, snap peas, bell peppers, tomatoes, spinach, and onions or chives.

Microwave the potatoes first to cut down on cooking time, then put them in the refrigerator to cool a bit before cutting them up. While the potatoes are cooling, I prepare the rest of my ingredients.

Kielbasa Skillet Potatoes

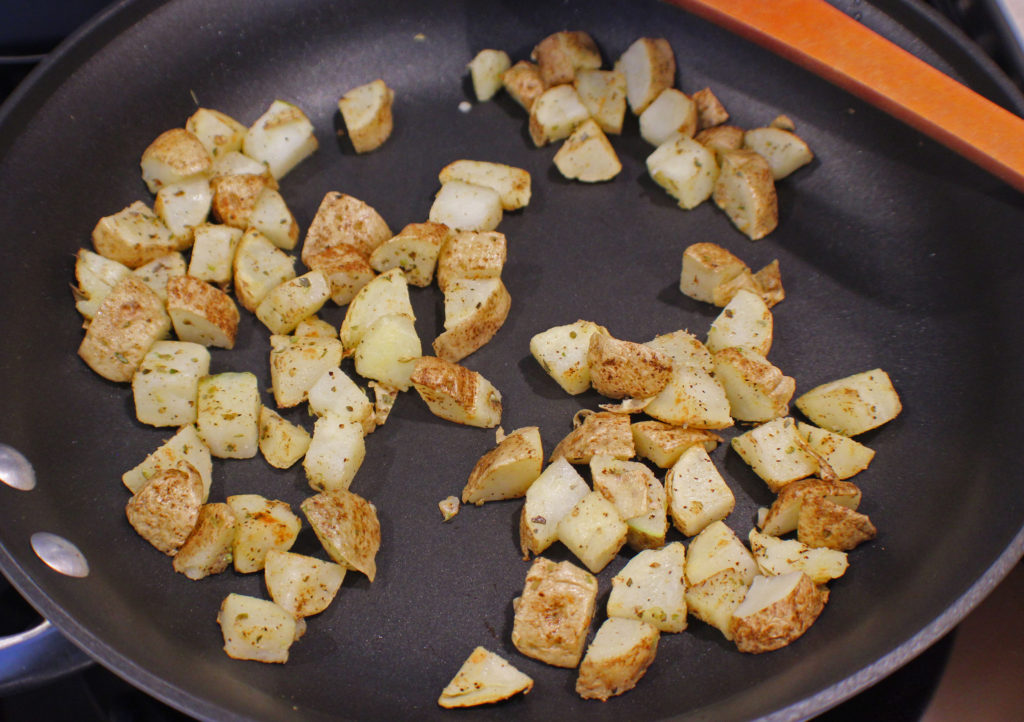
Use a nonstick pan when cooking potatoes since they tend to stick to stainless steel quite well. Medium heat seems to crisp them up perfectly in about 5 minutes, but you might need to turn it down to medium low after adding the sausage and other vegetables to prevent things from burning.

Kielbasa Skillet Spuds and Veg

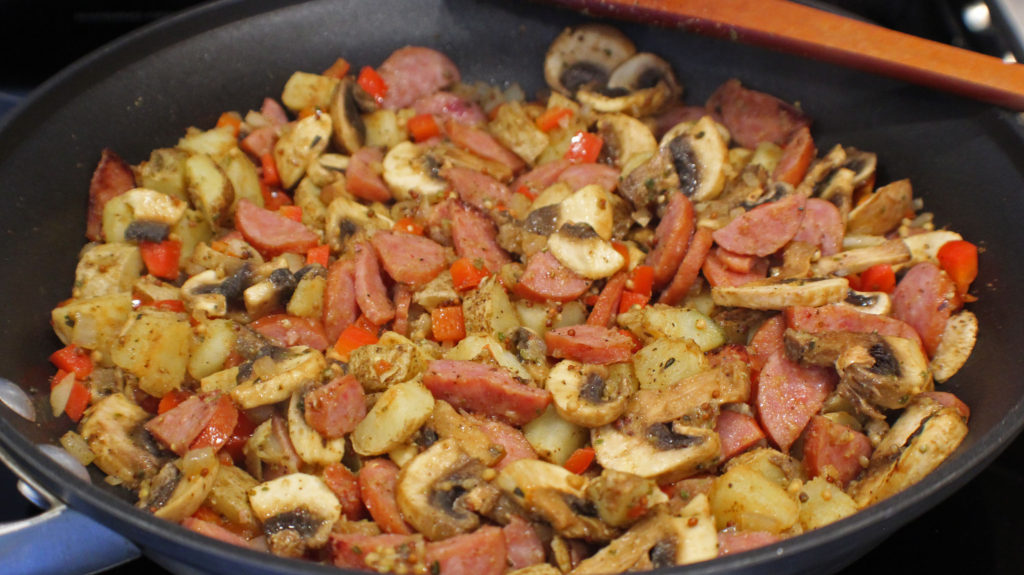
When adding the sausage and veggies there is no need to add more oil since the sausage will render out fat.

It is also important to season in layers, so I add about half of the seasonings with my potatoes, and the other half with the sausage and veggies, as well the mustard with the sausage and veggies.

Kielbasa Skillet Greens and Kraut

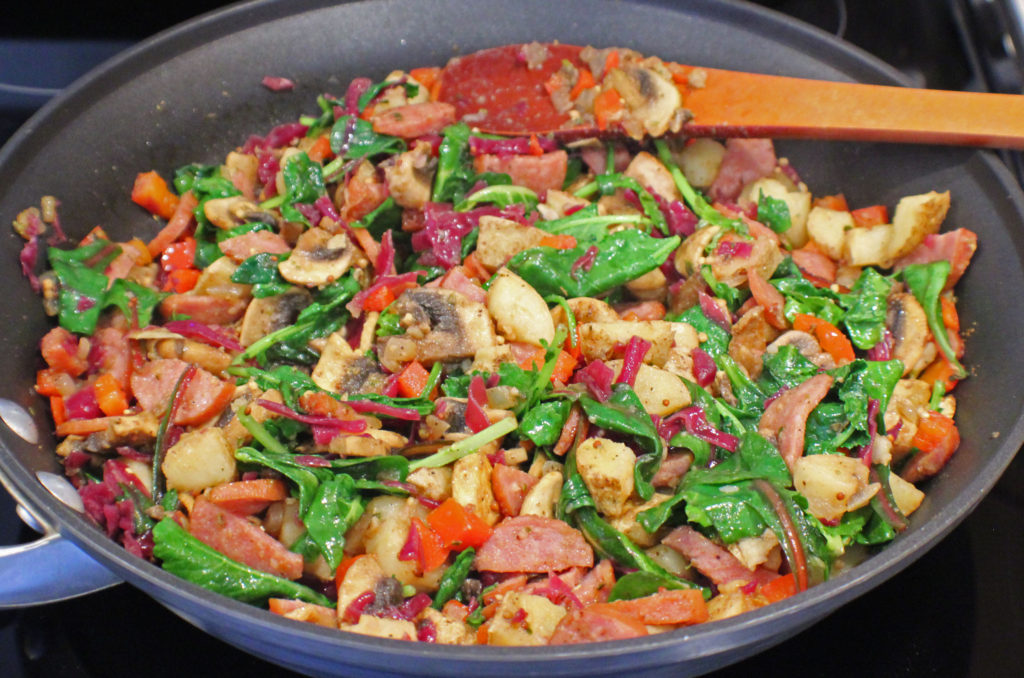
In the last couple of minutes, stir in the greens and sauerkraut. If it’s not summer or fall, I have power greens from Earthbound Farm in my fridge, so I use that. The power greens mix has baby spinach, kale, and chard. But using just spinach or kale works too.

I also make my own sauerkraut using purple cabbage, so I have purple sauerkraut. But regular sauerkraut is just fine. Make sure you drain the sauerkraut first.

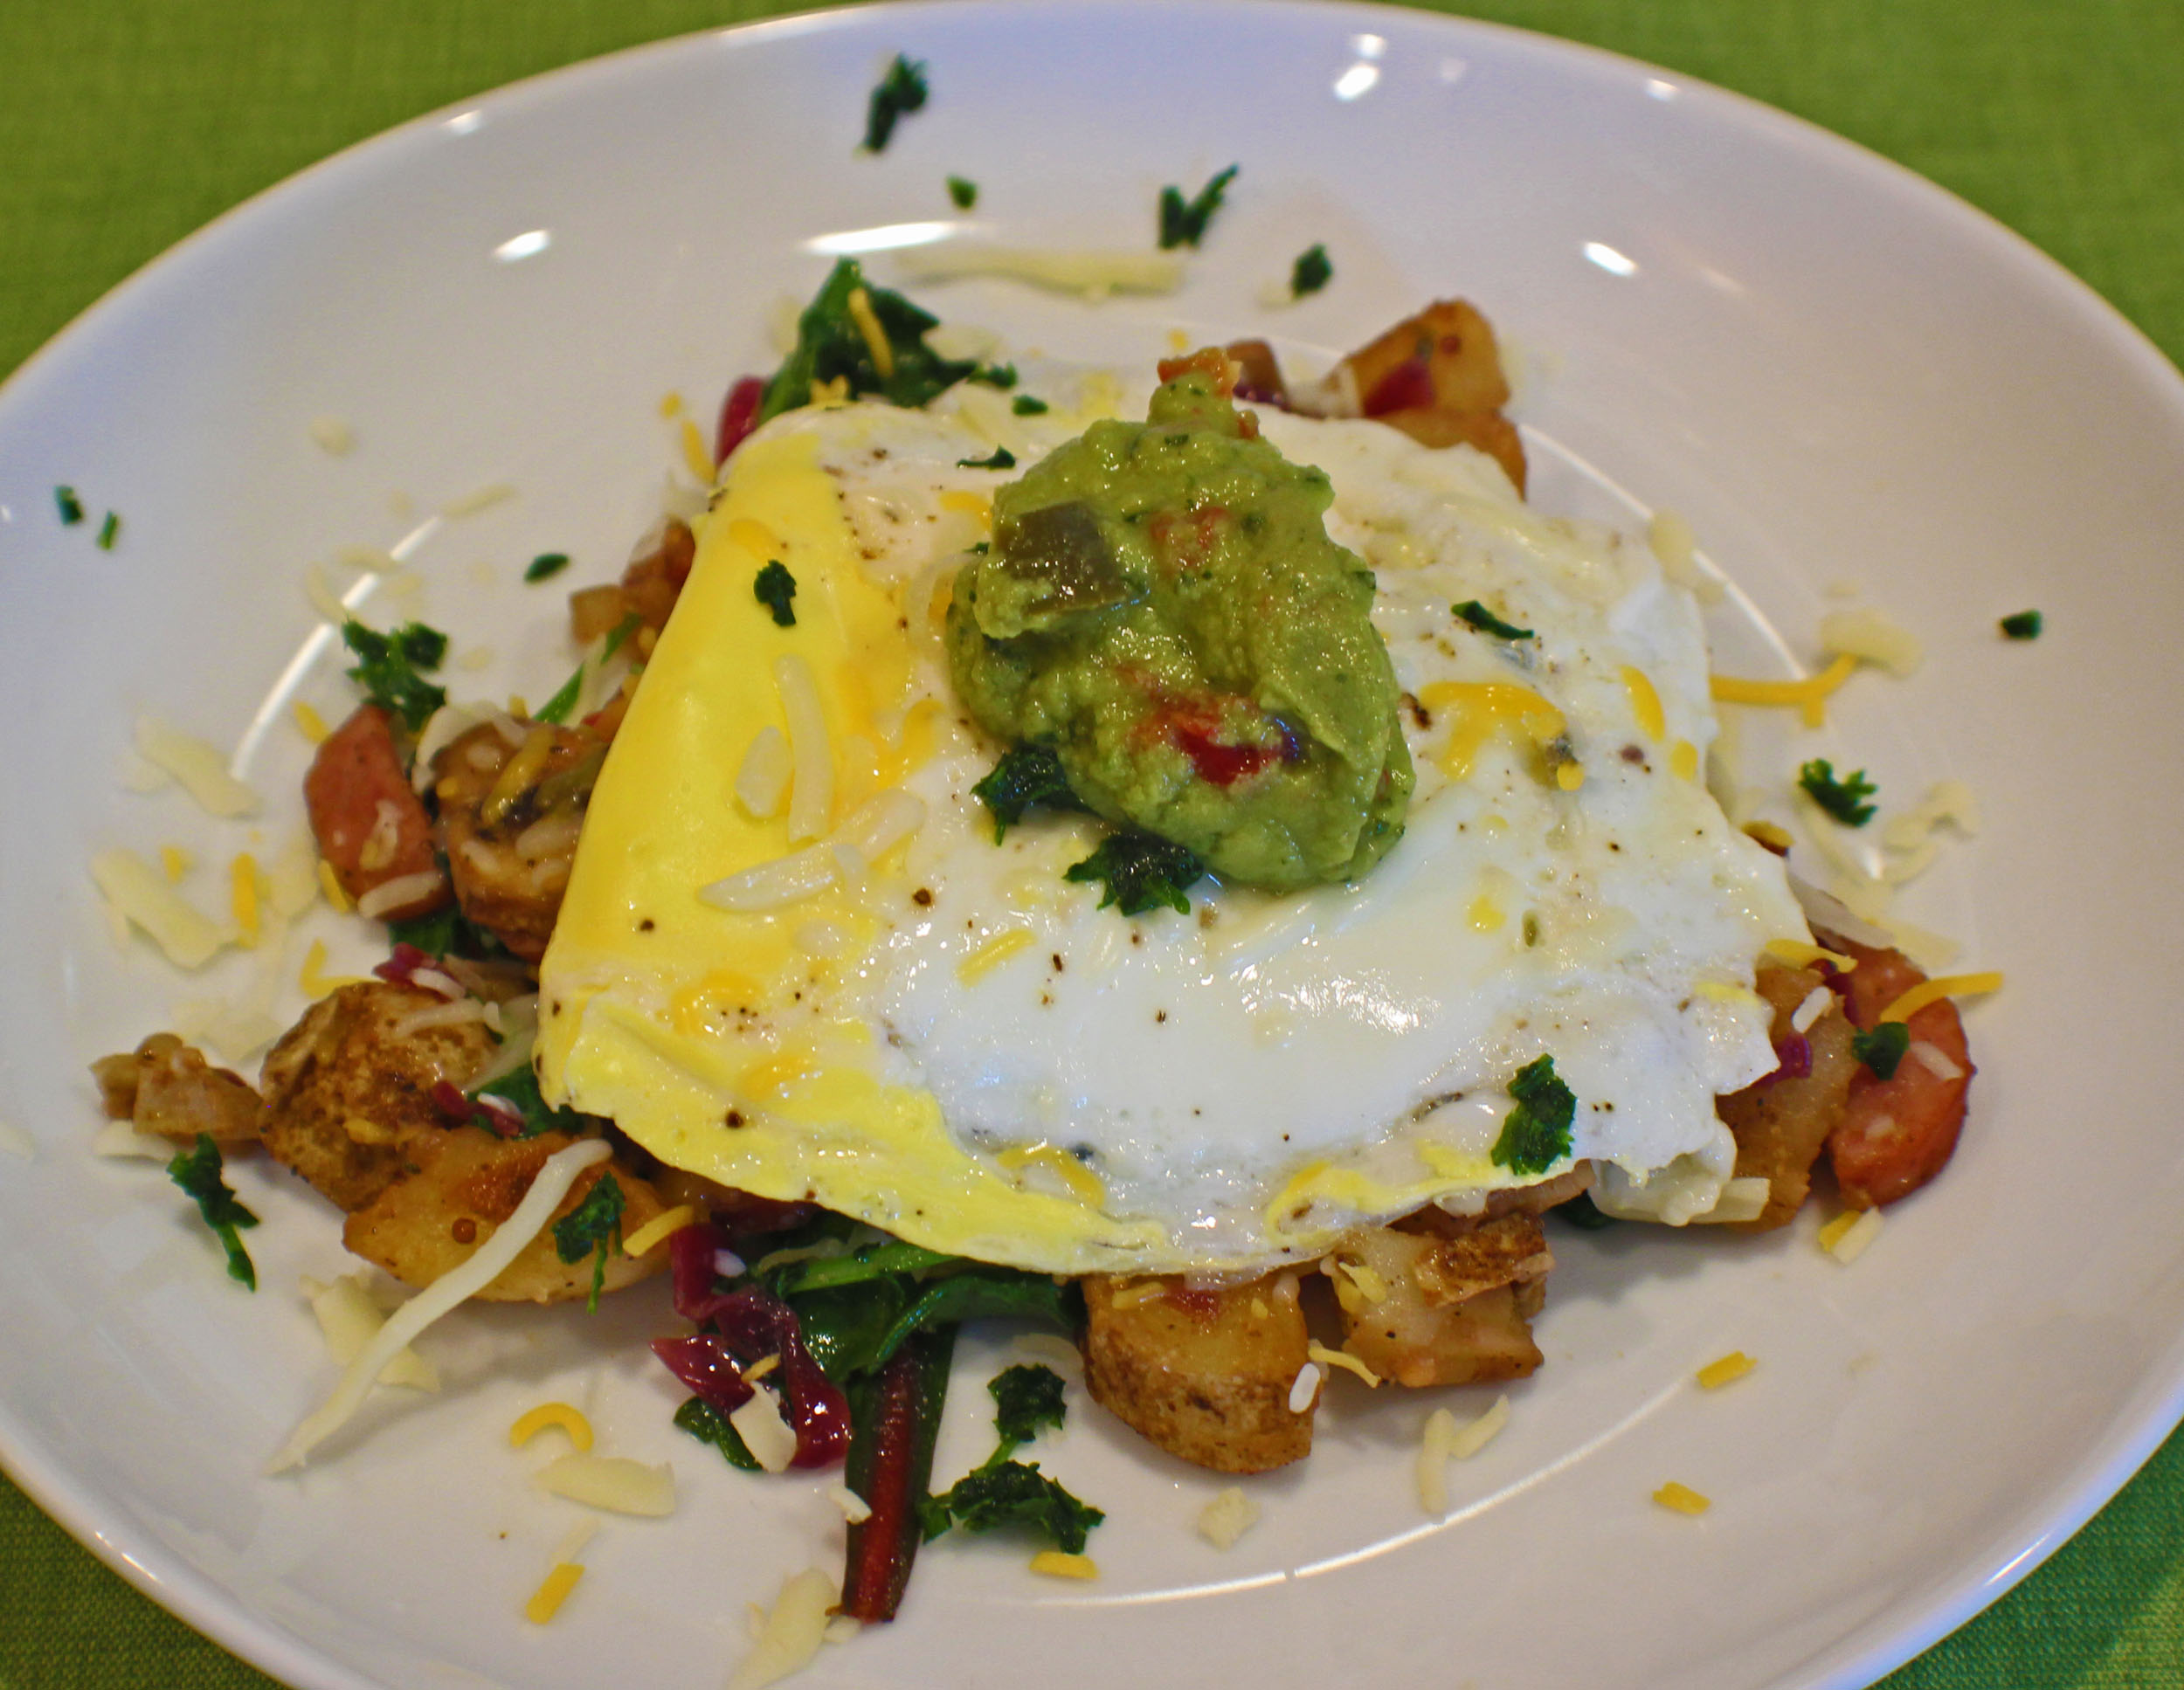
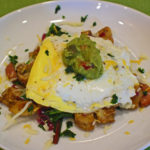
Now you are ready to eat. This is great as is, but you can top it with whatever you desire, cheese, avocado, a fried egg, fresh tomatoes…

Enjoy!
Kielbasa Skillet

A quick skillet meal that can be served for breakfast, brunch, lunch, or dinner. Full of vegetables and flavor!
Prep Time15 minutes
Cook Time15 minutes
Total Time30 minutes
Course: Breakfast, Brunch, Dinner, Lunch
Cuisine: American
Keyword: kielbasa, Kielbasa Skillet, Skillet Meals
Servings: 4 people
Calories: 237kcal
Author: Eating With Deb

Equipment

  • Cutting board and knife
  • Large nonstick sauté pan and heat resistant spoon

Ingredients

  • ½ pound kielbasa sausage sliced in ½ moons
  • ½ each red bell pepper diced
  • ¼ each yellow onion diced
  • 8 each button mushrooms sliced
  • 2 each russet potatoes
  • 1 cup sauerkraut
  • 4 cups fresh spinach or 4 handfuls
  • 1 tbsp olive oil
  • 1 tbsp Dijon mustard or brown mustard
  • 1 tsp oregano
  • ½ tsp black pepper
  • ½ tsp sea salt
  • ½ tsp granulated garlic
  • ¼ tsp chipotle pepper

Optional Toppings

  • Fried Egg
  • Avocado slices or Guacamole
  • Shredded cheese
  • Fresh diced tomatoes
  • Sour cream

Instructions

  • Wash the potatoes and stab several times with a fork. Microwave for 2 minutes, turn over and microwave for 2 more minutes. Put in the refrigerator.
  • Gather and prepare the rest of the ingredients, then dice the potatoes.
  • In a large nonstick sauté pan, heat over medium heat and add oil. Stir in the potatoes and abut half of the seasonings, and sauté for about 5 minutes to start crisping them.
  • Add the kielbasa, the vegetables, except the spinach and sauerkraut, Dijon mustard, and the rest of the seasonings.
  • Sauté for 5 minutes or so to soften the vegetables and crisp the sausage.
  • Stir in the spinach and sauerkraut and cook until it wilts, another 3 to 5 minutes.
  • Serve as is or top with your favorite skillet toppings.
  • Enjoy!
Nutrition

Calories: 237kcal | Carbohydrates: 5g | Protein: 10g | Fat: 20g | Saturated Fat: 6g | Polyunsaturated Fat: 2g | Monounsaturated Fat: 10g | Cholesterol: 40mg | Sodium: 1089mg | Potassium: 390mg | Fiber: 2g | Sugar: 1g | Vitamin A: 2836IU | Vitamin C: 15mg | Calcium: 59mg | Iron: 2mg

BBQ Chicken Thighs (Air Fryer)

BBQ Chicken Thighs with Pepperoncinis

The flavor of charcoal barbeque is one of my favorites, and I will grill all year round. I have added a little bit of liquid smoke to the marinade and cook the chicken in my air fryer to make for a great barbeque-tasting chicken that can be made any time of the year.

Chicken Thighs Marinating

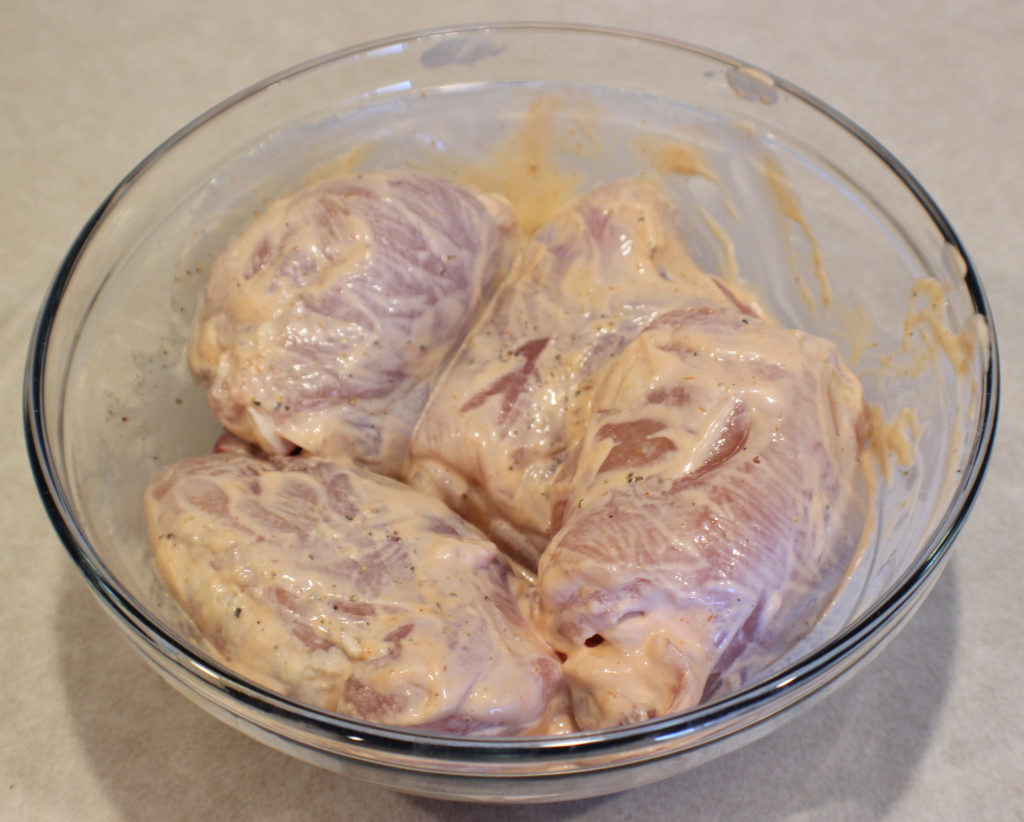
This is a fairly simple process, just mix the mayonnaise, ketchup, and liquid smoke together in a bowl, and rub the chicken thighs all around in it. Then mix together the dry seasoning and walk away for an hour or prepare any side dishes you are going to have with the chicken.

You can use whatever liquid smoke flavor you like. I happen to really like hickory, but mesquite or apple works great too.

Chicken Thighs Ready to Season

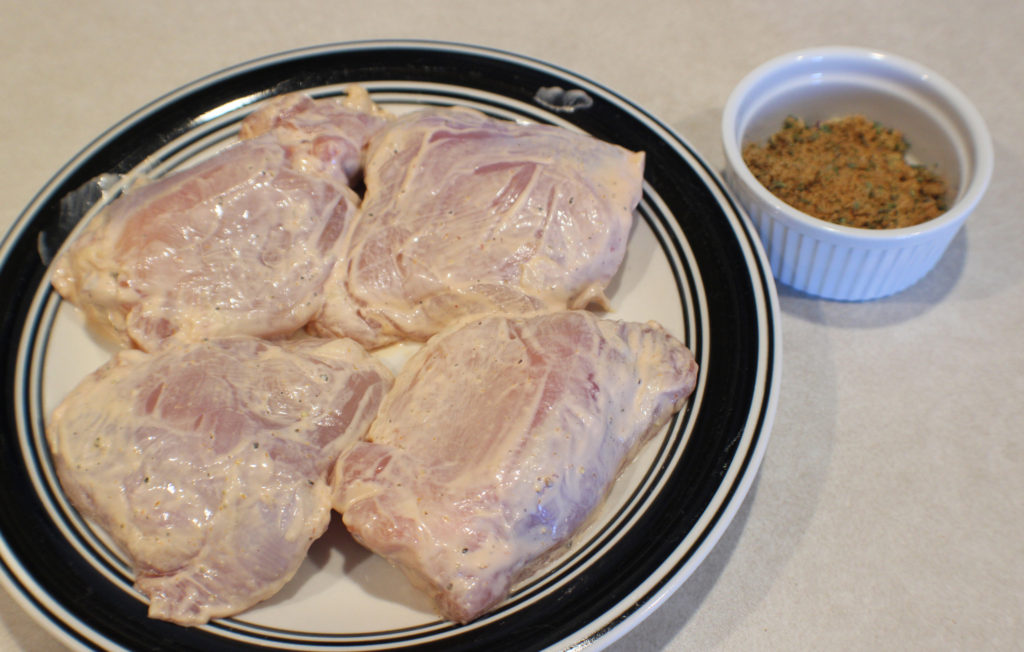
When it’s been about an hour, you are ready to season the chicken. Remove the chicken from the bowl and leave whatever excess mayonnaise mixture there is in the bowl.

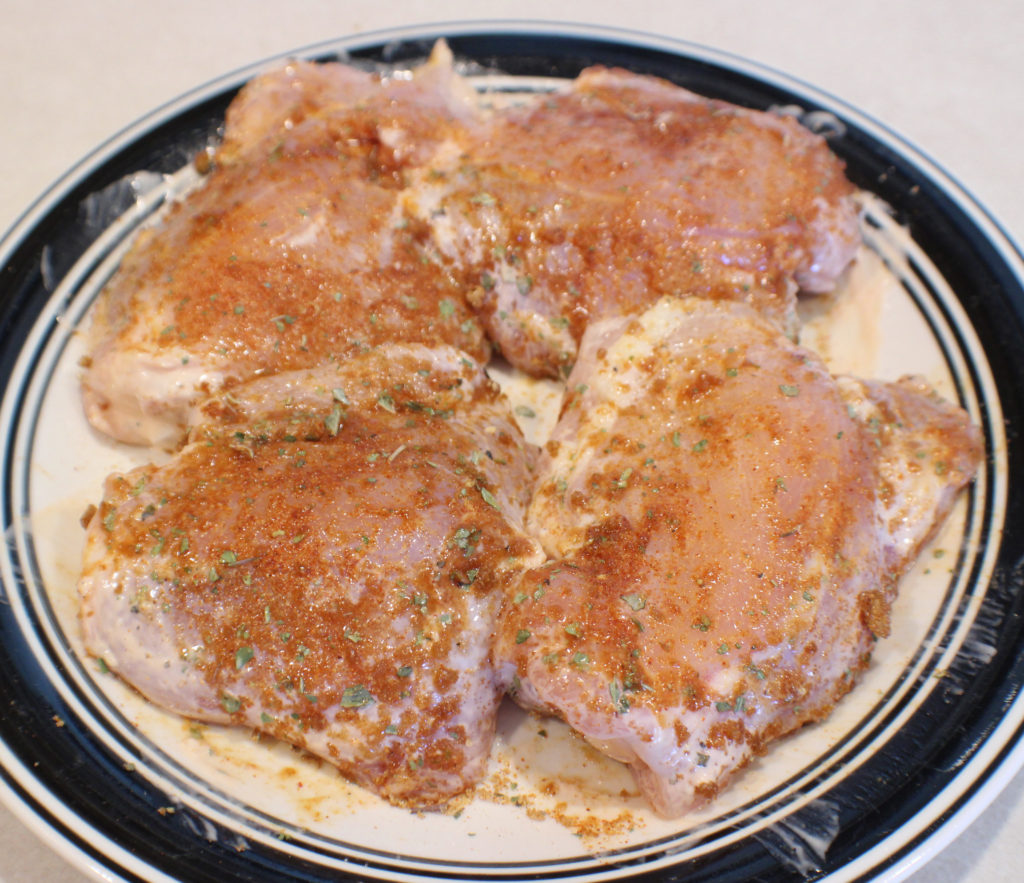
Seasoned Chicken Thighs

Sprinkle the seasoning mixture on both sides of the thighs. The mayonnaise will help it stick. Let this sit for about 15 – 30 minutes.

Now they are ready for the air fryer.

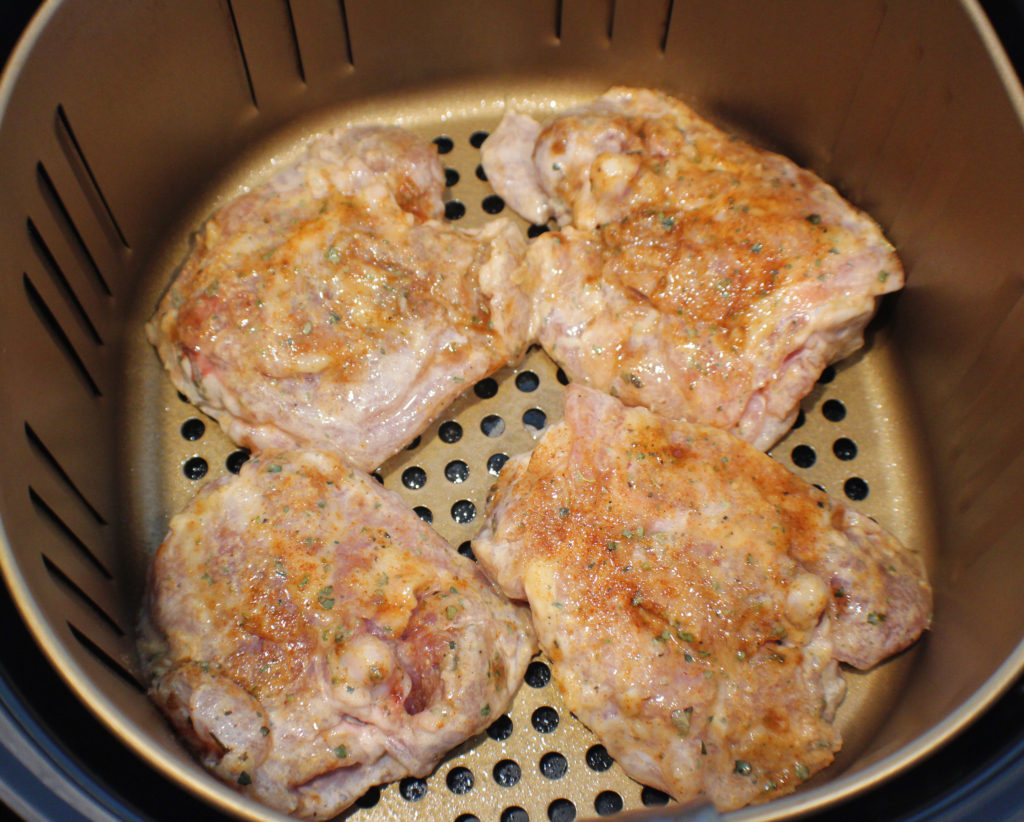
Chicken Thighs in Air Fryer

With a non-aerosol cooking spray, spray the bottom of the basket. Place the chicken in and spray the top of the chicken.

For some models of air fryers, aerosol spray will damage the coating of the basket and will cause it to flake off over time.

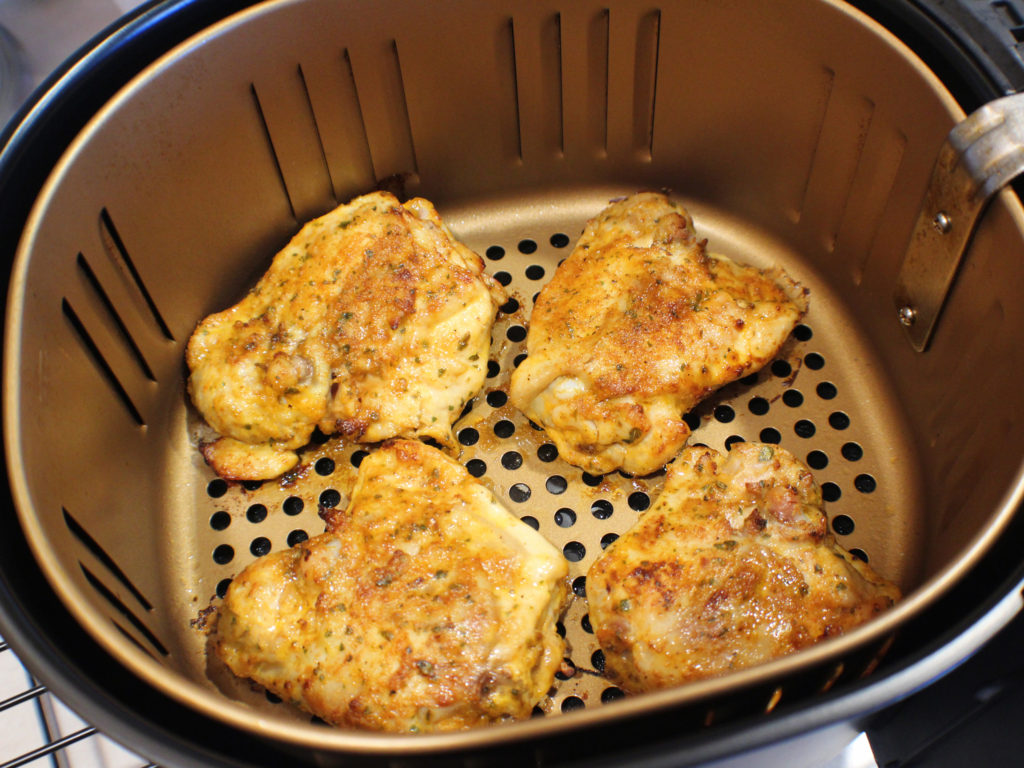
BBQ Chicken Thighs Ready

It takes about 20 minutes to cook at 350 degrees (15 minutes if using boneless chicken thighs). You will want to flip them over after 10 minutes.

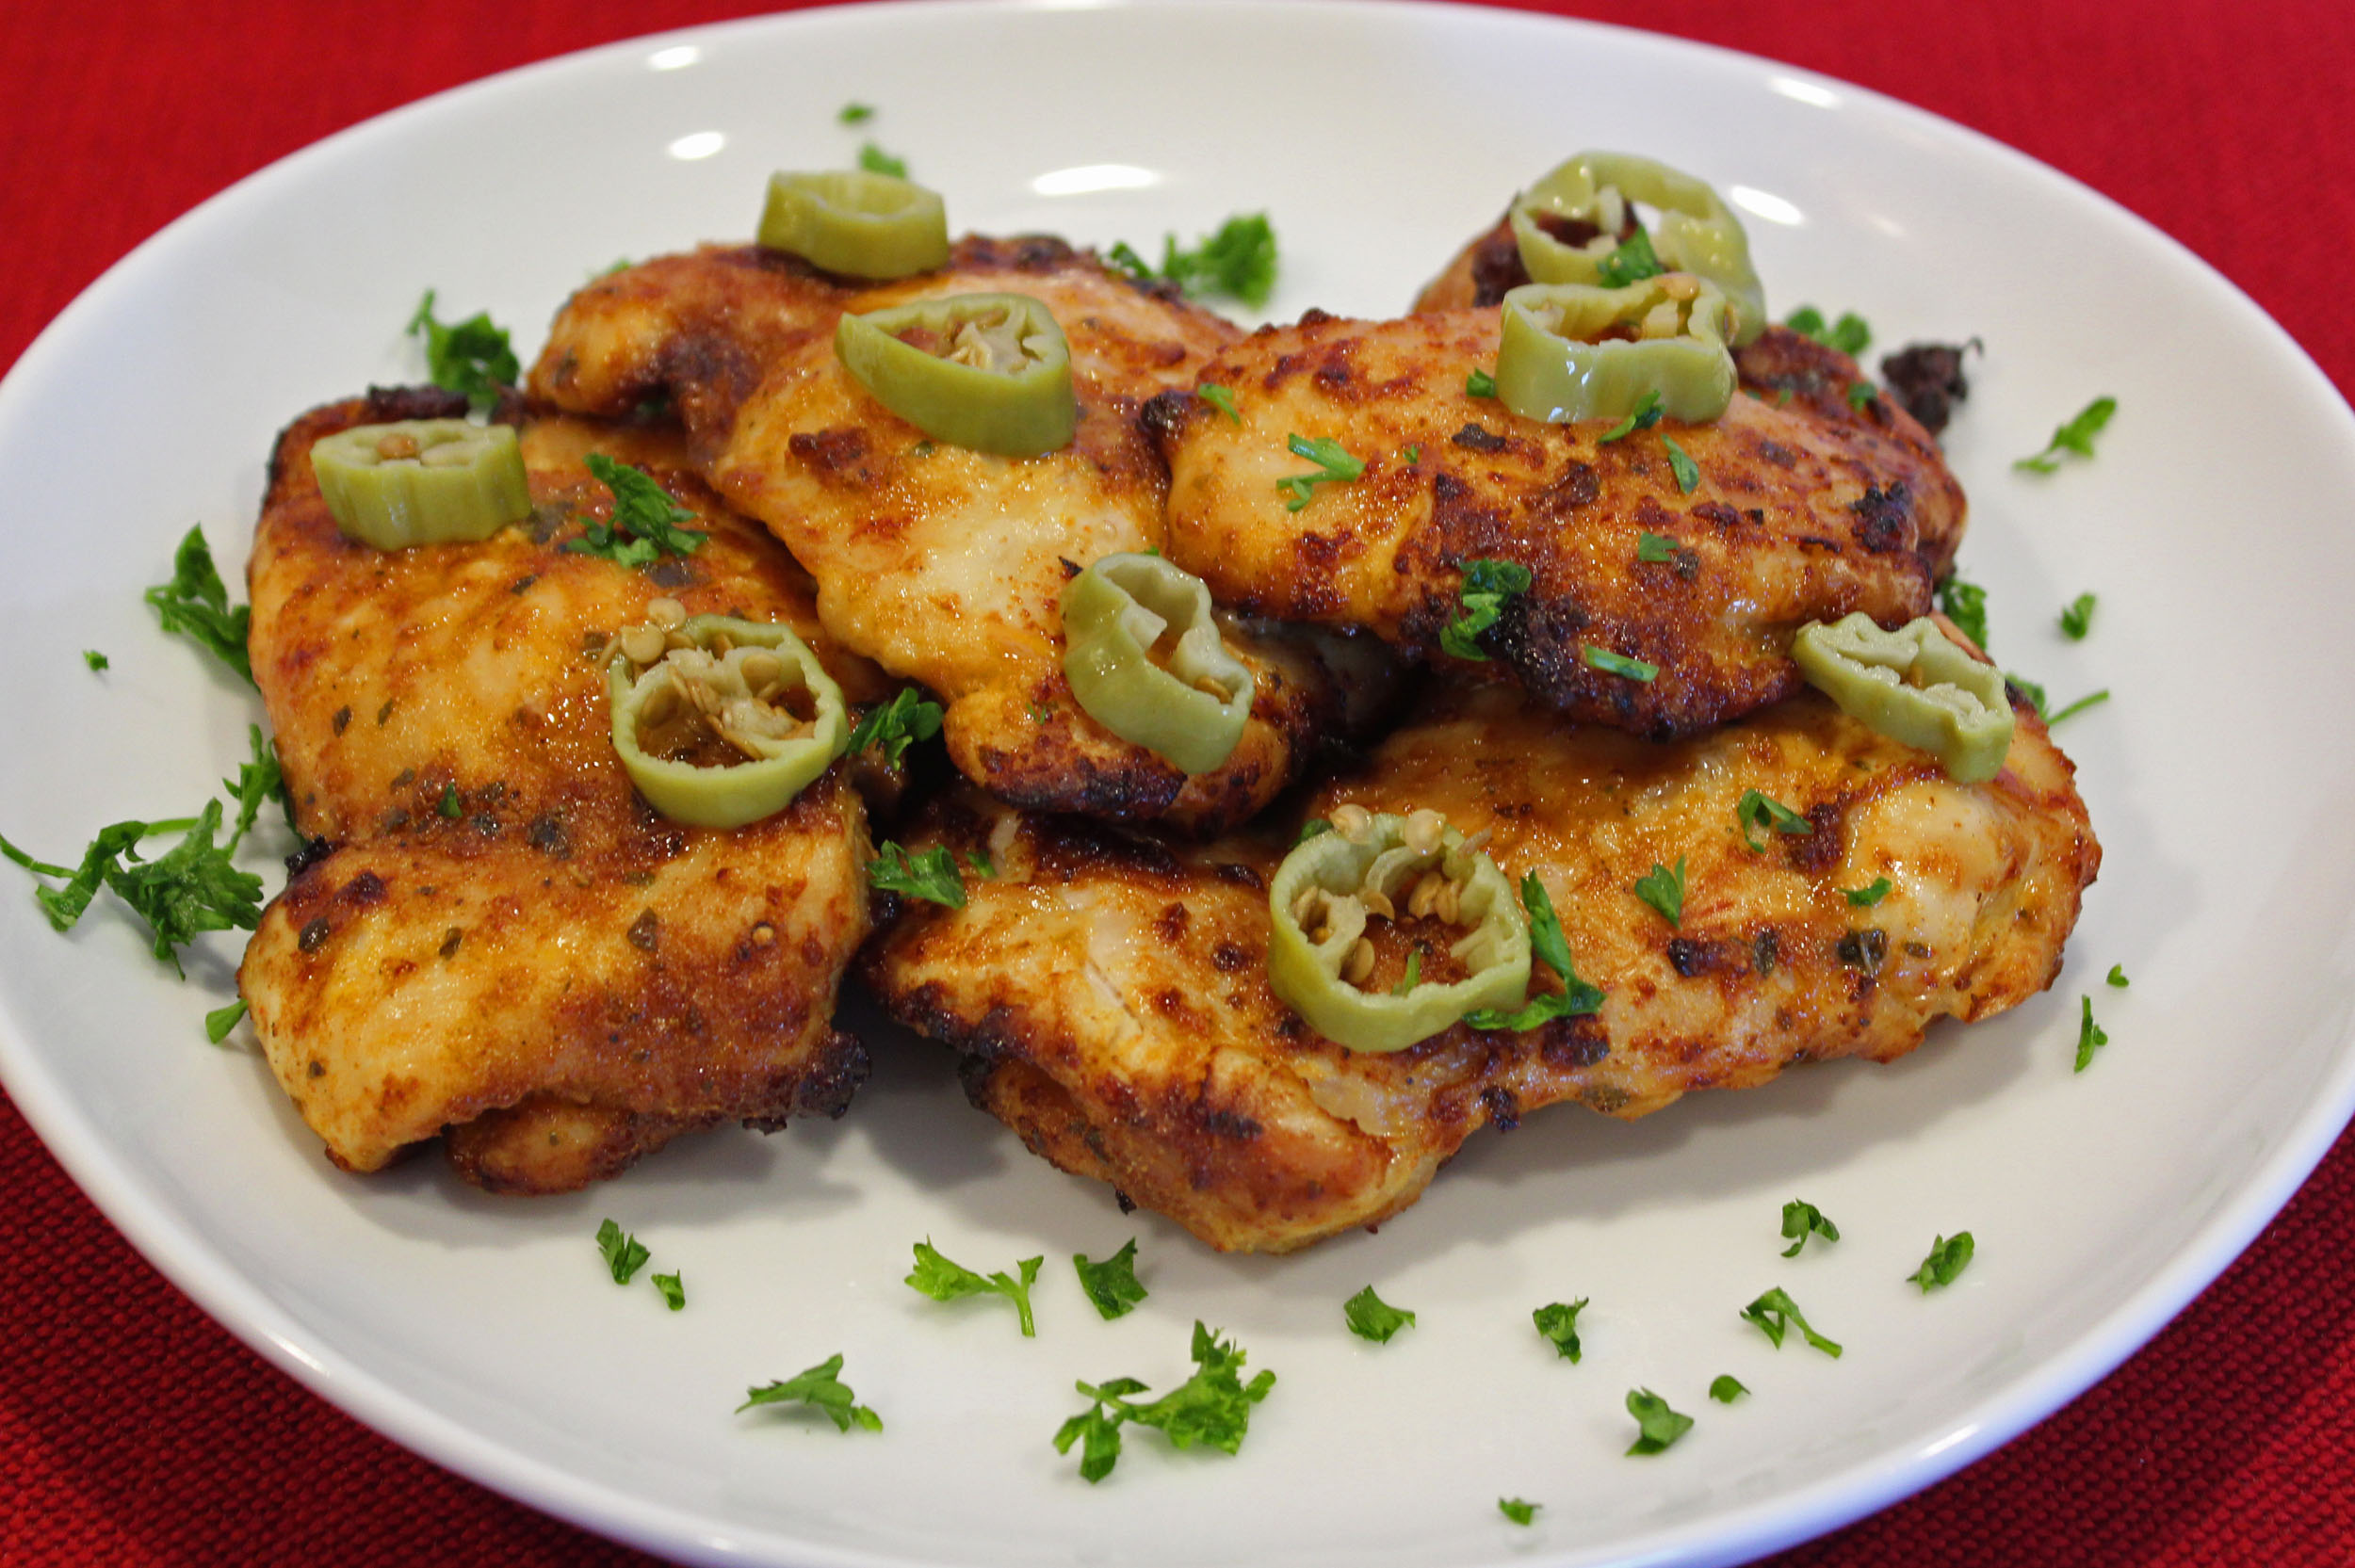
Now you have a tender, slightly smoky tasting chicken thigh to enjoy! If you want an extra little kick, try them with some pepperoncinis.
BBQ Chicken Thighs (Air Fryer)

These super moist and delicious chicken thighs cooked in an air fryer brings the flavors of barbequing any time of the year.
Prep Time10 minutes
Cook Time20 minutes
Resting Time1 hour 30 minutes
Total Time2 hours
Course: Dinner, Main Course
Cuisine: American
Keyword: Air Fryer, Chicken, Dairyfree, Glutenfree
Servings: 4 people
Calories: 74kcal
Author: Eating With Deb

Equipment

  • Air Fryer
  • Large bowl
  • Plate
  • Small Bowl

Ingredients

  • 4 each Chicken thighs bone-in, skinless
  • ½ tsp black pepper

Marinade

  • 2 tbsp mayonnaise
  • 1 tbsp ketchup
  • ½ tsp liquid smoke

Dry Seasoning

  • 1 tbsp brown sugar I prefer dark but it light is fine
  • 1 tsp paprika
  • 1 tsp granulated garlic
  • 1 tsp dry mustard
  • 1 tsp oregano

Instructions

  • In a bowl, mix together mayonnaise, ketchup, and liquid smoke. Sprinkle both sides of the chicken thighs with pepper and add to mayonnaise mixture. Marinate for 1 hour.
  • While marinating, mix together dry ingredients.
  • After about an hour, remove chicken thighs from the bowl, shaking off excess mayo mixture and lay flat on a plate.
  • Sprinkle dry ingredients on both sides of the thighs, using it all up. Let sit for 15 to 30 minutes.
  • Spray bottom of air fryer basket with non-aerosol cooking spray and add thighs. Spray tops of thighs.
  • Cook in air fryer at 350 degrees for 20 minutes turning over at 10 minutes. Internal temperature of chicken should reach 165 degrees, may need to cook another 3 – 5 minutes depending on size of the chicken thighs.
  • Enjoy!

Notes

If using boneless chicken thighs, it will only take about 15 minutes to cook.

Nutrition

Calories: 74kcal | Carbohydrates: 5g | Protein: 1g | Fat: 6g | Saturated Fat: 1g | Trans Fat: 1g | Cholesterol: 4mg | Sodium: 82mg | Potassium: 53mg | Fiber: 1g | Sugar: 4g | Vitamin A: 281IU | Vitamin C: 1mg | Calcium: 16mg | Iron: 1mg

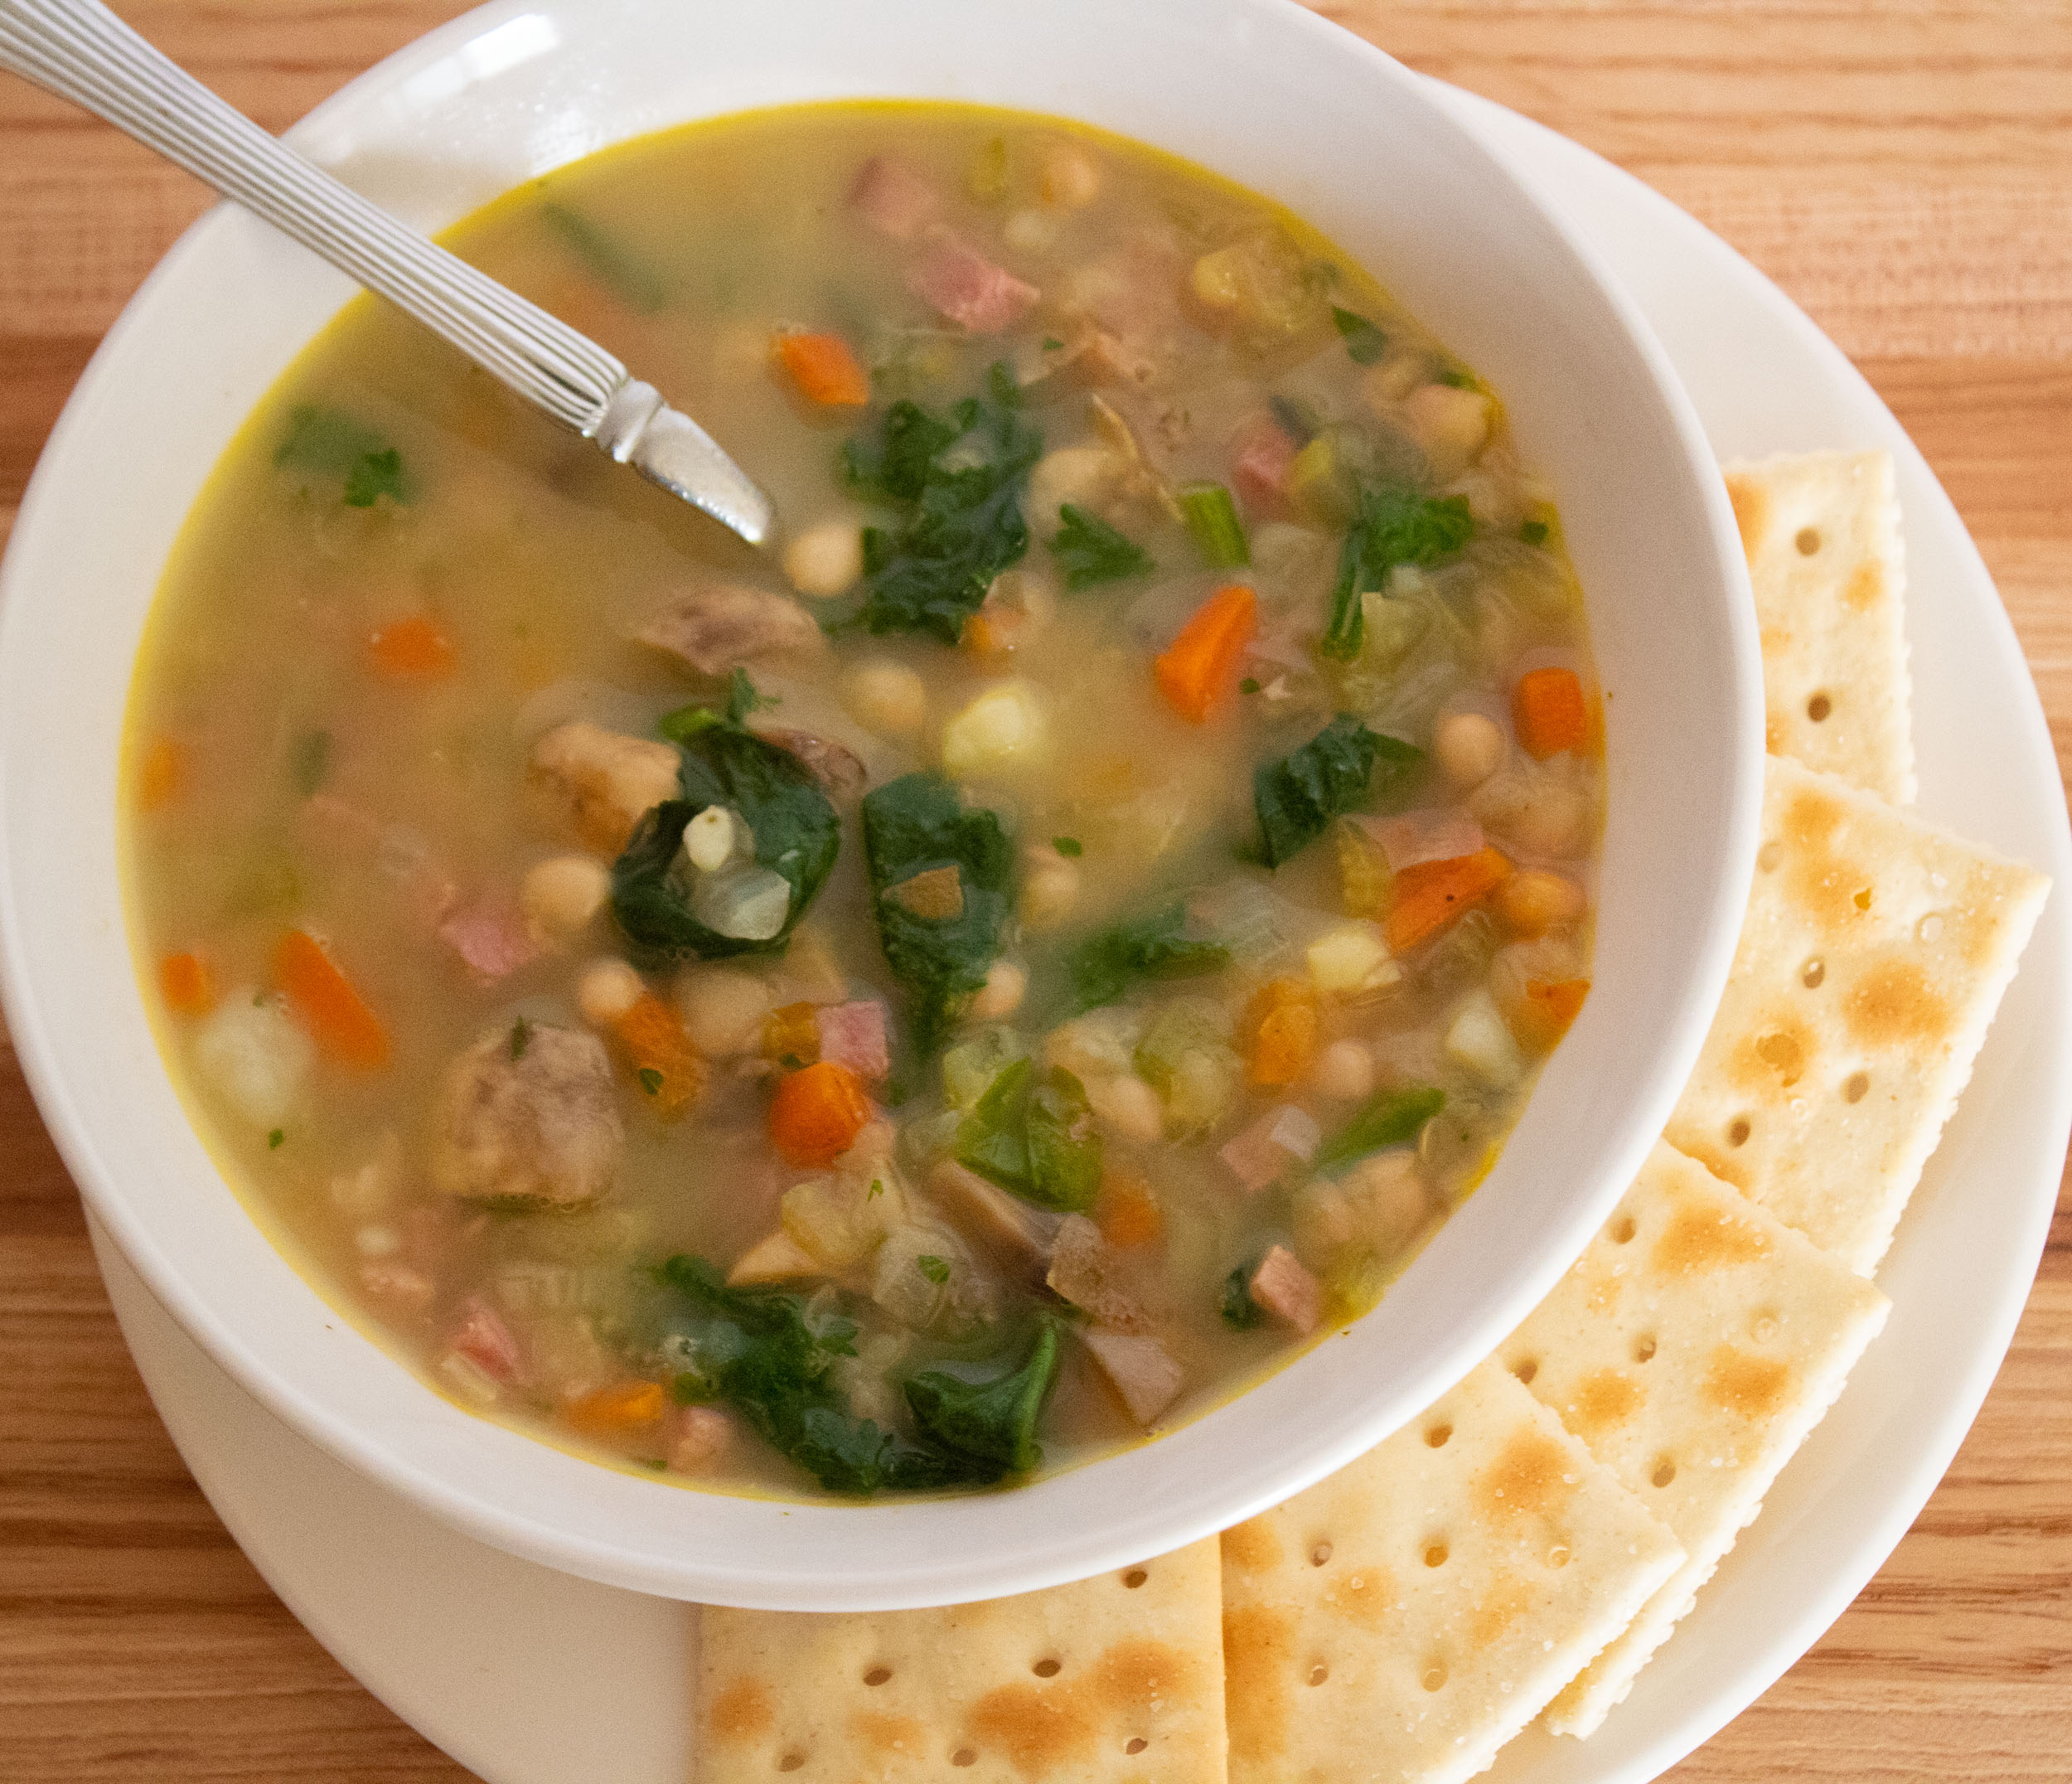
Ham and White Bean Soup

Ham and White Bean Soup

I love a good ham and bean soup and look forward to using up leftover ham in soup making. I’m not a runny soup type person, so I add mashed potatoes to a lot of my soups to thicken them up a bit. I also throw in broccoli, spinach and/or kale into a lot of my soups for added nutrients.

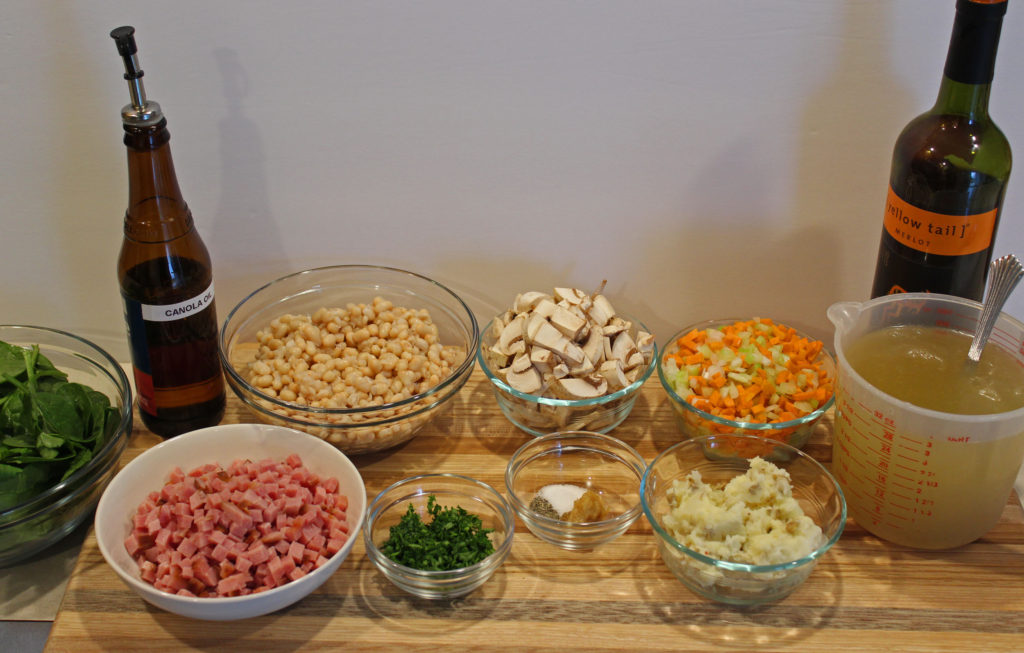
Ham and Bean Soup Ingredients

This is a quick soup to put together so make sure you have all your ingredients ready to go. If you don’t want to thicken it with mashed potatoes or add spinach, that’s ok.

I generally use navy beans because I like the size, but use whatever white bean you want. Just make sure you drain and rinse them well to get as much of the gases off of them as possible.

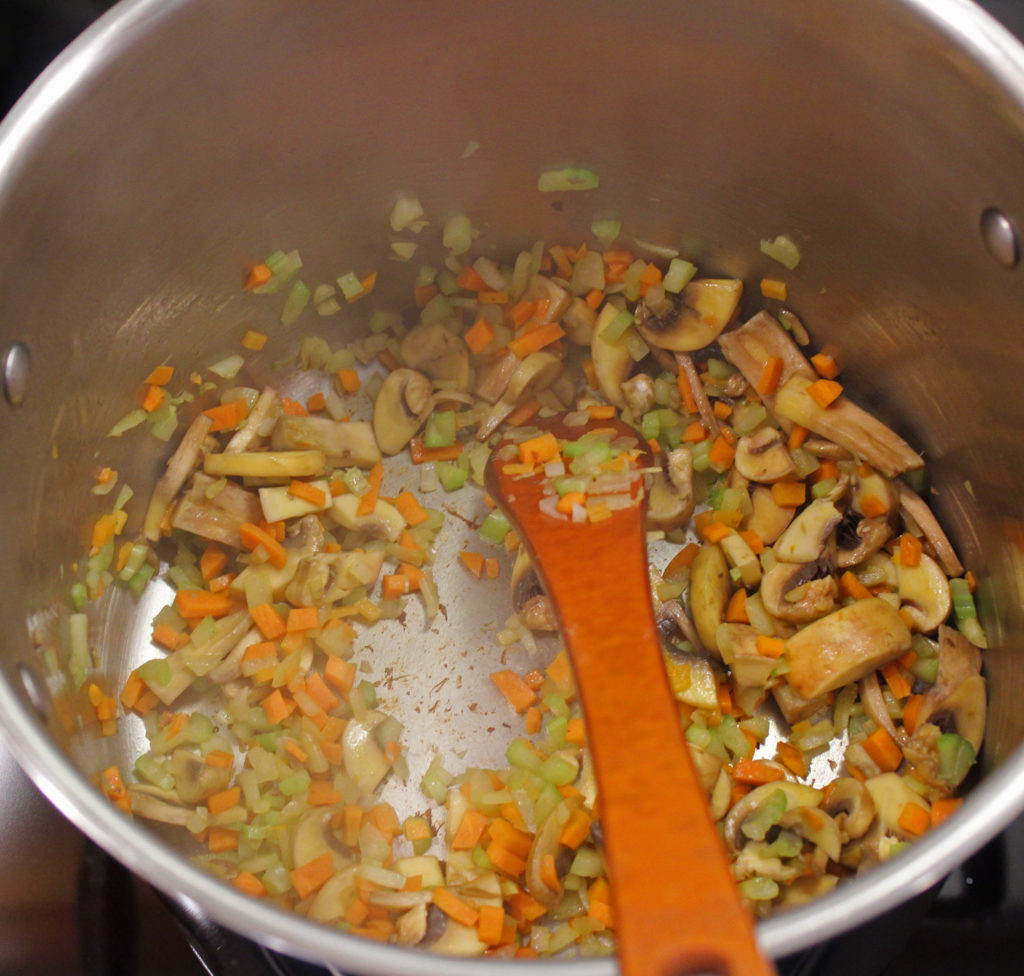
Sautéing Veggies

In a large stock pot, sauté the veggies for a few minutes to soften them. Then deglaze the pan with red wine or red wine vinegar, or a couple tablespoons of the chicken stock. Scrap the bottom of the pan to get all the stuck on bits of flavor up off the bottom.

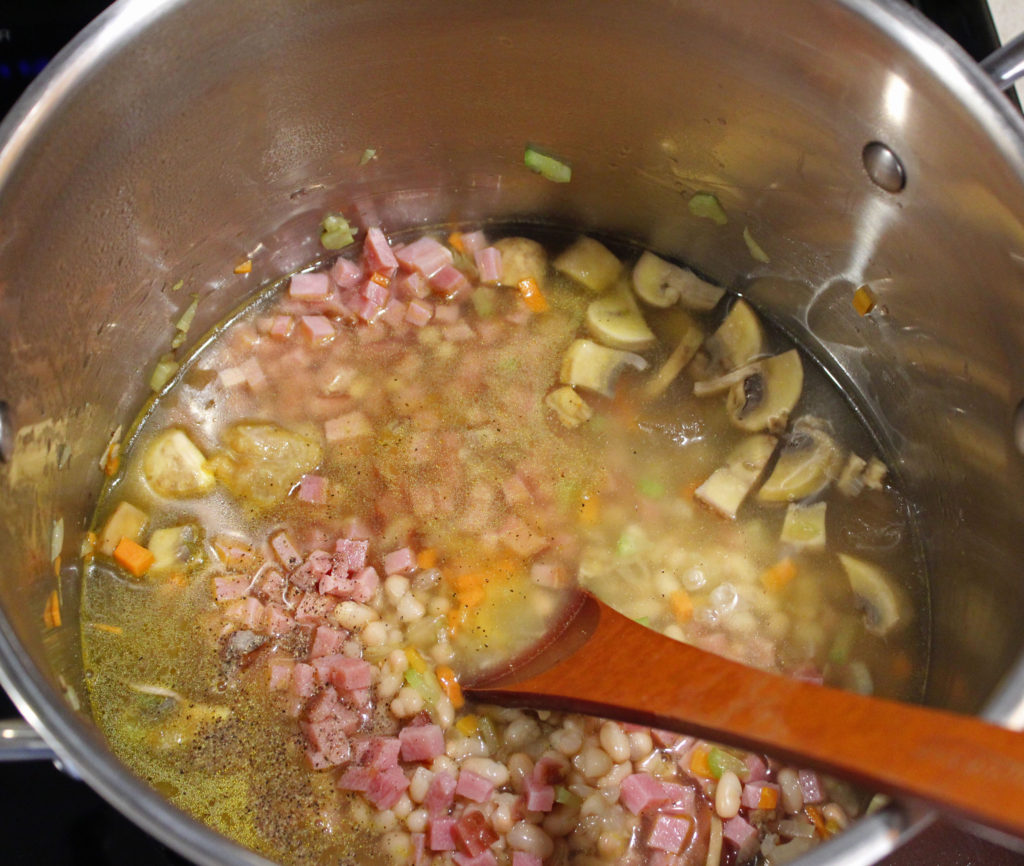
Putting it Together

Now add the ham, beans, stock, and seasonings. Bring to a boil, reduce to simmer, and simmer for about 20 minutes.

Final Ingredients

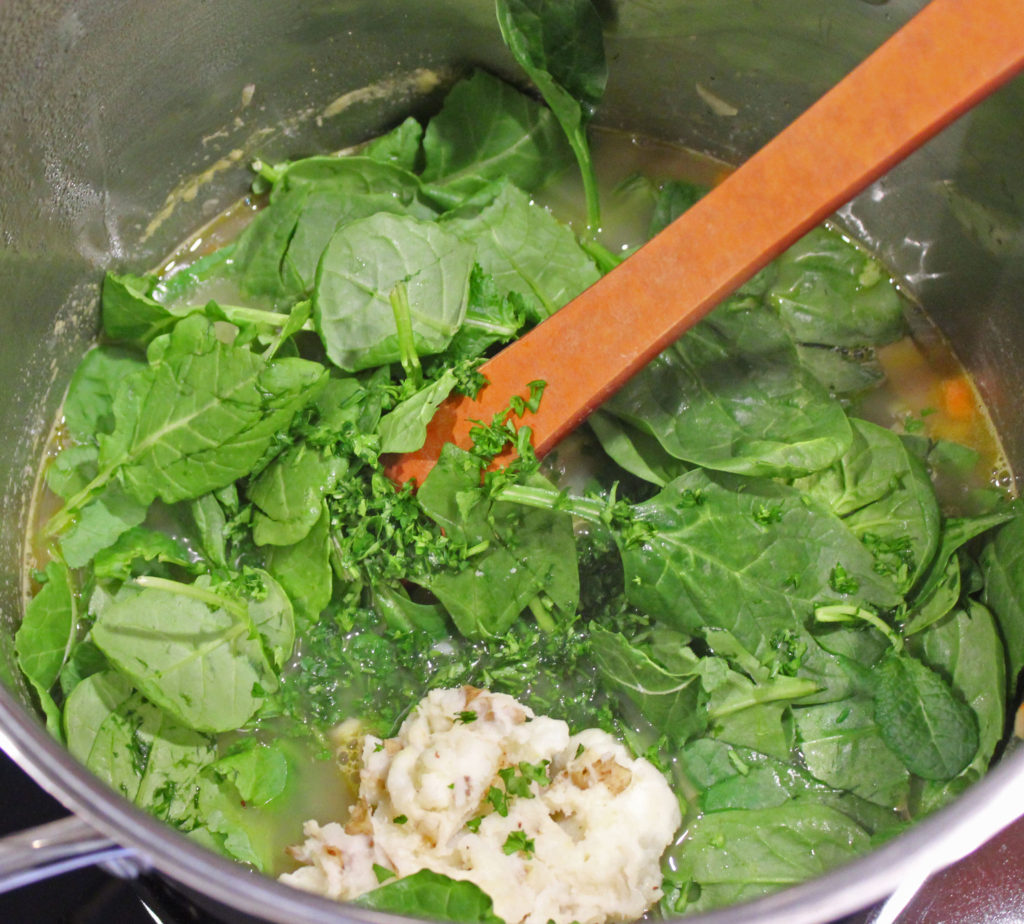
If you’re adding mashed potatoes and hearty greens like spinach, kale, or chard, now is the time to stir them in. Simmer for another 5 minutes or so to wilt the greens and heat everything thru.

It’s as easy as that, you have a delicious ham and white bean soup ready to eat.

Enjoy!

Ham and White Bean Soup

Ham and white bean soup is a wonderful soup for the dreary fall and winter days. Adding mashed potatoes, thickens it a little bit, and spinach and kale adds some extra nutrients to this soup.
Prep Time15 minutes
Cook Time30 minutes
Total Time45 minutes
Course: Dinner, Lunch
Cuisine: American
Keyword: ham and bean soup, soup
Servings: 4 people
Calories: 577kcal
Author: Eating With Deb

Equipment

  • Knife and cutting board
  • 6 to 8 quart stock pot
  • heat resistant spoon

Ingredients

  • 2 tbsp vegetable oil or canola oil
  • 1/3 cup yellow onion diced
  • 1 stalk celery chopped, about 1 cup
  • 1 each carrot chopped, about 1 cup
  • 2 cups mushrooms sliced
  • 2 tbsp red wine or red wine vinegar
  • ½ tbsp garlic fresh minced
  • ½ tsp sea salt
  • ½ tsp black pepper
  • 2 cups ham diced
  • 2 cans white beans drained and rinsed well, 15 oz cans
  • 4 cups chicken stock
  • 1 cup mashed potatoes optional
  • 4 handfuls spinach and/or kale, optional
  • 2 tbsp parsley chopped, optional

Instructions

  • On medium heat, heat large stock pot and add oil, onions, celery, mushrooms, and carrots. Sauté for 3 minutes.
  • Deglaze pan with red wine, scrapping all the brown bits off the bottom.
  • Add ham, beans, stock and seasonings. Bring to a boil. Reduce heat and simmer for 20 minutes.
  • If adding mashed potatoes, spinach and/or kale, or parsley, stir in and cook for another 3 minutes or so until the potatoes are hot and the spinach is wilted.
  • Enjoy!

Nutrition

Serving: 2cups | Calories: 577kcal | Carbohydrates: 57g | Protein: 37g | Fat: 22g | Saturated Fat: 6g | Polyunsaturated Fat: 6g | Monounsaturated Fat: 9g | Trans Fat: 1g | Cholesterol: 51mg | Sodium: 1524mg | Potassium: 1712mg | Fiber: 11g | Sugar: 7g | Vitamin A: 3079IU | Vitamin C: 26mg | Calcium: 173mg | Iron: 7mg

Kielbasa Stew

Kielbasa Stew

Looking through the freezer I found some kielbasa sausage that didn’t end up on my grill this summer. In trying to figure out what to make with it, I looked through the pantry and found some lentils and quinoa and decided to make a hearty stew to stand up to the wonderful flavors of the kielbasa sausage.

This is a fairly simple stew to make and you can accomplish prepping the vegetables and kielbasa while the lentils and quinoa are cooking.

Quinoa and Lentils

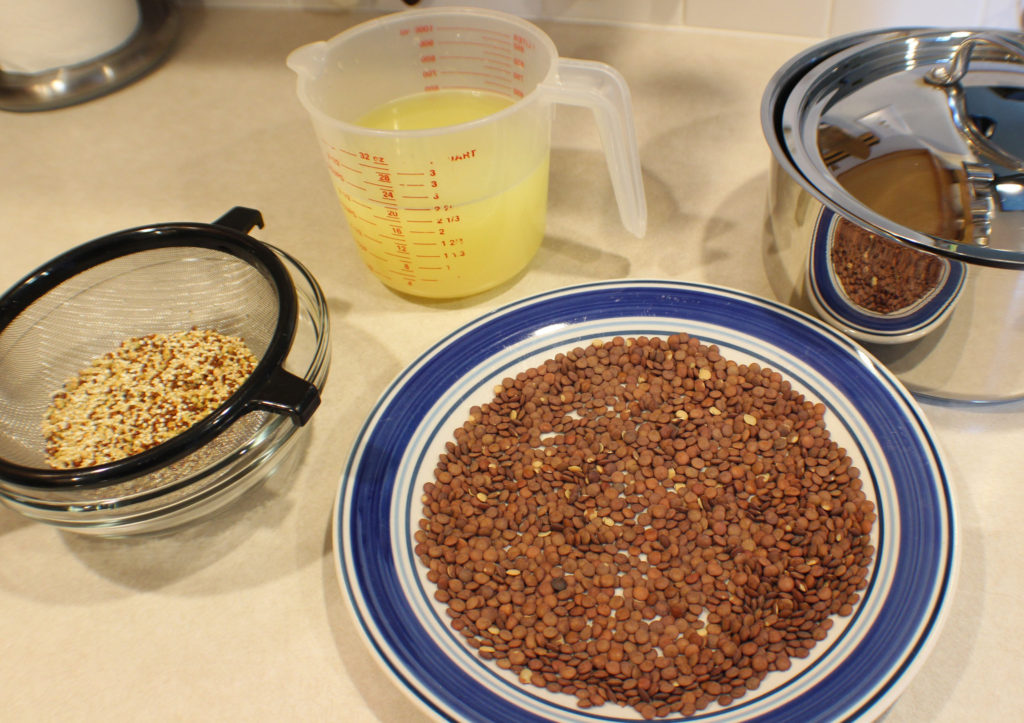
First you want to rinse the quinoa. For some people quinoa can taste a bit soapy when it is cooked, so rinsing it is an important step prior to cooking.

Also, sort through the lentils to ensure there are no any rocks.

You can put both in one pan to cook since they take about the same amount of time. I happened to have a quinoa and grain mix in my pantry so I used that.

Put this on the stove and simmer with a lid on the pan for about 20 minutes.

Kielbasa and Veggies

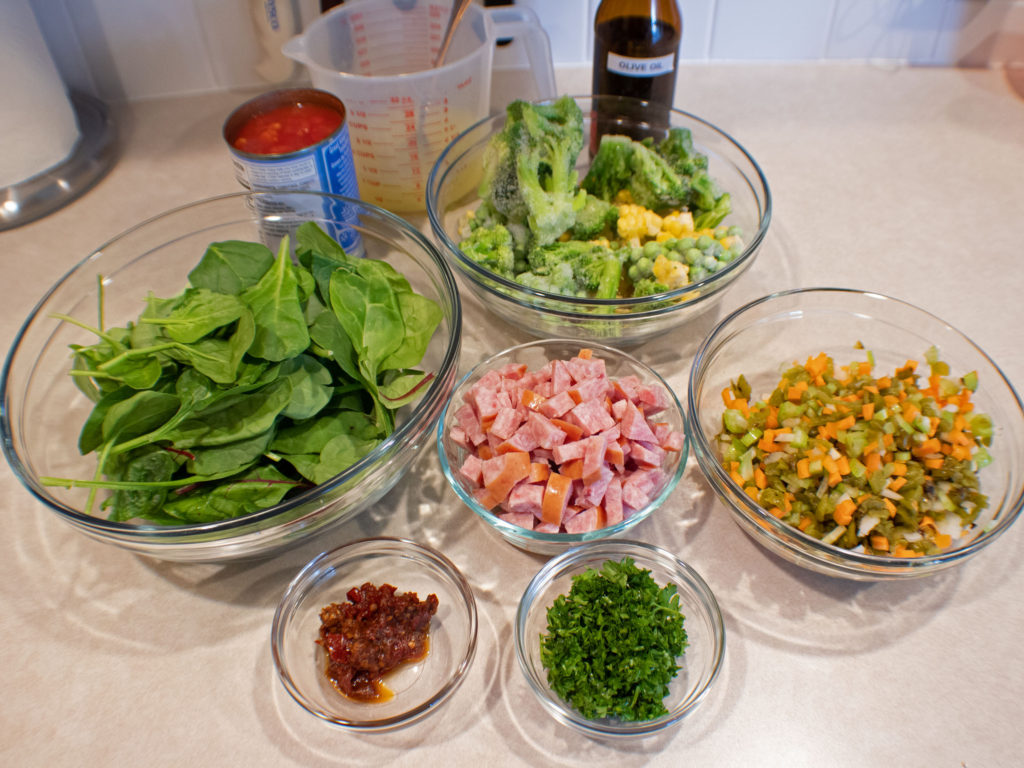
While the lentils and quinoa are cooking, you can gather and prep the rest of the ingredients. I found some bell peppers in my freezer from my garden this summer that had been roasted, so I used them instead of a fresh bell pepper.

I also kept the frozen broccoli on top of the peas and corn because when it thaws a bit, I chopped it down into bite size pieces.

The chipotle pepper was also in my freezer. When I open a can of chipotle peppers in adobo sauce, I usually only use 1 or 2 at a time, so the rest I freeze individually in snack size bags for future use. That way I don’t waste most of a can of chipotle peppers.

At this point your lentils and quinoa are probably cooked. If there is a lot of liquid left, you can strain it, or just turn up the heat and boil it out. Just be careful not to burn the lentils and quinoa. If there is a little liquid left, its not a big deal to add it to the stew.

Sautéed Kielbasa and Veg

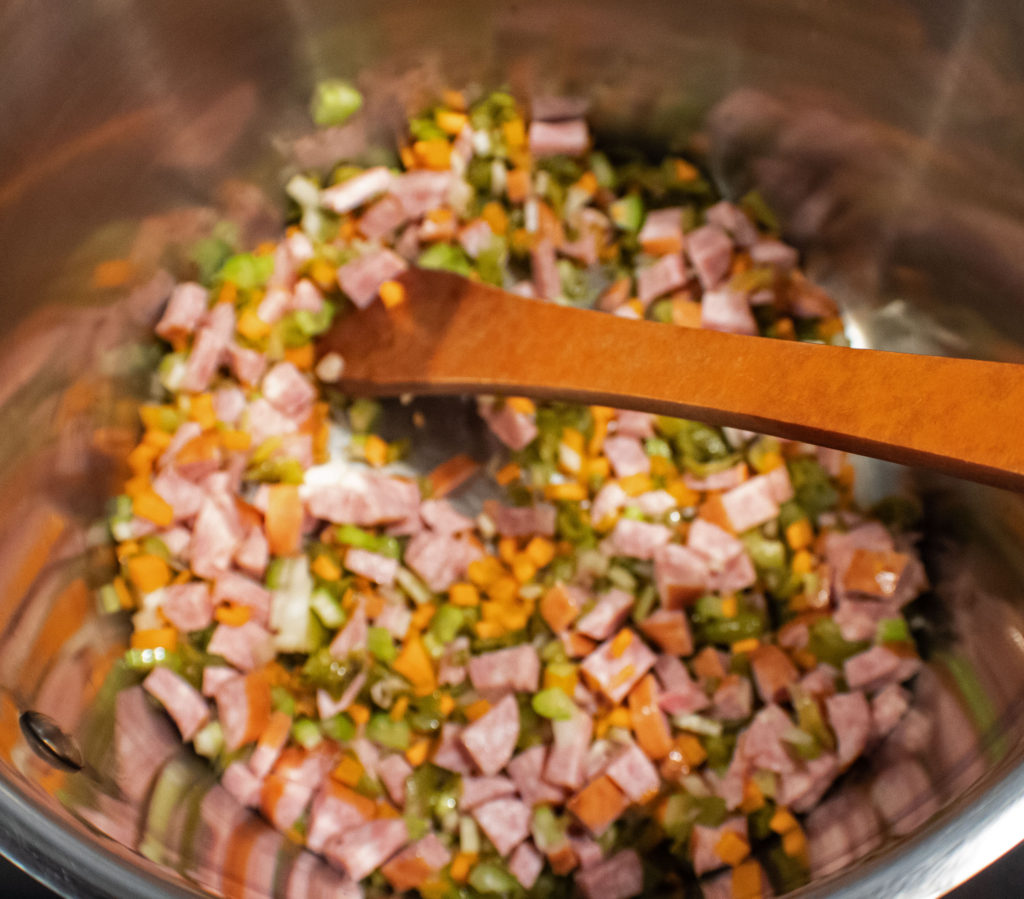
In a larger stock pot, saute the kielbasa, carrots, onions, celery, and bell peppers. Be careful not to add too much oil, the kielbasa has some fat, and you don’t want a greasy stew in the end. About 1 tablespoon or a little less oil is plenty.

Simmering Kielbasa Stew

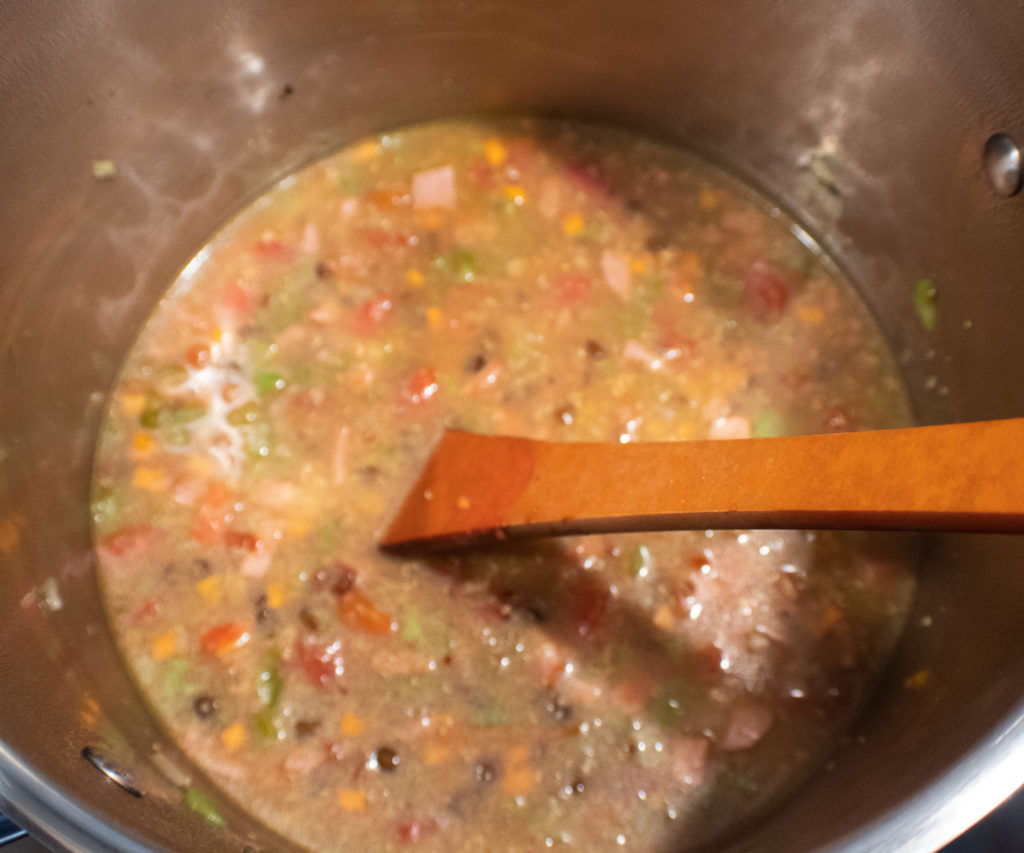
Now add the canned tomatoes, chicken stock, chipotle pepper if you are using one, lentils, and quinoa. You only need to simmer this for about 10 minutes. Everything is cooked, you’re just combining the flavors.

This is when I rough chop the frozen broccoli. 

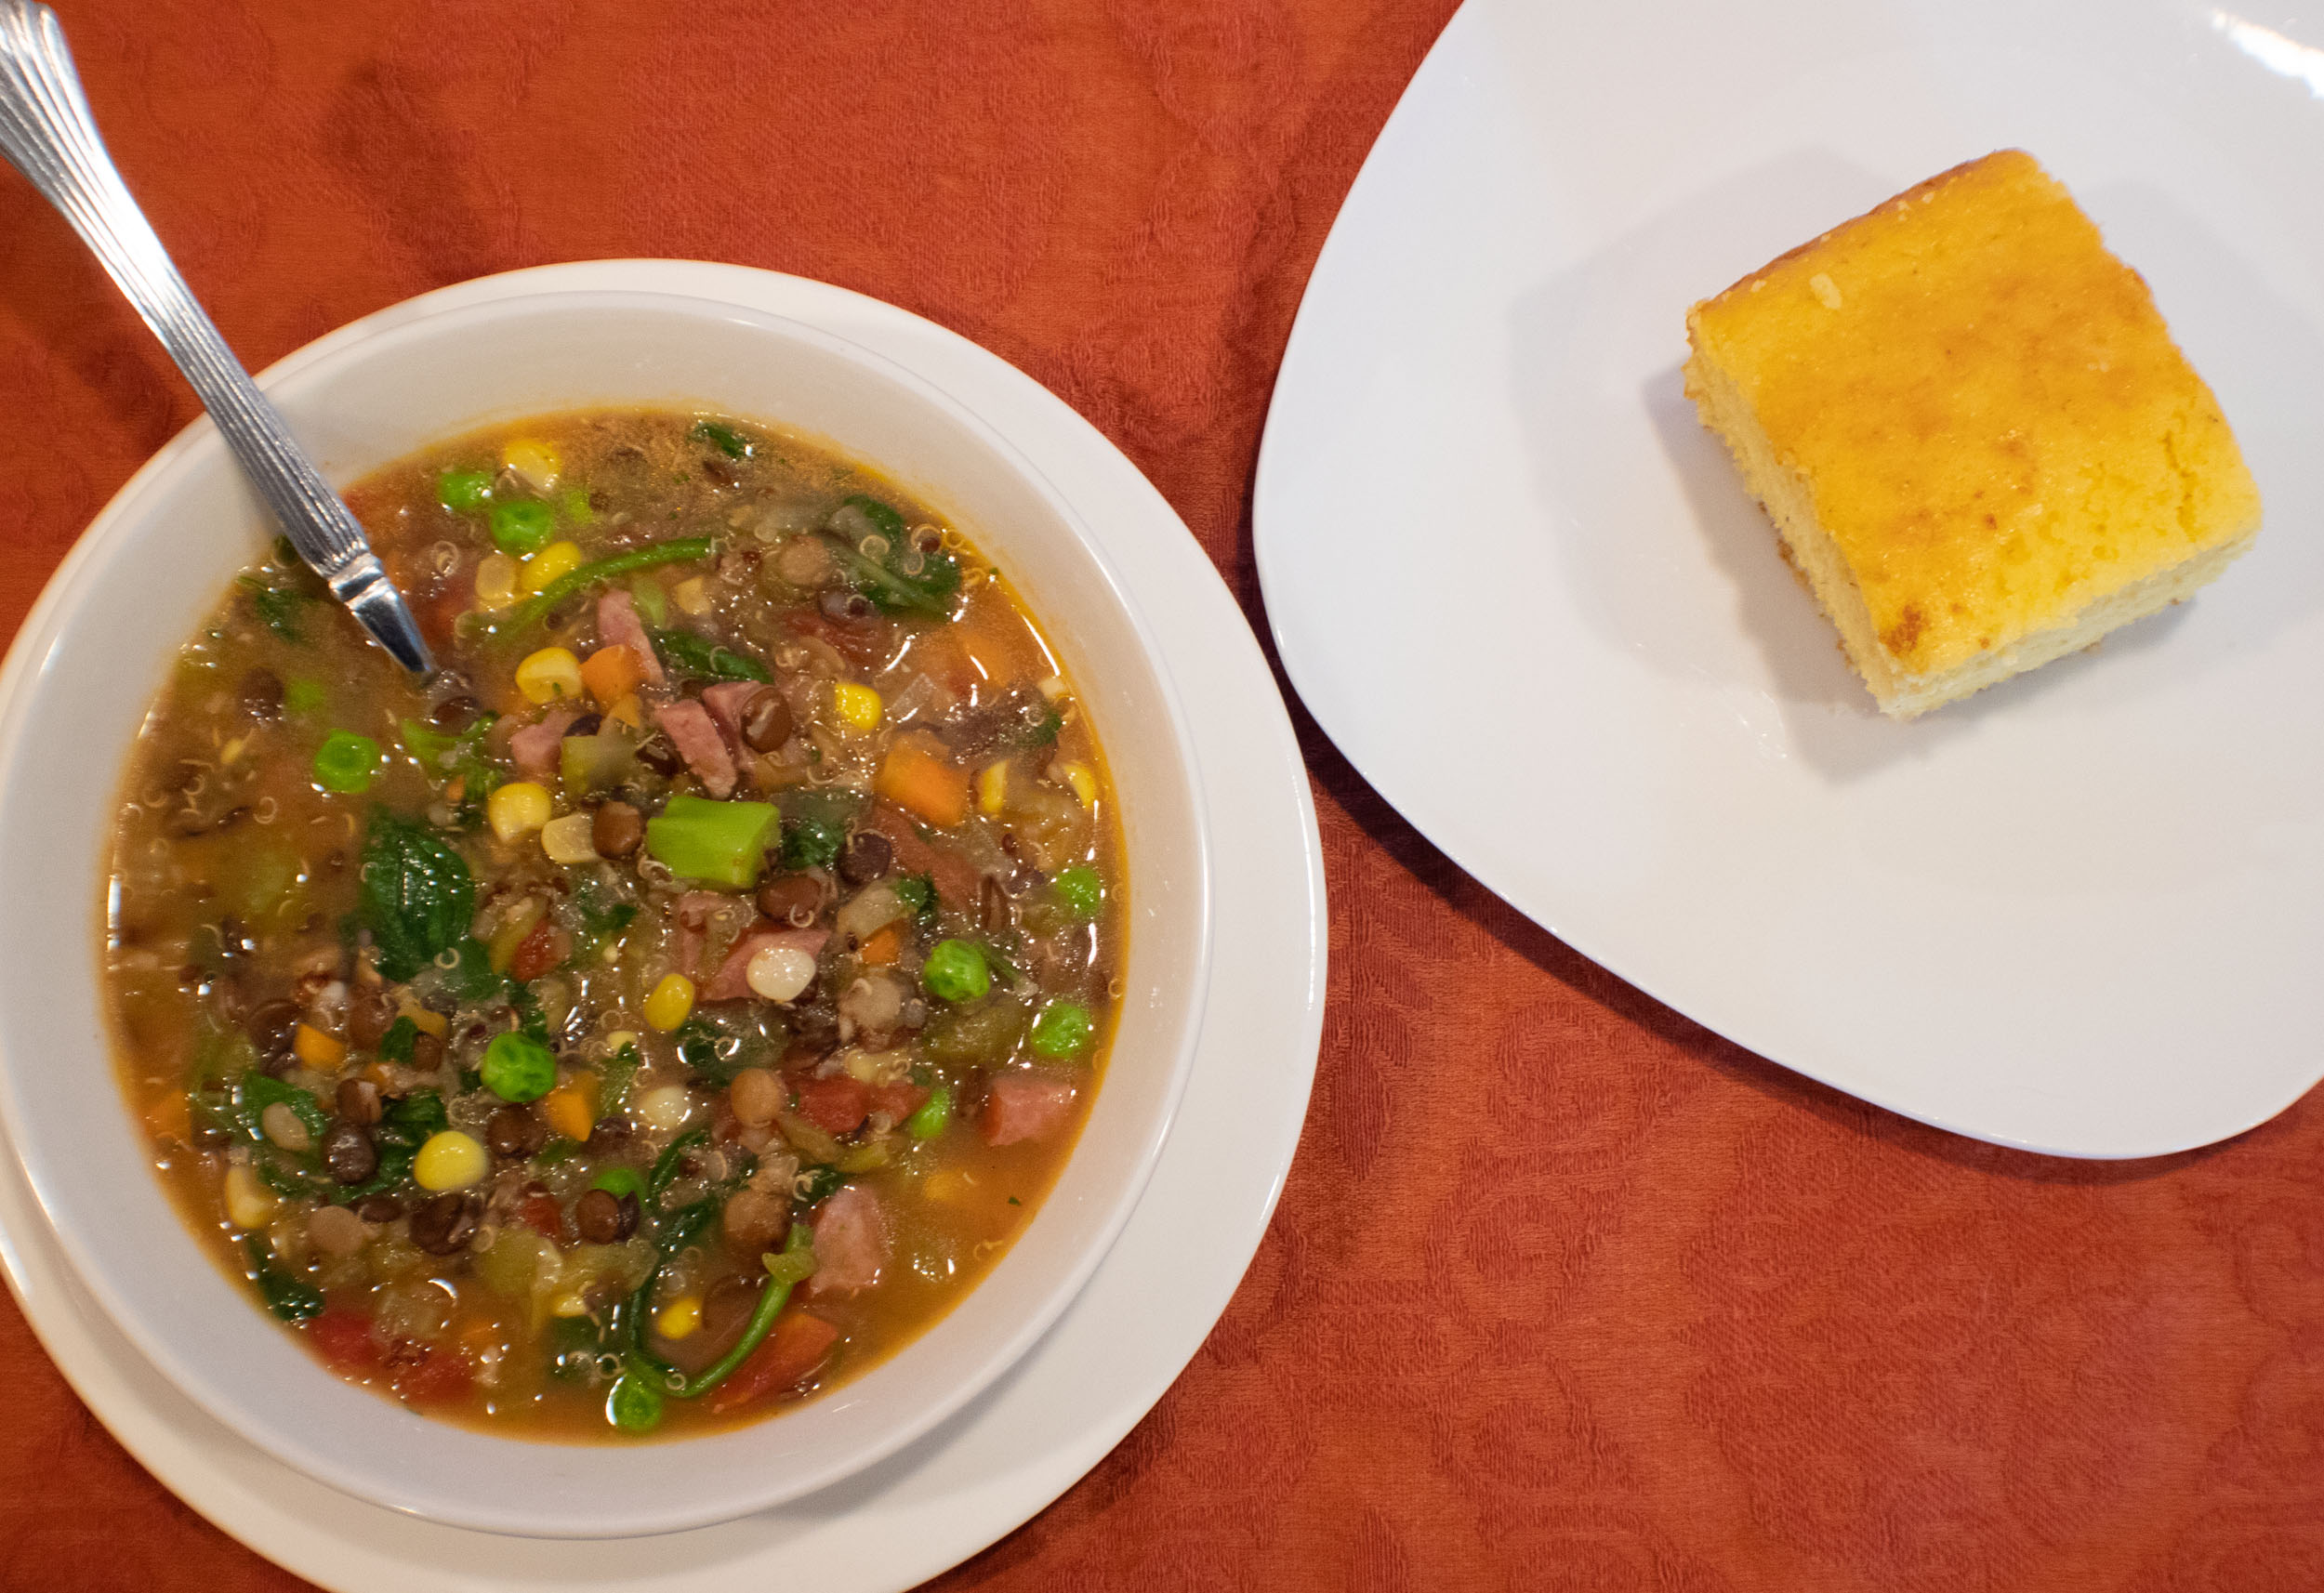
Kielbasa Stew Finished

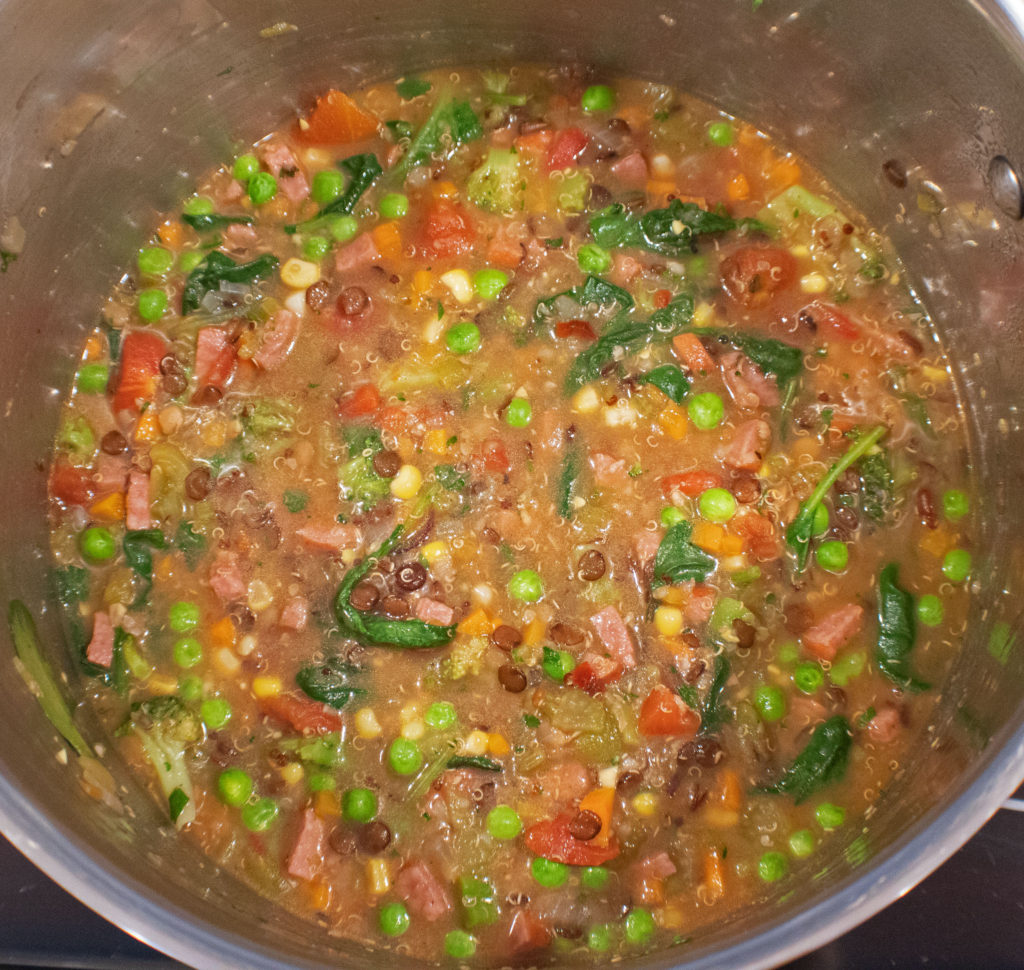
Stir in the frozen veggies, parsley, and fresh spinach. I happened to have a baby spinach, kale, and chard mix that I used.

Simmer for about 5 minutes to heat everything up and wilt the greens, and it’s ready to eat.

Try this soup with some homemade Cornbread for that finishing touch.

Enjoy!

Kielbasa Stew

A hearty, somewhat smoky and spicy stew to warm you on a cold winter day, filled with nutritious vegetables, quinoa, lentils, and kielbasa sausage.
Prep Time20 minutes
Cook Time35 minutes
Total Time55 minutes
Course: Dinner, Lunch
Cuisine: American
Keyword: kielbasa, soup, stew
Servings: 5 servings
Calories: 482kcal
Author: Eating With Deb

Equipment

  • Cutting board and knife
  • 4 quart sauce pan
  • Fine mesh sieve
  • 6 quart sauce pan

Ingredients

Lentils and Quinoa

  • ½ cup lentils
  • ½ cup quinoa
  • 2 ½ cups chicken stock

Kielbasa and Vegetables

  • 1 tbsp olive oil
  • ½ pound kielbasa chopped
  • 1 cup carrots diced
  • ¼ cup yellow onions diced
  • 1 stalk celery diced
  • 1 each bell pepper diced
  • 1 each chipotle pepper or jalapeno pepper, diced, optional
  • 1 cup corn frozen
  • 1 cup peas frozen
  • 2 cups broccoli frozen, chopped
  • 4 handfuls spinach
  • ¼ cup parsley fresh, chopped

Sauce:

  • 1 can diced tomatoes in sauce 15 ounce can
  • 2 cups chicken stock

Instructions

  • Put quinoa in a fine mesh sieve and rinse well. Sort lentils to ensure there isn’t any rocks.
  • Add rinsed quinoa, lentils and 2 ½ cups chicken stock or water in a 3 to 4 quart sauce pan on the stove over high heat, Bring to a boil, reduce to a simmer, cover and cook for 15 to 20 minutes until done. Strain if there is excess liquid.
  • Prepare kielbasa and vegetables. Open tomatoes and get chicken stock. Measure out frozen veggies and spinach.
  • In a 6 quart or larger sauce pan, heat oil. Add kielbasa, onions, carrots, bell pepper, and celery. Sauté for about 5 minutes until the onions become translucent.
  • Stir in chipotle or jalapeno pepper, tomatoes in sauce, chicken stock, lentils and quinoa. Reduce heat and simmer for 10 minutes.
  • Rough chop the frozen (thawing) broccoli to bite size pieces.
  • Stir in corn, peas, broccoli, spinach, and parsley. Simmer for another 3 - 5 minutes to heat the frozen veggies and wilt the spinach.
  • Enjoy!

Notes

Makes about 10 cups.

Nutrition

Calories: 482kcal | Carbohydrates: 52g | Protein: 25g | Fat: 21g | Saturated Fat: 6g | Polyunsaturated Fat: 3g | Monounsaturated Fat: 10g | Cholesterol: 38mg | Sodium: 885mg | Potassium: 1286mg | Fiber: 13g | Sugar: 11g | Vitamin A: 7464IU | Vitamin C: 68mg | Calcium: 123mg | Iron: 6mg

Smoked Prime Rib

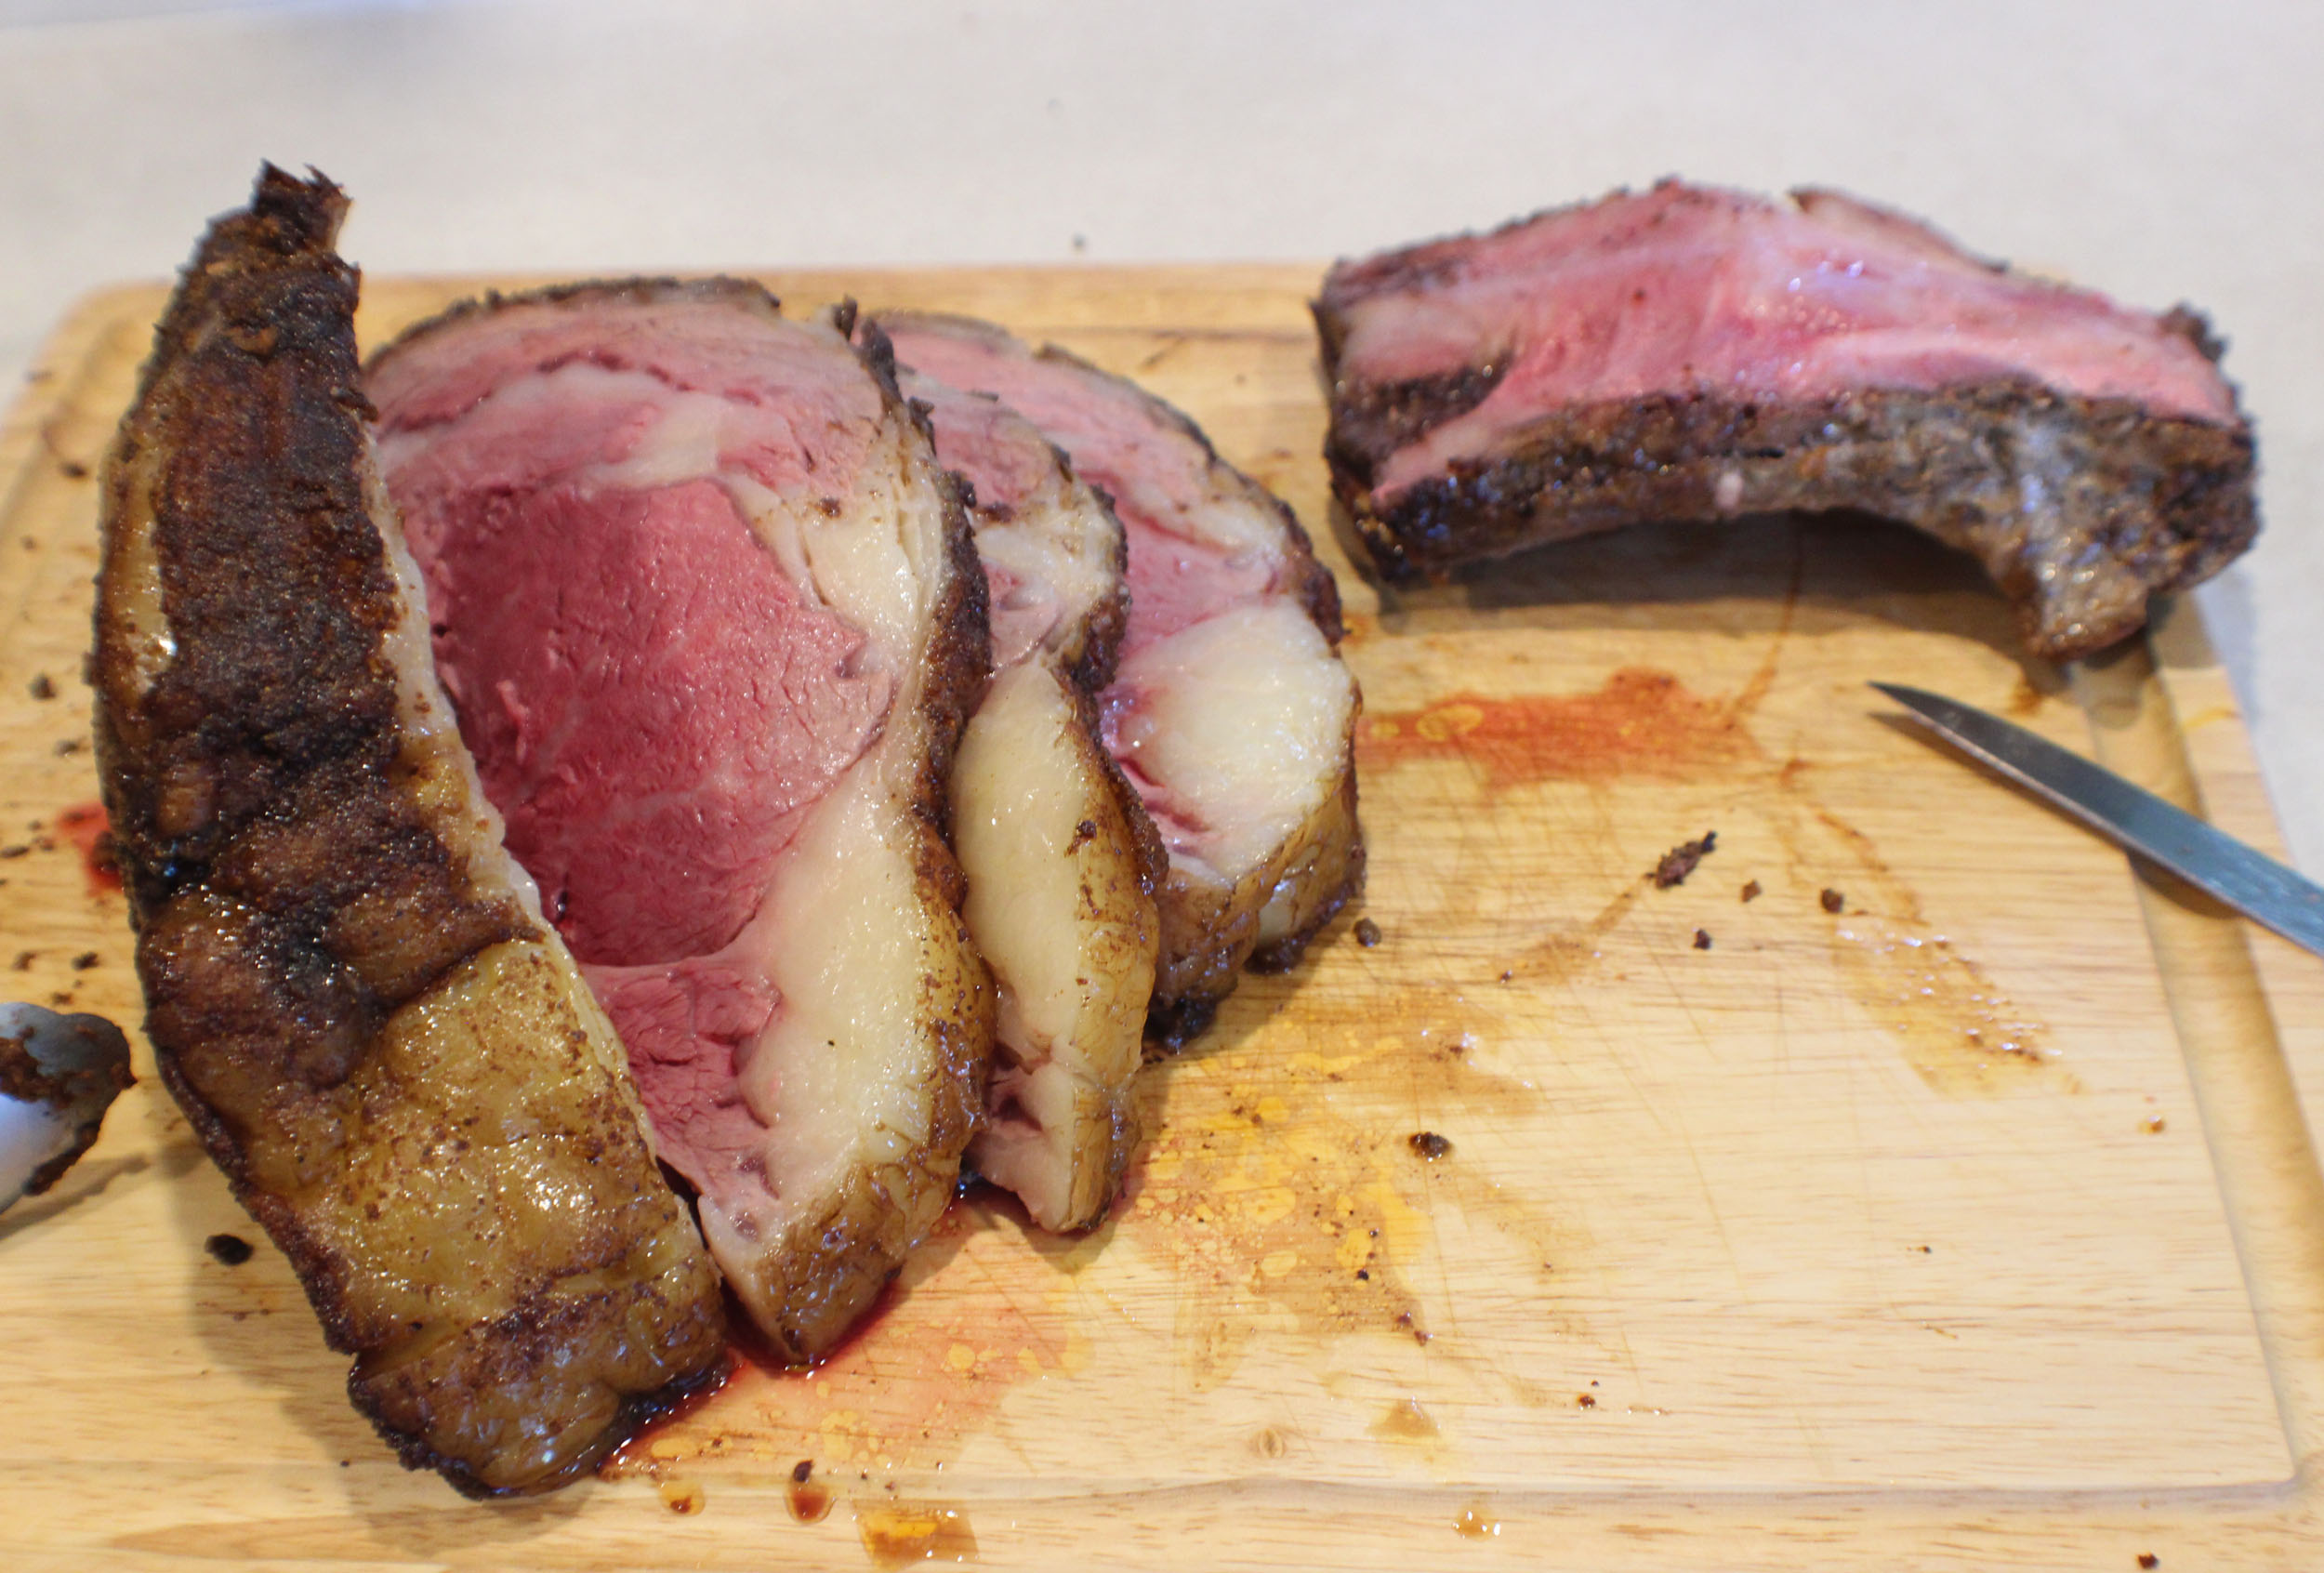
Medium Rare Smoked Prime Rib

I, like most meat eaters, love a good prime rib. I have tried different oven cooking methods, including the one where you cook it at 500 degrees for about 20 minutes, then turn the oven off and let it cook for a couple more hours – just don’t open the oven door. I haven’t had much luck with that method as it’s hard to determine exactly when it will be done.

When I got a smoker, I decided to try my luck with smoking prime rib. It is now the only way I cook prime rib. It is an easy way to cook prime rib, plus I always know when it will be cooked to a perfect medium rare. 

I also put a pan of Au Jus under the prime rib while smoking it. The seasonings and the juices drip into the Au Jus and add additional smoky tastiness to it.

Another bonus to smoking prime rib is it frees up your oven to cook any side dishes that you want with the Smoked Prime Rib.

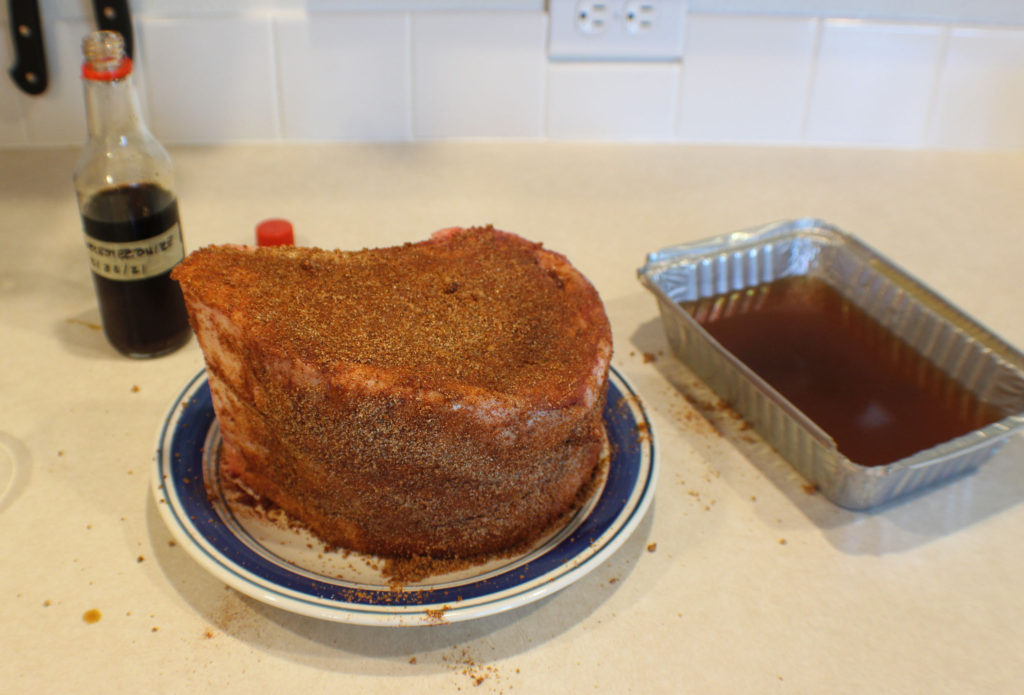
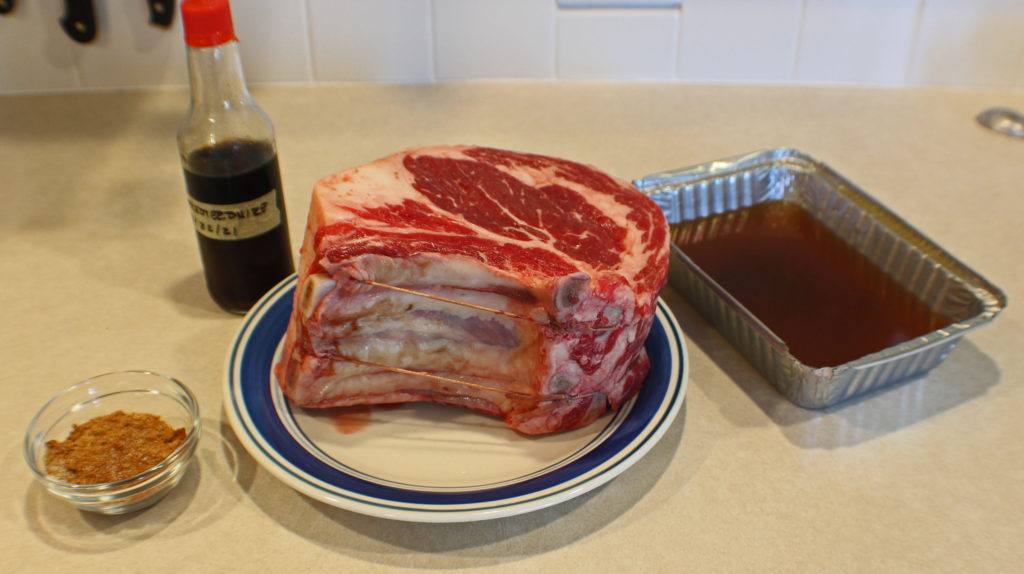
Prime Rib Ready to Season

Mix together the dry seasonings and put the beef stock in a pan. I by inexpensive foil pans that I use specifically for the smoker, but a metal pan will work too.

Rub the Worcestershire sauce around the outside of the prime rib and then the dry seasoning.

Now prepare your smoker according to the manufacture directions. I like to use hickory chips but use what flavor chips you like. 

Set the smoker to 225 degrees and an internal food temperature to 140 degrees, and do a chip burn.

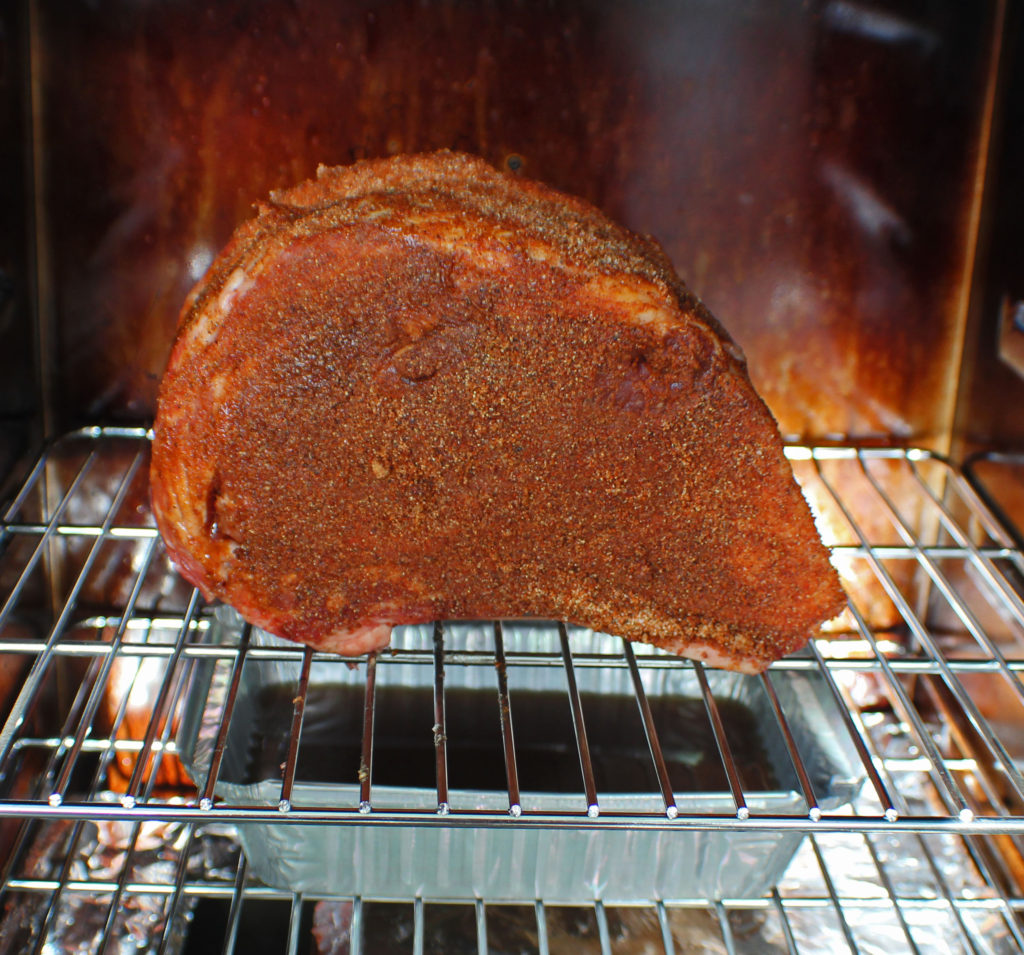
Put the pan of beef stock under the prime rib. This will catch any drippings from the meat and flavor the au jus. 

Insert the meat thermometer into the thickest part of the meat. It’s ready to start cooking.

I put my prime rib in the smoker fat side up. This way the fat drippings drip down through the meat and help flavor the meat as it cooks.

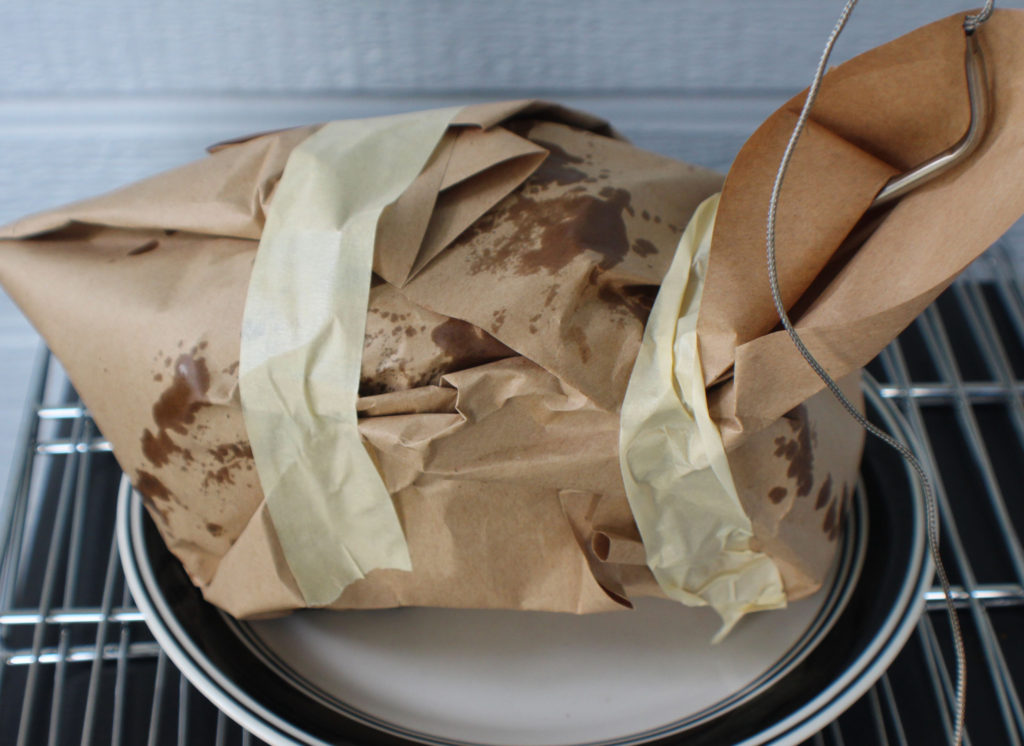
Prime Rib Wrapped in Butcher Paper

Once the prime rib reaches 100 degrees, wrap it in Butcher Paper. I found mine on Amazon.

Put it back in the smoker and cook until it reaches 140 degrees.

Wrapping it in butcher paper isn’t completely necessary, but it does have it’s benefits. Butcher paper helps the meat retain moisture and it’s more breathable than foil, so it doesn’t create a steaming environment for the meat.

A very important step is to let it rest for 1/2 hour; this helps ensure all of the juices don’t run out upon cutting. You will still have some of the juice run out, but the meat will remain moist and tender.

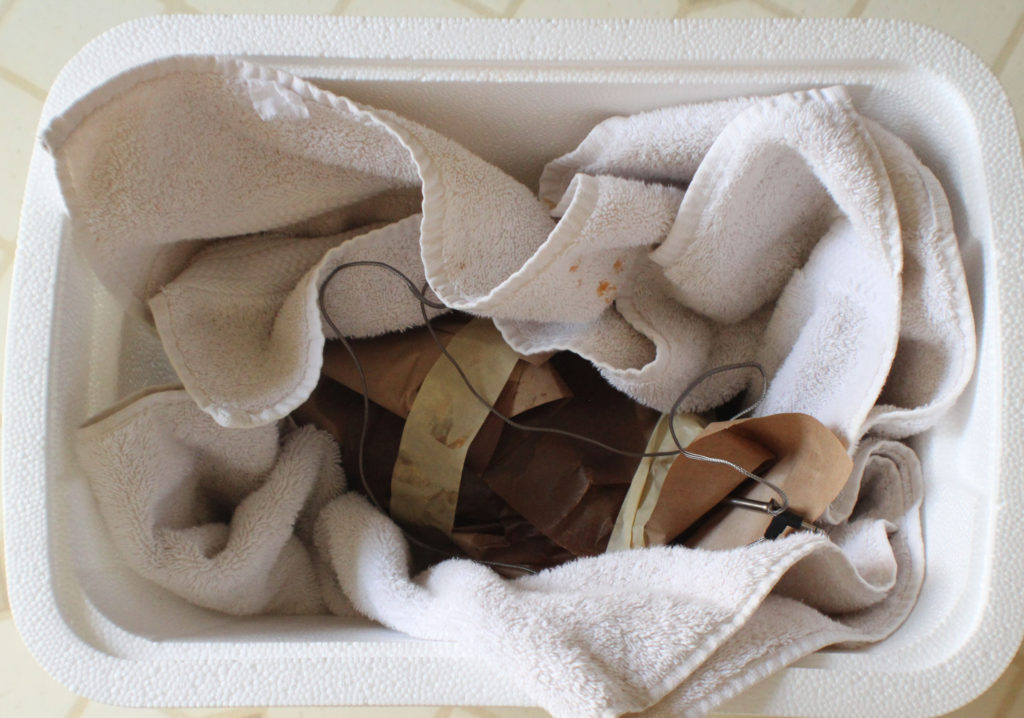
I purchased an inexpensive foam cooler that I use for resting food from the smoker. I found if I put an old, clean towel in the cooler, then the meat, and close the lid it helps keep it warm during the resting phase.

Smoked Prime Rib Dinner

Now you are ready to carve your perfect medium rare prime rib and enjoy your holiday meal. Don’t forget the Au Jus!

I like to serve prime rib with Asparagus and Mushrooms in a Garlic Balsamic Reduction, or Gingery Green Beans and Mushrooms. Holiday Wild Rice is also a perfect side dish for prime rib and it can be made a day or 2 in advance to save time and stove/oven space.

Enjoy!

Smoked Prime Rib

Prime rib is a great cut of meat to smoke. Put the Au Jus in a foil pan in the smoker to have a delicious, smokey Jus to serve with the Prime Rib.
Prep Time10 minutes
Cook Time4 hours
Resting Time30 minutes
Total Time4 hours 40 minutes
Course: Dinner
Cuisine: American
Keyword: Prime Rib, Smoked Prime Rib, Smoker
Servings: 6 people
Calories: 709kcal
Author: Eating With Deb

Equipment

  • Smoker
  • Foil Pan
  • Cutting board and knife
  • Butcher Paper
  • Cooler to rest Prime Rib in
  • Hickory, Mesquite, or wood chips of your choice

Ingredients

  • 5 pounds prime rib with bones
  • 3 tbsp Worcestershire sauce
  • 2 cups beef stock

Rub Ingredients

  • 1 tbsp paprika
  • 2 tsp granulated garlic
  • 2 tsp sea salt
  • 2 tsp black pepper
  • 1 tbsp brown sugar

Instructions

  • Combine rub seasonings.
  • Rub Worcestershire sauce on outside of prime rib then rub with the seasoning mixture.
  • Put beef stock in a foil pan.
  • Fill wood chip pan 1/3 full of hickory chips or chips of your choice.
  • Prepare smoker according to manufacture directions. Set cook to 225 degrees and internal food temperature to 140 degrees and do a chip burn.
  • Insert meat thermometer into prime rib, then put in the smoker over the pan with the Au Jus. This will catch the drippings from the prime rib and help season the Au Jus.
  • Cook until the prime rib reaches 100 degrees. Remove and wrap with butcher paper. I use some masking tape to help keep the paper closed.
  • Return to smoker and cook to 140 degrees.
  • Remove from smoker, keep it wrapped in the butcher paper, and let it rest for ½ hour before slicing.
  • Enjoy!

Notes

I have a disposable cooler that I line with old towels that I rest my prime rib in to help it stay warm.

Nutrition

Calories: 709kcal | Carbohydrates: 6g | Protein: 33g | Fat: 61g | Saturated Fat: 25g | Cholesterol: 137mg | Sodium: 1120mg | Potassium: 767mg | Fiber: 1g | Sugar: 3g | Vitamin A: 585IU | Vitamin C: 1mg | Calcium: 41mg | Iron: 4mg

Holiday Wild Rice

Holiday Wild Rice

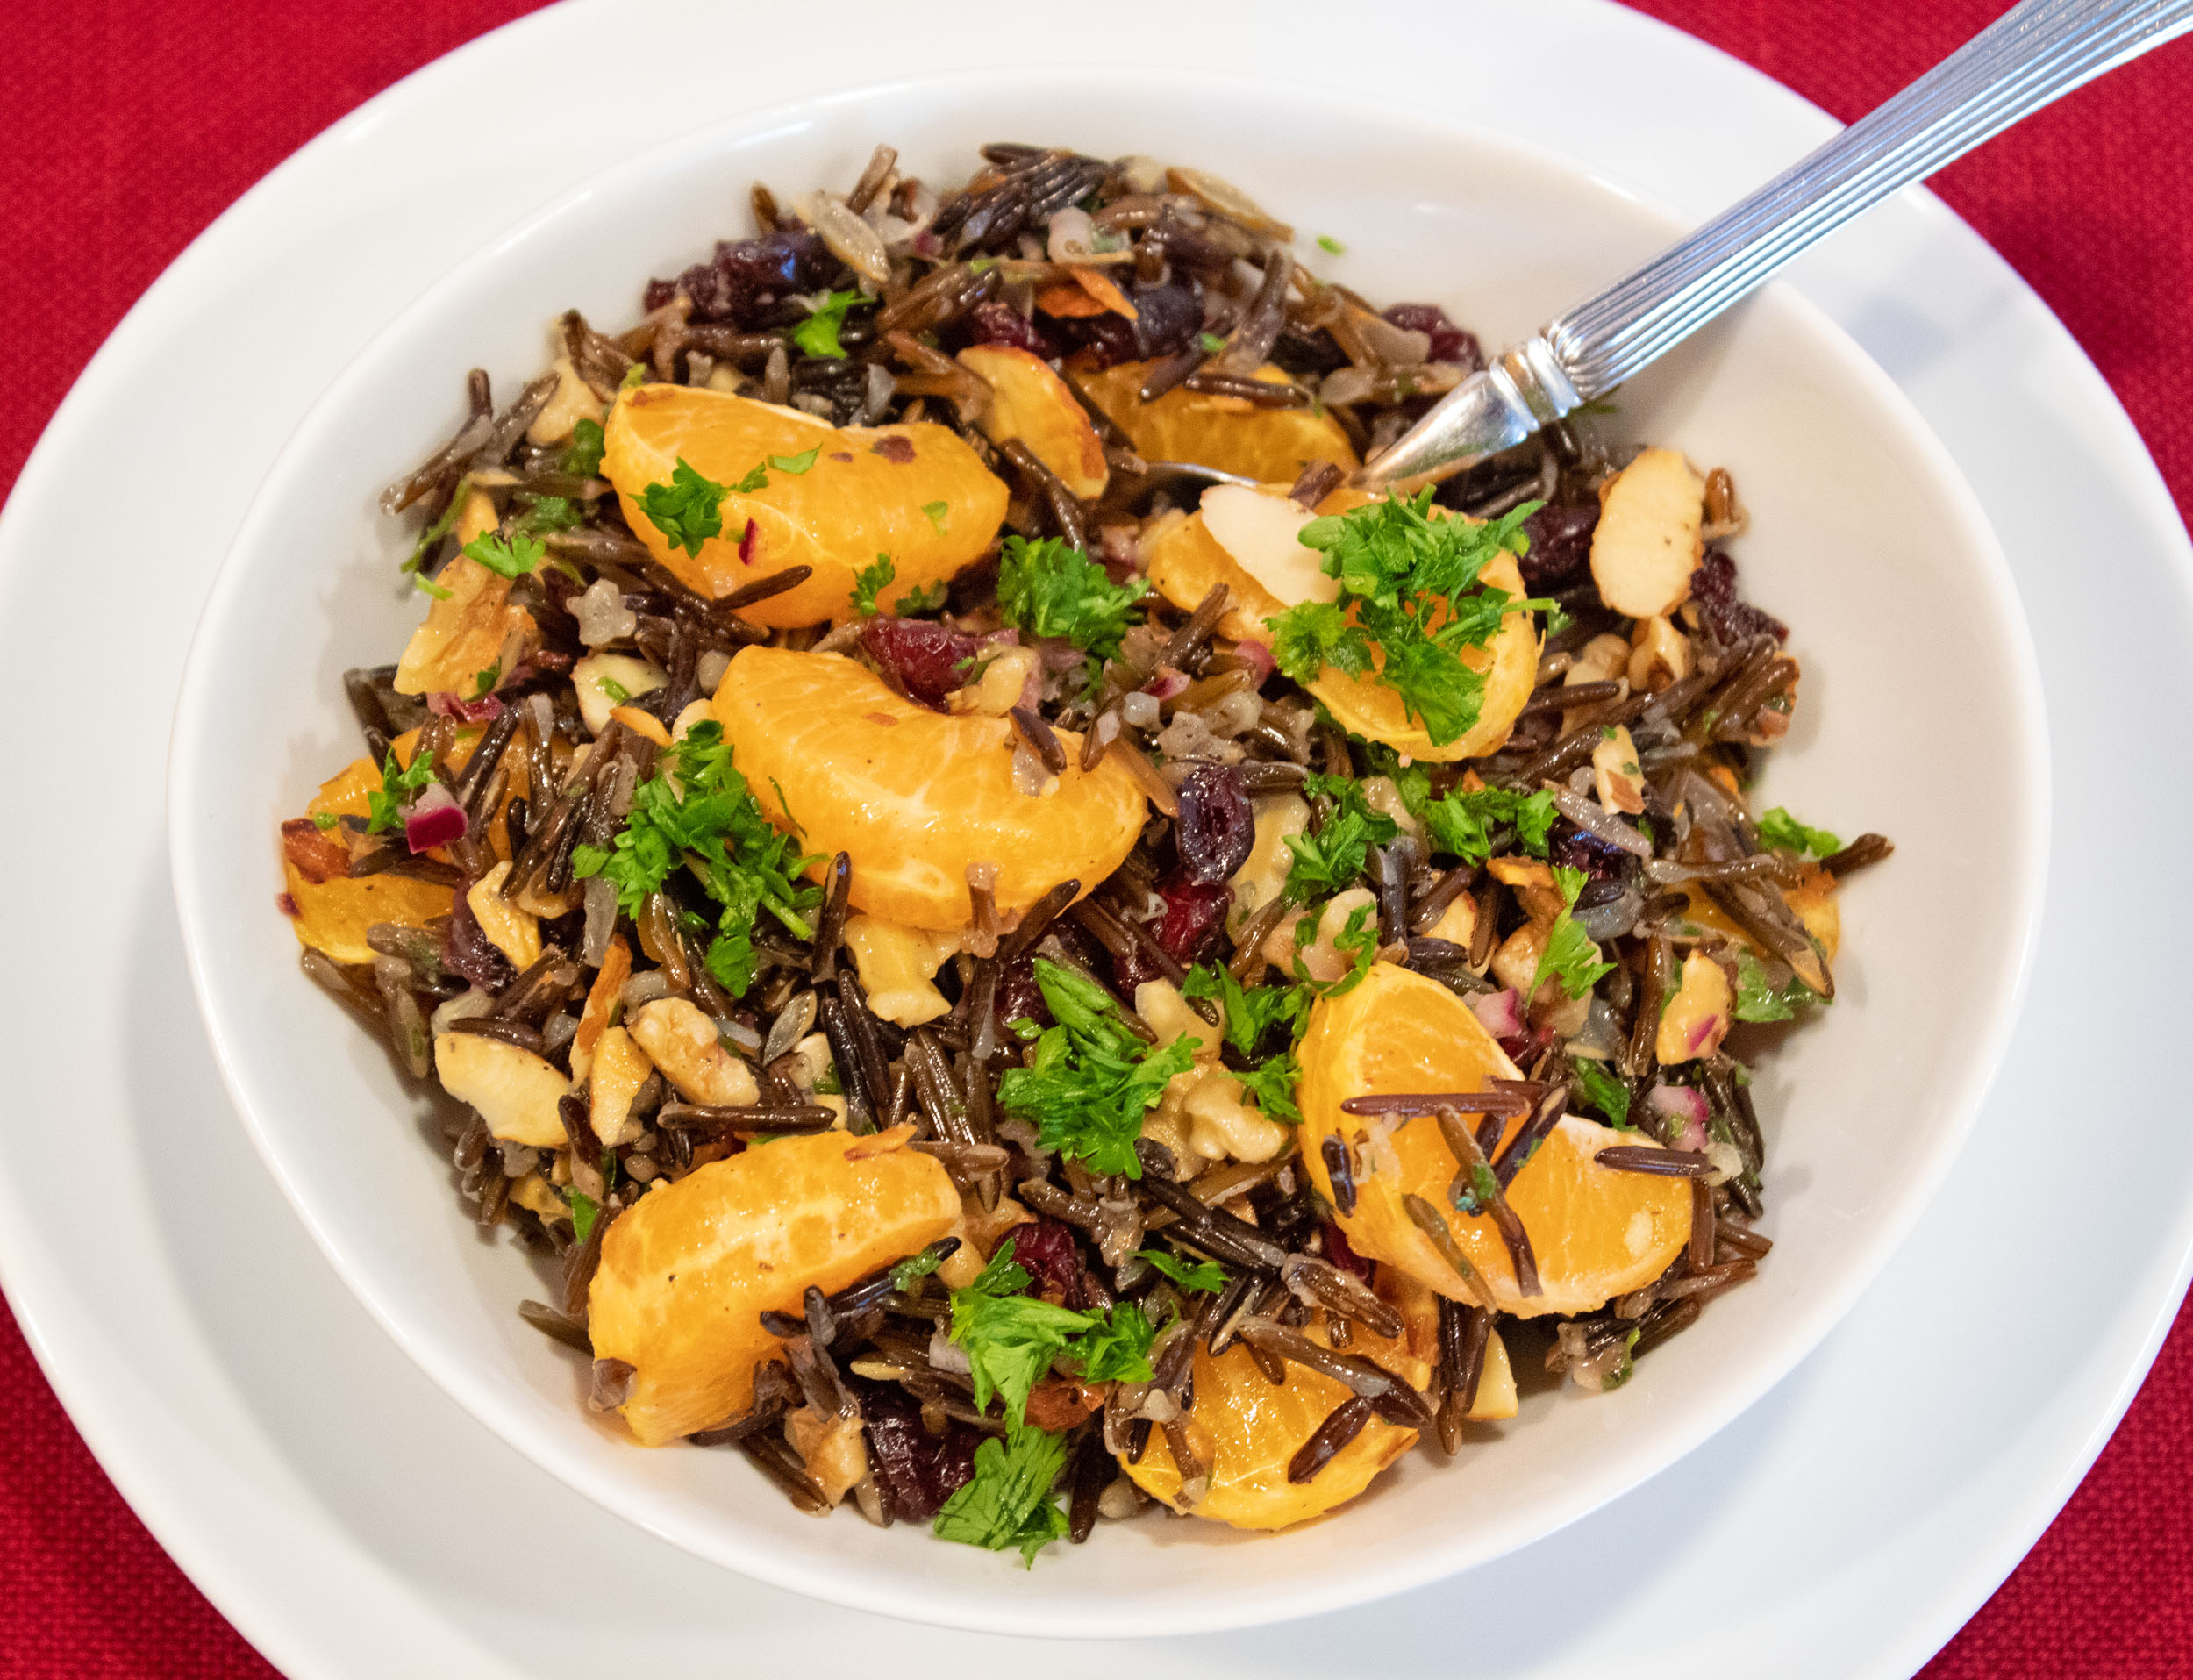
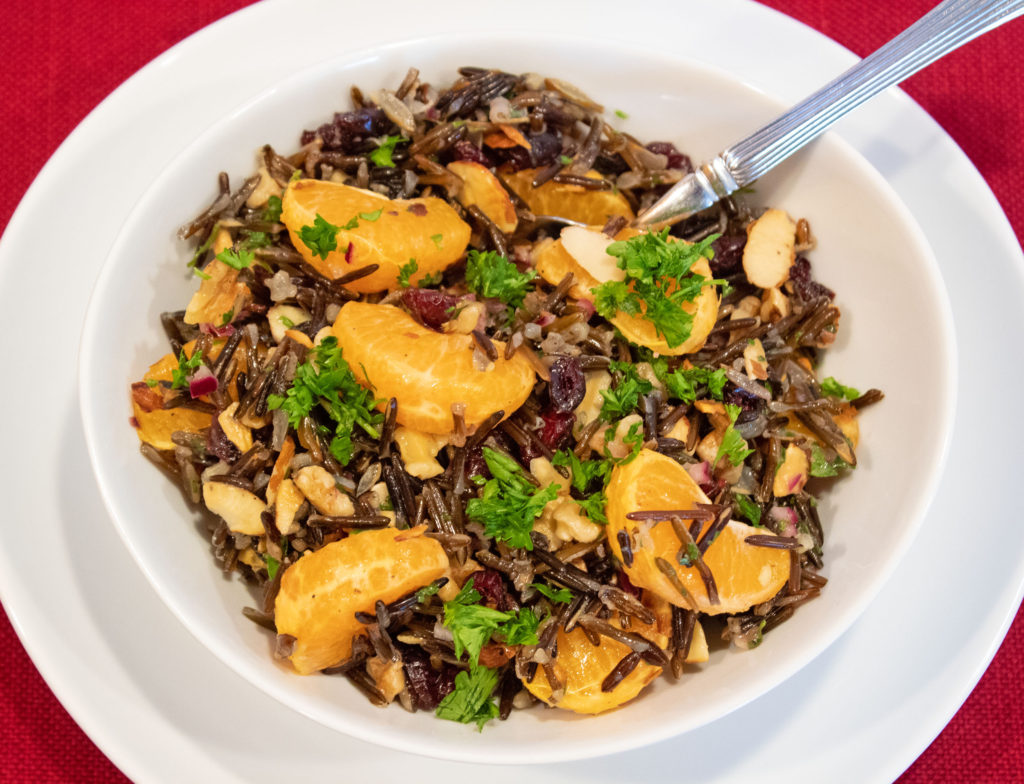
Wild rice is a wonderful accompaniment to a holiday meal. This salad has ingredients that remind me of the holiday season – cranberries, mandarin oranges, and nuts – dressed in a light and zippy dressing. It is served cold so it can easily be made a day or two in advance and not take up any precious stove or oven space or your time on the day of your gathering.

Wild Rice

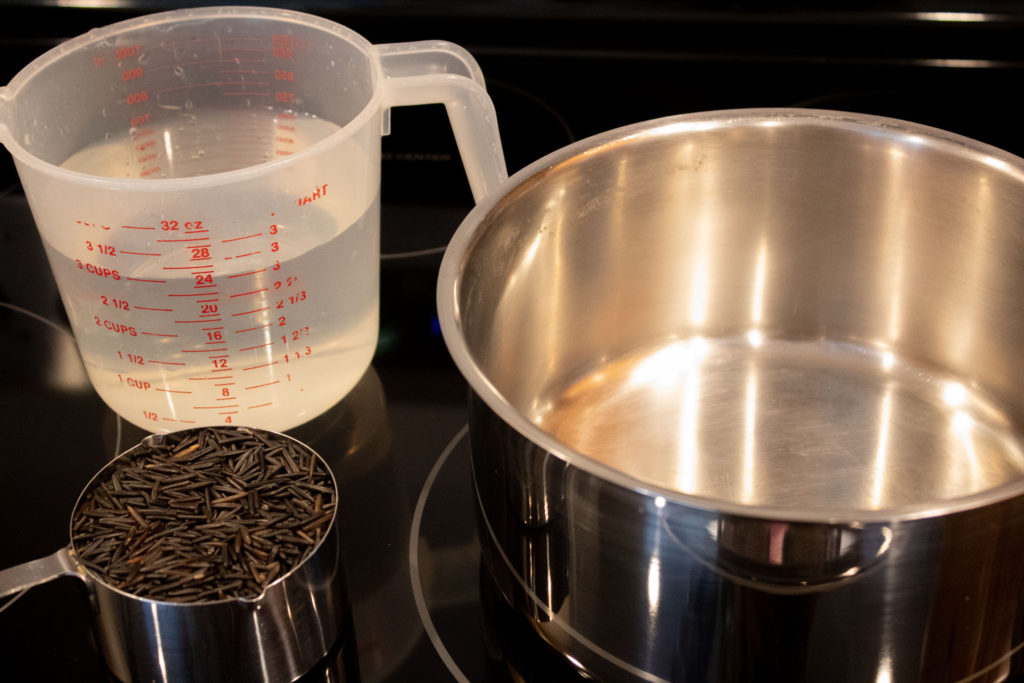
Start with measuring out the rice and stock or water. I generally us a vegetable or chicken stock to impart flavor in the wild rice. To keep it vegetarian, use vegetable stock or plain water.

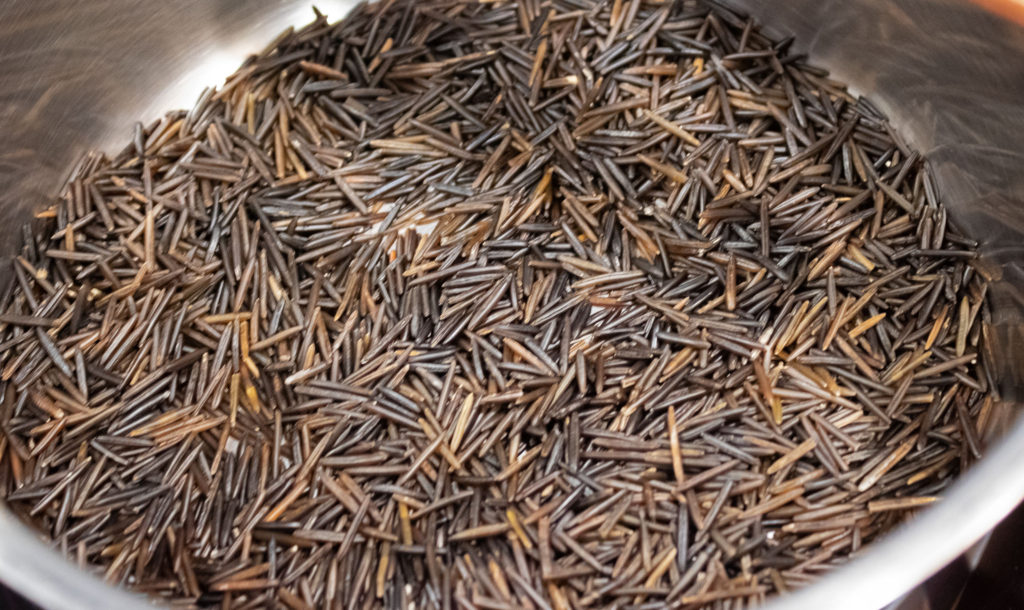
Toasting Wild Rice

While not a necessary step, I like to toast the wild rice first. It helps bring out a more nutty flavor. No need to use oil, just dry toast the rice over medium high heat for 3 to 5 minutes. You’ll hear it popping and see it starting to brown. Careful not to over toast, you don’t want it to taste burnt.

After toasting, add the stock or water. Be careful, the pan is already hot and the liquid will bubble and pop when you first start adding it to the pan.

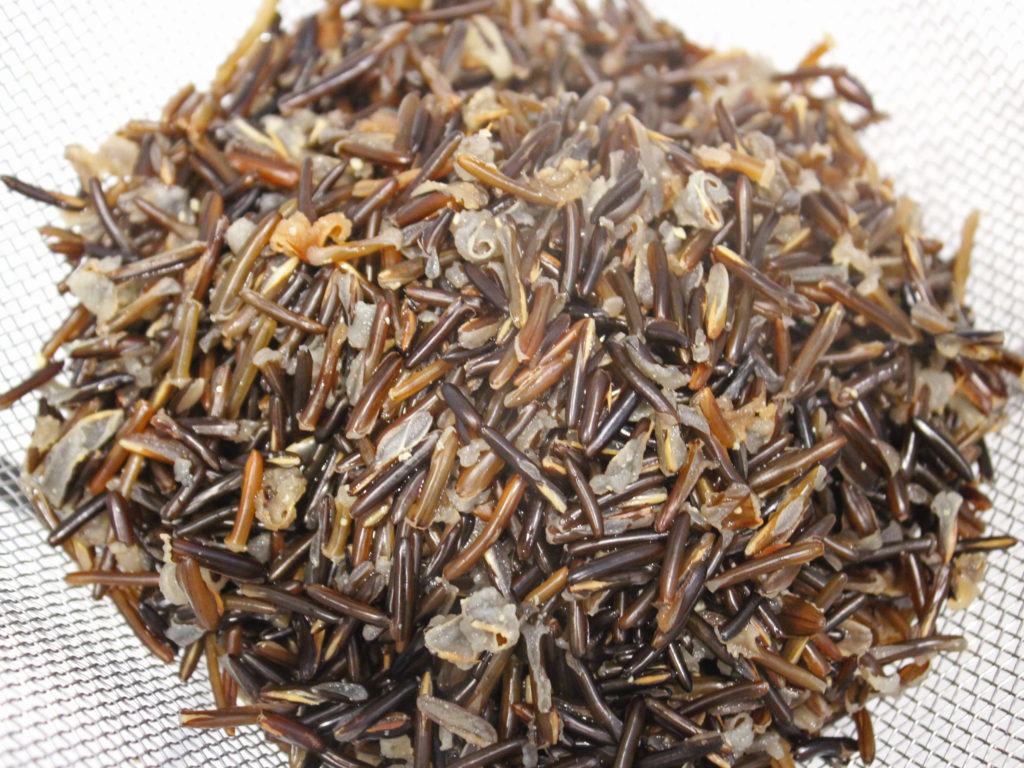
Bring to a boil, reduce heat to a simmer and cover. Cook the rice for about 45 minutes until tender.

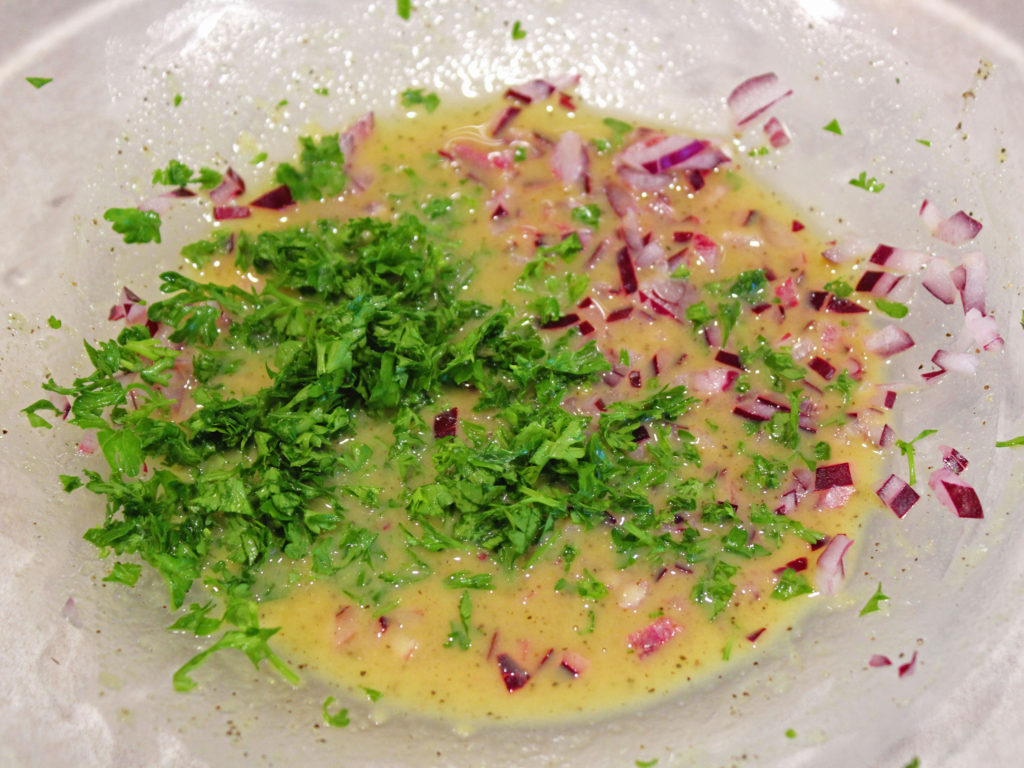
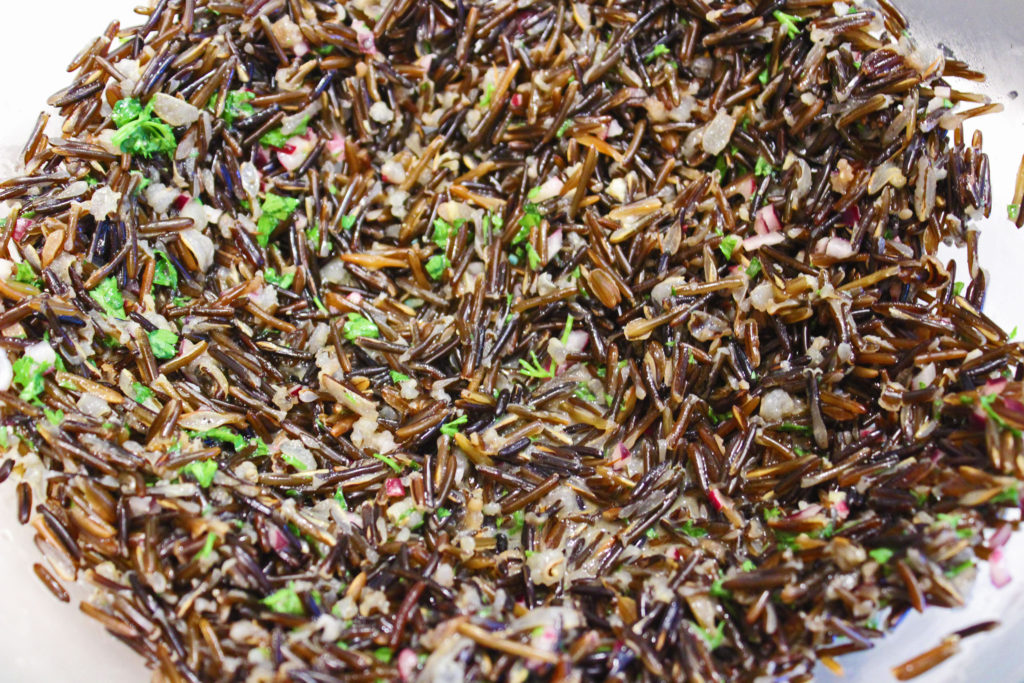
Wild Rice Dressing

While the wild rice is cooking, whisk together the dressing ingredients and toss in the onions and parsley.

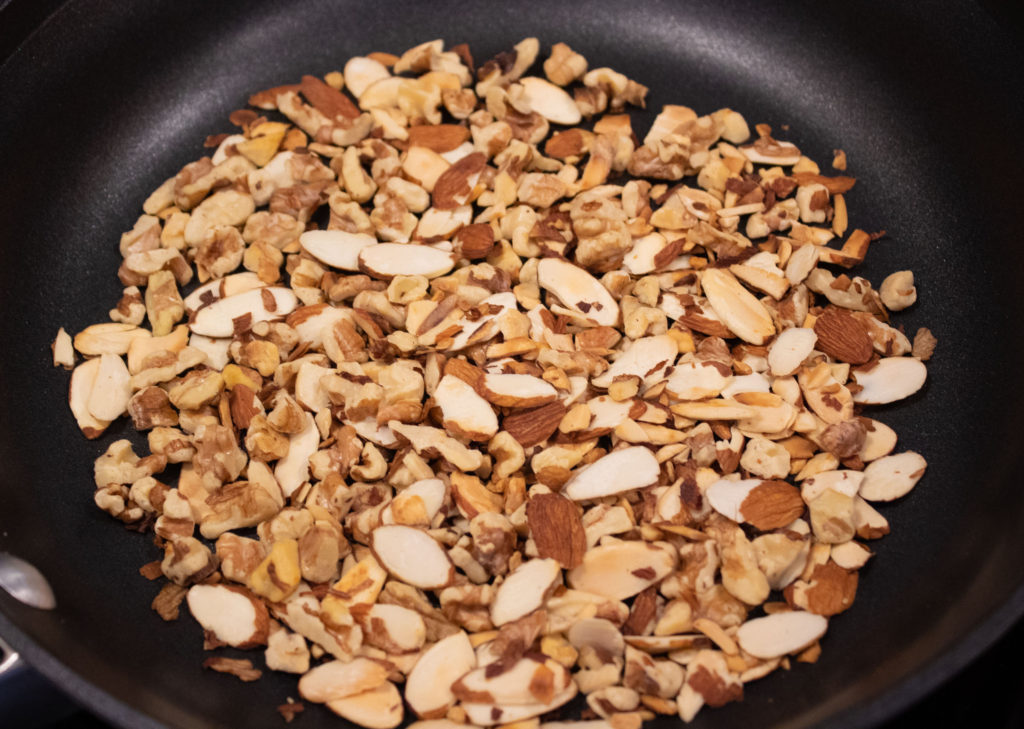
Toasting Nuts

Over medium high heat, dry toast the nuts. This step is also not necessary, but toasting brings out the nutty flavor. Once the nuts start browning, remove from heat and set aside. 

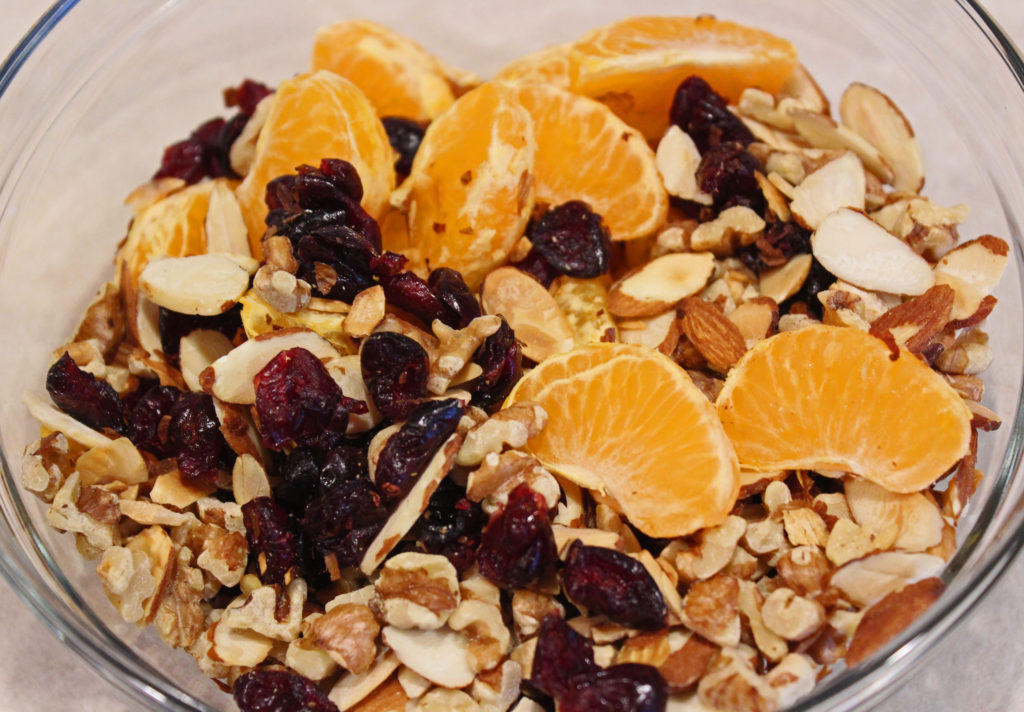
You can also peel and segment the mandarin oranges, measure out the cranberries, add the nuts, and set this aside.

Wild Rice Cooked and Strained

When the rice is done, if there is still liquid in the pan you can just strain it.

Wild Rice Dressed

Mix the rice in with the dressing and put in the refrigerator for about an hour to cool down.

Holiday Wild Rice

Once the rice is cool, mix in the oranges, cranberries, and nuts. It’s ready to eat. This can be stored in the refrigerator for a day or 2 before you are ready to eat it. When you are ready for your holiday meal, put it in a serving container and pass it around.

Enjoy!

Holiday Wild Rice (or Nutty Wild Rice Salad)

This Nutty Wild Rice Salad is a great accompaniment to any holiday meal. It doesn’t take oven or stove top space and can be made up to a few days in advance. While vegetarian and mostly allergen free, the nuts could be omitted if necessary.
Prep Time15 minutes
Cook Time45 minutes
Resting Time1 hour
Total Time2 hours
Course: Side Dish
Cuisine: American
Keyword: holiday wild rice, wild rice
Servings: 6 people
Calories: 211kcal
Author: Eating With Deb

Equipment

  • Knife and cutting board
  • Large bowl and whisk
  • 4 to 6 quart stock pot
  • Small non-stick sauté pan

Ingredients

  • 1 cup wild rice uncooked
  • 3 cups vegetable stock water, or chicken stock
  • 4 each mandarin oranges
  • 1/3 cup walnuts chopped
  • 1/3 cup almonds sliced
  • ½ cup cranberries dried

Dressing

  • 2 tbsp apple cider vinegar
  • 2 tbsp Dijon mustard
  • ¼ tsp sea salt
  • ¼ tsp black pepper
  • 1 tbsp honey
  • 2 tsp ginger fresh, minced
  • 2 tbsp red onion minced
  • ¼ cup parsley chopped

Instructions

  • Put a 4 to 6 quart sauce pan on the stove and turn on heat to medium high. Add the rice and dry toast for 3 to 5 minutes to brown.
  • Add the water or stock and bring to a boil, reduce heat, cover, and simmer for about 45 minutes until rice is cooked. If there is excess liquid, drain rice.

While rice is cooking:

  • In a large bowl, whisk together sauce ingredients.

Prep the rest of the salad ingredients:

  • Dry toast (don’t use any oil) the nuts over medium heat for 3 to 5 minutes until they start to brown. Remove from heat immediately.
  • Peel and segment mandarin oranges and get ½ cup dried cranberries.
  • When the rice is done (strain it if there is any liquid left), add it to the dressing and mix well. Put in refrigerator for about 1 hour to cool down.
  • Add the rest of the salad ingredients and mix well.
  • Enjoy!

Notes

Makes 6 cups

Nutrition

Serving: 1cup | Calories: 211kcal | Carbohydrates: 29g | Protein: 7g | Fat: 9g | Saturated Fat: 1g | Polyunsaturated Fat: 4g | Monounsaturated Fat: 3g | Trans Fat: 1g | Sodium: 628mg | Potassium: 242mg | Fiber: 4g | Sugar: 6g | Vitamin A: 481IU | Vitamin C: 5mg | Calcium: 42mg | Iron: 1mg

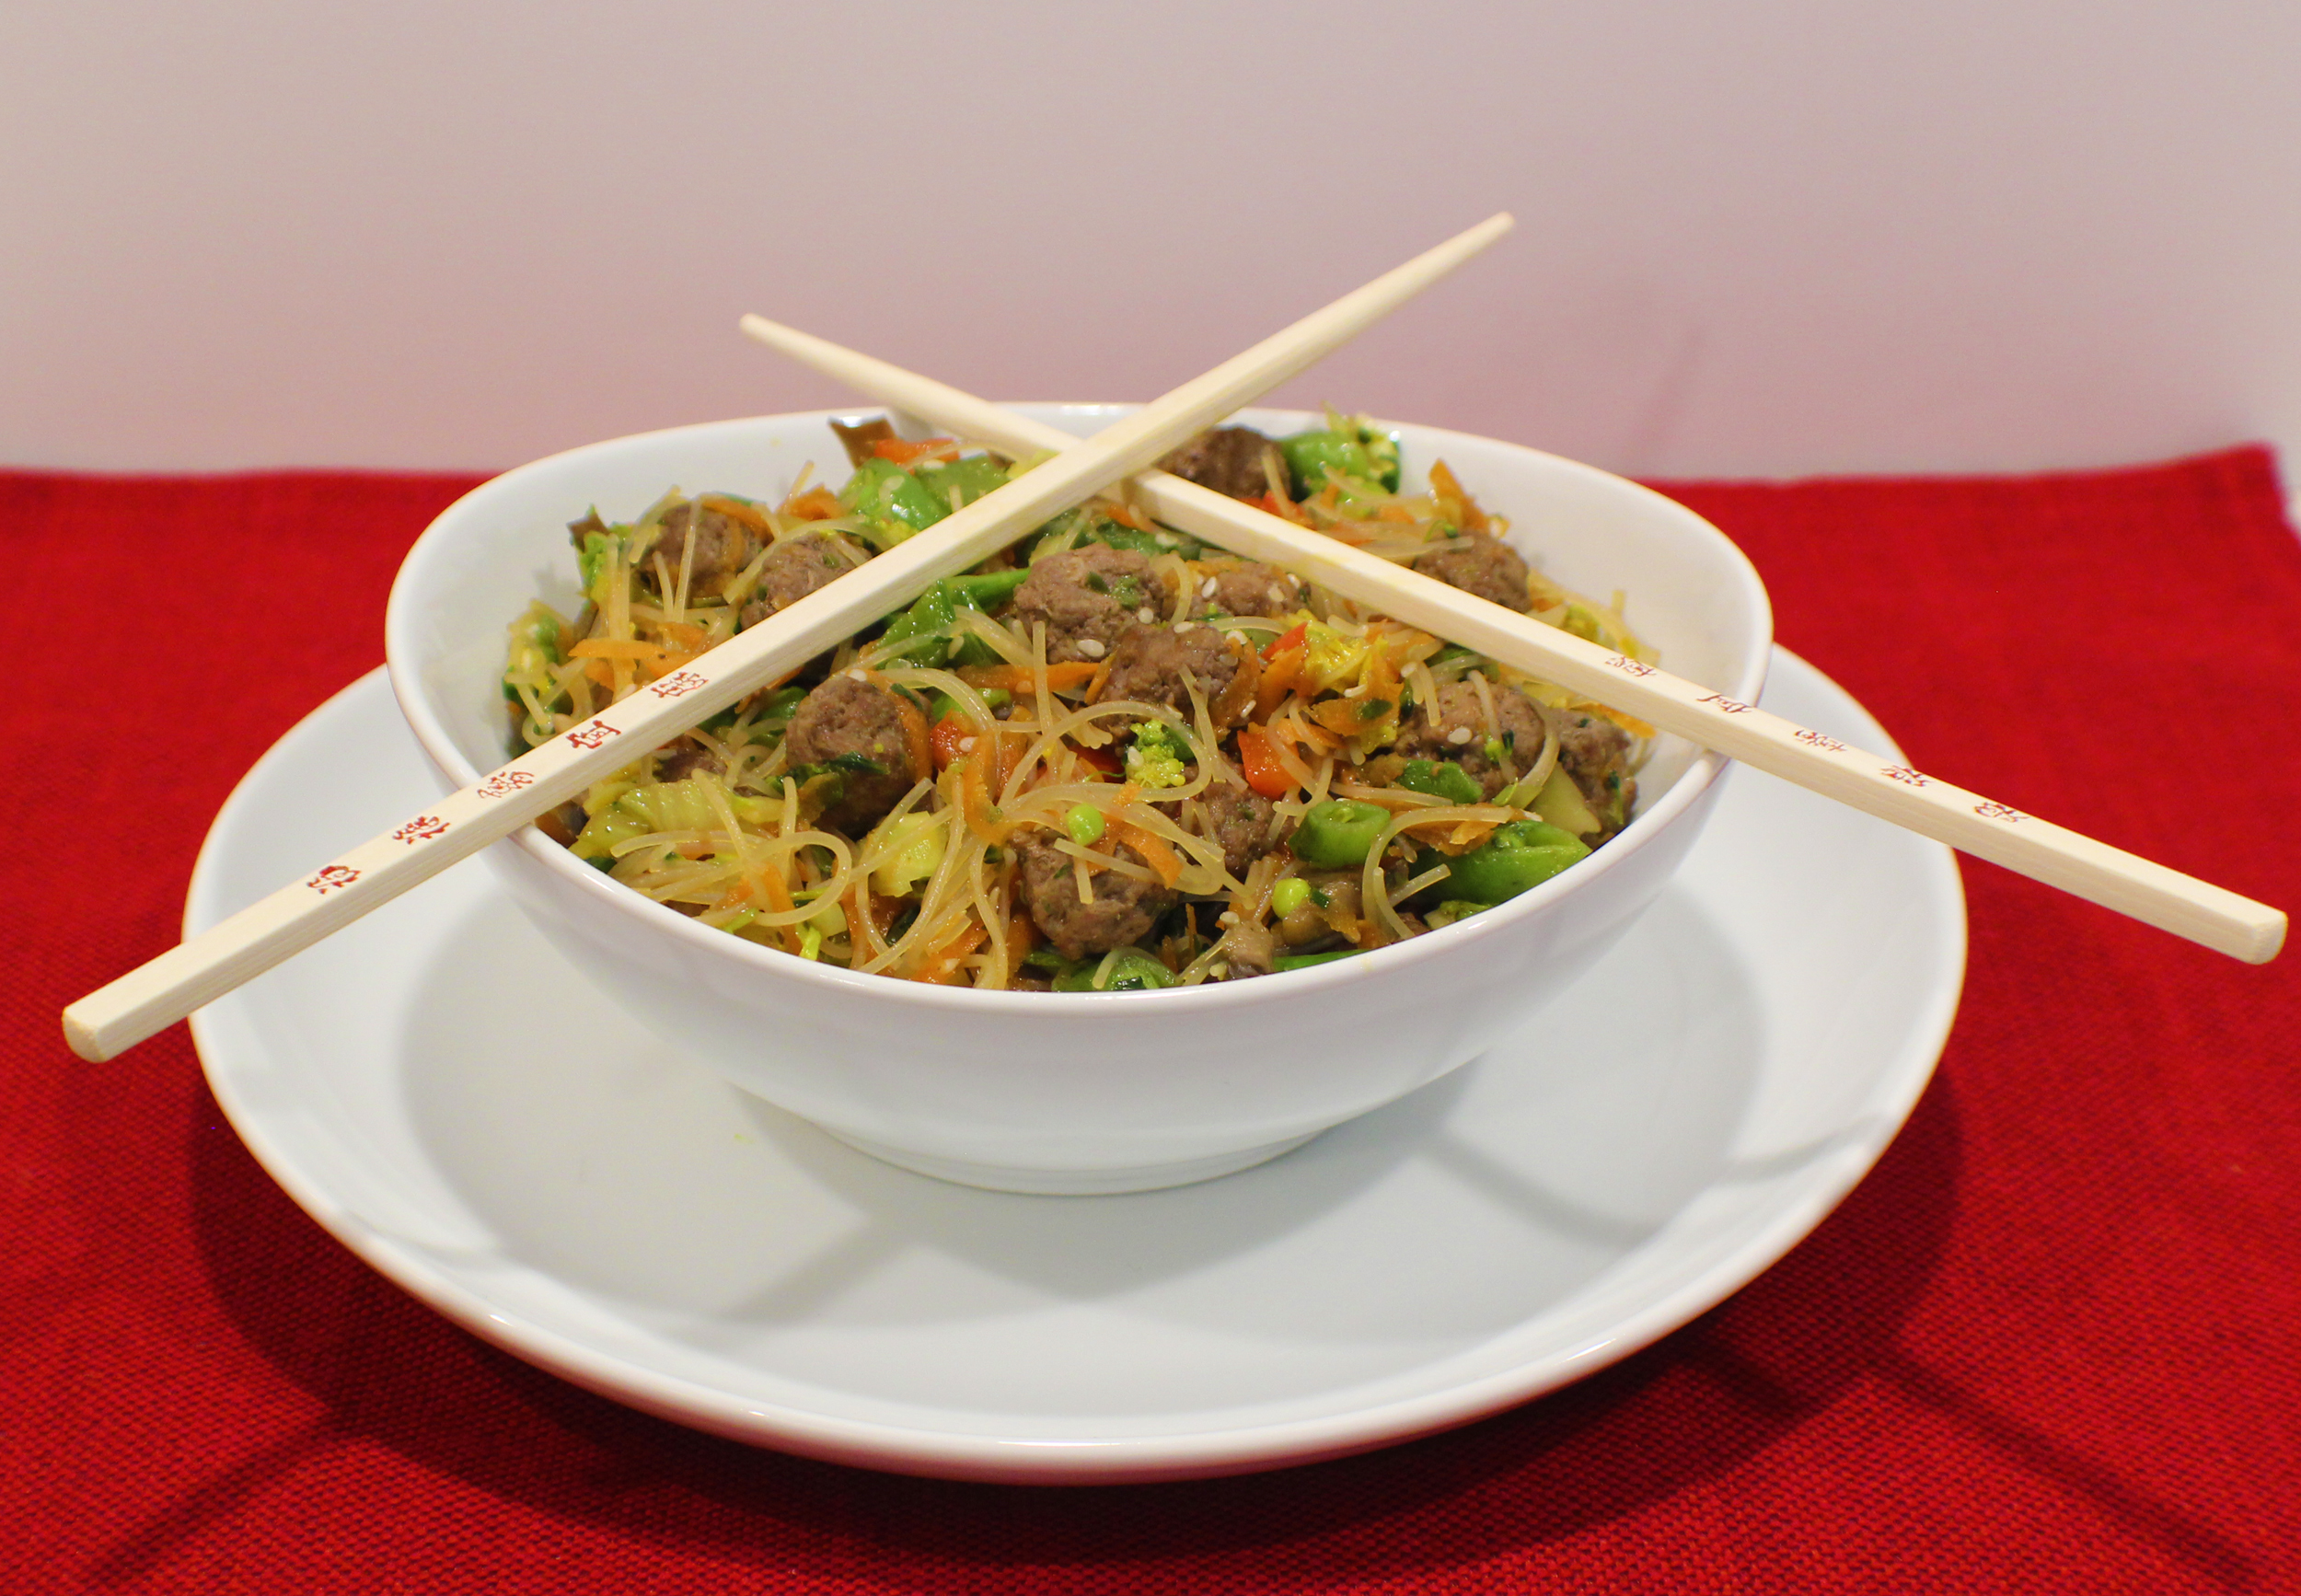
Sesame Ginger Noodles (with Meatballs and Veggies)

Sesame Ginger Noodles with Meatballs and Veggies

Fall is in the air and my garden is mostly ready to harvest. Noodle bowls are a great way to utilize fresh vegetables and are enjoyable any time of the year. This Sesame Ginger Noodles Bowl is wonderful hot or cold, with or without meatballs, and very versatile as to the vegetables that you put in it. If you don’t like something I have added, just switch it out with something you like,, or omit it. It is full mouth awakening flavors of ginger, garlic, soy, and sesame.

Using rice noodles in this dish makes this friendly for those who need to avoid gluten and it can easily be turned into a vegetarian dish by omiting the meatballs or using a hamburger alternative like Gimme Lean or Light Life ground beef style.

At first glance, this recipe looks like it takes a bit of work. But things can be done while other items are cooking, so don’t let the time scare you off.

Asian Meatballs

First get the meatballs mixed and made and in the oven. Be sure to set a timer, you don’t want to forget them. When cooked, remove from the oven and set aside until needed.

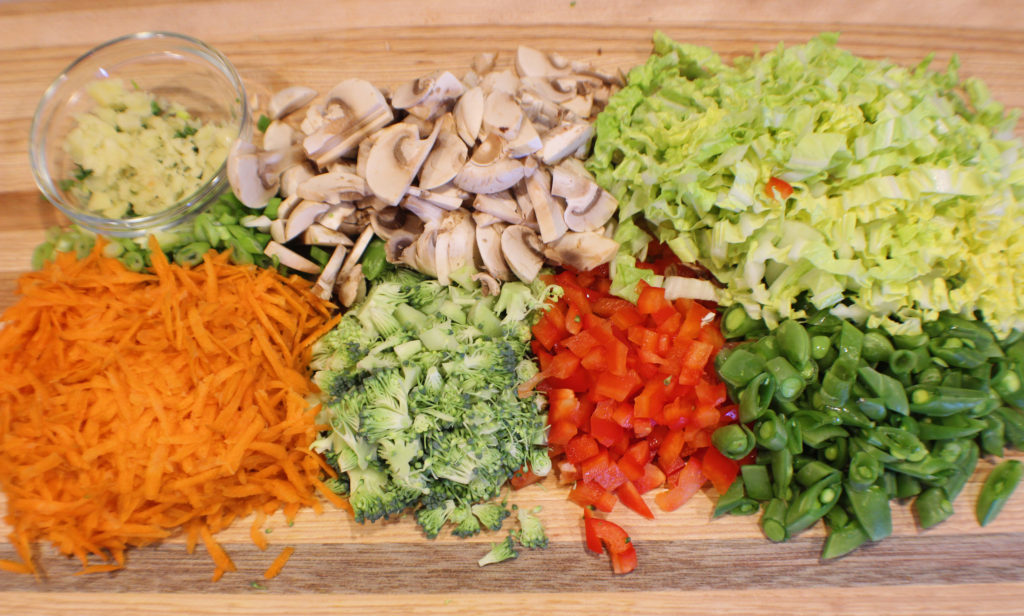
Sesame Ginger Noodle Ingredients

Now cut and shred the vegetables, garlic, and ginger.

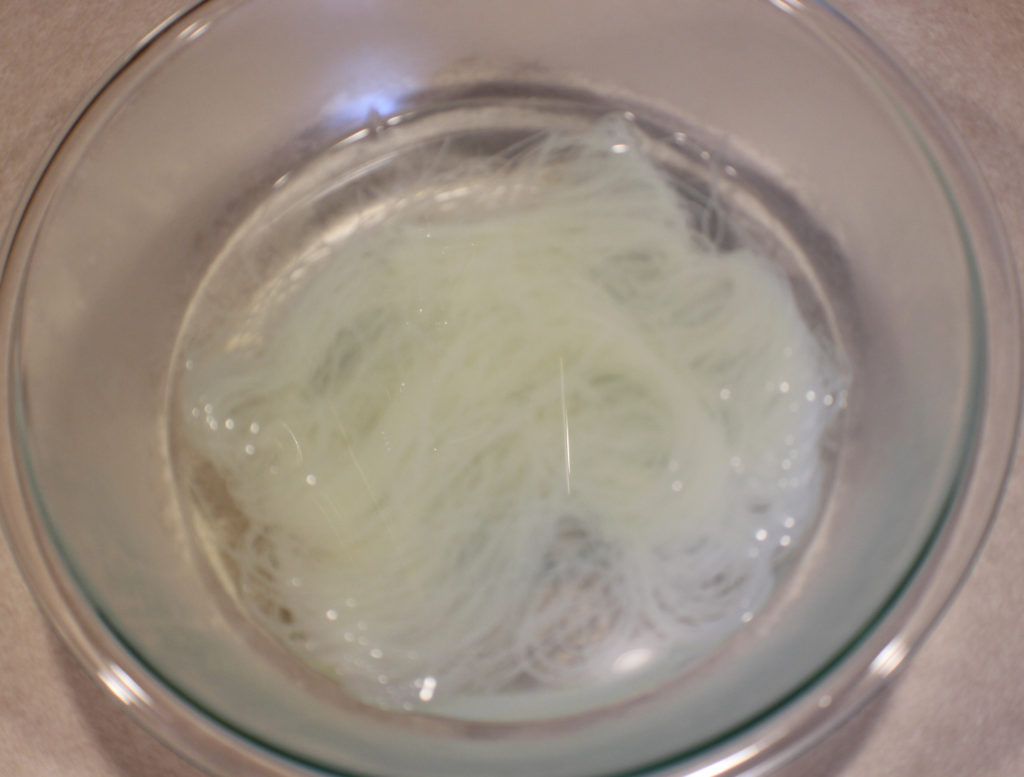
One great thing about rice noodles, is you put them in a bowl, cover them with hot water and walk away for about 10 minutes. No boiling and stirring on the stove top.

So after your vegetables are ready, get the noodles going.

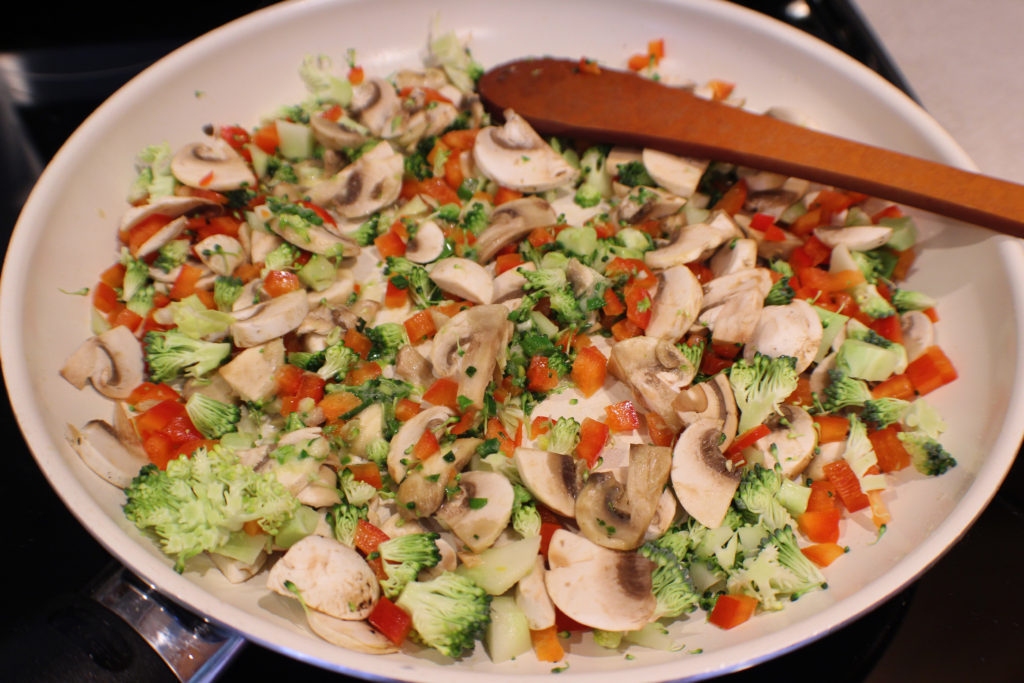
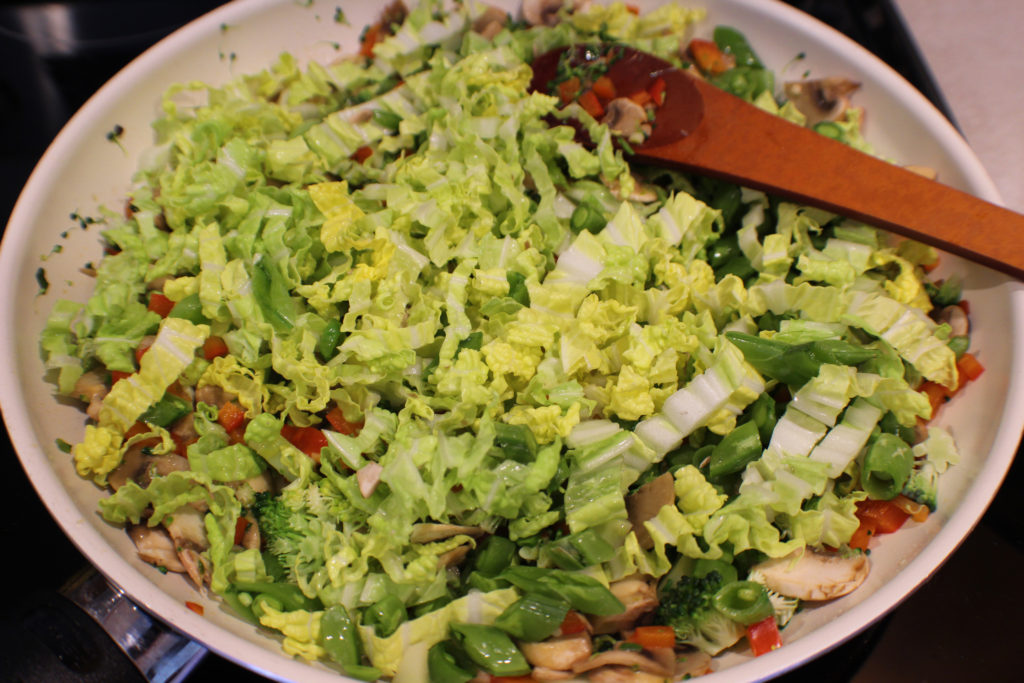
While the noodles are cooking it’s time to start cooking the veggies. Heat a pan on medium heat and add the sesame oil, garlic, ginger, mushrooms, bell peppers, and broccoli. Saute until the broccoli softens a bit but is still firm and bright green.

Now stir in the greens and snow peas and saute for a couple minutes.

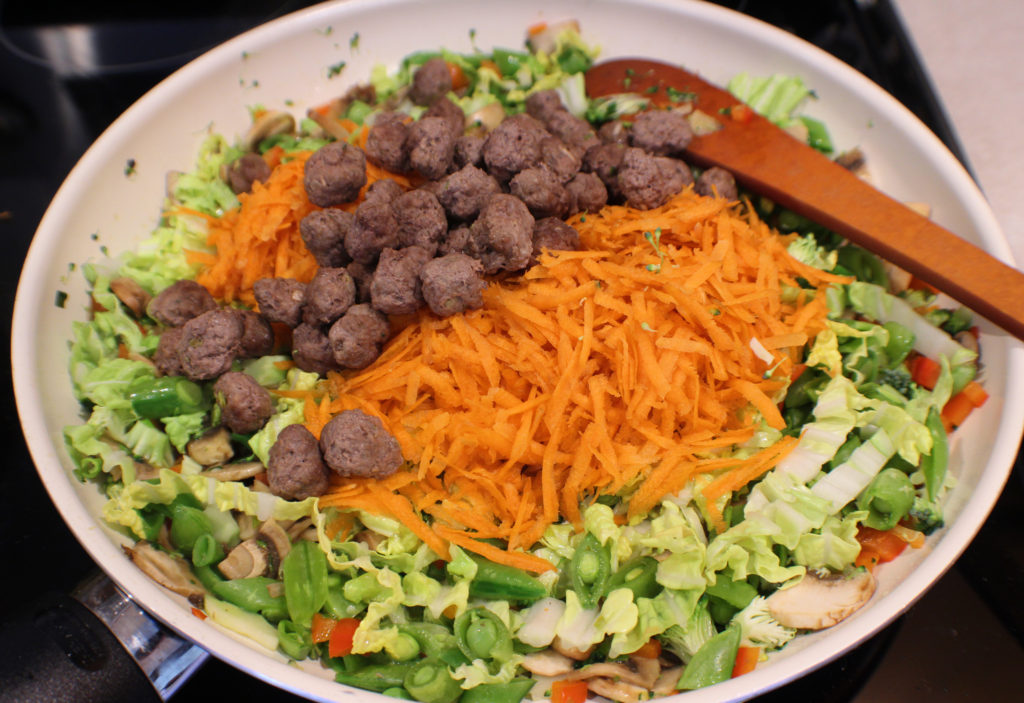
Meatballs and Carrots Addes

Stir in the meatballs and carrots.

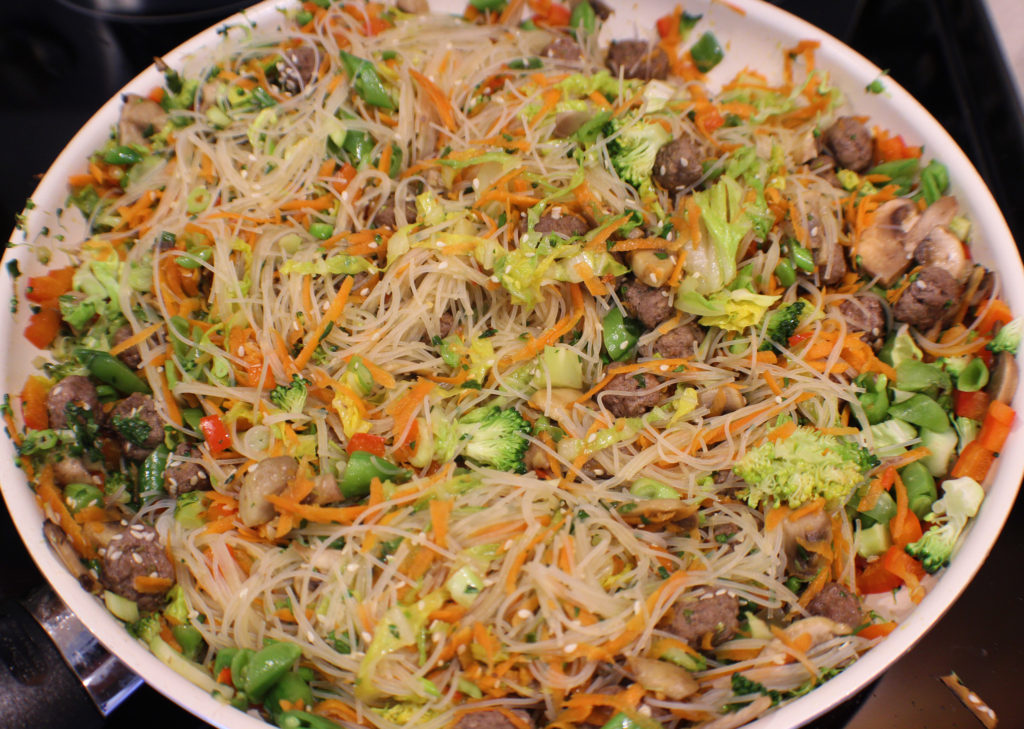
Noodles Added

Time to finish this off. Mix in the noodles and the rest of the ingredients.

Sesame Ginger Noodles Ready

Now it’s time to eat what you worked hard to make. Try this with some homemade Naan bread.

Enjoy!

Sesame Ginger Noodles with Meatballs and Veggies

This is a light and gingery Asian style rice bowl dish, which can easily be made vegetarian.
Prep Time30 minutes
Cook Time20 minutes
Course: Dinner, Entree, Main Course
Cuisine: Asian
Keyword: Asian Bowl, Dairyfree, Glutenfree, Noodle Bowl
Servings: 4 people
Calories: 429kcal
Author: Eating With Deb

Equipment

  • Cutting board and knife
  • Large heat resistant bowl
  • Large saute pan and spoon
  • Parchment lined sheet tray
  • Medium bowl

Ingredients

Asian Meatballs

  • 1/3 pound lean ground beef or Gimme Lean Hamburger Style
  • 1 tsp garlic fresh, minced
  • 1 tsp ginger fresh, minced
  • 1 ½ tsp soy sauce or wheat free tamari
  • 1 ½ tsp toasted sesame oil

Rice Noodles and Veggies

  • 8 ounces rice noodles use Udon or another Asian noodle if you wish
  • 1 cup broccoli florets and stems
  • 2 cups mushrooms chopped or sliced
  • 1 cup snow peas cut into bite size pieces (snap peas work too)
  • 2 cups bok choy or napa cabbage, shredded
  • ½ each red bell pepper diced
  • 2 each carrots shredded
  • 4 each green onions sliced
  • 3 tbsp toasted sesame oil
  • 1/3 cup soy sauce or wheat-free tamari
  • 1 tbsp ginger minced
  • 1 tbsp garlic minced
  • 1 tbsp sesame seeds
  • 1 tbsp cilantro
  • ½ t crushed red pepper

Instructions

  • Preheat oven to 350 degrees.
  • Mix together the Asian Meatball mixture and make your bite-size meatballs, about 20 of them and cook on a parchment lined sheet tray for 10 minutes.
  • Prep the vegetables and seasoning.
  • Cook the rice noodles according to package directions. Drain and set aside.
  • While the noodles are cooking, heat a sauté pan on medium heat, add sesame oil, garlic, ginger, mushrooms, bell peppers, and broccoli. Sauté until the broccoli starts to soften a bit, about 5 minutes.
  • Add your greens and snow peas and stir until the greens have wilted, about 3 minutes. Stir in the Asian meatballs and carrots.
  • Add the rest of the ingredients (rice noodles, soy sauce, cilantro, sesame seeds, crushed red pepper, and green onions).
  • Enjoy!

Notes

This is delicious without the meatballs, so if you are celebrating Meatless Mondays or are a vegetarian, give this a try! Or substitute Gimme Lean Hamburger style for the ground beef.

Nutrition

Calories: 429kcal | Carbohydrates: 56g | Protein: 16g | Fat: 16g | Saturated Fat: 3g | Trans Fat: 1g | Cholesterol: 23mg | Sodium: 1373mg | Potassium: 595mg | Fiber: 4g | Sugar: 3g | Vitamin A: 2151IU | Vitamin C: 53mg | Calcium: 104mg | Iron: 3mg

Asian Slaw

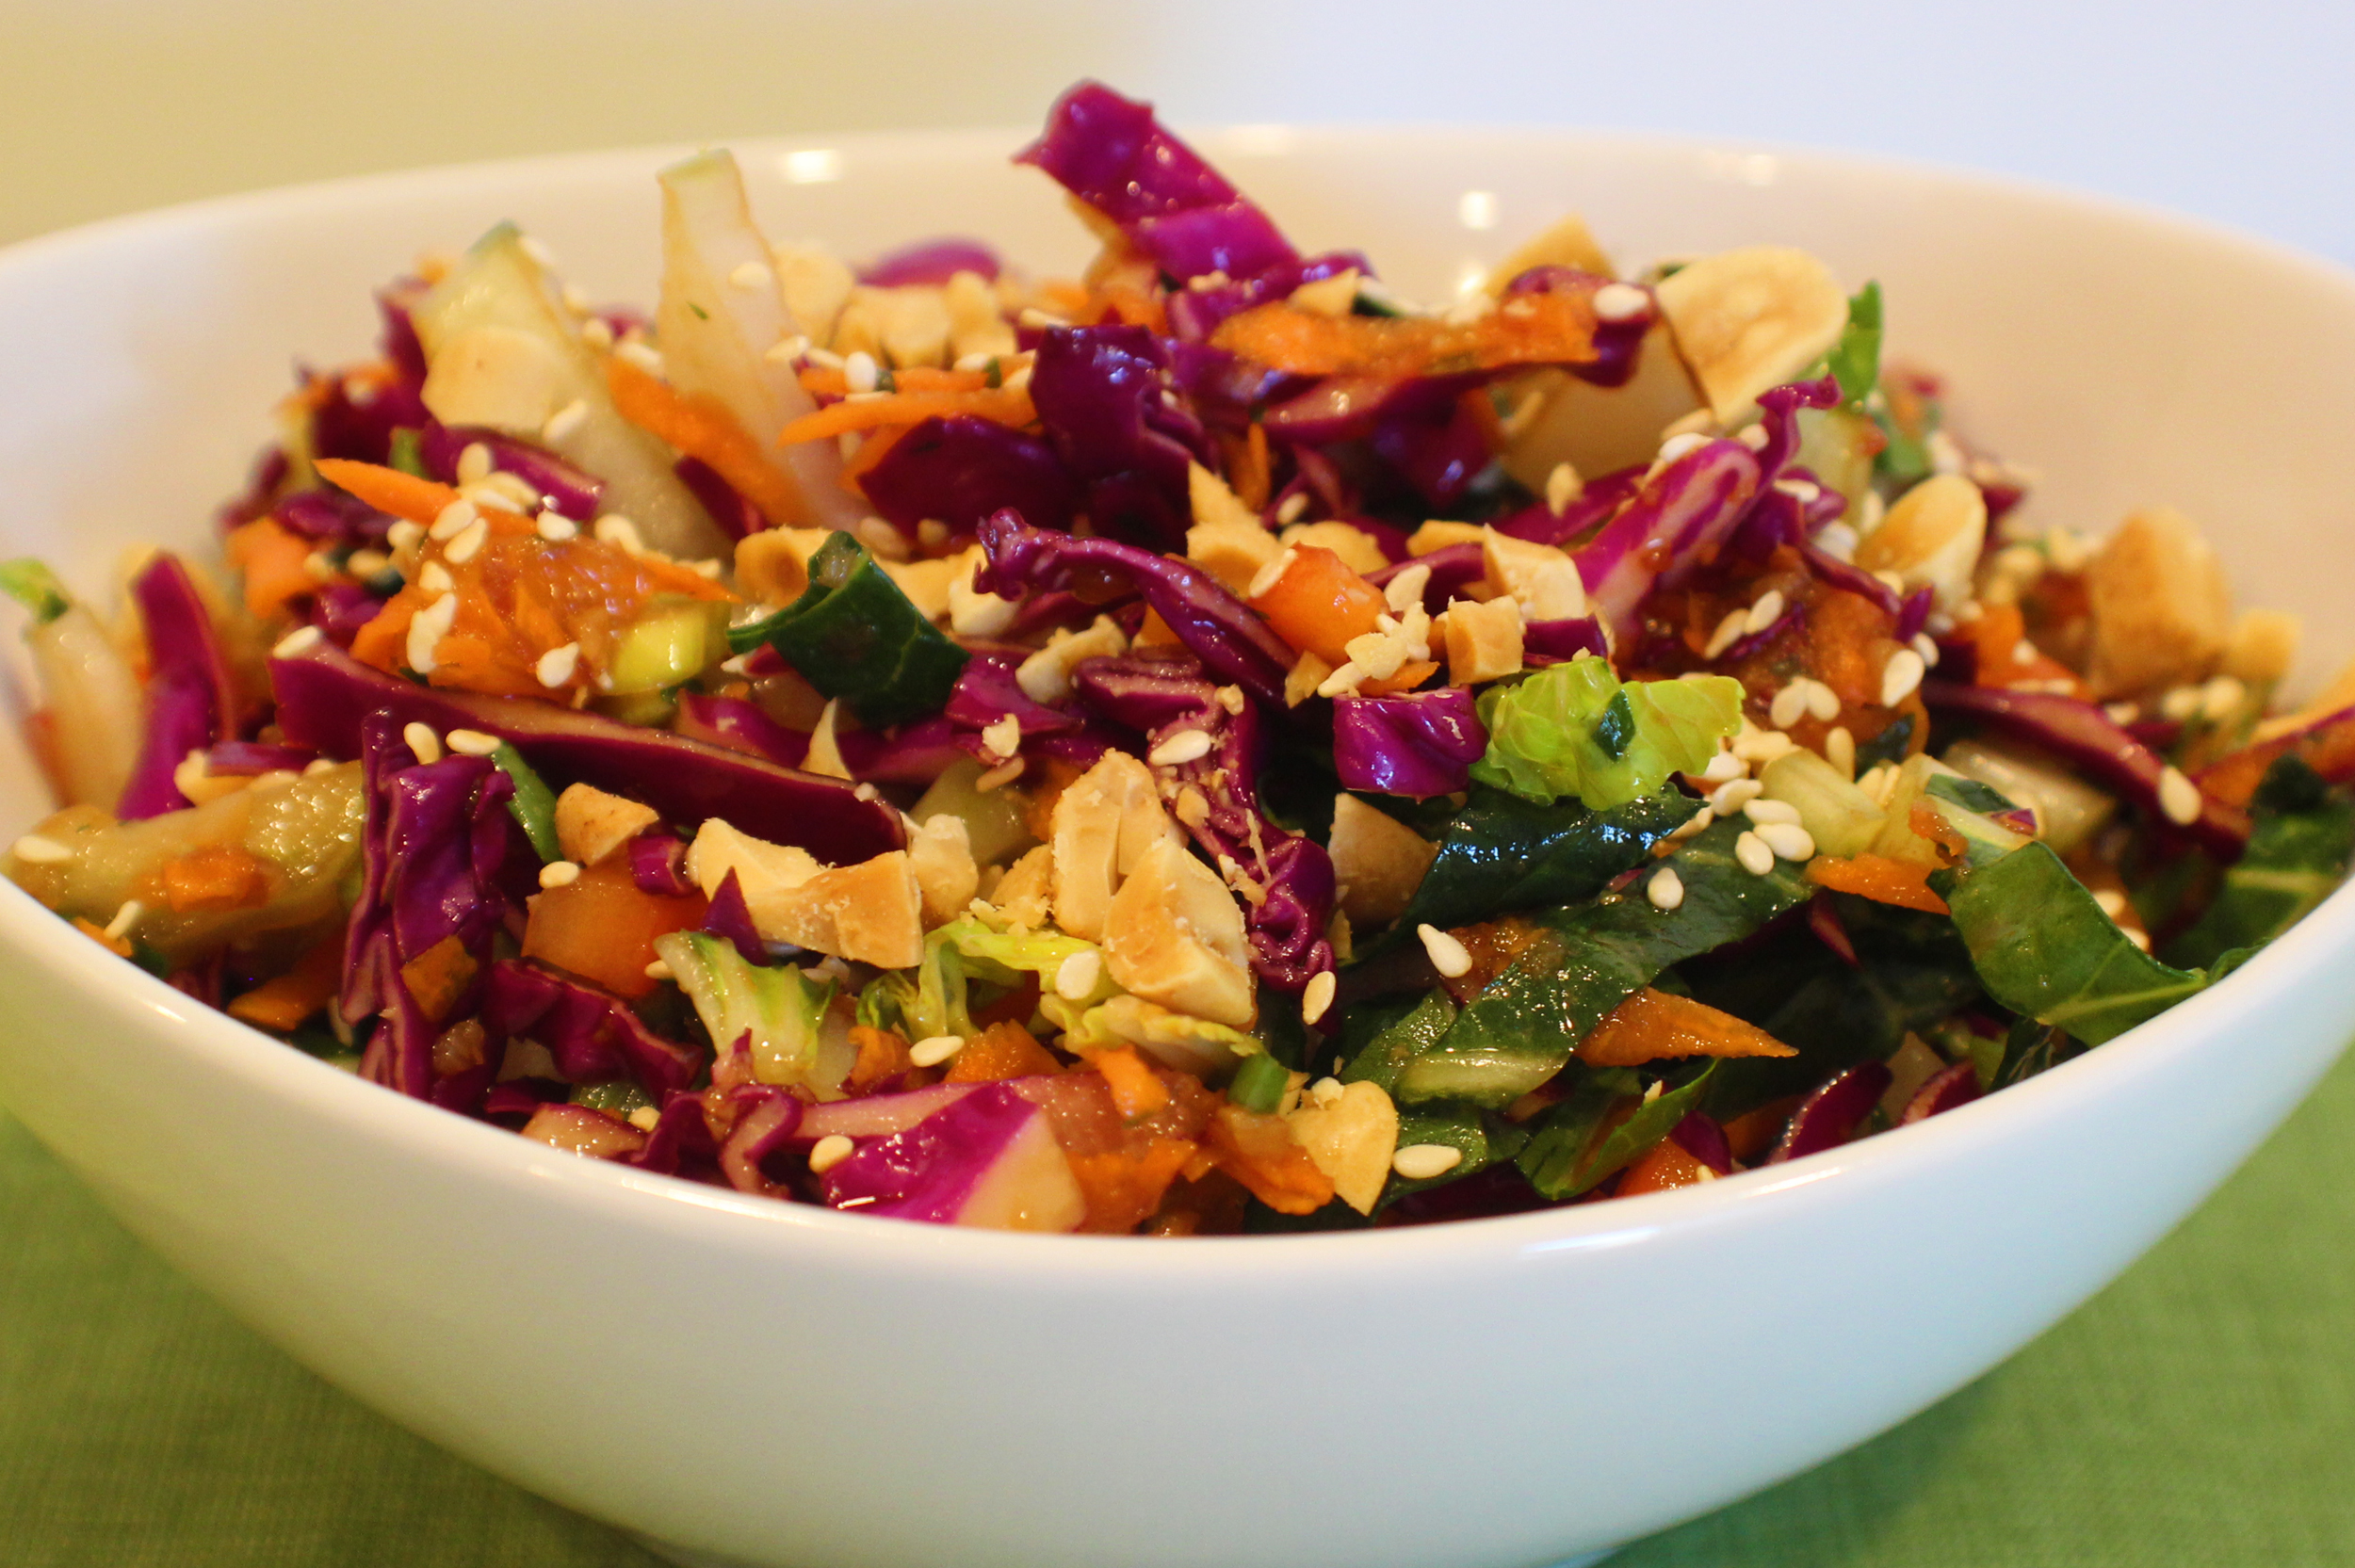
Asian Slaw

I’m all about the side dishes during the summer grilling season. This slaw goes well with about anything you are grilling, with or without an Asian flair.

When it comes to coleslaws, I always use purple cabbage, it’s firmer than the green cabbage, which means it stays crisper longer. But if you prefer green cabbage go ahead and use it.

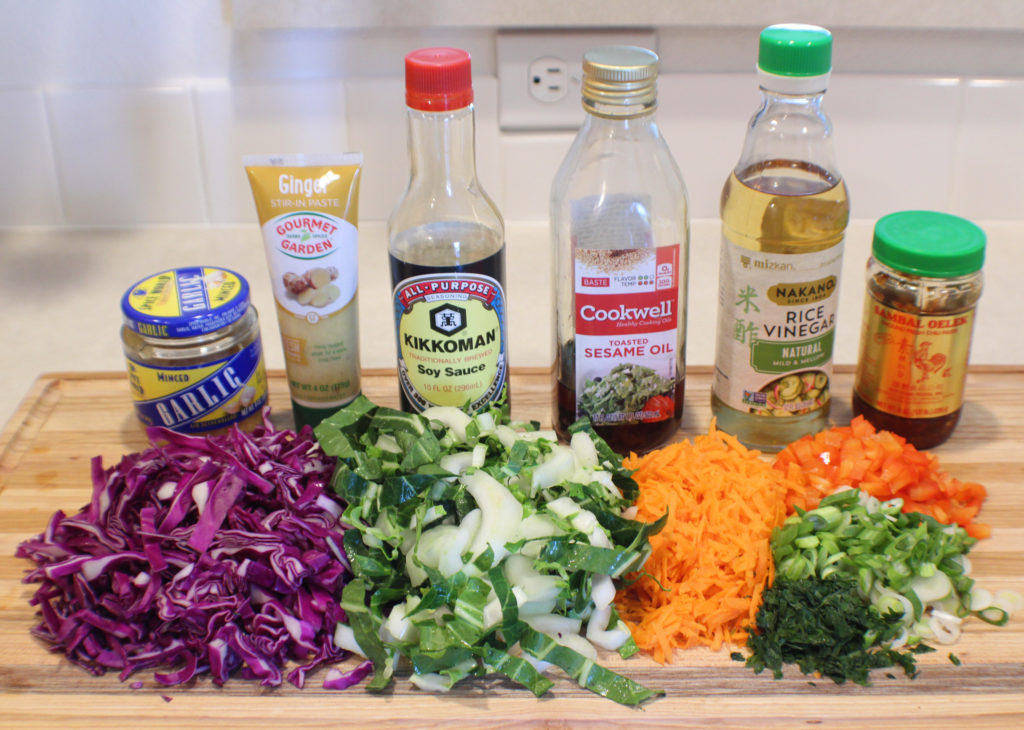
Asian Slaw Ingredients

Prep your veggies and gather the dressing ingredients. For the cabbage, I cut the head in half, then one half in half again. Then I cut out the remaining core. I cut the cabbage in half again, then thin slice it.

This time I couldn’t get a baby bok choy, so I shredded a large bok choy, mixed it all together, and measured out about 3 cups worth. I’ll use the rest as part of my greens in salads this week. Or maybe I’ll make a chicken stir fry.

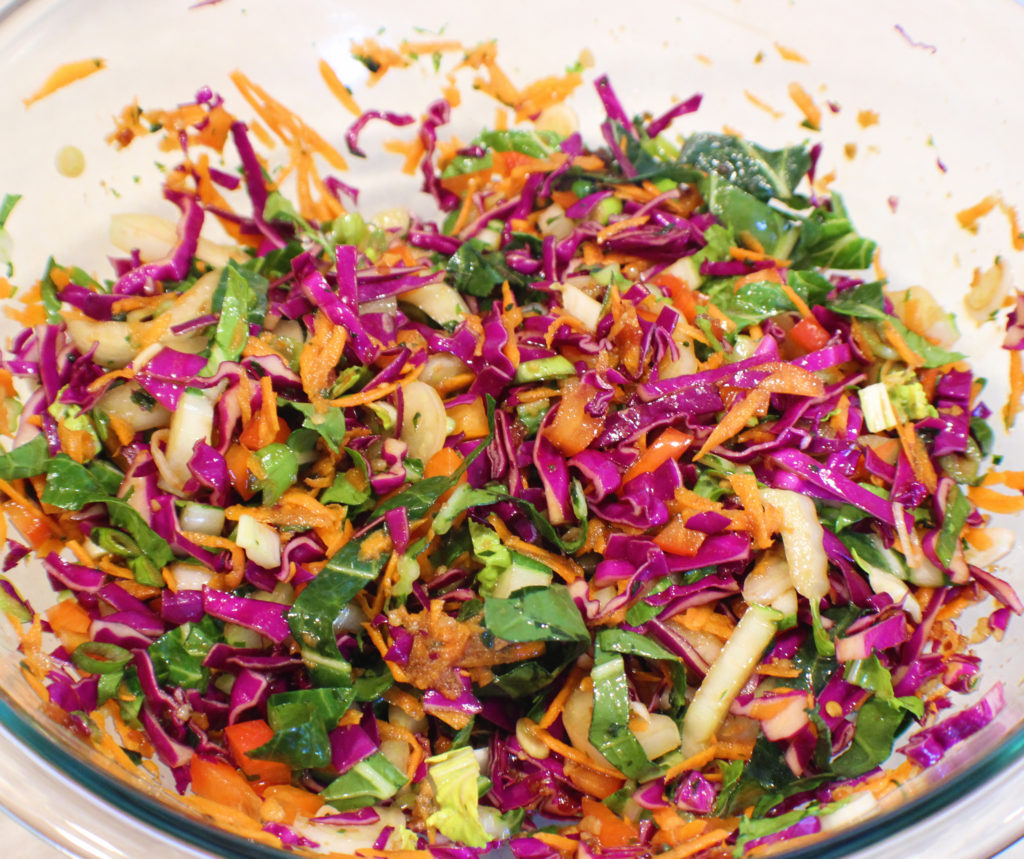
In a large bowl, mix together the dressing ingredients and toss in all the veggies. You could mix in the toasted sesame seeds and peanuts, or pass them around for everyone to add them if they desire.

I like this slaw on top of my Asian Burgers or as a side to Asian Beef and Veggie Kabobs, Spatchcock Chicken with Asian BBQ Sauce, or Ginger Soy Pork Chops.

Enjoy!

Asian Slaw

This slaw has a refreshing ginger flavor with a little heat from the Sambal Oelek. It’s a great summertime side when rocking that outdoor grill.
Prep Time15 minutes
Cook Time0 minutes
Course: Side Dish
Cuisine: Asian
Keyword: Asian Slaw, Cabbage, Slaw
Servings: 6 people
Calories: 130kcal
Author: Eating With Deb

Equipment

  • Large bowl and whisk
  • Cutting board and knife

Ingredients

Slaw

  • ¼ head purple cabbage shredded, about 3 cups
  • 1 each baby bok choy shredded, about 3 cups
  • 1 each carrot shredded
  • 3 each green onions sliced
  • ½ each red bell pepper chopped

Dressing

  • 1 tbsp toasted sesame oil
  • 1 tbsp mirin or brown rice vinegar
  • 2 tbsp soy sauce or wheat-free tamari
  • 2 tsp Samal Oelek chili sauce
  • 1 tbsp ginger fresh, minced
  • 1 tbsp garlic fresh, minced
  • 2 tbsp cilantro chopped

Toppings

  • ½ cup roasted peanuts chopped
  • 2 tbsp sesame seeds toasted

Instructions

  • Combine dressing ingredients in a large bowl and set aside.
  • Prep slaw ingredients and add to the dressing. Mix thoroughly.
  • Sprinkle on peanuts and sesame seeds.
  • Serve on top of Asian Style Burgers, Asian Beef and Veggie Kabobs, or with Ginger Soy Pork Chops.
  • Enjoy!

Notes

This recipe makes about 6 cups of slaw.

Nutrition

Calories: 130kcal | Carbohydrates: 8g | Protein: 5g | Fat: 10g | Saturated Fat: 1g | Sodium: 502mg | Potassium: 218mg | Fiber: 2g | Sugar: 2g | Vitamin A: 442IU | Vitamin C: 21mg | Calcium: 58mg | Iron: 1mg