Holiday Wild Rice

Holiday Wild Rice

Wild rice is a wonderful accompaniment to a holiday meal. This salad has ingredients that remind me of the holiday season – cranberries, mandarin oranges, and nuts – dressed in a light and zippy dressing. It is served cold so it can easily be made a day or two in advance and not take up any precious stove or oven space or your time on the day of your gathering.

Wild Rice

Start with measuring out the rice and stock or water. I generally us a vegetable or chicken stock to impart flavor in the wild rice. To keep it vegetarian, use vegetable stock or plain water.

Toasting Wild Rice

While not a necessary step, I like to toast the wild rice first. It helps bring out a more nutty flavor. No need to use oil, just dry toast the rice over medium high heat for 3 to 5 minutes. You’ll hear it popping and see it starting to brown. Careful not to over toast, you don’t want it to taste burnt.

After toasting, add the stock or water. Be careful, the pan is already hot and the liquid will bubble and pop when you first start adding it to the pan.

Bring to a boil, reduce heat to a simmer and cover. Cook the rice for about 45 minutes until tender.

Wild Rice Dressing

While the wild rice is cooking, whisk together the dressing ingredients and toss in the onions and parsley.

Toasting Nuts

Over medium high heat, dry toast the nuts. This step is also not necessary, but toasting brings out the nutty flavor. Once the nuts start browning, remove from heat and set aside. 

You can also peel and segment the mandarin oranges, measure out the cranberries, add the nuts, and set this aside.

Wild Rice Cooked and Strained

When the rice is done, if there is still liquid in the pan you can just strain it.

Wild Rice Dressed

Mix the rice in with the dressing and put in the refrigerator for about an hour to cool down.

Holiday Wild Rice

Once the rice is cool, mix in the oranges, cranberries, and nuts. It’s ready to eat. This can be stored in the refrigerator for a day or 2 before you are ready to eat it. When you are ready for your holiday meal, put it in a serving container and pass it around.

Enjoy!

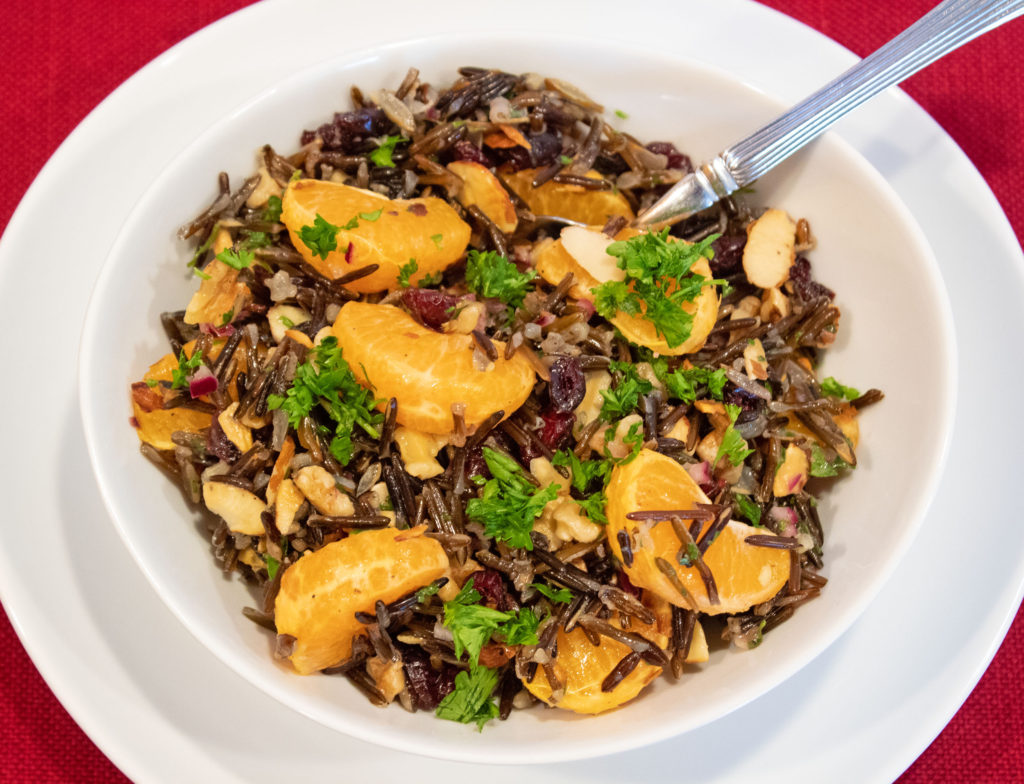
Holiday Wild Rice (or Nutty Wild Rice Salad)

This Nutty Wild Rice Salad is a great accompaniment to any holiday meal. It doesn’t take oven or stove top space and can be made up to a few days in advance. While vegetarian and mostly allergen free, the nuts could be omitted if necessary.
Prep Time15 minutes
Cook Time45 minutes
Resting Time1 hour
Total Time2 hours
Course: Side Dish
Cuisine: American
Keyword: holiday wild rice, wild rice
Servings: 6 people
Calories: 211kcal
Author: Eating With Deb

Equipment

  • Knife and cutting board
  • Large bowl and whisk
  • 4 to 6 quart stock pot
  • Small non-stick sauté pan

Ingredients

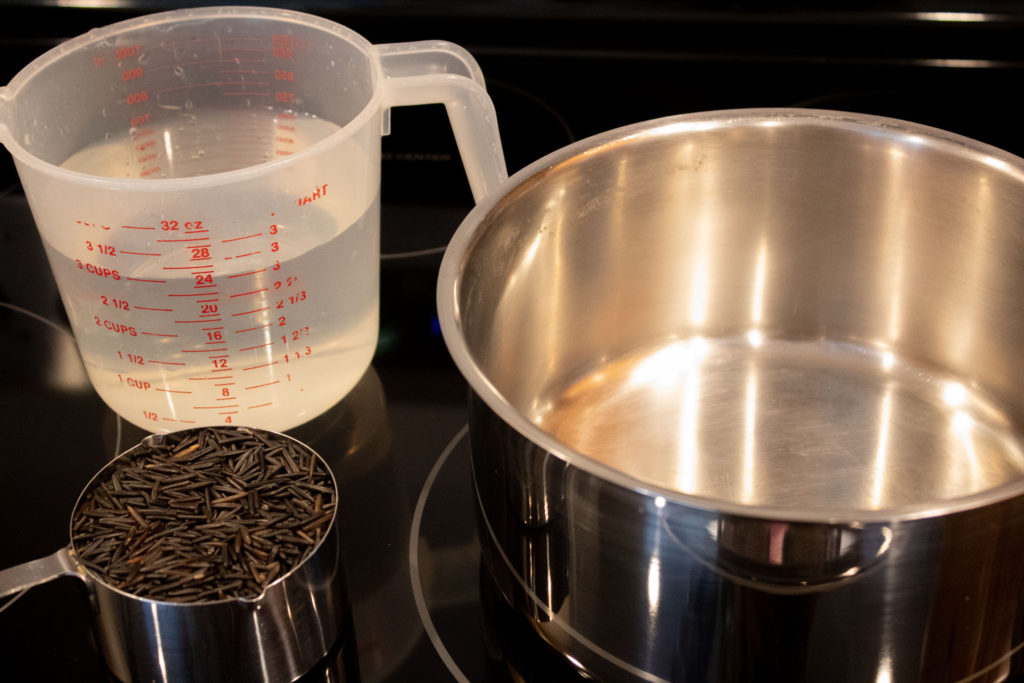
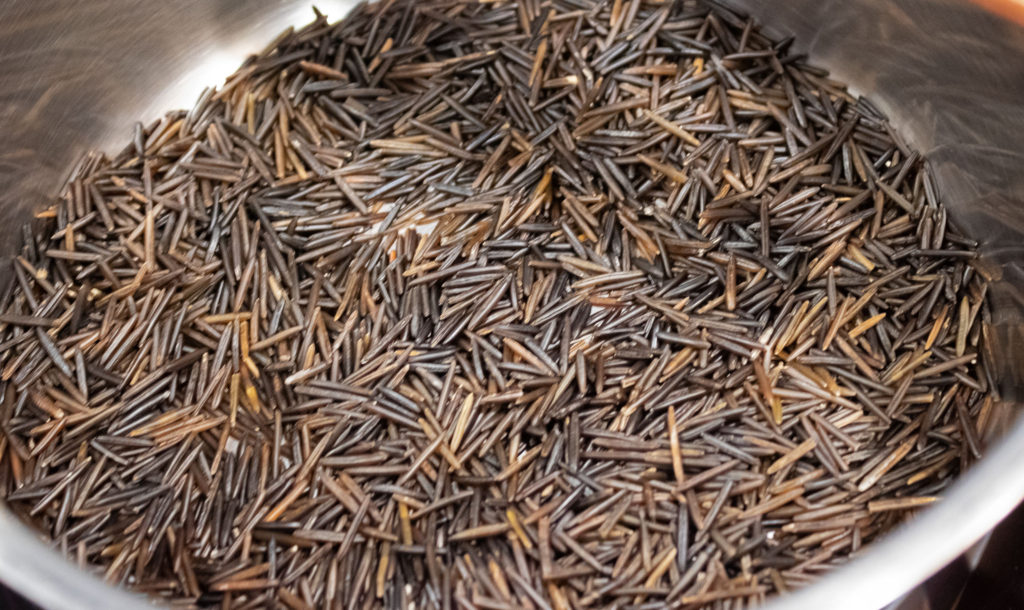
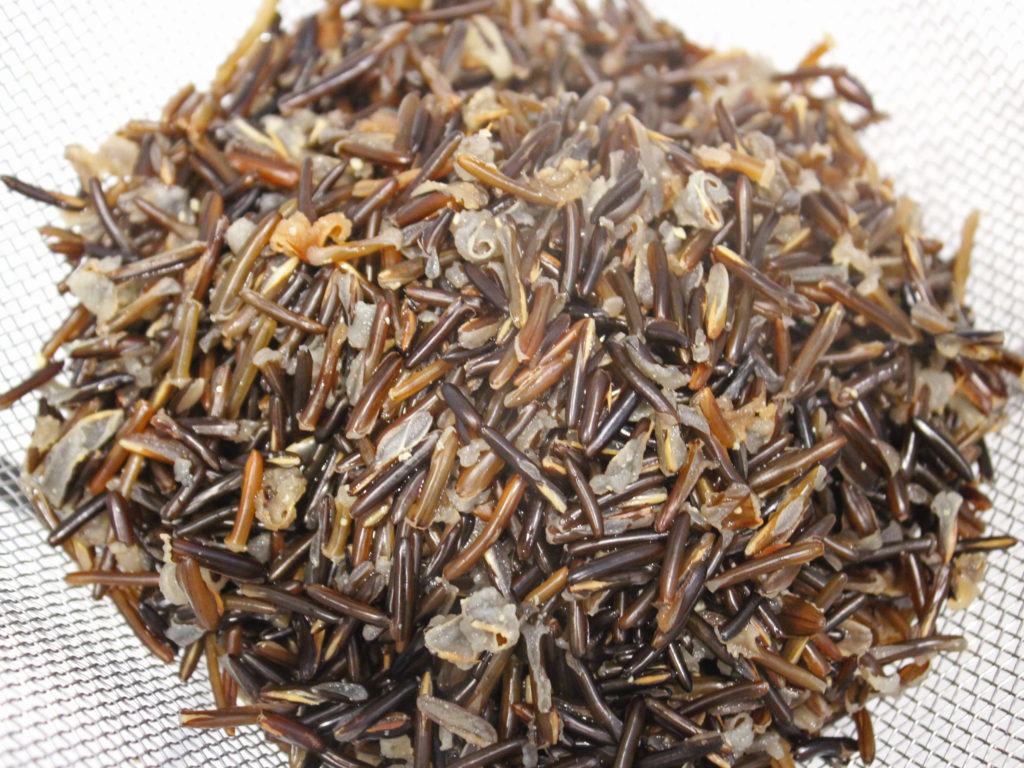
  • 1 cup wild rice uncooked
  • 3 cups vegetable stock water, or chicken stock
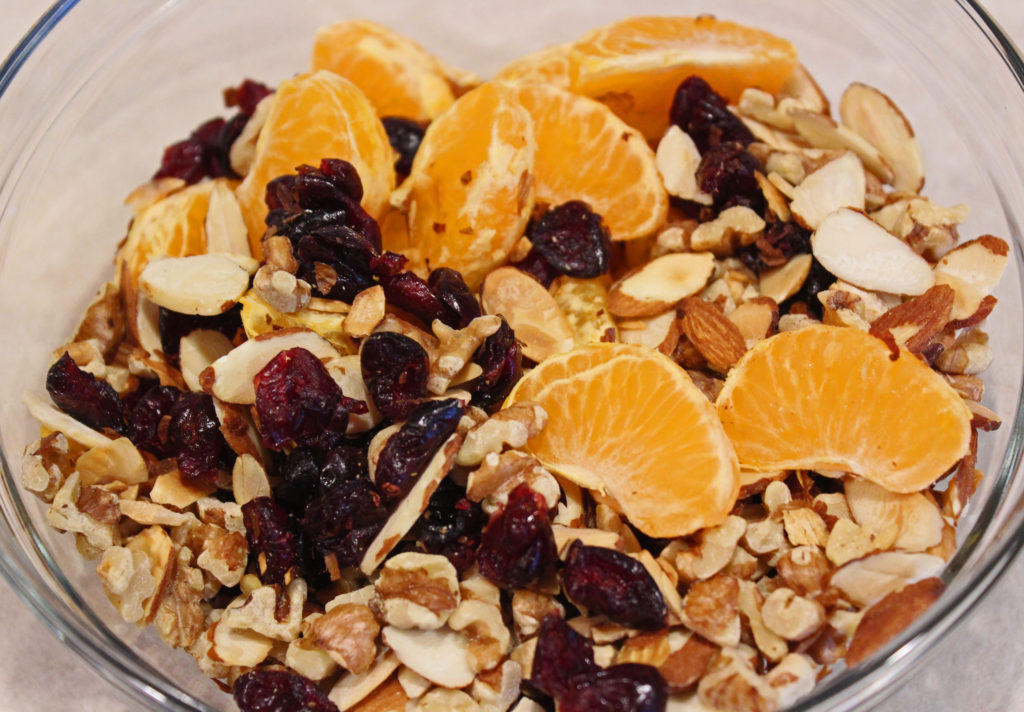
  • 4 each mandarin oranges
  • 1/3 cup walnuts chopped
  • 1/3 cup almonds sliced
  • ½ cup cranberries dried
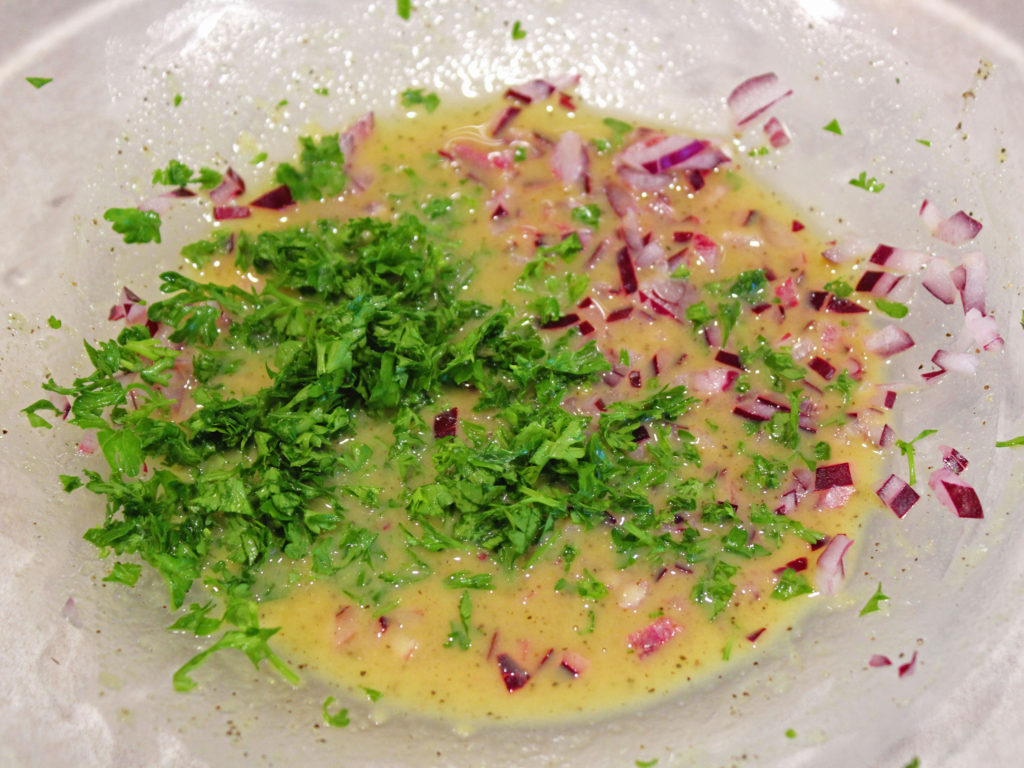
Dressing

  • 2 tbsp apple cider vinegar
  • 2 tbsp Dijon mustard
  • ¼ tsp sea salt
  • ¼ tsp black pepper
  • 1 tbsp honey
  • 2 tsp ginger fresh, minced
  • 2 tbsp red onion minced
  • ¼ cup parsley chopped

Instructions

  • Put a 4 to 6 quart sauce pan on the stove and turn on heat to medium high. Add the rice and dry toast for 3 to 5 minutes to brown.
  • Add the water or stock and bring to a boil, reduce heat, cover, and simmer for about 45 minutes until rice is cooked. If there is excess liquid, drain rice.

While rice is cooking:

  • In a large bowl, whisk together sauce ingredients.

Prep the rest of the salad ingredients:

  • Dry toast (don’t use any oil) the nuts over medium heat for 3 to 5 minutes until they start to brown. Remove from heat immediately.
  • Peel and segment mandarin oranges and get ½ cup dried cranberries.
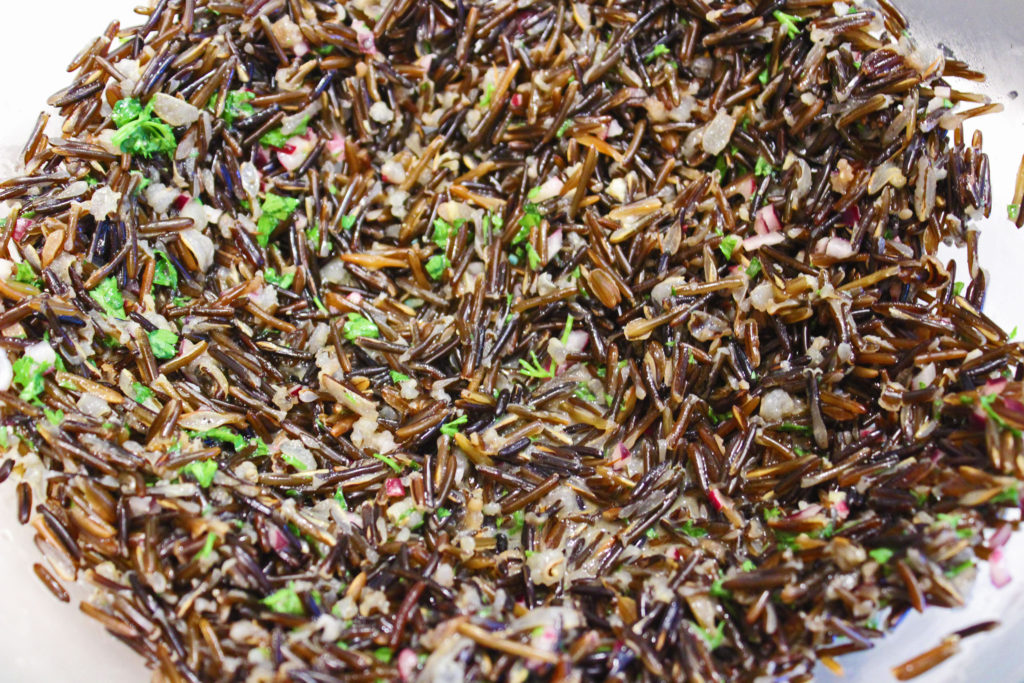
  • When the rice is done (strain it if there is any liquid left), add it to the dressing and mix well. Put in refrigerator for about 1 hour to cool down.
  • Add the rest of the salad ingredients and mix well.
  • Enjoy!

Notes

Makes 6 cups

Nutrition

Serving: 1cup | Calories: 211kcal | Carbohydrates: 29g | Protein: 7g | Fat: 9g | Saturated Fat: 1g | Polyunsaturated Fat: 4g | Monounsaturated Fat: 3g | Trans Fat: 1g | Sodium: 628mg | Potassium: 242mg | Fiber: 4g | Sugar: 6g | Vitamin A: 481IU | Vitamin C: 5mg | Calcium: 42mg | Iron: 1mg

Italian Beef

Italian Beef Sandwich

If you’ve never had an Italian Beef Sandwich from Chicago you are in for a treat. The closest I can compare it to is a French Dip but with a lot more flavor. I don’t recall the Italian Beef Sandwiches I used to get in Chicago having bell peppers and mushrooms, but I think they are a great addition. It’s your call though. Definitely don’t omit the pepperoncinis.

This recipe is as simple as throwing everything in the slowwcooker, turning it on and walking away. I often get everything ready the night before and keep this in my refrigerator so I only have to pull it out the next morning and turn it on.

I recommend using a sirloin roast, but a chuck roast will work too. Be sure to trim as much of the outer fat off the chuck roast as  you can.

After cooking on high for 2 1/2 hours, flip the roast over and stir things around. It’s not necessary, but if you can, it will help distribute all the flavors and juice throughout the meat.

After cooking for 5 hours, pull the roast out and pull/shred the beef. Return it back to the slow cooker, reduce the heat to low and cook for another hour. By shredding and letting it cook longer, the flavors get infused throughout the meat. You can let it cook longer after shredding, the meat will be more flavorful and tender.

It’s time to eat!

Toast a hearty bun with some mozzarella cheese on it if you desire. Add the meat and veggies, I always add more pepperoncinis to my sandwich and a side of the juice to dip my sandwich in.

Enjoy!

Italian Beef

One of the things I really loved about Chicago was getting a great Italian Beef Sandwich. I haven't been there in many years but sometimes crave Italian Beef, so I decided I had to come up with a recipe. Make sure you have a sturdy bun, this is a sloppy sandwich, toast and melt some mozzarella cheese on it. I always add more pepperoncini to my sandwich.
Prep Time10 minutes
Cook Time6 hours
Course: Lunch, Sandwich
Cuisine: American
Keyword: Beef, Sandwich, Slow Cooker
Servings: 6 sandwiches
Calories: 308kcal
Author: Eating With Deb

Equipment

  • 4 to 6 quart slow cooker
  • Cutting board and knife

Ingredients

  • 2 pound beef roast
  • 2 cups pepperoncini
  • 1 each bell pepper julienned
  • 4 cups mushrooms sliced
  • ½ each onion sliced into half moons
  • 2 packets zesty Italian dressing mix Good Seasonings Brand works great
  • 2 cups beef stock

Instructions

  • In the bottom of a slow cooker crock (4 to 6 quart) layer the vegetables and pepperoncini. Add the beef roast and sprinkle on the Italian seasoning packets. Pour the beef stock around the edges.
  • Turn slow cooker on high and cook for 2 1/2 hours.
  • Flip roast over and stir around veggies and juice. Cook on high for another 2 1/2 hours.
  • Remove roast from the slow cooker and pull/shred the roast. Return the meat back to the slow cooker, reduce heat to low and cook another hour.
  • Put on a toasted bun with melted mozzarella cheese.
  • Enjoy!

Nutrition

Serving: 1cup | Calories: 308kcal | Carbohydrates: 5g | Protein: 33g | Fat: 18g | Saturated Fat: 8g | Cholesterol: 104mg | Sodium: 289mg | Potassium: 959mg | Fiber: 2g | Sugar: 3g | Vitamin A: 160IU | Vitamin C: 36mg | Calcium: 40mg | Iron: 4mg

Parmesan Crusted Chicken

Parmesan Crusted Chicken Breast

This recipe is very simple, yet the chicken is full of flavor, moist, and tender.  

This is also a great recipe to involve children in making the dinner. I recommend the adult use the knife and do the actual cooking, but pounding and breading the chicken is a fun activity for young children.

Start by taking 1 large or 2 small chicken breasts and turning it into 4 portions. For the 1 large chicken breast, cut in in half cross-wise, then spit each piece through the middle, basically butterflying it all the way through.

If you have 2 small chicken breasts, cut them in half cross-wise or butterfly them through the middle if they are thick.

Now it’s time to flatten them a little bit for a more even and faster cooking. I like to put them between 2 pieces of plastic wrap before I hit them with the meat mallet. You could certainly put them in a zipper style bag. This helps prevent chicken and juice from splashing all over your kitchen.

Be sure to use the flat side of the meat mallet, we don’t need to tenderize or create holes in the chicken breast. Don’t use too much force when pounding, it will flatten fairly easily.

Remove the top piece of plastic and sprinkle black pepper on both sides. I do a couple turns of my pepper grinder per side. There is no need for salt, you will get enough in the Parmesan cheese.

If you haven’t already mixed together the parmesan and seasonings or enlisted help for this step, do that now.

Using about half the parmesan mixture, press that into one side of the chicken breasts. Flip them over and press the rest into the other side. Don’t worry, some will fall off, you can just add that to the top of the chicken when it’s in the pan.

Be sure to use a large nonstick pan for cooking. The parmesan will stick to a stainless steel pan. This takes about 3 minutes cooking time per side, maybe up to 6 minutes total, depending on how thick the chicken is.

When it’s a nice golden brown on both sides and has an internal temperature of 165 degrees, it’s time to eat. But there are choices to be made. I do like it as is with no additional toppings. Sometimes I put it on a bed of arugula or spinach for some added nutrients.

I have served this Italian style topped with warm marinara sauce and mozzarella cheese with pasta and marinara.

I also like it done California style topped with a tomato slice, avocado slices, melted mozzarella cheese, and served with some sautéed asparagus, mushrooms, and bacon.

However you decide to eat this, Enjoy!

Parmesan Crusted Chicken

This chicken is tender, full of flavor, and is delicious as is, or Italian style topped with marinara and melted mozzarella cheese, or California Style topped with a sliced tomato and avocado with melted mozzarella cheese.
Prep Time10 minutes
Cook Time10 minutes
Total Time20 minutes
Course: Dinner, Main Course
Cuisine: American, Italian
Keyword: Chicken, Glutenfree, Parmesan
Servings: 4 people
Calories: 147kcal
Author: Eating With Deb

Equipment

  • Cutting board and knife
  • Plastic wrap and meat mallet
  • Small Bowl
  • Large nonstick sauté pan and spatula

Ingredients

  • 1 each large chicken breast or 2 small chicken breast, boneless, skinless
  • 1 cup shredded parmesan cheese
  • 1 tbsp Italian seasoning
  • 1 ½ tsp granulated garlic
  • ½ tsp red pepper flakes
  • Black pepper
  • 1 tbsp olive oil

Instructions

  • Cut the large chicken breast in half down the middle, from short side to short side. Then butterfly the 2 pieces, cutting all the way through to create 4 pieces of chicken. If you have smaller chicken breasts, cut the 2 in half to create 4 pieces.
  • Lay out a long piece of plastic wrap on the counter and put the 4 pieces of chicken on it. Top with another long piece of plastic wrap, making sure the chicken is completely covered with room to spare.
  • Using the flat side of the meat mallet, gently pound the chicken down to about 1/8 inch thick.
  • Remove top sheet of plastic wrap and sprinkle both sides of the chicken with black pepper.
  • In a small bowl, combine the parmesan and seasonings.
  • Press about 2 tablespoons of the parmesan mix into each side of the chicken.
  • Heat a large nonstick sauté pan on medium to medium low heat. Add the olive oil and the chicken. If some of the parmesan mix fell off, press in back into the tops of the chicken in the pan.
  • Cook the chicken about 3 to 5 minutes on each side until the chicken reaches an internal temperature of 165 degrees. The parmesan will brown and get crispy.
  • The chicken is delicious as is or top it with a tablespoon or 2 of marinara sauce and mozzarella cheese, or a tomato slice, avocado slices and mozzarella cheese for a California style chicken.
  • You can melt the cheese in the oven under the broiler, but I find it just as easy to put a lid on my pan for a minute or 2.
  • Enjoy!

Notes

Can use 4 boneless, skinless chicken thighs instead of the chicken breast.

Nutrition

Serving: 1cutlet | Calories: 147kcal | Carbohydrates: 3g | Protein: 10g | Fat: 11g | Saturated Fat: 5g | Cholesterol: 22mg | Sodium: 388mg | Potassium: 66mg | Fiber: 1g | Sugar: 1g | Vitamin A: 312IU | Vitamin C: 1mg | Calcium: 299mg | Iron: 1mg

Sesame Ginger Noodles (with Meatballs and Veggies)

Sesame Ginger Noodles with Meatballs and Veggies

Fall is in the air and my garden is mostly ready to harvest. Noodle bowls are a great way to utilize fresh vegetables and are enjoyable any time of the year. This Sesame Ginger Noodles Bowl is wonderful hot or cold, with or without meatballs, and very versatile as to the vegetables that you put in it. If you don’t like something I have added, just switch it out with something you like,, or omit it. It is full mouth awakening flavors of ginger, garlic, soy, and sesame.

Using rice noodles in this dish makes this friendly for those who need to avoid gluten and it can easily be turned into a vegetarian dish by omiting the meatballs or using a hamburger alternative like Gimme Lean or Light Life ground beef style.

At first glance, this recipe looks like it takes a bit of work. But things can be done while other items are cooking, so don’t let the time scare you off.

Asian Meatballs

First get the meatballs mixed and made and in the oven. Be sure to set a timer, you don’t want to forget them. When cooked, remove from the oven and set aside until needed.

Sesame Ginger Noodle Ingredients

Now cut and shred the vegetables, garlic, and ginger.

One great thing about rice noodles, is you put them in a bowl, cover them with hot water and walk away for about 10 minutes. No boiling and stirring on the stove top.

So after your vegetables are ready, get the noodles going.

While the noodles are cooking it’s time to start cooking the veggies. Heat a pan on medium heat and add the sesame oil, garlic, ginger, mushrooms, bell peppers, and broccoli. Saute until the broccoli softens a bit but is still firm and bright green.

Now stir in the greens and snow peas and saute for a couple minutes.

Meatballs and Carrots Addes

Stir in the meatballs and carrots.

Noodles Added

Time to finish this off. Mix in the noodles and the rest of the ingredients.

Sesame Ginger Noodles Ready

Now it’s time to eat what you worked hard to make. Try this with some homemade Naan bread.

Enjoy!

Sesame Ginger Noodles with Meatballs and Veggies

This is a light and gingery Asian style rice bowl dish, which can easily be made vegetarian.
Prep Time30 minutes
Cook Time20 minutes
Course: Dinner, Entree, Main Course
Cuisine: Asian
Keyword: Asian Bowl, Dairyfree, Glutenfree, Noodle Bowl
Servings: 4 people
Calories: 429kcal
Author: Eating With Deb

Equipment

  • Cutting board and knife
  • Large heat resistant bowl
  • Large saute pan and spoon
  • Parchment lined sheet tray
  • Medium bowl

Ingredients

Asian Meatballs

  • 1/3 pound lean ground beef or Gimme Lean Hamburger Style
  • 1 tsp garlic fresh, minced
  • 1 tsp ginger fresh, minced
  • 1 ½ tsp soy sauce or wheat free tamari
  • 1 ½ tsp toasted sesame oil

Rice Noodles and Veggies

  • 8 ounces rice noodles use Udon or another Asian noodle if you wish
  • 1 cup broccoli florets and stems
  • 2 cups mushrooms chopped or sliced
  • 1 cup snow peas cut into bite size pieces (snap peas work too)
  • 2 cups bok choy or napa cabbage, shredded
  • ½ each red bell pepper diced
  • 2 each carrots shredded
  • 4 each green onions sliced
  • 3 tbsp toasted sesame oil
  • 1/3 cup soy sauce or wheat-free tamari
  • 1 tbsp ginger minced
  • 1 tbsp garlic minced
  • 1 tbsp sesame seeds
  • 1 tbsp cilantro
  • ½ t crushed red pepper

Instructions

  • Preheat oven to 350 degrees.
  • Mix together the Asian Meatball mixture and make your bite-size meatballs, about 20 of them and cook on a parchment lined sheet tray for 10 minutes.
  • Prep the vegetables and seasoning.
  • Cook the rice noodles according to package directions. Drain and set aside.
  • While the noodles are cooking, heat a sauté pan on medium heat, add sesame oil, garlic, ginger, mushrooms, bell peppers, and broccoli. Sauté until the broccoli starts to soften a bit, about 5 minutes.
  • Add your greens and snow peas and stir until the greens have wilted, about 3 minutes. Stir in the Asian meatballs and carrots.
  • Add the rest of the ingredients (rice noodles, soy sauce, cilantro, sesame seeds, crushed red pepper, and green onions).
  • Enjoy!

Notes

This is delicious without the meatballs, so if you are celebrating Meatless Mondays or are a vegetarian, give this a try! Or substitute Gimme Lean Hamburger style for the ground beef.

Nutrition

Calories: 429kcal | Carbohydrates: 56g | Protein: 16g | Fat: 16g | Saturated Fat: 3g | Trans Fat: 1g | Cholesterol: 23mg | Sodium: 1373mg | Potassium: 595mg | Fiber: 4g | Sugar: 3g | Vitamin A: 2151IU | Vitamin C: 53mg | Calcium: 104mg | Iron: 3mg

Pickled Jalapenos

Pickled Jalapenos

I don’t can much because it is a lot of work, it’s a very hot process, and requires a lot of space, both to process and store. So I’ve come up with several refrigerator pickling recipes for different items that I grow in my garden.

Making your own refrigerator pickled jalapenos is a very easy process. Plus you can control the heat level by removing seeds if you desire. Using apple cider vinegar gives them a little sweetness and tanginess. 

Sliced Jalapenos

It only takes minutes to slice and put this together. However, if you want to have a lot less heat, remove the seeds before slicing.

Removing Seeds

To easily remove the seeds and keep the jalapenos in rings, just cut off the stem end of the jalapeno and use the pointy end of a skewer to loosen the seeds and ribs. Just be careful not to poke all the way through the jalapeno and stab yourself. Trust me, the oils from the hot peppers poked into your skin don’t feel good!

Removing Seeds 2

Once you have everything loosened, tap the jalapeno on the cutting board to knock everything out of the pepper.

Removing Seeds 3

Now you should have a hollow jalapeno to slice into rings for pickling (or stuffing to make jalapeno poppers).

Add the seasonings into an 8 ounce jar and then the sliced jalapenos.

Heat up the water and vinegar to a boil and pour it into the jar with the jalapenos and seasonings.

Pickled Jalapenos

Using a towel or hot pads, tighten the lid on the jar and shake it a few times to dissolve the salt and sugar.

Let it sit at room temperature for an hour or 2 and put in the refrigerator overnight to cool down completely.

Enjoy!

Pickled Jalapenos

Refrigerator pickling is a quick and easy process and often can reap the rewards within a day or less.
Prep Time10 minutes
Cook Time3 minutes
Resting Time1 day
Total Time1 day 13 minutes
Course: Condiments
Cuisine: American, Tex-Mex
Keyword: Hot Peppers, Jalapeno Peppers, Pickling, Refrigerator Pickling
Servings: 8 servings
Calories: 3kcal
Author: Eating With Deb

Equipment

  • One 8 ounce clean jar
  • Cutting board and knife

Ingredients

  • 8 each jalapenos
  • ¼ tsp sea salt
  • 1/8 tsp minced garlic
  • ¼ tsp sugar
  • ¼ tsp dill dry
  • 1/3 cup water
  • 1/3 cup apple cider vinegar or white vinegar

Instructions

  • Slice the jalapenos into ¼ inch rings.
  • Add your seasonings to the jar and then the jalapenos.
  • Bring the water and vinegar to a boil (I use apple cider vinegar because I want that touch of added sweetness it brings to the palate).
  • Pour over the top of the jalapenos and secure the lid. Using a towel or hot pads, give the jar a few shakes to mix it up and dissolve the salt and sugar.
  • Let it cool down a couple hours and then refrigerate.
  • They are ready to eat the next day.
  • Enjoy!

Notes

I want the full heat effect of the seeds and ribs so I leave the seeds in when slicing the jalapenos. However, you could remove the seeds and ribs and then slice them.
Don't forget to wash your hands a few times and don't touch your eyes or other sensitive spots for several hours after and several washings later!

Nutrition

Calories: 3kcal | Carbohydrates: 1g | Protein: 1g | Fat: 1g | Saturated Fat: 1g | Polyunsaturated Fat: 1g | Sodium: 74mg | Potassium: 10mg | Fiber: 1g | Sugar: 1g | Vitamin A: 11IU | Vitamin C: 1mg | Calcium: 1mg | Iron: 1mg

Maple Glazed Pork Chops

Maple Glazed Pork Chops

Maple syrup compliments pork extremely well. After marinating the pork chops overnight, save the marinade and heat it up with some rum and butter for a delicious maple rum sauce to top the cooked pork chops.

Marinade Ingredients

It only takes about 5 minutes to gather and whisk together the marinade ingredients.

Then put the marinade in a sealable bag, add the pork chops and seal, and put it in the refrigerator overnight. You might want to put it in a bowl or on a plate just in case you have a little leakage.

Making Maple Rum Glaze

The next day, while the charcoal is getting ready or your gas grill is heating up, remove the pork chops from the marinade and add the marinade to a medium sauté or sauce pan with a little butter and rum.

Heat this to a simmer and cook for 3 to 5 minutes to thicken a little and cook the raw pork juices.

Maple Glaze Pork Chops Grilling

Grill the pork chops over medium heat. It will only take about 3 to 5 minutes per side, depending on how thick the chops are. To be sure, cook until the pork reaches an internal temperature of 145 degrees.

Maple Glazed Pork Chops

Top the pork chops with the maple rum sauce and sliced green onions. Try this with Grilled Loaded Potatoes.

Enjoy!

Maple Glazed Pork Chops (with a Maple Rum Sauce)

Maple syrup is a wonderful ingredient that compliments pork. If you don’t want to use rum, just add the butter when heating the sauce to make the glaze for the pork chops.
Prep Time5 minutes
Cook Time15 minutes
Resting Time12 hours
Total Time12 hours 20 minutes
Course: Dinner, Entree, Main Course
Cuisine: American
Keyword: Maple, Pork Chops
Servings: 4 people
Calories: 215kcal
Author: Eating With Deb

Equipment

  • Medium bowl and whisk
  • 1 gallon sealable bag
  • Barbeque grill

Ingredients

  • 4 each pork chops

For the Marinade

  • ½ cup maple syrup
  • 1 tbsp molasses
  • 1 tbsp Worcestershire sauce
  • 1 tbsp vegetable oil
  • 1 tbsp Dijon or brown mustard
  • 2 tsp garlic fresh, minced
  • 2 tsp ginger fresh, minced
  • ¼ tsp sea salt
  • ¼ tsp black pepper

Maple Rum Sauce

  • Marinade after removing the pork chops
  • 1 tbsp butter
  • 1 shot rum

Instructions

  • Whisk together the marinade ingredients. Put it in a zipper bag and add the pork chops. Seal the bag and smush the marinade around, being sure to cover the pork chops. Put in a bowl in the refrigerator overnight.
  • The next day, start the charcoal or gas grill. Remove the pork chops from the marinade and set aside.
  • Put the marinade in a saute pan and add the butter and rum. Bring to a simmer and cook for 3 to 5 minutes. This will cook out the alcohol and reduce the sauce in half.
  • Grill the pork chops over medium heat, 3 to 5 minutes per side, depending on how thick the pork chops are.
  • When pork has reached 145 degrees, remove from grill and drizzle the maple rum sauce over the top of the pork chops.
  • Enjoy!

Nutrition

Serving: 1chop | Calories: 215kcal | Carbohydrates: 33g | Protein: 1g | Fat: 7g | Saturated Fat: 5g | Trans Fat: 1g | Cholesterol: 8mg | Sodium: 261mg | Potassium: 220mg | Fiber: 1g | Sugar: 28g | Vitamin A: 94IU | Vitamin C: 1mg | Calcium: 65mg | Iron: 1mg

Grilled Loaded Potatoes

Grilled Loaded Potatoes

I love loaded potatoes, but they can be a bit heavy in the summer. Slicing cooked potatoes and grilling them while grilling other items, is a wonderful way to bring loaded potatoes into any summer meal.

Loaded Potatoes Ready to Grill

I pre-cook the potatoes in the microwave for a couple of minutes before slicing and grilling. You’ll want to cool them down a little bit before slicing so you don’t burn yourself. I often cook them the day before and put them in the refrigerator overnight. If I don’t cook them the day before, after microwaving them I put them directly into the refrigerator for about 15 minutes to cool down before  slicing them.

Cook 1 potato per person. When slicing them cut off a little bit from each end so they will stay flat when they are on the grill. The thinner you slice, the more toppings you’ll have versus the potato ratio. Be careful not to slice too thin or they will be hard to keep together when grilling. I find about 1/2 inch thick works the best for me.

Get them ready with the oil and seasonings and have the toppings ready to go.

Grill potatoes over direct heat about 3 to 5 minutes per side. You want them nice and brown and a little crispy. Take them off direct heat and top with what ever toppings you like. I add my chives or green onions after I remove them from the grill.

Try with Smoked Ribs with a Cocoa Dry Rub, Maple Glazed Pork Chops or BBQ Rib Burgers.

Enjoy!

Grilled Loaded Potatoes

Grilling potatoes is a quick, easy way to make a tasty side dish for almost any outdoor grilling adventure. Whether you load them or not is your choice, you will end up with crispy potato slices.
Prep Time10 minutes
Cook Time14 minutes
Resting Time15 minutes
Total Time39 minutes
Course: Potatoes, Side Dish
Cuisine: American
Keyword: Grilled Potatoes, Loaded Potatoes
Servings: 4 people
Calories: 152kcal
Author: Eating With Deb

Equipment

  • Microwave
  • Cutting board and knife
  • Grill or Outdoor Barbeque
  • Small kitchen barbeque style brush

Ingredients

  • 4 each russet potatoes
  • 2 tbsp vegetable oil or canola oil

Seasoning Blend

  • ½ tsp sea salt
  • ½ tsp black pepper
  • ¼ tsp mustard dry
  • 1 tsp oregano
  • 1 tsp rosemary

Toppings

  • ¼ cup sour cream
  • 3 tbsp colby jack cheese or cheddar, shredded
  • 2 tbsp chives or green onions sliced
  • 2 tbsp bacon bits

Instructions

  • Stab the potatoes several times with a fork and cook in the microwave 2 minutes per side. Cool in the refrigerator for at least 15 minutes before slicing (I cook them the day before and put them in the refrigerator overnight).
  • Mix together the dry spices.
  • Slice potatoes ½ - 1 inch thick, cutting off the very ends so they will stay flat. Brush one side with oil and sprinkle with the seasoning blend. Turn slices over and repeat, making sure to get oil around the sides of the potato slices.
  • Grill over medium heat about 3 to 5 minutes per side (3 minutes if they weren’t cooled down overnight). In the last 2 minutes of cooking time, slide the potatoes to a cooler spot on the grill and top with the toppings. I like to smear the sour cream on, then sprinkle on the cheese and bacon bits. Reserve the green onions or chives for after they come off the grill.

Nutrition

Calories: 152kcal | Carbohydrates: 2g | Protein: 4g | Fat: 14g | Saturated Fat: 10g | Cholesterol: 18mg | Sodium: 435mg | Potassium: 58mg | Fiber: 1g | Sugar: 1g | Vitamin A: 276IU | Vitamin C: 1mg | Calcium: 107mg | Iron: 1mg

BBQ Rib Burgers

BBQ Rib Burger with Peppery Bacon Relish

If I have leftover ribs, I often pull the meat off the bones and freeze the meat for future use. Adding the rib meat, like meat from my Smoked Ribs with a Cocoa Dry Rub, to ground beef helps rehydrate the rib meat and offers a different texture and a wonderful smoky flavor to a grilled burger.

Making these burgers are as simple as putting all the ingredients in a bowl and mixing them together. Mix only until everything is just mixed together, if you overmix you’ll end up with a tough burger.

When forming burger patties, it is important to make the center of the patty thinner than the edges. Burgers plump when cooking and the thinner center will help ensure an even thickness when done.

Time to grill. I find with my burgers, if I cook them over medium, direct heat, it takes about 5 minutes per side to reach the perfect doneness. Too hot and they cook too fast and you risk burning them, too cool and it takes quite a bit longer, plus they don’t turn out as firm.

If you want cheese, in the last minute when toasting the buns on the grill, top the burgers with cheese and close the lid.


BBQ Rib Burger with Peppery Bacon Relish

Top the burgers with the toppings of your choice.

This time I used my Peppery Bacon Relish as my condiment but my Sweet Pepper Sauce works well too.

Serve these with Grilled Loaded Potatoes or Dilly Potato Salad with Radishes for a delicious summer barbecue meal.

Enjoy!

BBQ Rib Burgers

This is a very easy way to use any leftover grilled ribs you may have. The rib meat gets rehydrated in the ground beef and adds a wonderful flavor and texture to burgers.
Prep Time10 minutes
Cook Time10 minutes
Total Time20 minutes
Course: Dinner, Lunch, Main Course
Cuisine: American
Keyword: Barbeque, Burgers, Ribs
Servings: 4 people
Calories: 501kcal
Author: Eating With Deb

Equipment

  • Large bowl
  • Plate to put raw burgers on

Ingredients

  • 1 pound ground beef 80/20
  • 1 cup leftover cooked rib meat chopped
  • 2 tbsp barbecue sauce
  • ¼ tsp black pepper
  • ¼ tsp sea salt
  • 1 tbsp onion flakes dry
  • ½ tsp granulated garlic

Instructions

  • Mix all ingredients together and form 4 patties, making sure to indent the center of each patty.
  • Cook on barbecue over medium heat about 5 minutes per side until internal temperature reaches 155 degrees.
  • Top with your favorite toppings.
  • Try this with Peppery Bacon and Onion Relish as a spread on the bun.

Nutrition

Calories: 501kcal | Carbohydrates: 5g | Protein: 29g | Fat: 40g | Saturated Fat: 16g | Trans Fat: 3g | Cholesterol: 125mg | Sodium: 343mg | Potassium: 482mg | Fiber: 1g | Sugar: 3g | Vitamin A: 32IU | Vitamin C: 1mg | Calcium: 33mg | Iron: 3mg

Asian Slaw

Asian Slaw

I’m all about the side dishes during the summer grilling season. This slaw goes well with about anything you are grilling, with or without an Asian flair.

When it comes to coleslaws, I always use purple cabbage, it’s firmer than the green cabbage, which means it stays crisper longer. But if you prefer green cabbage go ahead and use it.

Asian Slaw Ingredients

Prep your veggies and gather the dressing ingredients. For the cabbage, I cut the head in half, then one half in half again. Then I cut out the remaining core. I cut the cabbage in half again, then thin slice it.

This time I couldn’t get a baby bok choy, so I shredded a large bok choy, mixed it all together, and measured out about 3 cups worth. I’ll use the rest as part of my greens in salads this week. Or maybe I’ll make a chicken stir fry.

In a large bowl, mix together the dressing ingredients and toss in all the veggies. You could mix in the toasted sesame seeds and peanuts, or pass them around for everyone to add them if they desire.

I like this slaw on top of my Asian Burgers or as a side to Asian Beef and Veggie Kabobs, Spatchcock Chicken with Asian BBQ Sauce, or Ginger Soy Pork Chops.

Enjoy!

Asian Slaw

This slaw has a refreshing ginger flavor with a little heat from the Sambal Oelek. It’s a great summertime side when rocking that outdoor grill.
Prep Time15 minutes
Cook Time0 minutes
Course: Side Dish
Cuisine: Asian
Keyword: Asian Slaw, Cabbage, Slaw
Servings: 6 people
Calories: 130kcal
Author: Eating With Deb

Equipment

  • Large bowl and whisk
  • Cutting board and knife

Ingredients

Slaw

  • ¼ head purple cabbage shredded, about 3 cups
  • 1 each baby bok choy shredded, about 3 cups
  • 1 each carrot shredded
  • 3 each green onions sliced
  • ½ each red bell pepper chopped

Dressing

  • 1 tbsp toasted sesame oil
  • 1 tbsp mirin or brown rice vinegar
  • 2 tbsp soy sauce or wheat-free tamari
  • 2 tsp Samal Oelek chili sauce
  • 1 tbsp ginger fresh, minced
  • 1 tbsp garlic fresh, minced
  • 2 tbsp cilantro chopped

Toppings

  • ½ cup roasted peanuts chopped
  • 2 tbsp sesame seeds toasted

Instructions

  • Combine dressing ingredients in a large bowl and set aside.
  • Prep slaw ingredients and add to the dressing. Mix thoroughly.
  • Sprinkle on peanuts and sesame seeds.
  • Serve on top of Asian Style Burgers, Asian Beef and Veggie Kabobs, or with Ginger Soy Pork Chops.
  • Enjoy!

Notes

This recipe makes about 6 cups of slaw.

Nutrition

Calories: 130kcal | Carbohydrates: 8g | Protein: 5g | Fat: 10g | Saturated Fat: 1g | Sodium: 502mg | Potassium: 218mg | Fiber: 2g | Sugar: 2g | Vitamin A: 442IU | Vitamin C: 21mg | Calcium: 58mg | Iron: 1mg

Spatchcock Chicken with Asian BBQ Sauce

Grilled Chicken with Asian BBQ Sauce

Don’t let the term spatchcock scare you away. It’s just a fancy way of saying to butterfly a whole chicken, or to split it open, and it’s pretty simple to do with a pair of kitchen shears.

When grilling spatchcock chicken a weight is added, like a brick wrapped with foil, and that helps cook it faster and keep it moist and tender.

I like to put my chicken on a sheet tray lined with parchment paper. That way I can cut out the backbone and season it all on the same pan.

You can see that I don’t have the best kitchen shears, but they work.

Start with the chicken breasts down on the pan. Cut down one side of the backbone, all the way through to the other end.

When you get through one side, cut down the other side of the backbone and pull it out. You can freeze it to make chicken stock in the future. 

Once the backbone is out, open it up and flip it over.

Using the heal of your hand, press down on the breast bone to flatten the chicken out. Yes, you will hear and feel bones cracking, but that goes with the territory.

Once you get if flattened out, season it by rubbing oil and salt and pepper on both sides.

Careful on the bone side so you don’t poke yourself.

While my charcoal is heating up, and my chicken is sitting at room temperature, I like to make a barbecue sauce. This Asian BBQ sauce has a little zip and tastes great on chicken.

Just put all the ingredients together is a small sauce pan and simmer it for about 5 minutes. The sugar just needs to get dissolved and it will heat up more on the grill.

Time to get grilling. I happened to have a larger patio brick laying around, but 2 smaller bricks will do. The main thing is to try to have an even weight across the whole chicken.

Start with the breast side down, right over the top of the coals and close the lid.

After about 20 minutes, remove the brick (careful, it’s hot!), and flip the chicken. The skin is getting crispy and the chicken is cooking nicely!

Put the brick back on the chicken, close the lid and cook for another 20 minutes or so. Be sure to check for an internal temperature of 160 degrees before removing the brick.

Everybody’s grill is different, so you may need a little more or a little less cooking time.

Now it’s time to baste the chicken with barbecue sauce and cook a little longer. Use 1/3 of the Asian Barbecue sauce on the first side, close the lid and cook for about 3 minutes.

Flip the chicken over and use another 1/3 of the barbecue sauce. Close the lid and let cook for another 3 minutes.

Grilled Chicken with Asian BBQ Sauce

Remove the chicken from the grill to a cutting board and let it rest for about 10 minutes before cutting it apart.

Cut the legs and thighs off, then the wings and drummies. Cut the chicken breasts down the breast bone. I top the pieces with the remaining barbecue sauce and some sliced green onions.

Serve this with Asian Slaw.

Enjoy!

Grilled Spatchcock Chicken with Asian BBQ Sauce

Spatchcocking chicken is an easy way to get a whole chicken to cook faster and keep it moist. Baste it with barbecue sauce for a finishing touch to a great tasting grilled chicken.
Prep Time10 minutes
Cook Time46 minutes
Resting Timee10 minutes
Total Time1 hour 6 minutes
Course: Dinner, Entree, Main Course
Cuisine: American, Asian
Keyword: Asian BBQ Sauce, Chicken, Dinner Ideas, Grilling, Spatchcock Chicken, Whats for Dinner
Servings: 8 servings
Calories: 84kcal
Author: Eating With Deb

Equipment

  • 2-quart sauce pan
  • Kitchen shears
  • Barbeque Grill, Tongs, and Brick Wrapped with Foil
  • Knife and cutting board

Ingredients

Chicken

  • 1 each whole chicken
  • 2 tbsp vegetable oil
  • 1 tsp sea salt
  • 1 tsp black pepper

Asian BBQ Sauce

  • ½ cup ketchup
  • 1 tbsp molasses
  • 1 tbsp soy sauce or wheat-free tamari
  • 2 tbsp mirin or brown rice vinegar
  • 1 tbsp Sambal Oelek
  • 1 tsp sesame oil
  • 11 tbsp ginger
  • 1 tbsp garlic fresh minced
  • 1 tbsp brown sugar

Instructions

For the BBQ Sauce

  • Combine all ingredients in a 2-quart sauce pan and simmer for 5 minutes.

For the Chicken

  • Place chicken breast side down. Using a pair of kitchen shears, cut down each side of the back bone. Remove and save for making chicken stock.
  • Flip chicken over, using the heals of your hands, press down on the breast bone, breasts, and thighs to flatten as much as possible.
  • Using half the oil, salt, and pepper, rub oil all over 1 side and sprinkle with salt and pepper. Flip chicken over and repeat with the remaining oil, salt, and pepper.
  • Set chicken aside at room temperature and start the charcoal, you will need a full chimney.
  • Wrap a large patio brick, or 2 smaller bricks with foil.
  • Once grill is ready, place chicken, meat side down on the grill, directly over the charcoal, and put the foil wrapped brick(s) on top of the chicken. Close the lid and cook for 20 minutes.
  • Remove the brick(s), flip the chicken over, and replace brick(s). Close the lid and cook for another 20 minutes. Check the internal temperature of the chicken is 2 or 3 places on each side to ensure the chicken has reached 160 degrees.
  • Remove the brick and baste one side of the chicken with 1/3 of the BBQ sauce. Close the lid and cook for 3 minutes.
  • Flip the chicken over and baste the other side with 1/3 of the BBQ sauce. Close the lid and cook for 3 minutes.
  • Remove the chicken and let rest for 10 minutes. Cut the chicken off at the joints, removing the wings and drummies together. Remove the thighs and legs together then cut at the joint between the thigh and leg. Cut the breasts in half down the breast bone.
  • Drizzle the remaining BBQ sauce all over the chicken pieces.
  • Enjoy!

Nutrition

Calories: 84kcal | Carbohydrates: 12g | Protein: 1g | Fat: 4g | Saturated Fat: 3g | Cholesterol: 1mg | Sodium: 613mg | Potassium: 145mg | Fiber: 1g | Sugar: 8g | Vitamin A: 91IU | Vitamin C: 2mg | Calcium: 14mg | Iron: 1mg