Sweet Pepper Sauce

I really like food that tastes so good that you don’t need to add anything else, but there is something to be said about a great sauce. I came up with this sauce to use as a condiment on burgers, but have since used it as a salad dressing, a veggie dip, and a fry sauce.

This is super simple and only takes a few minutes to throw it together.

Start by gathering your ingredients. I had fresh garlic in my garden (pictured on the left). I also had some homemade mustard that I used instead of store-bought Dijon.

I pulled a couple limes out of the freezer 2 days prior to give them enough time to thaw. The morning I was going to make this sauce, I pulled the limes out of the refrigerator so they came to room temperature to ensure they gave me all the juice they had. Turned out I only needed 1 lime.

You can find jarred cherry peppers in the pickles and olives section in the grocery store.

Put your mayo and mustard in a bowl. Zest and juice your lime into the bowl. Chop your garlic and peppers and add to the bowl plus some pepper juice from the jar.

Just mix it up and it’s ready to enjoy!

Try it as the condiment on Pepper Burgers.

Sweet Pepper Sauce

This slightly tangy yet sweet dipping sauce pairs well with all sorts of dishes. I use it on burgers, salads or as a fry dipping sauce. Recently I made a taco salad and instead of using salsa and sour cream I used this sauce.
Prep Time10 minutes
Cook Time0 minutes
0 minutes
Course: Condiments
Cuisine: American
Keyword: Condiments, Fry Sauce, Salad Dressing
Servings: 16 tablespoons
Calories: 97kcal
Author: Eating With Deb

Ingredients

  • 1 cup mayonnaise
  • 2 tbsp lime juice 1 lime + zest
  • 1 tbsp cherry pepper juice
  • 1 tbsp Dijon mustard
  • 3 tbsp sweet cherry peppers chopped
  • 1 tsp garlic minced

Instructions

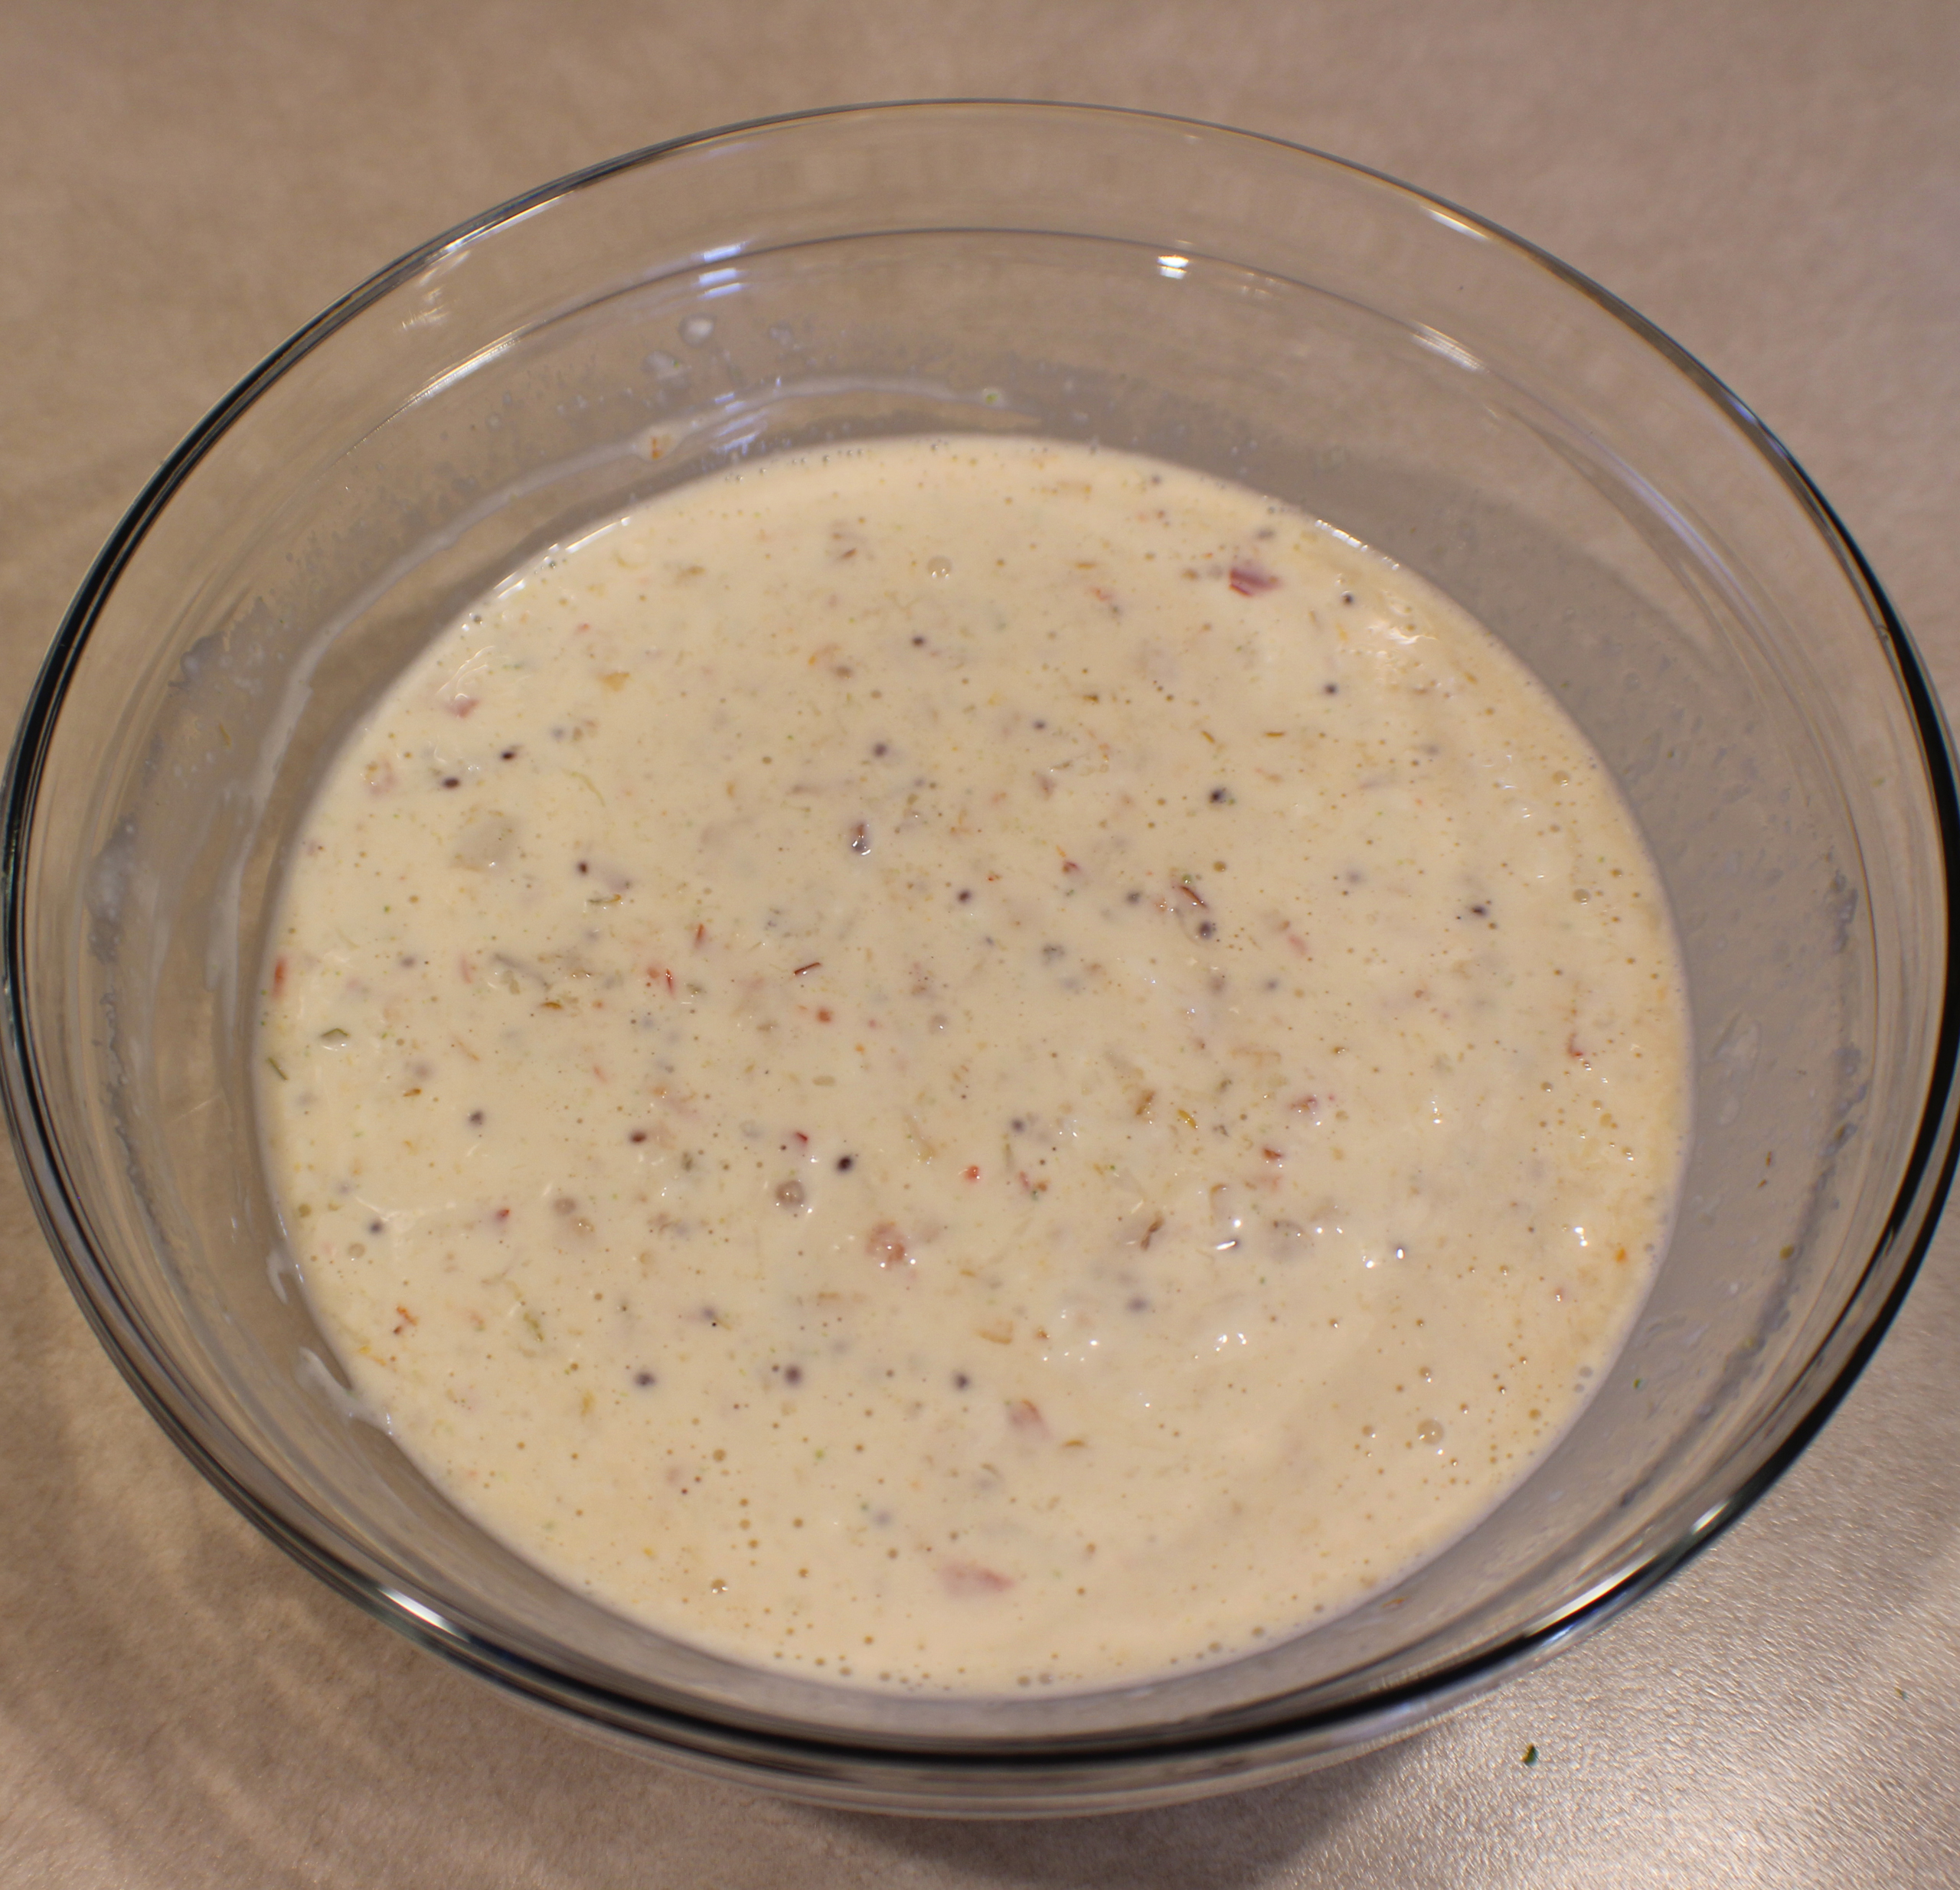
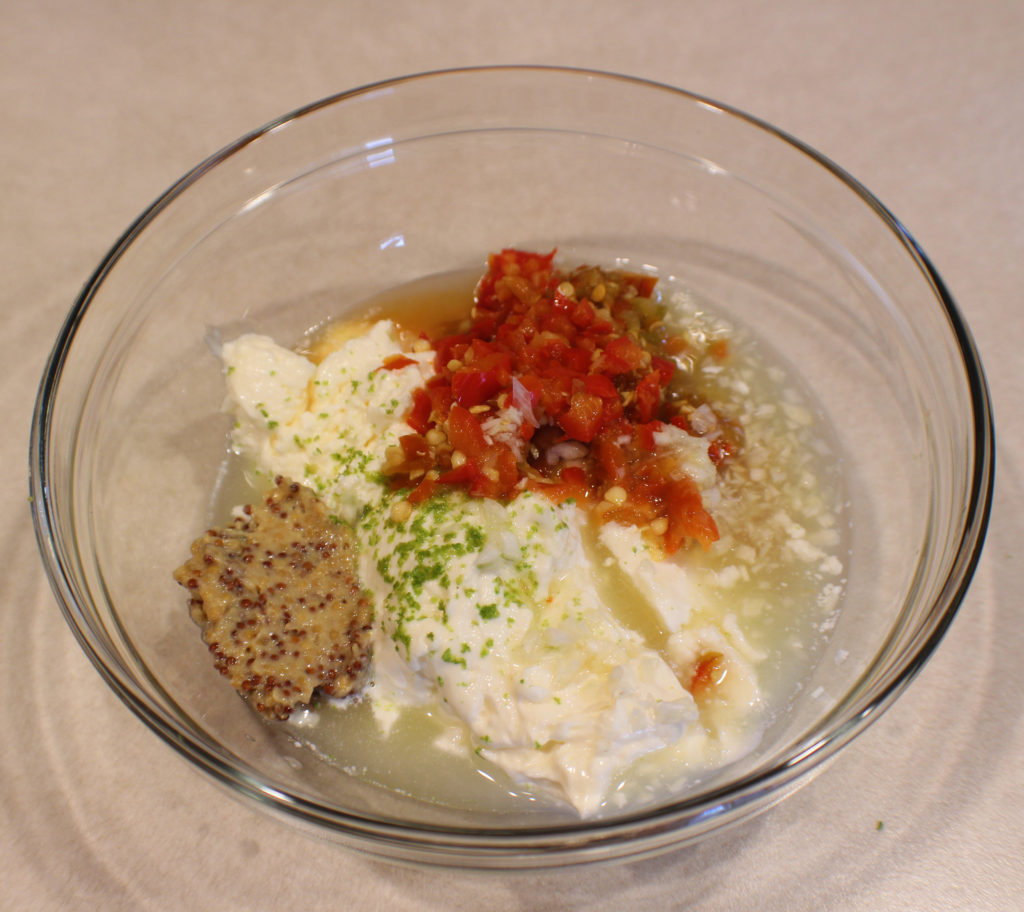
  • In a medium bowl, add the mayonnaise, zest and juice from 1 lime, mustard, and cherry pepper juice.
  • Chop the garlic and cherry peppers and add to the mayonnaise mix.
  • Mix well.
  • Enjoy!

Notes

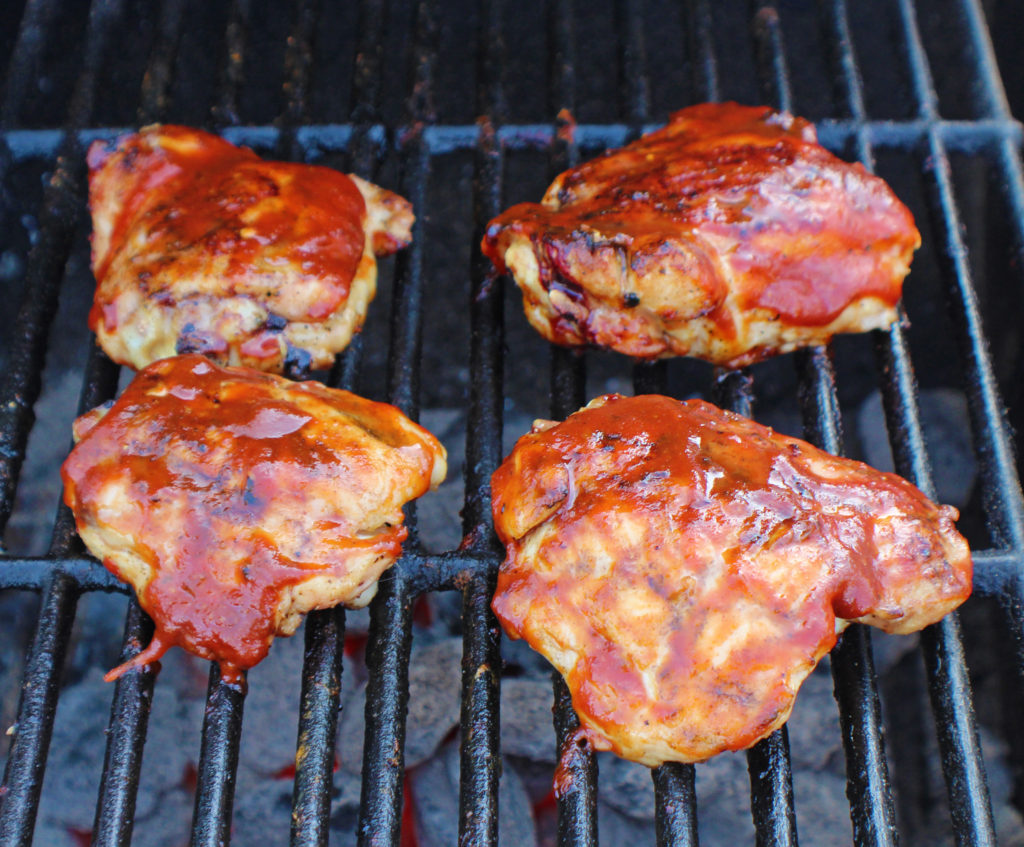
Serve as the sauce on burgers, like Pepper Burgers, as a dipping sauce for fries or tater tots, or as a veggie dip or salad dressing.

Nutrition

Calories: 97kcal | Carbohydrates: 1g | Protein: 1g | Fat: 11g | Saturated Fat: 2g | Cholesterol: 6mg | Sodium: 100mg | Potassium: 3mg | Fiber: 1g | Sugar: 1g | Vitamin A: 9IU | Vitamin C: 1mg | Calcium: 1mg | Iron: 1mg

Homemade Butter

Butter on Popovers

Making butter has always intrigued me but also seemed intimidating.  When I first started doing research on the process it didn’t help me get over the fear.  Some said to put carrots in the heavy cream and let it soak for a bit so it would turn yellow when whipped. I also saw the “put it in a jar and shake it” method.  That takes a lot of time and arm, wrist, and hand strength – a method I would recommend for a group of people, or have a mixer ready to go, because you will probably give up before reaching the butter stage.

When I finally tried it, it wasn’t daunting at all.  In fact, it is very easy and fun and a great project to do with children.  I’ve also found that depending on what area of the country you live in, homemade butter can be cheaper than buying a mid-range priced butter and tastes oh, so much better! 

So here is an easy to follow and make step-by-step process of making your own butter:

Whip Cream Stage

Start with heavy whipping cream (1 to 2 pints) in a mixing bowl, food processor, or blender.  Be sure to not over-fill any of the containers as the cream will splatter or ooze out.  I use my stand mixer and if using 2 pints I start out on the first setting until it starts to thicken.  As it gets thicker, I turn up the mixer.

Eventually you will get to the whipped cream stage, a very good stage, but not quite what we are after, so keep mixing.

Butter almost ready to drain

Finally you get to the point where the solids start to separate from the liquid. Almost there. Keep mixing until you get full separation.

And now it is ready to drain.

Strain out the milk into a bowl and save. It is quite tasty and good in coffee, used in baking, or I’ve used it to marinate chicken before breading and frying.

Rinsing the Butter

Now it’s time to rinse. This is an important step as it helps remove any “milk” that is left which will help preserve the butter longer.

Add about 1 cup or so of very cold water and squeeze the butter in the water. Drain and repeat several times until the water is clear after squeezing through the butter.

Once the water runs clear, drain and squeeze out any remaining water. You can use a cheese cloth, but I found the butter sticks to it and you loose some of the butter you worked so hard to make.

You could certainly use kitchen gloves for this step. Your hands will end up very oily when doing this.

Homemade Butter

Put the butter in a dry bowl or on a cutting board and using the back of a spoon or your hands that are already oily, mix in your salt. You can add as much or as little as you desire. If you want to experiment a little, add a pinch at a time and taste so you don’t over salt the butter.

You’ll notice that the butter turned yellow all on its own without adding any coloring.

Roll the butter in wax paper or put it in a container that seals and keep it in the refrigerator or freezer.

Try it on homemade Cornbread or Garlic Cheddar Dinner Rolls.

Enjoy!

Homemade Butter

Homemade butter has a wonderful flavor and is a very fun project to do by yourself or involve your kids.
Prep Time20 minutes
Total Time20 minutes
Keyword: Butter, Homemade Butter
Servings: 16 tablespoons
Calories: 102kcal
Author: Eating With Deb

Equipment

  • Stand Mixer, beaters, blender, or food processor
  • Fine mesh sieve
  • Bowl

Ingredients

  • 1 pint heavy whipping cream
  • 1/4 tsp sea salt
  • cold tap water

Instructions

  • Put the cream in the mixer bowl, blender, or food processor. Be sure not to fill past the liquid line.
  • Starting on a low speed, start mixing the cream. Gradually turn up the speed until the solids completely separate from the liquids.
  • Drain the solids from the liquid and reserve the milk.
  • Put the solids, or butter in a bowl and add 1 cup or so of cold water.
  • Squeeze the butter so the water goes through it.  Drain and repeat until the water runs clear.
  • Drain one last time and mix in the salt.
  • Roll the butter in wax paper or put in a food container and store in the refrigerator or freezer. 

Notes

Use the leftover milk in your coffee, or in baking, or to marinate chicken or pork.
For 1 pint of heavy cream you will get about 1 cup of butter and 1 cup of milk.

Nutrition

Serving: 1tbsp | Calories: 102kcal | Carbohydrates: 1g | Protein: 1g | Fat: 11g | Saturated Fat: 7g | Polyunsaturated Fat: 1g | Monounsaturated Fat: 3g | Cholesterol: 41mg | Sodium: 48mg | Potassium: 22mg | Sugar: 1g | Vitamin A: 435IU | Vitamin C: 1mg | Calcium: 19mg | Iron: 1mg

Honey Orange Sriracha (HOS) BBQ Sauce

Honey Orange Sriracha BBQ Sauce

I love making my own barbecue sauces. They are easy to make and you can flavor them anyway you like. You can certainly use ketchup as the base but sometimes I like to use no salt added tomato sauce so I can control the amount of sodium and sugar.

This is all you need. You could use already prepared orange juice right out of your refrigerator, but I like adding zest as well as juice and prefer the taste of fresh citrus juice. But it’s your choice. If you are going to use already made orange juice, you will need about 1/2 cup.

Combine all ingredients in a 4 quart sauce pan. You don’t want to use anything smaller, it will bubble and pop when it is simmering. You will simmer this for about 20 minutes until it reduces and thickens a bit. Stir it frequently because it will easily burn.

Cool and put in an old ketchup or barbecue sauce bottle or even a mason jar.

I couldn’t wait to use it and decided to grill up some chicken thighs. They take about 5 to 7 minutes per side over medium to medium low heat. In the last couple of minutes of cooking, I baste both sides with BBQ sauce and let it cook a bit. The heat will caramelize the sugars.

I have also grilled zucchini and portobello mushroom caps and baste them in the last minute or 2 with BBQ sauce.

Honey Orange Sriracha (HOS) BBQ Sauce

A little sweet, a little tangy, and a little spicy, this BBQ sauce tastes great on just about any grilled meat or vegetable.
Prep Time5 minutes
Cook Time20 minutes
Course: Condiments
Cuisine: American
Keyword: BBQ Sauce, Sriracha
Servings: 16 servings
Calories: 47kcal
Author: Eating With Deb

Equipment

  • 4 quart sauce pan
  • Heat resistant rubber spatula

Ingredients

  • 15 ounce can tomato sauce no salt added
  • 1/3 cup molasses
  • 1/3 cup Dijon or brown mustard
  • ¼ cup honey
  • 1 each orange juice and zest
  • 2 tbsp Sriracha sauce
  • ¼ tsp sea salt
  • ¼ tsp black pepper
  • ¼ tsp granulated garlic

Instructions

  • Combine all ingredients in a sauce pan and bring to a simmer. Reduce heat to low or medium low and simmer for 20 minutes stirring frequently. The sauce will reduce and thicken but can easily burn.
  • Remove from heat and let cool slightly. Taste while it’s still warm. If you need to add more honey because your orange wasn’t very sweet, add now. Adjust other seasonings to your desire.
  • Cool and put in an old ketchup or BBQ sauce bottle. or a mason jar.

Nutrition

Serving: 2tbsp | Calories: 47kcal | Carbohydrates: 11g | Protein: 1g | Fat: 1g | Saturated Fat: 1g | Trans Fat: 1g | Sodium: 280mg | Potassium: 204mg | Fiber: 1g | Sugar: 11g | Vitamin A: 122IU | Vitamin C: 3mg | Calcium: 22mg | Iron: 1mg