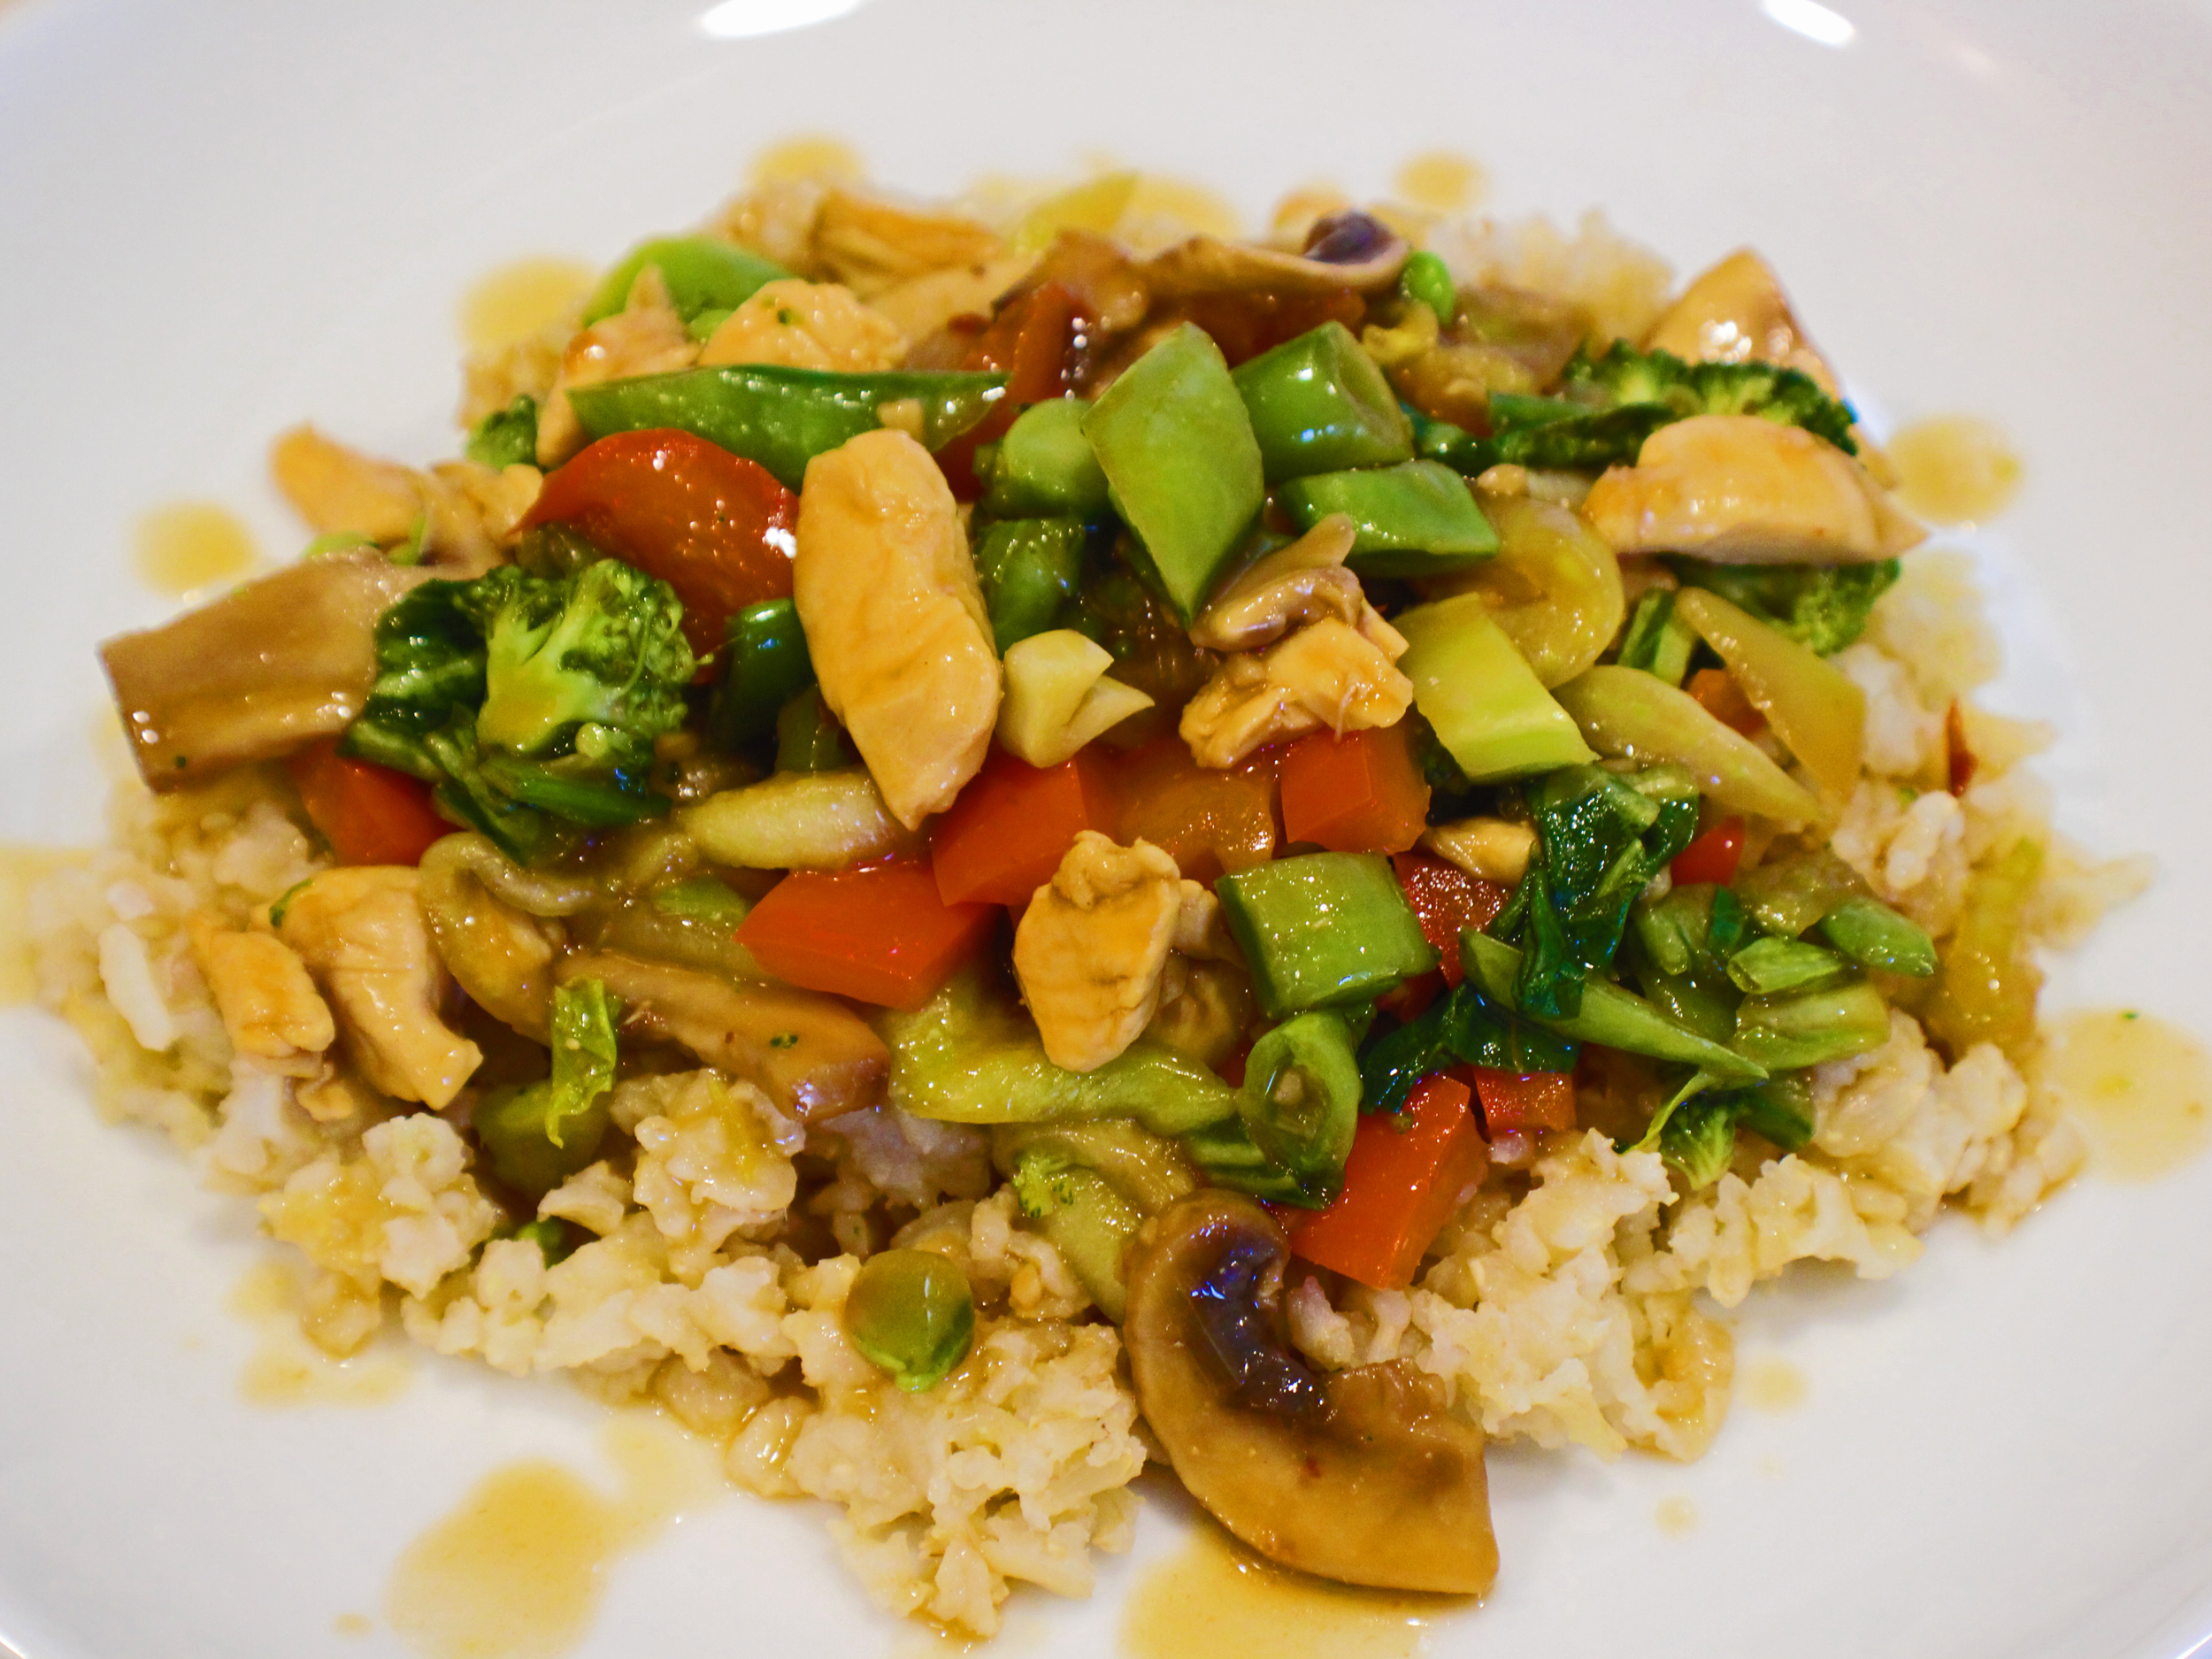
Orange Chicken

This Orange Chicken is quick and easy, but full of flavor. I often cook rice or quinoa on the weekend so I have it ready just to be heated up during the week to finish off a meal at some point during the week.

Try cooking Rice in the Slow Cooker.

First whisk your sauce ingredients together. Be sure to whisk the cornstarch in with a clear liquid, like chicken stock or soy sauce. Cornstarch tends to cling to chunky things which could make for a lumpy sauce. After whisking in the cornstarch, add the rest of the ingredients. It doesn’t matter if you use dark or light brown sugar. I always have dark on hand because I like the stronger flavor of dark brown sugar.
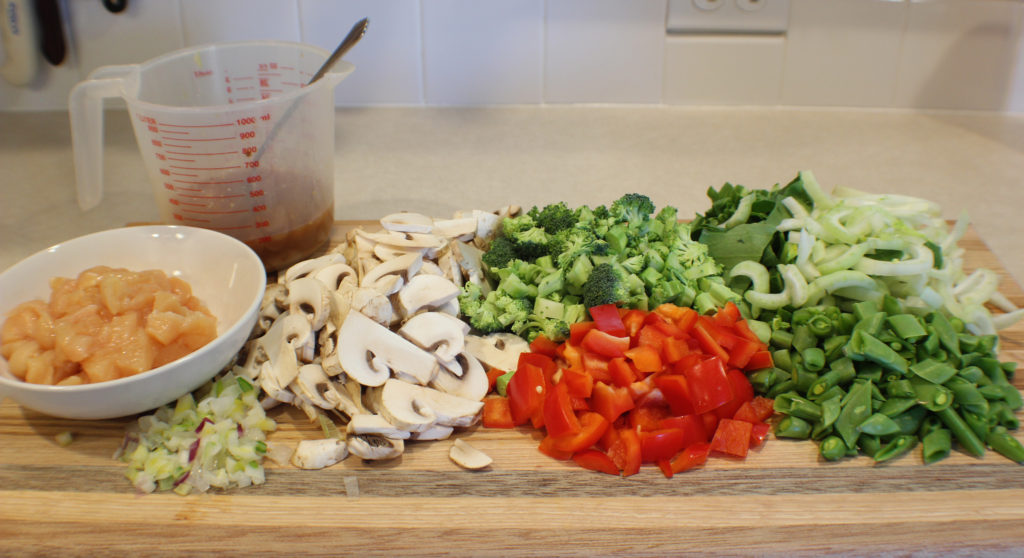
Next prep your veggies and chicken. You will want everything ready because this cooks fast.
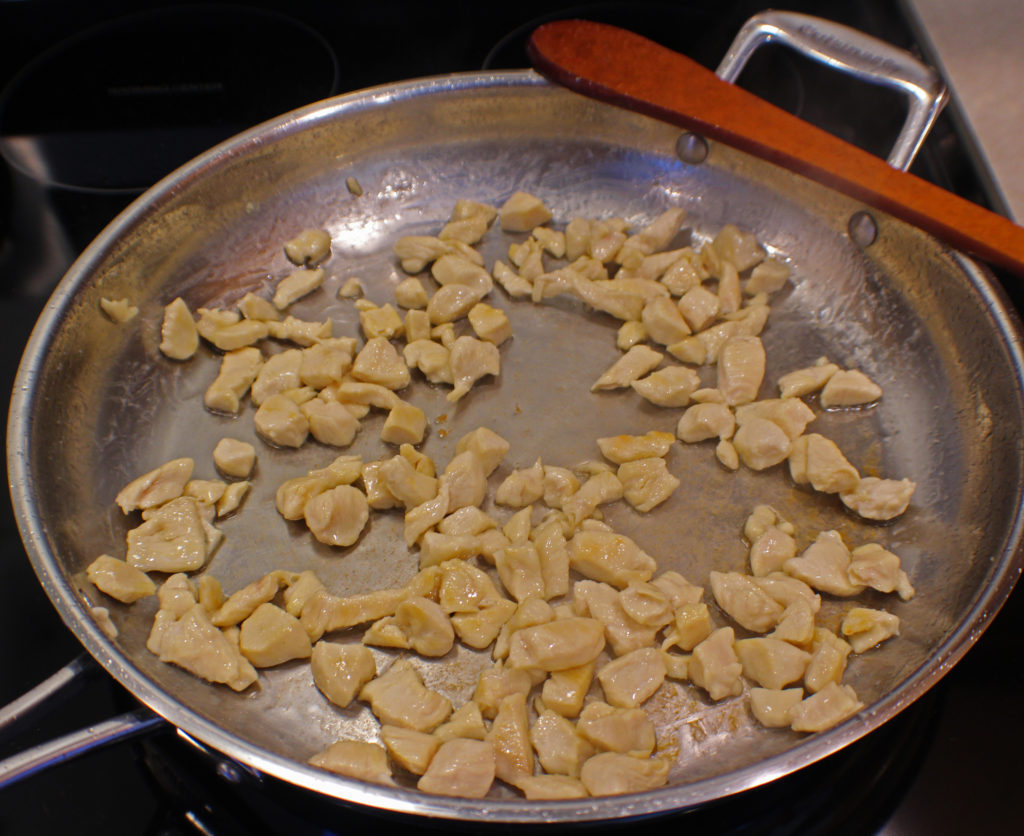
Now heat up a large saute pan on medium heat and add the peanut oil. You could use vegetable oil instead. Then add the chicken and saute for about 5 minutes until the chicken starts browning.

I use a stainless steel pan because it browns chicken and mushroom better than a non-stick pan. But if you prefer non-stick, by all means, go ahead and use that.
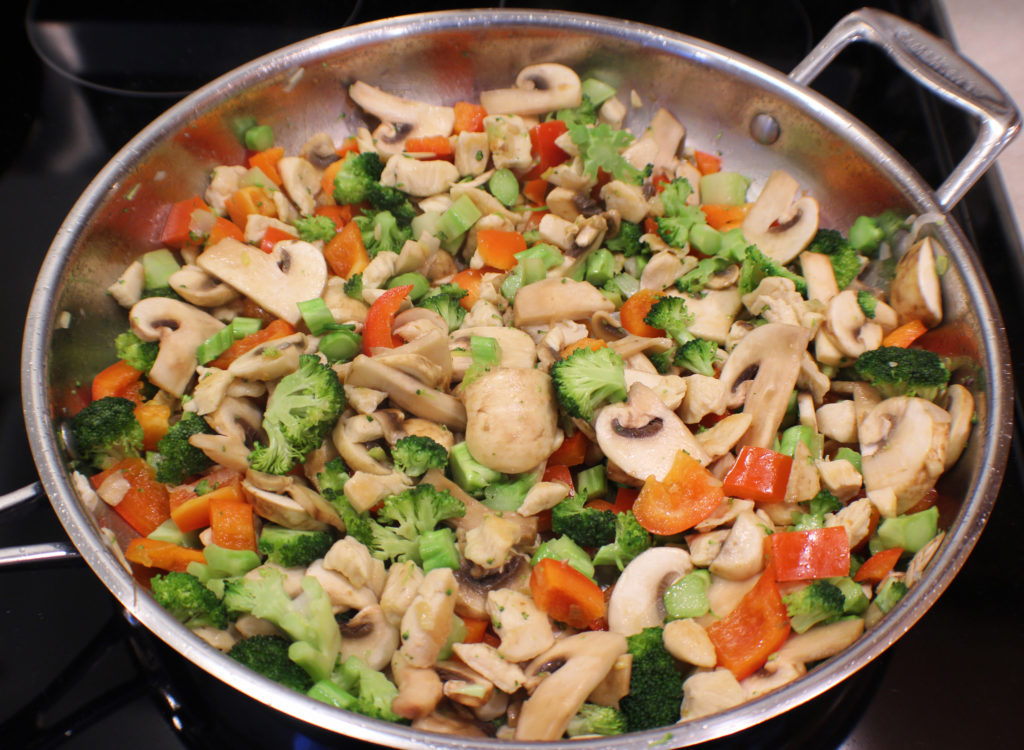
When the chicken is browned, add the bell pepper, broccoli, mushrooms, and onions to the pan and sauté for a few minutes until the broccoli start to soften.

Add the bok choy and sauce, and simmer for a few minutes until the sauce thickens and the bok choy softens.

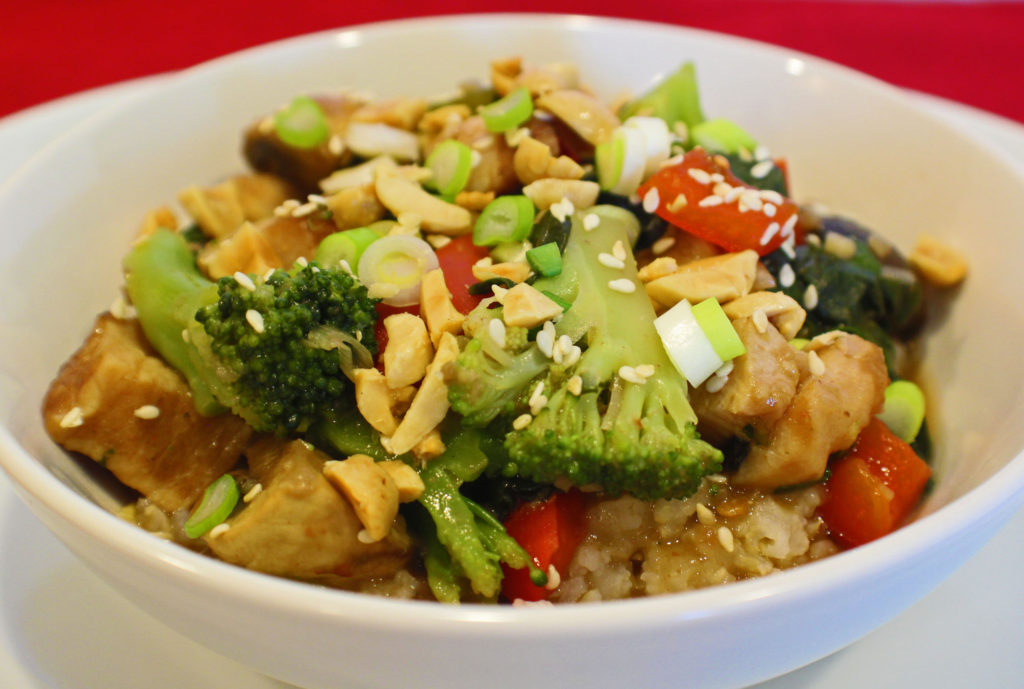
Serve this on some rice and top it with a couple tablespoons of chopped roasted peanuts and Naan Bread.

Enjoy!

Orange Chicken

This quick chicken dinner has a touch of orange and a touch of heat, served on a bed of rice, makes for a wonderful lunch or dinner.
Prep Time20 minutes
Cook Time15 minutes
Course: Dinner, Main Course
Cuisine: American, Asian
Keyword: Chicken, Dairyfree, Glutenfree, Orange Chicken, Whats for Dinner
Servings: 6 cups
Calories: 103kcal
Author: Eating With Deb

Equipment

  • Cutting board and knife
  • Large saute pan

Ingredients

  • 1 each chicken breast cubed
  • 2 tbsp peanut oil

Sauce

  • 1 each orange juice and zest
  • ¼ cup soy sauce or wheat-free tamari
  • 2 tbsp brown sugar
  • 1/3 cup chicken stock
  • 1 tbsp cornstarch
  • 2 tsp garlic fresh, minced
  • 2 tsp ginger fresh, minced
  • 1 tsp sambal Oelek or 1 tsp red pepper flakes

Veggies

  • 1 each red bell pepper chopped
  • 2 cups broccoli florets
  • 2 cups mushrooms sliced
  • ½ each yellow onion
  • 1 1/2 cups snap peas chopped
  • 1 each baby bok choy shredded

Instructions

  • Whisk cornstarch in chicken stock then whisk in orange juice, soy sauce, brown sugar, garlic, ginger, and sambal oelek. Set aside.
  • On medium heat, sauté chicken in peanut oil until brown, about 5 minutes.
  • Add bell pepper, broccoli, mushrooms, and onion to pan. Sauté until broccoli starts to soften but remains bright green, about 5 minutes.
  • Add sauce and bok choy. Simmer until sauce is thickened – about 5 minutes.
  • Serve on cooked rice topped with some chopped, roasted peanuts.
  • Enjoy!

Nutrition

Serving: 1cup | Calories: 103kcal | Carbohydrates: 12g | Protein: 4g | Fat: 5g | Saturated Fat: 1g | Cholesterol: 1mg | Sodium: 585mg | Potassium: 298mg | Fiber: 2g | Sugar: 7g | Vitamin A: 475IU | Vitamin C: 43mg | Calcium: 34mg | Iron: 1mg

Kung Pao Chicken (in the Slow Cooker)

Kung Pao Chicken

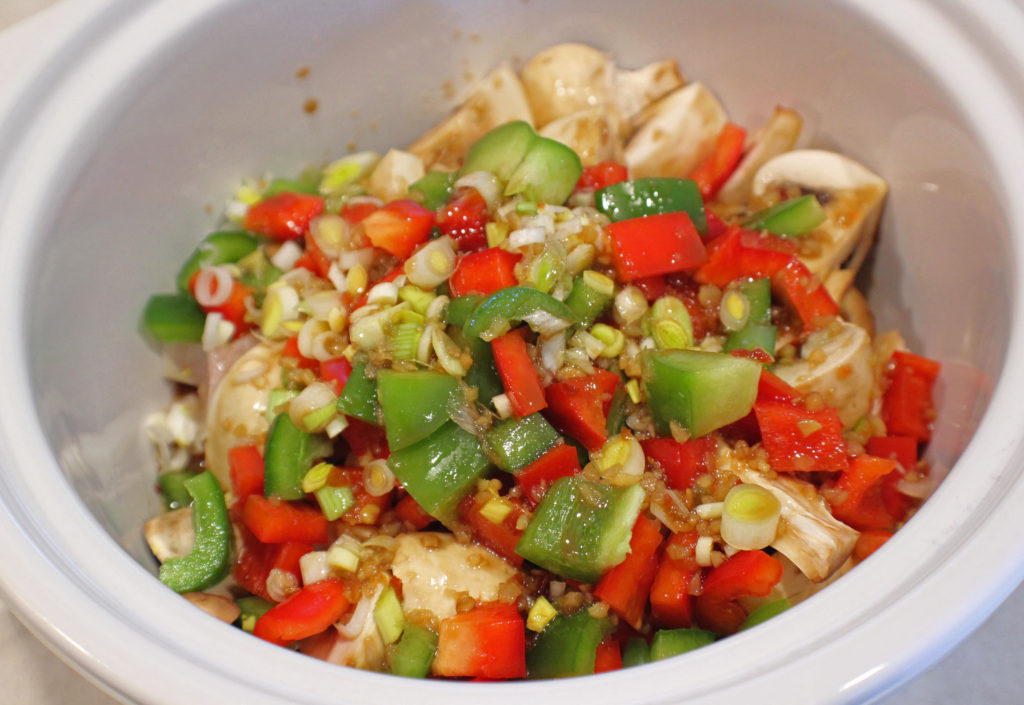
I make Kung Pao Chicken in a sauté pan on the stove top or in a slow cooker, it all depends on the time I have to prepare the meal. The slow cooker method allows me to be able to put all the ingredients in the slow cooker crock the day before and put it in my slow cooker the next day for a no fuss meal.

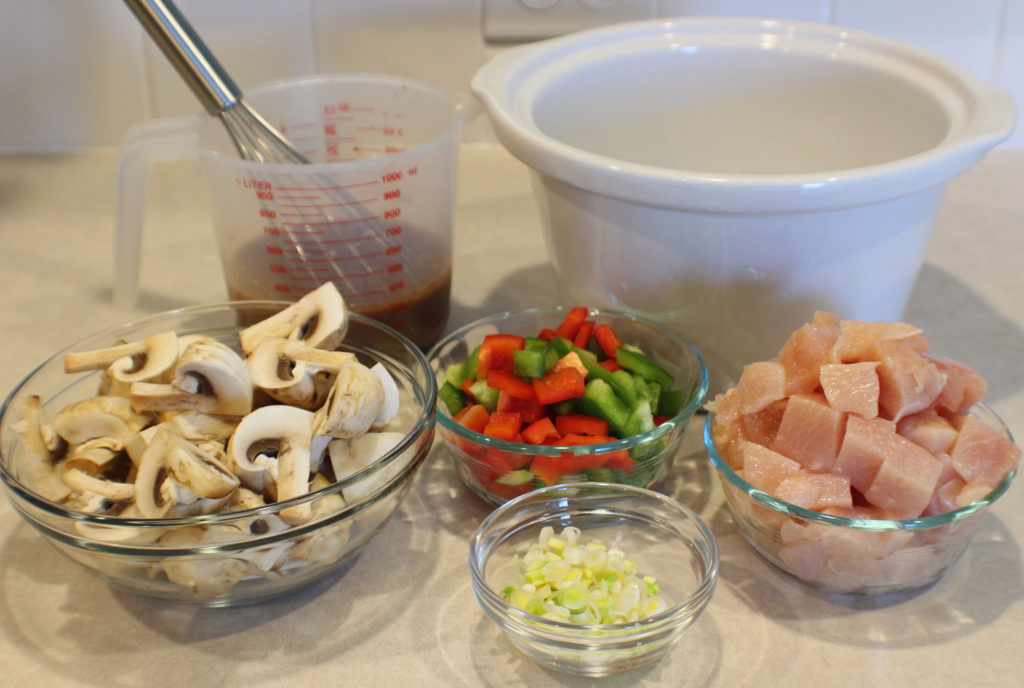
For the sauce, I whisk every thing together in a 4 cup measuring cup, that way I don’t have to dirty any other measuring cups and bowls. 

Be sure to mix the cornstarch in with just liquid, like water or soy sauce. Cornstarch likes to adhere to solids and you risk creating a lumpy sauce in the end. Once the cornstarch is dissolved in the liquid, mix in the rest of the ingredients.

Get the rest of the ingredients ready. If using fresh broccoli or bok choy, have that ready to go now too. This time around I’m using frozen broccoli so I need to add it later, and I have some frozen chard from my garden that I’m using instead of bok choy, so that is going in later too. You could use fresh spinach or napa cabbage instead.

Now just put it in the crock of the slow cooker and stir it up a bit. If I’m going to cook this the next day or later the same day, I put the lid on it and put it in my refrigerator.

If using frozen broccoli or another green other than bok choy, after about 2 1/2 hours of cooking, stir it in and cook for another half hour or so.


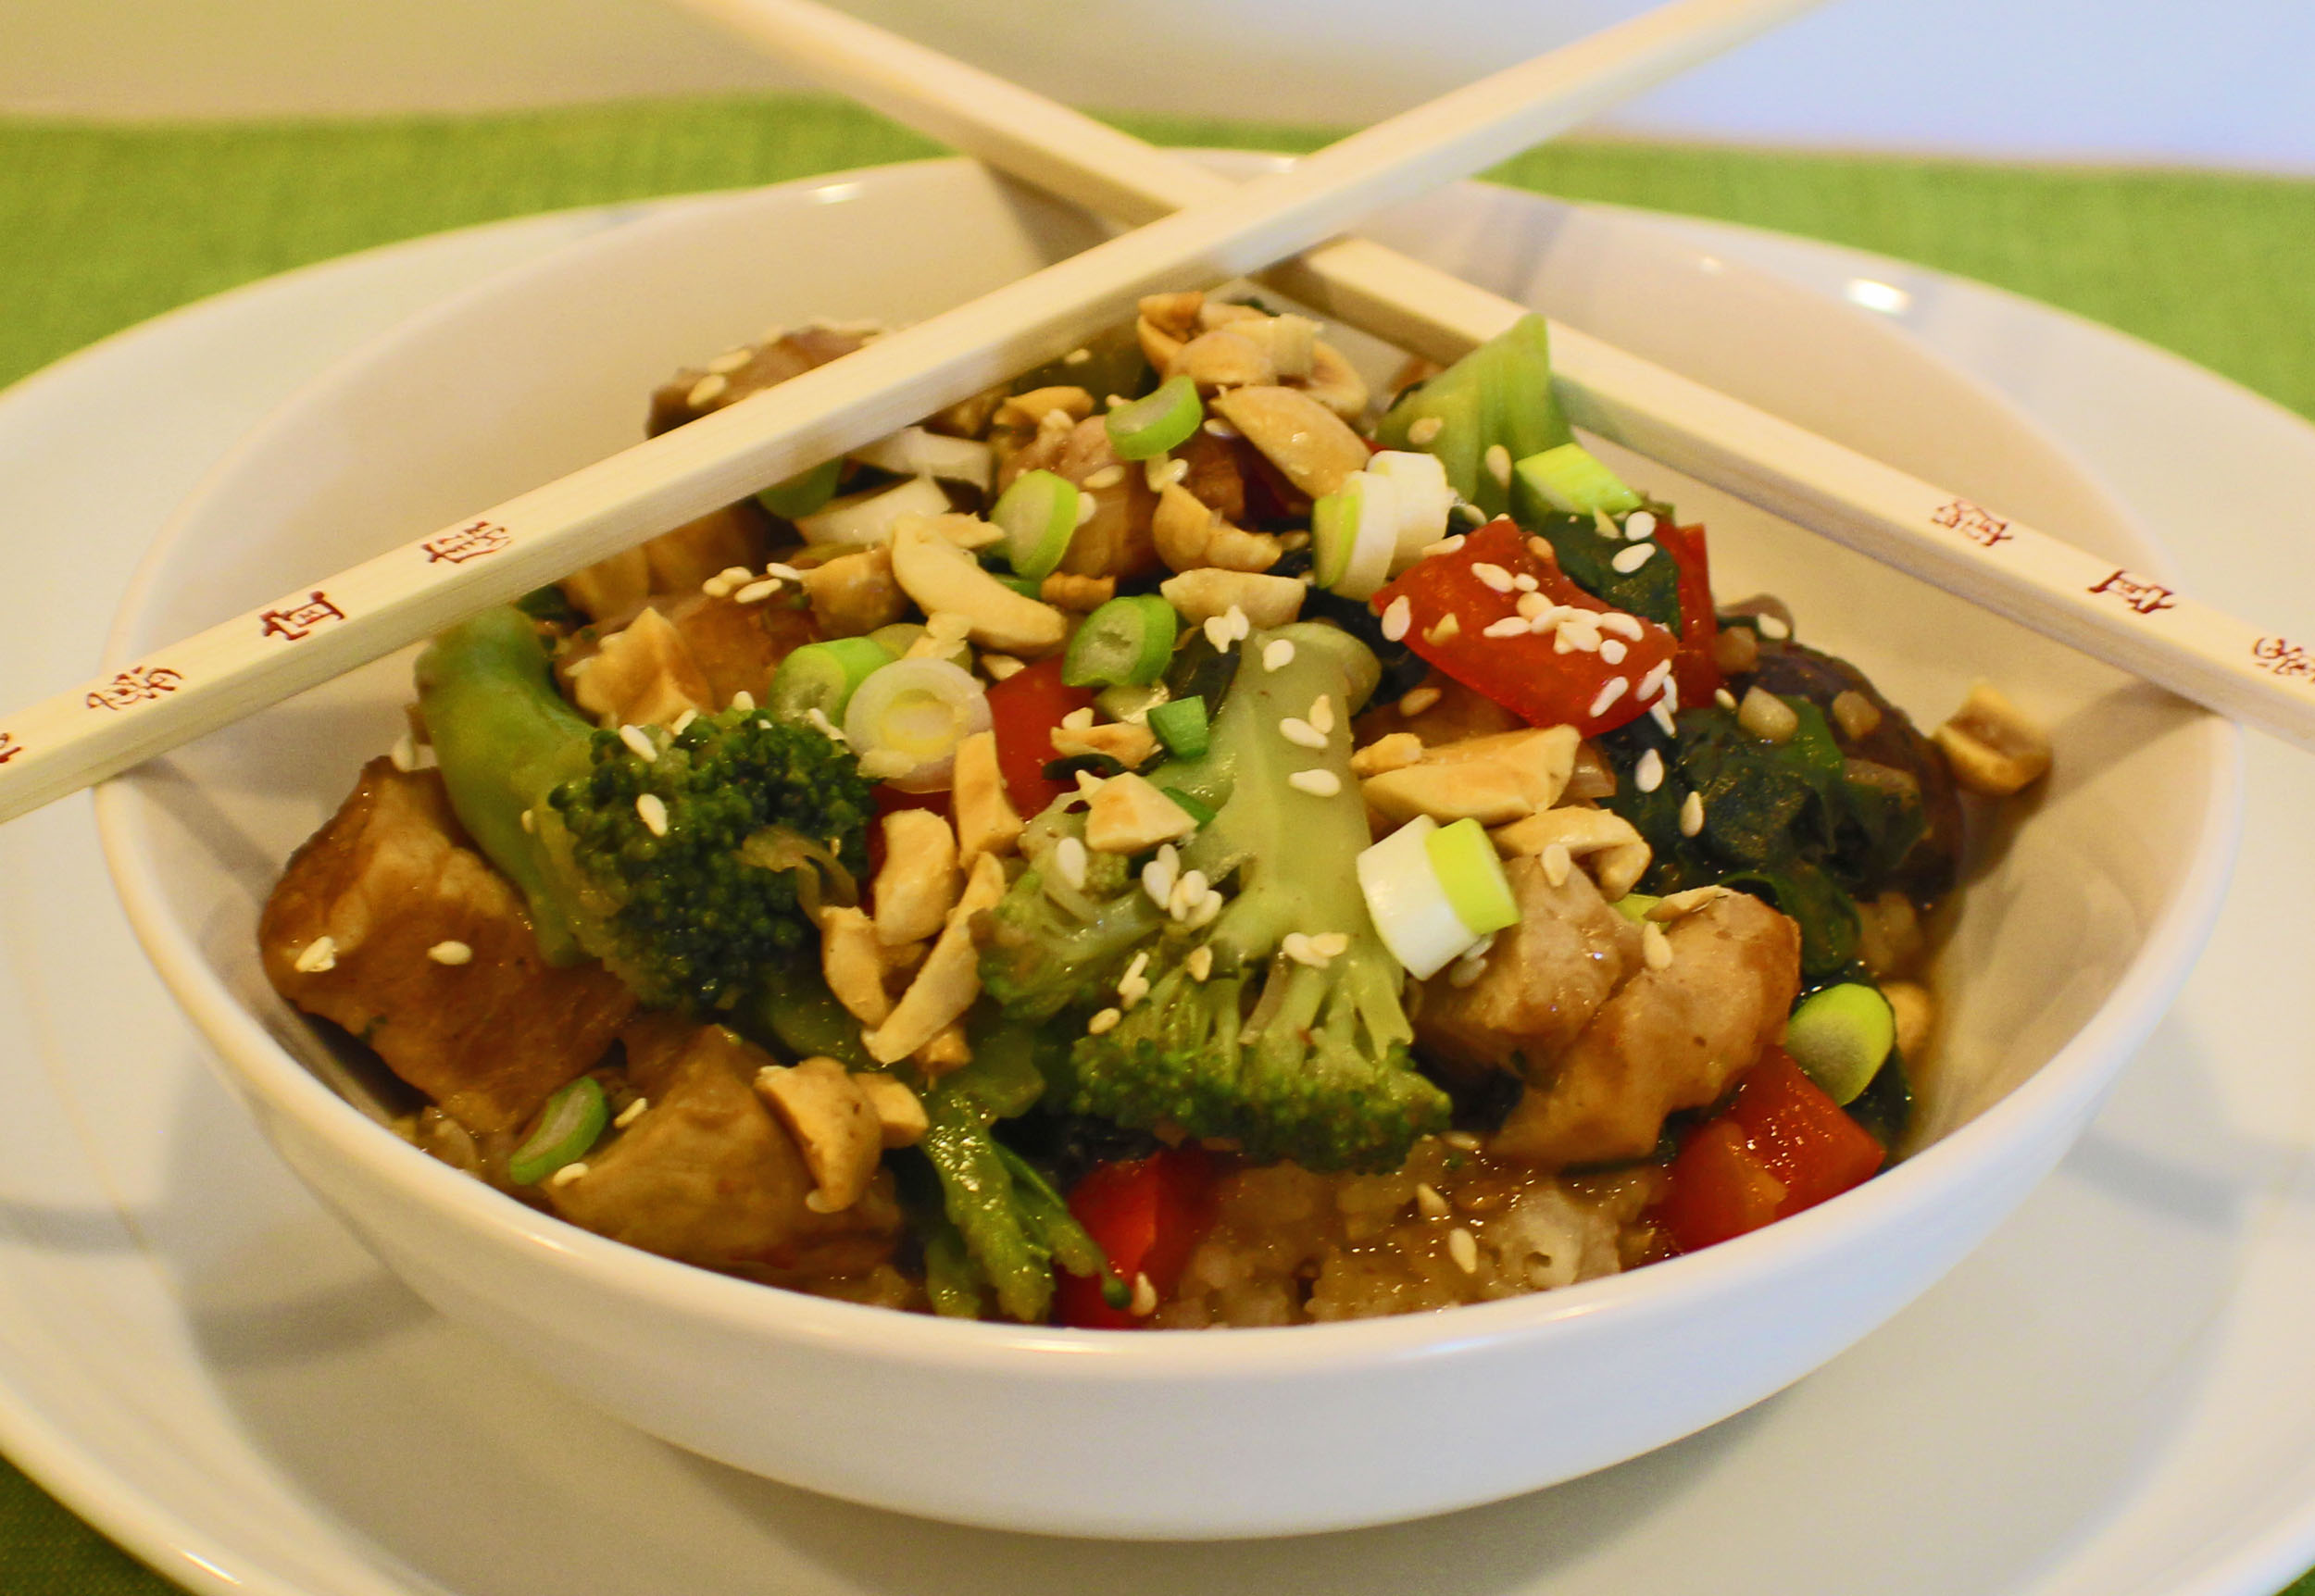
I like this on rice, try making Rice in the Slow Cooker, or serve it on cooked Udon or Hokkien noodles, topped with roasted peanuts, sliced green onions, and toasted sesame seeds.

Enjoy!
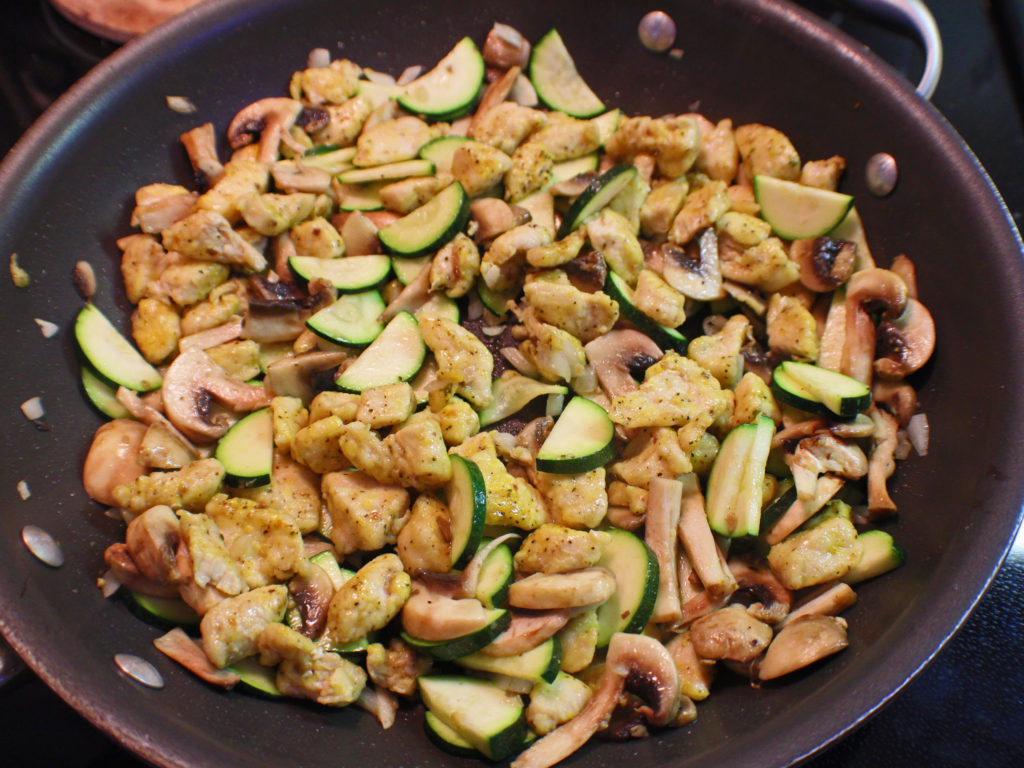
Kung Pao Chicken (Slow Cooker)

Kung Pao Chicken is a saucy and spicy stir fry dish with vegetables. It can be done on the stove top, but for added convenience, I like to put it together the day before, store it in my refrigerator, and put it in the slow cooker the next day for an easy dinner.
Prep Time15 minutes
Cook Time3 hours
Total Time3 hours 15 minutes
Course: Dinner, Lunch, Main Course
Cuisine: Asian
Keyword: Chicken, Dinner Ideas, Kung Pao
Servings: 6 cups
Calories: 100kcal
Author: Eating With Deb

Equipment

  • 4 to 6 quart slow cooker
  • Cutting board and knife
  • 4 cup measuring cup and whisk

Ingredients

Chicken and Veggies

  • 1 each large chicken breast cubed
  • Sea salt and black pepper
  • ½ each red bell pepper bite size pieces
  • ½ each green bell pepper bite size pieces
  • 1 each small leek sliced, or ¼ yellow onion, diced
  • 10 each button mushrooms quartered
  • 2 cups broccoli florets fresh or frozen
  • 1 each baby bok choy or 2 handfuls fresh spinach or shredded napa cabbage

Sauce:

  • ½ cup soy sauce
  • 1/3 cup water
  • 1 tbsp sesame oil
  • 2 tbsp mirin or brown rice vinegar
  • 2 tbsp cornstarch
  • 3 tbsp honey
  • 1 tbsp fresh garlic minced
  • 1 tbsp Sambal Oelek
  • 2 tbsp fresh ginger minced

Garnish

  • Roasted peanuts
  • Roasted sesame seeds
  • Sliced green onions or chives

Instructions

  • For sauce, whisk together soy, water, oil, mirin, and cornstarch. Then add honey, garlic, sambal oelek, and ginger and set aside.
  • Cube chicken breast and put it in the slow cooker. Sprinkle with salt and black pepper
  • Add bell peppers, mushrooms, broccoli (if using fresh), bok choy (if using), and sauce.
  • Turn on cooker to low and cook for 2 ½ hours, stirring once or twice. If using frozen broccoli or spinach or napa cabbage, stir in now. Cook for another ½ hour.
  • Serve over rice or udon or hokkien noodles and garnish with peanuts, green onions (or chives), and sesame seeds.
  • Enjoy!
Notes

You can replace the honey with brown sugar.

Nutrition

Serving: 1cup | Calories: 100kcal | Carbohydrates: 18g | Protein: 3g | Fat: 3g | Saturated Fat: 1g | Cholesterol: 1mg | Sodium: 1169mg | Potassium: 173mg | Fiber: 1g | Sugar: 11g | Vitamin A: 219IU | Vitamin C: 28mg | Calcium: 23mg | Iron: 1mg

Chicken Cordon Bleu Burgers

Chicken Cordon Bleu Burger

Spring is here, but because the weather isn’t cooperating, there haven’t been many days that I’ve wanted to go outside and grill yet. I’m craving grilled burgers but still wanting some of the colder weather comfort food.

Making Chicken Cordon Bleu is a process, but a tasty dinner that’s well worth it. To make it a lot easier, I turned it into a burger that you can cook in a pan on the stove top with the wonderful flavors of Chicken Cordon Bleu and satisfies my burger and comfort food cravings.

This is a great burger to make in the spring, fall, or winter when you aren’t using your grill. The patties are a little soft and won’t hold up well on an outdoor barbecue.

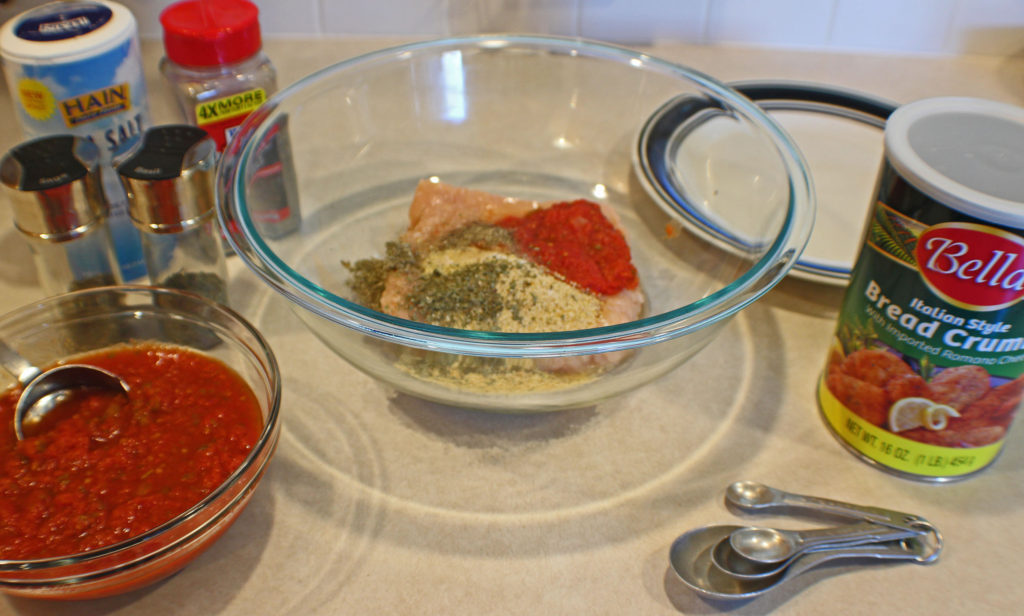
Chicken Cordon Bleu Burgers Ready to MIx

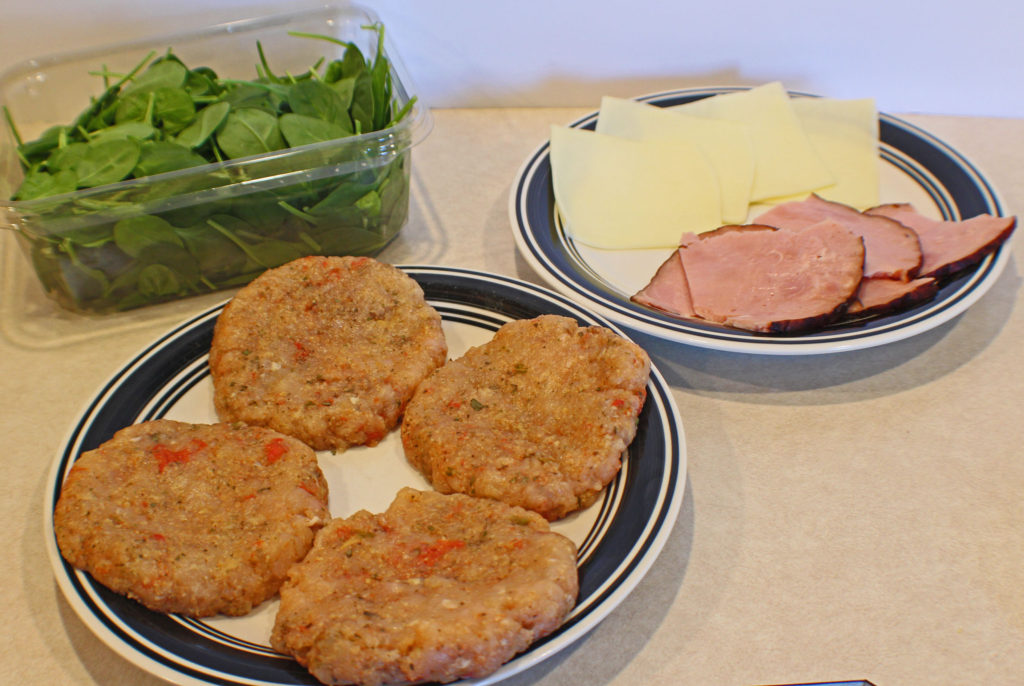
This is a very quick meal. Just mix the burger ingredients together and make 4 patties. Put those on a plate and collect your buns and toppings.

Chicken Cordon Bleu Burgers Ready to Cook

You could prepare everything the day before and come home to a dinner almost ready to eat.

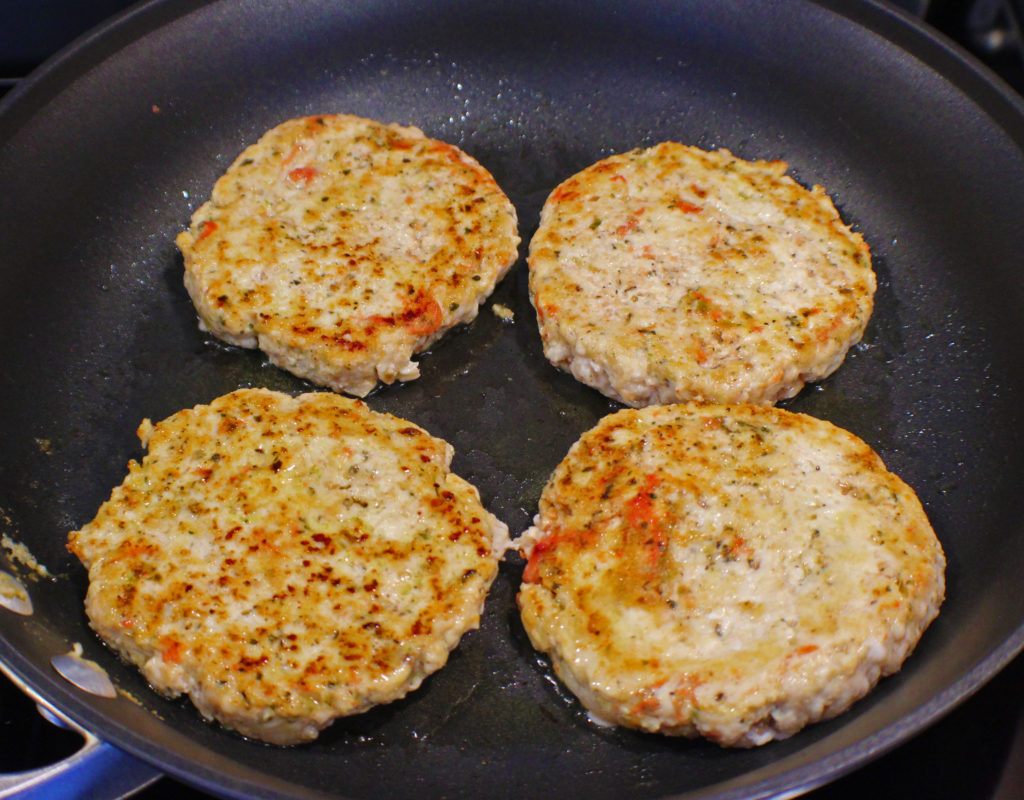
Chicken Cordon Bleu Burgers Cooking

When you are ready to cook these, heat up a large, nonstick pan over medium low heat and add a little olive oil.

Cook on each side about 4 to 5 minutes with a lid on the pan. The chicken patties should reach and internal temperature of 165 degrees.

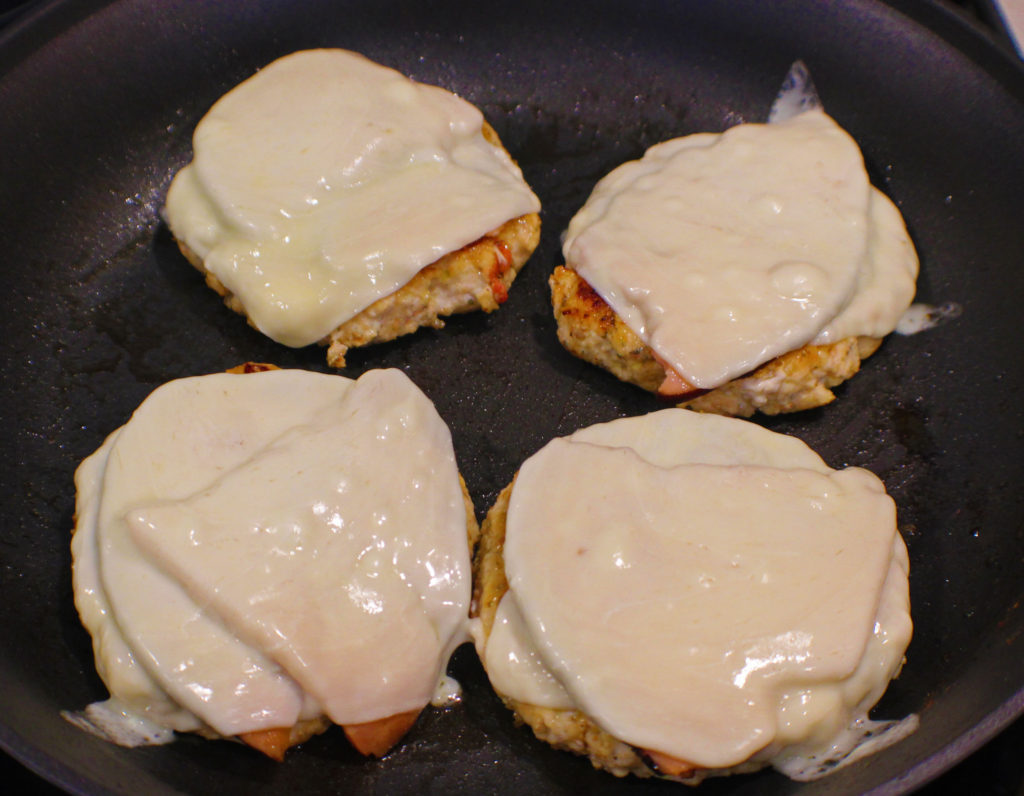
When your chicken patties are cooked, remove them from the pan and set aside for a minute or 2. Put your ham in the pan and cook on both sides for about 1 minute to heat through.

Put the ham on top of the chicken patties and return them to the pan. Top with cheese and put a lid on the pan. You can turn off the burner. It’ll only take a minute or so to melt the cheese.

I set this aside and toast the burger buns and heat up the marinara sauce in the microwave.

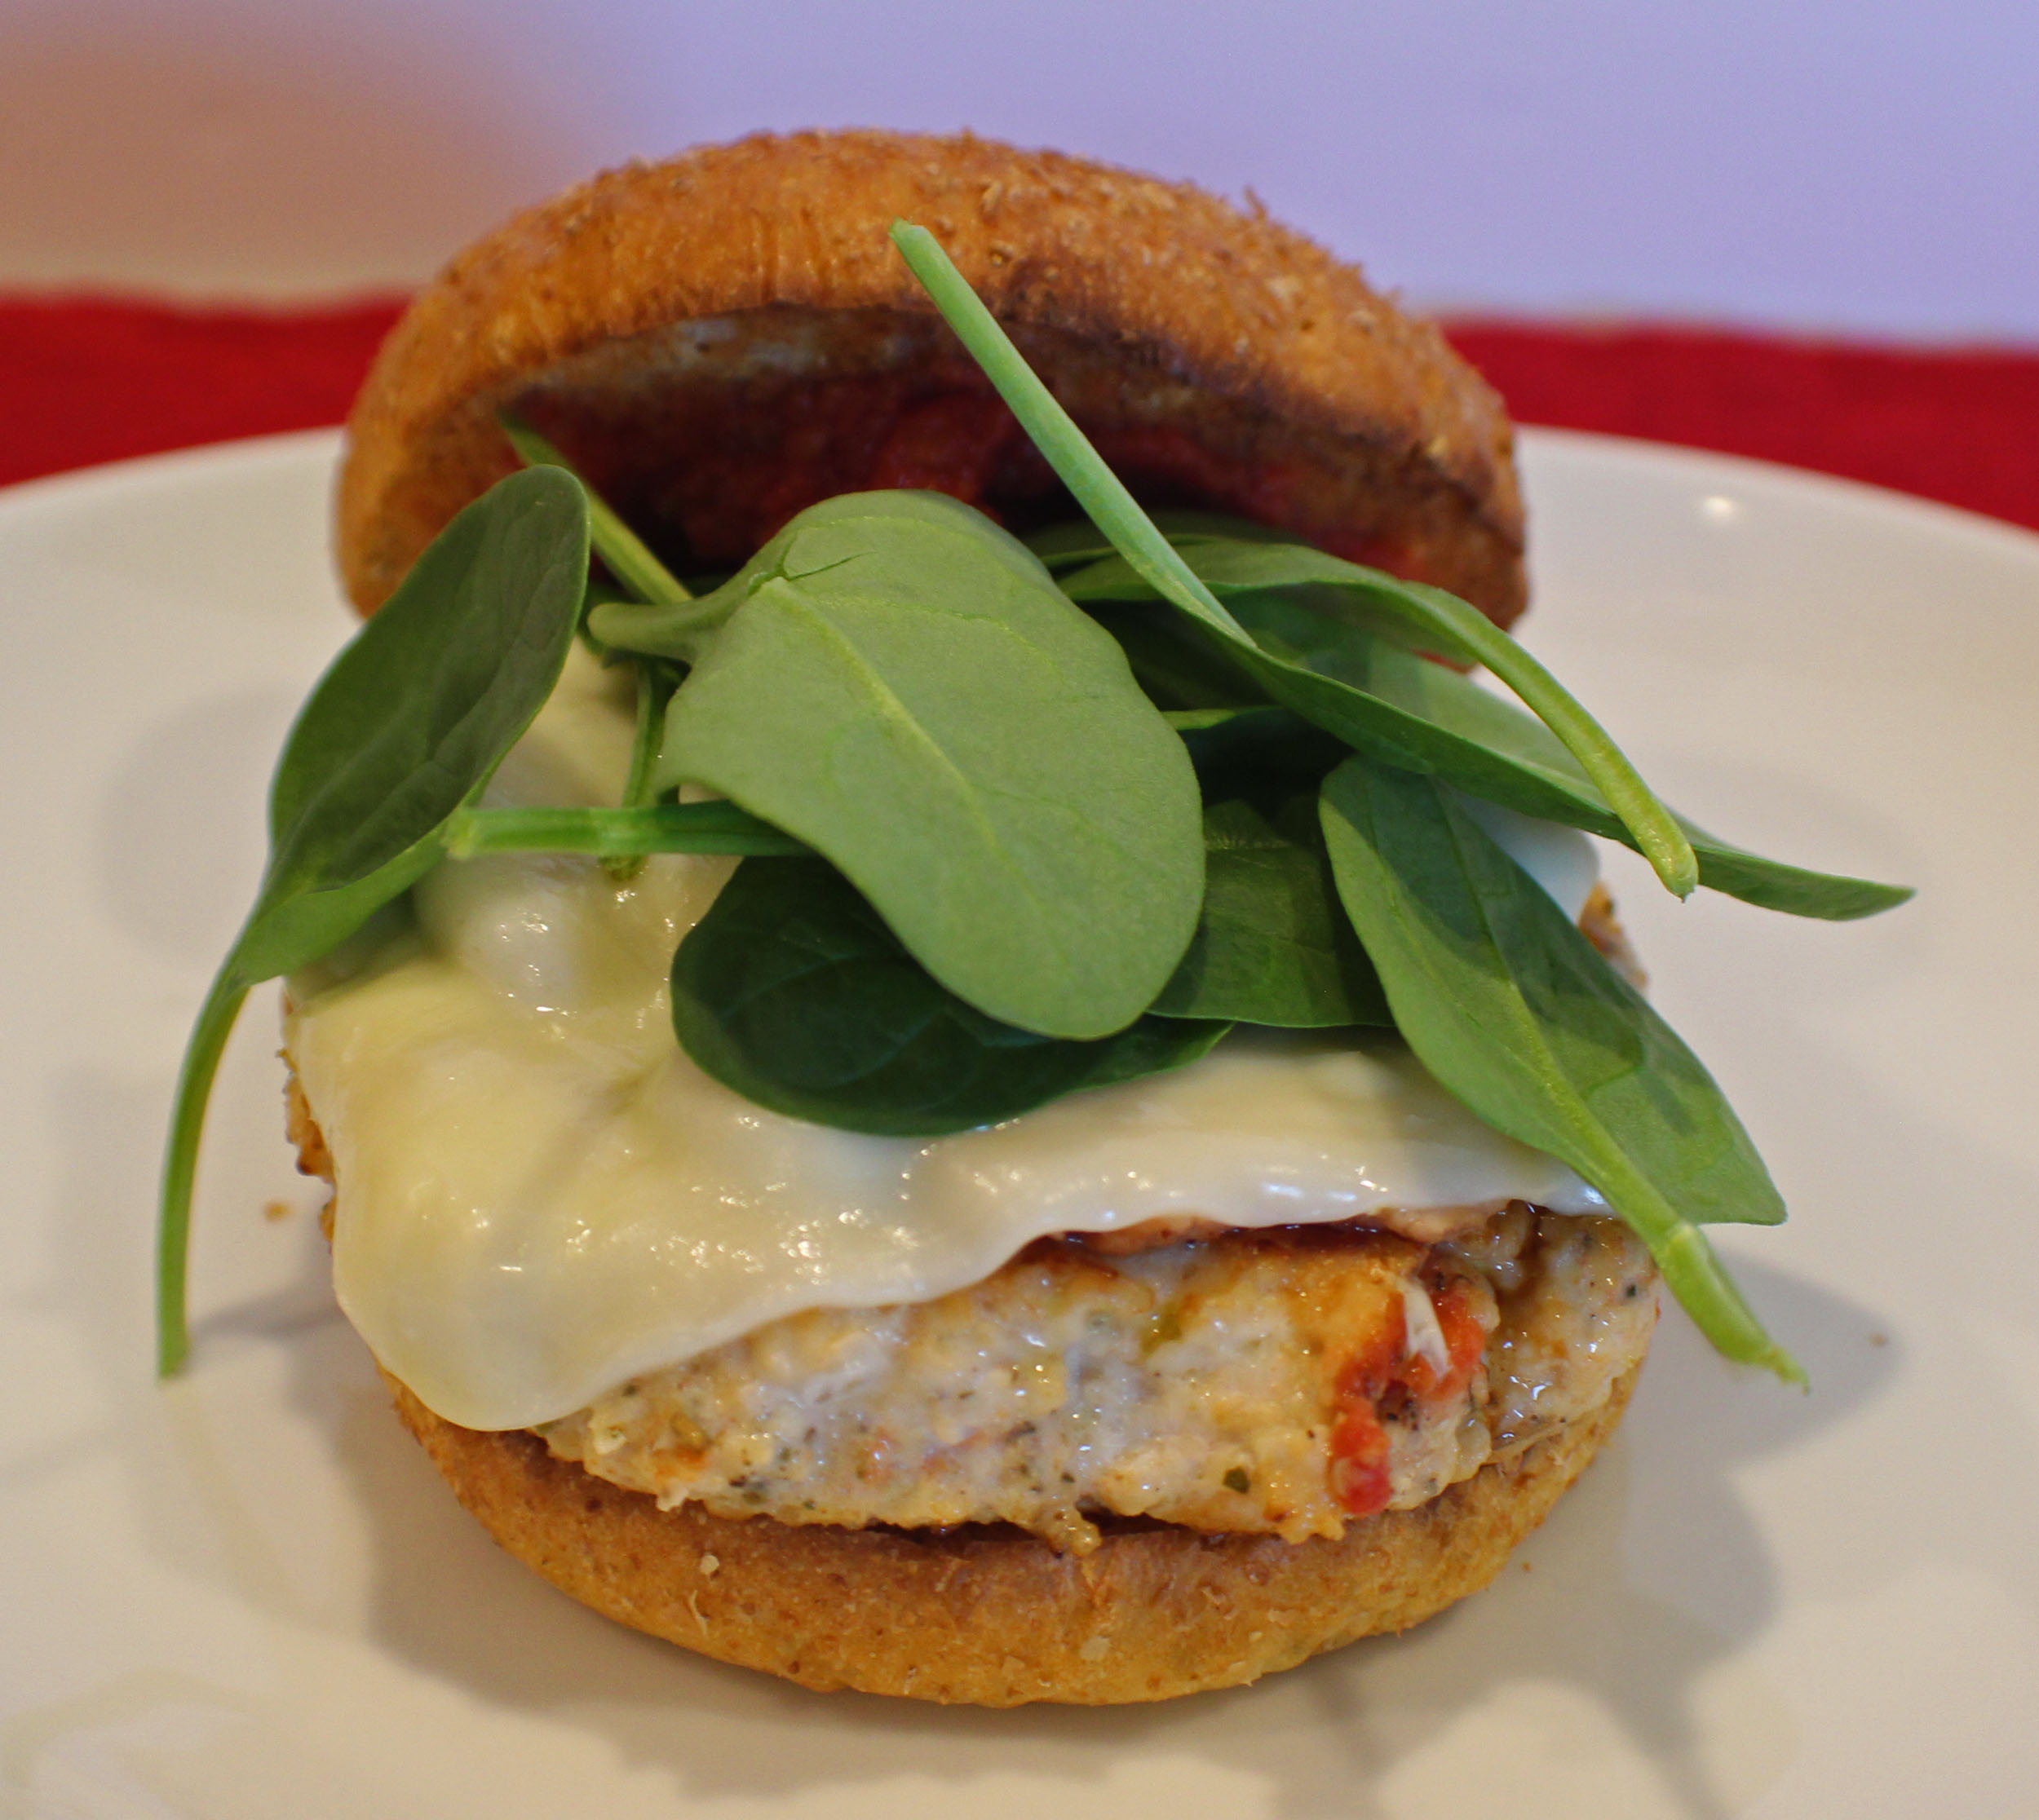
Build your burger and Enjoy!
Chicken Cordon Bleu Burger

This recipe combines my love of Chicken Cordon Bleu and Burgers. Perfect to make in the winter since it works best to cook these in a pan on the stove top.
Prep Time10 minutes
Cook Time12 minutes
Total Time22 minutes
Course: Dinner, Lunch
Cuisine: American
Keyword: Burgers, Chicken, Chicken Cordon Bleu, Cordon Bleu
Servings: 4 people
Calories: 388kcal
Author: Eating With Deb

Equipment

  • Large bowl
  • Large nonstick sauté pan and spatula

Ingredients

Burger Ingredients

  • 1 pound ground chicken
  • ¼ cup bread crumbs
  • ¼ cup marinara sauce
  • 1 tsp basil
  • 1 tsp sage
  • ¼ tsp sea salt
  • ¼ tsp black pepper

For Cooking:

  • 1 tbsp olive oil

Toppings:

  • 4 slices mozzarella
  • 4 slices ham thin sliced
  • 4 each burger buns
  • 8 tbsp marinara sauce warmed up
  • Fresh spinach

Instructions

  • Mix all burger ingredients together, divide into 4 patties.
  • Heat a large nonstick sauté pan on medium low heat and add 1 tablespoon olive oil to the pan. Add the 4 patties, top the pan with a lid, and cook on each side about 4 minutes, make sure patty reaches 165 degrees.
  • Remove from heat and set aside.
  • Add the ham to the pan and cook on both sides a minute or 2.
  • Put ham on top of the burger patties and return to the pan. Top with a slice of mozzarella, cover the pan, turn off heat and melt the cheese for a minute or 2.
  • Time to build the burgers.
  • Toast the burger buns and smear 1 tablespoon of marinara on each side of the bun.
  • Put the burger on the bottom bun, top with fresh spinach and the top bun.
  • Enjoy!
Nutrition

Calories: 388kcal | Carbohydrates: 9g | Protein: 34g | Fat: 24g | Saturated Fat: 9g | Polyunsaturated Fat: 3g | Monounsaturated Fat: 11g | Trans Fat: 1g | Cholesterol: 137mg | Sodium: 1015mg | Potassium: 862mg | Fiber: 1g | Sugar: 3g | Vitamin A: 390IU | Vitamin C: 3mg | Calcium: 176mg | Iron: 2mg

BBQ Chicken Thighs (Air Fryer)

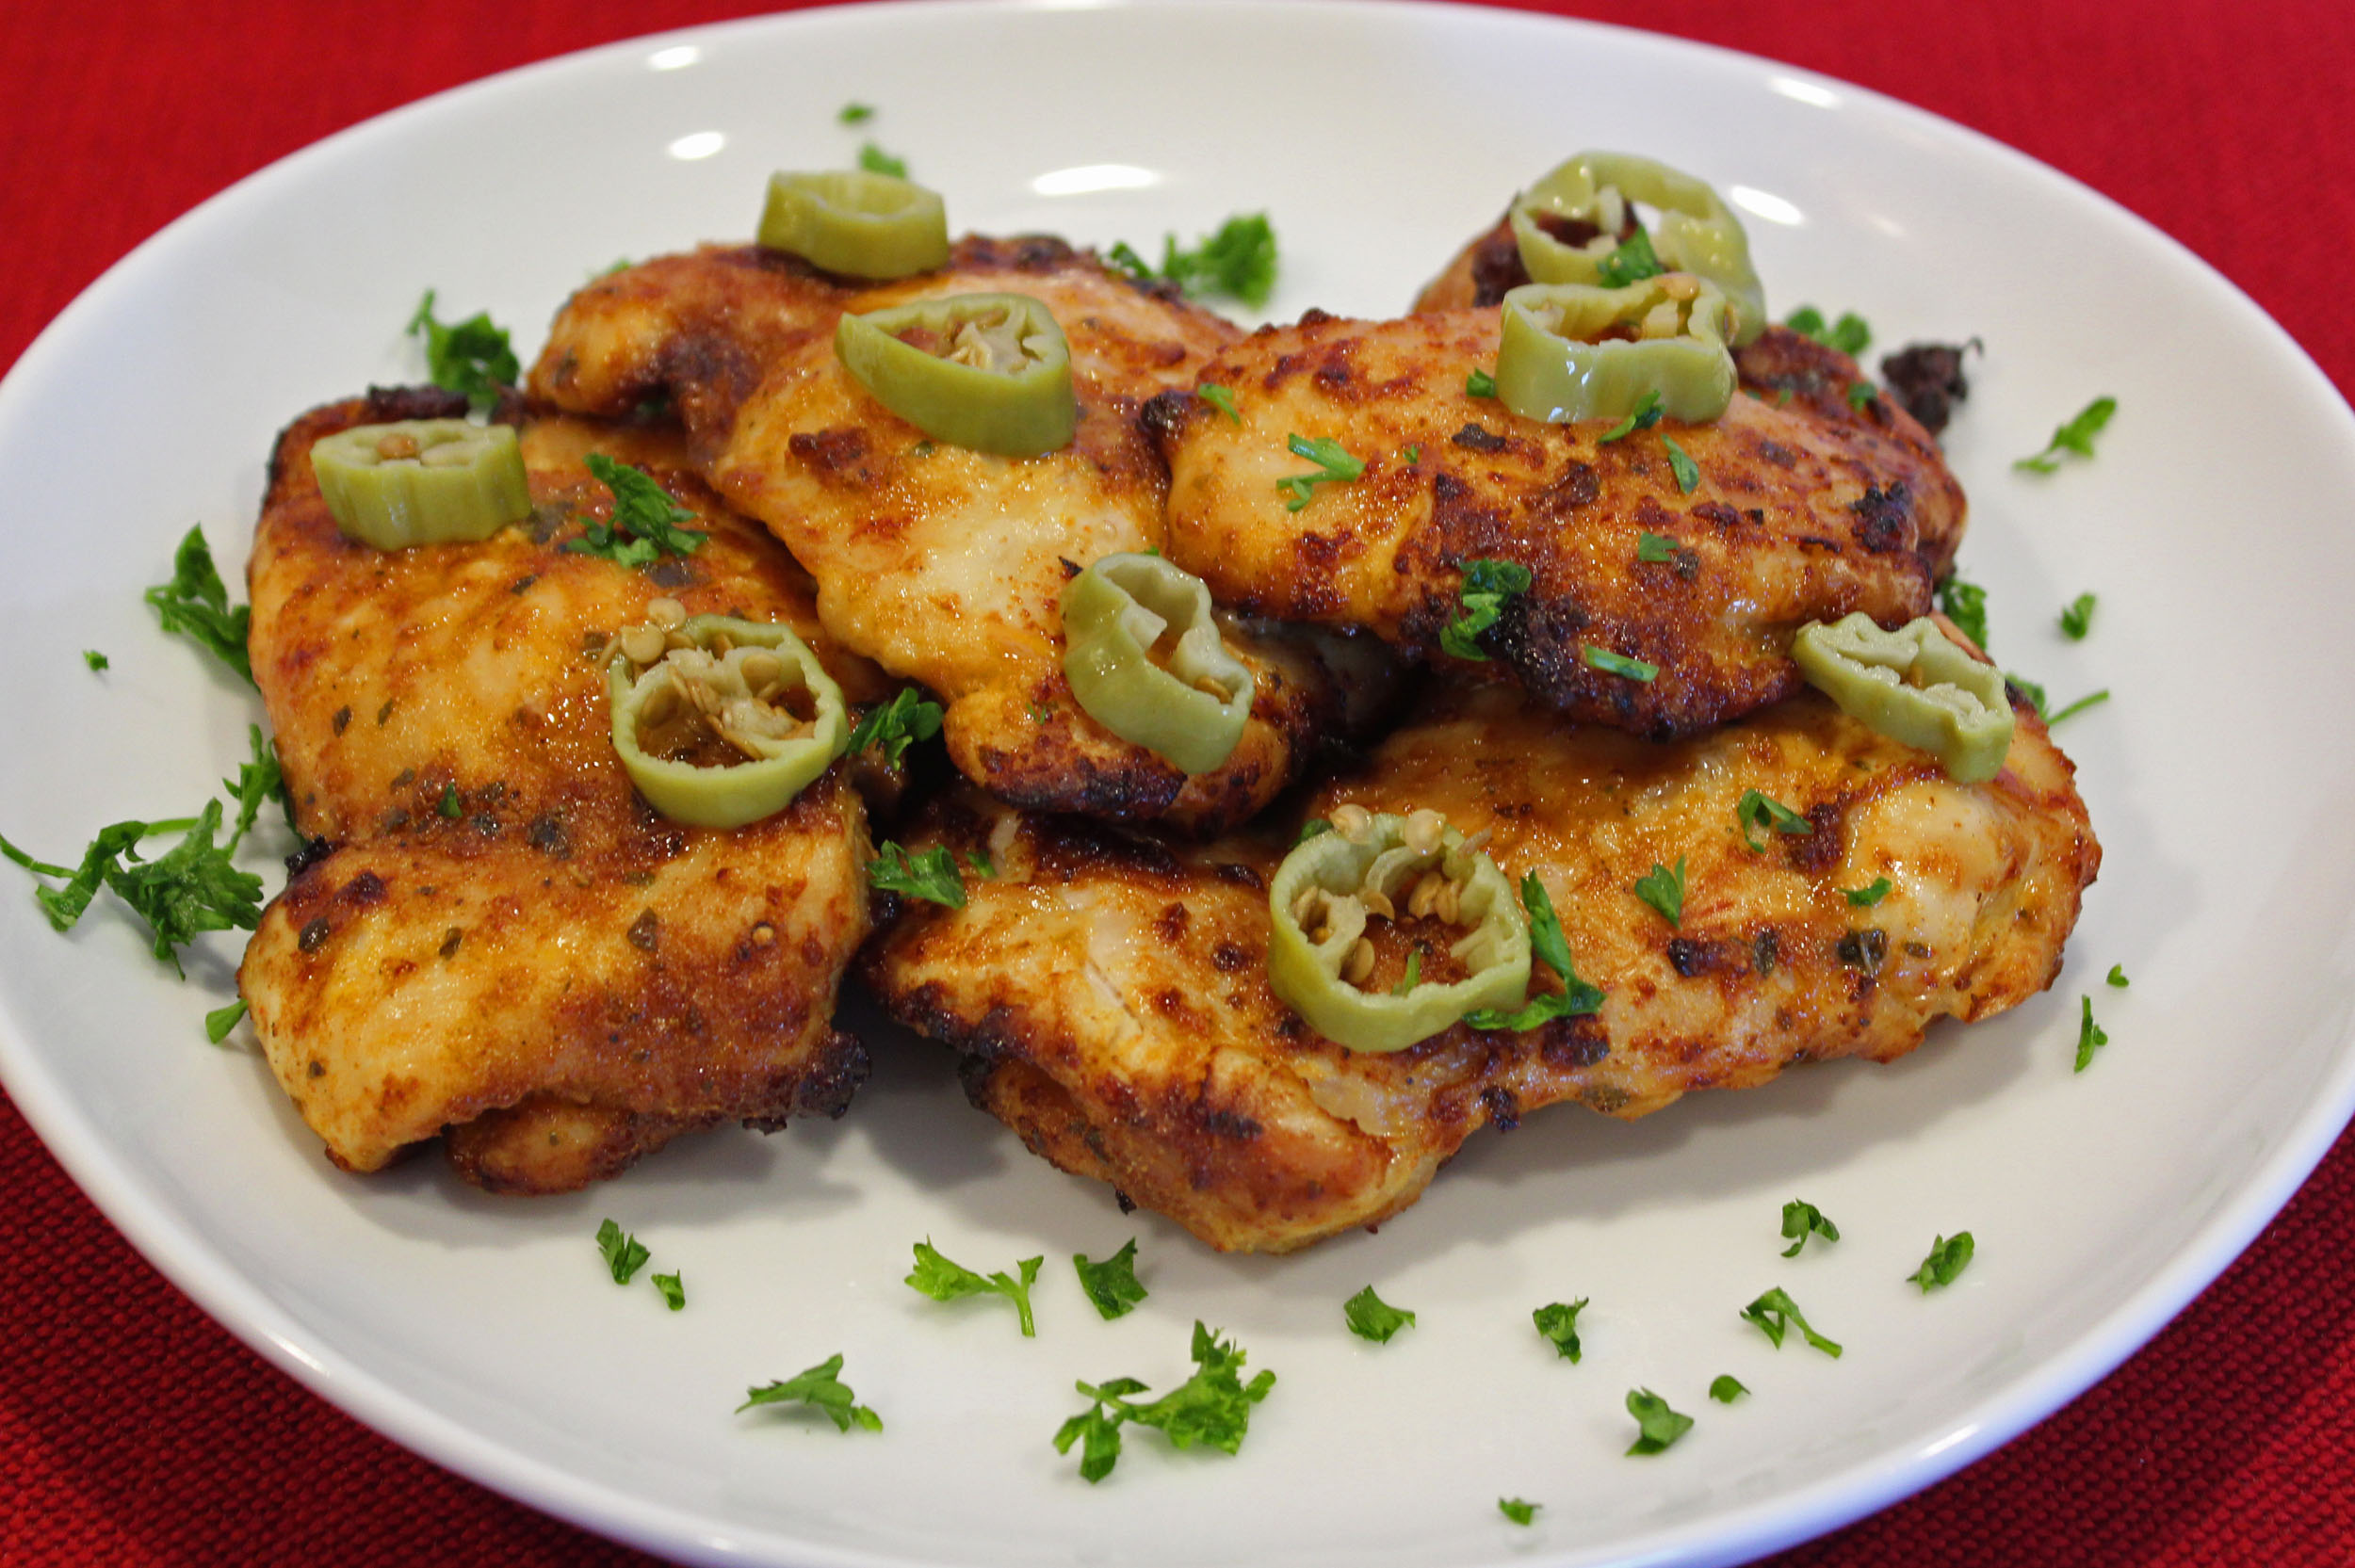
BBQ Chicken Thighs with Pepperoncinis

The flavor of charcoal barbeque is one of my favorites, and I will grill all year round. I have added a little bit of liquid smoke to the marinade and cook the chicken in my air fryer to make for a great barbeque-tasting chicken that can be made any time of the year.

Chicken Thighs Marinating

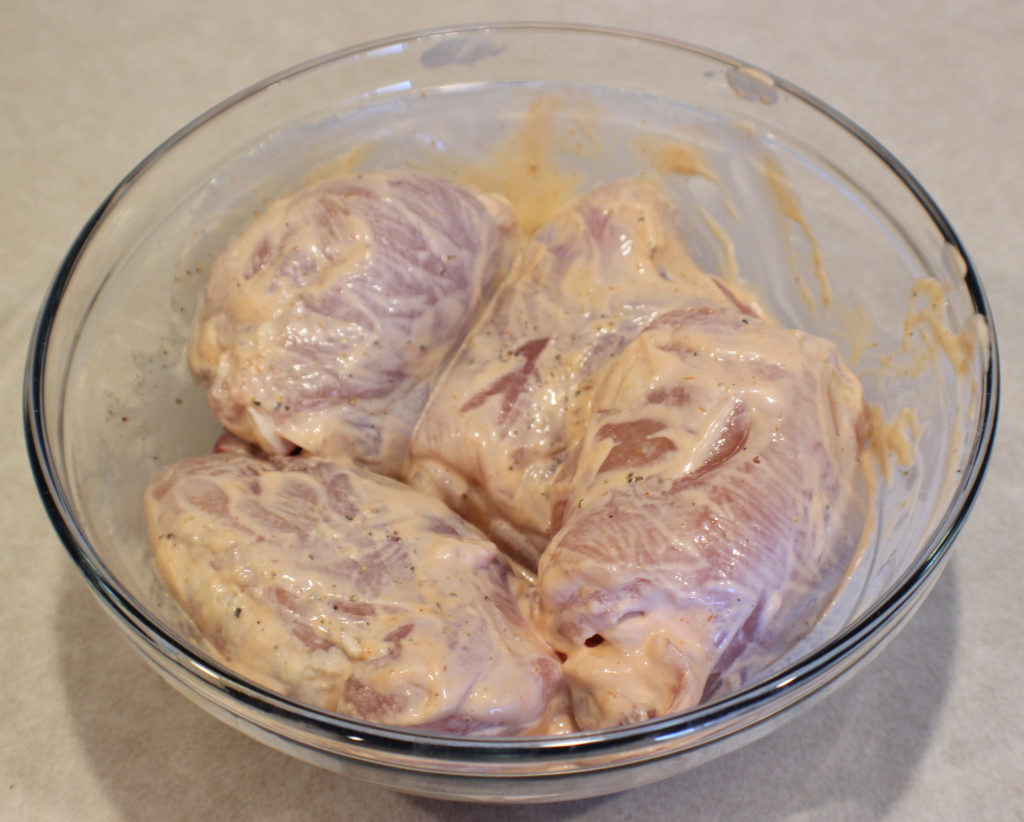
This is a fairly simple process, just mix the mayonnaise, ketchup, and liquid smoke together in a bowl, and rub the chicken thighs all around in it. Then mix together the dry seasoning and walk away for an hour or prepare any side dishes you are going to have with the chicken.

You can use whatever liquid smoke flavor you like. I happen to really like hickory, but mesquite or apple works great too.

Chicken Thighs Ready to Season

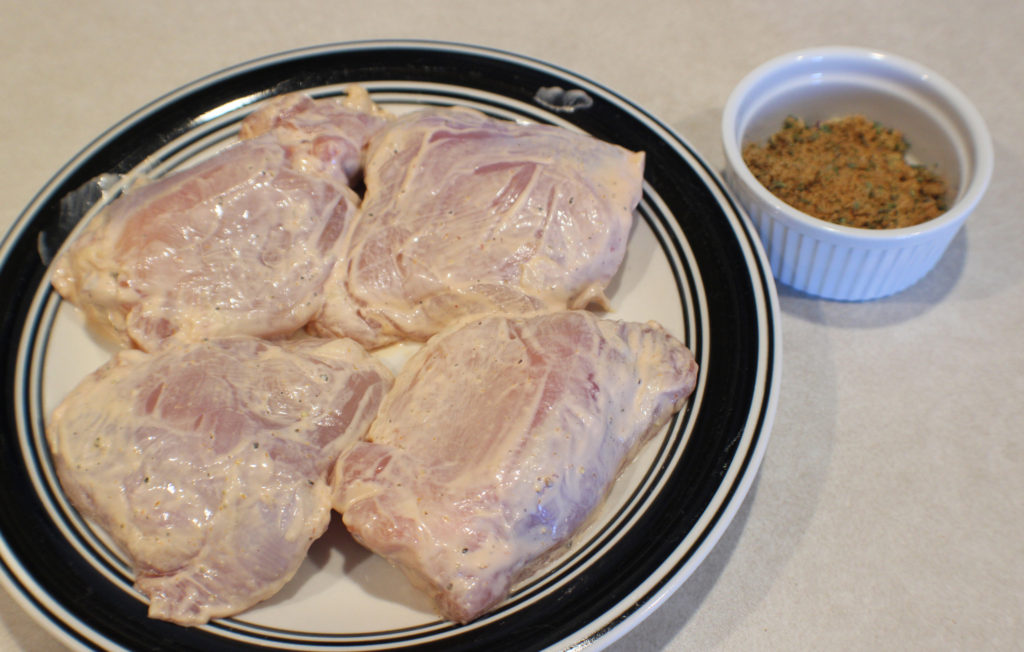
When it’s been about an hour, you are ready to season the chicken. Remove the chicken from the bowl and leave whatever excess mayonnaise mixture there is in the bowl.

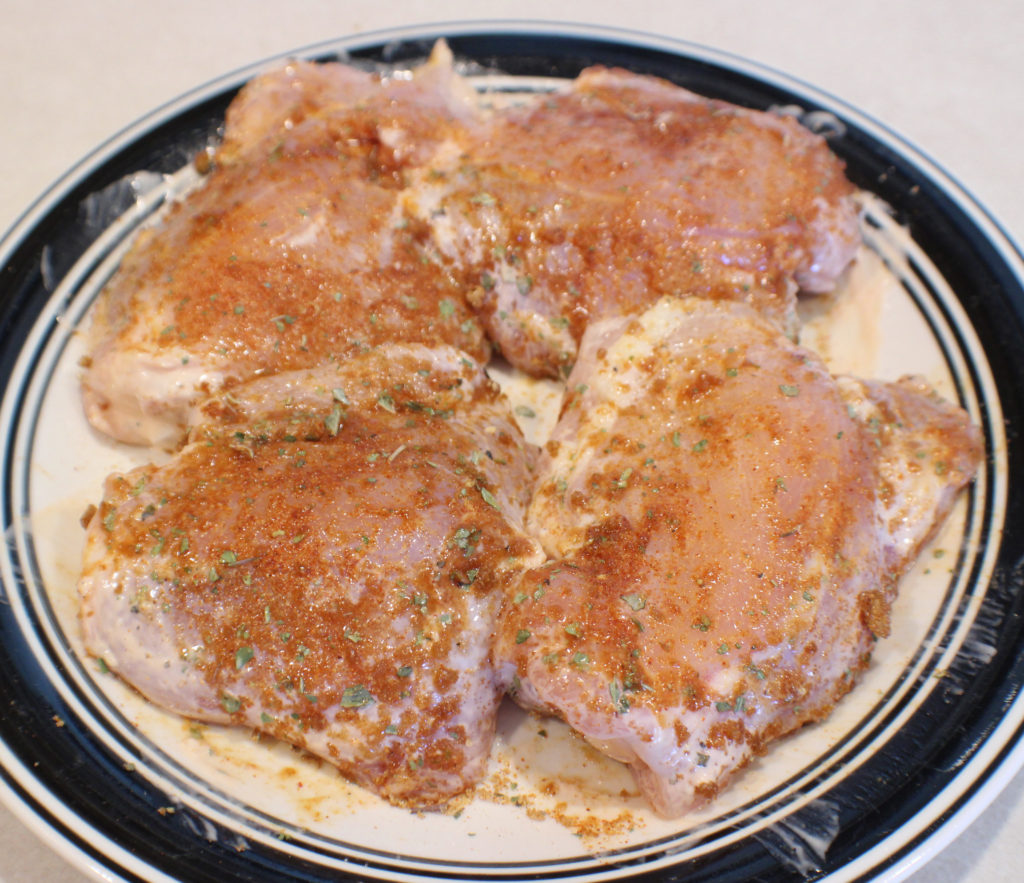
Seasoned Chicken Thighs

Sprinkle the seasoning mixture on both sides of the thighs. The mayonnaise will help it stick. Let this sit for about 15 – 30 minutes.

Now they are ready for the air fryer.

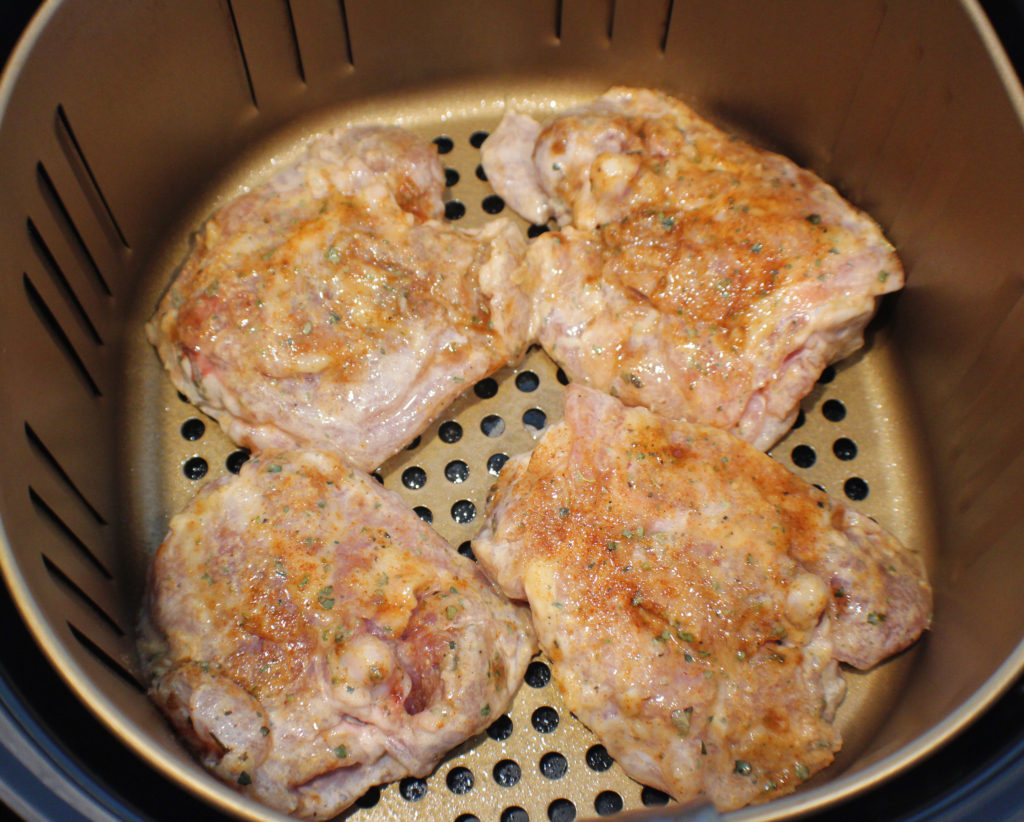
Chicken Thighs in Air Fryer

With a non-aerosol cooking spray, spray the bottom of the basket. Place the chicken in and spray the top of the chicken.

For some models of air fryers, aerosol spray will damage the coating of the basket and will cause it to flake off over time.

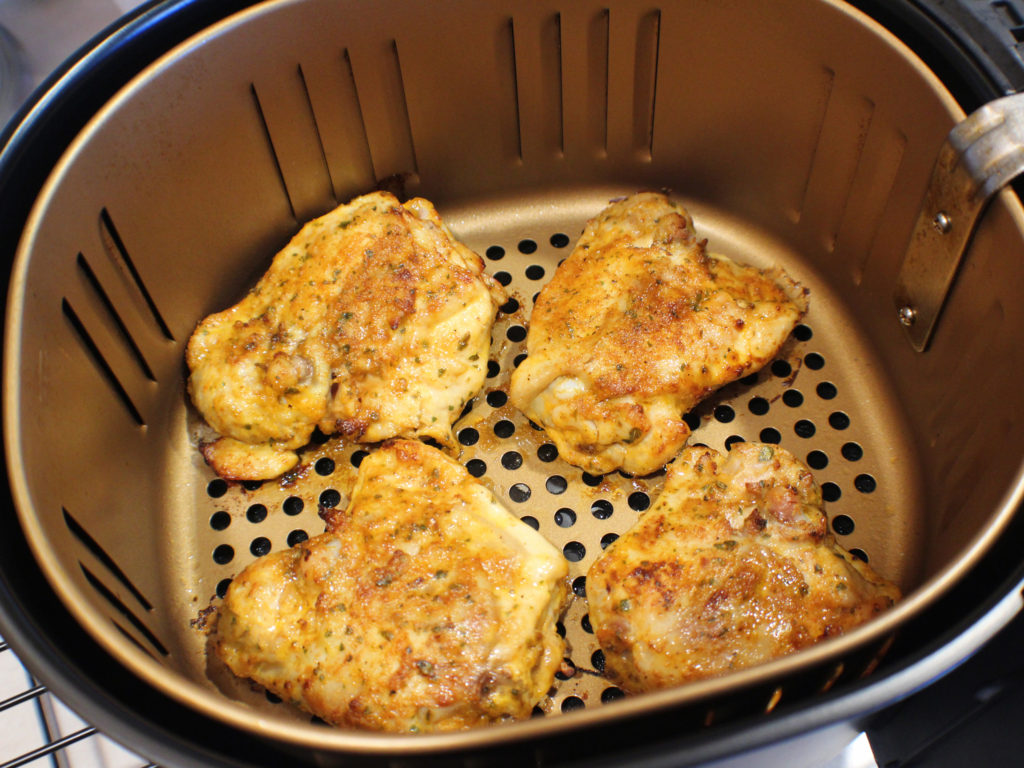
BBQ Chicken Thighs Ready

It takes about 20 minutes to cook at 350 degrees (15 minutes if using boneless chicken thighs). You will want to flip them over after 10 minutes.

Now you have a tender, slightly smoky tasting chicken thigh to enjoy! If you want an extra little kick, try them with some pepperoncinis.
BBQ Chicken Thighs (Air Fryer)

These super moist and delicious chicken thighs cooked in an air fryer brings the flavors of barbequing any time of the year.
Prep Time10 minutes
Cook Time20 minutes
Resting Time1 hour 30 minutes
Total Time2 hours
Course: Dinner, Main Course
Cuisine: American
Keyword: Air Fryer, Chicken, Dairyfree, Glutenfree
Servings: 4 people
Calories: 74kcal
Author: Eating With Deb

Equipment

  • Air Fryer
  • Large bowl
  • Plate
  • Small Bowl

Ingredients

  • 4 each Chicken thighs bone-in, skinless
  • ½ tsp black pepper

Marinade

  • 2 tbsp mayonnaise
  • 1 tbsp ketchup
  • ½ tsp liquid smoke

Dry Seasoning

  • 1 tbsp brown sugar I prefer dark but it light is fine
  • 1 tsp paprika
  • 1 tsp granulated garlic
  • 1 tsp dry mustard
  • 1 tsp oregano

Instructions

  • In a bowl, mix together mayonnaise, ketchup, and liquid smoke. Sprinkle both sides of the chicken thighs with pepper and add to mayonnaise mixture. Marinate for 1 hour.
  • While marinating, mix together dry ingredients.
  • After about an hour, remove chicken thighs from the bowl, shaking off excess mayo mixture and lay flat on a plate.
  • Sprinkle dry ingredients on both sides of the thighs, using it all up. Let sit for 15 to 30 minutes.
  • Spray bottom of air fryer basket with non-aerosol cooking spray and add thighs. Spray tops of thighs.
  • Cook in air fryer at 350 degrees for 20 minutes turning over at 10 minutes. Internal temperature of chicken should reach 165 degrees, may need to cook another 3 – 5 minutes depending on size of the chicken thighs.
  • Enjoy!

Notes

If using boneless chicken thighs, it will only take about 15 minutes to cook.

Nutrition

Calories: 74kcal | Carbohydrates: 5g | Protein: 1g | Fat: 6g | Saturated Fat: 1g | Trans Fat: 1g | Cholesterol: 4mg | Sodium: 82mg | Potassium: 53mg | Fiber: 1g | Sugar: 4g | Vitamin A: 281IU | Vitamin C: 1mg | Calcium: 16mg | Iron: 1mg

Chile Stuffed Chicken Breasts

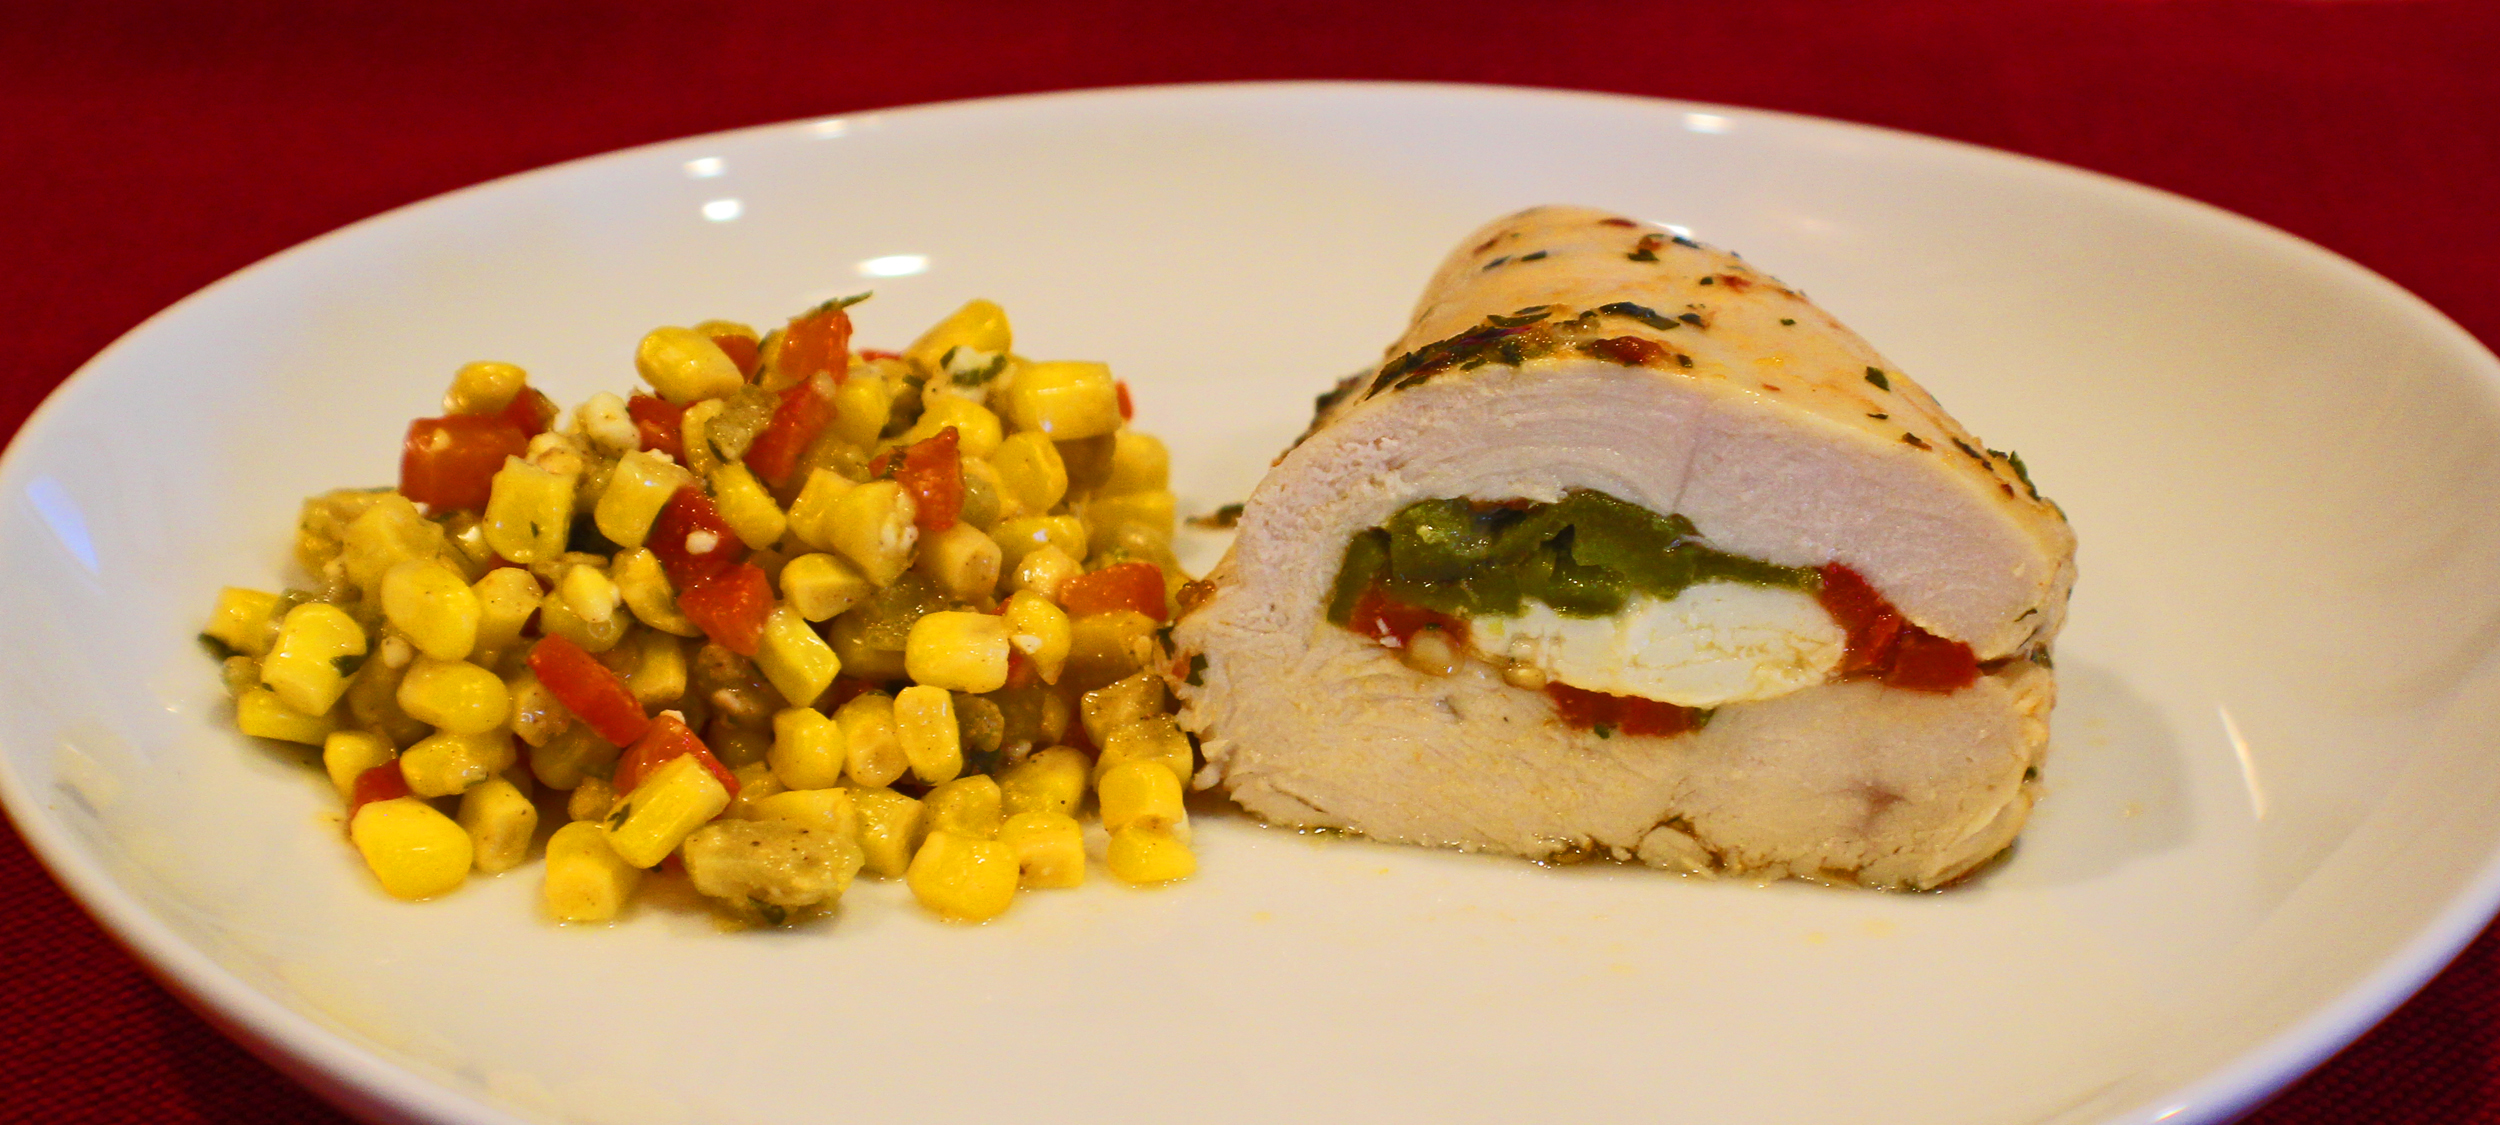
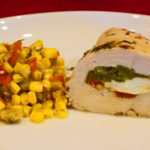
Chile Stuffed Chicken and Maize Picante

As far as meat proteins go, I probably use chicken the most. Trying to figure out new and exciting ways to prepare chicken has become a challenge for me that I have happily taken on.

I stuff these chicken breasts with roasted peppers, chiles, and cotija cheese and marinate them in a somewhat spicy, sweet, and tangy marinade to add a lot of flavor to the chicken.

2 larger chicken breasts can easily be cut in half for a meal for 4 people. Try serving this with Cilantro Lime Rice for a delicious meal.

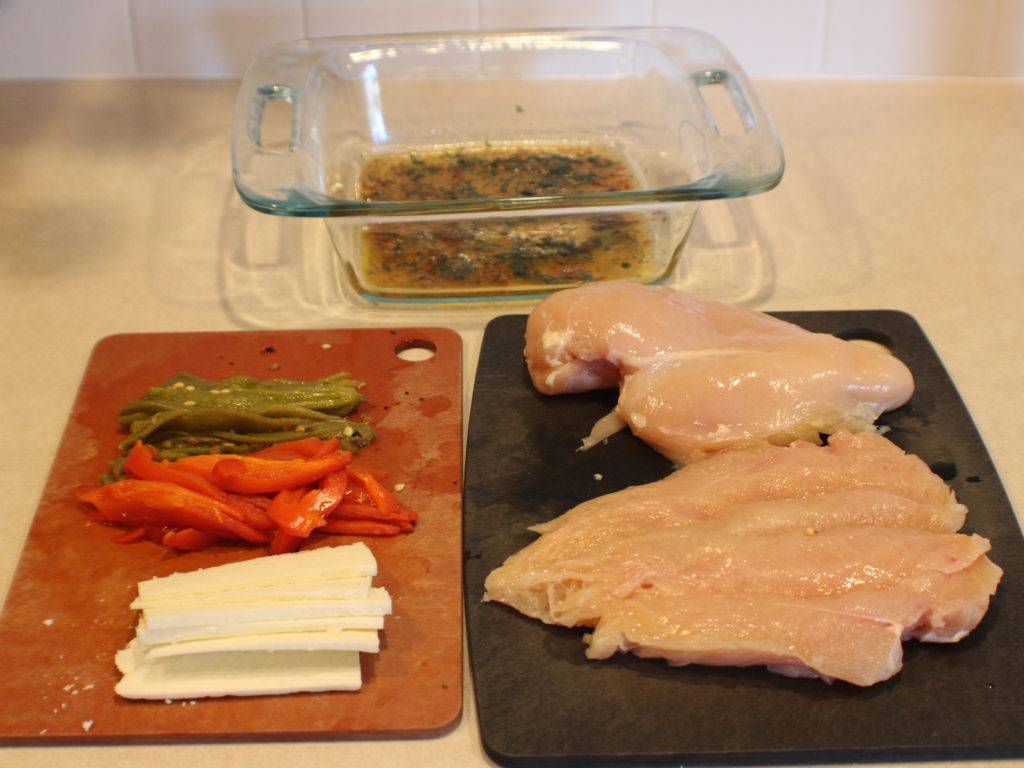
I start by mixing my marinade ingredients in the pan that I’m going to cook my chicken in.

Slice the cheese, peppers and chiles, and butterfly the chicken.

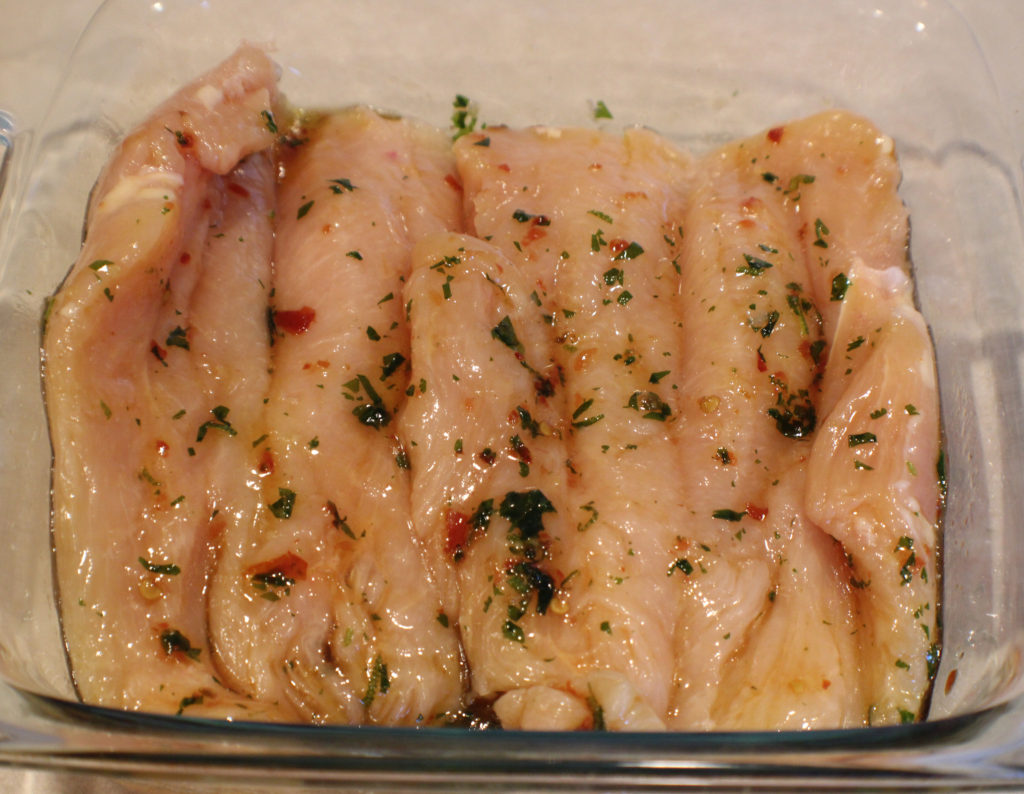
Roll your chicken breasts around in the marinade, ensuring you get it all over and leave them cut side up.

Now it’s time to add the fillings. I like to put the cheese in between the peppers and chiles. Cotija cheese holds up well when baking. You can use a mild feta if you can’t find cotija cheese.

Now fold over the top. Try to stuff everything inside, but a little hanging out won’t really matter.

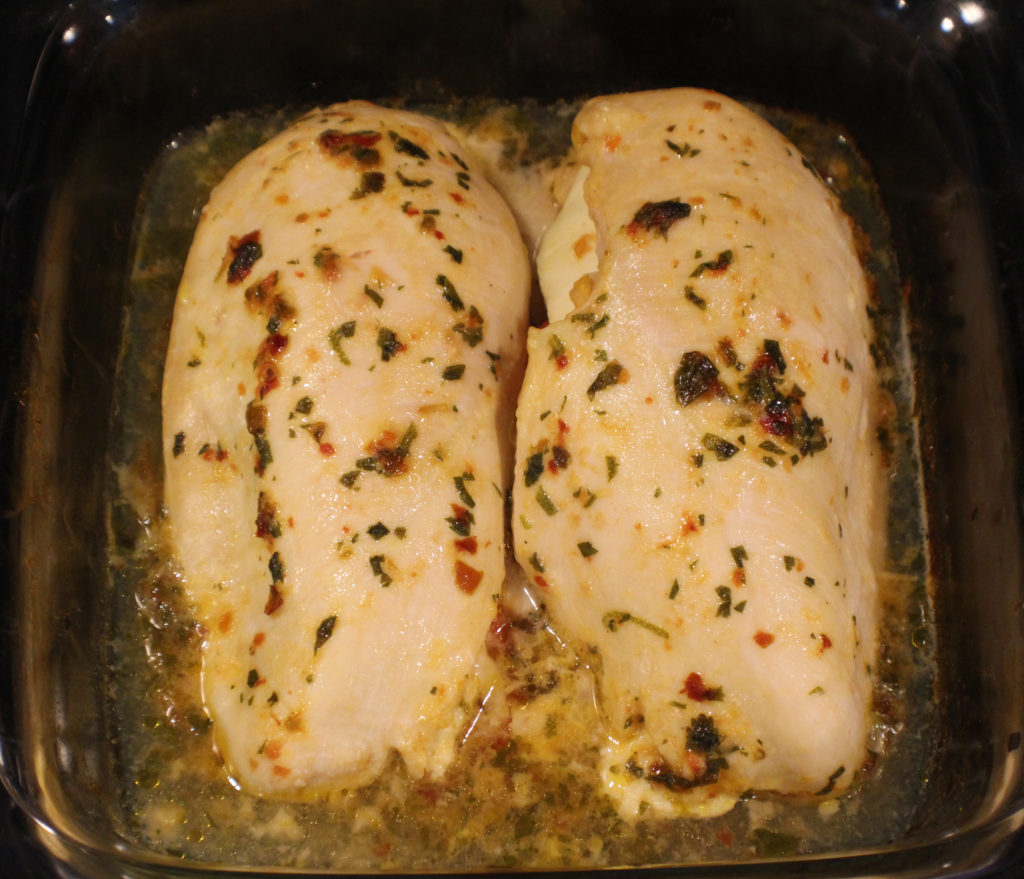
Cover the pan with a lid or foil and bake at 350 degrees for 45 minutes.

Remove the chicken from the oven and remove the foil or lid. Using a spoon, scoop up some of the liquid and baste the chicken. Return to the oven without a cover and bake for an additional 15 minutes. Make sure the internal temperature of your chicken reaches 165 degrees.

Now it’s time to eat. You could certainly top this off with a dollop of sour cream or guacamole or even some avocado slices, but it is so tender and delicious all on its own. Try this with Cilantro Lime Rice and Maize picante.

Enjoy!

Chile Stuffed Chicken Breasts

Stuffing the chicken with moist chiles and peppers and baking in a marinade makes this chicken super moist and tender to eat. It has a little bit of spice, a little tang, and a little sweetness.
Prep Time10 minutes
Cook Time1 hour
Total Time1 hour 10 minutes
Course: Dinner, Main Course
Cuisine: Tex-Mex
Keyword: Chicken, Chiles and Chicken, Stuffed Chicken
Servings: 4 people
Calories: 104kcal
Author: Eating With Deb

Equipment

  • 1 8 x 8 baking dish
  • Cutting board and knife
  • Citrus Zester

Ingredients

Chicken and Stuffing

  • 2 each chicken breasts butterflied
  • 2 each whole green chiles cut into long strips
  • ½ each roasted red bell pepper cut into long strips
  • 2 ounces cotija cheese 4 to 6 thin slices

Marinade

  • 2 tsp Sambal Oelek chili sauce
  • 1 tbsp olive oil
  • ½ each lime juice and zest
  • 2 tbsp honey
  • 1 tsp fresh ginger minced
  • 1 tbsp cilantro fresh, chopped

Instructions

  • Preheat oven to 350 degrees.
  • In the dish you are going to bake the chicken in, combine the Sambal Oelek, oil, lime juice, honey, ginger, and chopped cilantro.
  • Butterfly the chicken breasts.
  • Slice the cheese, roasted red pepper, and green chiles.
  • Rub both sides of the chicken breasts in the marinade mixture.
  • Place chicken breasts flat, cut side up. On one half of each breast stack half the chiles, half of the cheese, and half of the red bell peppers. Fold over tucking in the ingredients.
  • Cover and bake at 350 degrees for 45 minutes. Remove from oven and use a spoon to baste the tops of the chicken with the sauce that is in the pan. Leave cover off, return to oven and bake for an additional 15 minutes. Check to ensure the chicken has reached an internal temperature of 165 degrees.
  • Cut each breast in half to get 4 servings.
  • Try this with Maize Picante.
  • Enjoy!

Notes

Cotija cheese which is a Mexican Feta does not melt well and will hold up during baking. You can replace it with a mild feta if you cannot find Cotija cheese.
You can find roasted whole green chiles in the Mexican section of the supermarket.

Nutrition

Calories: 104kcal | Carbohydrates: 10g | Protein: 2g | Fat: 7g | Saturated Fat: 3g | Cholesterol: 13mg | Sodium: 197mg | Potassium: 29mg | Fiber: 1g | Sugar: 9g | Vitamin A: 85IU | Vitamin C: 1mg | Calcium: 71mg | Iron: 1mg

Lemon Pepper Linguini with Chicken and Veggies

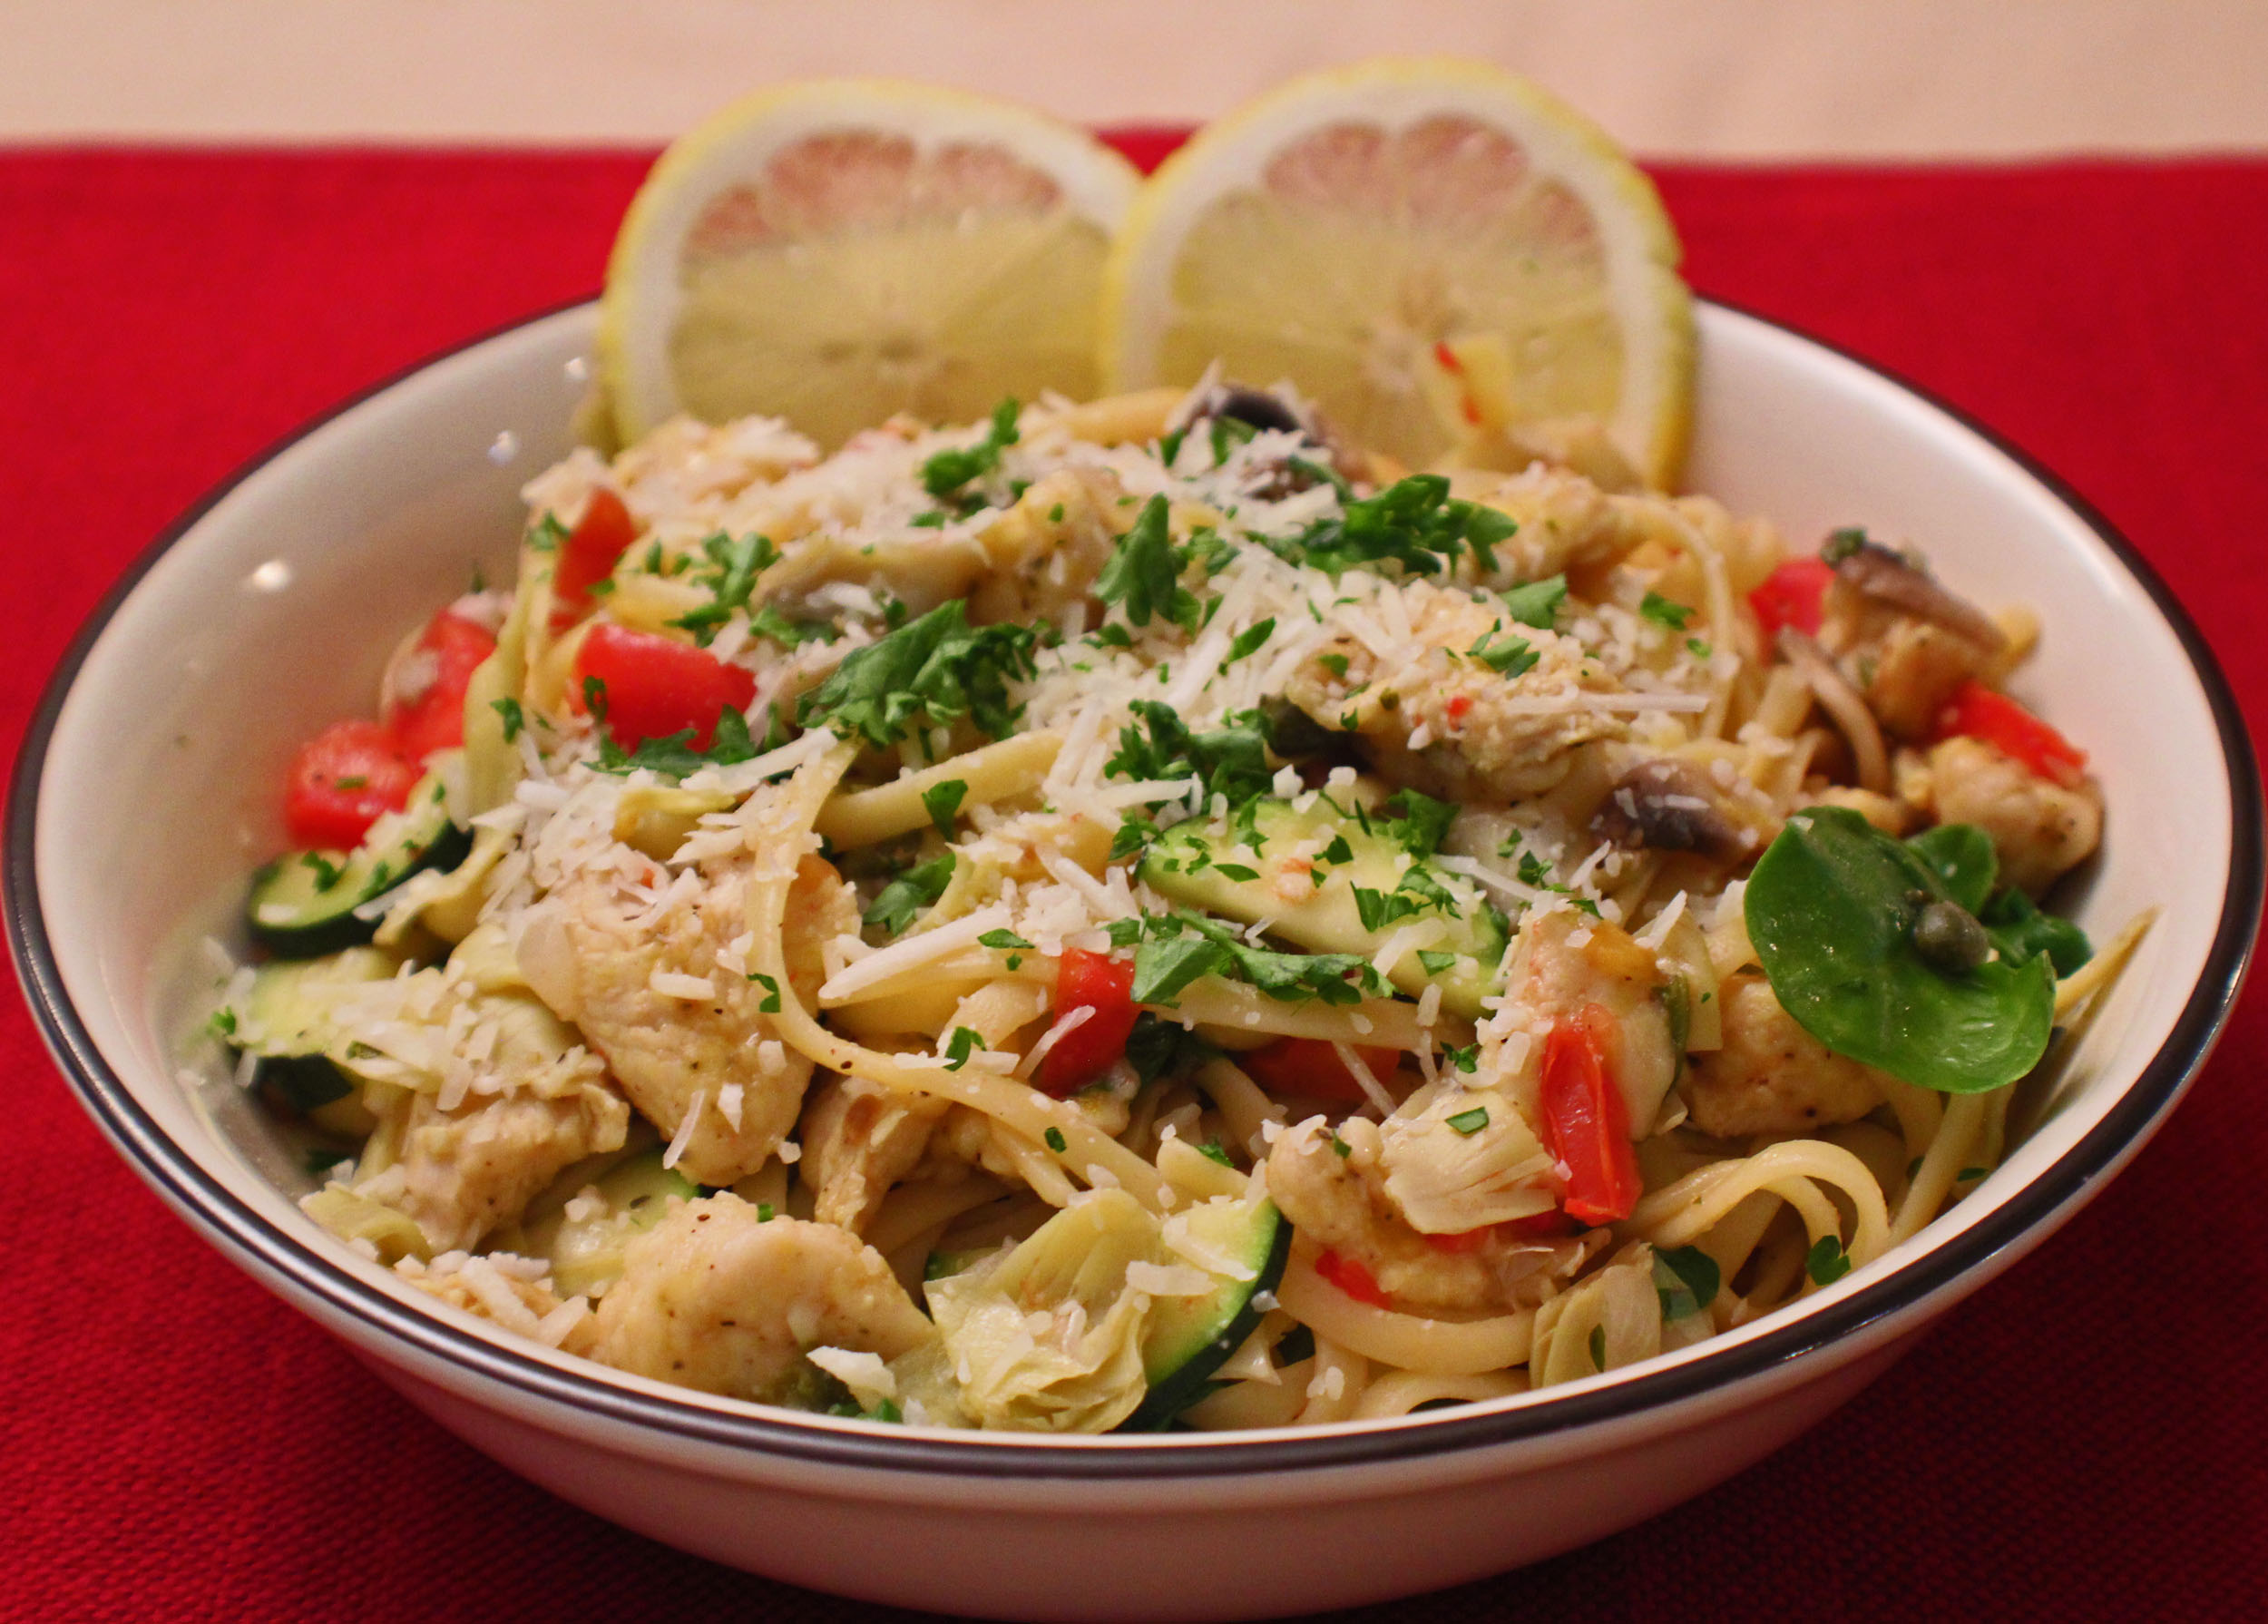
Lemon Pepper Linguini with Chicken and Veggies

Lemon Pepper Chicken and Veggies is a dish that I often throw together in a pinch but never wrote down a recipe. Kind of like my Chicken and Veggies Pesto Pasta. These are 2 dishes that you can use almost any vegetable you have on hand and is extremely easy to throw together.

Friends started requesting the recipes so I thought it was about time to put one on paper and make it official.

The first step is to cook your noodles, doesn’t have to be linguini, just use whatever you have on hand that you like. Cook them to the package directions for al dente.

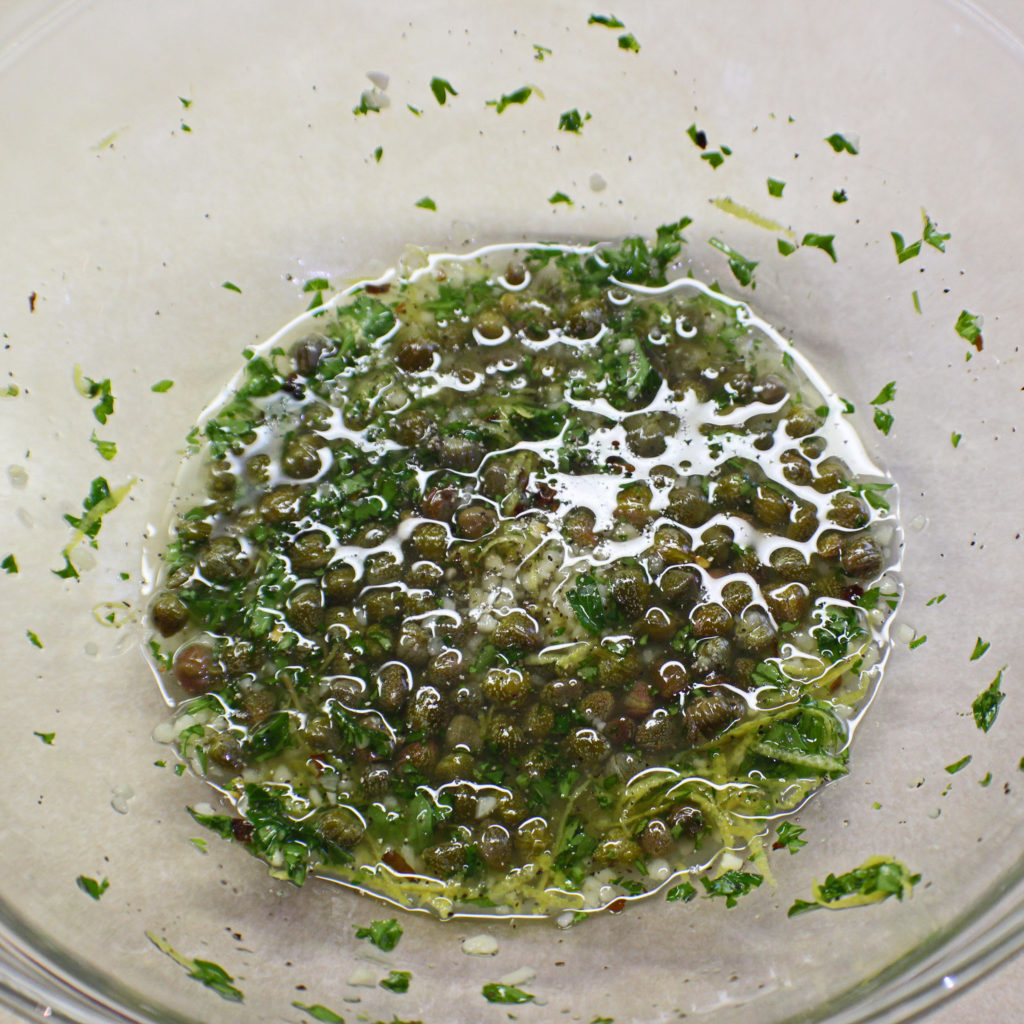
Lemon Pepper Linguini Sauce

While your noodles are cooking, mix together the sauce ingredients and prepare the rest of your other ingredients. Use whatever vegetables you like or have on hand. I sometimes replace the zucchini with broccoli.

When the pasta is cooked to al dente, reserve about 1/2 cup of the pasta water, it will be used later to help create a sauce, and strain the noodles. Toss the noodles in with the lemon pepper sauce you just made.

Chicken Mushrooms Zucchini

Heat a large sauté pan on medium heat. Toss the cubed chicken in with the flour and lemon pepper. Add the oil to the pan and the chicken. Sauté the chicken until it starts to brown.

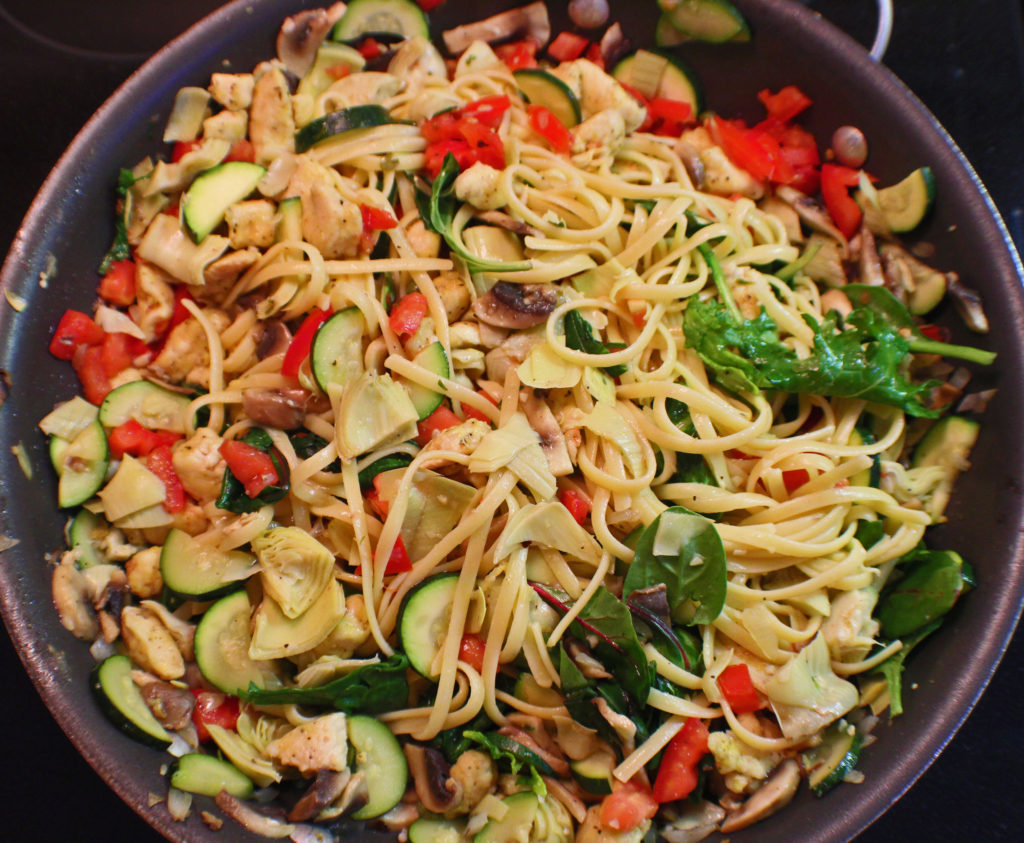
Add the mushrooms, zucchini, and onions. Sauté until the mushrooms and zucchini soften.

Now it’s ready to finish off.

Lemon Pepper Chicken and Veg

Add the rest of the ingredients, including the reserved pasta water. Stir until the spinach wilts and the pasta is hot.

Lemon Pepper Linguini Ready to Eat

This is a great dish to serve family style. Sprinkle parmesan cheese over the top and serve with lemon wedges and warm garlic bread or toast.

Enjoy!

Lemon Pepper Linguini with Chicken and Veggies

Lemon Pepper Chicken Linguini is a light pasta dish with refreshing ingredients that tastes great hot or cold and can be enjoyed any time of the year.
Prep Time15 minutes
Cook Time20 minutes
Total Time35 minutes
Course: Dinner, Entree, Lunch, Main Course
Cuisine: American
Keyword: Chicken, Dinner Ideas, Lemon pepper chicken, Linguini, Pasta, Whats for Dinner
Servings: 6 people
Calories: 256kcal
Author: Eating With Deb

Equipment

  • 6-quart sauce pot
  • Large saute pan
  • 2 medium bowls
  • Cutting board and knife

Ingredients

  • ½ pound linguini

Chicken

  • 2 each chicken breast cubed
  • 2 tbsp flour
  • 2 tsp lemon pepper

Veggies

  • 2 cups mushrooms sliced
  • 1 each zucchini or yellow squash sliced in half moons
  • 2 tbsp yellow onion fine chopped
  • 1 can artichoke hearts drained and chopped
  • 2 each roma tomatoes fine chopped
  • 3 handfuls spinach kale and/or baby chard

Sauce:

  • 1 each lemon zest and juice
  • 1 tbsp parsley chopped
  • 1 tbsp garlic fresh, minced
  • 3 tbsp capers
  • ¼ tsp red pepper flakes optional
  • ¼ tsp black pepper
  • ¼ tsp sea salt

Other ingredients

  • 2 tbsp olive oil
  • 1 tbsp butter
  • ½ cup reserved pasta water
  • 1/3 cup Parmesan cheese shredded

Instructions

  • Cook linguini according to package instructions until al dente, about 10 minutes.
  • Combine sauce ingredients and prepare vegetables.
  • Once linguini is cooked, drain, reserving ½ cup of the pasta water, and stir linguini into sauce. Set aside.
  • In a medium bowl, combine flour and lemon pepper, cut up chicken. Toss chicken in the flour and lemon pepper.
  • Heat a large sauté pan on medium heat, add oil and chicken, brown chicken, about 5 minutes.
  • Add mushrooms, zucchini, and onions, sauté until mushrooms are brown, zucchini has softened, and onions are translucent, about 3 minutes.
  • Add artichoke hearts, tomatoes, spinach, butter, reserved pasta water, and linguini with sauce. Stir and cook until spinach is wilted and everything is nice and hot, about 2 minuutes.
  • Serve and top with Parmesan cheese.
  • Enjoy!

Notes

Using a nonstick sauté pan versus a stainless-steel pan:
A nonstick pan will ensure nothing sticks to the bottom, but the chicken and veggies won’t brown as well.
A stainless-steel pan will create a brown layer on the bottom of the pan that can easily be scraped up when the liquid is added and enhance the flavor of the dish.
My preference is stainless steel, but a nonstick has the benefit of not having to scrape or scrub the pan.

Nutrition

Calories: 256kcal | Carbohydrates: 35g | Protein: 9g | Fat: 9g | Saturated Fat: 3g | Trans Fat: 1g | Cholesterol: 9mg | Sodium: 480mg | Potassium: 308mg | Fiber: 3g | Sugar: 2g | Vitamin A: 1602IU | Vitamin C: 7mg | Calcium: 100mg | Iron: 1mg

Parmesan Crusted Chicken

Parmesan Crusted Chicken Breast

This recipe is very simple, yet the chicken is full of flavor, moist, and tender.  

This is also a great recipe to involve children in making the dinner. I recommend the adult use the knife and do the actual cooking, but pounding and breading the chicken is a fun activity for young children.

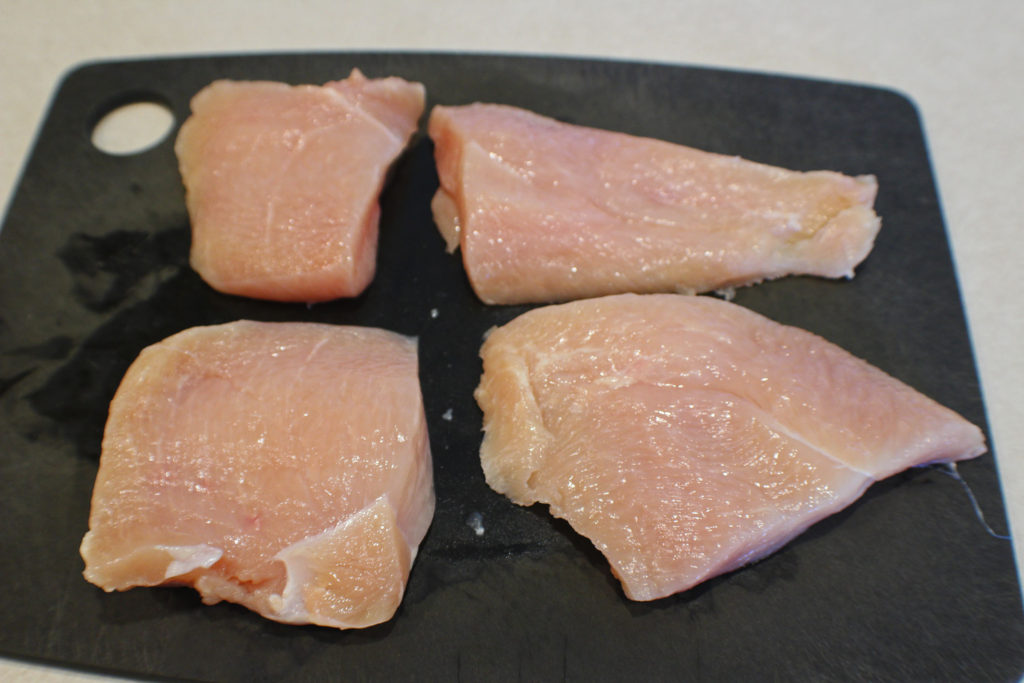
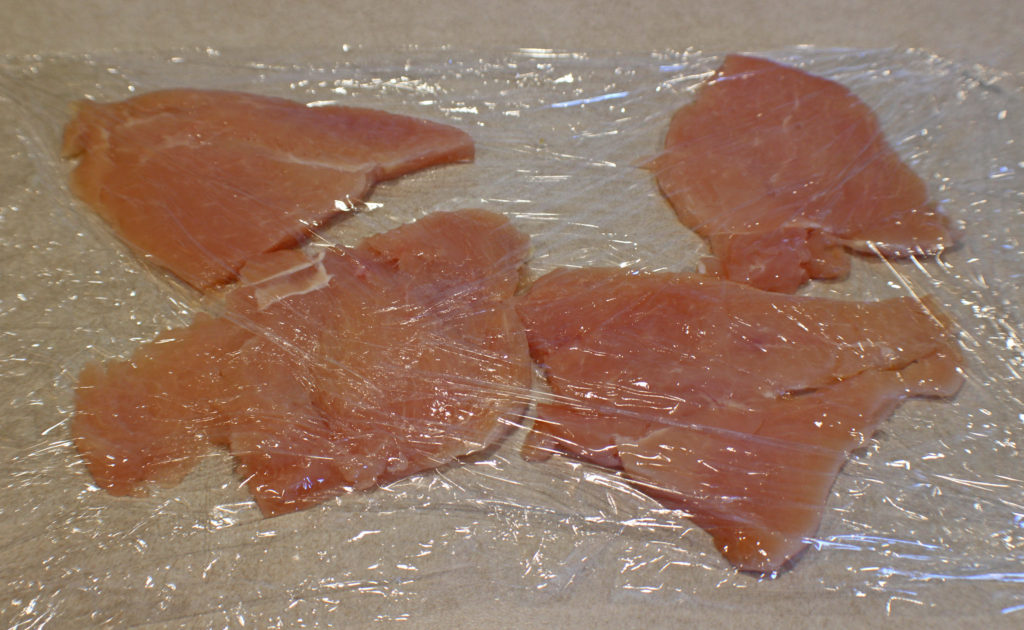
Start by taking 1 large or 2 small chicken breasts and turning it into 4 portions. For the 1 large chicken breast, cut in in half cross-wise, then spit each piece through the middle, basically butterflying it all the way through.

If you have 2 small chicken breasts, cut them in half cross-wise or butterfly them through the middle if they are thick.

Now it’s time to flatten them a little bit for a more even and faster cooking. I like to put them between 2 pieces of plastic wrap before I hit them with the meat mallet. You could certainly put them in a zipper style bag. This helps prevent chicken and juice from splashing all over your kitchen.

Be sure to use the flat side of the meat mallet, we don’t need to tenderize or create holes in the chicken breast. Don’t use too much force when pounding, it will flatten fairly easily.

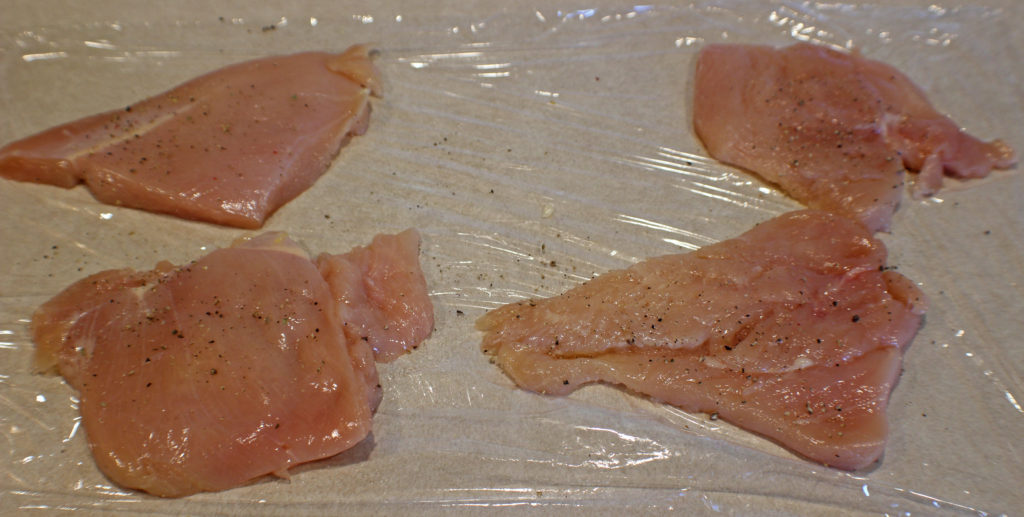
Remove the top piece of plastic and sprinkle black pepper on both sides. I do a couple turns of my pepper grinder per side. There is no need for salt, you will get enough in the Parmesan cheese.

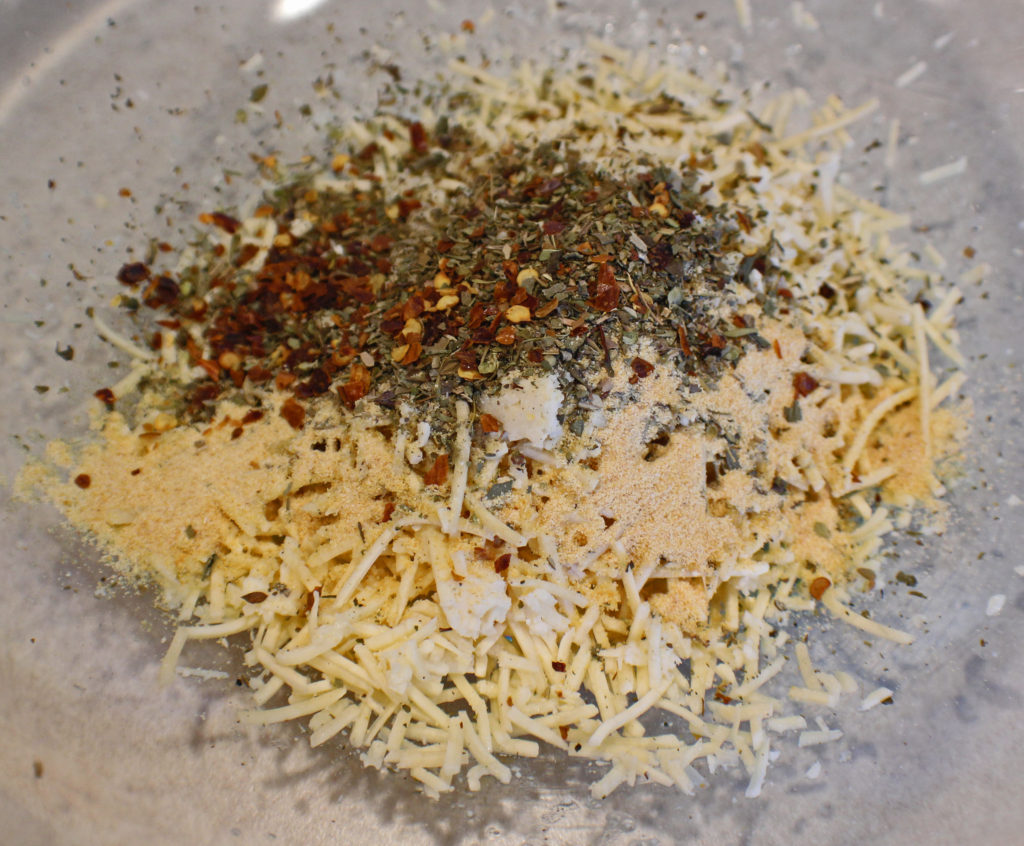
If you haven’t already mixed together the parmesan and seasonings or enlisted help for this step, do that now.

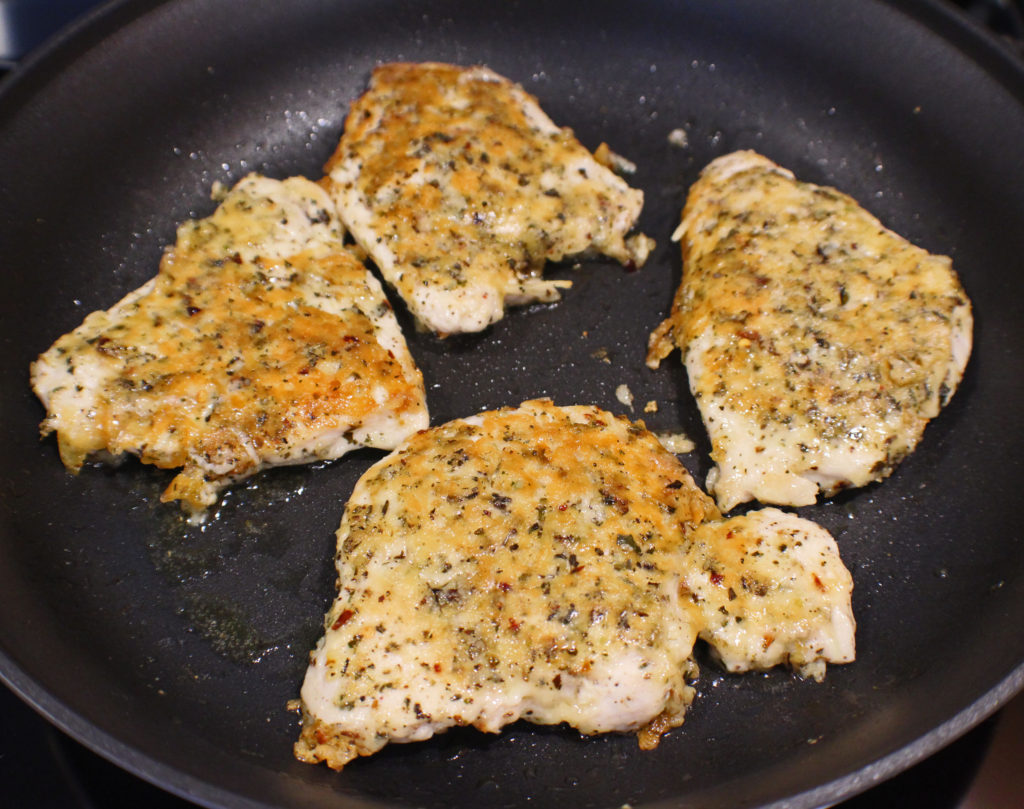
Using about half the parmesan mixture, press that into one side of the chicken breasts. Flip them over and press the rest into the other side. Don’t worry, some will fall off, you can just add that to the top of the chicken when it’s in the pan.

Be sure to use a large nonstick pan for cooking. The parmesan will stick to a stainless steel pan. This takes about 3 minutes cooking time per side, maybe up to 6 minutes total, depending on how thick the chicken is.

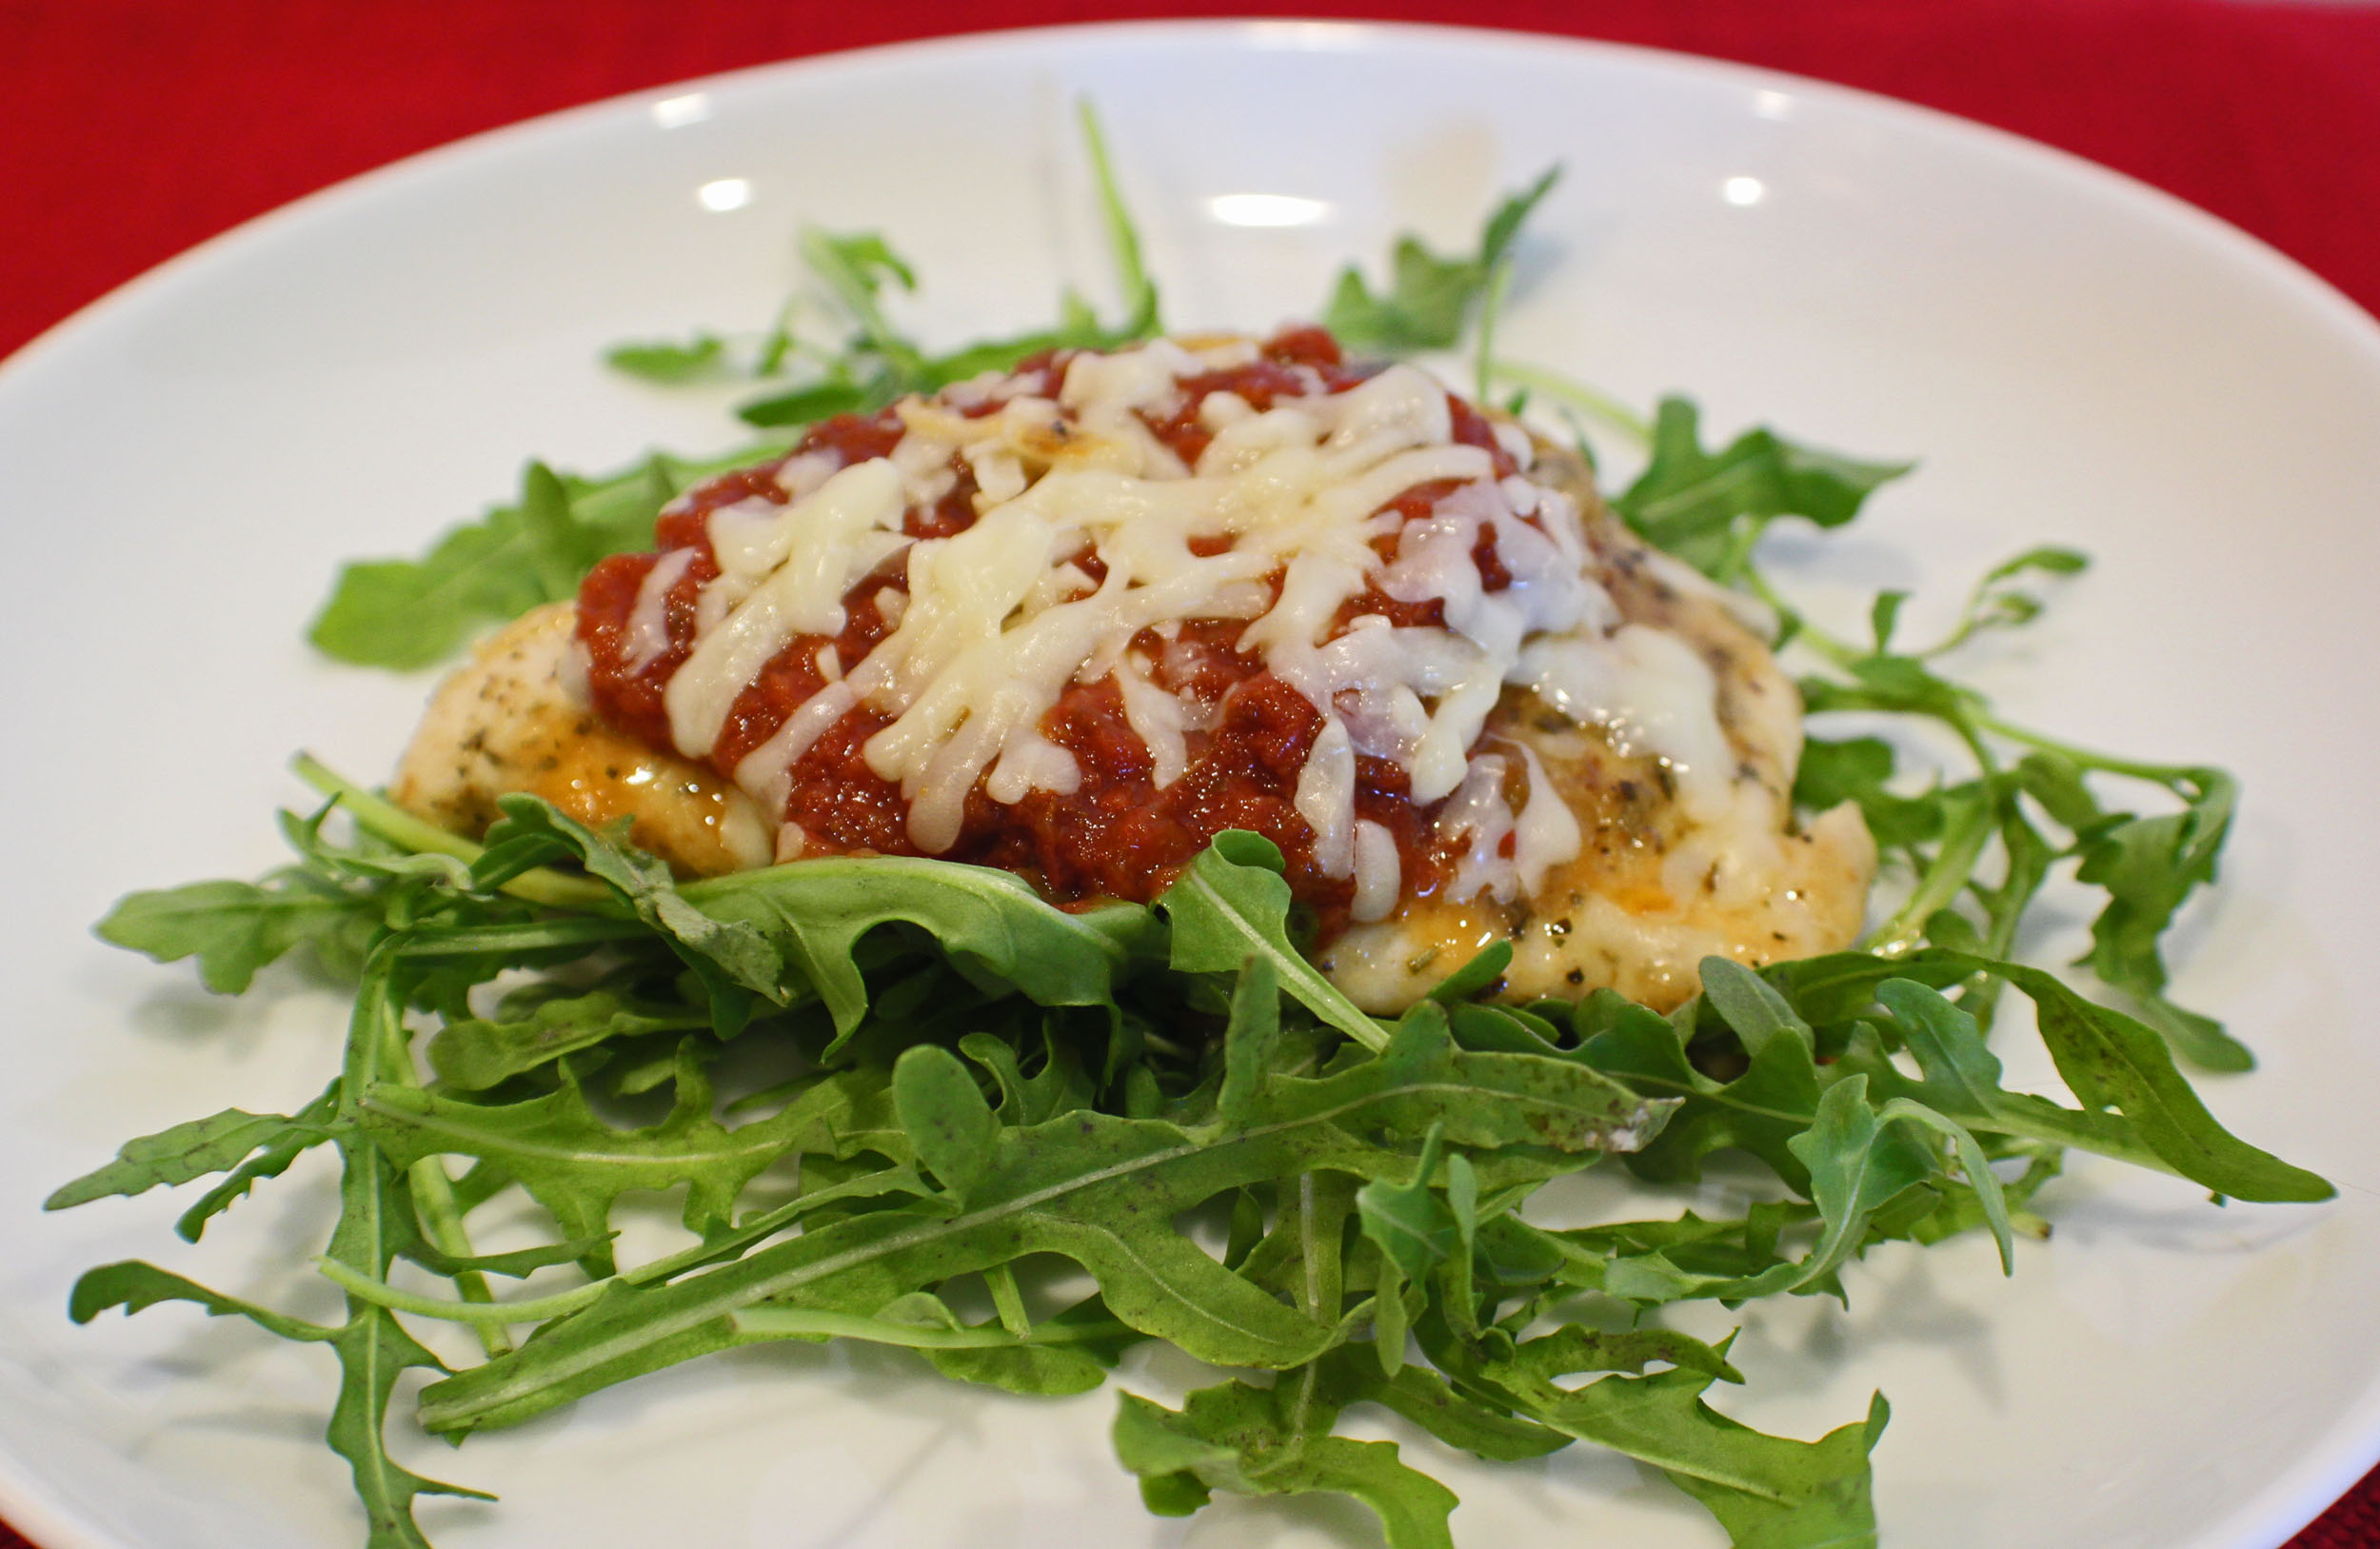
When it’s a nice golden brown on both sides and has an internal temperature of 165 degrees, it’s time to eat. But there are choices to be made. I do like it as is with no additional toppings. Sometimes I put it on a bed of arugula or spinach for some added nutrients.

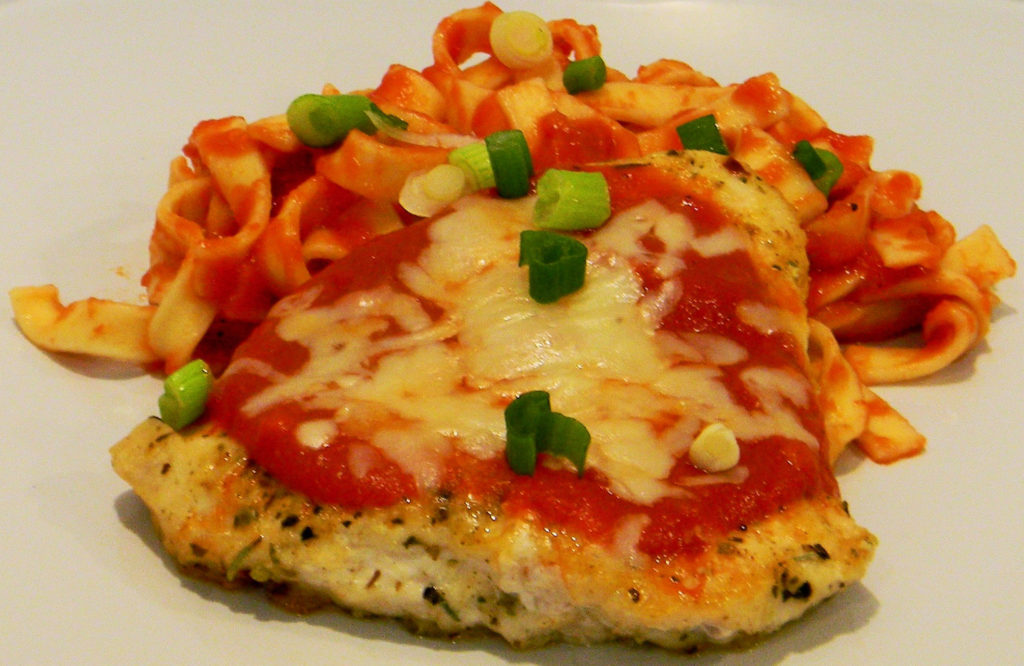
I have served this Italian style topped with warm marinara sauce and mozzarella cheese with pasta and marinara.

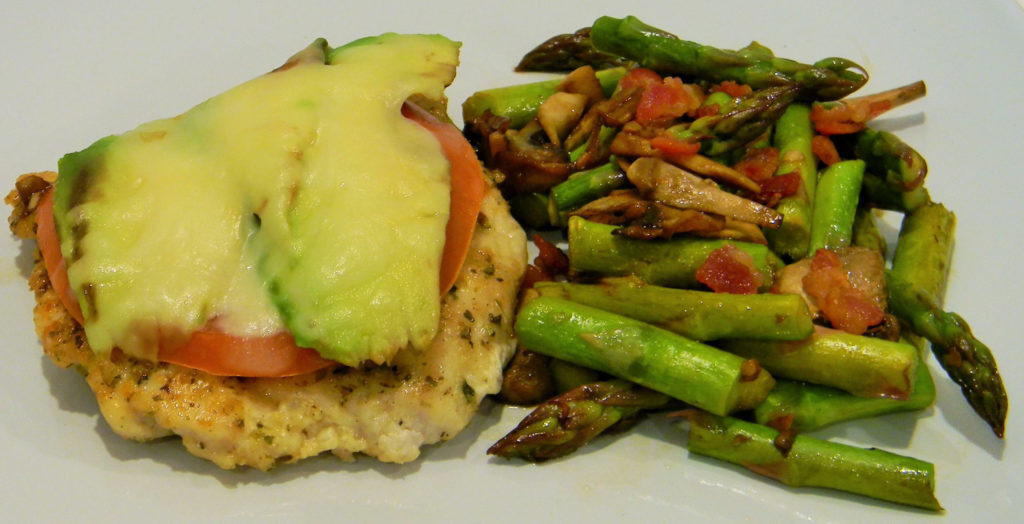
I also like it done California style topped with a tomato slice, avocado slices, melted mozzarella cheese, and served with some sautéed asparagus, mushrooms, and bacon.

However you decide to eat this, Enjoy!

Parmesan Crusted Chicken

This chicken is tender, full of flavor, and is delicious as is, or Italian style topped with marinara and melted mozzarella cheese, or California Style topped with a sliced tomato and avocado with melted mozzarella cheese.
Prep Time10 minutes
Cook Time10 minutes
Total Time20 minutes
Course: Dinner, Main Course
Cuisine: American, Italian
Keyword: Chicken, Glutenfree, Parmesan
Servings: 4 people
Calories: 147kcal
Author: Eating With Deb

Equipment

  • Cutting board and knife
  • Plastic wrap and meat mallet
  • Small Bowl
  • Large nonstick sauté pan and spatula

Ingredients

  • 1 each large chicken breast or 2 small chicken breast, boneless, skinless
  • 1 cup shredded parmesan cheese
  • 1 tbsp Italian seasoning
  • 1 ½ tsp granulated garlic
  • ½ tsp red pepper flakes
  • Black pepper
  • 1 tbsp olive oil

Instructions

  • Cut the large chicken breast in half down the middle, from short side to short side. Then butterfly the 2 pieces, cutting all the way through to create 4 pieces of chicken. If you have smaller chicken breasts, cut the 2 in half to create 4 pieces.
  • Lay out a long piece of plastic wrap on the counter and put the 4 pieces of chicken on it. Top with another long piece of plastic wrap, making sure the chicken is completely covered with room to spare.
  • Using the flat side of the meat mallet, gently pound the chicken down to about 1/8 inch thick.
  • Remove top sheet of plastic wrap and sprinkle both sides of the chicken with black pepper.
  • In a small bowl, combine the parmesan and seasonings.
  • Press about 2 tablespoons of the parmesan mix into each side of the chicken.
  • Heat a large nonstick sauté pan on medium to medium low heat. Add the olive oil and the chicken. If some of the parmesan mix fell off, press in back into the tops of the chicken in the pan.
  • Cook the chicken about 3 to 5 minutes on each side until the chicken reaches an internal temperature of 165 degrees. The parmesan will brown and get crispy.
  • The chicken is delicious as is or top it with a tablespoon or 2 of marinara sauce and mozzarella cheese, or a tomato slice, avocado slices and mozzarella cheese for a California style chicken.
  • You can melt the cheese in the oven under the broiler, but I find it just as easy to put a lid on my pan for a minute or 2.
  • Enjoy!

Notes

Can use 4 boneless, skinless chicken thighs instead of the chicken breast.

Nutrition

Serving: 1cutlet | Calories: 147kcal | Carbohydrates: 3g | Protein: 10g | Fat: 11g | Saturated Fat: 5g | Cholesterol: 22mg | Sodium: 388mg | Potassium: 66mg | Fiber: 1g | Sugar: 1g | Vitamin A: 312IU | Vitamin C: 1mg | Calcium: 299mg | Iron: 1mg

Spatchcock Chicken with Asian BBQ Sauce

Grilled Chicken with Asian BBQ Sauce

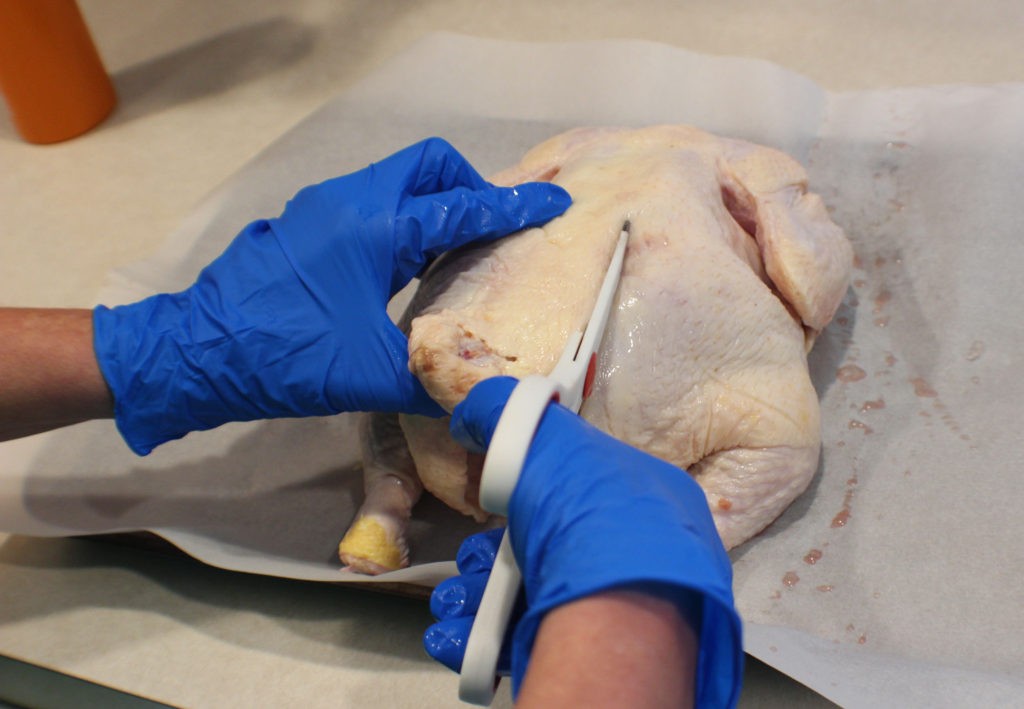
Don’t let the term spatchcock scare you away. It’s just a fancy way of saying to butterfly a whole chicken, or to split it open, and it’s pretty simple to do with a pair of kitchen shears.

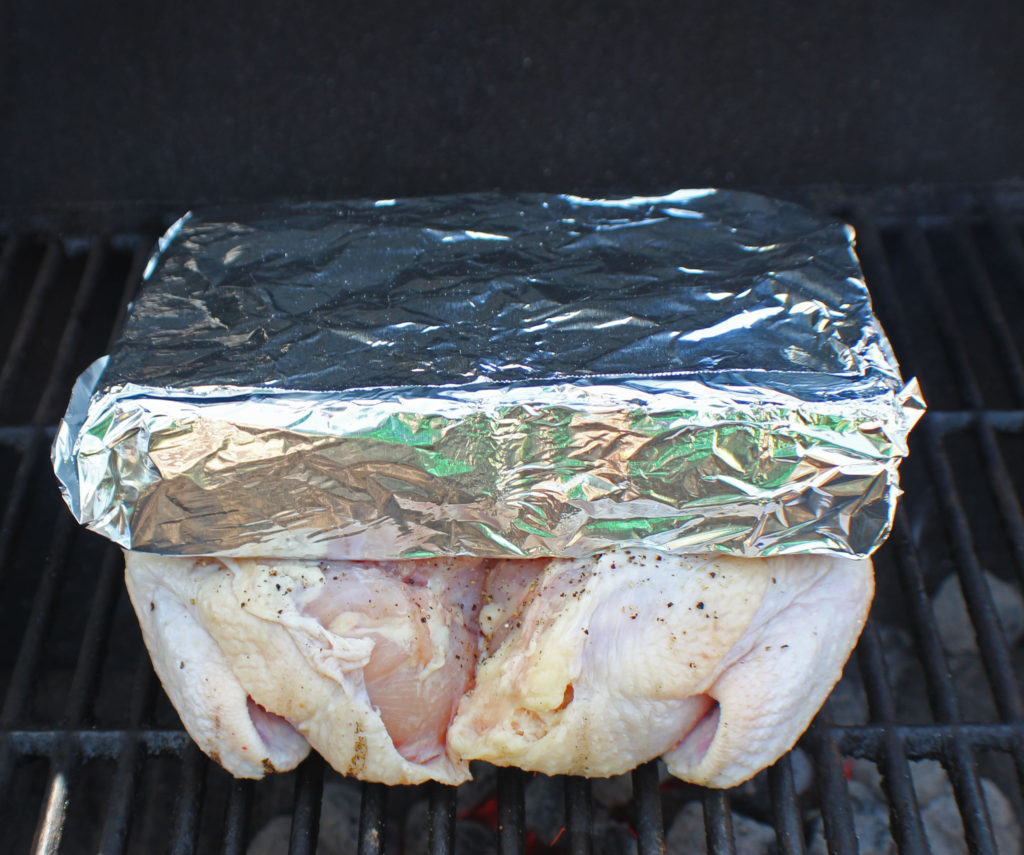
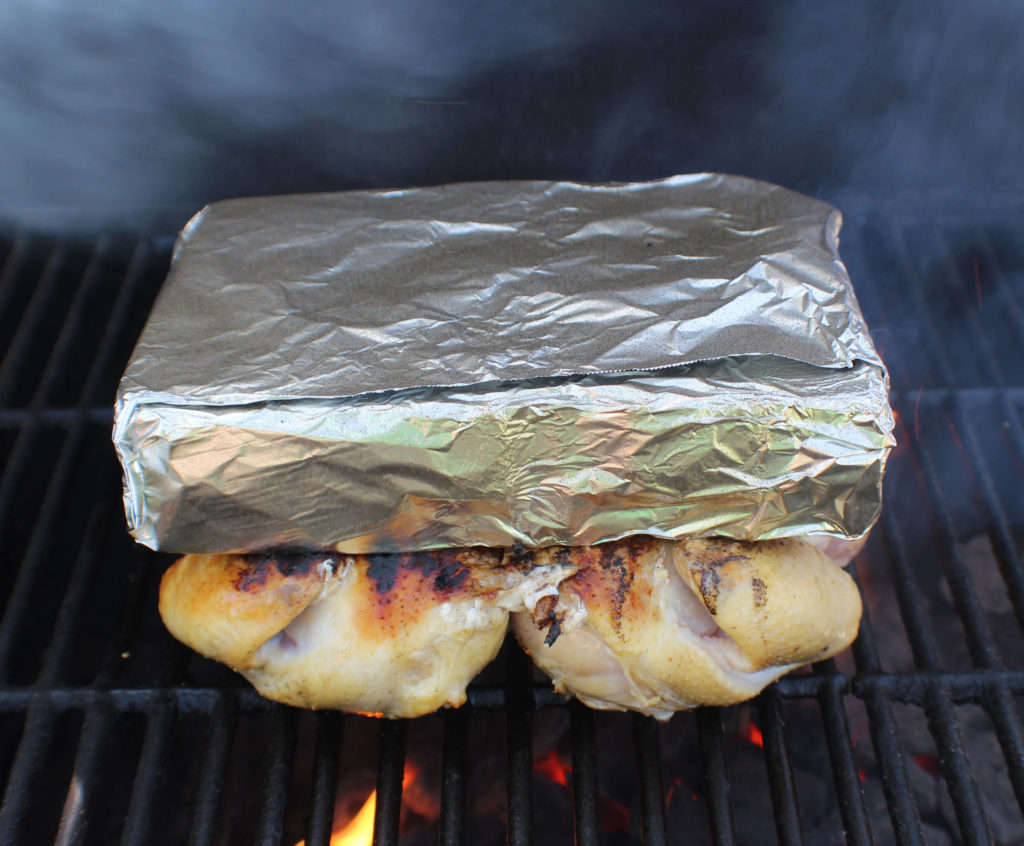
When grilling spatchcock chicken a weight is added, like a brick wrapped with foil, and that helps cook it faster and keep it moist and tender.

I like to put my chicken on a sheet tray lined with parchment paper. That way I can cut out the backbone and season it all on the same pan.

You can see that I don’t have the best kitchen shears, but they work.

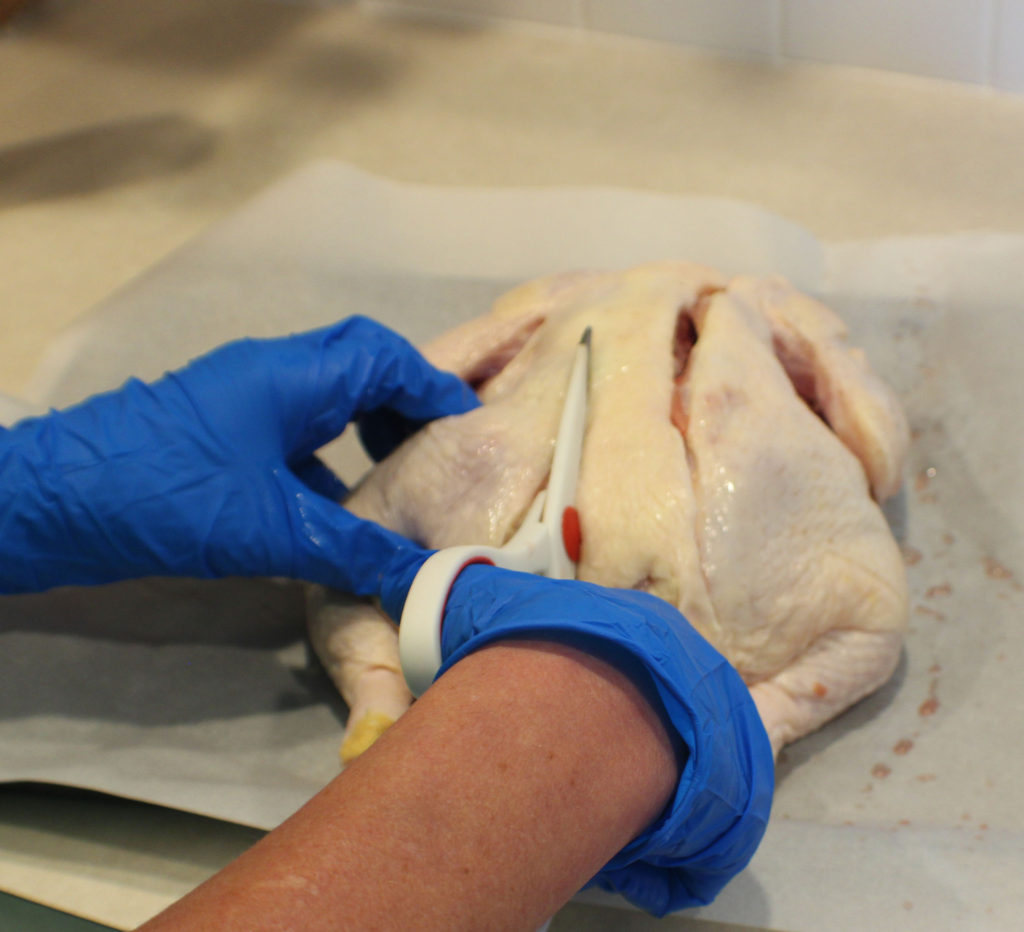
Start with the chicken breasts down on the pan. Cut down one side of the backbone, all the way through to the other end.

When you get through one side, cut down the other side of the backbone and pull it out. You can freeze it to make chicken stock in the future. 

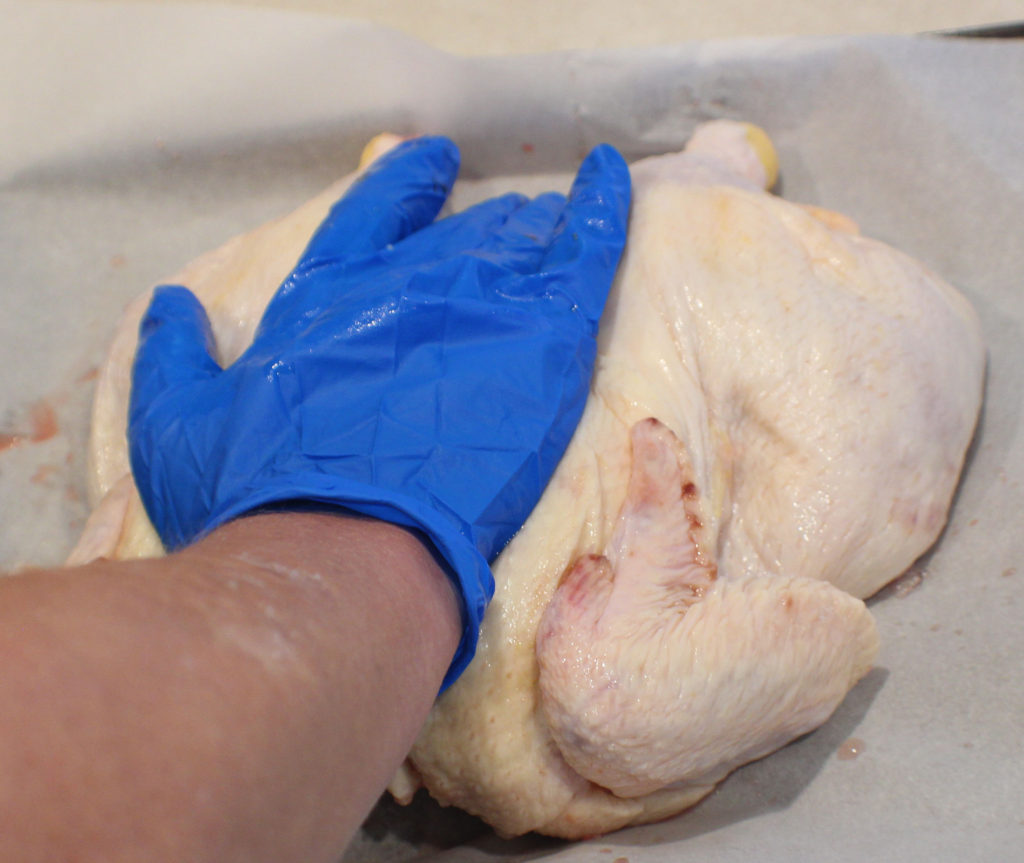
Once the backbone is out, open it up and flip it over.

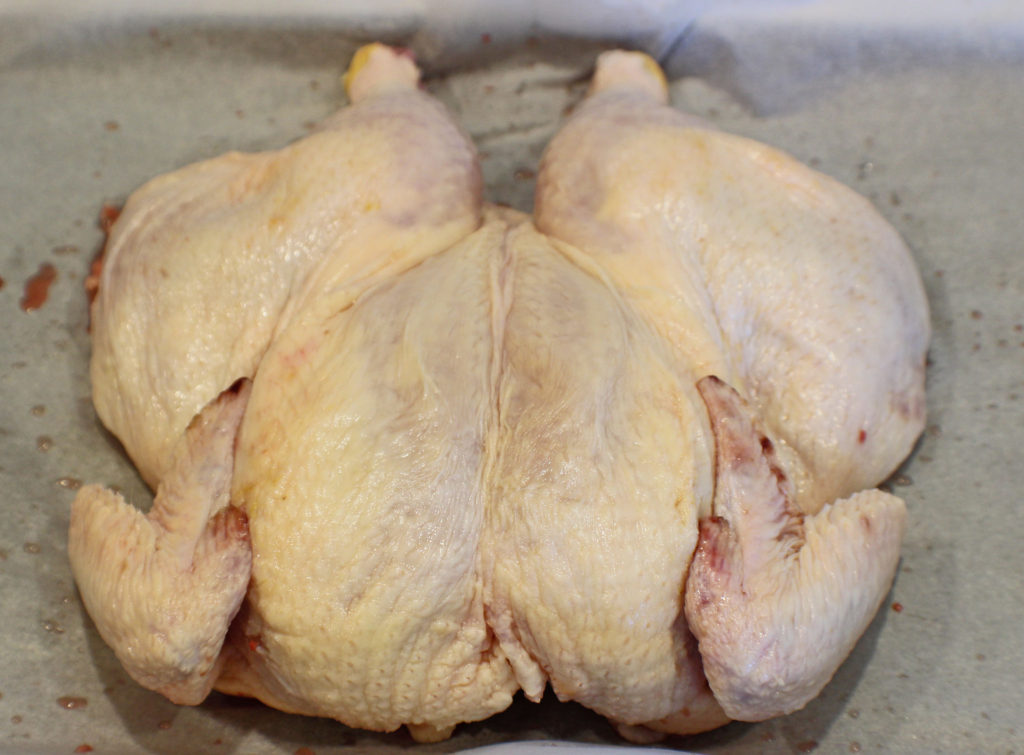
Using the heal of your hand, press down on the breast bone to flatten the chicken out. Yes, you will hear and feel bones cracking, but that goes with the territory.

Once you get if flattened out, season it by rubbing oil and salt and pepper on both sides.

Careful on the bone side so you don’t poke yourself.

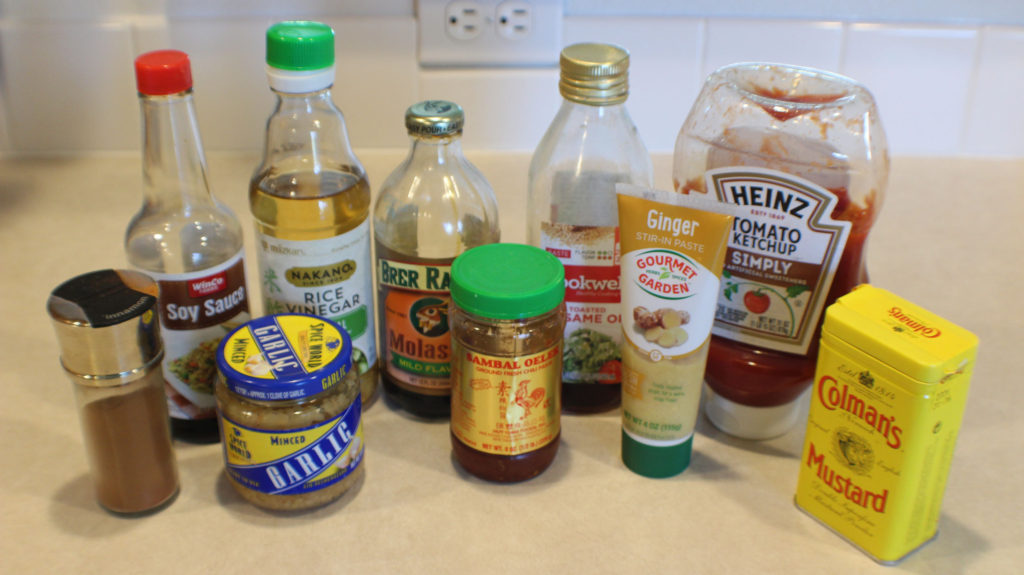
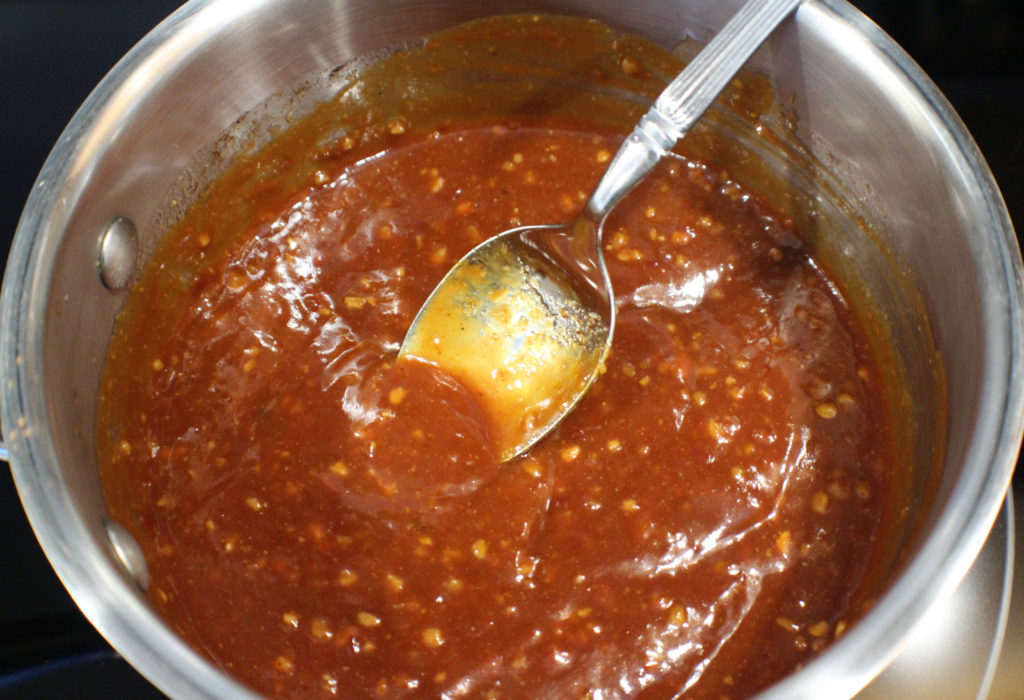
While my charcoal is heating up, and my chicken is sitting at room temperature, I like to make a barbecue sauce. This Asian BBQ sauce has a little zip and tastes great on chicken.

Just put all the ingredients together is a small sauce pan and simmer it for about 5 minutes. The sugar just needs to get dissolved and it will heat up more on the grill.

Time to get grilling. I happened to have a larger patio brick laying around, but 2 smaller bricks will do. The main thing is to try to have an even weight across the whole chicken.

Start with the breast side down, right over the top of the coals and close the lid.

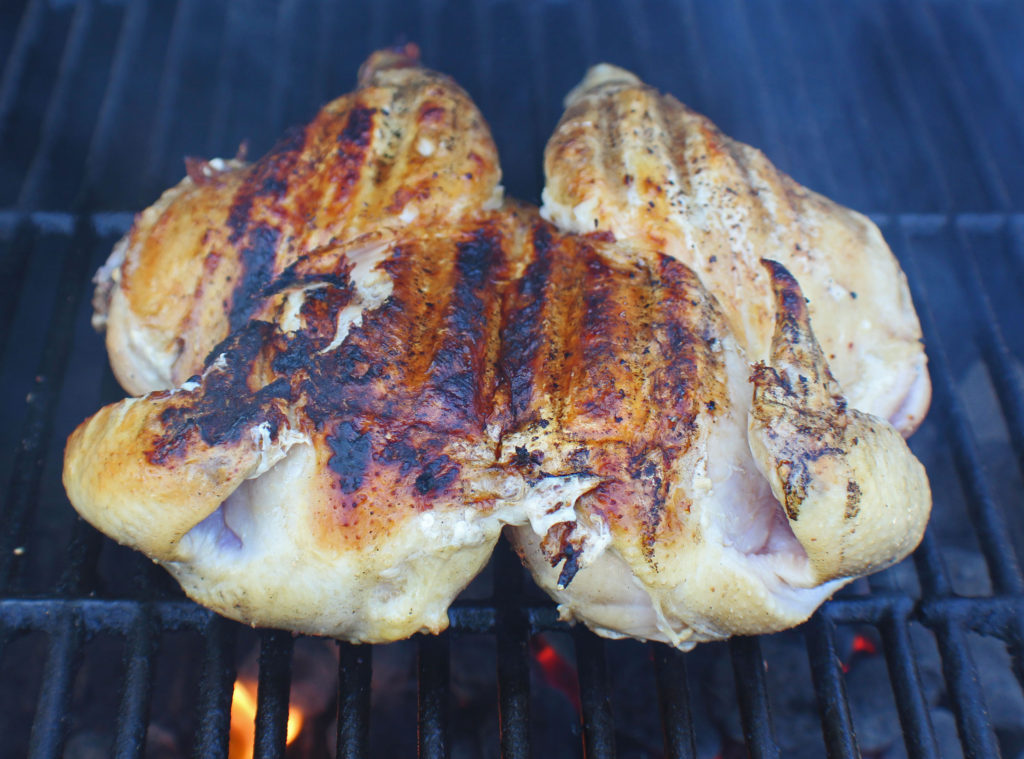
After about 20 minutes, remove the brick (careful, it’s hot!), and flip the chicken. The skin is getting crispy and the chicken is cooking nicely!

Put the brick back on the chicken, close the lid and cook for another 20 minutes or so. Be sure to check for an internal temperature of 160 degrees before removing the brick.

Everybody’s grill is different, so you may need a little more or a little less cooking time.

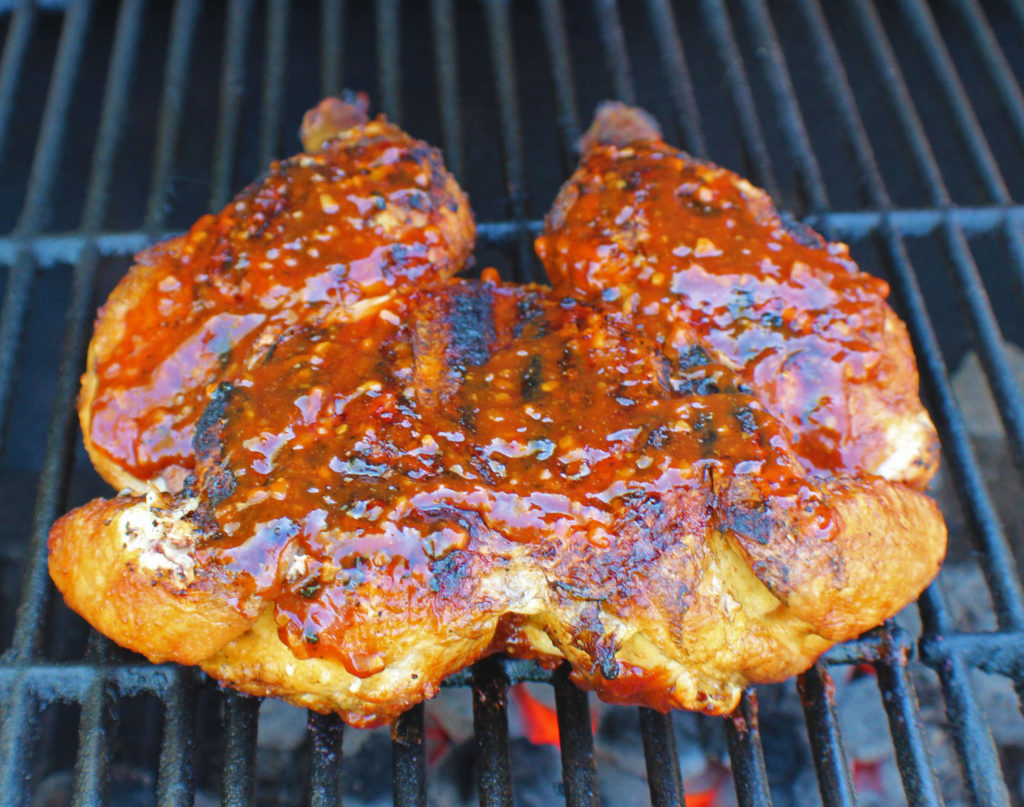
Now it’s time to baste the chicken with barbecue sauce and cook a little longer. Use 1/3 of the Asian Barbecue sauce on the first side, close the lid and cook for about 3 minutes.

Flip the chicken over and use another 1/3 of the barbecue sauce. Close the lid and let cook for another 3 minutes.

Grilled Chicken with Asian BBQ Sauce

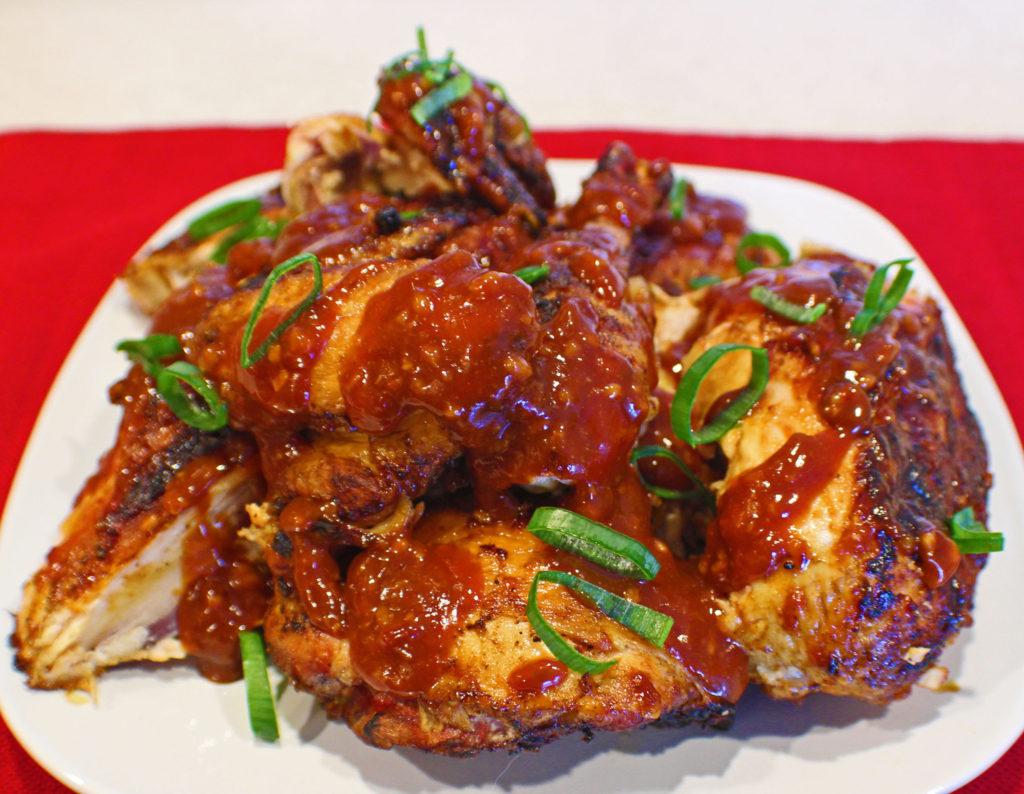
Remove the chicken from the grill to a cutting board and let it rest for about 10 minutes before cutting it apart.

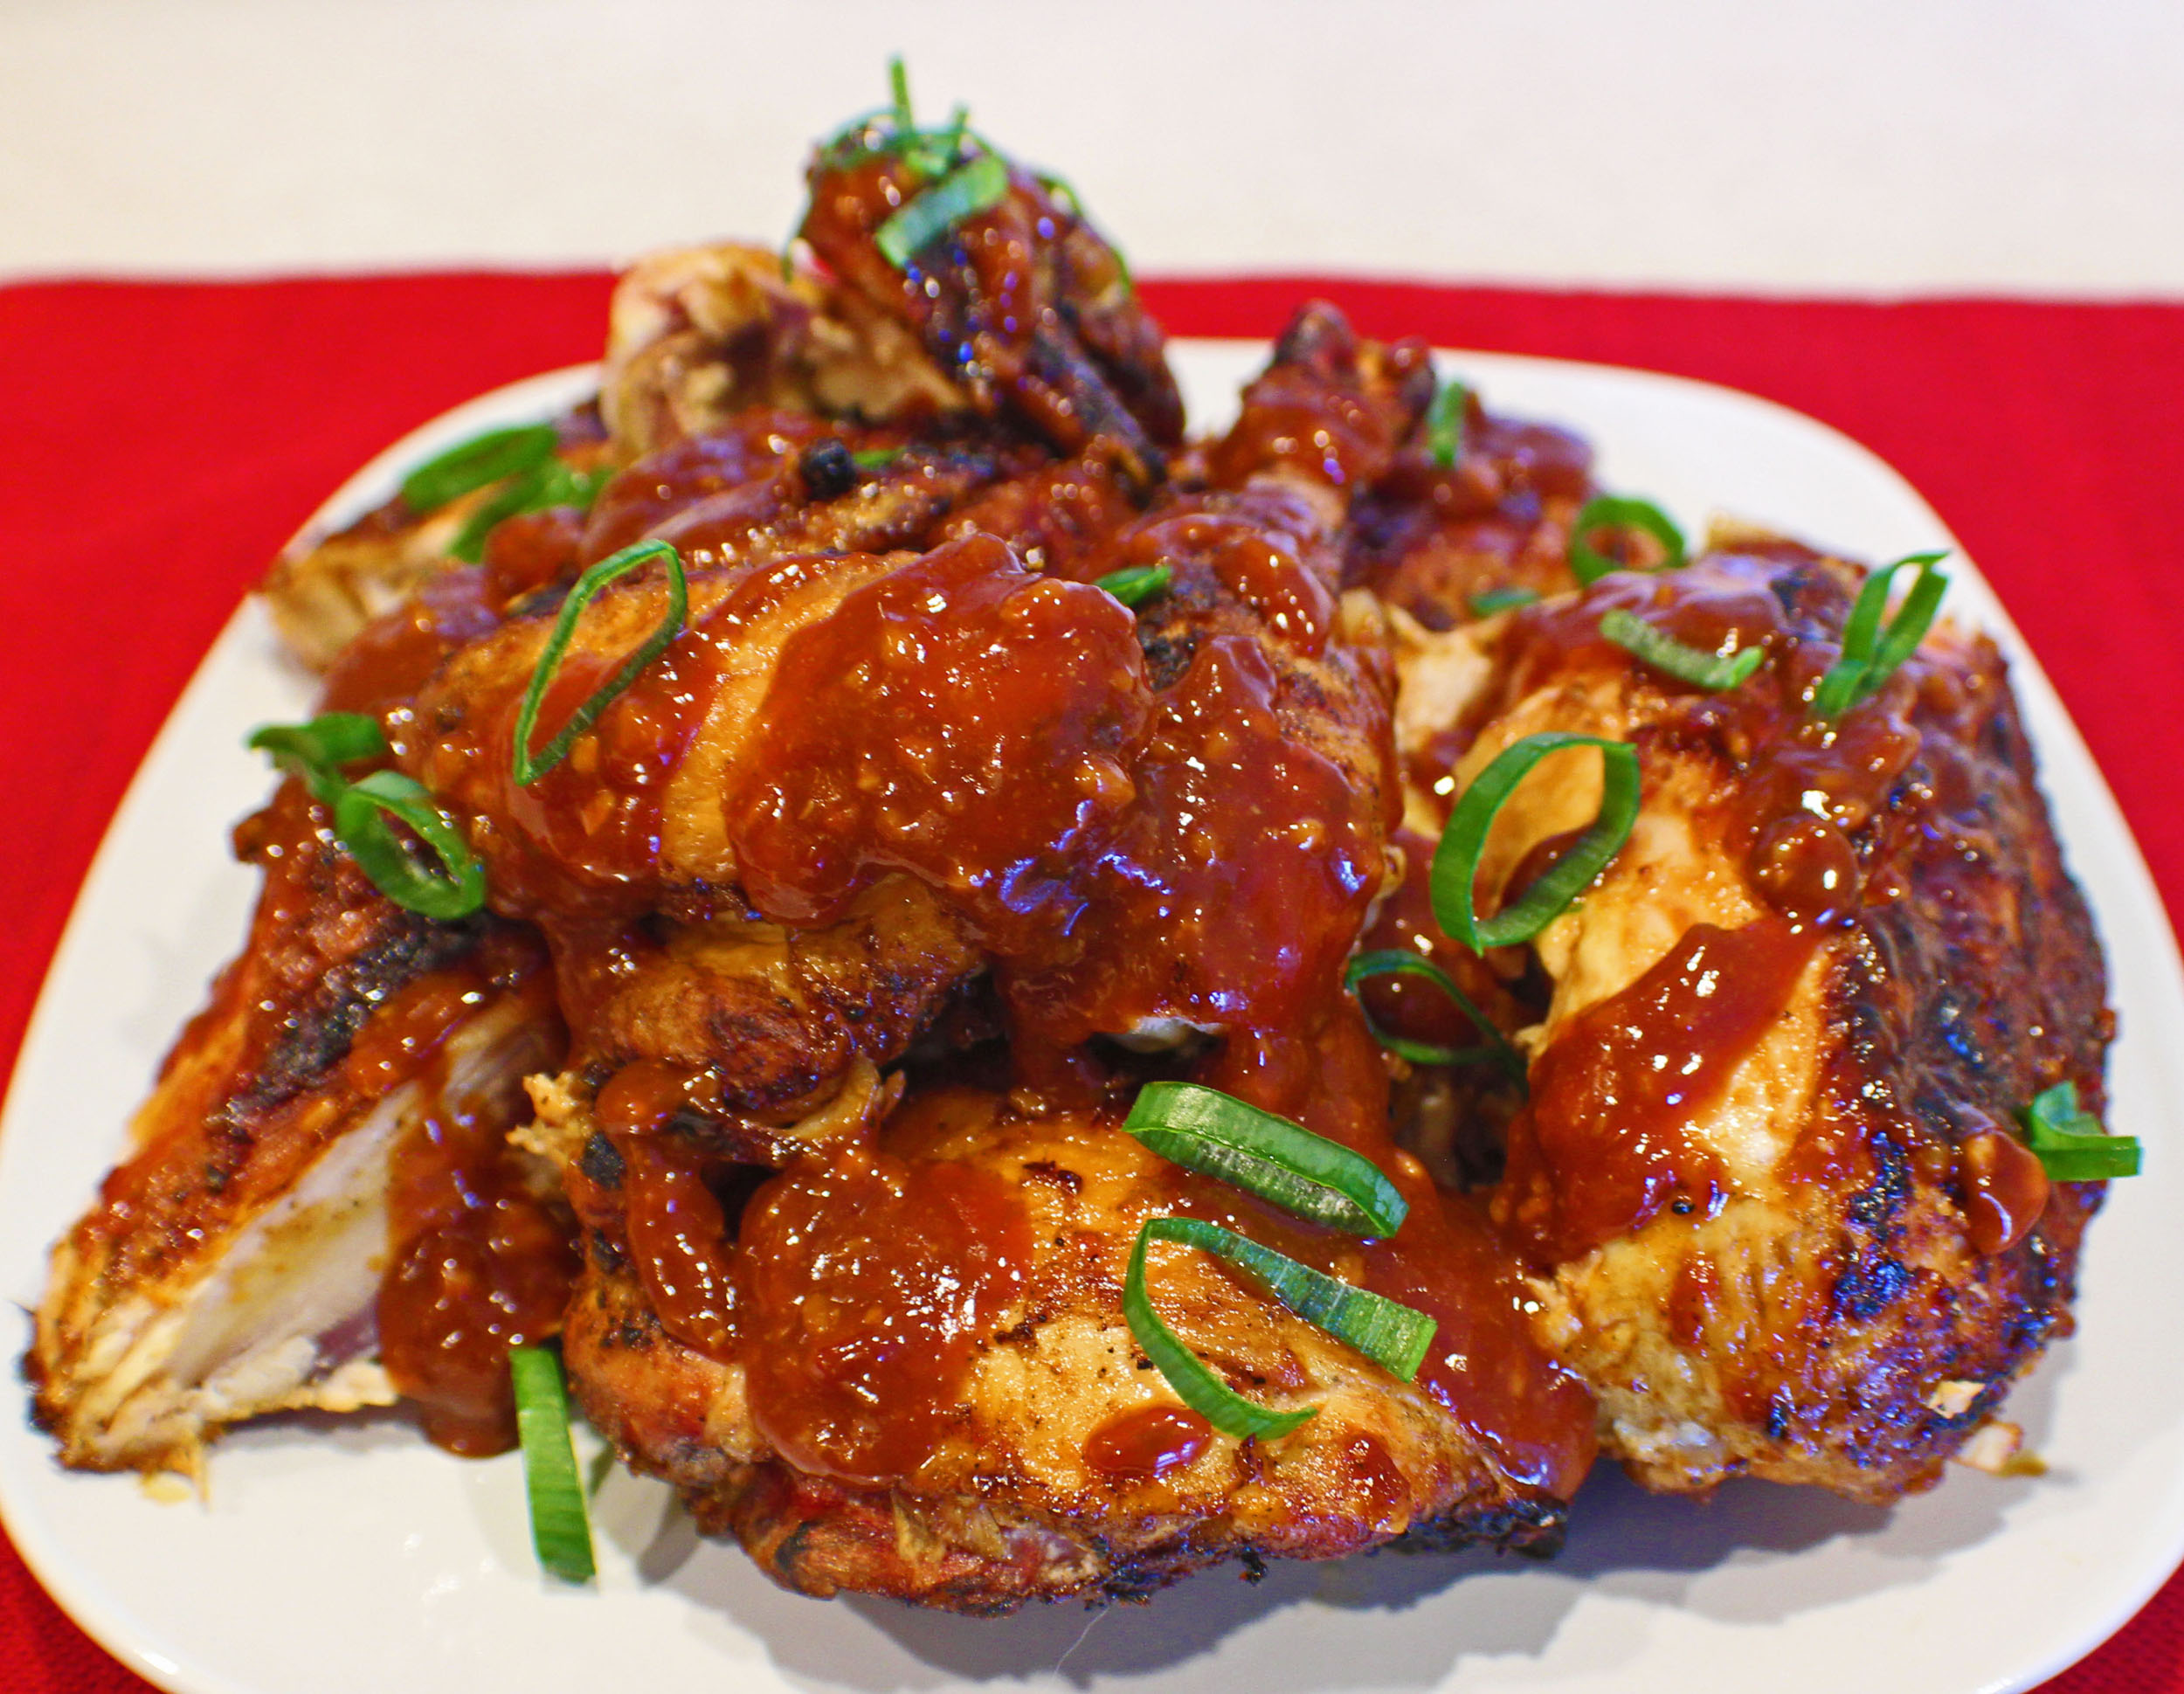
Cut the legs and thighs off, then the wings and drummies. Cut the chicken breasts down the breast bone. I top the pieces with the remaining barbecue sauce and some sliced green onions.

Serve this with Asian Slaw.

Enjoy!

Grilled Spatchcock Chicken with Asian BBQ Sauce

Spatchcocking chicken is an easy way to get a whole chicken to cook faster and keep it moist. Baste it with barbecue sauce for a finishing touch to a great tasting grilled chicken.
Prep Time10 minutes
Cook Time46 minutes
Resting Timee10 minutes
Total Time1 hour 6 minutes
Course: Dinner, Entree, Main Course
Cuisine: American, Asian
Keyword: Asian BBQ Sauce, Chicken, Dinner Ideas, Grilling, Spatchcock Chicken, Whats for Dinner
Servings: 8 servings
Calories: 84kcal
Author: Eating With Deb

Equipment

  • 2-quart sauce pan
  • Kitchen shears
  • Barbeque Grill, Tongs, and Brick Wrapped with Foil
  • Knife and cutting board

Ingredients

Chicken

  • 1 each whole chicken
  • 2 tbsp vegetable oil
  • 1 tsp sea salt
  • 1 tsp black pepper

Asian BBQ Sauce

  • ½ cup ketchup
  • 1 tbsp molasses
  • 1 tbsp soy sauce or wheat-free tamari
  • 2 tbsp mirin or brown rice vinegar
  • 1 tbsp Sambal Oelek
  • 1 tsp sesame oil
  • 11 tbsp ginger
  • 1 tbsp garlic fresh minced
  • 1 tbsp brown sugar

Instructions

For the BBQ Sauce

  • Combine all ingredients in a 2-quart sauce pan and simmer for 5 minutes.

For the Chicken

  • Place chicken breast side down. Using a pair of kitchen shears, cut down each side of the back bone. Remove and save for making chicken stock.
  • Flip chicken over, using the heals of your hands, press down on the breast bone, breasts, and thighs to flatten as much as possible.
  • Using half the oil, salt, and pepper, rub oil all over 1 side and sprinkle with salt and pepper. Flip chicken over and repeat with the remaining oil, salt, and pepper.
  • Set chicken aside at room temperature and start the charcoal, you will need a full chimney.
  • Wrap a large patio brick, or 2 smaller bricks with foil.
  • Once grill is ready, place chicken, meat side down on the grill, directly over the charcoal, and put the foil wrapped brick(s) on top of the chicken. Close the lid and cook for 20 minutes.
  • Remove the brick(s), flip the chicken over, and replace brick(s). Close the lid and cook for another 20 minutes. Check the internal temperature of the chicken is 2 or 3 places on each side to ensure the chicken has reached 160 degrees.
  • Remove the brick and baste one side of the chicken with 1/3 of the BBQ sauce. Close the lid and cook for 3 minutes.
  • Flip the chicken over and baste the other side with 1/3 of the BBQ sauce. Close the lid and cook for 3 minutes.
  • Remove the chicken and let rest for 10 minutes. Cut the chicken off at the joints, removing the wings and drummies together. Remove the thighs and legs together then cut at the joint between the thigh and leg. Cut the breasts in half down the breast bone.
  • Drizzle the remaining BBQ sauce all over the chicken pieces.
  • Enjoy!

Nutrition

Calories: 84kcal | Carbohydrates: 12g | Protein: 1g | Fat: 4g | Saturated Fat: 3g | Cholesterol: 1mg | Sodium: 613mg | Potassium: 145mg | Fiber: 1g | Sugar: 8g | Vitamin A: 91IU | Vitamin C: 2mg | Calcium: 14mg | Iron: 1mg

Chicken Cordon Bleu Fingers

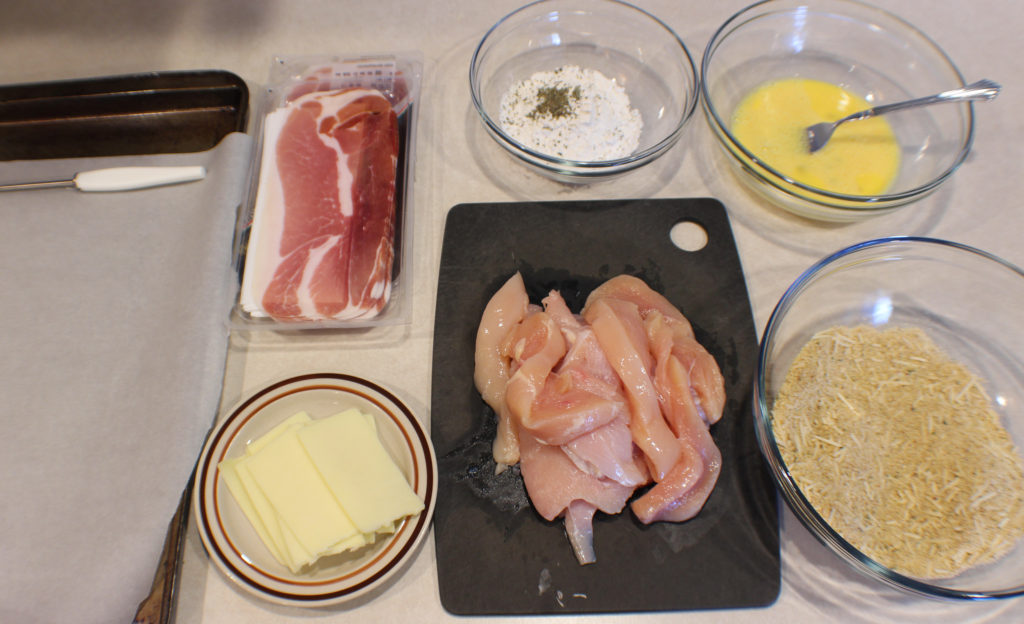
I love Chicken Cordon Bleu, but it is a lot of work to make, so when I do I make a lot and freeze them for future dinners. But I thought there must be an easier way. So I turned it into chicken strips wrapped with cheese and prosciutto and breaded before being cooked in an air fryer. This makes a great appetizer or entree for adults and kids alike!

It’s fairly simple to gather and prep the ingredients. Just slice the chicken into strips, make sure your mozzarella cheese is sliced, combine the flour and seasonings, beat the eggs with water, and combine the parmesan with the bread crumbs. The prosciutto comes sliced and placed between sheets of paper.

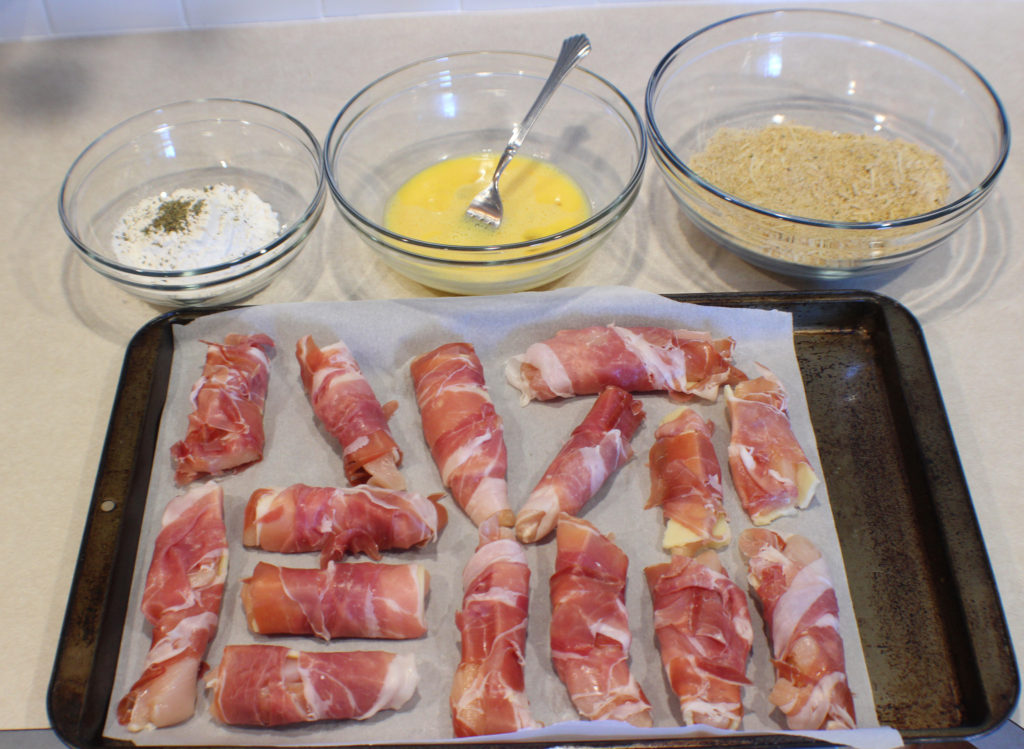
Now place a slice of mozzarella on the a chicken strip, fold around the chicken if it’s too wide or break off some of the cheese. Then take a slice of prosciutto and wrap it around the chicken and mozzarella. Try to cover all of the cheese.

Now we are ready to bread them.

Dip in the flour, then the egg, then the bread crumbs. With each step make sure the chicken strip is fully coated. If I cannot enlist someone else’s help for this process, I use one hand to take the chicken from the flour through the egg and into the breading. Then I use the other hand just for the breading part. Otherwise you start getting a huge build-up of the flour, egg and breading on all of your fingers.

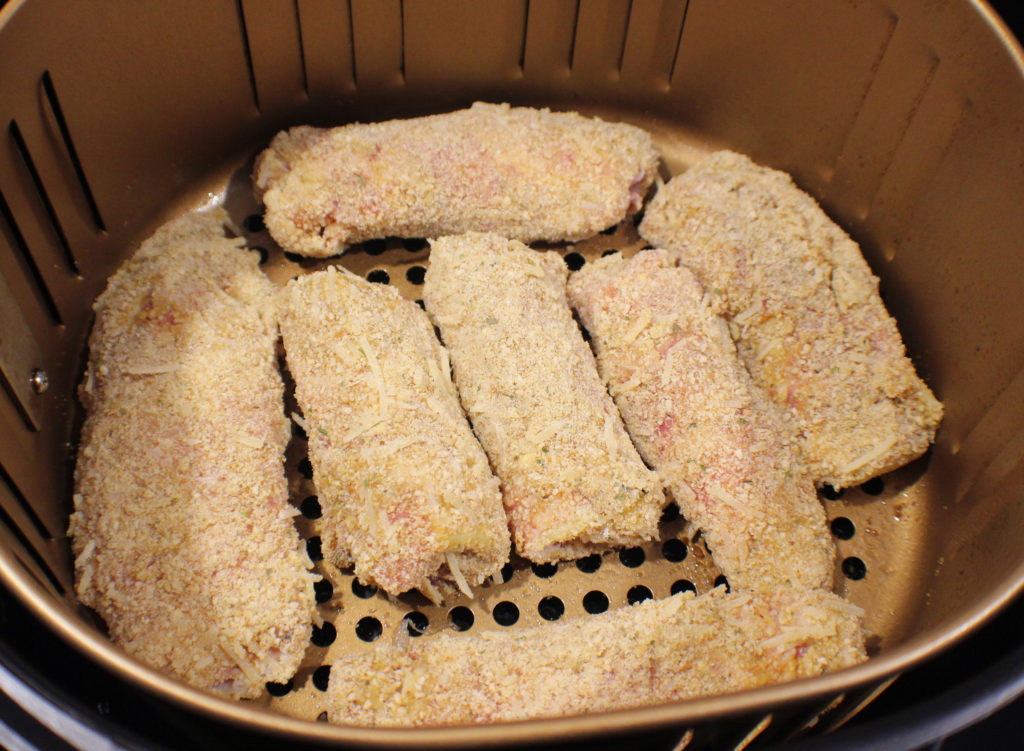
Ok, time to cook. I spray the bottom of my air fryer basket, put the strip in, this will take two batches, and then spray the top of the chicken. I recently learned that you should use a non-aerosol cooking spray for this. I guess with some air fryers, aerosol sprays will eventually chip the coating off of the air fryer basket.

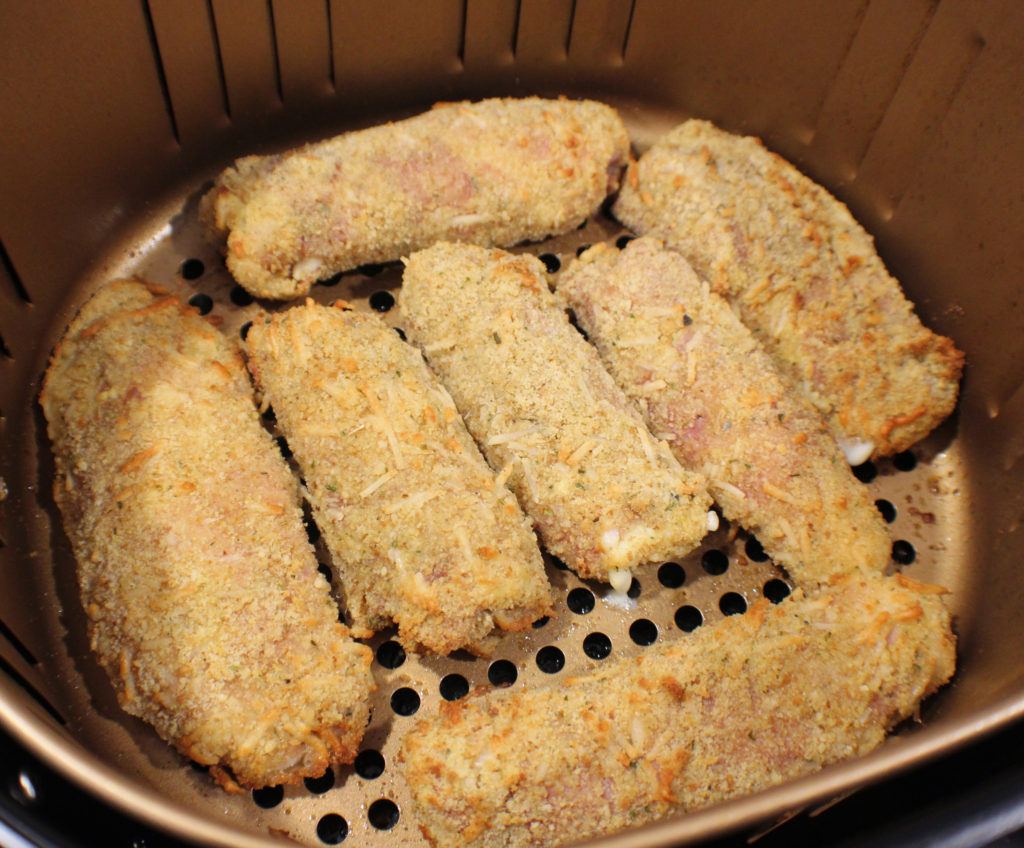
Put the basket in the air fryer, turn on to 360 degrees and cook for 5 minutes. I have a little mozzarella seeping out, but overall I did a good job getting it all coated. Flip the chicken over and cook at 360 degrees for another 5 minutes.

The chicken should be at 165 degrees at this point and is ready to eat. I like dipping them in warm marinara sauce.

Enjoy!

Chicken Cordon Bleu Fingers

Chicken Cordon Bleu is time consuming to make, so I turned it inside out and cooked it in an air fryer for a much quicker method to making one of my favorite chicken dinner recipes.
Prep Time15 minutes
Cook Time10 minutes
Course: Appetizer, Dinner
Cuisine: American, French
Keyword: Air Fryer, Chicken, Chicken Cordon Bleu
Servings: 4 people
Calories: 879kcal
Author: Eating With Deb

Equipment

  • Air Fryer
  • Knife and cutting board
  • 3 Medium to Large Bowls

Ingredients

  • 2 each chicken breasts
  • 24 slices mozzarella cheese
  • 12 slices prosciutto

Flour Mixture

  • ½ cup flour
  • 1 tsp Italian seasoning
  • 1 pinch sea salt
  • 1 pinch black pepper

Egg Wash

  • 2 each eggs
  • 2 tbsp water

Breading

  • 1 ½ cup bread crumbs Italian seasoned
  • ½ cup Parmesan cheese shredded

Instructions

  • Cut chicken breasts into strips, about 6 strips per breast.
  • Mix flour mixture.
  • Beat eggs and water.
  • Combine bread crumbs and cheese.
  • Put a slice of mozzarella cheese (break slices in ½ if they are too wide) on each side of the chicken strip and wrap with prosciutto. Set aside and finish the rest.
  • Dredge in flour mixture, eggs, and then bread crumbs. Set aside and finish the rest.
  • Spray bottom of air fryer basket with a non-aerosol cooking oil spray and place chicken strips in basket. Spray the top of the chicken strips.
  • Turn on air fryer to 360 degrees and cook for 5 minutes. Flip over, cook at 360 degrees for 5 minutes. Check temperature to see if the internal temp of the chicken has reached 165 degrees.
  • Serve with warm marinara as a dipping sauce.
  • Enjoy!

Notes

You may need a few more or fewer slices of mozzarella cheese or prosciutto depending on how you sliced your chicken. Just be sure to keep them separate so as to not cross-contaminate any leftovers with raw chicken. Better yet, if someone else is around, get a helper.
If the chicken slices are too long to wrap the prosciutto completely around it, cut them in half. It's important to seal the cheese under the prosciutto and breading to prevent cheese from seeping out during cooking.

Nutrition

Serving: 3slices | Calories: 879kcal | Carbohydrates: 46g | Protein: 52g | Fat: 53g | Saturated Fat: 28g | Trans Fat: 1g | Cholesterol: 161mg | Sodium: 1733mg | Potassium: 293mg | Fiber: 2g | Sugar: 4g | Vitamin A: 1267IU | Vitamin C: 1mg | Calcium: 1093mg | Iron: 4mg

Tarragon Dijon Penne (with Chicken and Veggies)

If you’ve never tried tarragon, here is your chance. For spices I rarely use I buy in bulk at my local grocery store, that way I can buy the amount I need. Most grocery stores have a bulk spice section now, so I don’t clutter up my already cluttered spice cabinet and rack and I have fresh spices when I need them.

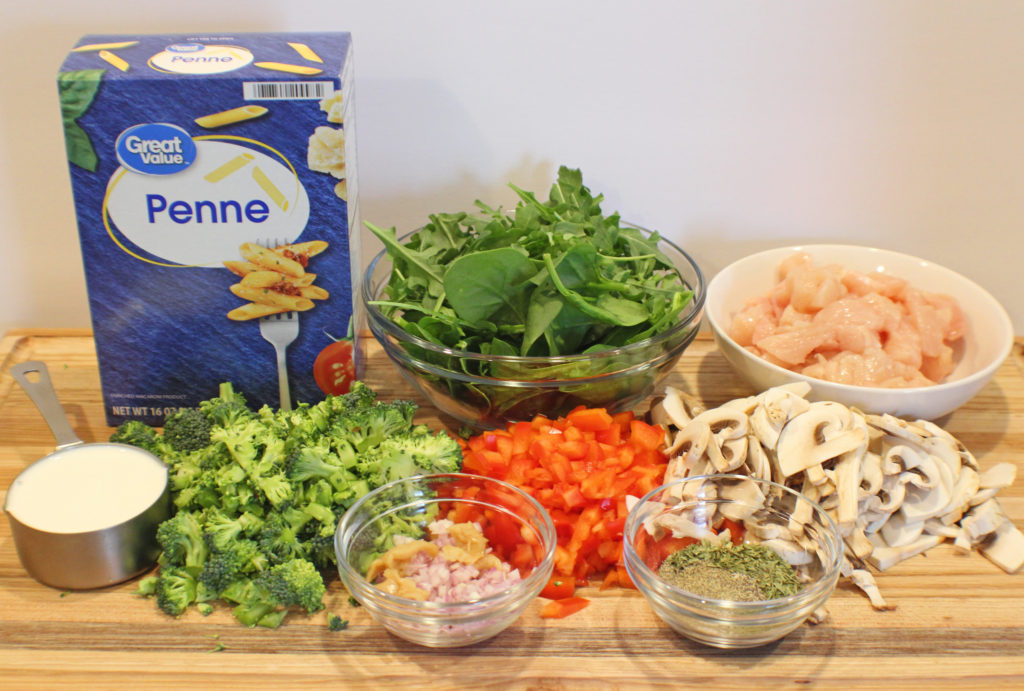
Cooking time is fairly fast once this gets started so you will want all your ingredients gathered and prepped before you start.

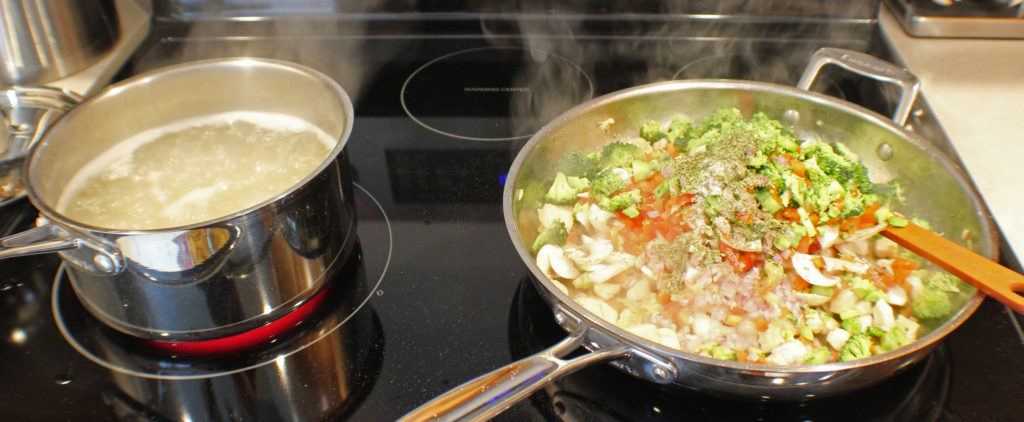
Then, bring a large pot of water to a boil, add a lot of sea salt and the penne pasta. You will need to cook pasta to al dente which will take about 12 to 15 minutes (check the package instructions).

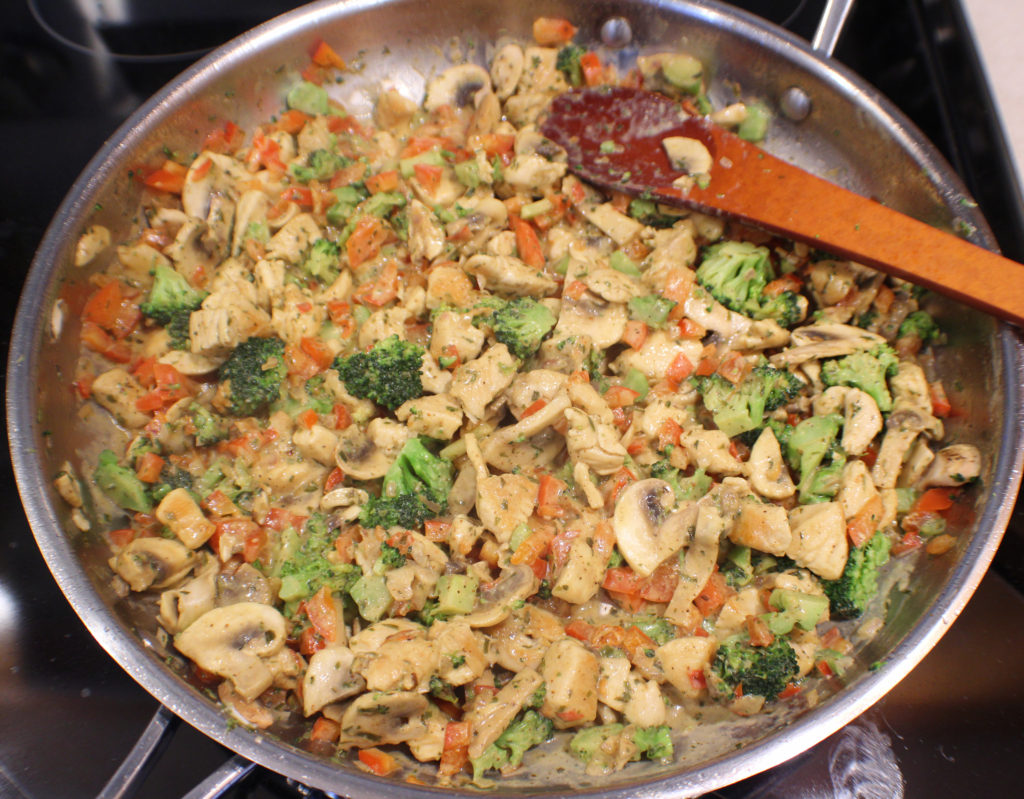
Once the pasta is in the water, heat up a large saute pan, add the oil and chicken. Saute the chicken until brown. Then add the veggies, except the spinach, shallots, garlic, and dry seasonings.

Stir and cook for about 5 minutes.

Then stir in the dijon and half and half. By now your pasta should be ready to be drained.

Drain your pasta, do not rinse, and reserve 1/2 cup of pasta water, you need it to bring your sauce together and make it more saucy.

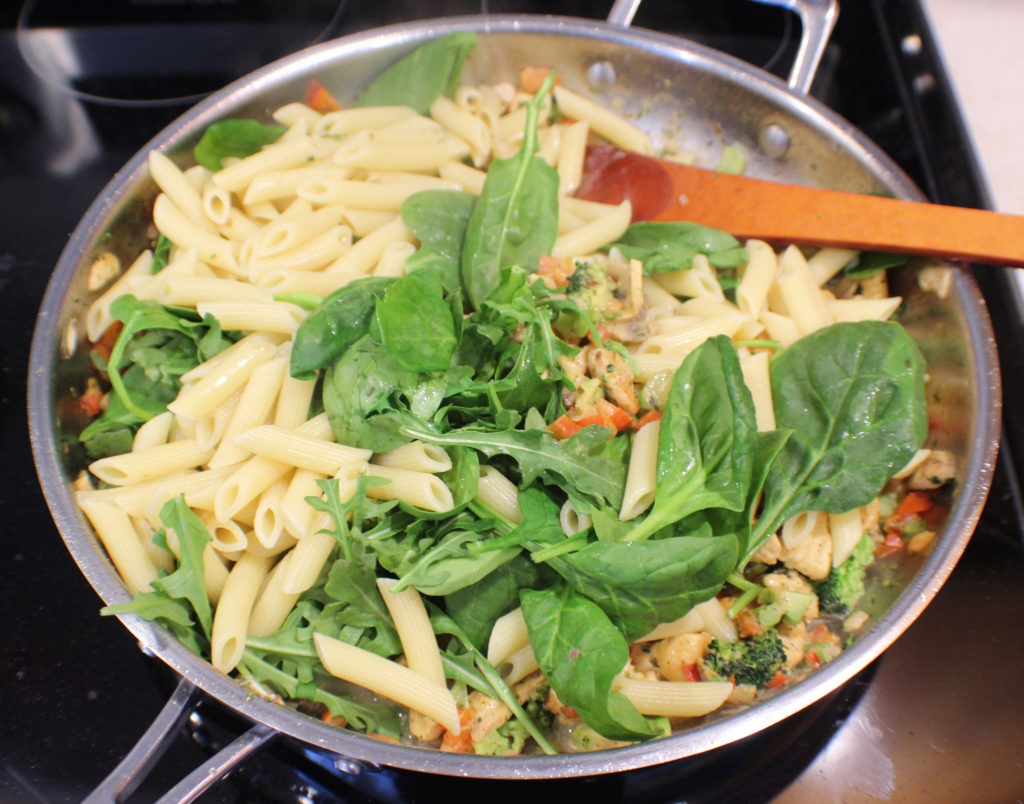
Add the pasta and spinach (I used some arugula this time also) to your pan and give it a good stir. Stir in the pasta water until you are happy with the consistency and sauce.

Cook just until the spinach is wilted.

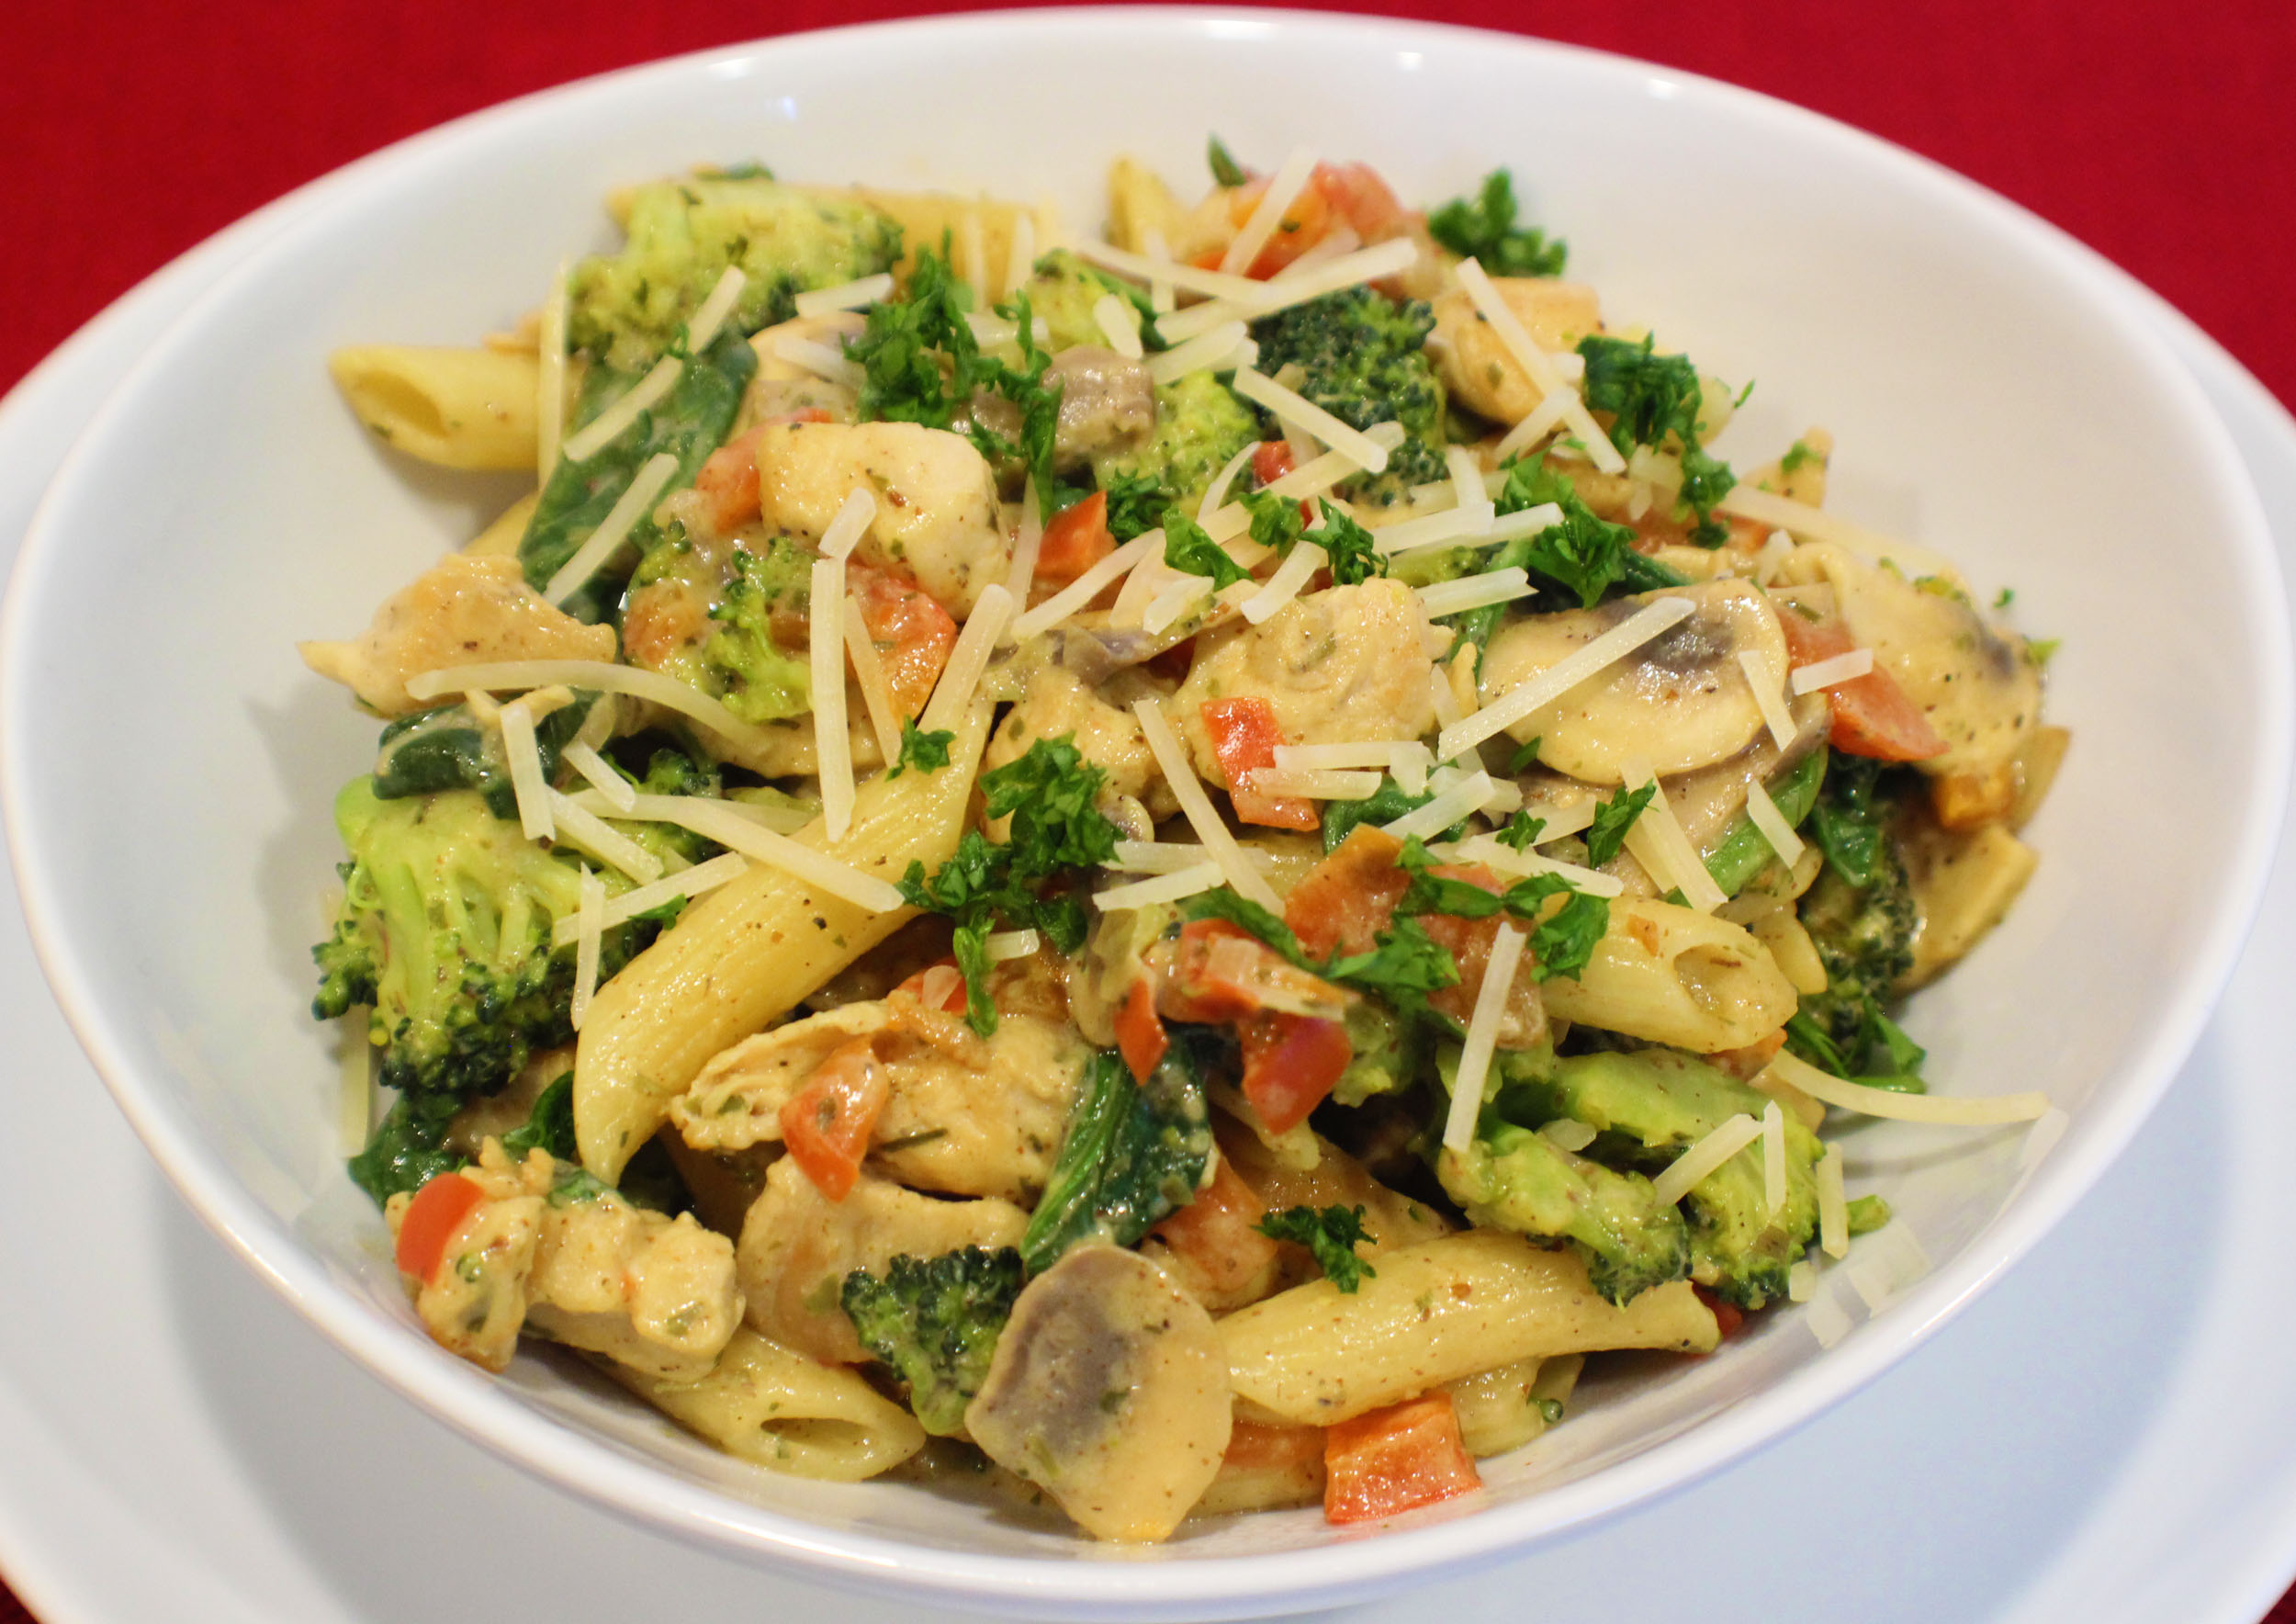
I like to top with with some shredded parmesan cheese.

Enjoy!

Tarragon Dijon Penne (with Chicken and Veggies)

This one bowl dinner is sure to be a hit with your family. You can keep it vegetarian by replacing the chicken with some chopped portabello mushrooms or seitan. Go dairy-free using a milk alternative, or even gluten-free with one of the good gluten-free pastas that are on the market. No need to stick to penne, bowtie pasta works well with this dish too.
Prep Time20 minutes
Cook Time20 minutes
Course: Dinner
Cuisine: American
Keyword: Chicken, Dijon, Pasta
Servings: 8 cups
Calories: 214kcal
Author: Eating With Deb

Equipment

  • Large stainless steel saute pan
  • Large Sauce Pan
  • Cutting board and knife

Ingredients

  • ½ pound penne pasta
  • 2 tbsp olive oil
  • 1/2 pound chicken breast cut into bite-size pieces
  • 1 each red bell pepper diced
  • 2 cups mushrooms sliced
  • 2 cups broccoli florets and stems, chopped
  • 3 handfuls spinach
  • 1 tbsp garlic fresh, minced
  • 2 tbsp shallots minced
  • 1 tbsp tarragon dry
  • ¾ tsp sea salt
  • ½ tsp black pepper
  • ½ cup half and half room temperature
  • 3 tbsp Dijon mustard
  • ½ cup reserved pasta water

Instructions

  • Gather and prep all ingredients. Measure half and half and leave out at room temperature.
  • Bring a large pot of water to a boil, add sea salt and penne. Cook according to package directions until al dente (about 12 to 15 minutes).
  • Once pasta is in the water, heat a large saute pan, add oil and chicken. Cook until the chicken is golden brown.
  • Add veggies (except spinach), shallots, garlic, and dry seasonings. Stir and cook for about 5 minutes. Add dijon and half and half.
  • By now the pasta should be ready. Remove ½ cup of the pasta water, drain and add pasta, spinach, and pasta water to the chicken mixture. Stir until the spinach is melted.
  • Top with some parmesan cheese.
  • Enjoy!

Nutrition

Serving: 1cup | Calories: 214kcal | Carbohydrates: 26g | Protein: 12g | Fat: 7g | Saturated Fat: 2g | Cholesterol: 24mg | Sodium: 341mg | Potassium: 441mg | Fiber: 2g | Sugar: 2g | Vitamin A: 1295IU | Vitamin C: 26mg | Calcium: 60mg | Iron: 1mg