Homemade Butter

Butter on Popovers

Making butter has always intrigued me but also seemed intimidating.  When I first started doing research on the process it didn’t help me get over the fear.  Some said to put carrots in the heavy cream and let it soak for a bit so it would turn yellow when whipped. I also saw the “put it in a jar and shake it” method.  That takes a lot of time and arm, wrist, and hand strength – a method I would recommend for a group of people, or have a mixer ready to go, because you will probably give up before reaching the butter stage.

When I finally tried it, it wasn’t daunting at all.  In fact, it is very easy and fun and a great project to do with children.  I’ve also found that depending on what area of the country you live in, homemade butter can be cheaper than buying a mid-range priced butter and tastes oh, so much better! 

So here is an easy to follow and make step-by-step process of making your own butter:

Whip Cream Stage

Start with heavy whipping cream (1 to 2 pints) in a mixing bowl, food processor, or blender.  Be sure to not over-fill any of the containers as the cream will splatter or ooze out.  I use my stand mixer and if using 2 pints I start out on the first setting until it starts to thicken.  As it gets thicker, I turn up the mixer.

Eventually you will get to the whipped cream stage, a very good stage, but not quite what we are after, so keep mixing.

Butter almost ready to drain

Finally you get to the point where the solids start to separate from the liquid. Almost there. Keep mixing until you get full separation.

And now it is ready to drain.

Strain out the milk into a bowl and save. It is quite tasty and good in coffee, used in baking, or I’ve used it to marinate chicken before breading and frying.

Rinsing the Butter

Now it’s time to rinse. This is an important step as it helps remove any “milk” that is left which will help preserve the butter longer.

Add about 1 cup or so of very cold water and squeeze the butter in the water. Drain and repeat several times until the water is clear after squeezing through the butter.

Once the water runs clear, drain and squeeze out any remaining water. You can use a cheese cloth, but I found the butter sticks to it and you loose some of the butter you worked so hard to make.

You could certainly use kitchen gloves for this step. Your hands will end up very oily when doing this.

Homemade Butter

Put the butter in a dry bowl or on a cutting board and using the back of a spoon or your hands that are already oily, mix in your salt. You can add as much or as little as you desire. If you want to experiment a little, add a pinch at a time and taste so you don’t over salt the butter.

You’ll notice that the butter turned yellow all on its own without adding any coloring.

Roll the butter in wax paper or put it in a container that seals and keep it in the refrigerator or freezer.

Try it on homemade Cornbread or Garlic Cheddar Dinner Rolls.

Enjoy!

Homemade Butter

Homemade butter has a wonderful flavor and is a very fun project to do by yourself or involve your kids.
Prep Time20 minutes
Total Time20 minutes
Keyword: Butter, Homemade Butter
Servings: 16 tablespoons
Calories: 102kcal
Author: Eating With Deb

Equipment

  • Stand Mixer, beaters, blender, or food processor
  • Fine mesh sieve
  • Bowl

Ingredients

  • 1 pint heavy whipping cream
  • 1/4 tsp sea salt
  • cold tap water

Instructions

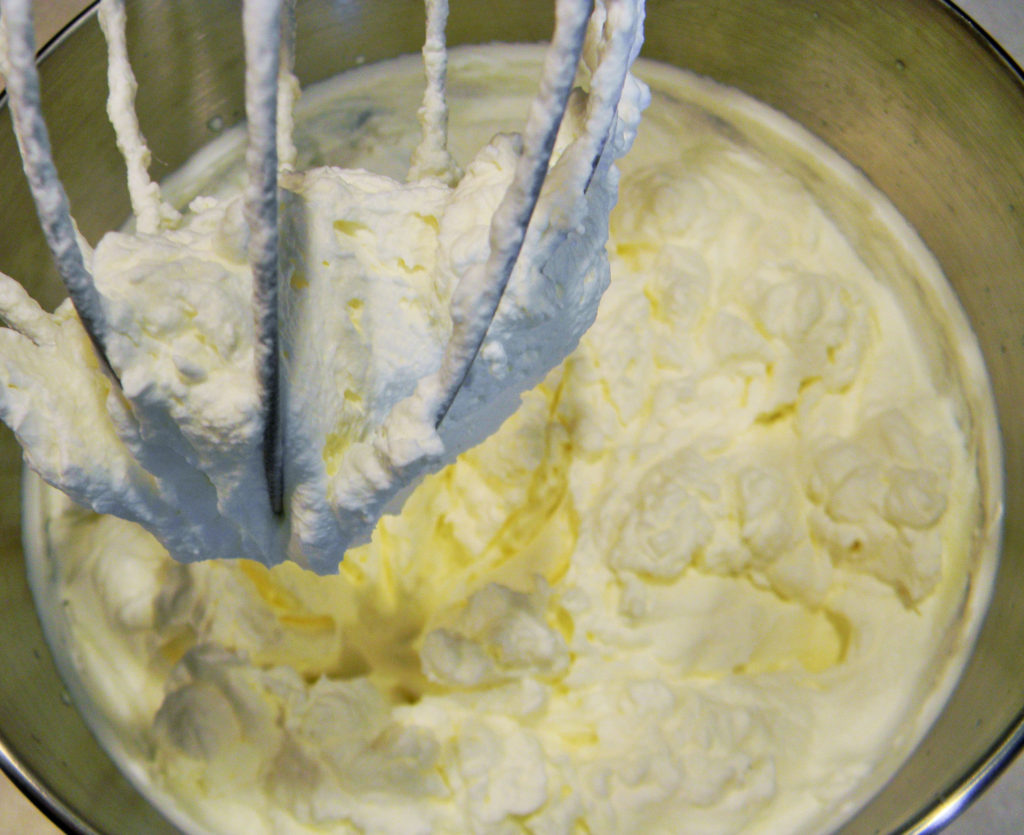
  • Put the cream in the mixer bowl, blender, or food processor. Be sure not to fill past the liquid line.
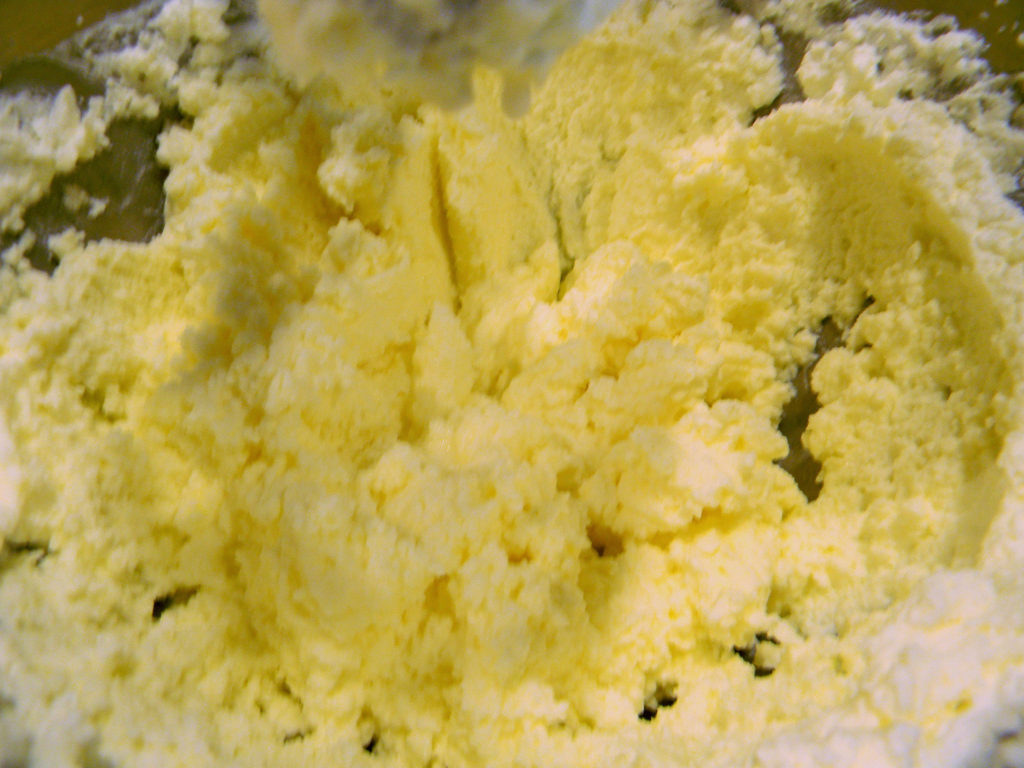
  • Starting on a low speed, start mixing the cream. Gradually turn up the speed until the solids completely separate from the liquids.
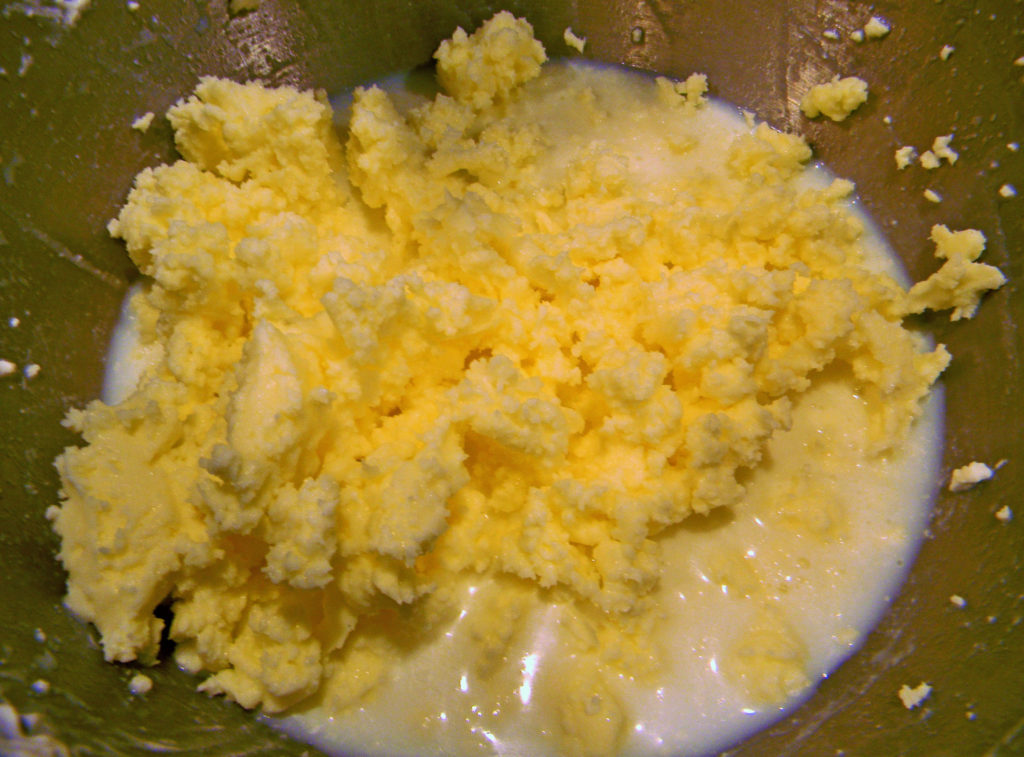
  • Drain the solids from the liquid and reserve the milk.
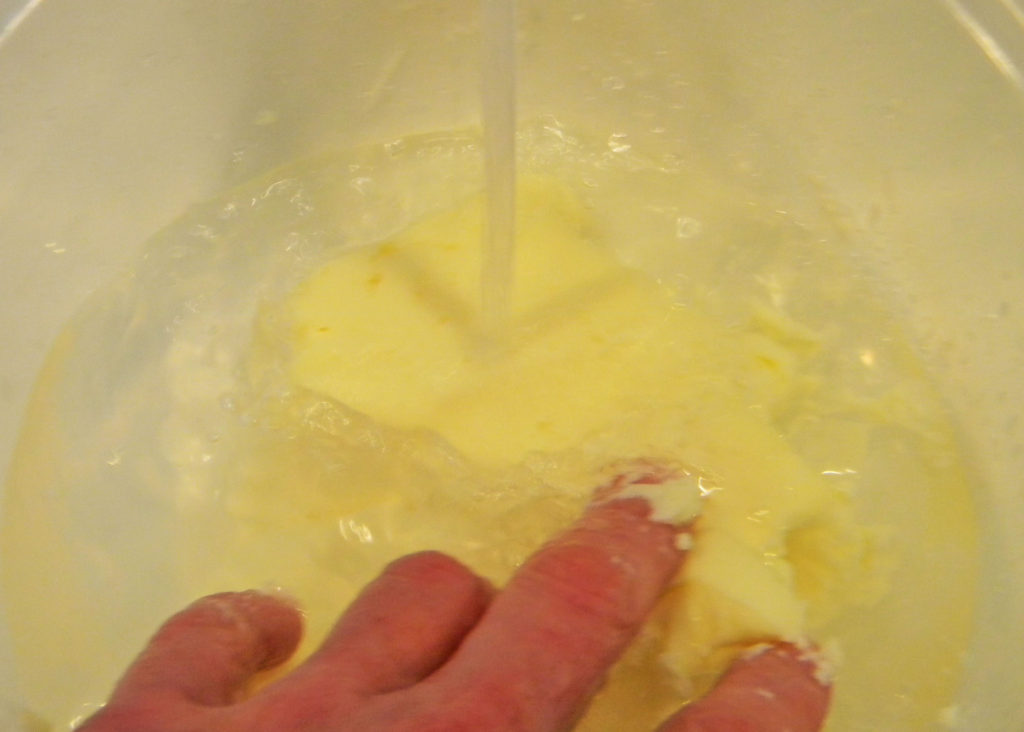
  • Put the solids, or butter in a bowl and add 1 cup or so of cold water.
  • Squeeze the butter so the water goes through it.  Drain and repeat until the water runs clear.
  • Drain one last time and mix in the salt.
  • Roll the butter in wax paper or put in a food container and store in the refrigerator or freezer. 

Notes

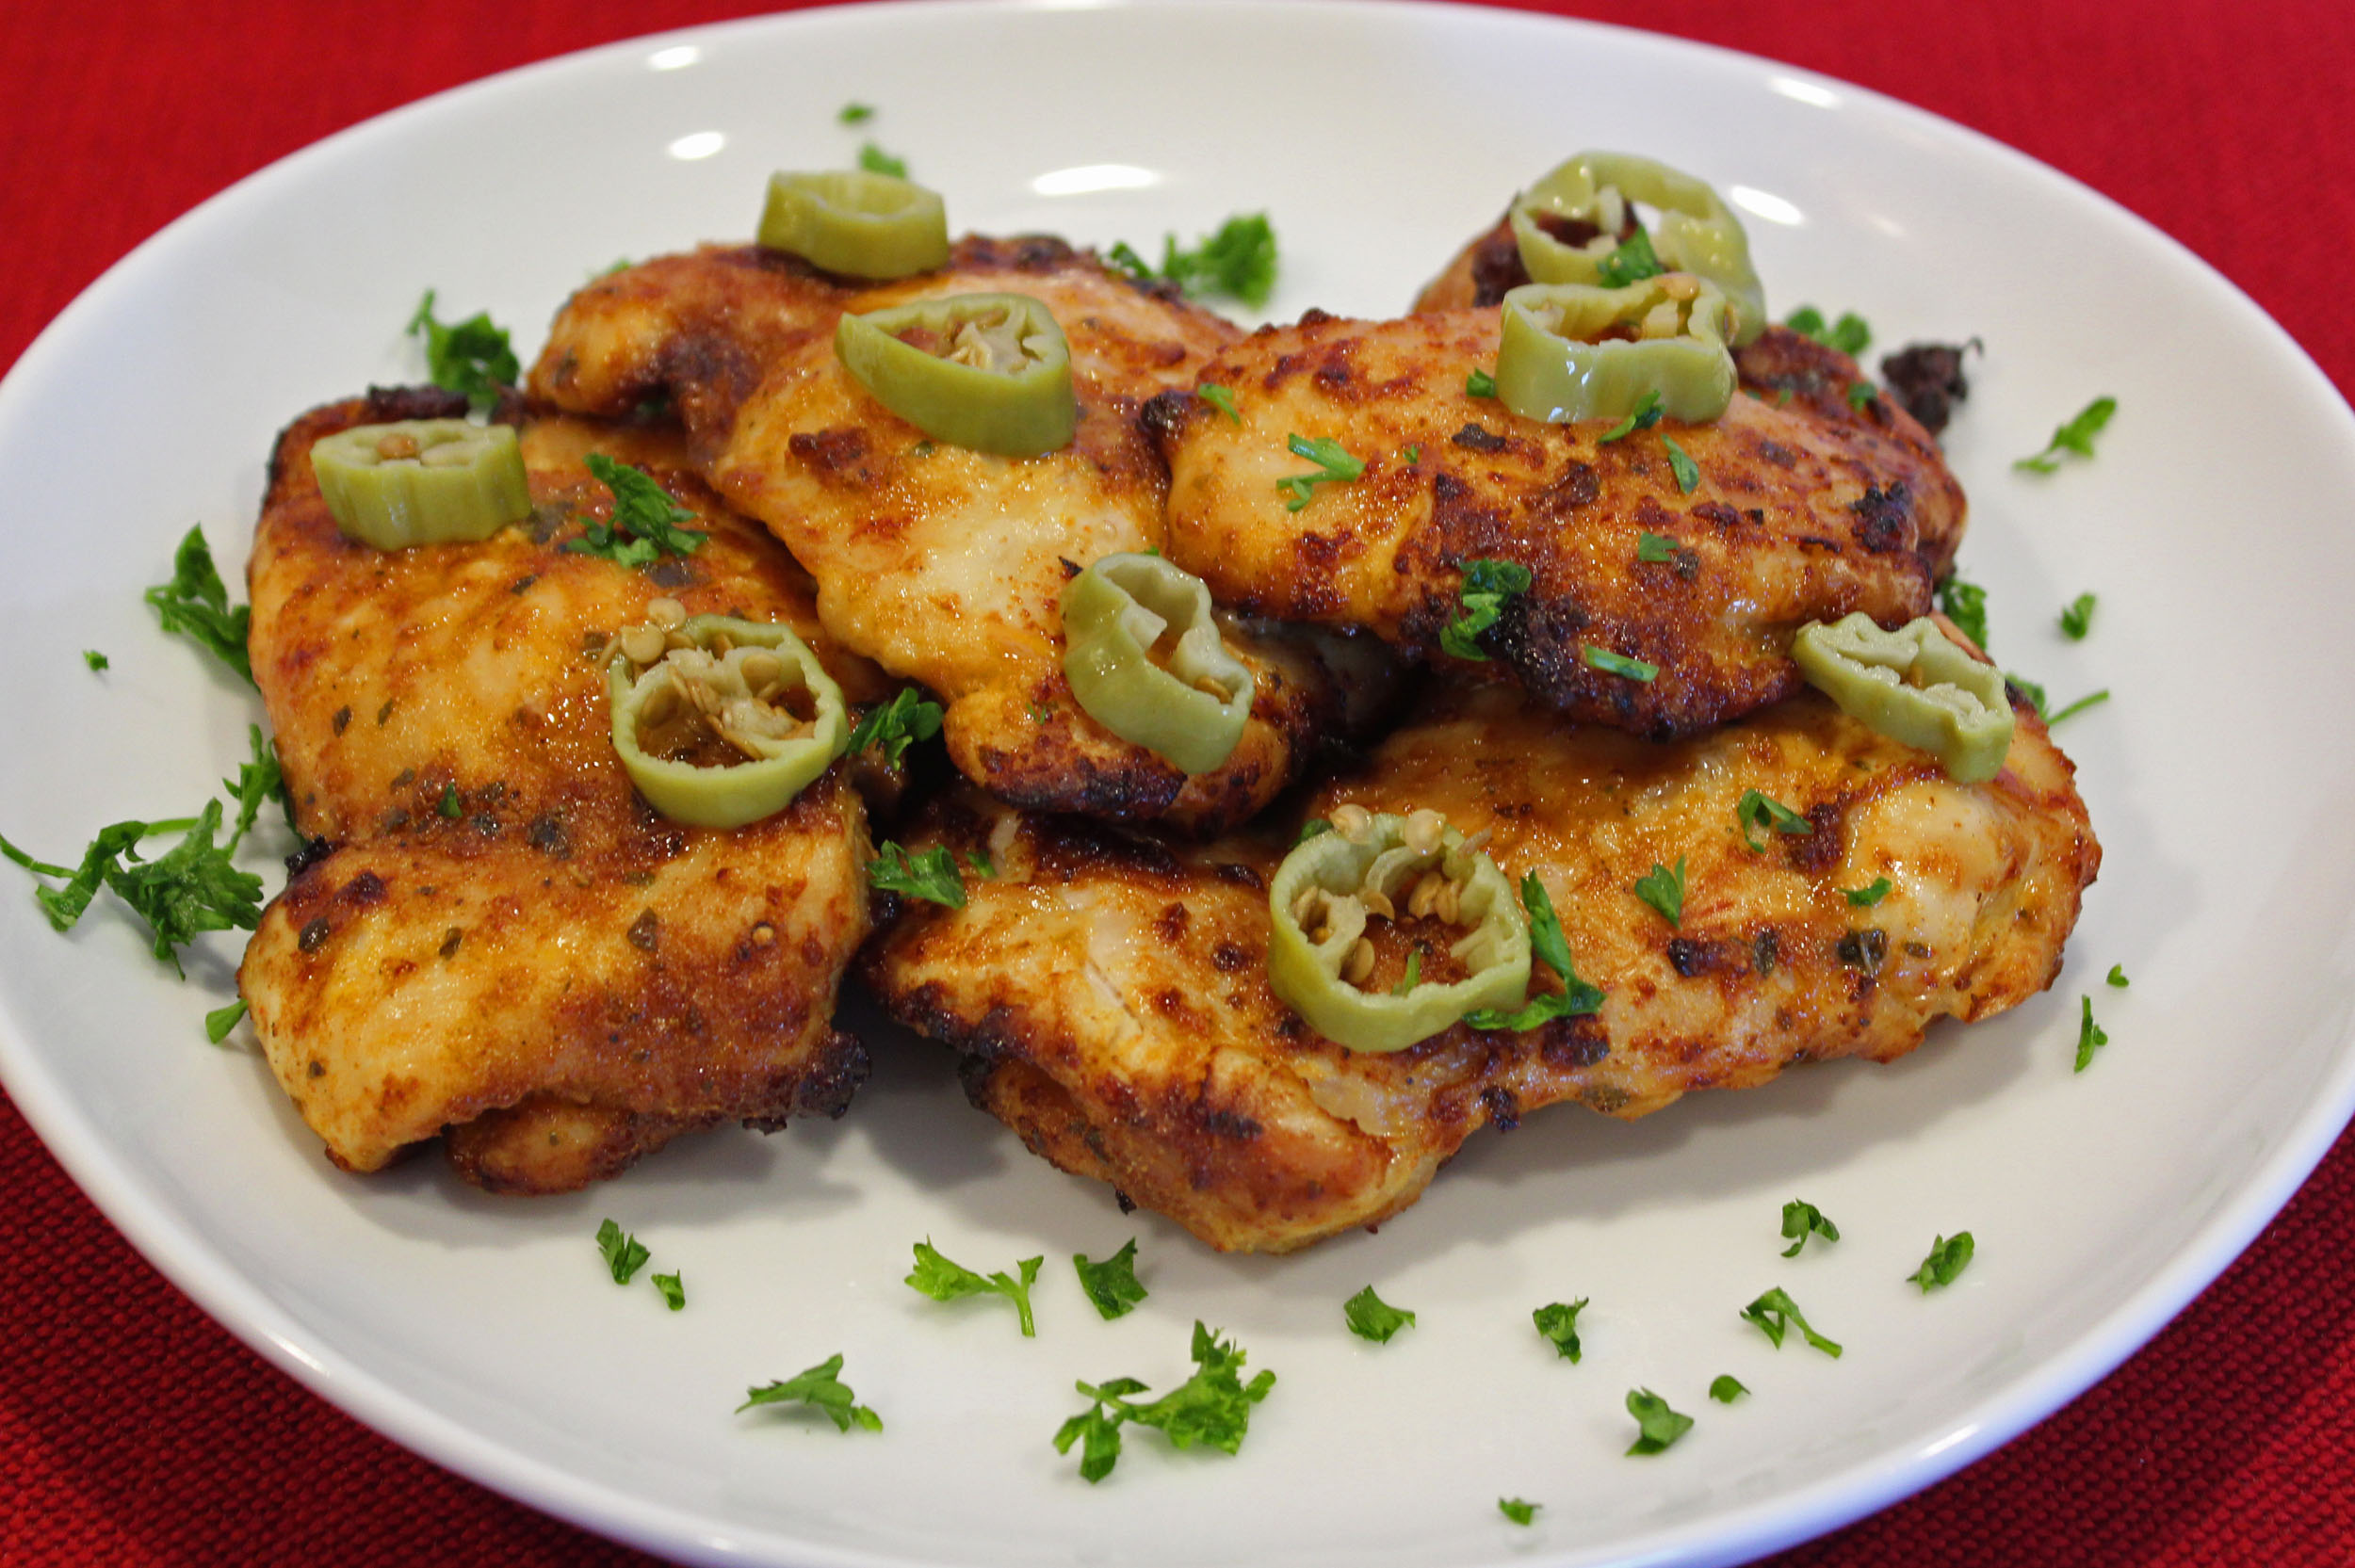
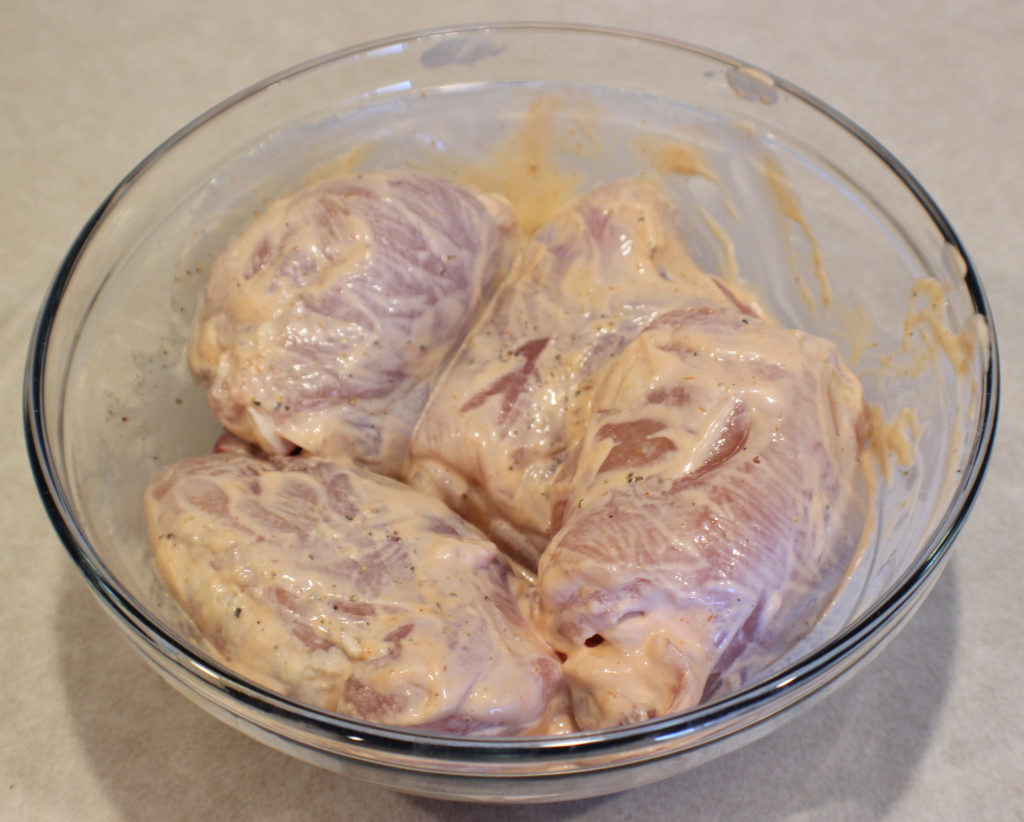
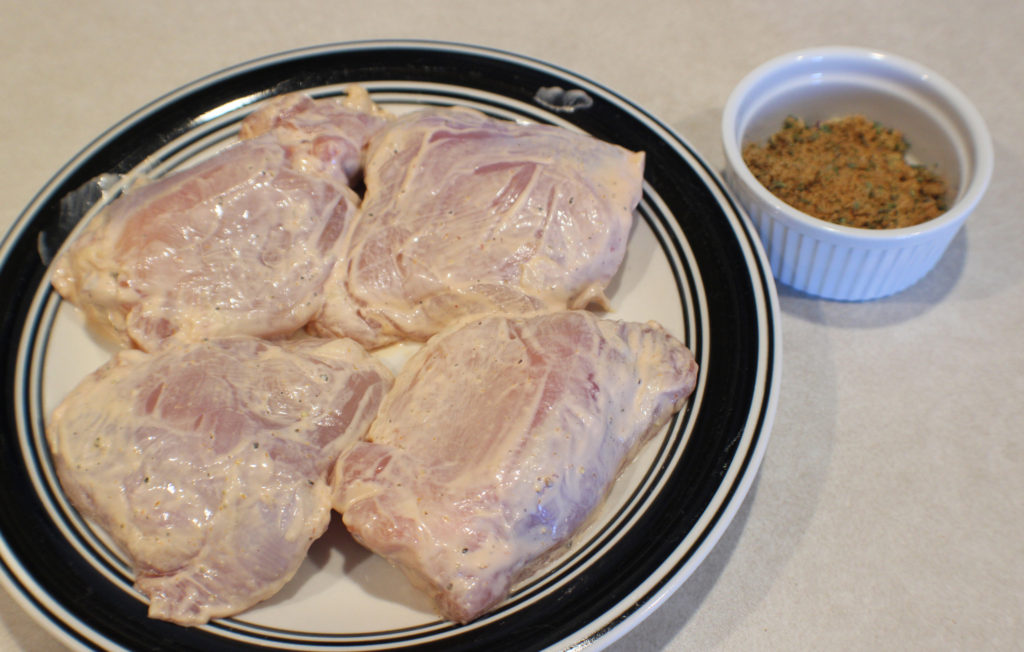
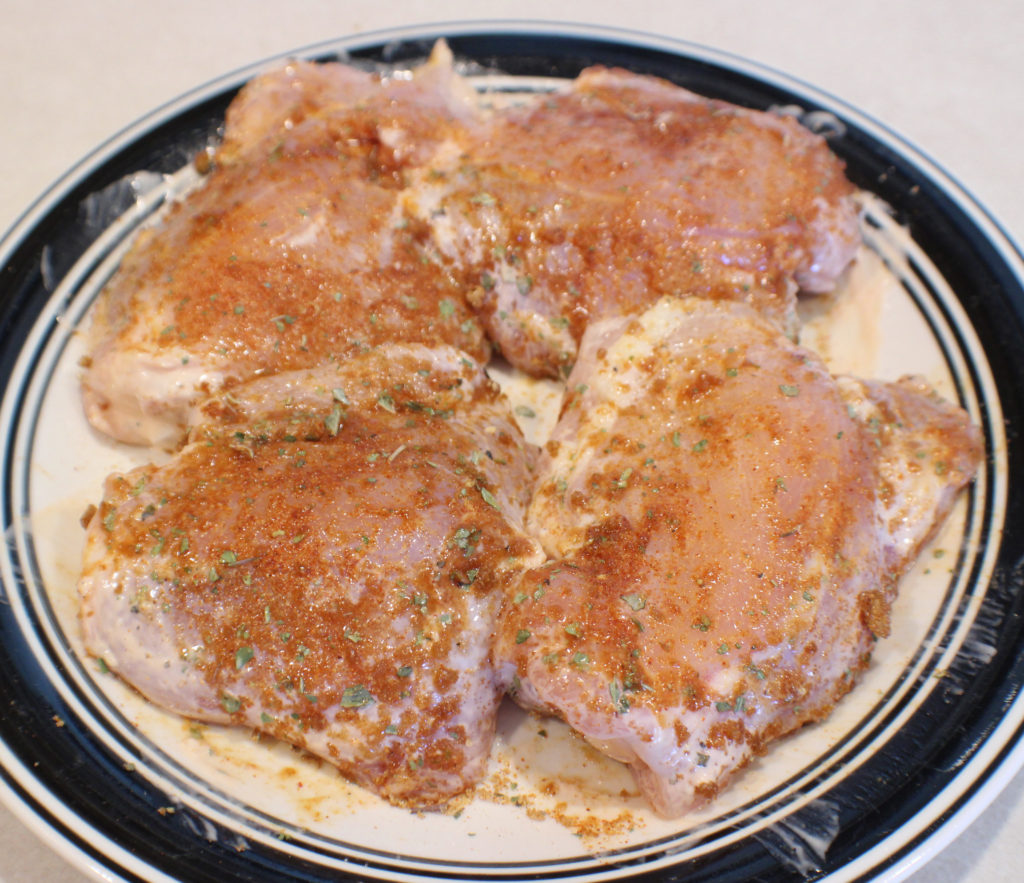
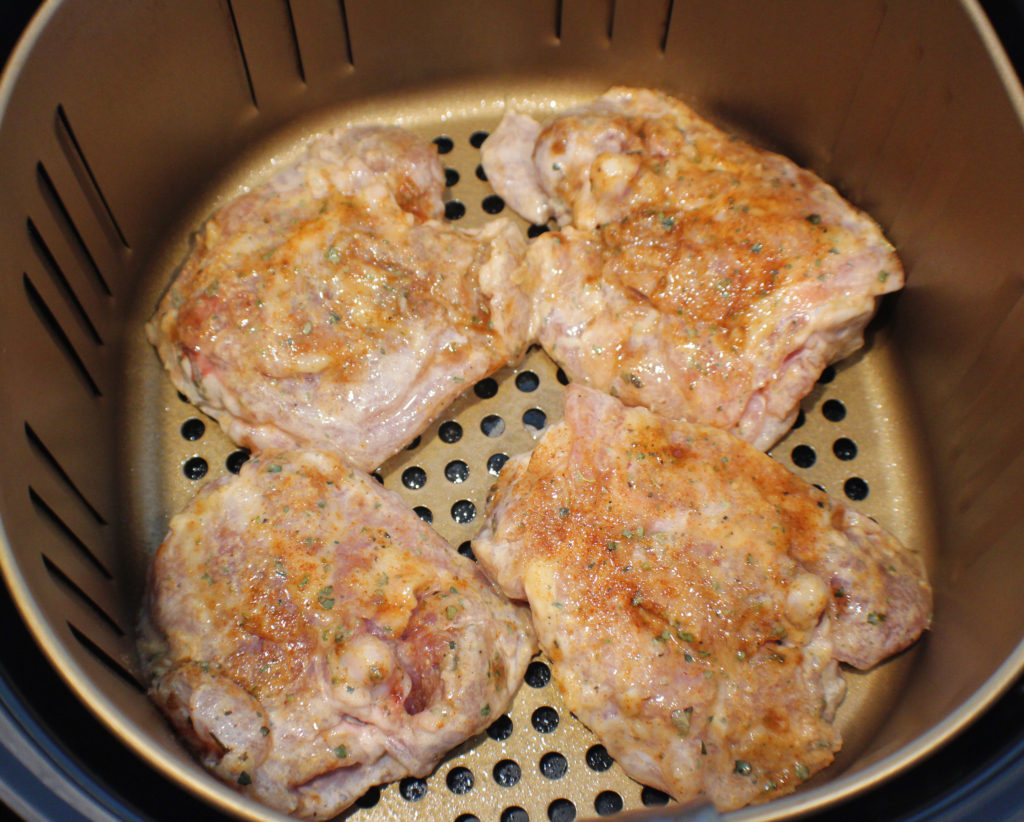
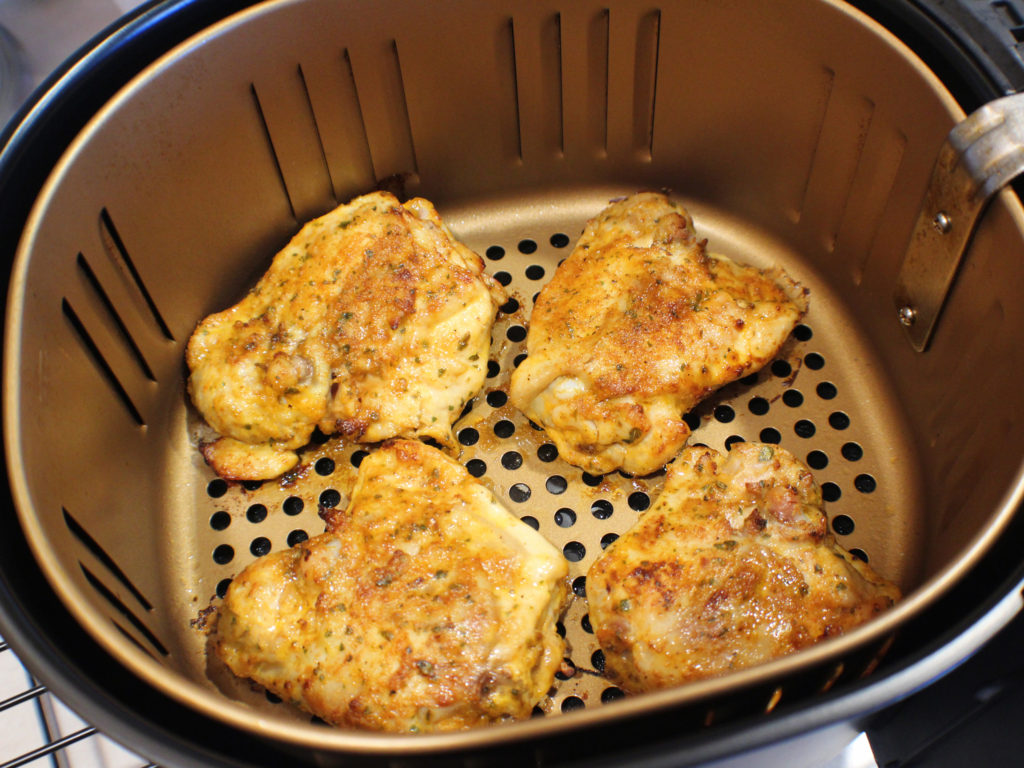
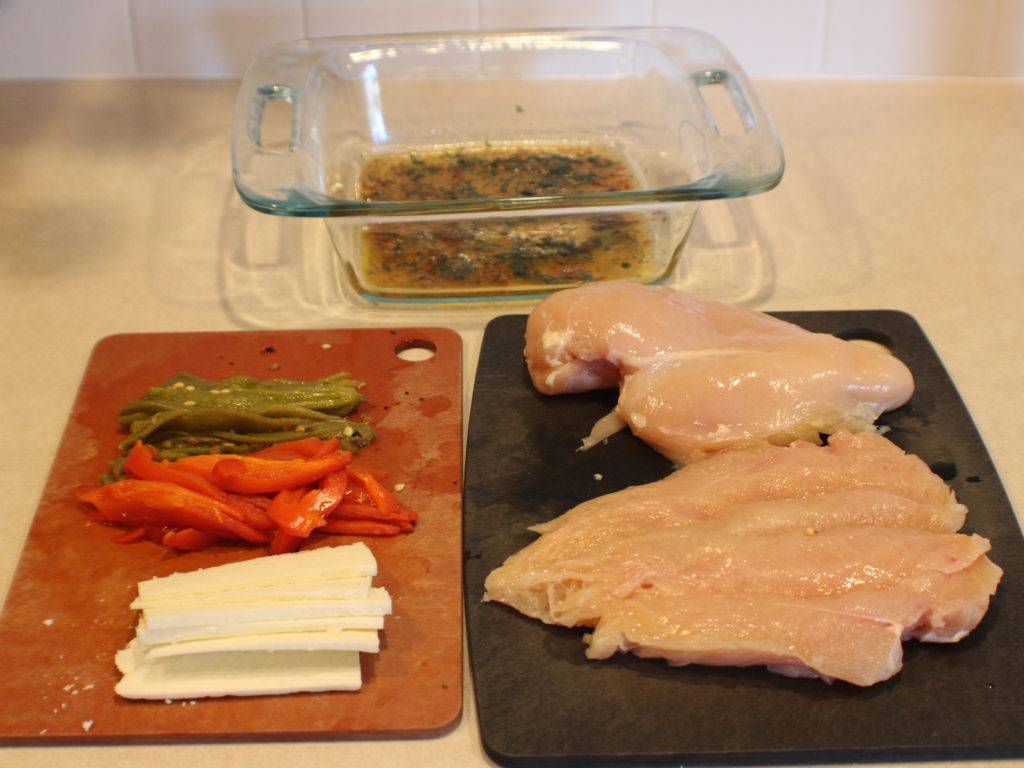
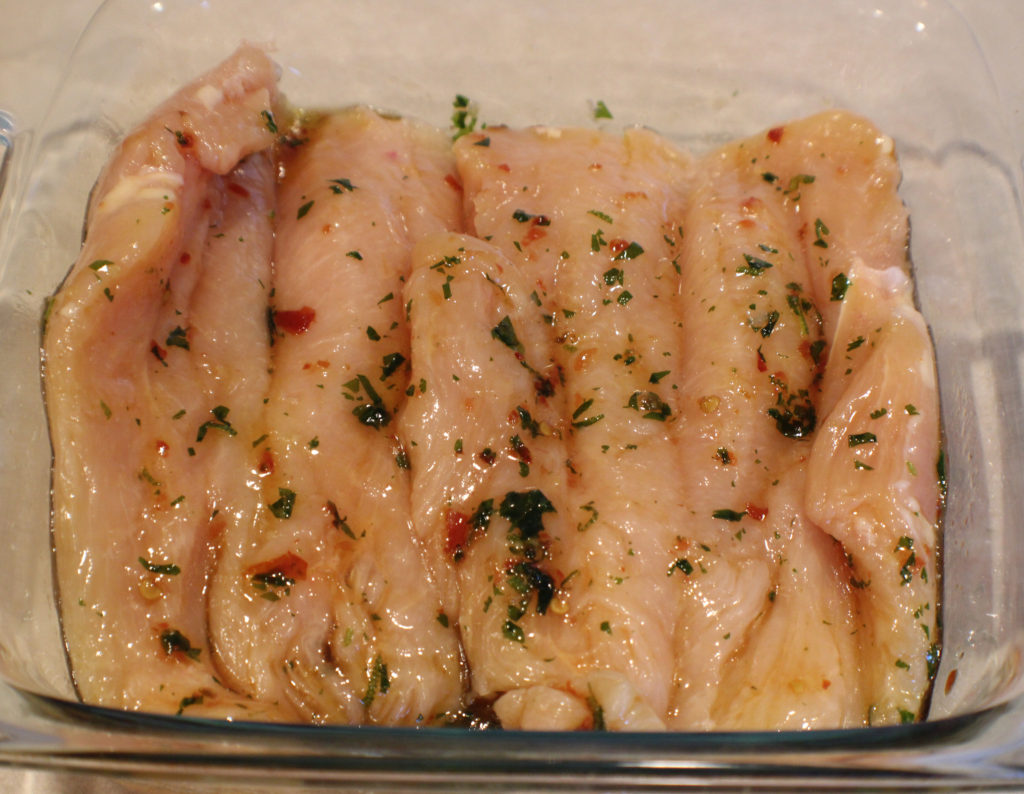
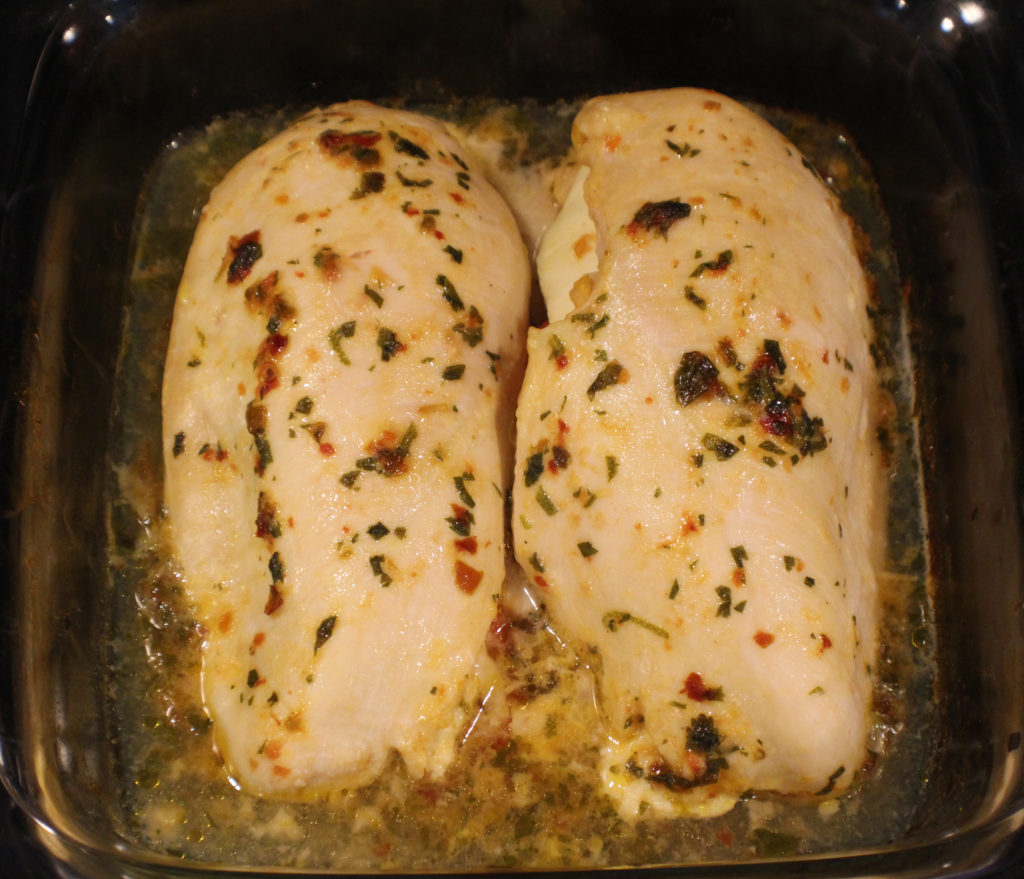
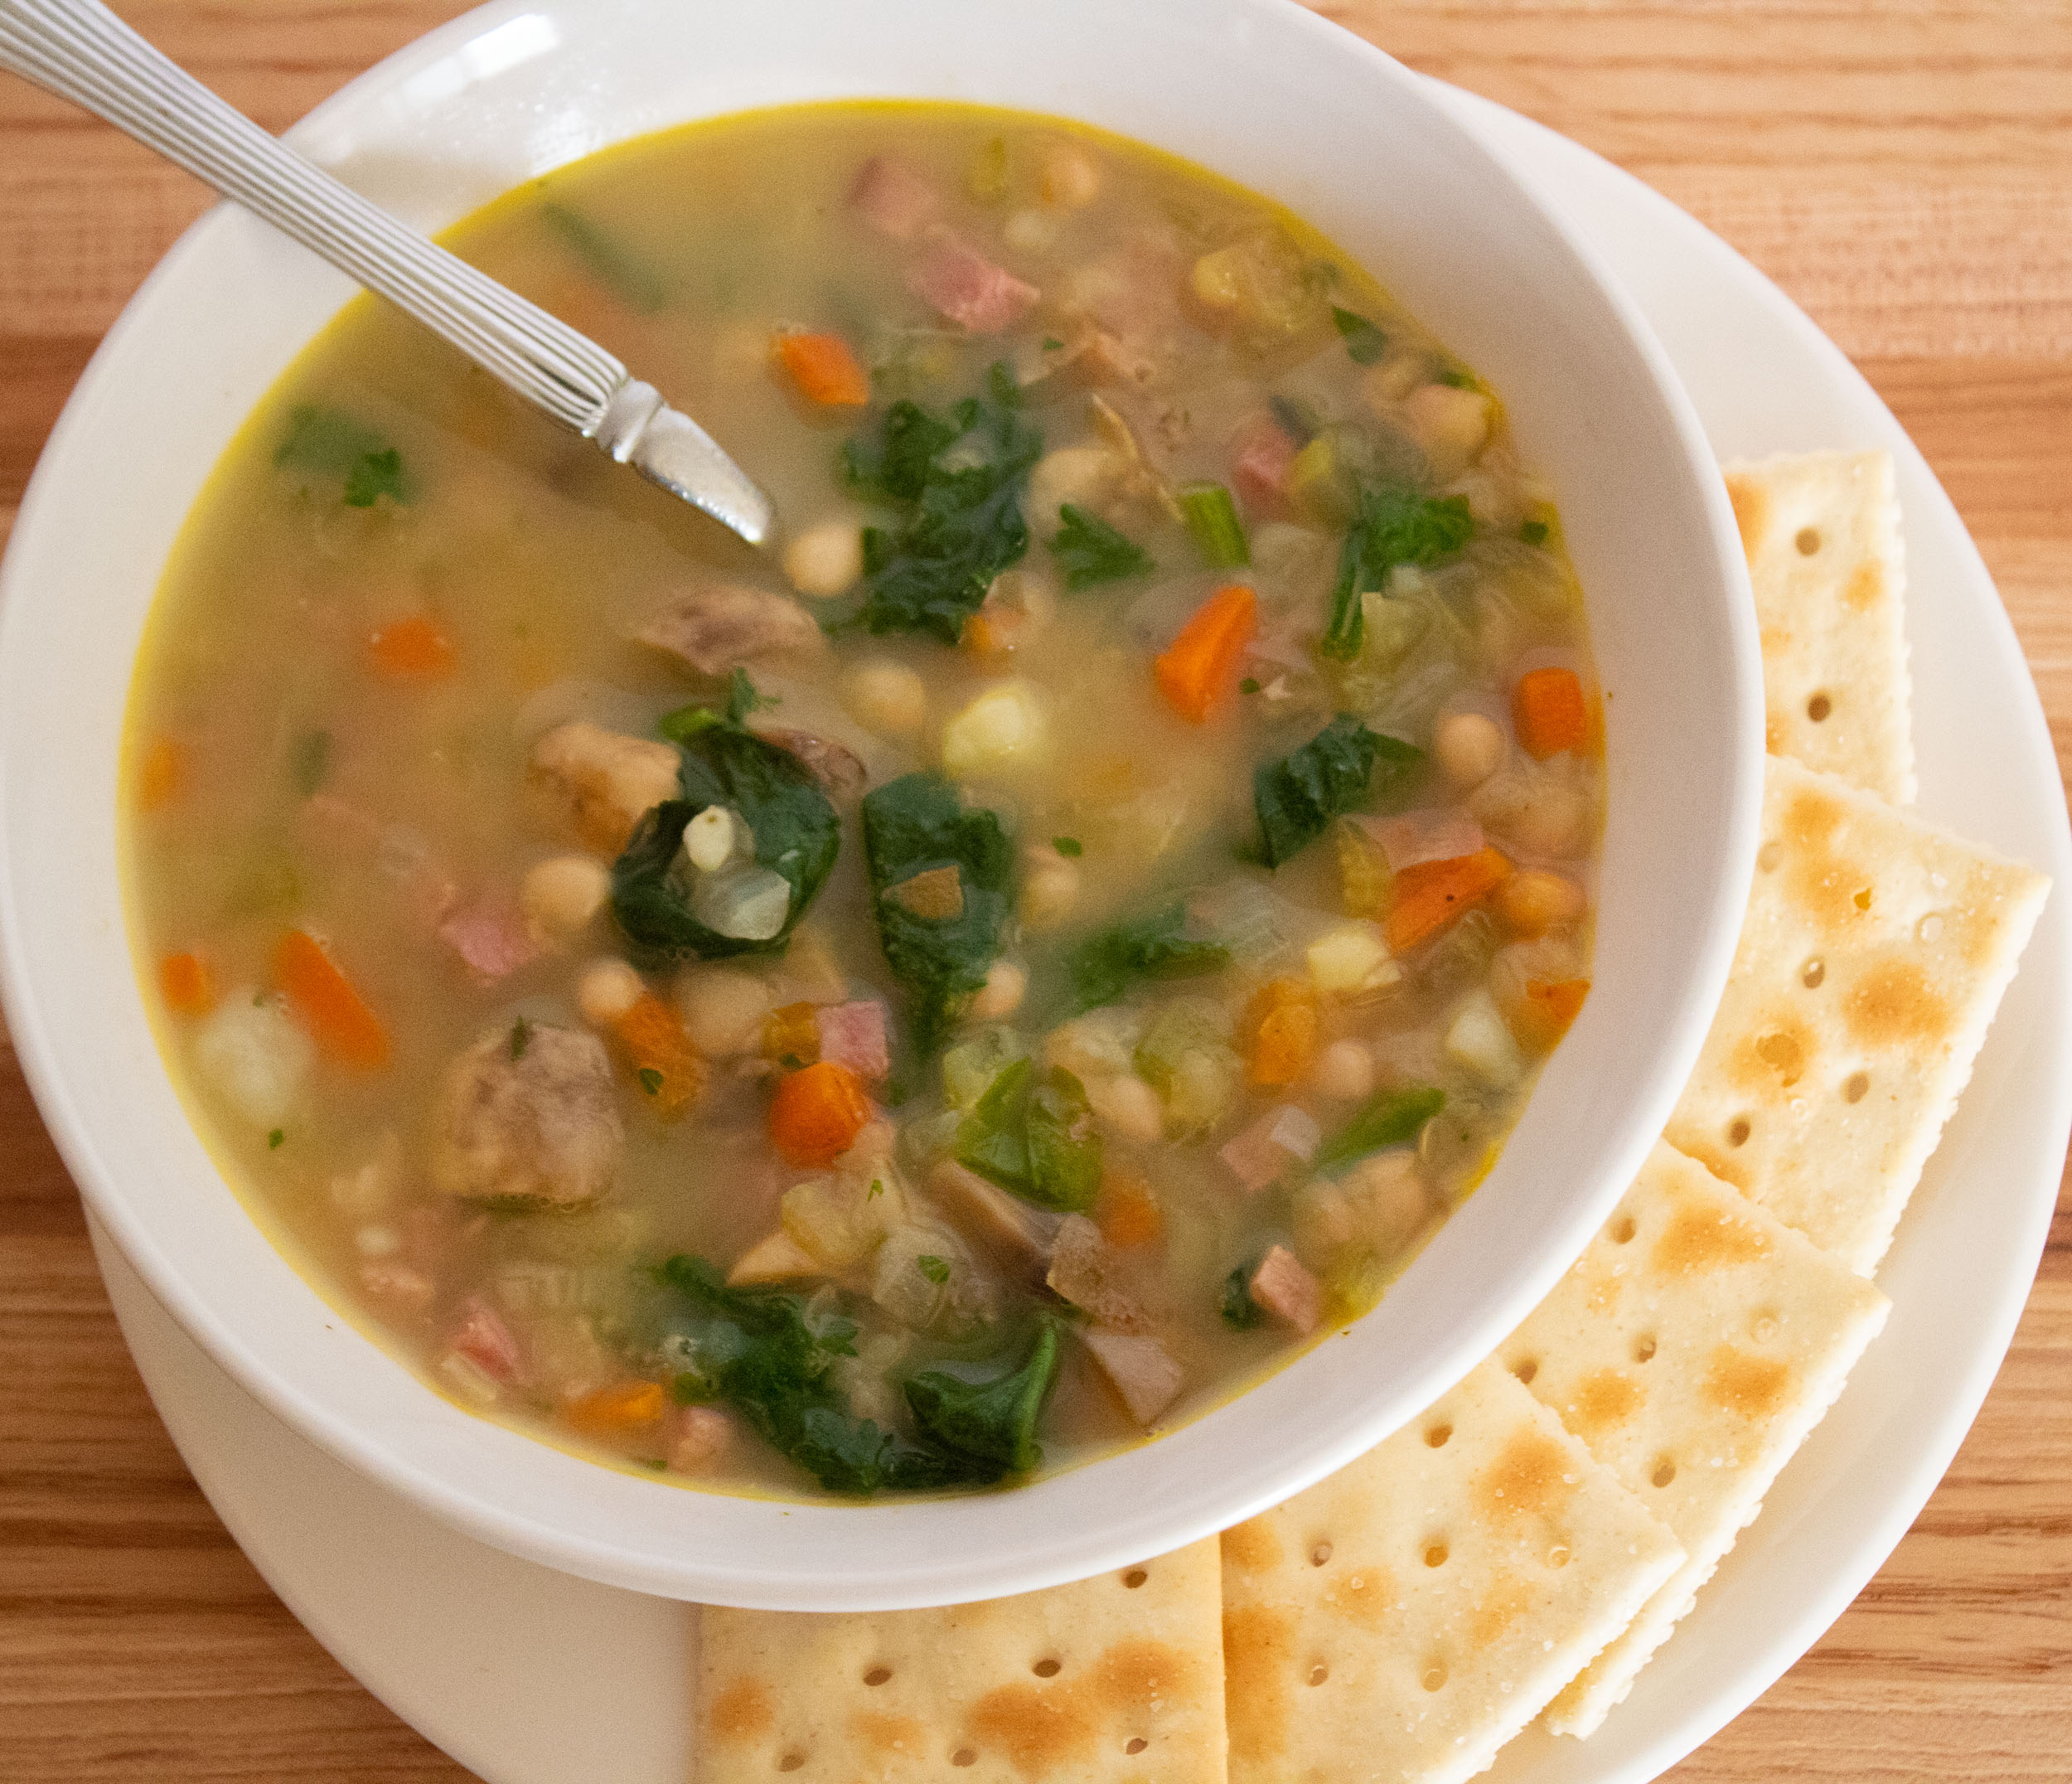
Use the leftover milk in your coffee, or in baking, or to marinate chicken or pork.
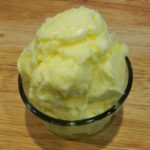
For 1 pint of heavy cream you will get about 1 cup of butter and 1 cup of milk.

Nutrition

Serving: 1tbsp | Calories: 102kcal | Carbohydrates: 1g | Protein: 1g | Fat: 11g | Saturated Fat: 7g | Polyunsaturated Fat: 1g | Monounsaturated Fat: 3g | Cholesterol: 41mg | Sodium: 48mg | Potassium: 22mg | Sugar: 1g | Vitamin A: 435IU | Vitamin C: 1mg | Calcium: 19mg | Iron: 1mg

BBQ Chicken Thighs (Air Fryer)

BBQ Chicken Thighs with Pepperoncinis

The flavor of charcoal barbeque is one of my favorites, and I will grill all year round. I have added a little bit of liquid smoke to the marinade and cook the chicken in my air fryer to make for a great barbeque-tasting chicken that can be made any time of the year.

Chicken Thighs Marinating

This is a fairly simple process, just mix the mayonnaise, ketchup, and liquid smoke together in a bowl, and rub the chicken thighs all around in it. Then mix together the dry seasoning and walk away for an hour or prepare any side dishes you are going to have with the chicken.

You can use whatever liquid smoke flavor you like. I happen to really like hickory, but mesquite or apple works great too.

Chicken Thighs Ready to Season

When it’s been about an hour, you are ready to season the chicken. Remove the chicken from the bowl and leave whatever excess mayonnaise mixture there is in the bowl.

Seasoned Chicken Thighs

Sprinkle the seasoning mixture on both sides of the thighs. The mayonnaise will help it stick. Let this sit for about 15 – 30 minutes.

Now they are ready for the air fryer.

Chicken Thighs in Air Fryer

With a non-aerosol cooking spray, spray the bottom of the basket. Place the chicken in and spray the top of the chicken.

For some models of air fryers, aerosol spray will damage the coating of the basket and will cause it to flake off over time.

BBQ Chicken Thighs Ready

It takes about 20 minutes to cook at 350 degrees (15 minutes if using boneless chicken thighs). You will want to flip them over after 10 minutes.

Now you have a tender, slightly smoky tasting chicken thigh to enjoy! If you want an extra little kick, try them with some pepperoncinis.

BBQ Chicken Thighs (Air Fryer)

These super moist and delicious chicken thighs cooked in an air fryer brings the flavors of barbequing any time of the year.
Prep Time10 minutes
Cook Time20 minutes
Resting Time1 hour 30 minutes
Total Time2 hours
Course: Dinner, Main Course
Cuisine: American
Keyword: Air Fryer, Chicken, Dairyfree, Glutenfree
Servings: 4 people
Calories: 74kcal
Author: Eating With Deb

Equipment

  • Air Fryer
  • Large bowl
  • Plate
  • Small Bowl

Ingredients

  • 4 each Chicken thighs bone-in, skinless
  • ½ tsp black pepper

Marinade

  • 2 tbsp mayonnaise
  • 1 tbsp ketchup
  • ½ tsp liquid smoke

Dry Seasoning

  • 1 tbsp brown sugar I prefer dark but it light is fine
  • 1 tsp paprika
  • 1 tsp granulated garlic
  • 1 tsp dry mustard
  • 1 tsp oregano

Instructions

  • In a bowl, mix together mayonnaise, ketchup, and liquid smoke. Sprinkle both sides of the chicken thighs with pepper and add to mayonnaise mixture. Marinate for 1 hour.
  • While marinating, mix together dry ingredients.
  • After about an hour, remove chicken thighs from the bowl, shaking off excess mayo mixture and lay flat on a plate.
  • Sprinkle dry ingredients on both sides of the thighs, using it all up. Let sit for 15 to 30 minutes.
  • Spray bottom of air fryer basket with non-aerosol cooking spray and add thighs. Spray tops of thighs.
  • Cook in air fryer at 350 degrees for 20 minutes turning over at 10 minutes. Internal temperature of chicken should reach 165 degrees, may need to cook another 3 – 5 minutes depending on size of the chicken thighs.
  • Enjoy!

Notes

If using boneless chicken thighs, it will only take about 15 minutes to cook.

Nutrition

Calories: 74kcal | Carbohydrates: 5g | Protein: 1g | Fat: 6g | Saturated Fat: 1g | Trans Fat: 1g | Cholesterol: 4mg | Sodium: 82mg | Potassium: 53mg | Fiber: 1g | Sugar: 4g | Vitamin A: 281IU | Vitamin C: 1mg | Calcium: 16mg | Iron: 1mg

Party Mix

Party Mix

The super bowl is on the way and the winter Olympics are upon us, that means it is snack season. I love a good party mix, and they are easy to make. Plus you can use whatever you like when you make your own. I generally hit up the bulk section in my supermarket when I buy the ingredients to make my snack mix.

Combine all your snacking stuff in a bowl. If you need it to be gluten-free, it is easy to do with the different corn and rice chex cereals as well as gluten-free pretzels. Don’t like mixed nuts, just use a nut you like.

Melt the butter, maple syrup, Worcestershire, and seasonings in a pan on low heat to ensure you don’t burn the butter. If you don’t want the little bit of heat the chipotle powder adds, go ahead and leave it out.

Pour the butter mixture over the party mix mix and stir it up to ensure even coating. Spread the mix out on 2 sheet trays lined with parchment paper and bake. You’ll need to stir it around a couple times while it is baking to ensure even cooking.

That’s all there is to it.

Enjoy!

Party Mix

Making a party mix is a fairly simple process and you can tweak it to match your tastes. Add a little more sweetener if you desire, add more, or less, chipotle to your tastes. This recipe is slightly sweet with a hint of warmth.
Prep Time15 minutes
Cook Time1 hour 30 minutes
Total Time1 hour 45 minutes
Course: Appetizer
Cuisine: American
Keyword: Chex Mix, Munchies, Party Mix
Servings: 18 cups
Calories: 586kcal
Author: Eating With Deb

Equipment

  • Large, heat-safe bowl
  • 2 parchment-lined sheet trays
  • Saucepan

Ingredients

  • 4 cups Chex cereal corn, rice, whatever is your favorite
  • 4 cups Honey Grahams or Cinnamon Squares cereal
  • 4 cups Goldfish or Cheddar Bunnies
  • 4 cups pretzels
  • 3 cups mixed nuts roasted
  • 1 stick butter
  • ½ cup maple syrup
  • ¼ cup Worcestershire
  • ½ tsp chipotle powder
  • ½ tsp granulated garlic
  • ¼ tsp sea salt
  • ¼ tsp black pepper

Instructions

  • Preheat oven to 250 degrees.
  • In a large, heat-safe bowl, mix together cereals, goldfish, pretzels, and mixed nuts.
  • In a saucepan, melt butter, maple syrup, Worcestershire, and seasonings.
  • Pour butter mixture over cereal mixture and mix well. Spread out on 2 parchment-lined sheet trays.
  • Bake for 30 minutes.
  • Remove from oven, stir, switch top pan with bottom pan and return to oven.
  • Cook 30 minutes, remove from oven and stir.
  • Switch top pan with bottom pan and return to oven. Cook 15 minutes.
  • Remove from oven, stir, switch top pan with bottom pan and return to oven.
  • Cook 15 minutes and remove from oven.
  • Cool. Store in a sealable container or bag.
  • Enjoy!

Notes

Makes 18 cups.

Nutrition

Serving: 1cup | Calories: 586kcal | Carbohydrates: 80g | Protein: 12g | Fat: 25g | Saturated Fat: 7g | Cholesterol: 31mg | Sodium: 907mg | Potassium: 265mg | Fiber: 5g | Sugar: 9g | Vitamin A: 434IU | Vitamin C: 4mg | Calcium: 128mg | Iron: 9mg

Toffee Bars

Toffee Bars

I recently came across a Toffee Square recipe that I kept from my Home Ec class back in Junior High. I remembered them being very good, so I decided to give them a try again.

I changed the recipe a bit and updated it as well, and came up with these delicious, easy to make, bars.

Toffee Bar Ingredients

There isn’t much to putting this together, just make sure your butter is at room temperature.

I mix the salt in with the flour,

Toffee Bar Batter

Mix the butter, sugar, egg yolk, and vanilla together first to get a nice creamy batter. No need for a stand mixer, hand beater work just fine for this.

Using a wooden spoon or firm rubber spatula, mix in the flour, salt, and half of the package of toffee bits. The result will be a crumbly batter.

Toffee Bars Ready to Bake

Make sure to spray you pan with cooking spray before adding the batter. I find it is just as easy to press the batter down with my hands as it is a wooden spoon. The crumbly batter will press together to form the bars.

Bake them for 20 to 25 minutes, no more. The bars will be soft but a toothpick will come out clean. As the bars cool, they will firm up.

Remove the bars from the oven and sprinkle the chocolate chips and the rest of the toffee bits over the top. Put it back in the oven for a minute or 2 to melt the chocolate.

Remove from the oven and spread the chocolate out over the top.

Let them cool for about 1/2 hour before cutting to allow the bars to firm up a bit and the chocolate to solidify a bit. 

These are great warm or cold. I eating one topped with vanilla bean ice cream.

Enjoy!

Toffee Bars

This is a very quick and easy to make sweet treat with heath toffee bits mixed throughout.
Prep Time10 minutes
Cook Time25 minutes
Total Time35 minutes
Course: Dessert, Sweet Treats
Cuisine: American
Keyword: Bars, Sweet Treats, Toffee, Toffee Bars
Servings: 20 bars
Calories: 199kcal
Author: Eating With Deb

Equipment

  • Large bowl and mixer
  • Medium bowl
  • Wooden spoon or firm rubber spatula
  • 9 x 13” pan

Ingredients

  • 1 cup butter softened at room temperature
  • 1 cup brown sugar packed
  • 1 each egg yolk
  • 1 tsp vanilla
  • 2 cups flour
  • ¼ tsp sea salt
  • ½ pkg heath toffee bits

Topping:

  • ½ pkg heath toffee bits
  • 1 cup chocolate chips

Instructions

  • Preheat oven to 350 degrees.
  • In a stand mixer or bowl, mix butter, sugar, egg yolk, and vanilla. Scrape down sides.
  • Mix in flour, salt, and toffee bits (dough will appear crumbly).
  • Spray a 9 x 13 in pan with cooking spray. Spoon dough into pan, level and smooth top. It may be easier to use your hands or the back of a wooden spoon.
  • Bake 20 to 25 minutes. Bars will be soft, but a toothpick should come out clean.
  • Remove from oven and sprinkle on chocolate chips and the rest of the toffee bits.
  • Turn off oven and put bars back in oven for a minute or 2 to melt the chocolate.
  • Remove from oven and smooth chocolate over top of bars with a spatula.
  • Allow to cool for about 1/2 hour before cutting.
  • Cut into 20 bars.

Notes

These freeze well.

Nutrition

Calories: 199kcal | Carbohydrates: 24g | Protein: 1g | Fat: 11g | Saturated Fat: 7g | Polyunsaturated Fat: 1g | Monounsaturated Fat: 2g | Trans Fat: 1g | Cholesterol: 27mg | Sodium: 116mg | Potassium: 31mg | Fiber: 1g | Sugar: 14g | Vitamin A: 285IU | Calcium: 14mg | Iron: 1mg

Chile Stuffed Chicken Breasts

Chile Stuffed Chicken and Maize Picante

As far as meat proteins go, I probably use chicken the most. Trying to figure out new and exciting ways to prepare chicken has become a challenge for me that I have happily taken on.

I stuff these chicken breasts with roasted peppers, chiles, and cotija cheese and marinate them in a somewhat spicy, sweet, and tangy marinade to add a lot of flavor to the chicken.

2 larger chicken breasts can easily be cut in half for a meal for 4 people. Try serving this with Cilantro Lime Rice for a delicious meal.

I start by mixing my marinade ingredients in the pan that I’m going to cook my chicken in.

Slice the cheese, peppers and chiles, and butterfly the chicken.

Roll your chicken breasts around in the marinade, ensuring you get it all over and leave them cut side up.

Now it’s time to add the fillings. I like to put the cheese in between the peppers and chiles. Cotija cheese holds up well when baking. You can use a mild feta if you can’t find cotija cheese.

Now fold over the top. Try to stuff everything inside, but a little hanging out won’t really matter.

Cover the pan with a lid or foil and bake at 350 degrees for 45 minutes.

Remove the chicken from the oven and remove the foil or lid. Using a spoon, scoop up some of the liquid and baste the chicken. Return to the oven without a cover and bake for an additional 15 minutes. Make sure the internal temperature of your chicken reaches 165 degrees.

Now it’s time to eat. You could certainly top this off with a dollop of sour cream or guacamole or even some avocado slices, but it is so tender and delicious all on its own. Try this with Cilantro Lime Rice and Maize picante.

Enjoy!

Chile Stuffed Chicken Breasts

Stuffing the chicken with moist chiles and peppers and baking in a marinade makes this chicken super moist and tender to eat. It has a little bit of spice, a little tang, and a little sweetness.
Prep Time10 minutes
Cook Time1 hour
Total Time1 hour 10 minutes
Course: Dinner, Main Course
Cuisine: Tex-Mex
Keyword: Chicken, Chiles and Chicken, Stuffed Chicken
Servings: 4 people
Calories: 104kcal
Author: Eating With Deb

Equipment

  • 1 8 x 8 baking dish
  • Cutting board and knife
  • Citrus Zester

Ingredients

Chicken and Stuffing

  • 2 each chicken breasts butterflied
  • 2 each whole green chiles cut into long strips
  • ½ each roasted red bell pepper cut into long strips
  • 2 ounces cotija cheese 4 to 6 thin slices

Marinade

  • 2 tsp Sambal Oelek chili sauce
  • 1 tbsp olive oil
  • ½ each lime juice and zest
  • 2 tbsp honey
  • 1 tsp fresh ginger minced
  • 1 tbsp cilantro fresh, chopped

Instructions

  • Preheat oven to 350 degrees.
  • In the dish you are going to bake the chicken in, combine the Sambal Oelek, oil, lime juice, honey, ginger, and chopped cilantro.
  • Butterfly the chicken breasts.
  • Slice the cheese, roasted red pepper, and green chiles.
  • Rub both sides of the chicken breasts in the marinade mixture.
  • Place chicken breasts flat, cut side up. On one half of each breast stack half the chiles, half of the cheese, and half of the red bell peppers. Fold over tucking in the ingredients.
  • Cover and bake at 350 degrees for 45 minutes. Remove from oven and use a spoon to baste the tops of the chicken with the sauce that is in the pan. Leave cover off, return to oven and bake for an additional 15 minutes. Check to ensure the chicken has reached an internal temperature of 165 degrees.
  • Cut each breast in half to get 4 servings.
  • Try this with Maize Picante.
  • Enjoy!

Notes

Cotija cheese which is a Mexican Feta does not melt well and will hold up during baking. You can replace it with a mild feta if you cannot find Cotija cheese.
You can find roasted whole green chiles in the Mexican section of the supermarket.

Nutrition

Calories: 104kcal | Carbohydrates: 10g | Protein: 2g | Fat: 7g | Saturated Fat: 3g | Cholesterol: 13mg | Sodium: 197mg | Potassium: 29mg | Fiber: 1g | Sugar: 9g | Vitamin A: 85IU | Vitamin C: 1mg | Calcium: 71mg | Iron: 1mg

Ham and White Bean Soup

Ham and White Bean Soup

I love a good ham and bean soup and look forward to using up leftover ham in soup making. I’m not a runny soup type person, so I add mashed potatoes to a lot of my soups to thicken them up a bit. I also throw in broccoli, spinach and/or kale into a lot of my soups for added nutrients.

Ham and Bean Soup Ingredients

This is a quick soup to put together so make sure you have all your ingredients ready to go. If you don’t want to thicken it with mashed potatoes or add spinach, that’s ok.

I generally use navy beans because I like the size, but use whatever white bean you want. Just make sure you drain and rinse them well to get as much of the gases off of them as possible.

Sautéing Veggies

In a large stock pot, sauté the veggies for a few minutes to soften them. Then deglaze the pan with red wine or red wine vinegar, or a couple tablespoons of the chicken stock. Scrap the bottom of the pan to get all the stuck on bits of flavor up off the bottom.

Putting it Together

Now add the ham, beans, stock, and seasonings. Bring to a boil, reduce to simmer, and simmer for about 20 minutes.

Final Ingredients

If you’re adding mashed potatoes and hearty greens like spinach, kale, or chard, now is the time to stir them in. Simmer for another 5 minutes or so to wilt the greens and heat everything thru.

It’s as easy as that, you have a delicious ham and white bean soup ready to eat.

Enjoy!

Ham and White Bean Soup

Ham and white bean soup is a wonderful soup for the dreary fall and winter days. Adding mashed potatoes, thickens it a little bit, and spinach and kale adds some extra nutrients to this soup.
Prep Time15 minutes
Cook Time30 minutes
Total Time45 minutes
Course: Dinner, Lunch
Cuisine: American
Keyword: ham and bean soup, soup
Servings: 4 people
Calories: 577kcal
Author: Eating With Deb

Equipment

  • Knife and cutting board
  • 6 to 8 quart stock pot
  • heat resistant spoon

Ingredients

  • 2 tbsp vegetable oil or canola oil
  • 1/3 cup yellow onion diced
  • 1 stalk celery chopped, about 1 cup
  • 1 each carrot chopped, about 1 cup
  • 2 cups mushrooms sliced
  • 2 tbsp red wine or red wine vinegar
  • ½ tbsp garlic fresh minced
  • ½ tsp sea salt
  • ½ tsp black pepper
  • 2 cups ham diced
  • 2 cans white beans drained and rinsed well, 15 oz cans
  • 4 cups chicken stock
  • 1 cup mashed potatoes optional
  • 4 handfuls spinach and/or kale, optional
  • 2 tbsp parsley chopped, optional

Instructions

  • On medium heat, heat large stock pot and add oil, onions, celery, mushrooms, and carrots. Sauté for 3 minutes.
  • Deglaze pan with red wine, scrapping all the brown bits off the bottom.
  • Add ham, beans, stock and seasonings. Bring to a boil. Reduce heat and simmer for 20 minutes.
  • If adding mashed potatoes, spinach and/or kale, or parsley, stir in and cook for another 3 minutes or so until the potatoes are hot and the spinach is wilted.
  • Enjoy!

Nutrition

Serving: 2cups | Calories: 577kcal | Carbohydrates: 57g | Protein: 37g | Fat: 22g | Saturated Fat: 6g | Polyunsaturated Fat: 6g | Monounsaturated Fat: 9g | Trans Fat: 1g | Cholesterol: 51mg | Sodium: 1524mg | Potassium: 1712mg | Fiber: 11g | Sugar: 7g | Vitamin A: 3079IU | Vitamin C: 26mg | Calcium: 173mg | Iron: 7mg

Chorizo Skillet Scramble

Chorizo Skillet Scramble

When I decide to make a larger breakfast or brunch I often make some sort of a skillet style breakfast. You know the kind you get served in a restaurant in a sizzling skillet? They are fairly simple to make and you can put whatever you want in them, plus cook the eggs however you like them best. This Chorizo Skillet Scramble is a slightly spicy and very flavorful Tex-Mex style skillet that is wonderful for breakfast, lunch, or dinner.

Skillet style breakfasts take time sautéing and crisping the potatoes, so I microwave the potatoes first to cut out about 1/2 hour of cooking time.

This skillet has a little spiciness to it and can be eaten as is, or put it in a burrito shell for a hand-held, to-go style breakfast. 

After I stab my potatoes several times, and put those in the microwave to cook, I start preparing the rest of my ingredients. Once my potatoes are finished, they only take 4 minutes, I put them in the refrigerator to cool down a bit while I finish preparing my ingredients.

After my ingredients are all gathered and prepared, I take the potatoes out of the refrigerator and dice them up. Those are the first to go in the pan and crisp up. Once done, I put them in my baking dish that I sprayed with cooking oil.

Next in the pan is the chorizo. I like to cook it long enough to get it a little crispy. The oil will be used to sauté the vegetables and beans.

Add to the pan with the chorizo, pepper, mushrooms, onions, and garlic. Sauté this for a couple minutes until the peppers have softened.

And preheat the oven to broil.

Now stir in the beans, corn, chiles, and dry seasonings. Reduce heat to low.

While the beans are heating up, cook the scrambled eggs, or cook the eggs however you want to eat them.

Pour the chorizo mixture over the potatoes, top with the eggs and cheese. Put under the broiler for about 3 minutes to melt the cheese.

Top with sour cream, guacamole or avocado, salsa or fresh tomatoes, and fresh cilantro.

Enjoy!

Chorizo Skillet Scramble

Slightly spicy, yet flavorful Tex-Mex style breakfast skillet for any time of the day. Goes great with fresh biscuits.
Prep Time15 minutes
Cook Time25 minutes
Course: Breakfast, Brunch, Dinner, Main Course
Cuisine: American, Tex-Mex
Keyword: Chorizo, Scramble, Skillet
Servings: 6 people
Calories: 333kcal
Author: Eating With Deb

Equipment

  • Large non-stick sauté pan
  • Medium non-stick sauté pan
  • 7 x 11 oven safe baking dish
  • Microwave
  • Large bowl and whisk
  • Cutting board and knife

Ingredients

Eggs

  • 8 each eggs
  • 1 pinch sea salt
  • 1 pinch black pepper
  • 1 tbsp butter

Potatoes

  • 3 each russet potatoes medium size
  • 1 tbsp vegetable oil
  • 1 pinch sea salt
  • 1 pinch black pepper

Scramble

  • ½ pound chorizo
  • 2 cups mushrooms sliced
  • ½ cup yellow onion chopped
  • 1 tbsp garlic fresh, minced
  • 1 each bell pepper
  • 1 can green chiles
  • 1 can black beans drained and rinsed
  • 1 cup corn frozen
  • ½ tsp basil dry
  • ½ tsp oregano dry
  • ¼ tsp black pepper
  • 1 tsp taco seasoning

Toppings

  • 1 cup co-jack cheese shredded
  • 2 tbsp cilantro fresh, chopped
  • Sour cream
  • Guacamole or an avocado
  • Salsa

Instructions

  • Stab the potatoes several times with a fork. Put on a plate in the microwave and cook for 2 minutes. Flip over and cook another 2 minutes. Remove to the refrigerator to cool.
  • While the potatoes are in the microwave, crack and whip the eggs with a pinch each of salt and pepper and set aside.
  • While the potatoes are cooling, prepare the vegetables, drain and rinse the black bean, open green chiles, and get corn out of the freezer. Then dice the potatoes.
  • On medium heat, heat a large sauté pan. Add the oil and chopped potatoes, and a pinch each of salt and pepper. Cook for 5 minutes, stirring occasionally, until the potatoes are crispy. Put potatoes in the baking dish that has been sprayed with cooking oil.
  • Put pan back on medium low heat and add the chorizo. Sauté for 3 minutes until it is cooked and starting to get crispy.
  • Preheat oven to broil.
  • Add the mushrooms, onions, garlic, and bell pepper. Sauté for 5 minutes until the pepper softens and the onions become translucent.
  • Add the chiles, beans, corn and dry seasoning. Reduce heat to low.
  • In a non-stick sauté pan, melt the butter on medium heat. Add the eggs, stir frequently, and cook for 5 minutes until the eggs are just firm.
  • Pour the chorizo mixture over the potatoes in the oven safe dish. Top with the scrambled eggs and shredded cheese.
  • Put in the oven for 3 minutes until the cheese is melted.
  • To serve top with sour cream, salsa, avocado, and fresh cilantro.

Nutrition

Calories: 333kcal | Carbohydrates: 20g | Protein: 17g | Fat: 21g | Saturated Fat: 11g | Trans Fat: 1g | Cholesterol: 55mg | Sodium: 696mg | Potassium: 389mg | Fiber: 5g | Sugar: 3g | Vitamin A: 533IU | Vitamin C: 10mg | Calcium: 181mg | Iron: 2mg

Kielbasa Stew

Kielbasa Stew

Looking through the freezer I found some kielbasa sausage that didn’t end up on my grill this summer. In trying to figure out what to make with it, I looked through the pantry and found some lentils and quinoa and decided to make a hearty stew to stand up to the wonderful flavors of the kielbasa sausage.

This is a fairly simple stew to make and you can accomplish prepping the vegetables and kielbasa while the lentils and quinoa are cooking.

Quinoa and Lentils

First you want to rinse the quinoa. For some people quinoa can taste a bit soapy when it is cooked, so rinsing it is an important step prior to cooking.

Also, sort through the lentils to ensure there are no any rocks.

You can put both in one pan to cook since they take about the same amount of time. I happened to have a quinoa and grain mix in my pantry so I used that.

Put this on the stove and simmer with a lid on the pan for about 20 minutes.

Kielbasa and Veggies

While the lentils and quinoa are cooking, you can gather and prep the rest of the ingredients. I found some bell peppers in my freezer from my garden this summer that had been roasted, so I used them instead of a fresh bell pepper.

I also kept the frozen broccoli on top of the peas and corn because when it thaws a bit, I chopped it down into bite size pieces.

The chipotle pepper was also in my freezer. When I open a can of chipotle peppers in adobo sauce, I usually only use 1 or 2 at a time, so the rest I freeze individually in snack size bags for future use. That way I don’t waste most of a can of chipotle peppers.

At this point your lentils and quinoa are probably cooked. If there is a lot of liquid left, you can strain it, or just turn up the heat and boil it out. Just be careful not to burn the lentils and quinoa. If there is a little liquid left, its not a big deal to add it to the stew.

Sautéed Kielbasa and Veg

In a larger stock pot, saute the kielbasa, carrots, onions, celery, and bell peppers. Be careful not to add too much oil, the kielbasa has some fat, and you don’t want a greasy stew in the end. About 1 tablespoon or a little less oil is plenty.

Simmering Kielbasa Stew

Now add the canned tomatoes, chicken stock, chipotle pepper if you are using one, lentils, and quinoa. You only need to simmer this for about 10 minutes. Everything is cooked, you’re just combining the flavors.

This is when I rough chop the frozen broccoli. 

Kielbasa Stew Finished

Stir in the frozen veggies, parsley, and fresh spinach. I happened to have a baby spinach, kale, and chard mix that I used.

Simmer for about 5 minutes to heat everything up and wilt the greens, and it’s ready to eat.

Try this soup with some homemade Cornbread for that finishing touch.

Enjoy!

Kielbasa Stew

A hearty, somewhat smoky and spicy stew to warm you on a cold winter day, filled with nutritious vegetables, quinoa, lentils, and kielbasa sausage.
Prep Time20 minutes
Cook Time35 minutes
Total Time55 minutes
Course: Dinner, Lunch
Cuisine: American
Keyword: kielbasa, soup, stew
Servings: 5 servings
Calories: 482kcal
Author: Eating With Deb

Equipment

  • Cutting board and knife
  • 4 quart sauce pan
  • Fine mesh sieve
  • 6 quart sauce pan

Ingredients

Lentils and Quinoa

  • ½ cup lentils
  • ½ cup quinoa
  • 2 ½ cups chicken stock

Kielbasa and Vegetables

  • 1 tbsp olive oil
  • ½ pound kielbasa chopped
  • 1 cup carrots diced
  • ¼ cup yellow onions diced
  • 1 stalk celery diced
  • 1 each bell pepper diced
  • 1 each chipotle pepper or jalapeno pepper, diced, optional
  • 1 cup corn frozen
  • 1 cup peas frozen
  • 2 cups broccoli frozen, chopped
  • 4 handfuls spinach
  • ¼ cup parsley fresh, chopped

Sauce:

  • 1 can diced tomatoes in sauce 15 ounce can
  • 2 cups chicken stock

Instructions

  • Put quinoa in a fine mesh sieve and rinse well. Sort lentils to ensure there isn’t any rocks.
  • Add rinsed quinoa, lentils and 2 ½ cups chicken stock or water in a 3 to 4 quart sauce pan on the stove over high heat, Bring to a boil, reduce to a simmer, cover and cook for 15 to 20 minutes until done. Strain if there is excess liquid.
  • Prepare kielbasa and vegetables. Open tomatoes and get chicken stock. Measure out frozen veggies and spinach.
  • In a 6 quart or larger sauce pan, heat oil. Add kielbasa, onions, carrots, bell pepper, and celery. Sauté for about 5 minutes until the onions become translucent.
  • Stir in chipotle or jalapeno pepper, tomatoes in sauce, chicken stock, lentils and quinoa. Reduce heat and simmer for 10 minutes.
  • Rough chop the frozen (thawing) broccoli to bite size pieces.
  • Stir in corn, peas, broccoli, spinach, and parsley. Simmer for another 3 - 5 minutes to heat the frozen veggies and wilt the spinach.
  • Enjoy!

Notes

Makes about 10 cups.

Nutrition

Calories: 482kcal | Carbohydrates: 52g | Protein: 25g | Fat: 21g | Saturated Fat: 6g | Polyunsaturated Fat: 3g | Monounsaturated Fat: 10g | Cholesterol: 38mg | Sodium: 885mg | Potassium: 1286mg | Fiber: 13g | Sugar: 11g | Vitamin A: 7464IU | Vitamin C: 68mg | Calcium: 123mg | Iron: 6mg

Smoked Prime Rib

Medium Rare Smoked Prime Rib

I, like most meat eaters, love a good prime rib. I have tried different oven cooking methods, including the one where you cook it at 500 degrees for about 20 minutes, then turn the oven off and let it cook for a couple more hours – just don’t open the oven door. I haven’t had much luck with that method as it’s hard to determine exactly when it will be done.

When I got a smoker, I decided to try my luck with smoking prime rib. It is now the only way I cook prime rib. It is an easy way to cook prime rib, plus I always know when it will be cooked to a perfect medium rare. 

I also put a pan of Au Jus under the prime rib while smoking it. The seasonings and the juices drip into the Au Jus and add additional smoky tastiness to it.

Another bonus to smoking prime rib is it frees up your oven to cook any side dishes that you want with the Smoked Prime Rib.

Prime Rib Ready to Season

Mix together the dry seasonings and put the beef stock in a pan. I by inexpensive foil pans that I use specifically for the smoker, but a metal pan will work too.

Rub the Worcestershire sauce around the outside of the prime rib and then the dry seasoning.

Now prepare your smoker according to the manufacture directions. I like to use hickory chips but use what flavor chips you like. 

Set the smoker to 225 degrees and an internal food temperature to 140 degrees, and do a chip burn.

Put the pan of beef stock under the prime rib. This will catch any drippings from the meat and flavor the au jus. 

Insert the meat thermometer into the thickest part of the meat. It’s ready to start cooking.

I put my prime rib in the smoker fat side up. This way the fat drippings drip down through the meat and help flavor the meat as it cooks.

Prime Rib Wrapped in Butcher Paper

Once the prime rib reaches 100 degrees, wrap it in Butcher Paper. I found mine on Amazon.

Put it back in the smoker and cook until it reaches 140 degrees.

Wrapping it in butcher paper isn’t completely necessary, but it does have it’s benefits. Butcher paper helps the meat retain moisture and it’s more breathable than foil, so it doesn’t create a steaming environment for the meat.

A very important step is to let it rest for 1/2 hour; this helps ensure all of the juices don’t run out upon cutting. You will still have some of the juice run out, but the meat will remain moist and tender.

I purchased an inexpensive foam cooler that I use for resting food from the smoker. I found if I put an old, clean towel in the cooler, then the meat, and close the lid it helps keep it warm during the resting phase.

Smoked Prime Rib Dinner

Now you are ready to carve your perfect medium rare prime rib and enjoy your holiday meal. Don’t forget the Au Jus!

I like to serve prime rib with Asparagus and Mushrooms in a Garlic Balsamic Reduction, or Gingery Green Beans and Mushrooms. Holiday Wild Rice is also a perfect side dish for prime rib and it can be made a day or 2 in advance to save time and stove/oven space.

Enjoy!

Smoked Prime Rib

Prime rib is a great cut of meat to smoke. Put the Au Jus in a foil pan in the smoker to have a delicious, smokey Jus to serve with the Prime Rib.
Prep Time10 minutes
Cook Time4 hours
Resting Time30 minutes
Total Time4 hours 40 minutes
Course: Dinner
Cuisine: American
Keyword: Prime Rib, Smoked Prime Rib, Smoker
Servings: 6 people
Calories: 709kcal
Author: Eating With Deb

Equipment

  • Smoker
  • Foil Pan
  • Cutting board and knife
  • Butcher Paper
  • Cooler to rest Prime Rib in
  • Hickory, Mesquite, or wood chips of your choice

Ingredients

  • 5 pounds prime rib with bones
  • 3 tbsp Worcestershire sauce
  • 2 cups beef stock

Rub Ingredients

  • 1 tbsp paprika
  • 2 tsp granulated garlic
  • 2 tsp sea salt
  • 2 tsp black pepper
  • 1 tbsp brown sugar

Instructions

  • Combine rub seasonings.
  • Rub Worcestershire sauce on outside of prime rib then rub with the seasoning mixture.
  • Put beef stock in a foil pan.
  • Fill wood chip pan 1/3 full of hickory chips or chips of your choice.
  • Prepare smoker according to manufacture directions. Set cook to 225 degrees and internal food temperature to 140 degrees and do a chip burn.
  • Insert meat thermometer into prime rib, then put in the smoker over the pan with the Au Jus. This will catch the drippings from the prime rib and help season the Au Jus.
  • Cook until the prime rib reaches 100 degrees. Remove and wrap with butcher paper. I use some masking tape to help keep the paper closed.
  • Return to smoker and cook to 140 degrees.
  • Remove from smoker, keep it wrapped in the butcher paper, and let it rest for ½ hour before slicing.
  • Enjoy!

Notes

I have a disposable cooler that I line with old towels that I rest my prime rib in to help it stay warm.

Nutrition

Calories: 709kcal | Carbohydrates: 6g | Protein: 33g | Fat: 61g | Saturated Fat: 25g | Cholesterol: 137mg | Sodium: 1120mg | Potassium: 767mg | Fiber: 1g | Sugar: 3g | Vitamin A: 585IU | Vitamin C: 1mg | Calcium: 41mg | Iron: 4mg

Lemon Pepper Linguini with Chicken and Veggies

Lemon Pepper Linguini with Chicken and Veggies

Lemon Pepper Chicken and Veggies is a dish that I often throw together in a pinch but never wrote down a recipe. Kind of like my Chicken and Veggies Pesto Pasta. These are 2 dishes that you can use almost any vegetable you have on hand and is extremely easy to throw together.

Friends started requesting the recipes so I thought it was about time to put one on paper and make it official.

The first step is to cook your noodles, doesn’t have to be linguini, just use whatever you have on hand that you like. Cook them to the package directions for al dente.

Lemon Pepper Linguini Sauce

While your noodles are cooking, mix together the sauce ingredients and prepare the rest of your other ingredients. Use whatever vegetables you like or have on hand. I sometimes replace the zucchini with broccoli.

When the pasta is cooked to al dente, reserve about 1/2 cup of the pasta water, it will be used later to help create a sauce, and strain the noodles. Toss the noodles in with the lemon pepper sauce you just made.

Chicken Mushrooms Zucchini

Heat a large sauté pan on medium heat. Toss the cubed chicken in with the flour and lemon pepper. Add the oil to the pan and the chicken. Sauté the chicken until it starts to brown.

Add the mushrooms, zucchini, and onions. Sauté until the mushrooms and zucchini soften.

Now it’s ready to finish off.

Lemon Pepper Chicken and Veg

Add the rest of the ingredients, including the reserved pasta water. Stir until the spinach wilts and the pasta is hot.

Lemon Pepper Linguini Ready to Eat

This is a great dish to serve family style. Sprinkle parmesan cheese over the top and serve with lemon wedges and warm garlic bread or toast.

Enjoy!

Lemon Pepper Linguini with Chicken and Veggies

Lemon Pepper Chicken Linguini is a light pasta dish with refreshing ingredients that tastes great hot or cold and can be enjoyed any time of the year.
Prep Time15 minutes
Cook Time20 minutes
Total Time35 minutes
Course: Dinner, Entree, Lunch, Main Course
Cuisine: American
Keyword: Chicken, Dinner Ideas, Lemon pepper chicken, Linguini, Pasta, Whats for Dinner
Servings: 6 people
Calories: 256kcal
Author: Eating With Deb

Equipment

  • 6-quart sauce pot
  • Large saute pan
  • 2 medium bowls
  • Cutting board and knife

Ingredients

  • ½ pound linguini

Chicken

  • 2 each chicken breast cubed
  • 2 tbsp flour
  • 2 tsp lemon pepper

Veggies

  • 2 cups mushrooms sliced
  • 1 each zucchini or yellow squash sliced in half moons
  • 2 tbsp yellow onion fine chopped
  • 1 can artichoke hearts drained and chopped
  • 2 each roma tomatoes fine chopped
  • 3 handfuls spinach kale and/or baby chard

Sauce:

  • 1 each lemon zest and juice
  • 1 tbsp parsley chopped
  • 1 tbsp garlic fresh, minced
  • 3 tbsp capers
  • ¼ tsp red pepper flakes optional
  • ¼ tsp black pepper
  • ¼ tsp sea salt

Other ingredients

  • 2 tbsp olive oil
  • 1 tbsp butter
  • ½ cup reserved pasta water
  • 1/3 cup Parmesan cheese shredded

Instructions

  • Cook linguini according to package instructions until al dente, about 10 minutes.
  • Combine sauce ingredients and prepare vegetables.
  • Once linguini is cooked, drain, reserving ½ cup of the pasta water, and stir linguini into sauce. Set aside.
  • In a medium bowl, combine flour and lemon pepper, cut up chicken. Toss chicken in the flour and lemon pepper.
  • Heat a large sauté pan on medium heat, add oil and chicken, brown chicken, about 5 minutes.
  • Add mushrooms, zucchini, and onions, sauté until mushrooms are brown, zucchini has softened, and onions are translucent, about 3 minutes.
  • Add artichoke hearts, tomatoes, spinach, butter, reserved pasta water, and linguini with sauce. Stir and cook until spinach is wilted and everything is nice and hot, about 2 minuutes.
  • Serve and top with Parmesan cheese.
  • Enjoy!

Notes

Using a nonstick sauté pan versus a stainless-steel pan:
A nonstick pan will ensure nothing sticks to the bottom, but the chicken and veggies won’t brown as well.
A stainless-steel pan will create a brown layer on the bottom of the pan that can easily be scraped up when the liquid is added and enhance the flavor of the dish.
My preference is stainless steel, but a nonstick has the benefit of not having to scrape or scrub the pan.

Nutrition

Calories: 256kcal | Carbohydrates: 35g | Protein: 9g | Fat: 9g | Saturated Fat: 3g | Trans Fat: 1g | Cholesterol: 9mg | Sodium: 480mg | Potassium: 308mg | Fiber: 3g | Sugar: 2g | Vitamin A: 1602IU | Vitamin C: 7mg | Calcium: 100mg | Iron: 1mg