Sweet Pepper Sauce

I really like food that tastes so good that you don’t need to add anything else, but there is something to be said about a great sauce. I came up with this sauce to use as a condiment on burgers, but have since used it as a salad dressing, a veggie dip, and a fry sauce.

This is super simple and only takes a few minutes to throw it together.

Start by gathering your ingredients. I had fresh garlic in my garden (pictured on the left). I also had some homemade mustard that I used instead of store-bought Dijon.

I pulled a couple limes out of the freezer 2 days prior to give them enough time to thaw. The morning I was going to make this sauce, I pulled the limes out of the refrigerator so they came to room temperature to ensure they gave me all the juice they had. Turned out I only needed 1 lime.

You can find jarred cherry peppers in the pickles and olives section in the grocery store.
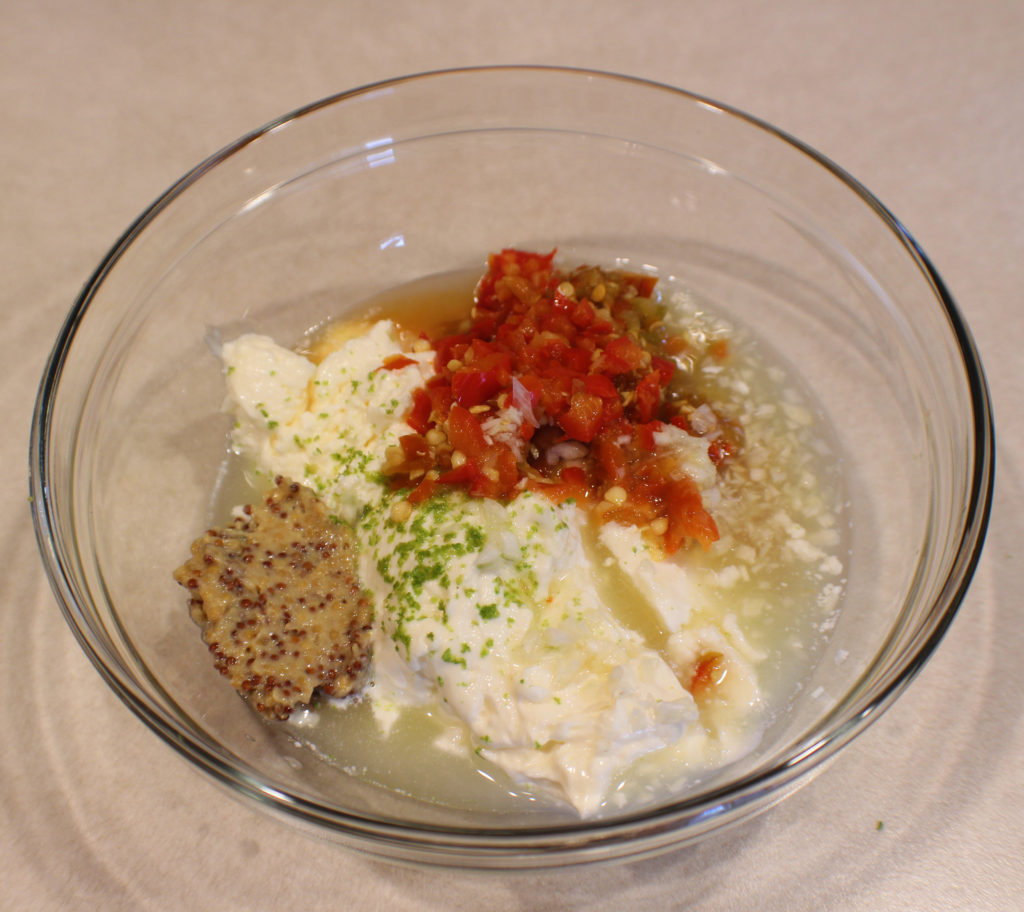
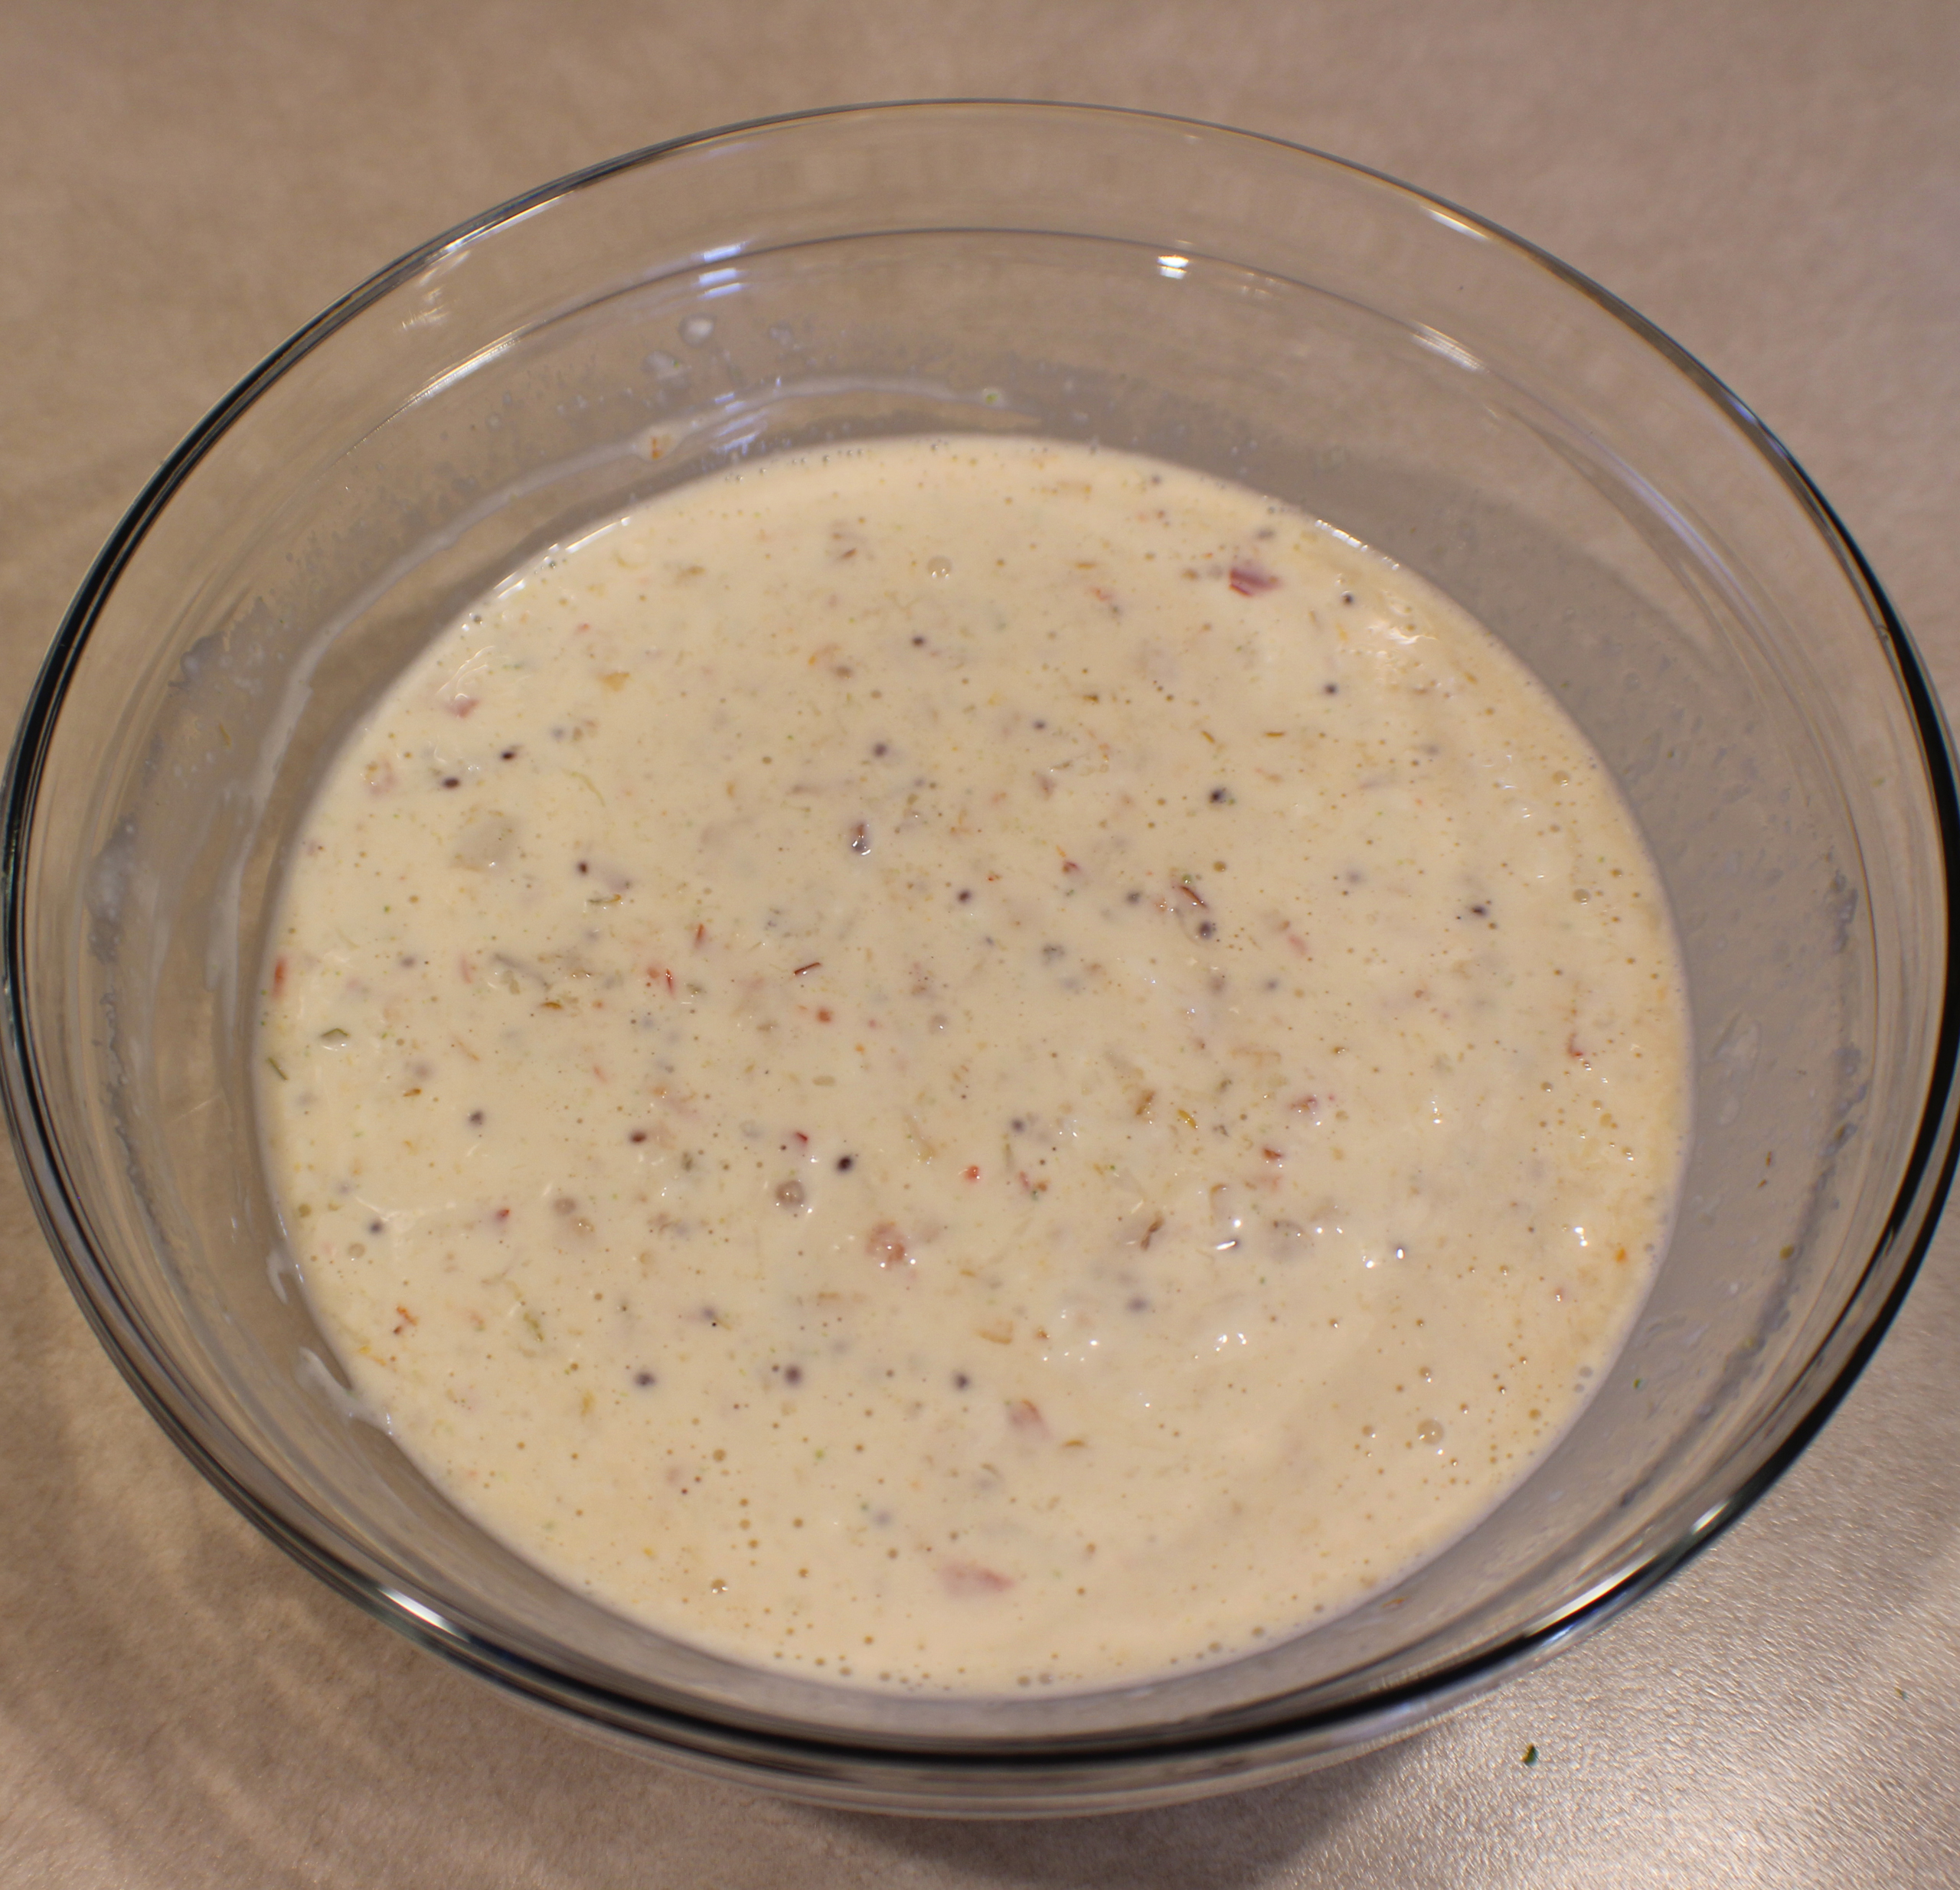
Put your mayo and mustard in a bowl. Zest and juice your lime into the bowl. Chop your garlic and peppers and add to the bowl plus some pepper juice from the jar.

Just mix it up and it’s ready to enjoy!

Try it as the condiment on Pepper Burgers.

Sweet Pepper Sauce

This slightly tangy yet sweet dipping sauce pairs well with all sorts of dishes. I use it on burgers, salads or as a fry dipping sauce. Recently I made a taco salad and instead of using salsa and sour cream I used this sauce.
Prep Time10 minutes
Cook Time0 minutes
0 minutes
Course: Condiments
Cuisine: American
Keyword: Condiments, Fry Sauce, Salad Dressing
Servings: 16 tablespoons
Calories: 97kcal
Author: Eating With Deb

Ingredients

  • 1 cup mayonnaise
  • 2 tbsp lime juice 1 lime + zest
  • 1 tbsp cherry pepper juice
  • 1 tbsp Dijon mustard
  • 3 tbsp sweet cherry peppers chopped
  • 1 tsp garlic minced

Instructions

  • In a medium bowl, add the mayonnaise, zest and juice from 1 lime, mustard, and cherry pepper juice.
  • Chop the garlic and cherry peppers and add to the mayonnaise mix.
  • Mix well.
  • Enjoy!

Notes

Serve as the sauce on burgers, like Pepper Burgers, as a dipping sauce for fries or tater tots, or as a veggie dip or salad dressing.

Nutrition

Calories: 97kcal | Carbohydrates: 1g | Protein: 1g | Fat: 11g | Saturated Fat: 2g | Cholesterol: 6mg | Sodium: 100mg | Potassium: 3mg | Fiber: 1g | Sugar: 1g | Vitamin A: 9IU | Vitamin C: 1mg | Calcium: 1mg | Iron: 1mg

Pickled Jalapenos

Pickled Jalapenos

I don’t can much because it is a lot of work, it’s a very hot process, and requires a lot of space, both to process and store. So I’ve come up with several refrigerator pickling recipes for different items that I grow in my garden.

Making your own refrigerator pickled jalapenos is a very easy process. Plus you can control the heat level by removing seeds if you desire. Using apple cider vinegar gives them a little sweetness and tanginess. 

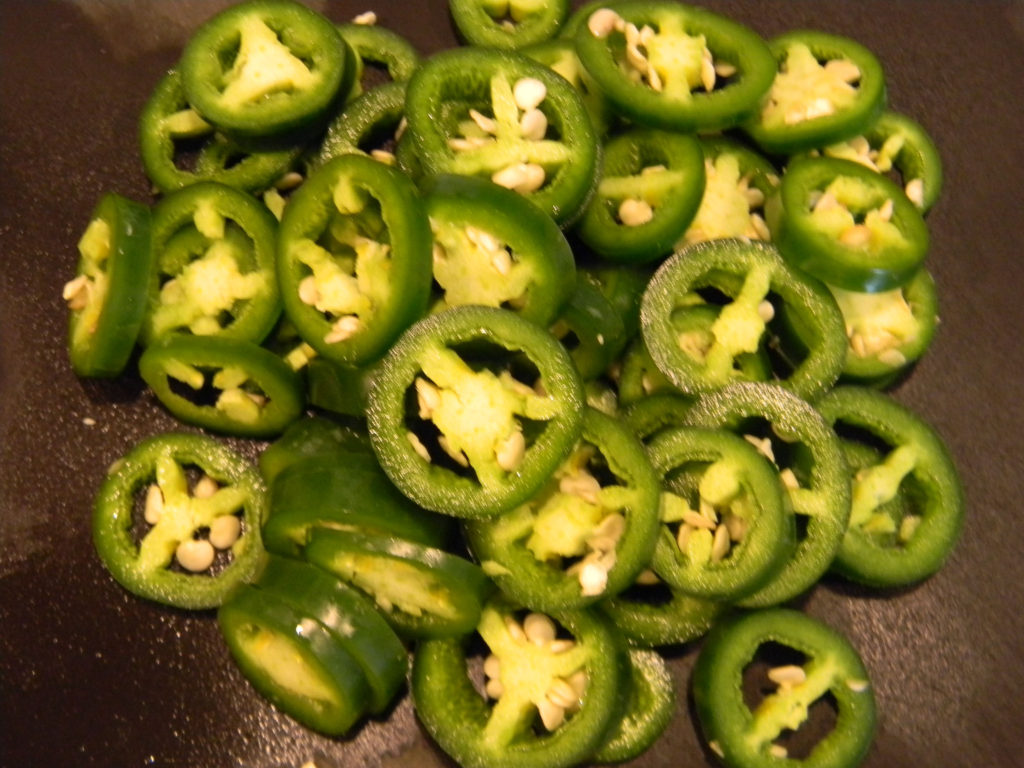
Sliced Jalapenos

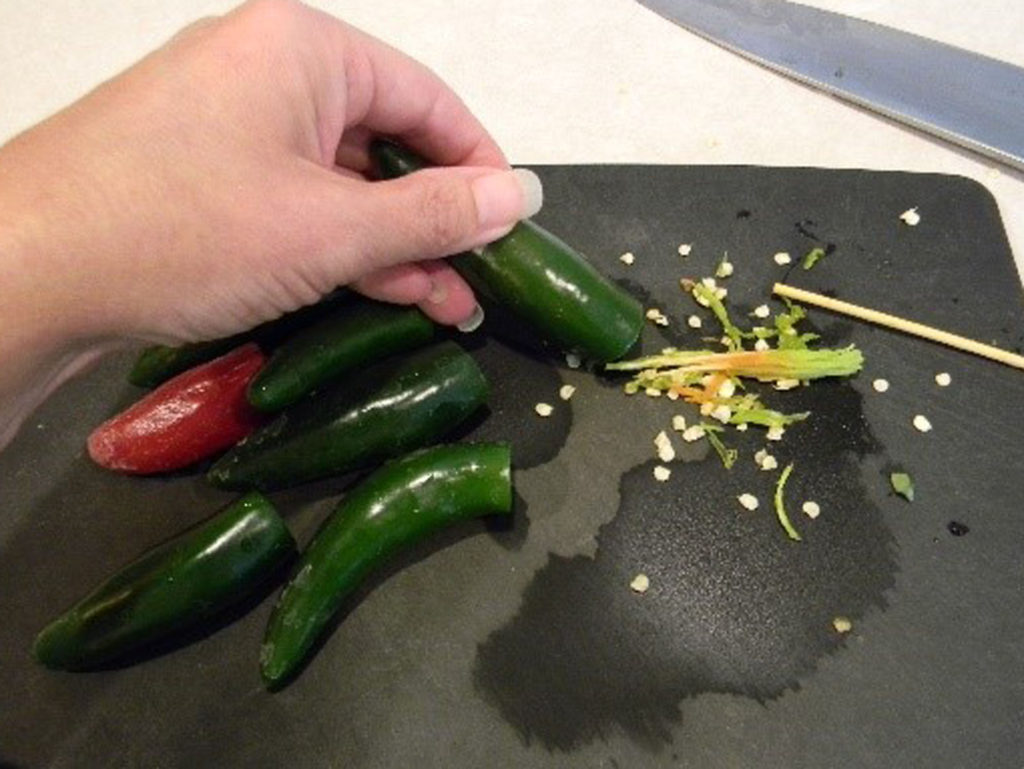
It only takes minutes to slice and put this together. However, if you want to have a lot less heat, remove the seeds before slicing.

Removing Seeds

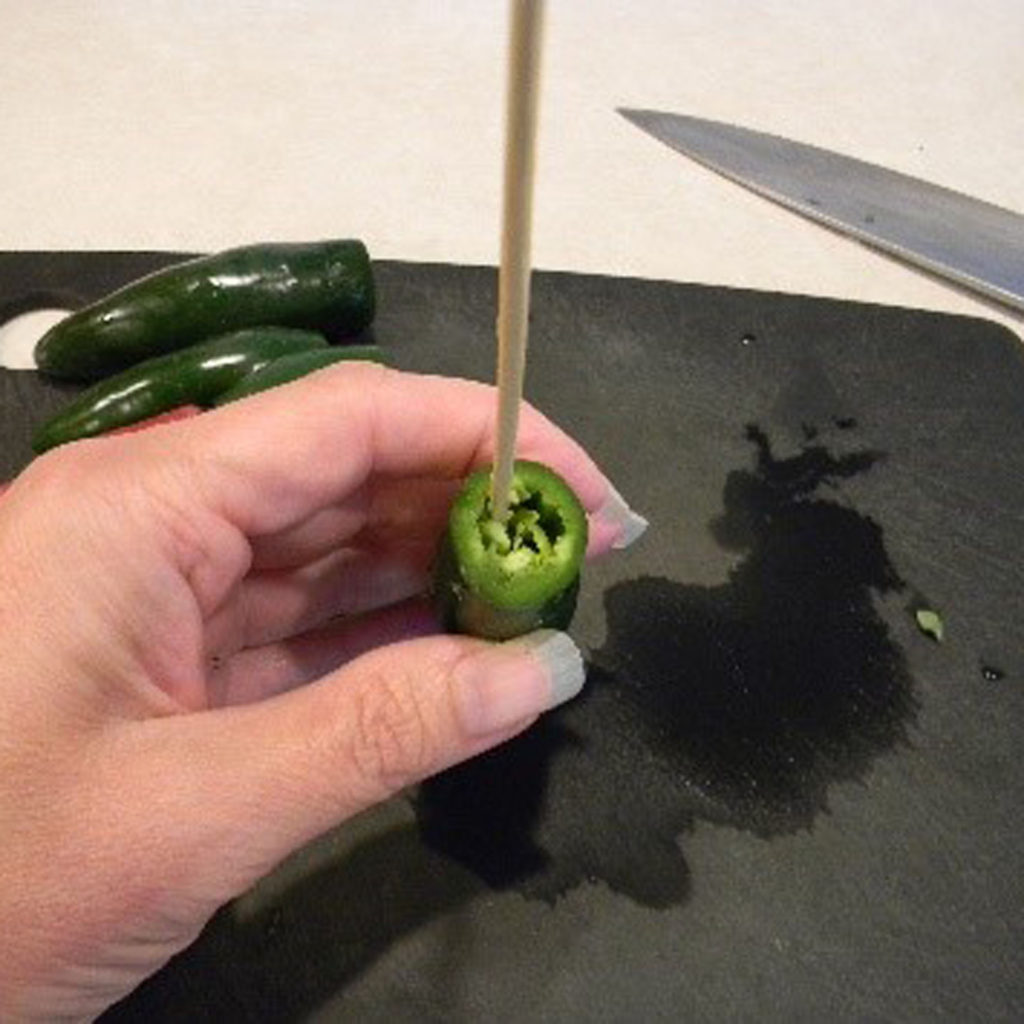
To easily remove the seeds and keep the jalapenos in rings, just cut off the stem end of the jalapeno and use the pointy end of a skewer to loosen the seeds and ribs. Just be careful not to poke all the way through the jalapeno and stab yourself. Trust me, the oils from the hot peppers poked into your skin don’t feel good!

Removing Seeds 2

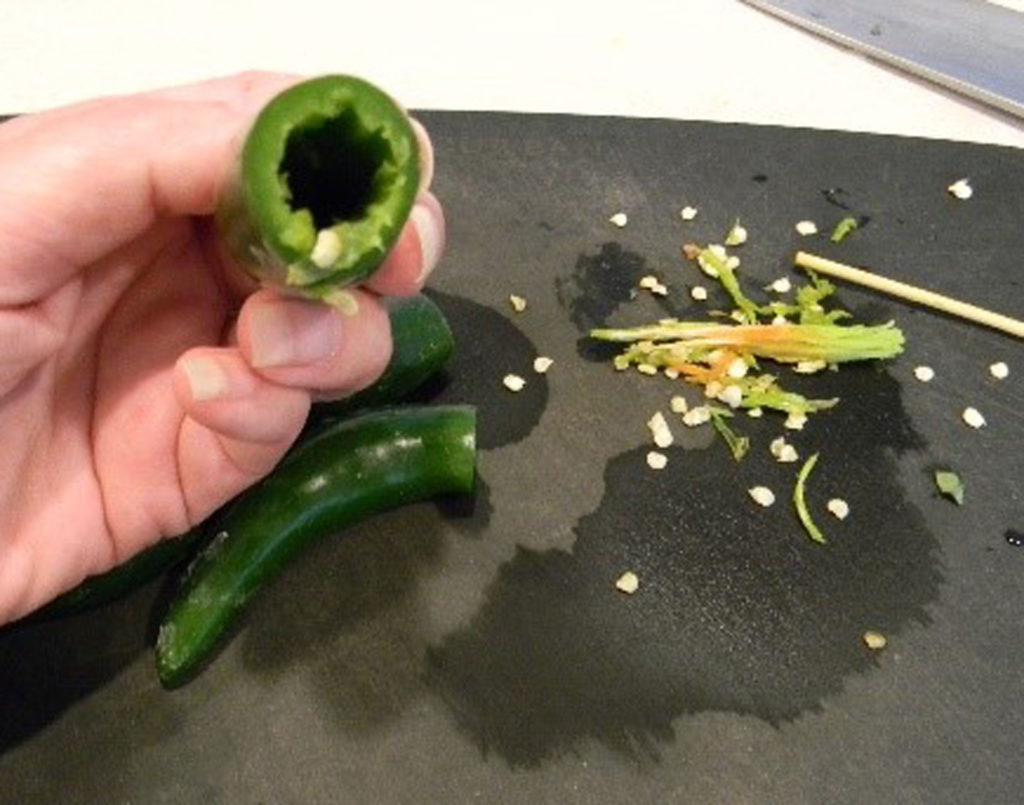
Once you have everything loosened, tap the jalapeno on the cutting board to knock everything out of the pepper.

Removing Seeds 3

Now you should have a hollow jalapeno to slice into rings for pickling (or stuffing to make jalapeno poppers).

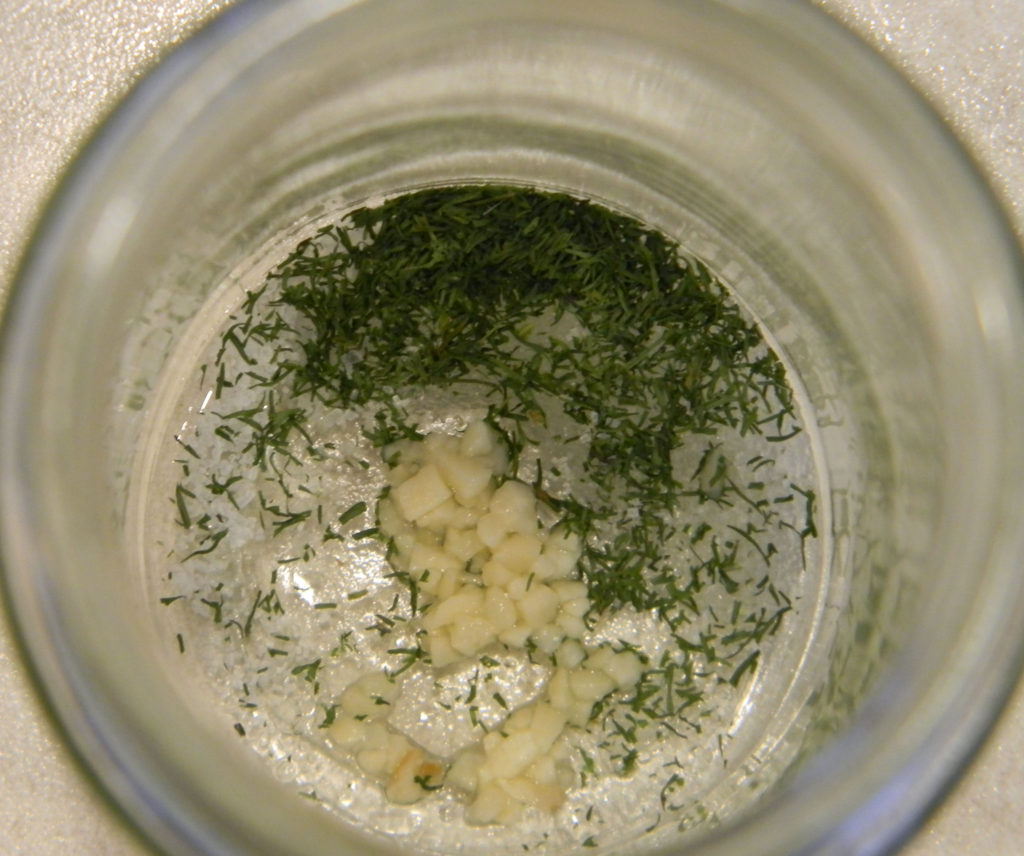
Add the seasonings into an 8 ounce jar and then the sliced jalapenos.

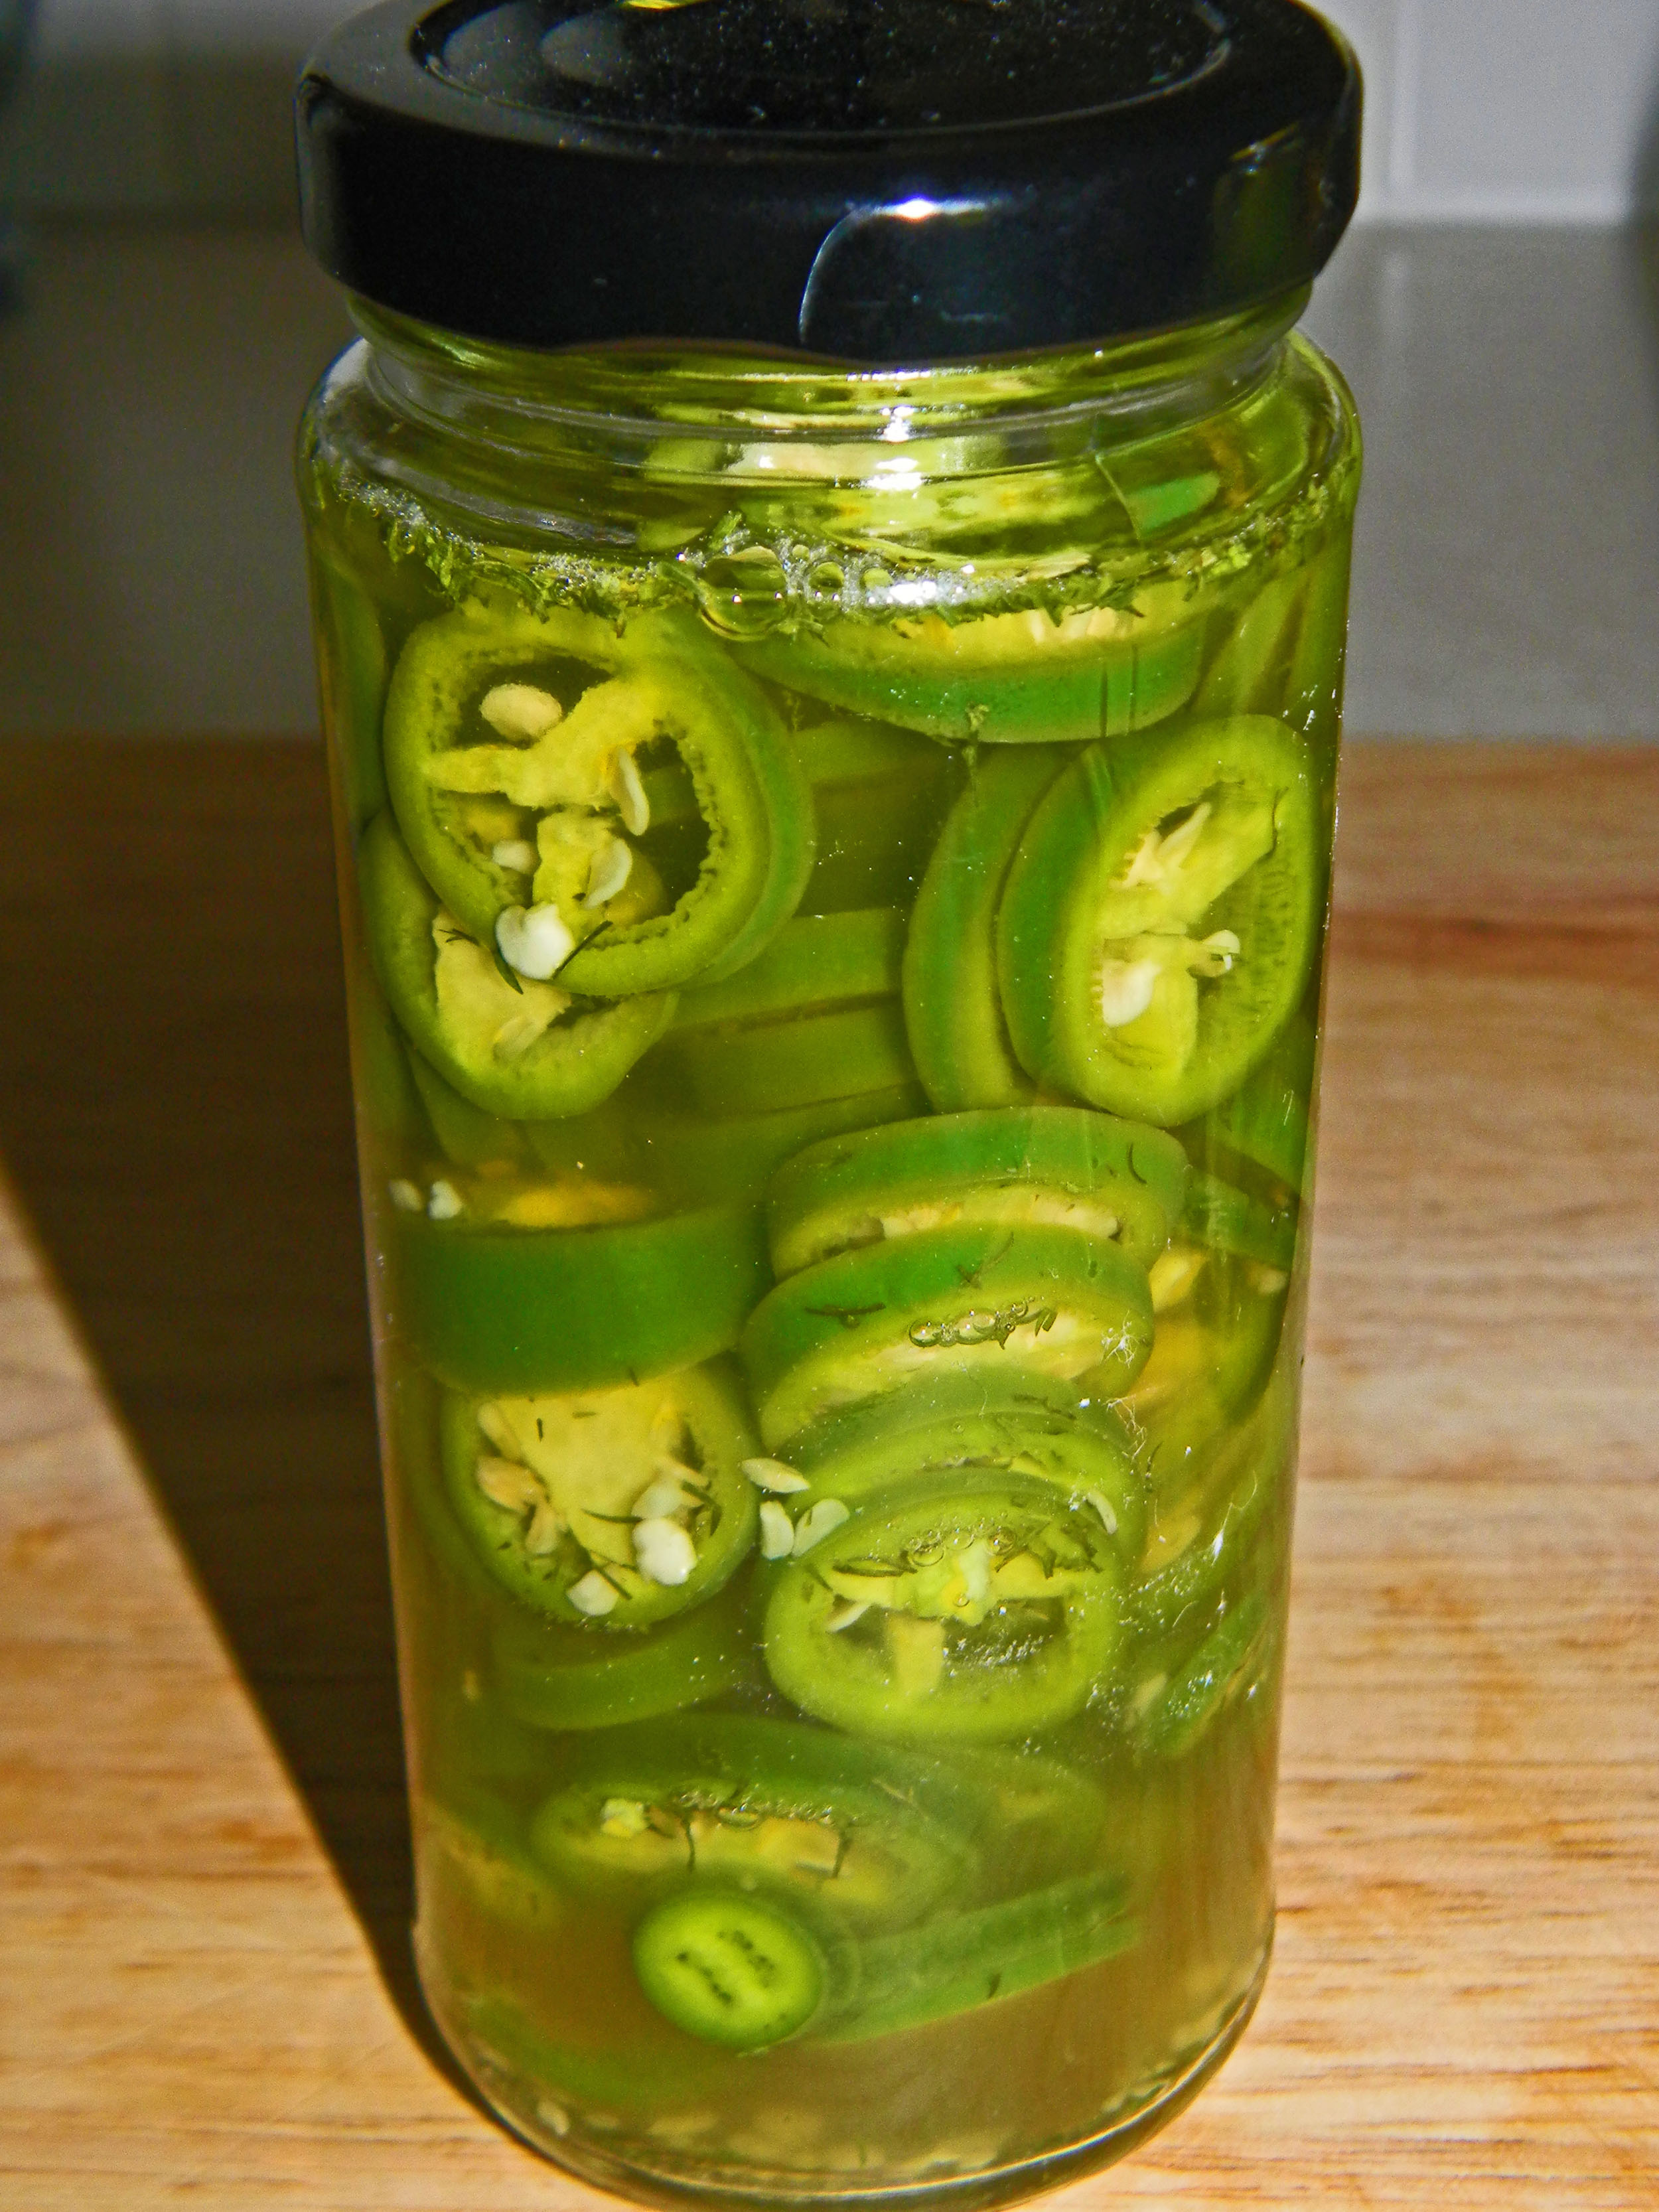
Heat up the water and vinegar to a boil and pour it into the jar with the jalapenos and seasonings.

Pickled Jalapenos

Using a towel or hot pads, tighten the lid on the jar and shake it a few times to dissolve the salt and sugar.

Let it sit at room temperature for an hour or 2 and put in the refrigerator overnight to cool down completely.

Enjoy!

Pickled Jalapenos

Refrigerator pickling is a quick and easy process and often can reap the rewards within a day or less.
Prep Time10 minutes
Cook Time3 minutes
Resting Time1 day
Total Time1 day 13 minutes
Course: Condiments
Cuisine: American, Tex-Mex
Keyword: Hot Peppers, Jalapeno Peppers, Pickling, Refrigerator Pickling
Servings: 8 servings
Calories: 3kcal
Author: Eating With Deb

Equipment

  • One 8 ounce clean jar
  • Cutting board and knife

Ingredients

  • 8 each jalapenos
  • ¼ tsp sea salt
  • 1/8 tsp minced garlic
  • ¼ tsp sugar
  • ¼ tsp dill dry
  • 1/3 cup water
  • 1/3 cup apple cider vinegar or white vinegar

Instructions

  • Slice the jalapenos into ¼ inch rings.
  • Add your seasonings to the jar and then the jalapenos.
  • Bring the water and vinegar to a boil (I use apple cider vinegar because I want that touch of added sweetness it brings to the palate).
  • Pour over the top of the jalapenos and secure the lid. Using a towel or hot pads, give the jar a few shakes to mix it up and dissolve the salt and sugar.
  • Let it cool down a couple hours and then refrigerate.
  • They are ready to eat the next day.
  • Enjoy!

Notes

I want the full heat effect of the seeds and ribs so I leave the seeds in when slicing the jalapenos. However, you could remove the seeds and ribs and then slice them.
Don't forget to wash your hands a few times and don't touch your eyes or other sensitive spots for several hours after and several washings later!

Nutrition

Calories: 3kcal | Carbohydrates: 1g | Protein: 1g | Fat: 1g | Saturated Fat: 1g | Polyunsaturated Fat: 1g | Sodium: 74mg | Potassium: 10mg | Fiber: 1g | Sugar: 1g | Vitamin A: 11IU | Vitamin C: 1mg | Calcium: 1mg | Iron: 1mg

Honey Orange Sriracha (HOS) BBQ Sauce

Honey Orange Sriracha BBQ Sauce

I love making my own barbecue sauces. They are easy to make and you can flavor them anyway you like. You can certainly use ketchup as the base but sometimes I like to use no salt added tomato sauce so I can control the amount of sodium and sugar.

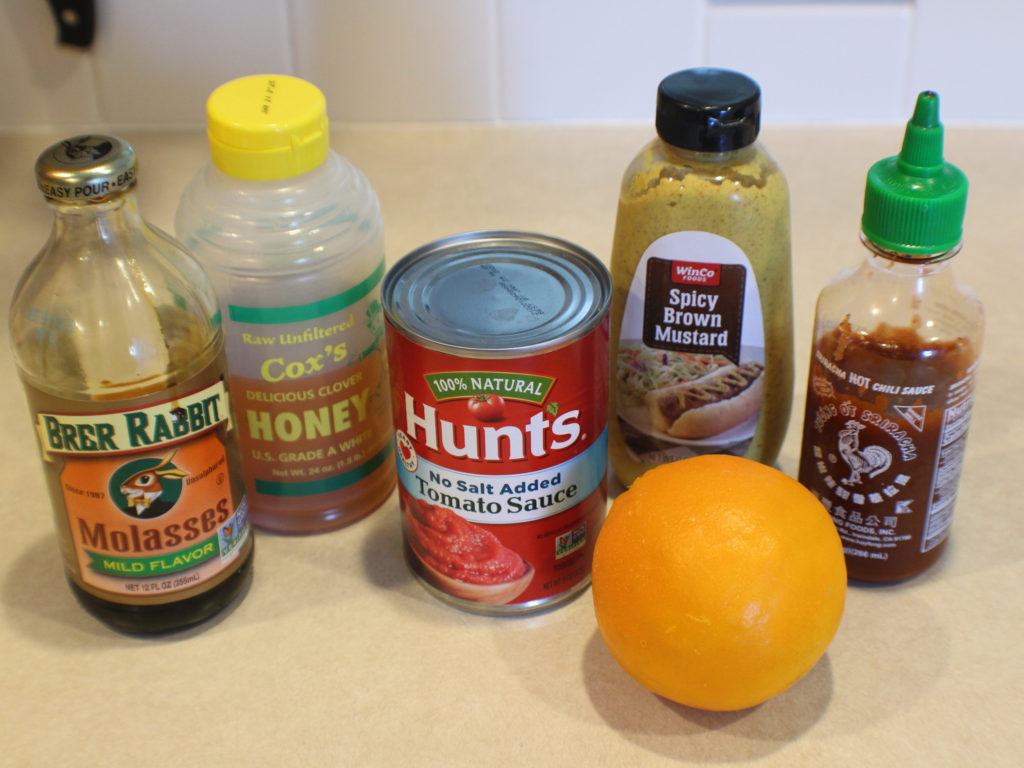
This is all you need. You could use already prepared orange juice right out of your refrigerator, but I like adding zest as well as juice and prefer the taste of fresh citrus juice. But it’s your choice. If you are going to use already made orange juice, you will need about 1/2 cup.

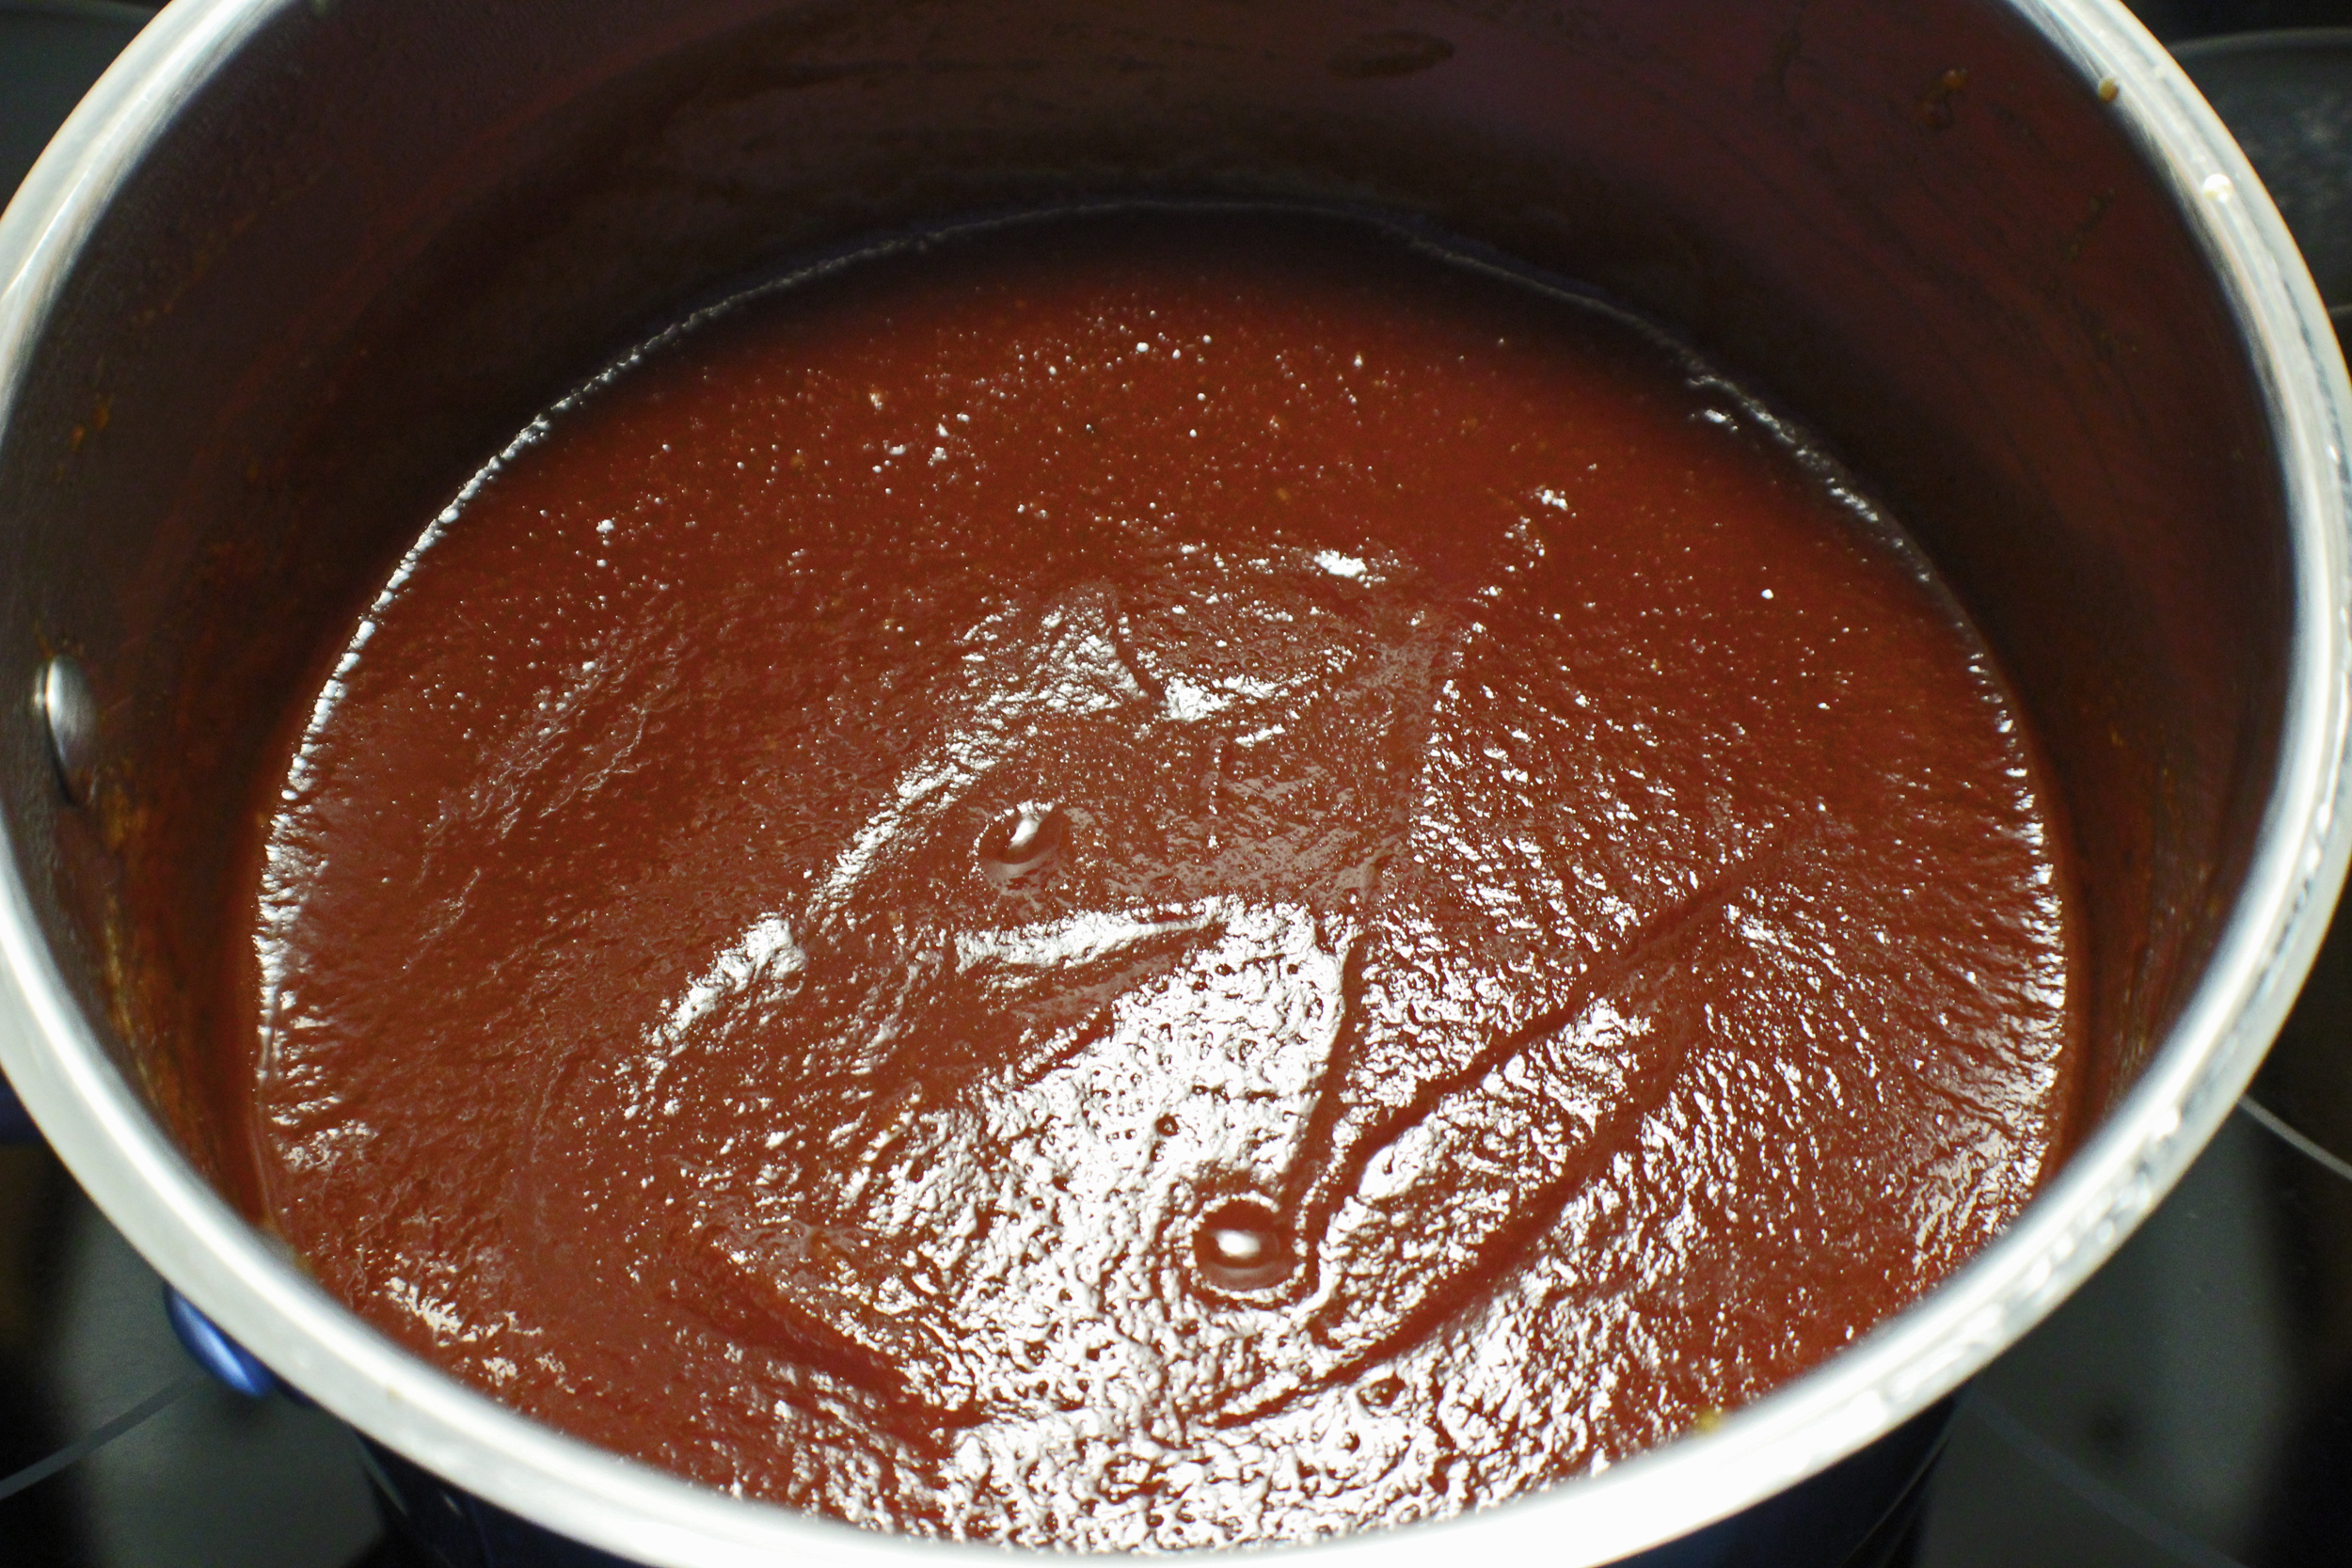
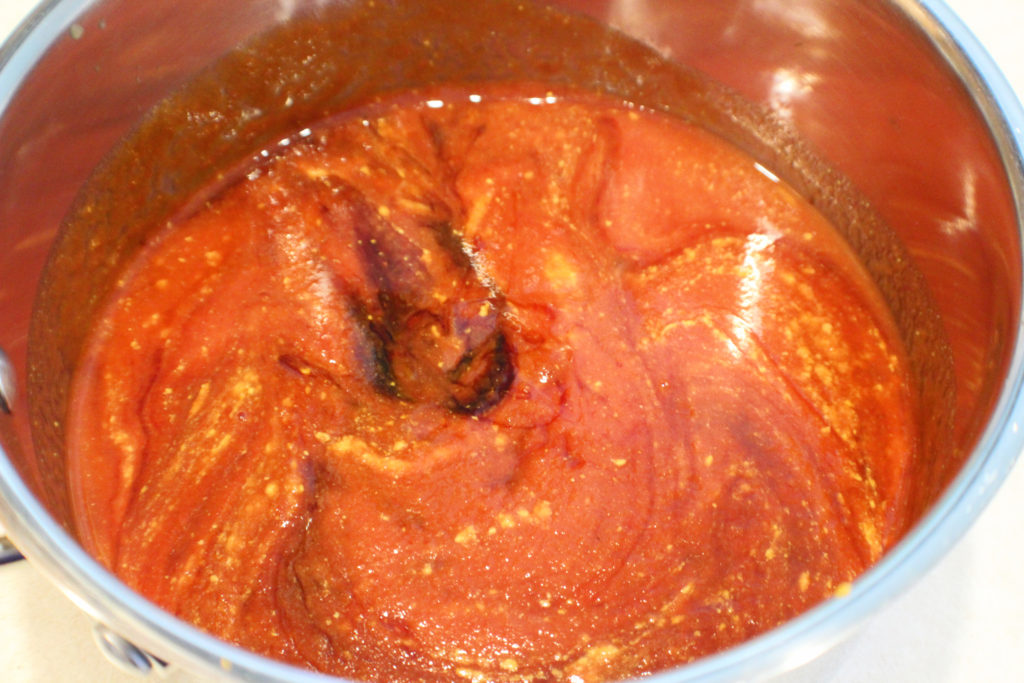
Combine all ingredients in a 4 quart sauce pan. You don’t want to use anything smaller, it will bubble and pop when it is simmering. You will simmer this for about 20 minutes until it reduces and thickens a bit. Stir it frequently because it will easily burn.

Cool and put in an old ketchup or barbecue sauce bottle or even a mason jar.

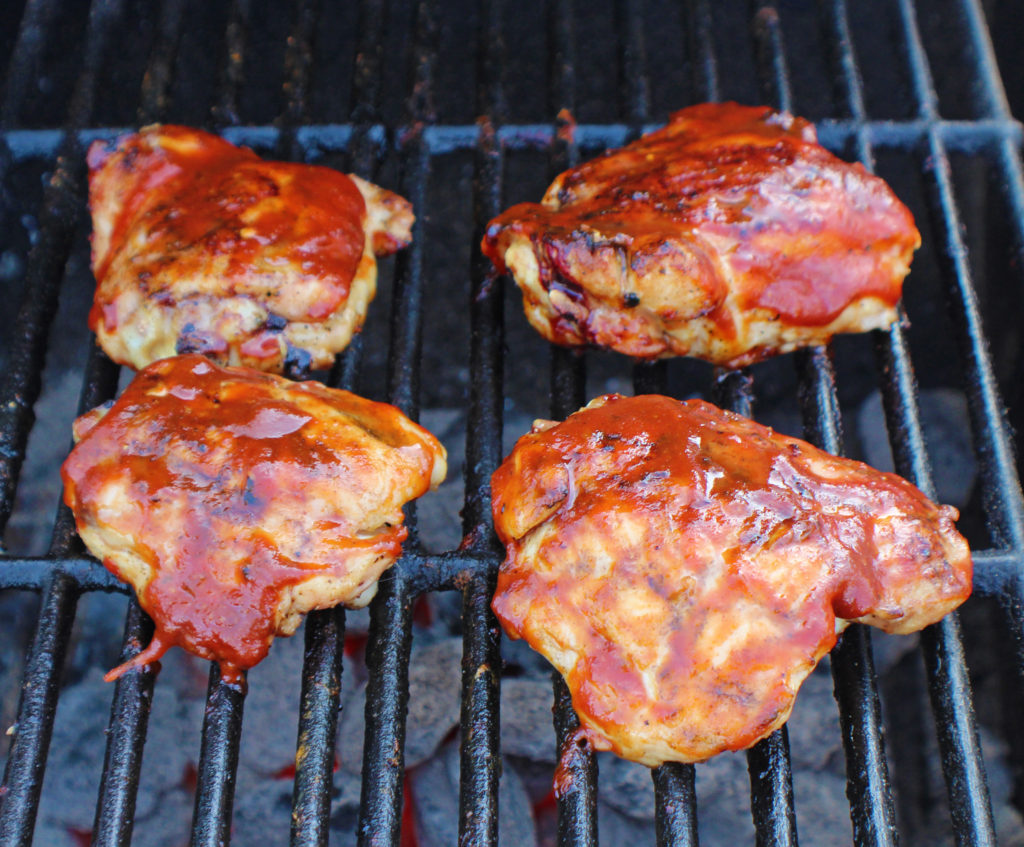
I couldn’t wait to use it and decided to grill up some chicken thighs. They take about 5 to 7 minutes per side over medium to medium low heat. In the last couple of minutes of cooking, I baste both sides with BBQ sauce and let it cook a bit. The heat will caramelize the sugars.

I have also grilled zucchini and portobello mushroom caps and baste them in the last minute or 2 with BBQ sauce.

Honey Orange Sriracha (HOS) BBQ Sauce

A little sweet, a little tangy, and a little spicy, this BBQ sauce tastes great on just about any grilled meat or vegetable.
Prep Time5 minutes
Cook Time20 minutes
Course: Condiments
Cuisine: American
Keyword: BBQ Sauce, Sriracha
Servings: 16 servings
Calories: 47kcal
Author: Eating With Deb

Equipment

  • 4 quart sauce pan
  • Heat resistant rubber spatula

Ingredients

  • 15 ounce can tomato sauce no salt added
  • 1/3 cup molasses
  • 1/3 cup Dijon or brown mustard
  • ¼ cup honey
  • 1 each orange juice and zest
  • 2 tbsp Sriracha sauce
  • ¼ tsp sea salt
  • ¼ tsp black pepper
  • ¼ tsp granulated garlic

Instructions

  • Combine all ingredients in a sauce pan and bring to a simmer. Reduce heat to low or medium low and simmer for 20 minutes stirring frequently. The sauce will reduce and thicken but can easily burn.
  • Remove from heat and let cool slightly. Taste while it’s still warm. If you need to add more honey because your orange wasn’t very sweet, add now. Adjust other seasonings to your desire.
  • Cool and put in an old ketchup or BBQ sauce bottle. or a mason jar.

Nutrition

Serving: 2tbsp | Calories: 47kcal | Carbohydrates: 11g | Protein: 1g | Fat: 1g | Saturated Fat: 1g | Trans Fat: 1g | Sodium: 280mg | Potassium: 204mg | Fiber: 1g | Sugar: 11g | Vitamin A: 122IU | Vitamin C: 3mg | Calcium: 22mg | Iron: 1mg

Sauerkraut

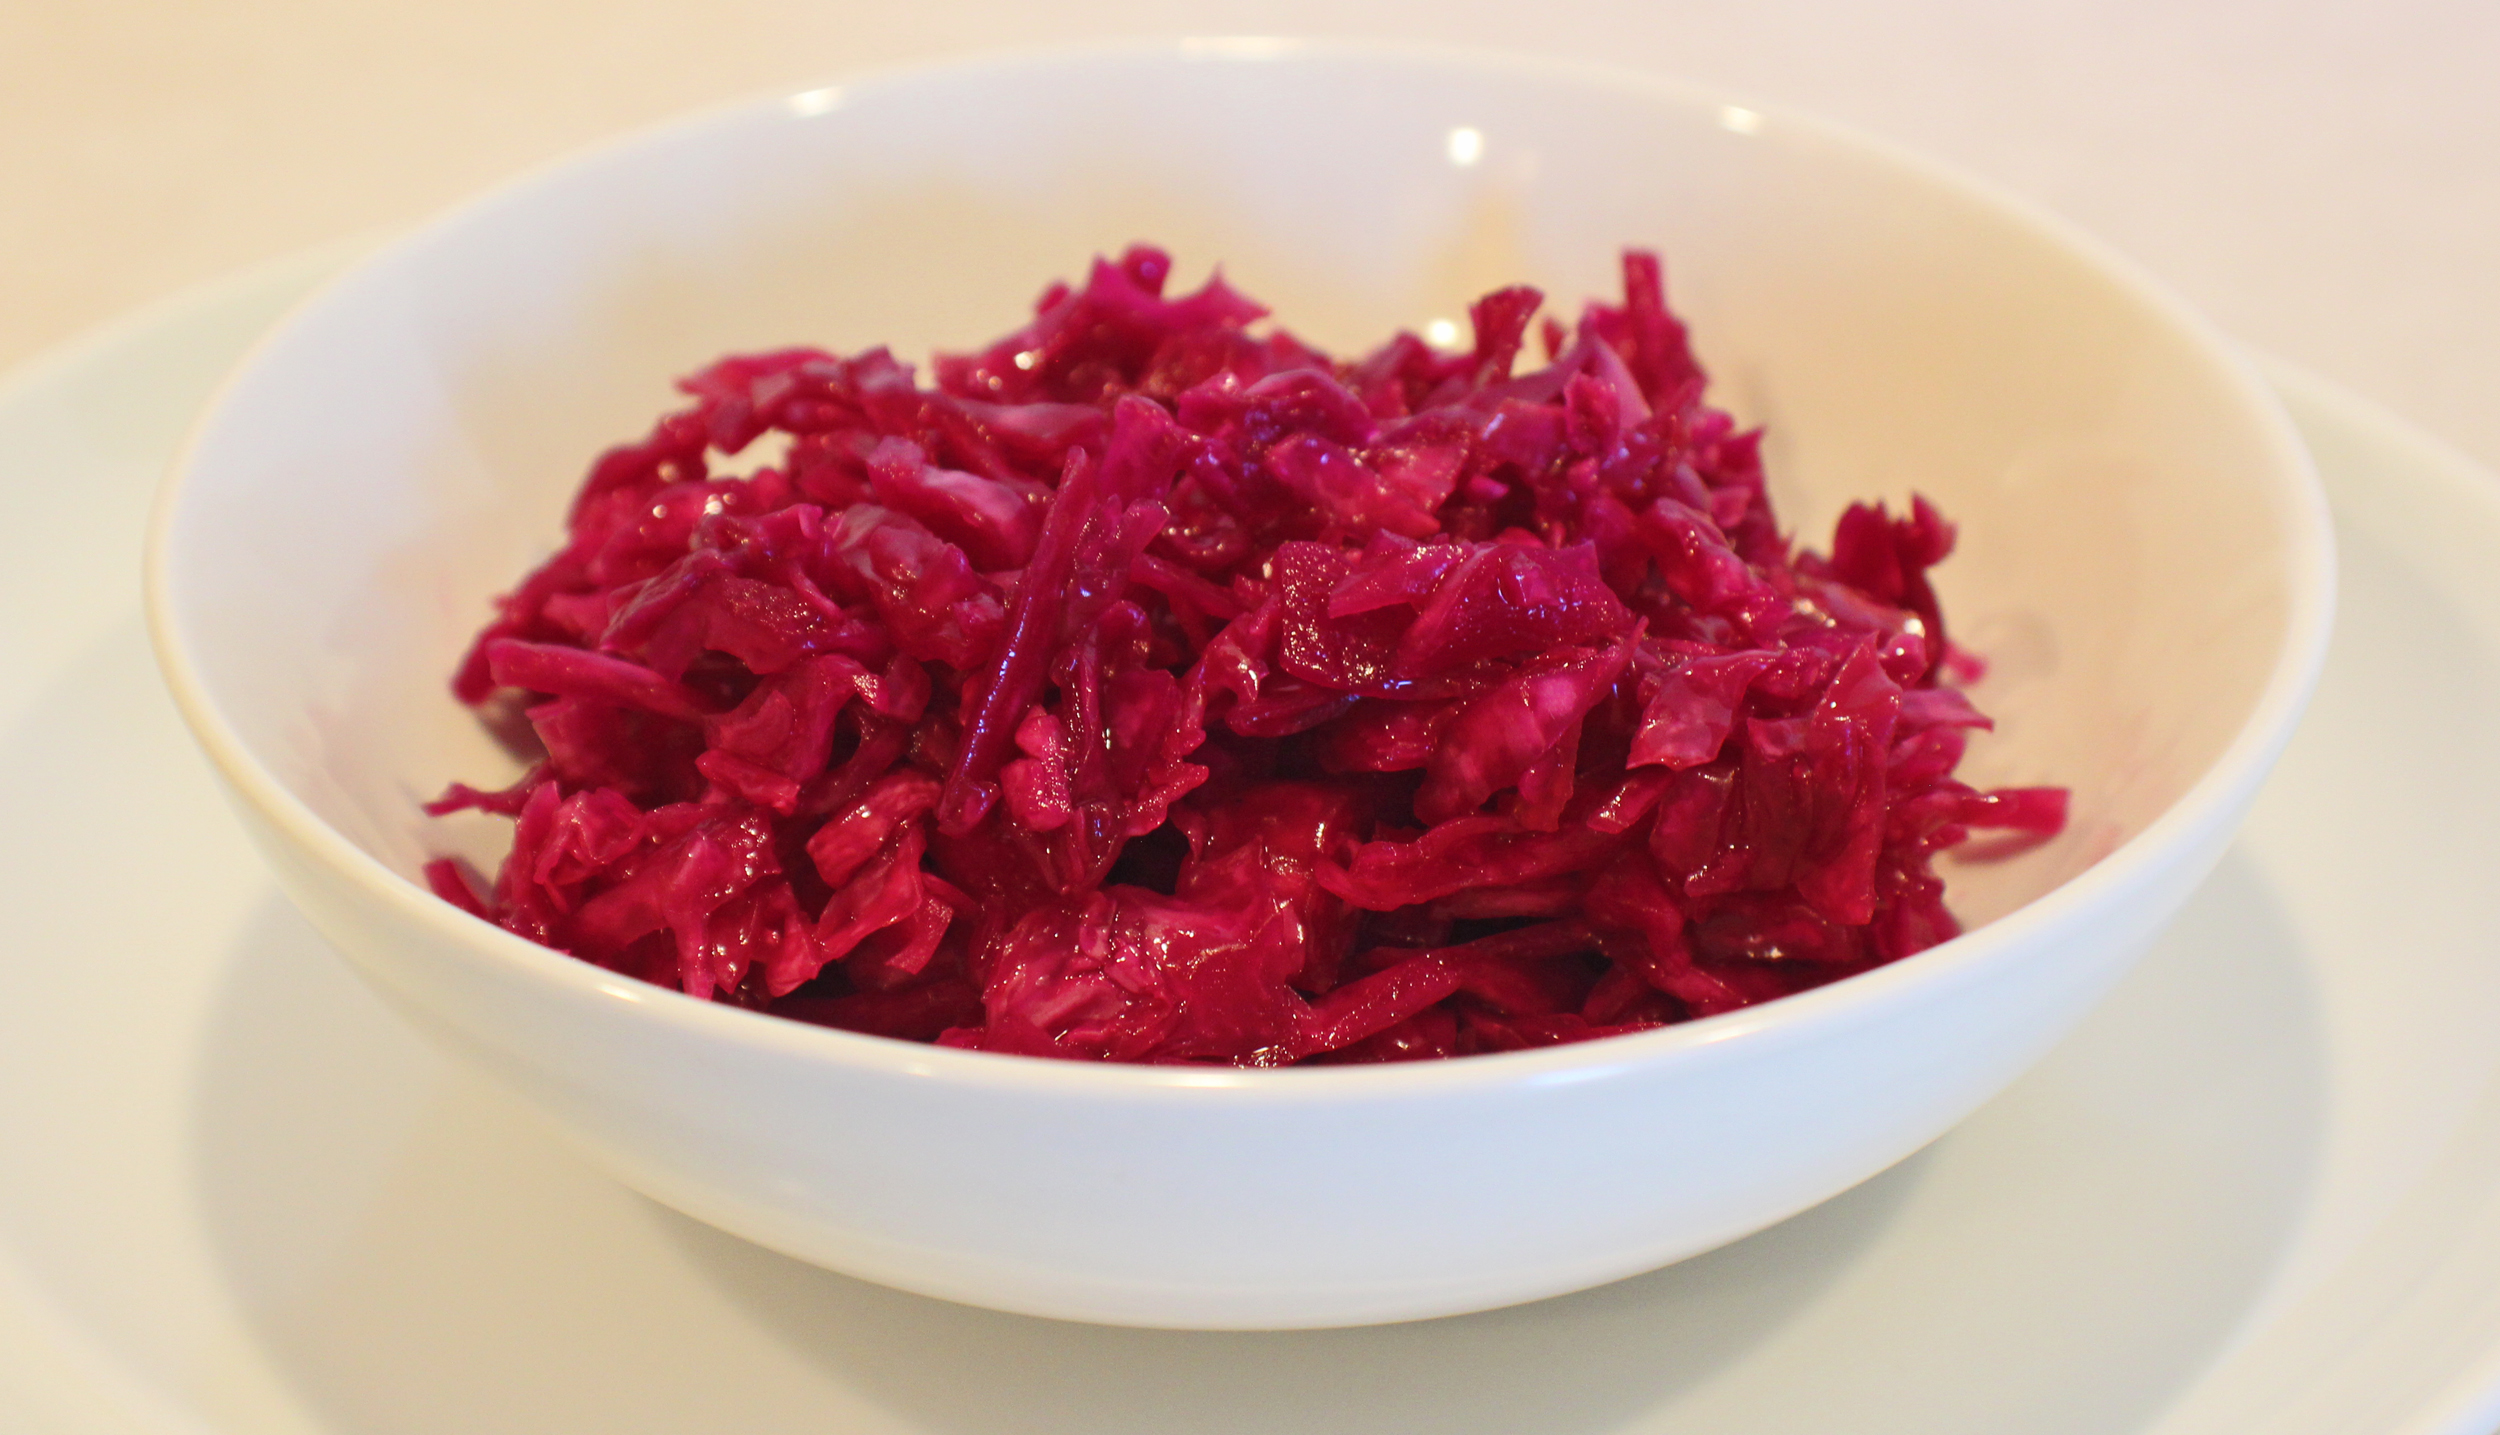
Purple Sauerkraut

With summer approaching, I get excited to start grilling more. So naturally, I need sauerkraut to go with a lot of the items that get grilled.

Making sauerkraut is very simple and doesn’t require any special tools. The fermenting process creates probiotics which are what is found in greek yogurt and helps maintain your gut health.

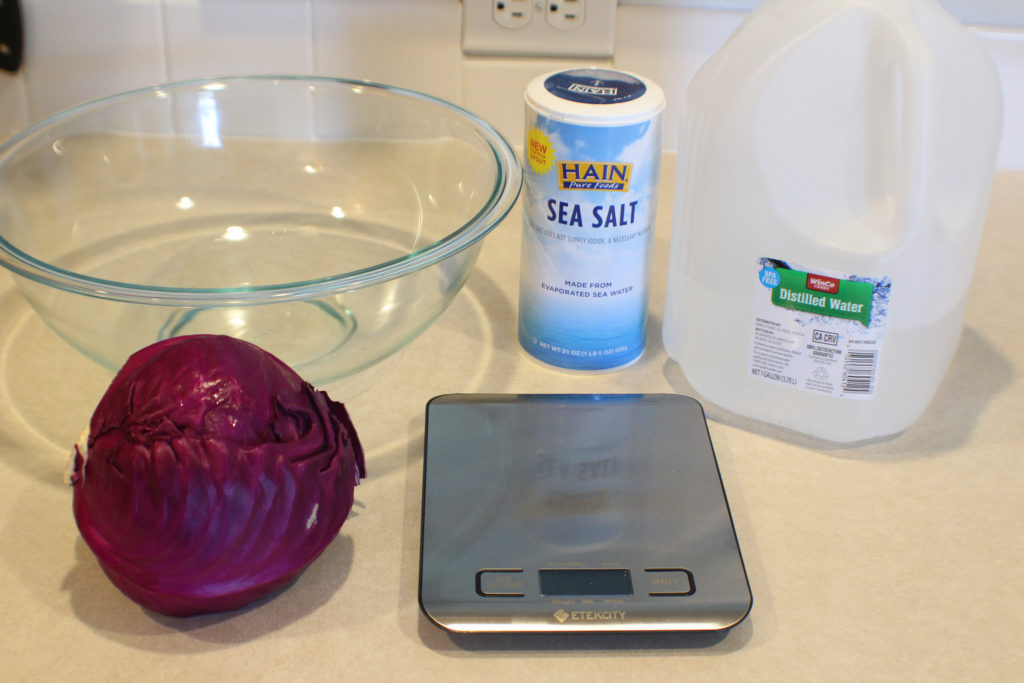
Kraut Ingredients

You need about 1 pound of cabbage, green or purple, sea salt, and potentially a little distilled water.

I like using purple cabbage over green because is stays firmer longer. I like the crunch. But use what you like best. It took some of my friends a bit to get used to the firmer sauerkraut because they never knew any different. They only had store bought kraut made from green cabbage.

Shred about 1 pound of cabbage. I use a knife, but you could use a food processor or mandolin if you desire.

Sprinkle in 2 teaspoons of sea salt and massage it into the cabbage. You can already see the water being pulled out of the cabbage.

Cabbage Resting

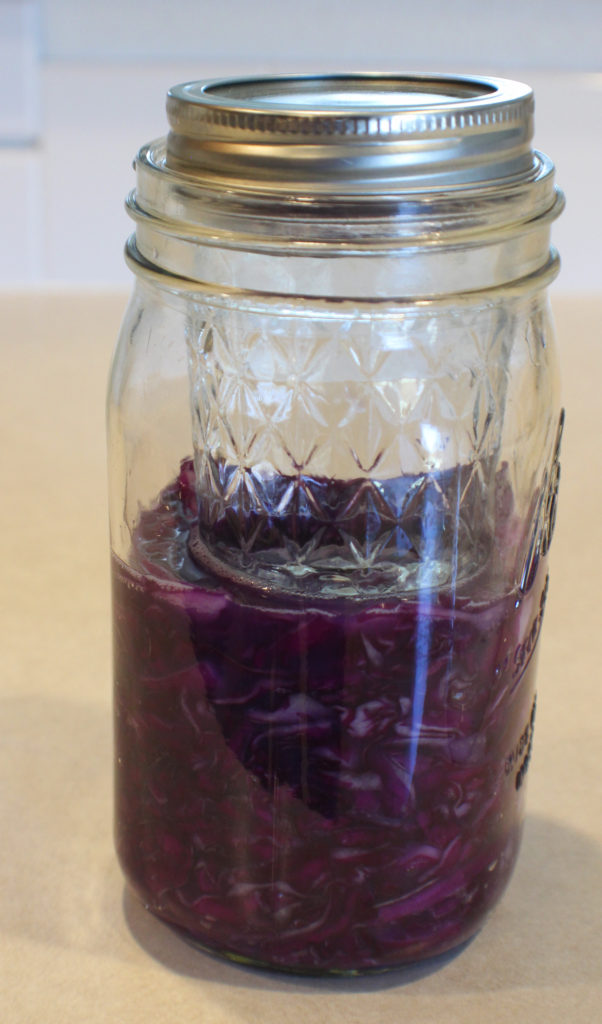
Push the cabbage together, top it with a plate and a weight. I fill the jar I’m going to put the kraut in with water and set that on top of the plate.

Now walk away for about an hour.

Smashing Cabbage in Jar

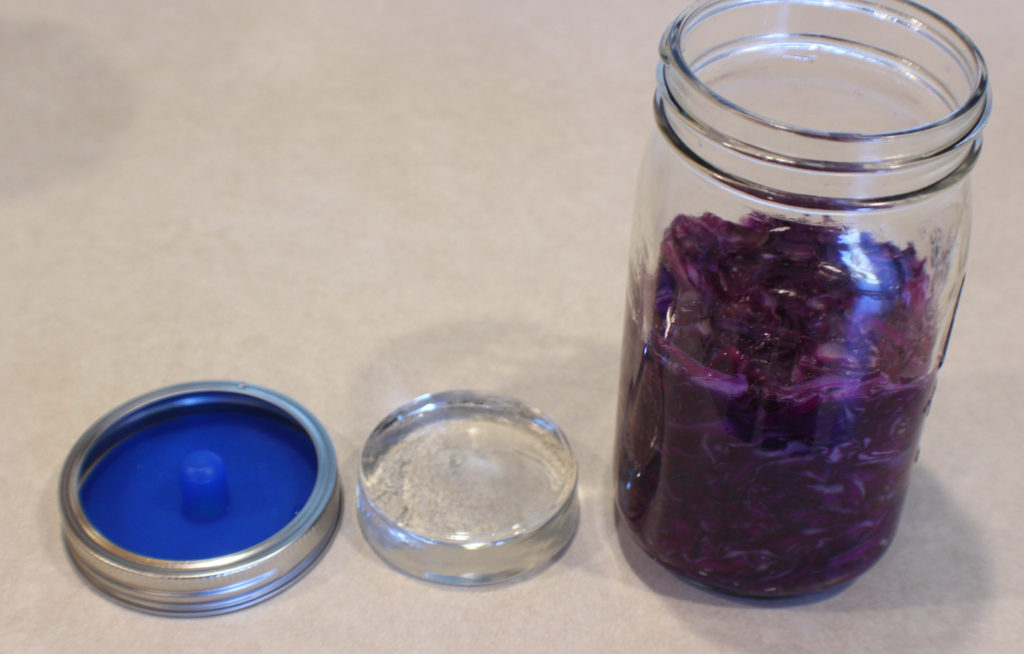
It’s time to fill the jar. For a long time I used my fist to smash the cabbage down in the jar. I finally broke down and bought a small fermenting kit that came with this handy pestle to smash the cabbage down.

Be sure all the cabbage is submerged in the brine. If not, you need to add more brine. If any cabbage is not submerged, mold will start growing during the fermenting process and ruin the sauerkraut.

If you don’t have a fermenting kit, a smaller jar filled with water will do the trick.

If you have a fermenting kit, you should have weights and fermenting lids in the kit. The fermenting lid allows gases to escape, but no air will be allowed in. This helps reduce the chances of mold growing.

Kraut Ready to Ferment

You are ready to store this away for a week. As the cabbage ferments, it produces more liquid so put it on a plate just in case water seeps out.

Store it away in a dark, cool spot. I put it in my pantry, that way I won’t forget to check on it daily to ensure there is enough water. It needs the dark to ferment properly, so don’t leave it out on a countertop.

Sauerkraut Ready

After a week, this is what you have. Mine produced a little foam during the fermentation process. I scrape that off with a spoon before I remove the weight.


Foam and Weight Removed

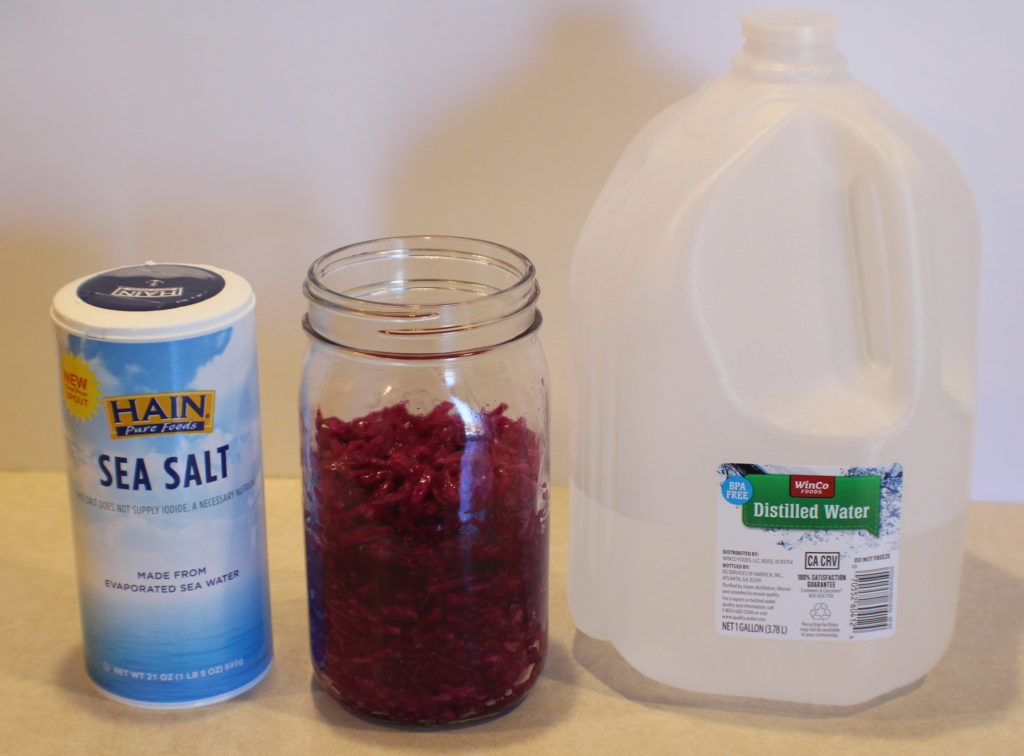
After the weight is removed, I need to add some more salt water to my jar to ensure the kraut stays fully submerged.

Salt Water Needed

I have plenty of room for a full cup of salt water. This way I make sure I have enough liquid. The sauerkraut is packed tight in the jar and as you start using it and loosening it up, you will need the additional liquid.

Salt Water Added

You now have a delicious, probiotic rich sauerkraut.

Time to get grilling!

Sauerkraut

Homemade sauerkraut is simple to make and tastes better than any store bought kraut. Using green or purple cabbage you can make a delicious kraut in a week.
Prep Time15 minutes
Resting Time7 days
Total Time7 days 15 minutes
Course: Condiments
Cuisine: German
Keyword: Cabbage, Fermenting, Probiotics, Sauerkraut
Servings: 8 servings
Calories: 14kcal
Author: Eating With Deb

Equipment

  • 1 quart jar
  • 1 pint jar or weight and fermenting lid
  • Pestle of some sort or your fist to smash the cabbage down in the jar
  • Cutting board and knife
  • Large bowl and plate that will fit in the bowl

Ingredients

  • 1 pound cabbage purple or green, shredded
  • 2 tsp sea salt

Additional Salt Water

  • 1 cup distilled water
  • 1 tsp sea salt

Instructions

  • In a large bowl, toss cabbage with salt, massaging the salt into the cabbage. Put a plate on it and weigh it down. I put water in the jar that I am going to use to put my sauerkraut in.
  • Let sit for an hour or up to 6 hours to wilt the cabbage and produce water.
  • Transfer to a jar and smash it down and be sure all of the cabbage is covered in brine. Add more salt water if needed (1 tsp sea salt to 1 cup distilled water).
  • If you have a weight and ferment lid, those work great. Otherwise fill a smaller jar with water and set that on top of the cabbage to weigh it down.
  • Put it on a plate and then in a cool, dark place. I use my pantry.
  • Check daily for water level (must stay above the cabbage so as not to produce mold).
  • Check for flavor starting at 7 days. Refrigerate when you have the flavor you want. It will continue to slowly ferment in the refrigerator over time.
  • Remove the weight and foam before refrigerating.
  • Add additional salt water to the jar to cover all the sauerkraut before refrigerating.

Notes

Makes about 3 cups of sauerkraut.
Use within 6 months. If it sits too long in the refrigerator, it starts turning mushy.

Nutrition

Calories: 14kcal | Carbohydrates: 3g | Protein: 1g | Fat: 1g | Saturated Fat: 1g | Sodium: 882mg | Potassium: 97mg | Fiber: 1g | Sugar: 2g | Vitamin A: 56IU | Vitamin C: 21mg | Calcium: 23mg | Iron: 1mg