Pepper Burgers

Nothing says summer like the smells coming off the barbecue. I will grill all year round – I’ve grilled filet mignon steaks for Christmas.

Of course hamburgers are one of the most often grilled item and with just a little bit of prep and a tip with the seasonings, you can have a gourmet burger at home.

I usually double my burger recipes, cook off what is needed and freeze the rest of them (flat on a lined sheet tray, then bag them up when frozen) so I can pull one out when I am in the mood.
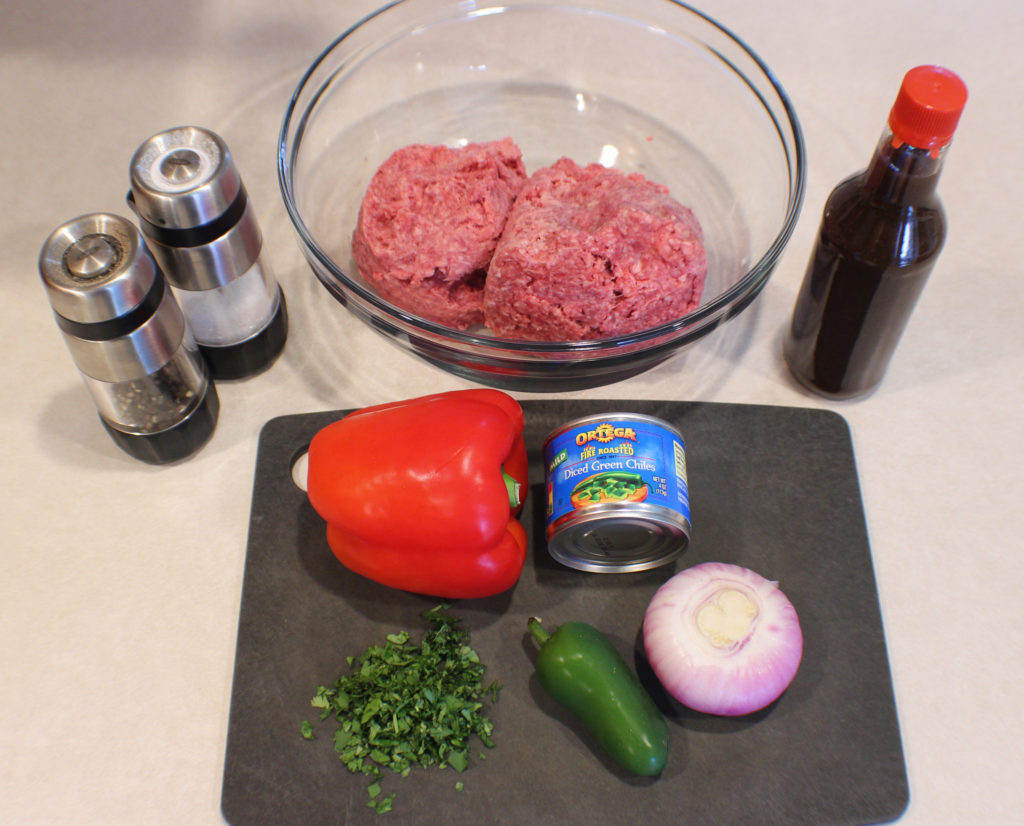
Start by gathering all of your ingredients. I used some cilantro the day before. I chopped up the whole bunch so it was ready for the next time I had use for it.
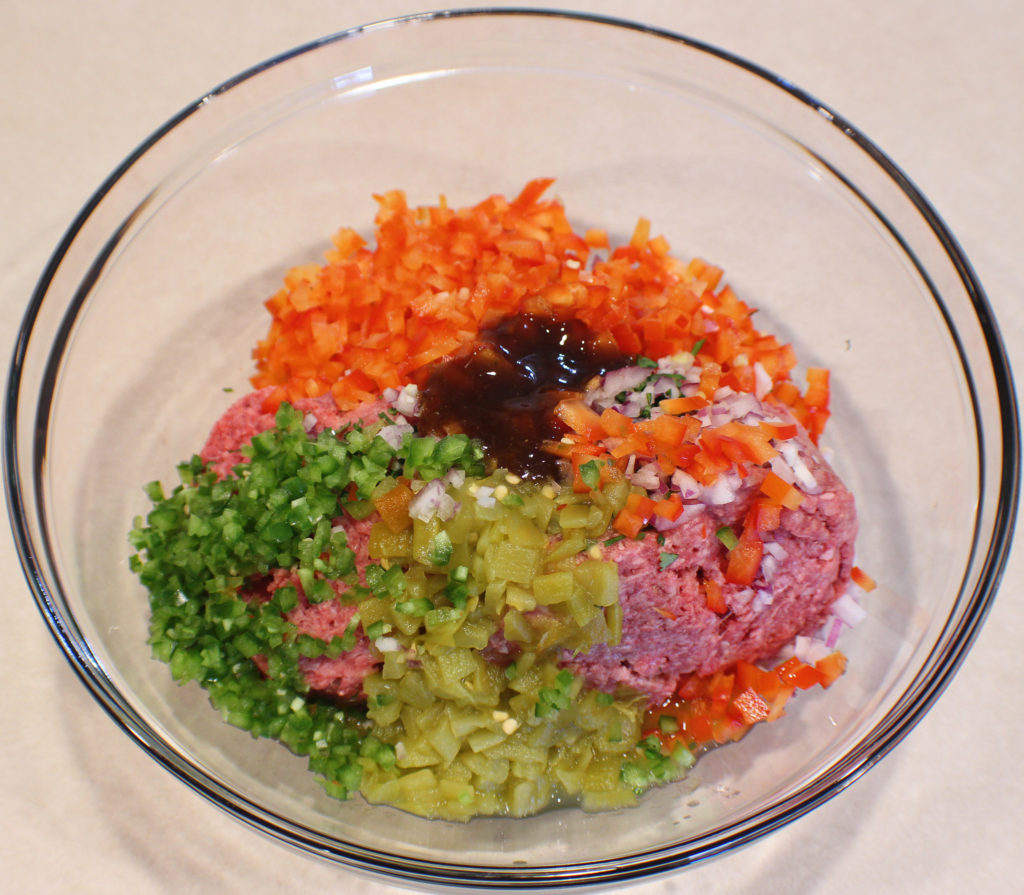
Chop your peppers, onion, and cilantro if you already have not. Put all of your ingredients in a bowl.
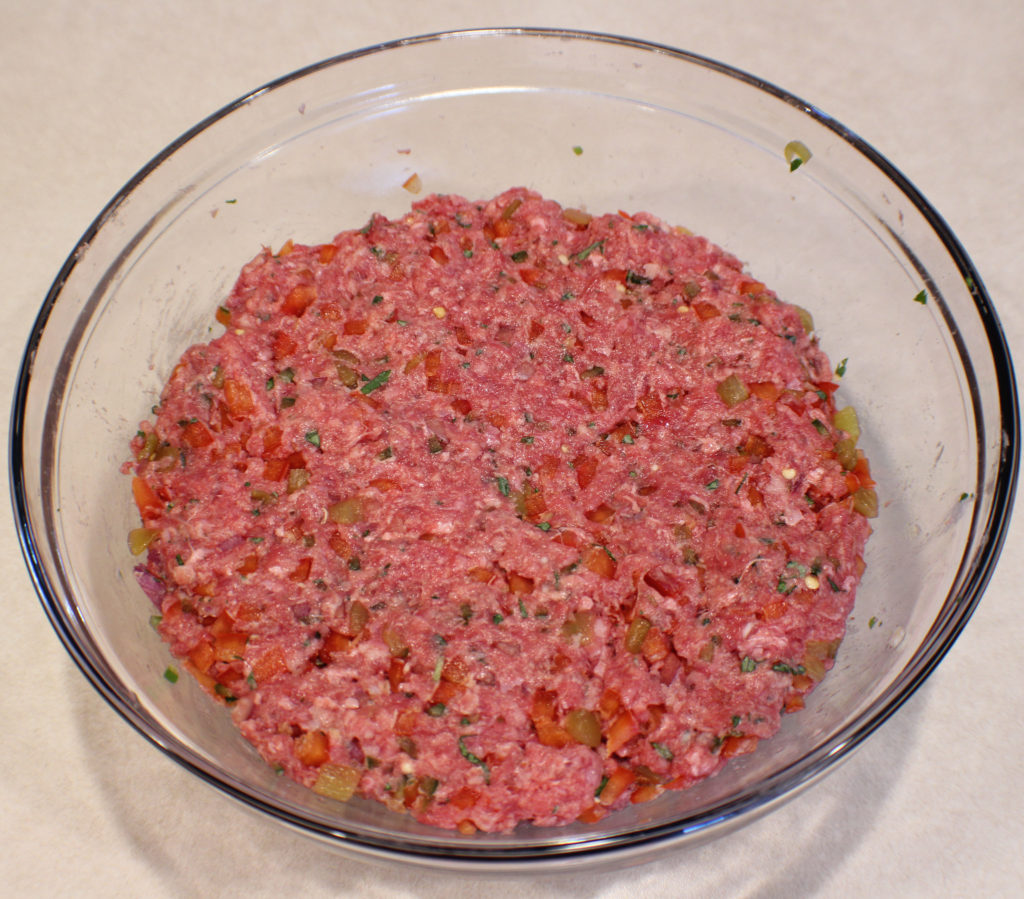
Mix it all together (no salt and pepper yet), and divide into how many burgers you want.

A note about mixing: mix only until the ingredients are all incorporated. Over mixing ground beef tends to make it tough.

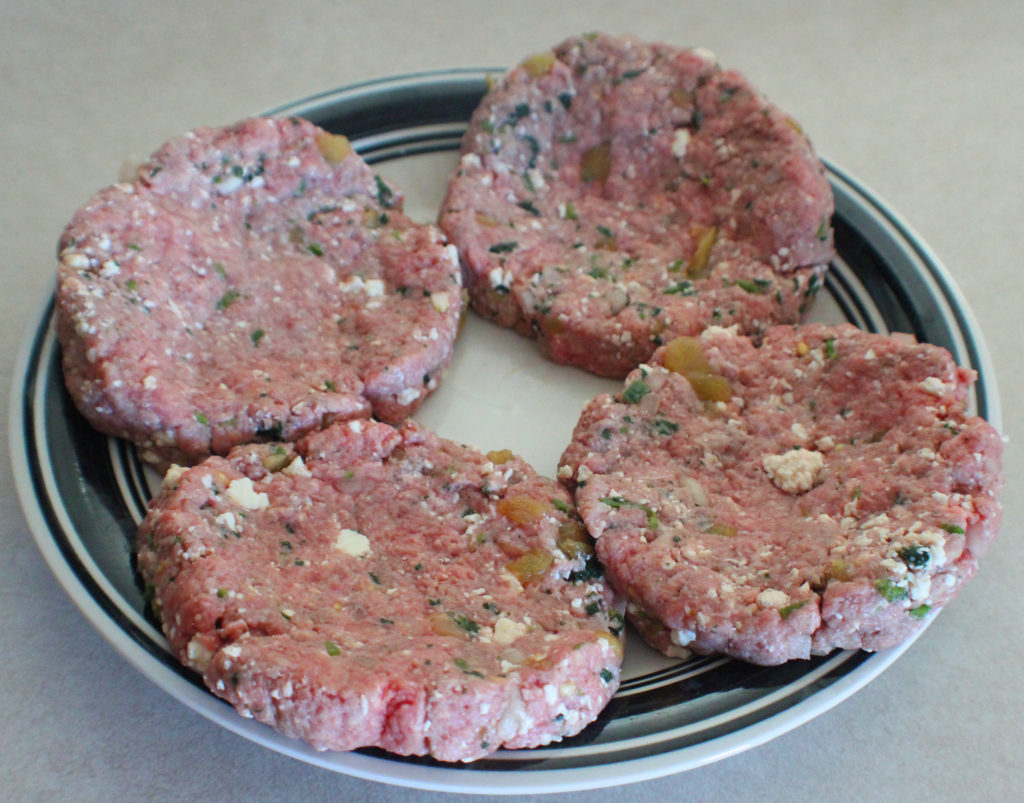
Start making your burger patties. When you form your patties, make sure the middle is thinner than the edges. When ground beef cooks, it pushes the juices to the middle, plumping up the middle of the patty. So, if your patties start out perfectly even in thickness all the way across, you will end up with swollen burgers in the middle.

Once your patties are formed, it is time to add the salt and pepper to both sides of the patties. By adding it to the outside of the meat, you get that really good restaurant grilled taste.
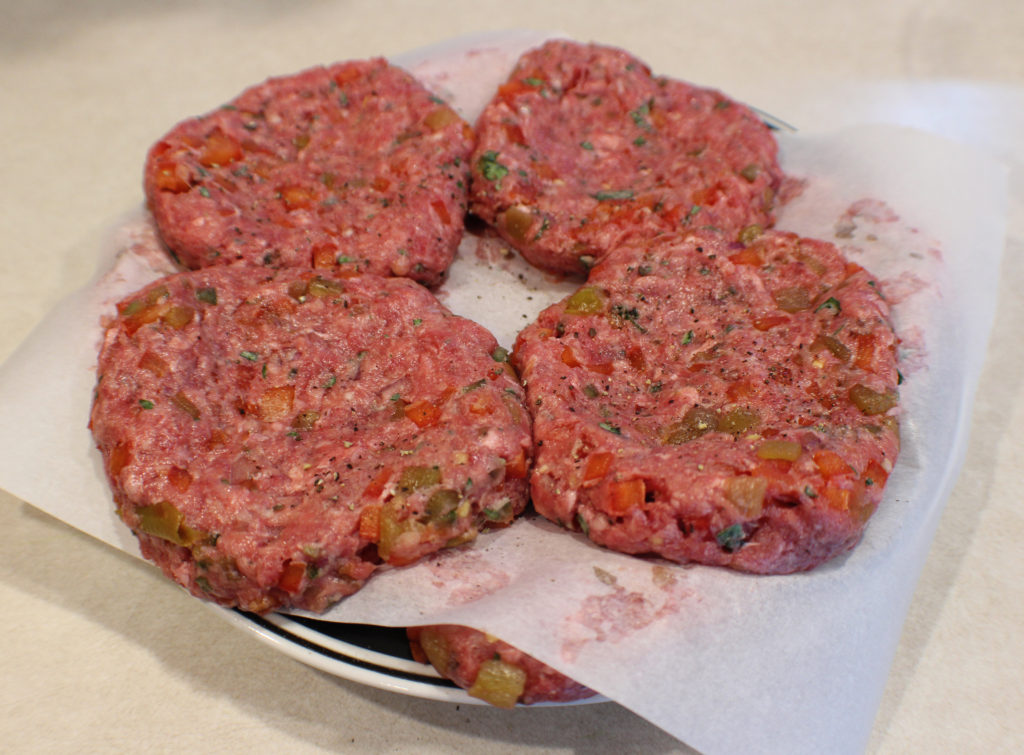
As I mentioned, I generally make double the amount of burgers I need and freeze what don’t get eaten for easy grilling later. Usually I will lay the burgers that I’m not going to cook on a lined sheet tray and freeze them until frozen, then bag them up.

This time I cooked all 8 burgers. Plus I made them the day before. To save space in my refrigerator, I decided to put these on a plate, but I needed to stack them. In order for them not to stick to one another, I put a piece of parchment paper in between the layers.

Ok, you are ready to cook your burgers. I will use a grill any day over a pan on the stove or in the oven. I prefer charcoal over gas, it just gives it a much better flavor. But use what you have available to you.

Today was really windy and cool and I have a small gas grill on the front patio that blocks the wind, so that’s where I cooked them.

Depending on how thick you made your burgers and how hot your grill is, depends on how long it will take to cook them. Generally it’s about 5 to 7 minutes per side with the lid closed.

Ok, I have to throw in the bit about food safety. Your burgers need to reach a minimum of 155 degrees to kill E-coli, which means your burgers will be cooked to medium.

If you are adding cheese, now is the time. Some people want cheese, some don’t, some are allergic to dairy. Some like pepper jack cheese, some like co-jack, mix it up and have fun with them.

Add your cheese and close the lid for the cheese to melt.

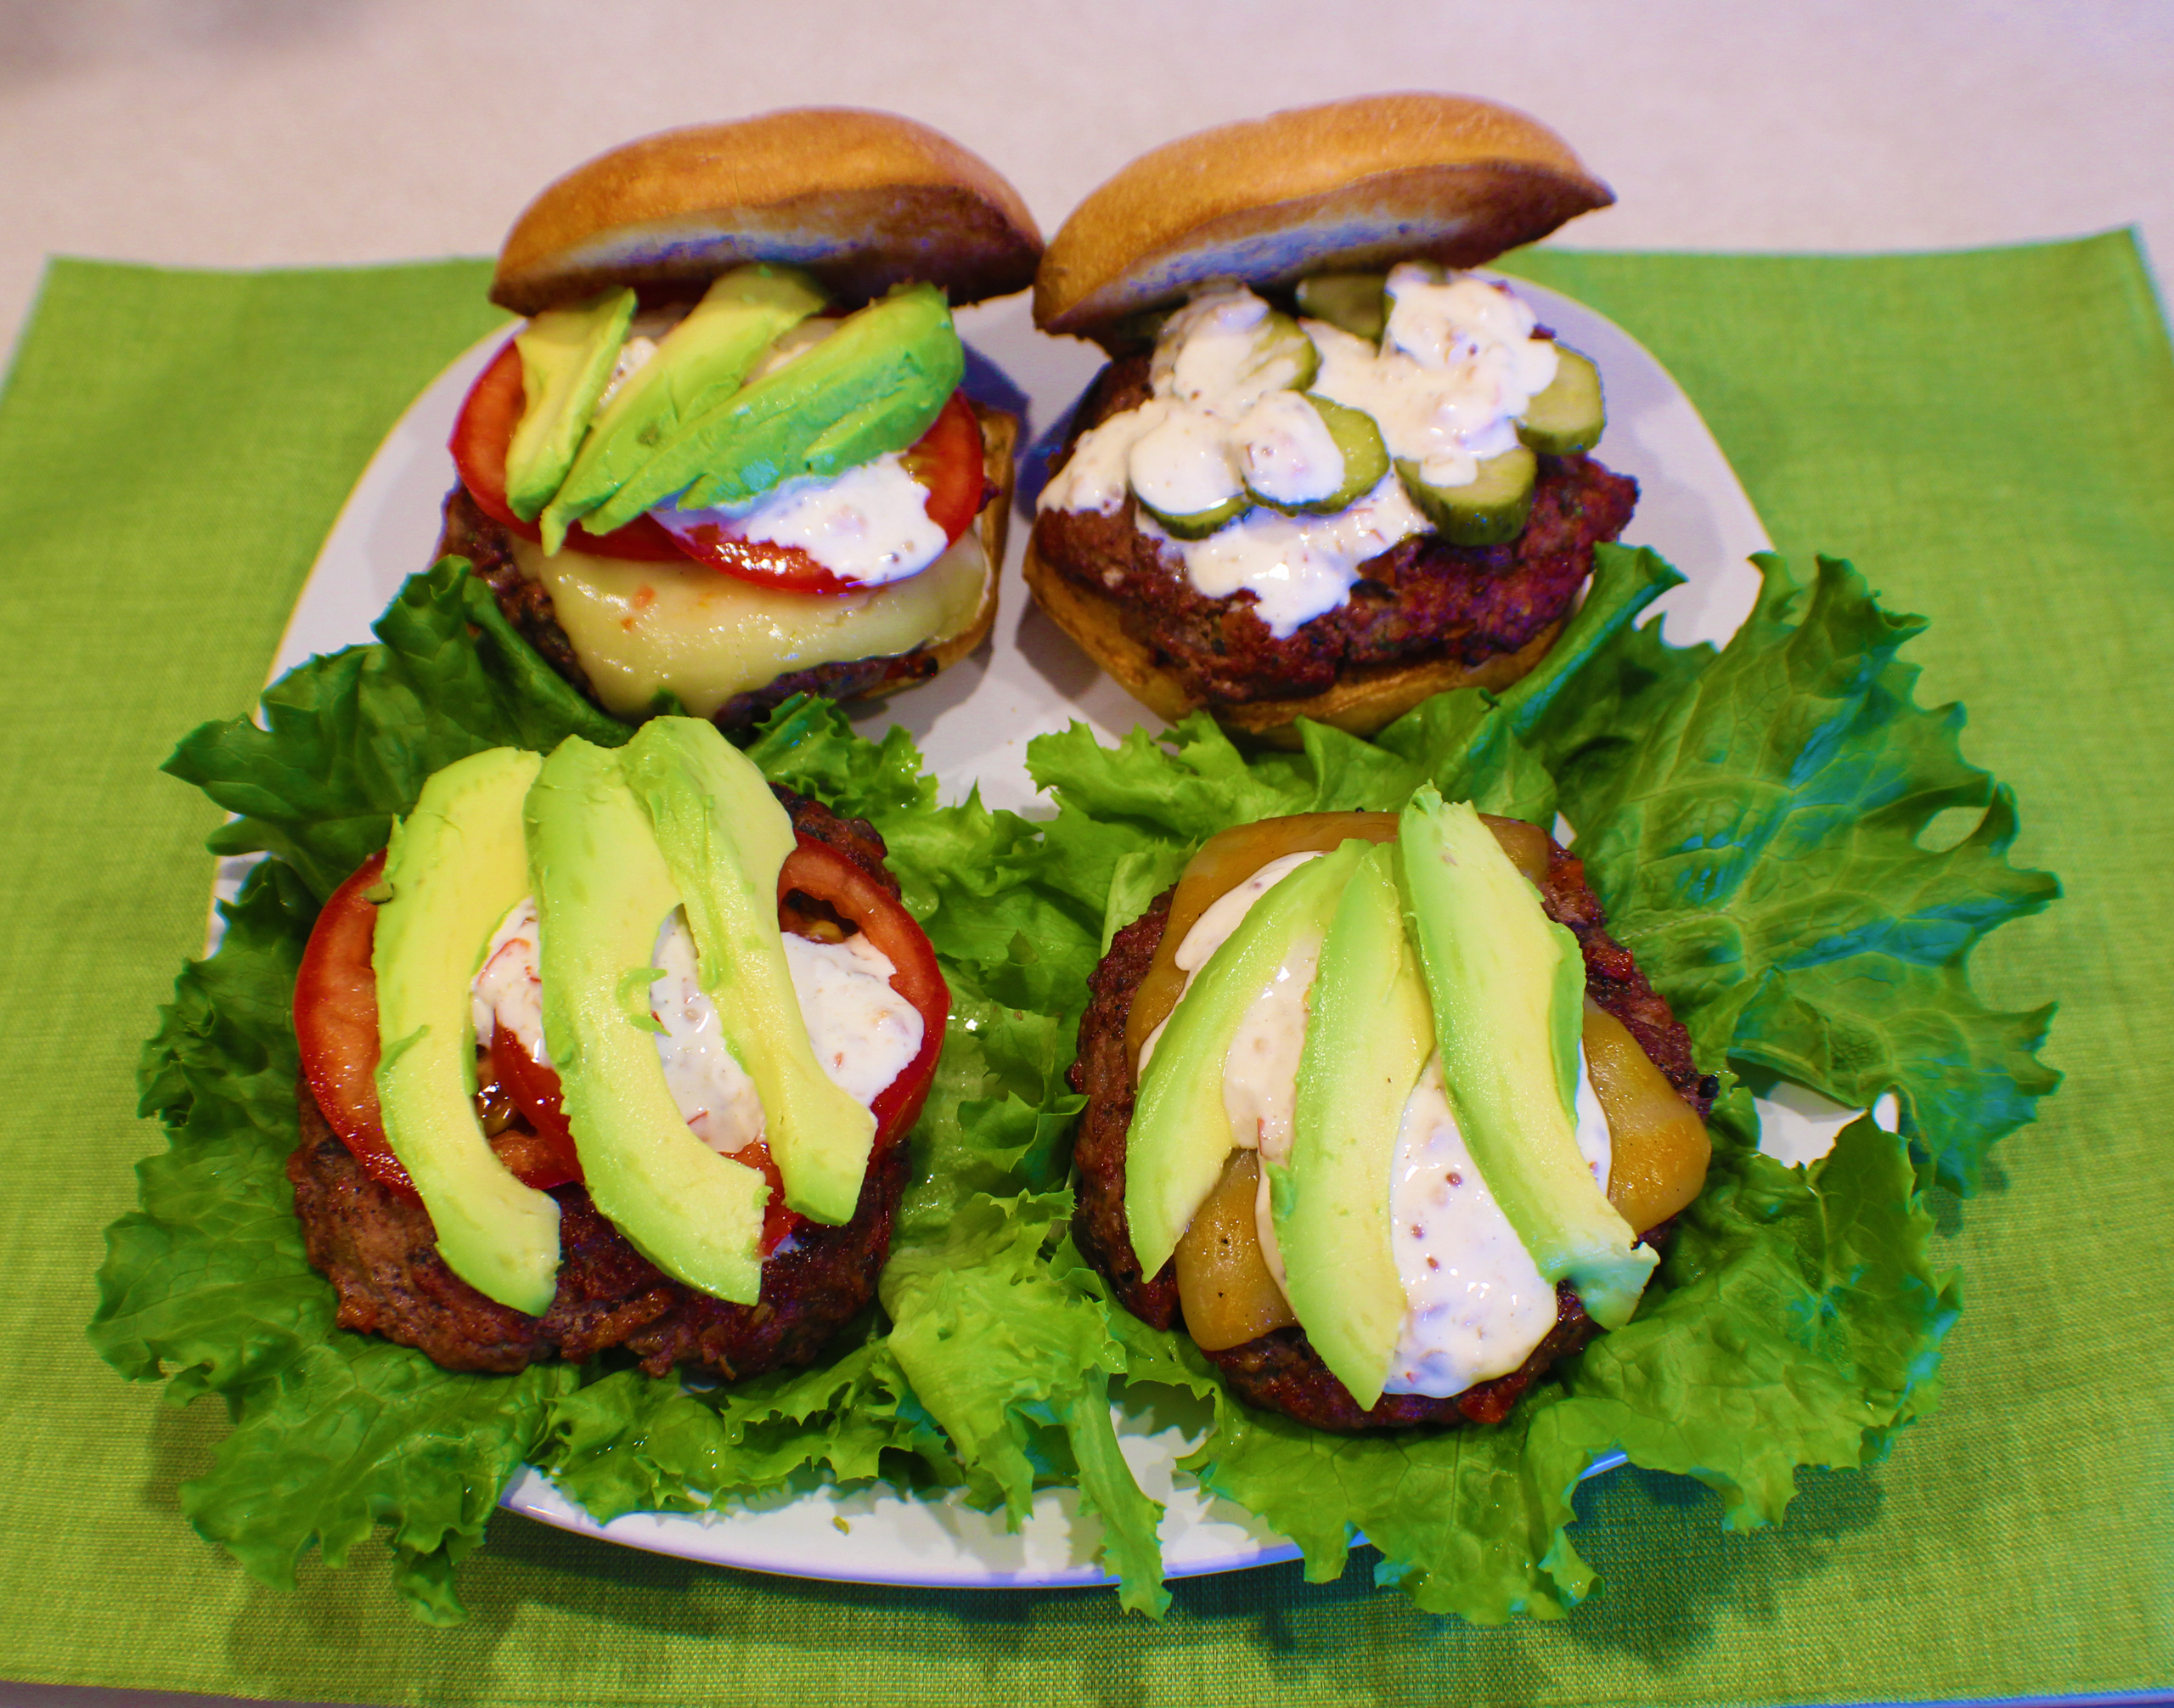
Now the fun part, the toppings. Get creative and add toppings that your really enjoy.

You can also wrap it in some lettuce for a bun-free (gluten-free) version. It’s a little more messy but a lot less filling.

I used my Sweet Pepper Sauce as my condiment on these Pepper Burgers.

Pepper Burger

If you like peppers and burgers, this one is for you! They have a well balanced pepper flavor and you control the heat by removing the seeds and ribs from the jalapeno pepper.
Prep Time15 minutes
Cook Time15 minutes
Course: Main Course
Cuisine: American, Tex-Mex
Keyword: Burgers
Servings: 4 Burgers
Calories: 303kcal
Author: Eating With Deb

Ingredients

  • 1 pound ground beef 80/20
  • 3 tbsp onion fine diced (sweet yellow or red works great)
  • ½ each bell pepper fine diced (whatever color you have on hand works)
  • ½ can diced green chilies
  • ½ each jalapeno minced, remove seeds and ribs
  • 1 tbsp Worcestershire
  • Sea salt and black pepper

Instructions

  • Chop onion, bell pepper and jalapeno.
  • In a large bowl, add the beef, chopped peppers and onions, green chilies, and Worcestershire. Mix until combined.
  • Split mixture into 4 and patty. Make sure the center of the patty is thinner than the edges.
  • Sprinkle both sides of the patties with sea salt and black pepper.
  • Grill patties until done to your prefered doneness (no less than medium is recommended). If desired, add cheese and melt.
  • Top with your favorite toppings.
  • Enjoy!

Notes

Topping ideas:
Pepperjack or Co-jack cheese
Tomatoes
Pickled Jalapenos
Greens
Avocado slices
Pickles
Sweet Pepper Sauce

Nutrition

Calories: 303kcal | Carbohydrates: 4g | Protein: 20g | Fat: 23g | Saturated Fat: 9g | Cholesterol: 81mg | Sodium: 123mg | Potassium: 448mg | Fiber: 1g | Sugar: 2g | Vitamin A: 60IU | Vitamin C: 6mg | Calcium: 41mg | Iron: 3mg

Maple Glazed Pork Chops

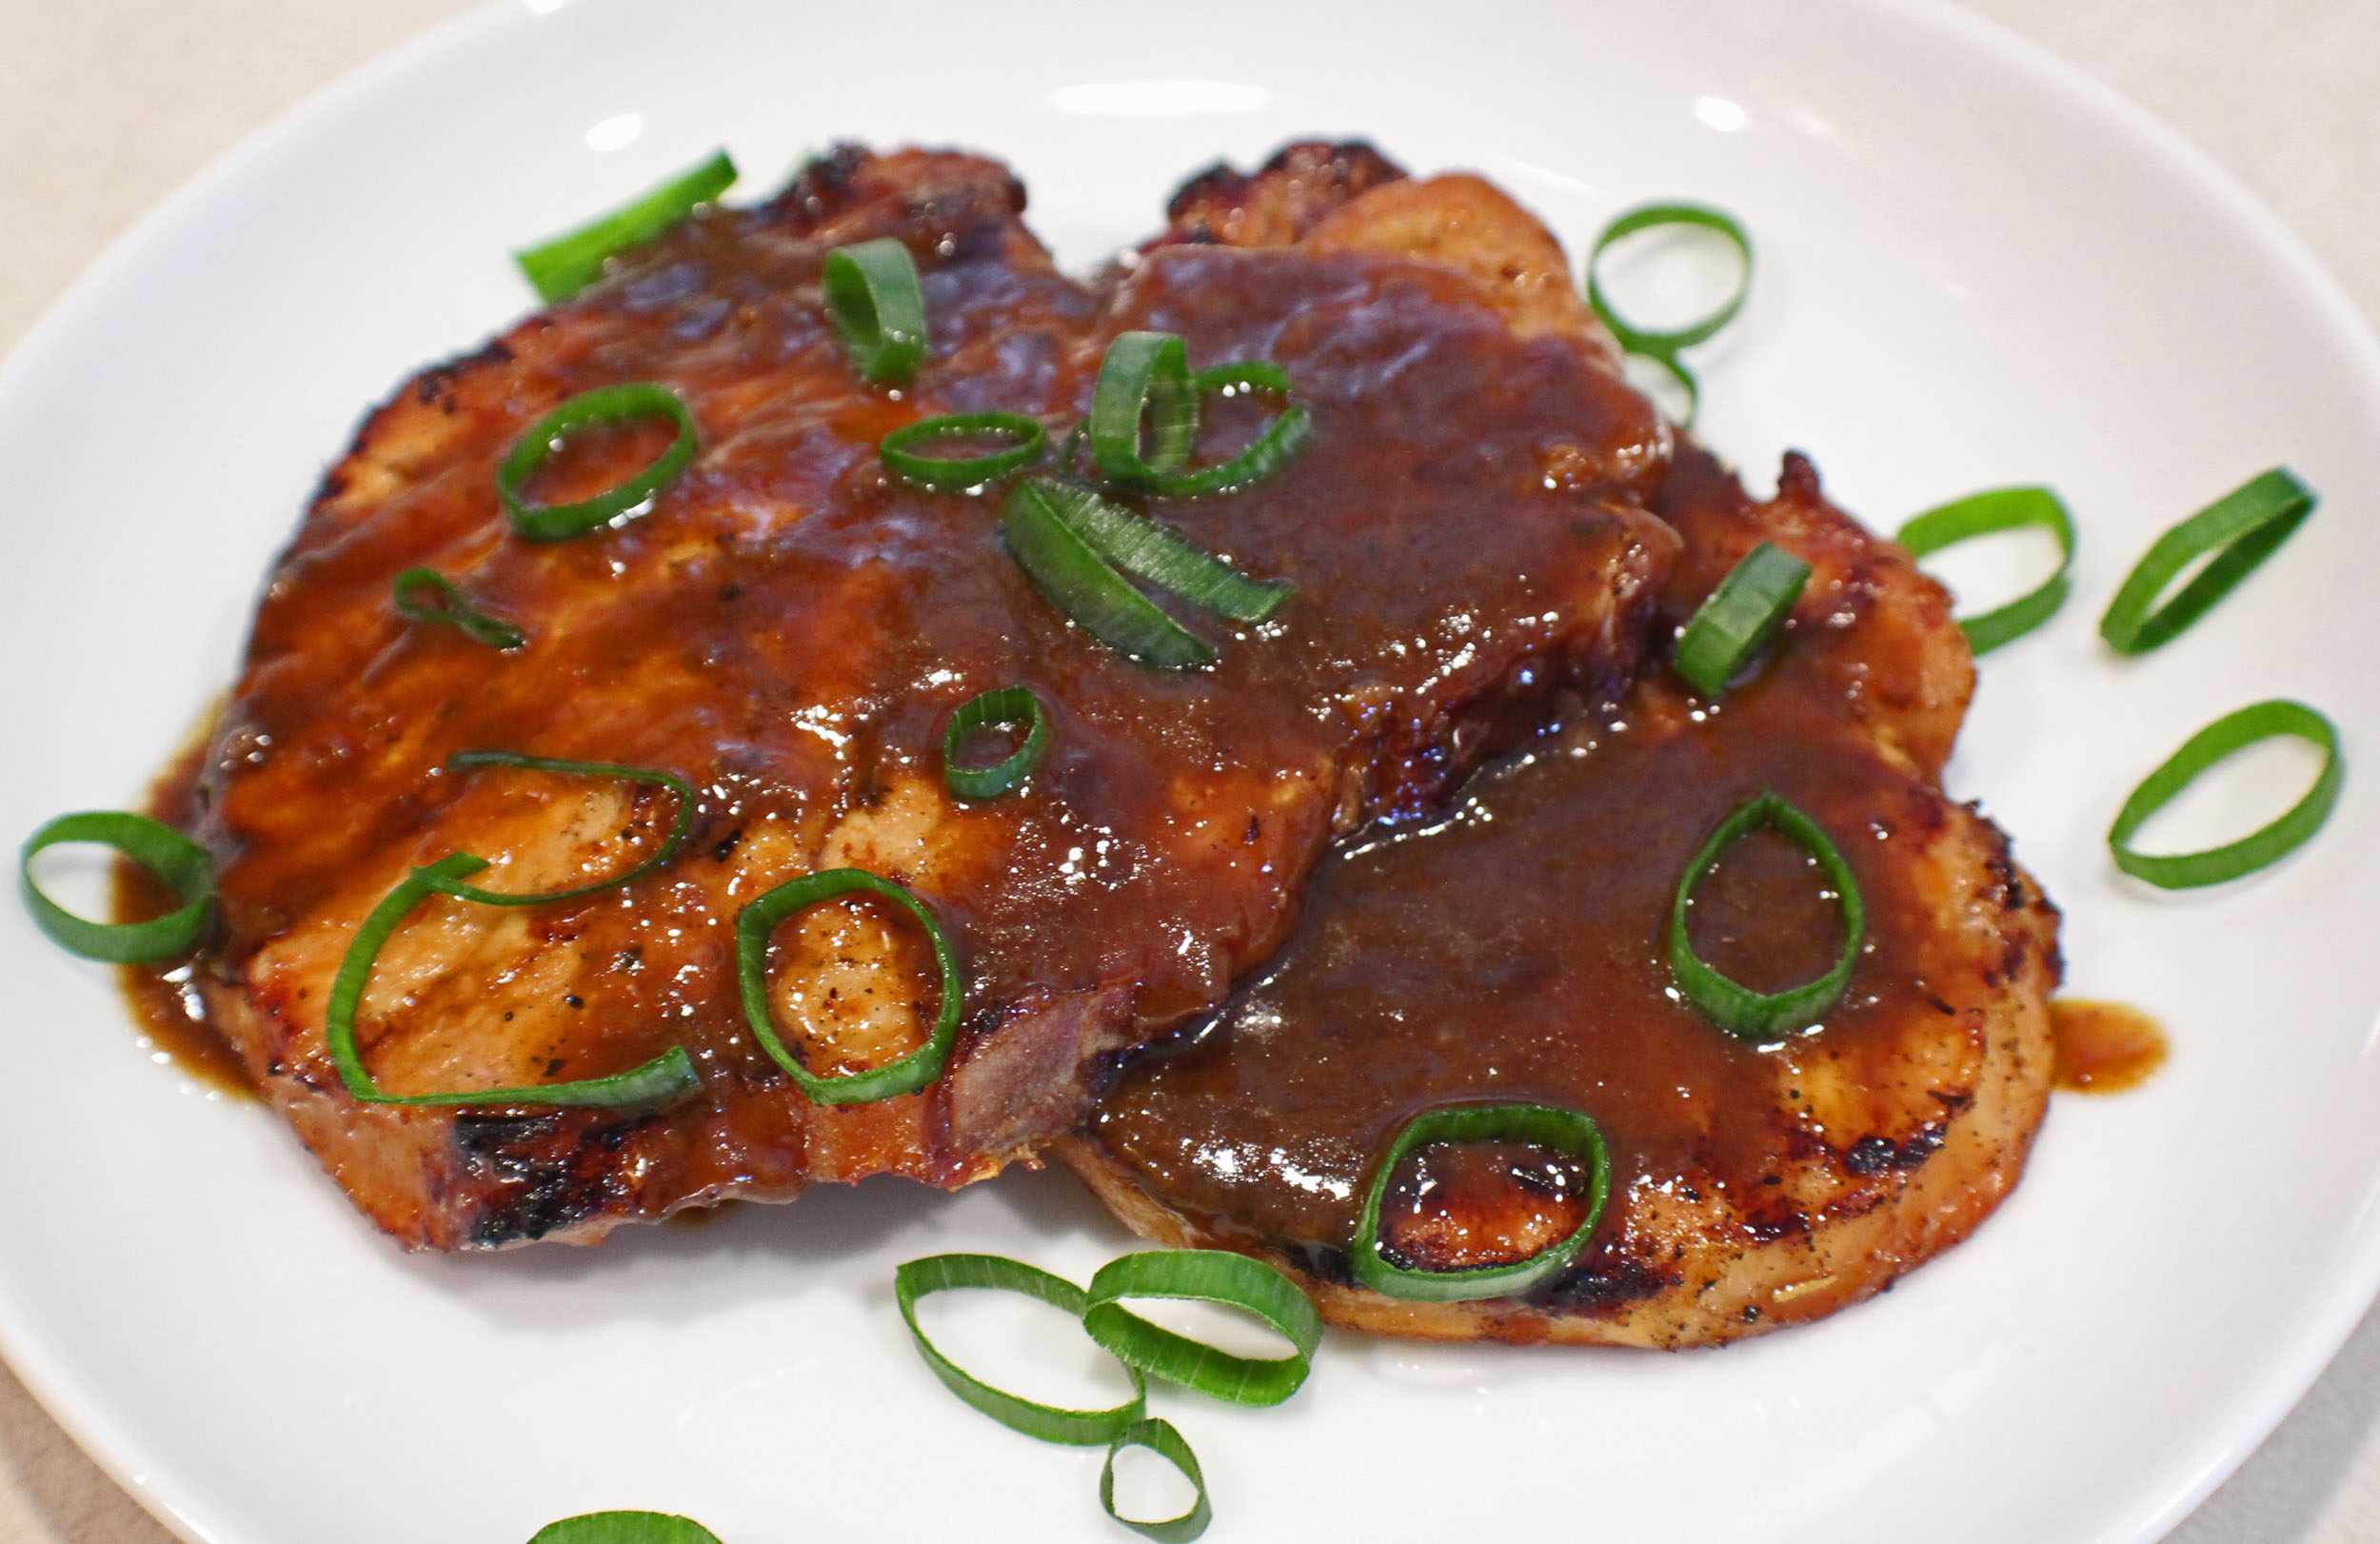
Maple Glazed Pork Chops

Maple syrup compliments pork extremely well. After marinating the pork chops overnight, save the marinade and heat it up with some rum and butter for a delicious maple rum sauce to top the cooked pork chops.

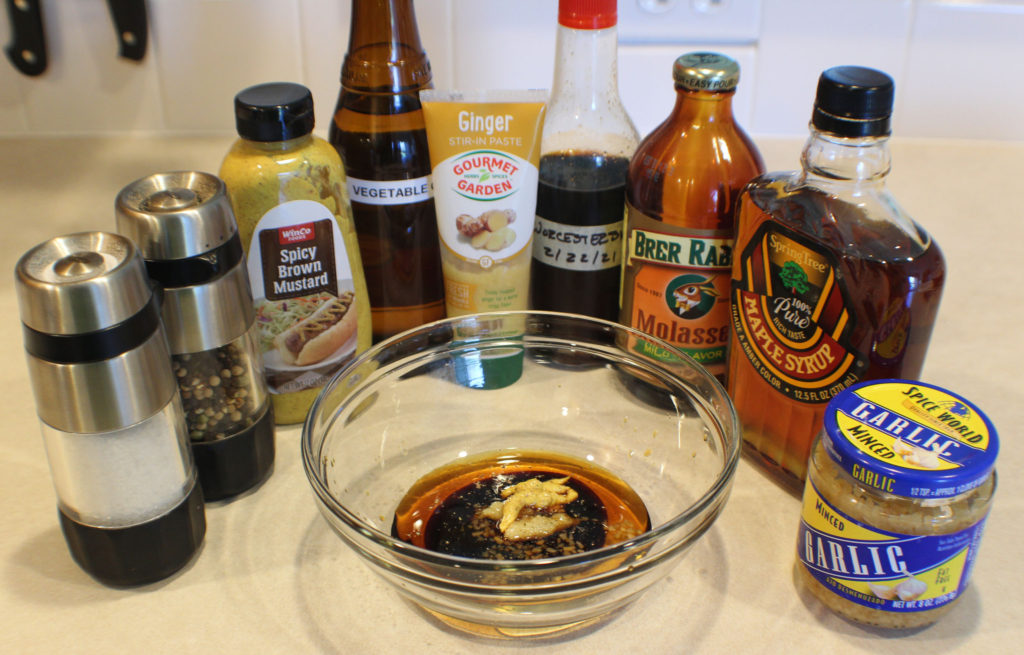
Marinade Ingredients

It only takes about 5 minutes to gather and whisk together the marinade ingredients.

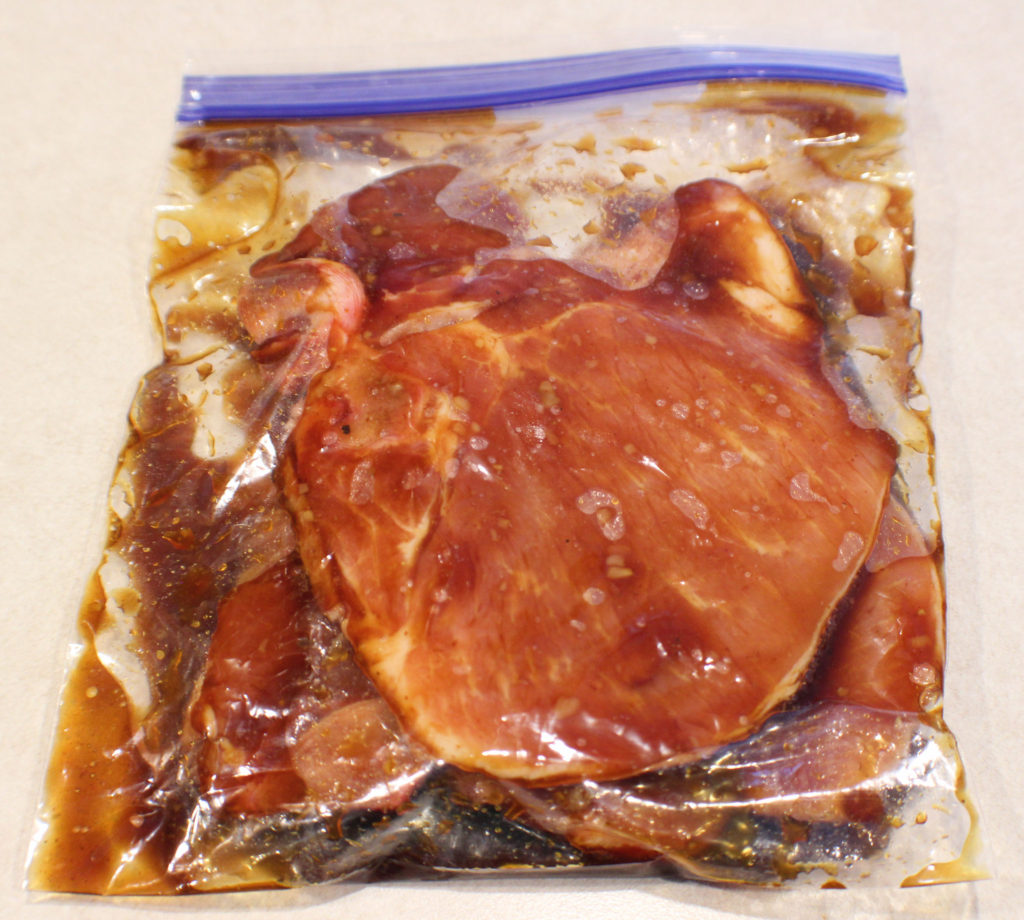
Then put the marinade in a sealable bag, add the pork chops and seal, and put it in the refrigerator overnight. You might want to put it in a bowl or on a plate just in case you have a little leakage.

Making Maple Rum Glaze

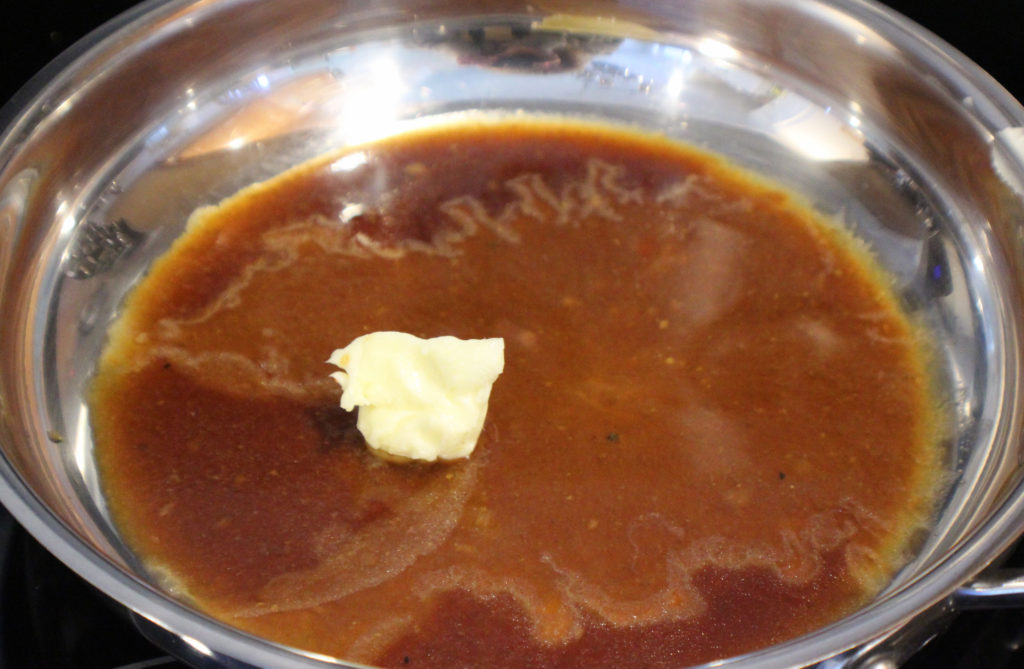
The next day, while the charcoal is getting ready or your gas grill is heating up, remove the pork chops from the marinade and add the marinade to a medium sauté or sauce pan with a little butter and rum.

Heat this to a simmer and cook for 3 to 5 minutes to thicken a little and cook the raw pork juices.

Maple Glaze Pork Chops Grilling

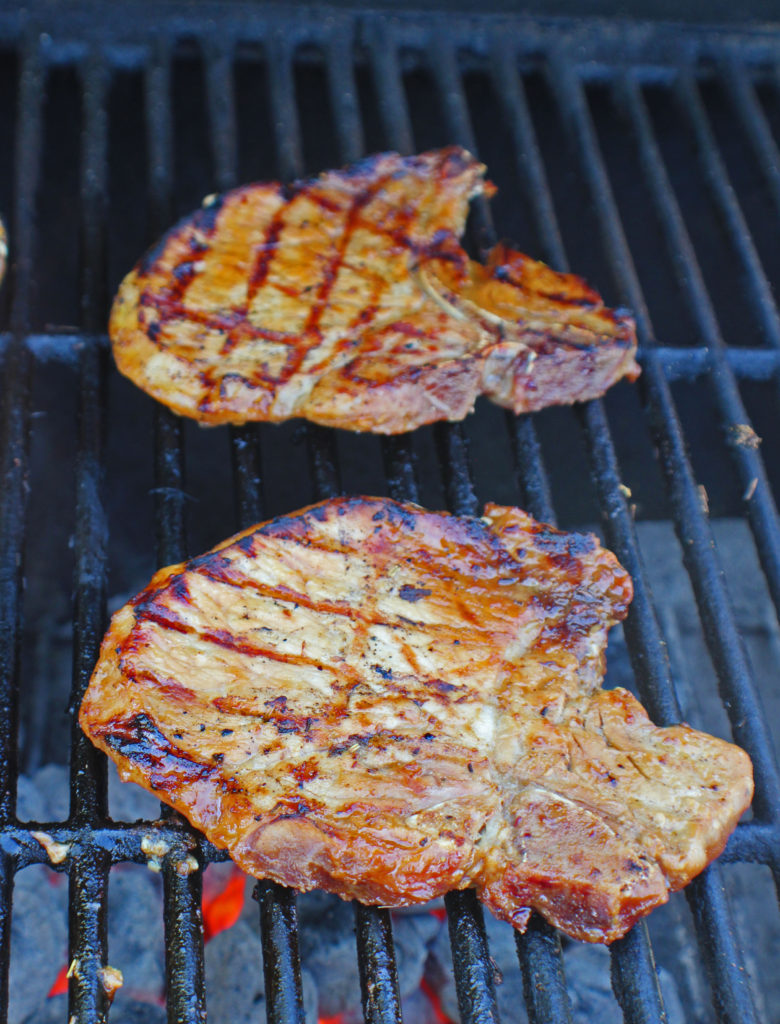
Grill the pork chops over medium heat. It will only take about 3 to 5 minutes per side, depending on how thick the chops are. To be sure, cook until the pork reaches an internal temperature of 145 degrees.

Maple Glazed Pork Chops

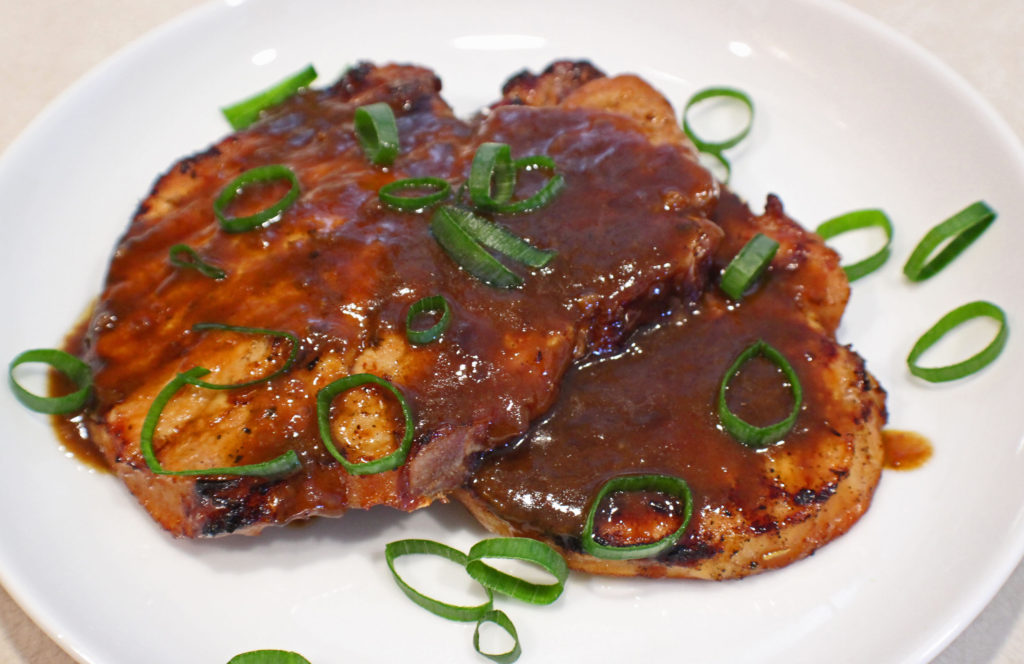
Top the pork chops with the maple rum sauce and sliced green onions. Try this with Grilled Loaded Potatoes.

Enjoy!

Maple Glazed Pork Chops (with a Maple Rum Sauce)

Maple syrup is a wonderful ingredient that compliments pork. If you don’t want to use rum, just add the butter when heating the sauce to make the glaze for the pork chops.
Prep Time5 minutes
Cook Time15 minutes
Resting Time12 hours
Total Time12 hours 20 minutes
Course: Dinner, Entree, Main Course
Cuisine: American
Keyword: Maple, Pork Chops
Servings: 4 people
Calories: 215kcal
Author: Eating With Deb

Equipment

  • Medium bowl and whisk
  • 1 gallon sealable bag
  • Barbeque grill

Ingredients

  • 4 each pork chops

For the Marinade

  • ½ cup maple syrup
  • 1 tbsp molasses
  • 1 tbsp Worcestershire sauce
  • 1 tbsp vegetable oil
  • 1 tbsp Dijon or brown mustard
  • 2 tsp garlic fresh, minced
  • 2 tsp ginger fresh, minced
  • ¼ tsp sea salt
  • ¼ tsp black pepper

Maple Rum Sauce
  • Marinade after removing the pork chops
  • 1 tbsp butter
  • 1 shot rum

Instructions

  • Whisk together the marinade ingredients. Put it in a zipper bag and add the pork chops. Seal the bag and smush the marinade around, being sure to cover the pork chops. Put in a bowl in the refrigerator overnight.
  • The next day, start the charcoal or gas grill. Remove the pork chops from the marinade and set aside.
  • Put the marinade in a saute pan and add the butter and rum. Bring to a simmer and cook for 3 to 5 minutes. This will cook out the alcohol and reduce the sauce in half.
  • Grill the pork chops over medium heat, 3 to 5 minutes per side, depending on how thick the pork chops are.
  • When pork has reached 145 degrees, remove from grill and drizzle the maple rum sauce over the top of the pork chops.
  • Enjoy!

Nutrition

Serving: 1chop | Calories: 215kcal | Carbohydrates: 33g | Protein: 1g | Fat: 7g | Saturated Fat: 5g | Trans Fat: 1g | Cholesterol: 8mg | Sodium: 261mg | Potassium: 220mg | Fiber: 1g | Sugar: 28g | Vitamin A: 94IU | Vitamin C: 1mg | Calcium: 65mg | Iron: 1mg

Grilled Loaded Potatoes

Grilled Loaded Potatoes

I love loaded potatoes, but they can be a bit heavy in the summer. Slicing cooked potatoes and grilling them while grilling other items, is a wonderful way to bring loaded potatoes into any summer meal.

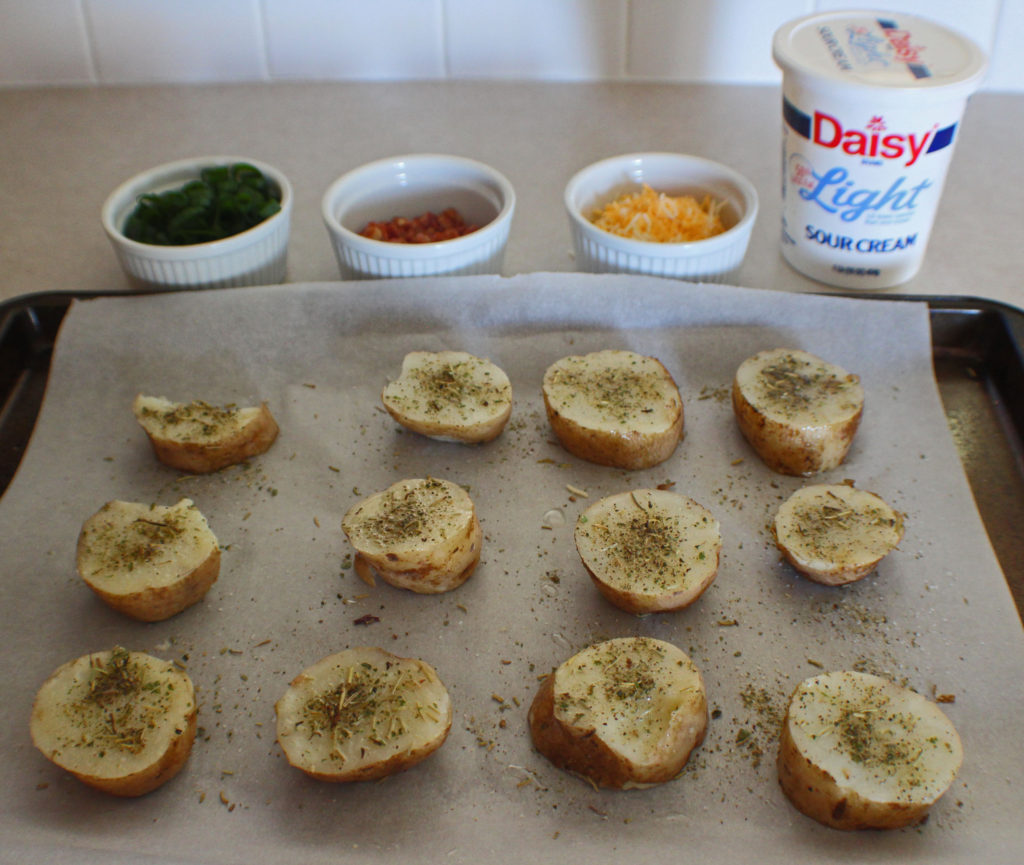
Loaded Potatoes Ready to Grill

I pre-cook the potatoes in the microwave for a couple of minutes before slicing and grilling. You’ll want to cool them down a little bit before slicing so you don’t burn yourself. I often cook them the day before and put them in the refrigerator overnight. If I don’t cook them the day before, after microwaving them I put them directly into the refrigerator for about 15 minutes to cool down before  slicing them.

Cook 1 potato per person. When slicing them cut off a little bit from each end so they will stay flat when they are on the grill. The thinner you slice, the more toppings you’ll have versus the potato ratio. Be careful not to slice too thin or they will be hard to keep together when grilling. I find about 1/2 inch thick works the best for me.

Get them ready with the oil and seasonings and have the toppings ready to go.

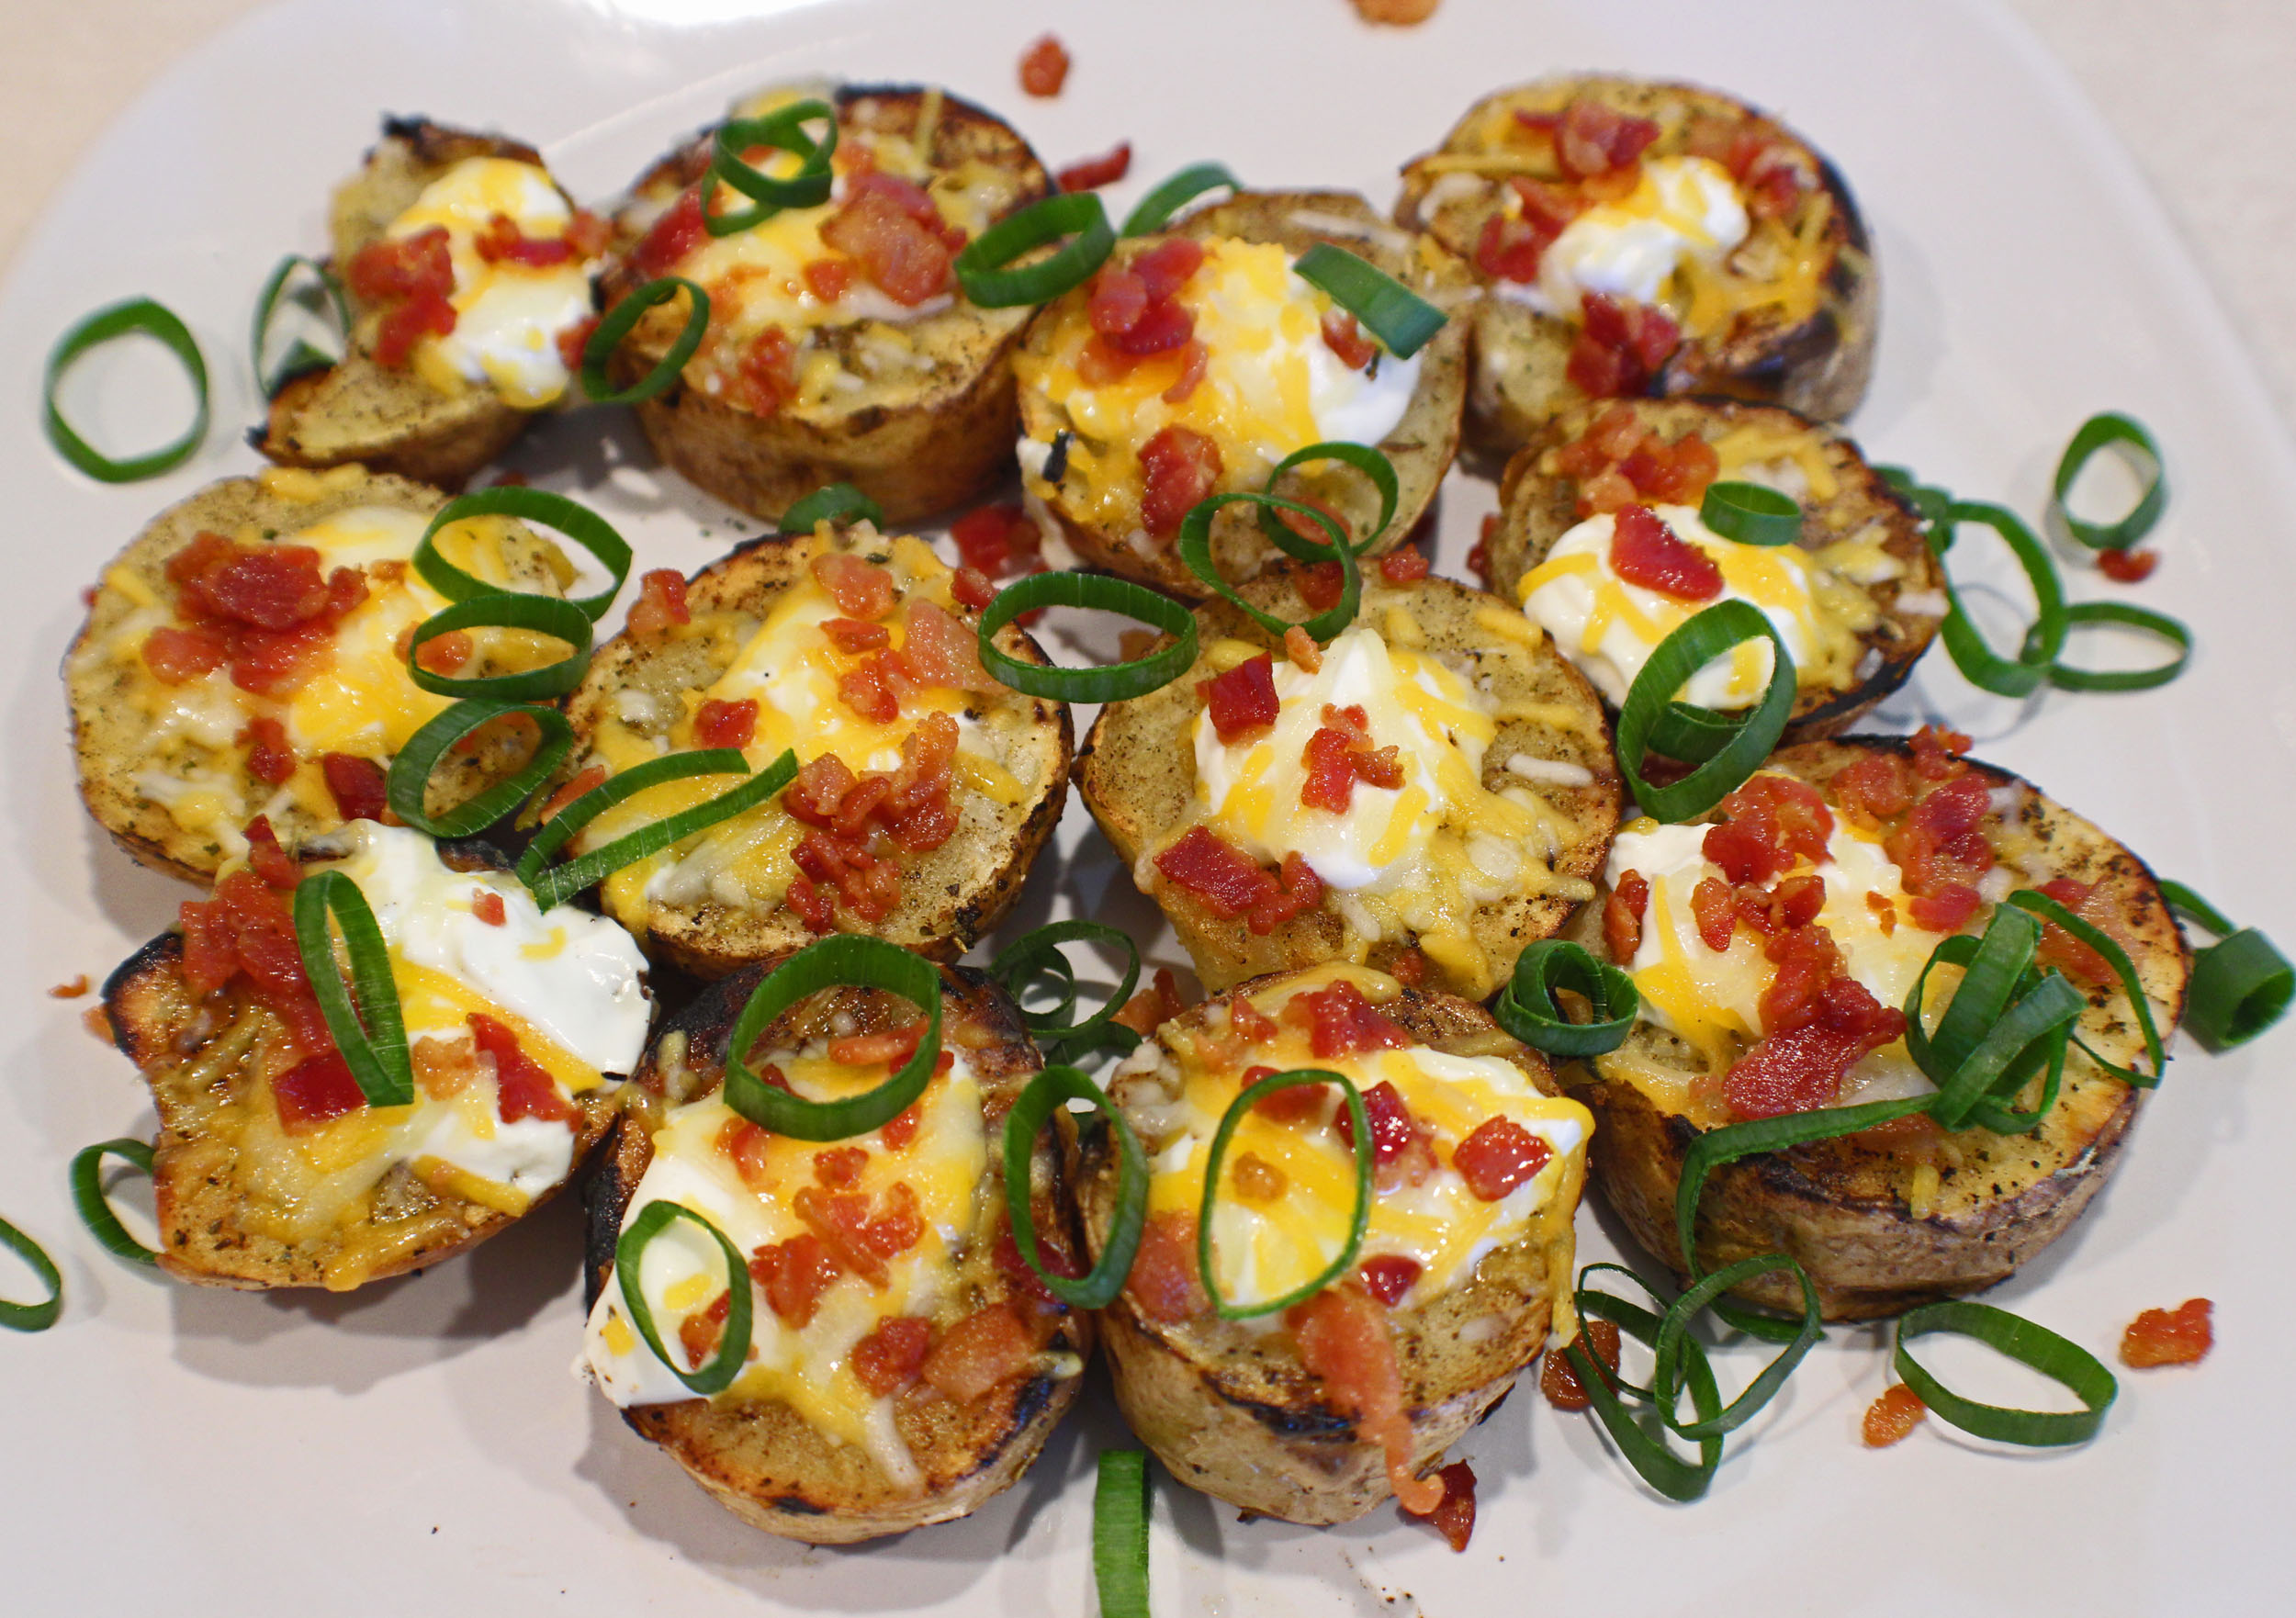
Grill potatoes over direct heat about 3 to 5 minutes per side. You want them nice and brown and a little crispy. Take them off direct heat and top with what ever toppings you like. I add my chives or green onions after I remove them from the grill.

Try with Smoked Ribs with a Cocoa Dry Rub, Maple Glazed Pork Chops or BBQ Rib Burgers.

Enjoy!

Grilled Loaded Potatoes

Grilling potatoes is a quick, easy way to make a tasty side dish for almost any outdoor grilling adventure. Whether you load them or not is your choice, you will end up with crispy potato slices.
Prep Time10 minutes
Cook Time14 minutes
Resting Time15 minutes
Total Time39 minutes
Course: Potatoes, Side Dish
Cuisine: American
Keyword: Grilled Potatoes, Loaded Potatoes
Servings: 4 people
Calories: 152kcal
Author: Eating With Deb

Equipment

  • Microwave
  • Cutting board and knife
  • Grill or Outdoor Barbeque
  • Small kitchen barbeque style brush

Ingredients

  • 4 each russet potatoes
  • 2 tbsp vegetable oil or canola oil

Seasoning Blend

  • ½ tsp sea salt
  • ½ tsp black pepper
  • ¼ tsp mustard dry
  • 1 tsp oregano
  • 1 tsp rosemary

Toppings

  • ¼ cup sour cream
  • 3 tbsp colby jack cheese or cheddar, shredded
  • 2 tbsp chives or green onions sliced
  • 2 tbsp bacon bits

Instructions

  • Stab the potatoes several times with a fork and cook in the microwave 2 minutes per side. Cool in the refrigerator for at least 15 minutes before slicing (I cook them the day before and put them in the refrigerator overnight).
  • Mix together the dry spices.
  • Slice potatoes ½ - 1 inch thick, cutting off the very ends so they will stay flat. Brush one side with oil and sprinkle with the seasoning blend. Turn slices over and repeat, making sure to get oil around the sides of the potato slices.
  • Grill over medium heat about 3 to 5 minutes per side (3 minutes if they weren’t cooled down overnight). In the last 2 minutes of cooking time, slide the potatoes to a cooler spot on the grill and top with the toppings. I like to smear the sour cream on, then sprinkle on the cheese and bacon bits. Reserve the green onions or chives for after they come off the grill.

Nutrition

Calories: 152kcal | Carbohydrates: 2g | Protein: 4g | Fat: 14g | Saturated Fat: 10g | Cholesterol: 18mg | Sodium: 435mg | Potassium: 58mg | Fiber: 1g | Sugar: 1g | Vitamin A: 276IU | Vitamin C: 1mg | Calcium: 107mg | Iron: 1mg

Spatchcock Chicken with Asian BBQ Sauce

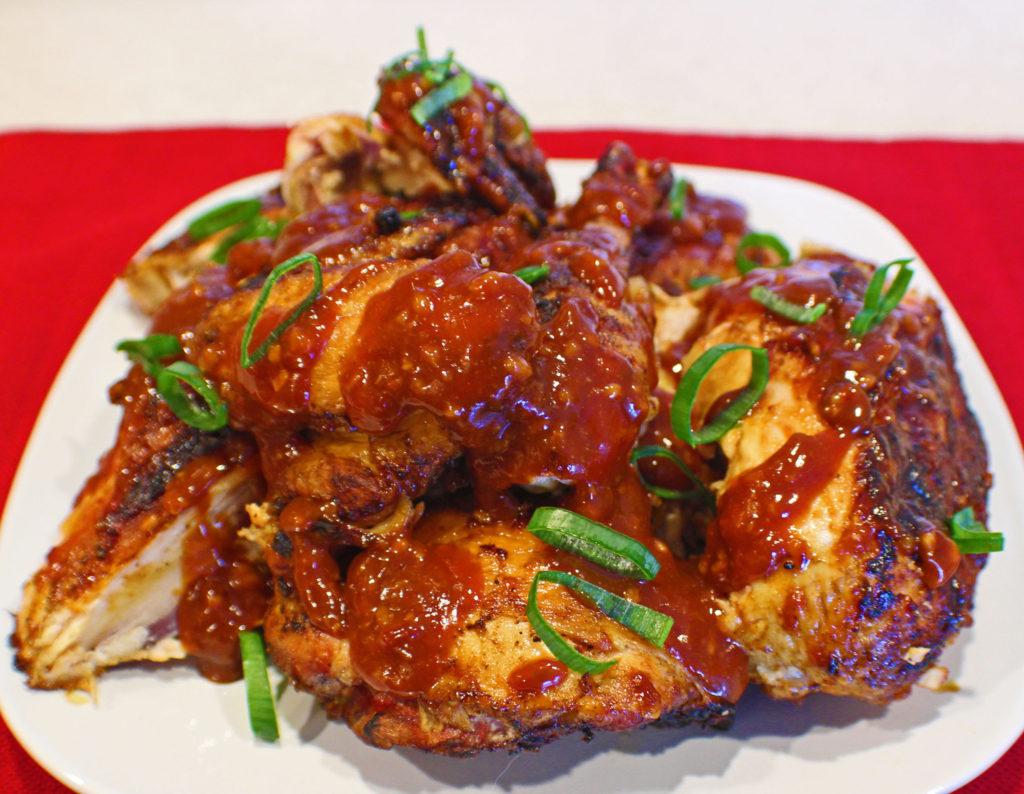
Grilled Chicken with Asian BBQ Sauce
Don’t let the term spatchcock scare you away. It’s just a fancy way of saying to butterfly a whole chicken, or to split it open, and it’s pretty simple to do with a pair of kitchen shears.

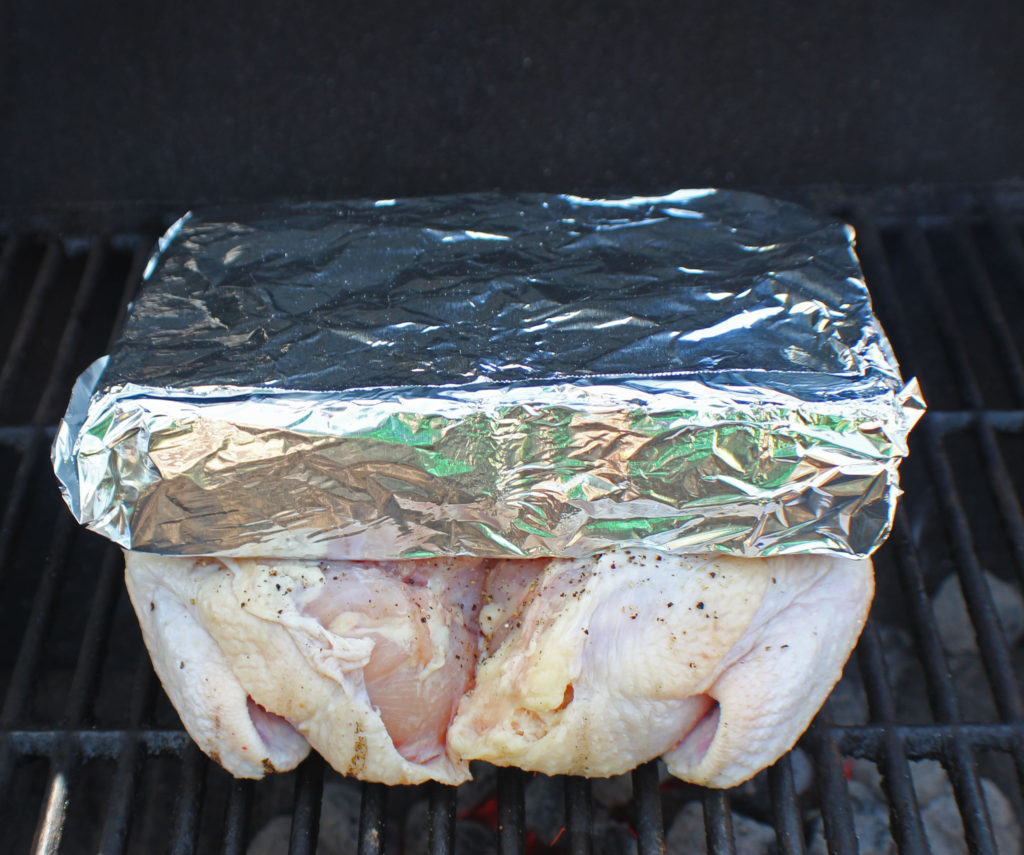
When grilling spatchcock chicken a weight is added, like a brick wrapped with foil, and that helps cook it faster and keep it moist and tender.

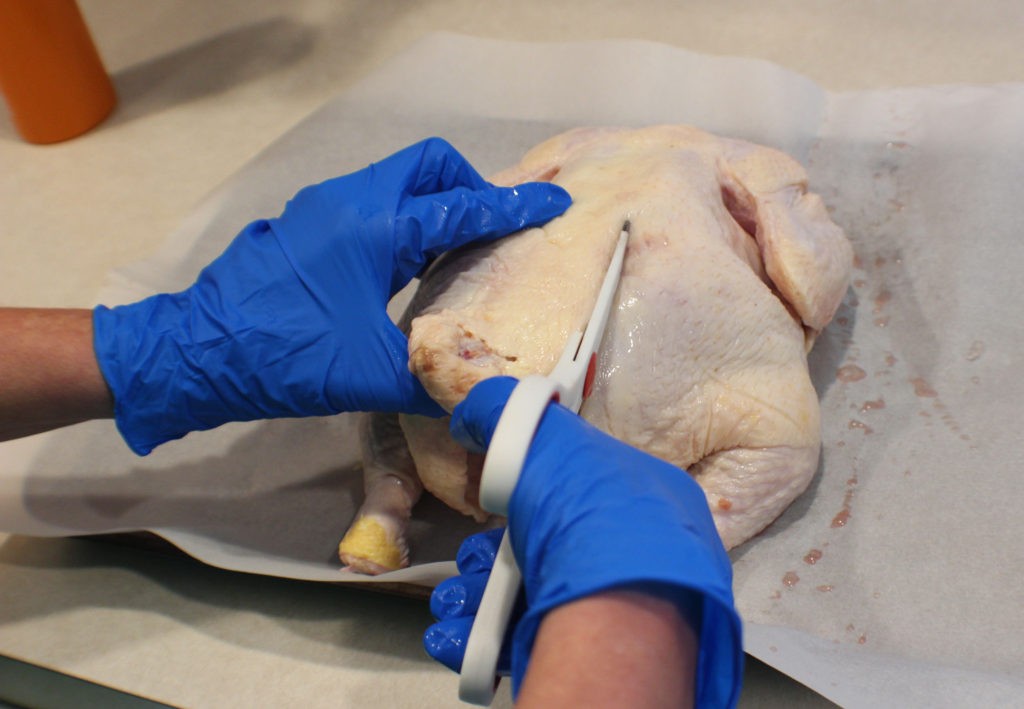
I like to put my chicken on a sheet tray lined with parchment paper. That way I can cut out the backbone and season it all on the same pan.

You can see that I don’t have the best kitchen shears, but they work.

Start with the chicken breasts down on the pan. Cut down one side of the backbone, all the way through to the other end.

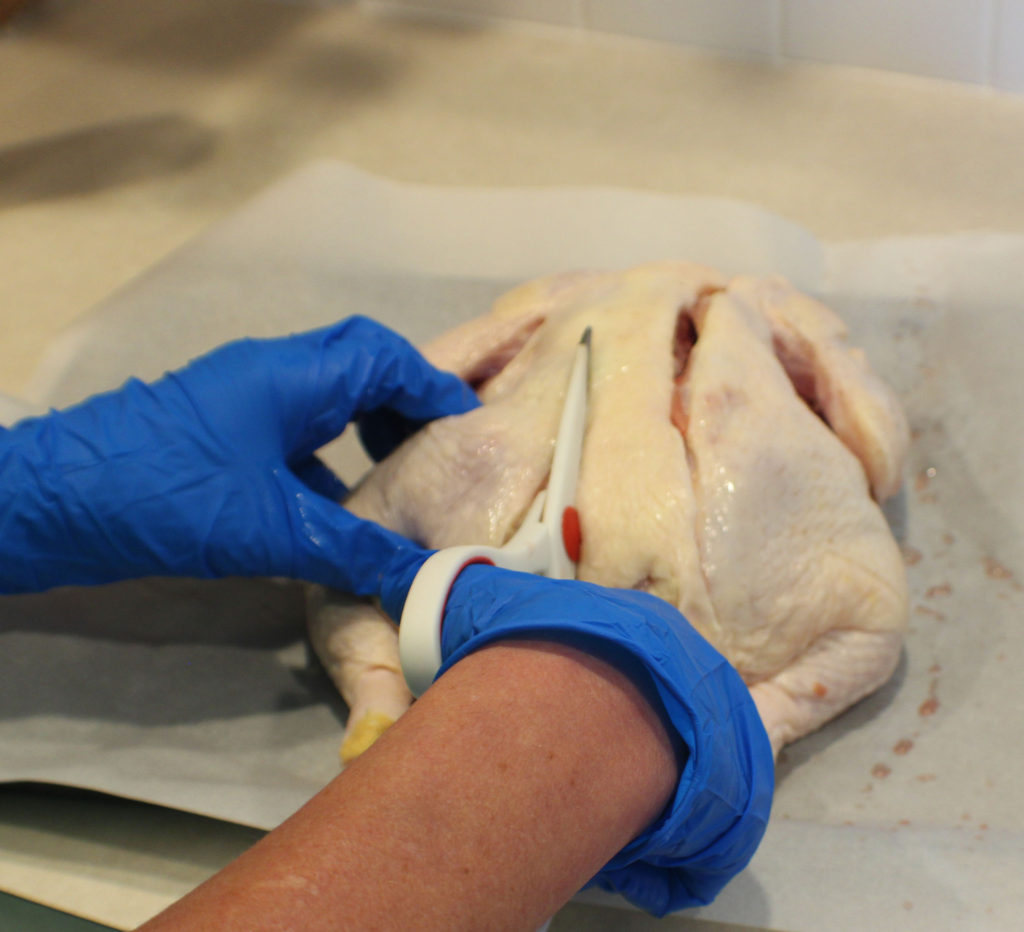
When you get through one side, cut down the other side of the backbone and pull it out. You can freeze it to make chicken stock in the future. 

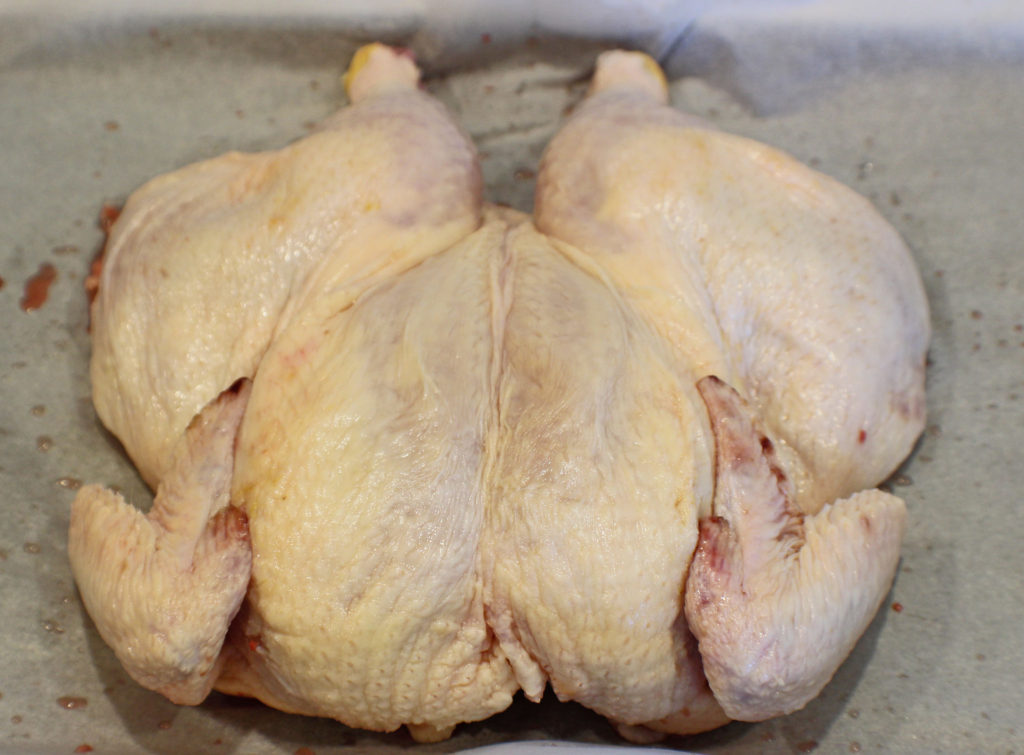
Once the backbone is out, open it up and flip it over.

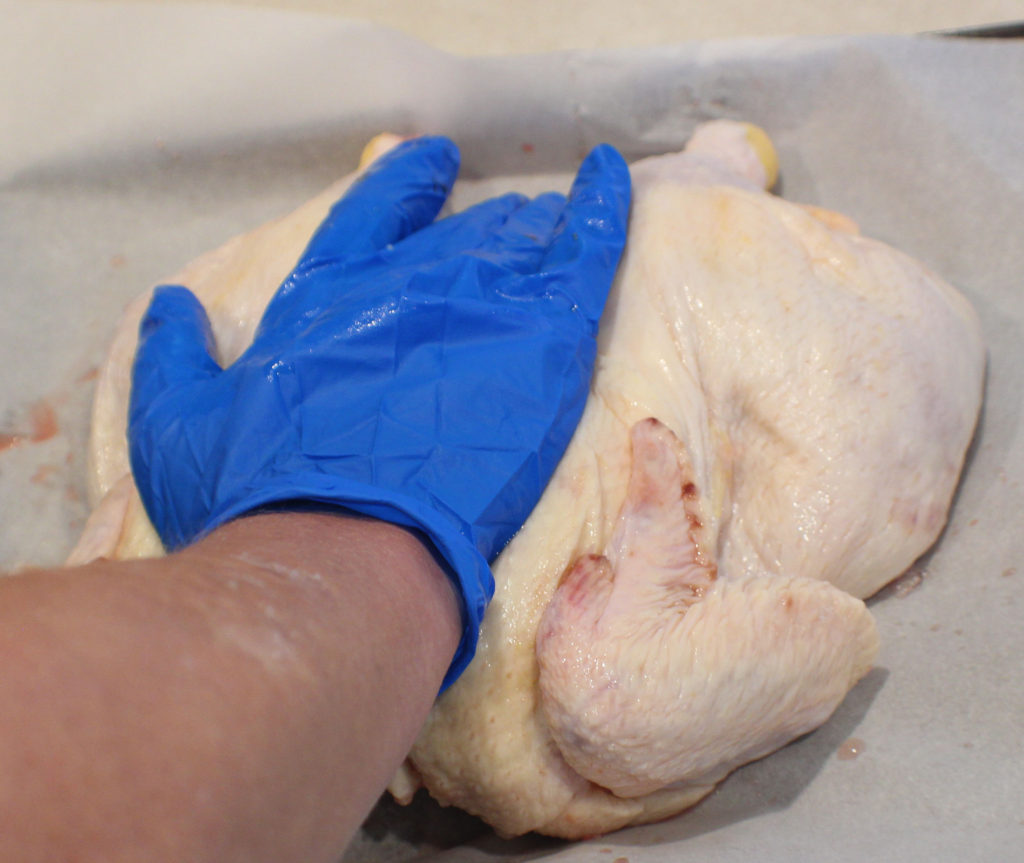
Using the heal of your hand, press down on the breast bone to flatten the chicken out. Yes, you will hear and feel bones cracking, but that goes with the territory.

Once you get if flattened out, season it by rubbing oil and salt and pepper on both sides.

Careful on the bone side so you don’t poke yourself.

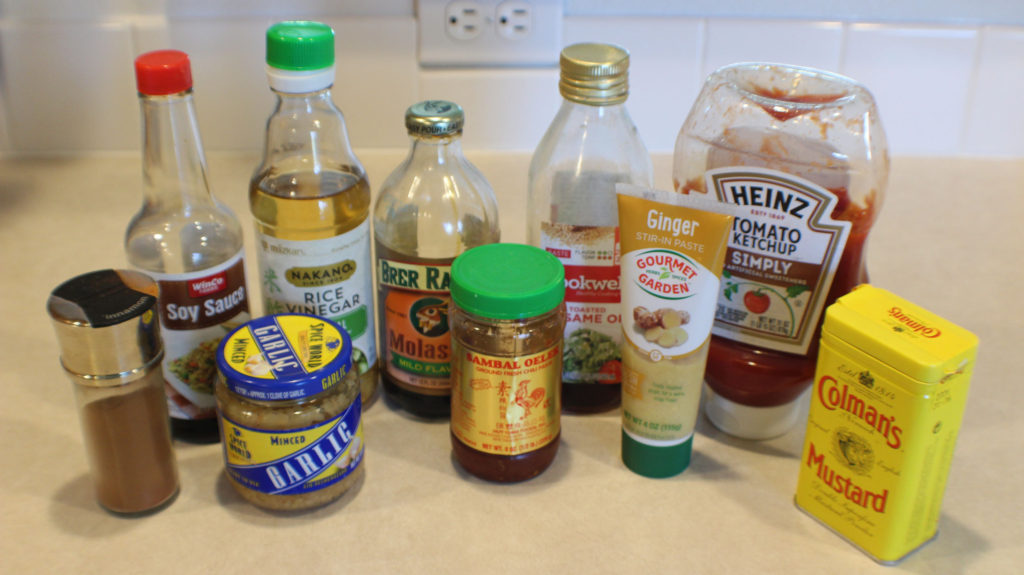
While my charcoal is heating up, and my chicken is sitting at room temperature, I like to make a barbecue sauce. This Asian BBQ sauce has a little zip and tastes great on chicken.

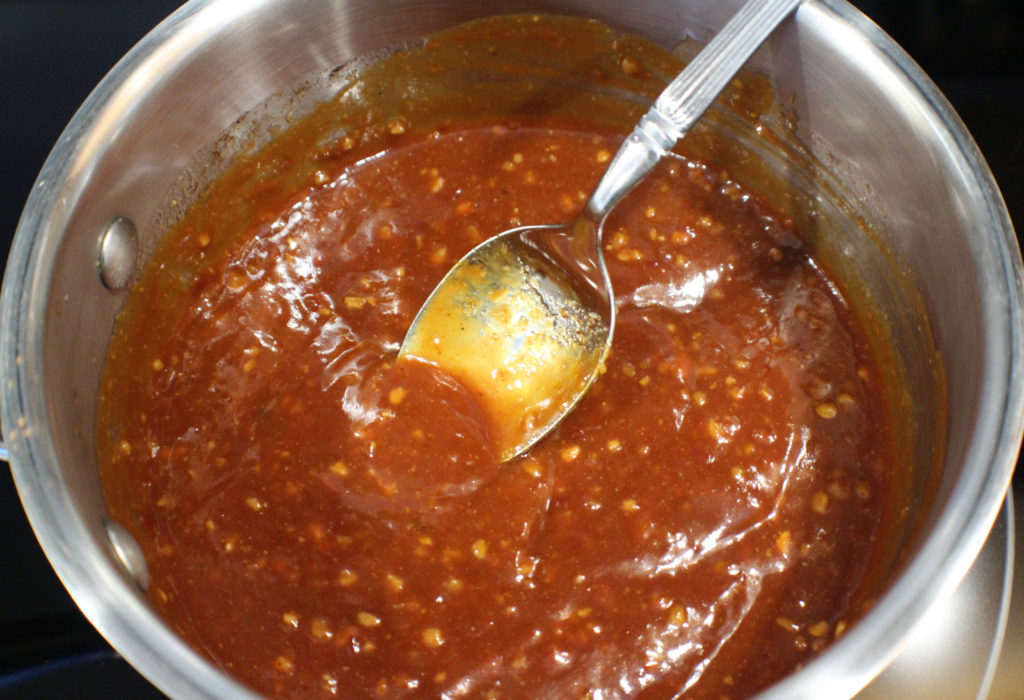
Just put all the ingredients together is a small sauce pan and simmer it for about 5 minutes. The sugar just needs to get dissolved and it will heat up more on the grill.

Time to get grilling. I happened to have a larger patio brick laying around, but 2 smaller bricks will do. The main thing is to try to have an even weight across the whole chicken.

Start with the breast side down, right over the top of the coals and close the lid.

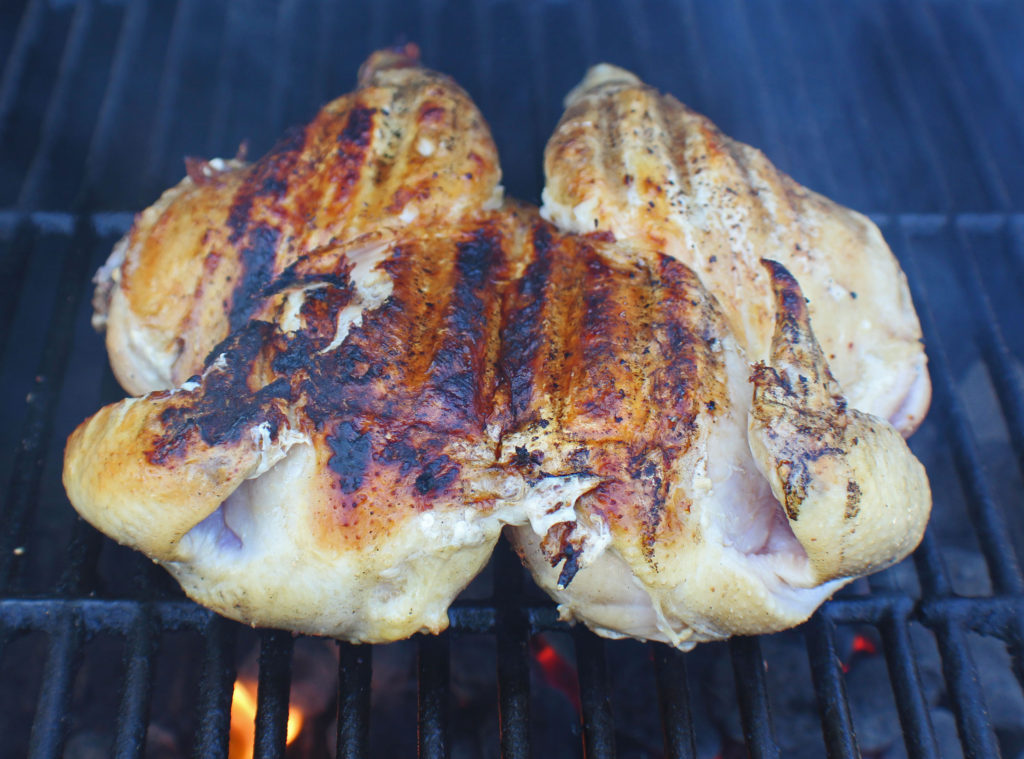
After about 20 minutes, remove the brick (careful, it’s hot!), and flip the chicken. The skin is getting crispy and the chicken is cooking nicely!

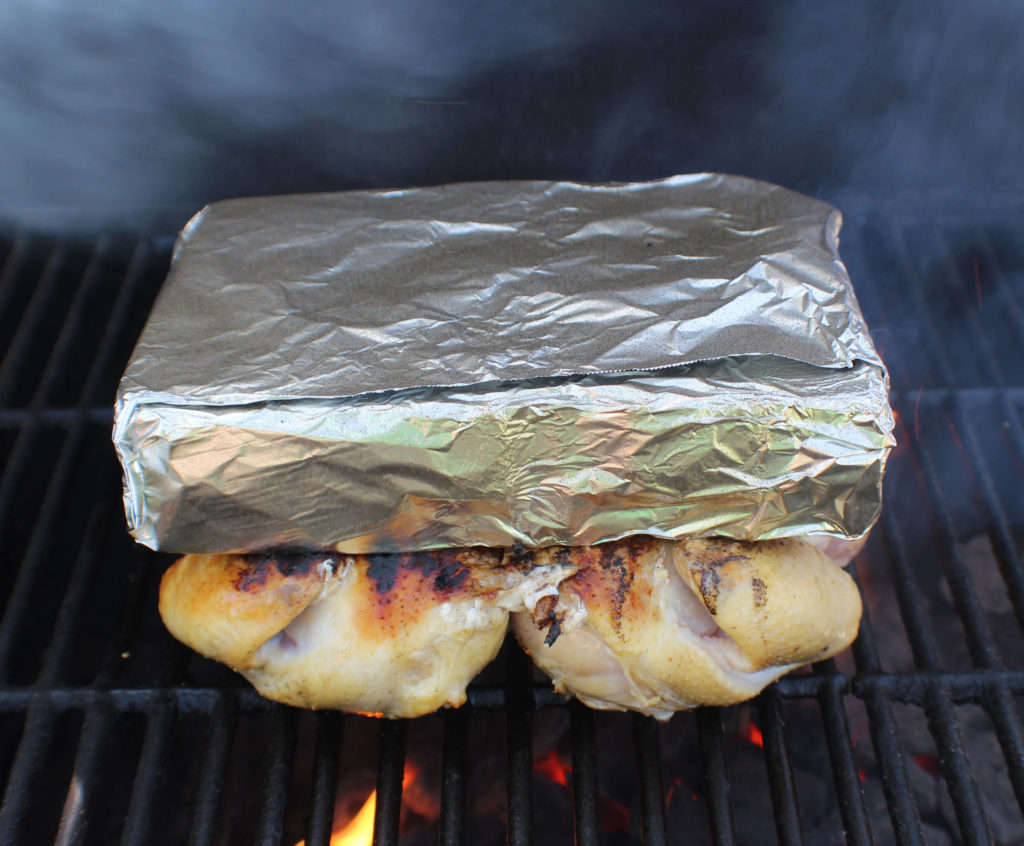
Put the brick back on the chicken, close the lid and cook for another 20 minutes or so. Be sure to check for an internal temperature of 160 degrees before removing the brick.

Everybody’s grill is different, so you may need a little more or a little less cooking time.

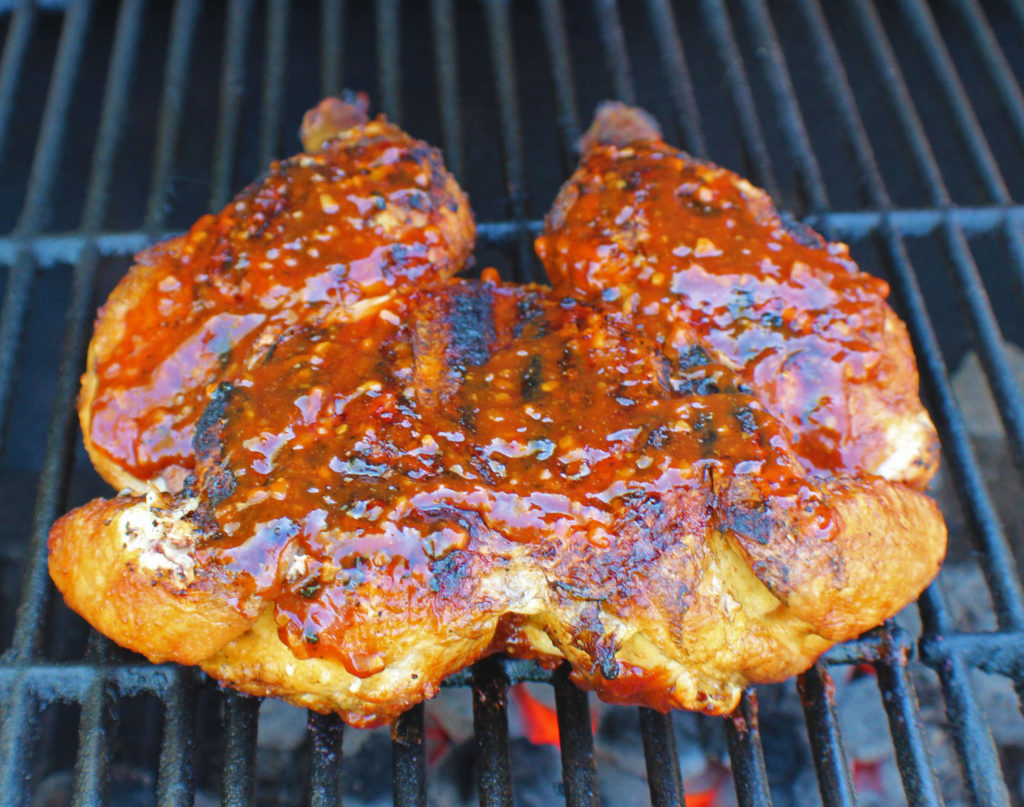
Now it’s time to baste the chicken with barbecue sauce and cook a little longer. Use 1/3 of the Asian Barbecue sauce on the first side, close the lid and cook for about 3 minutes.

Flip the chicken over and use another 1/3 of the barbecue sauce. Close the lid and let cook for another 3 minutes.

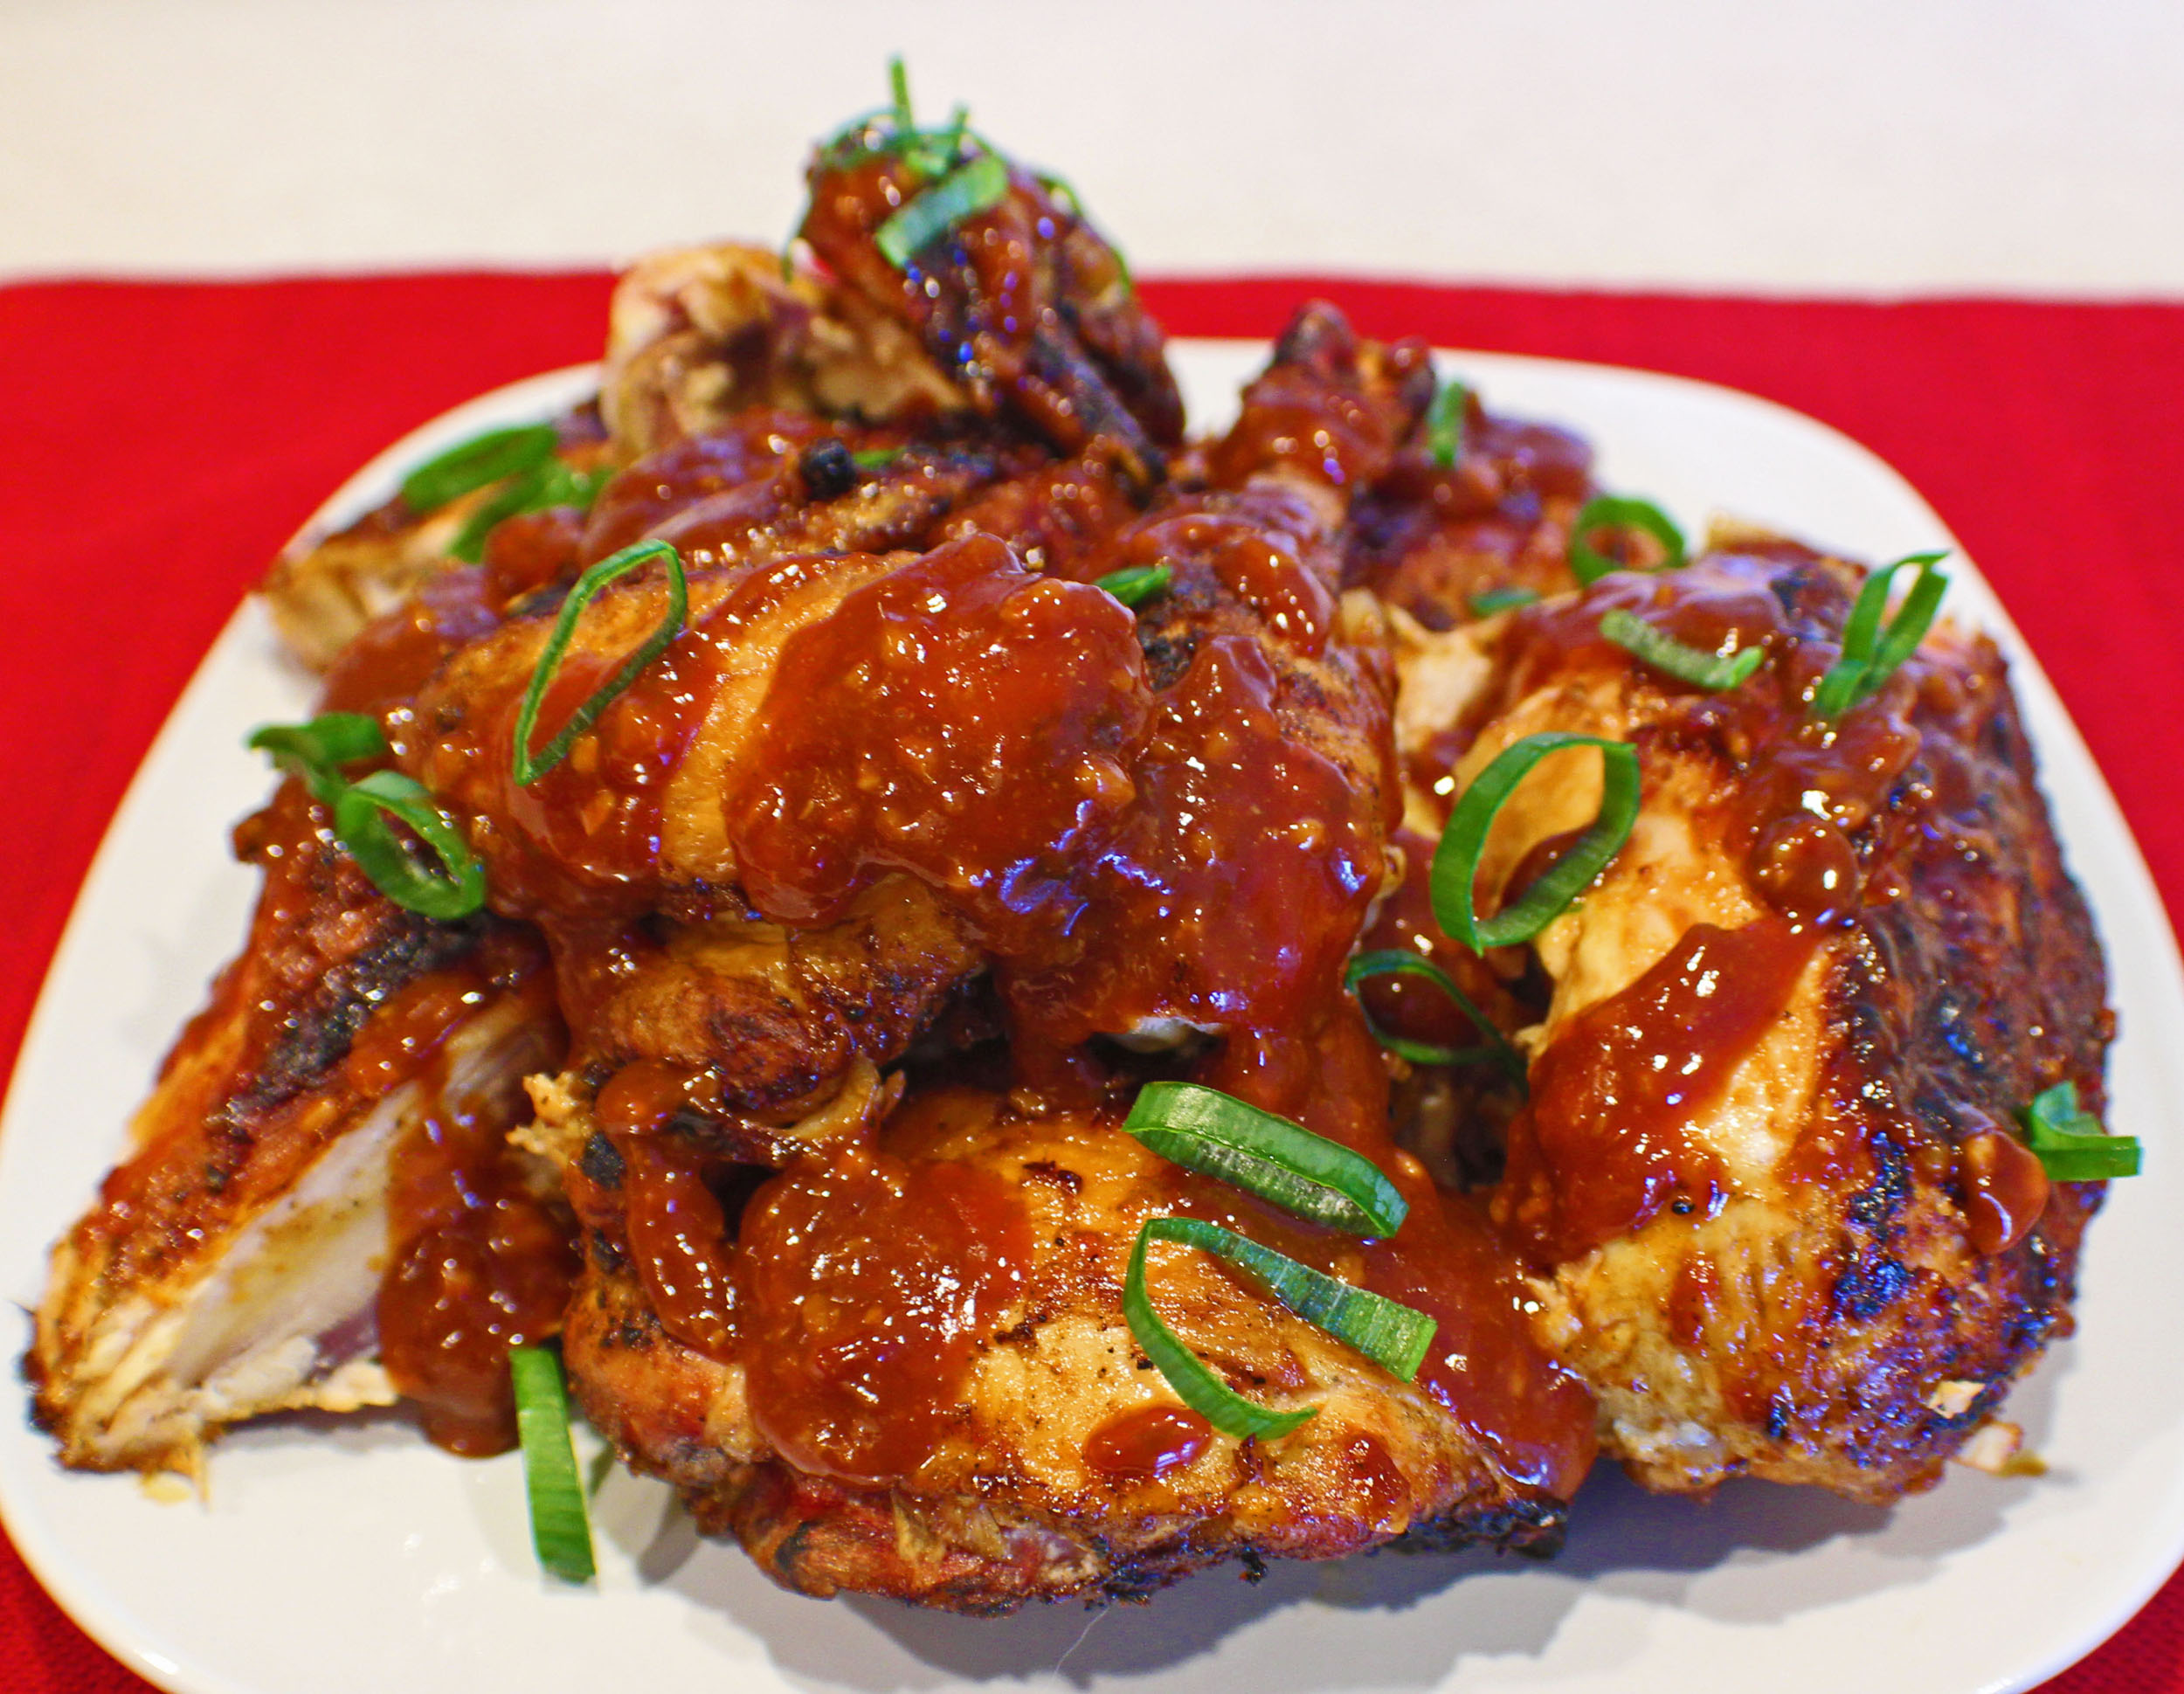
Grilled Chicken with Asian BBQ Sauce

Remove the chicken from the grill to a cutting board and let it rest for about 10 minutes before cutting it apart.

Cut the legs and thighs off, then the wings and drummies. Cut the chicken breasts down the breast bone. I top the pieces with the remaining barbecue sauce and some sliced green onions.

Serve this with Asian Slaw.

Enjoy!

Grilled Spatchcock Chicken with Asian BBQ Sauce

Spatchcocking chicken is an easy way to get a whole chicken to cook faster and keep it moist. Baste it with barbecue sauce for a finishing touch to a great tasting grilled chicken.
Prep Time10 minutes
Cook Time46 minutes
Resting Timee10 minutes
Total Time1 hour 6 minutes
Course: Dinner, Entree, Main Course
Cuisine: American, Asian
Keyword: Asian BBQ Sauce, Chicken, Dinner Ideas, Grilling, Spatchcock Chicken, Whats for Dinner
Servings: 8 servings
Calories: 84kcal
Author: Eating With Deb

Equipment

  • 2-quart sauce pan
  • Kitchen shears
  • Barbeque Grill, Tongs, and Brick Wrapped with Foil
  • Knife and cutting board

Ingredients

Chicken

  • 1 each whole chicken
  • 2 tbsp vegetable oil
  • 1 tsp sea salt
  • 1 tsp black pepper

Asian BBQ Sauce

  • ½ cup ketchup
  • 1 tbsp molasses
  • 1 tbsp soy sauce or wheat-free tamari
  • 2 tbsp mirin or brown rice vinegar
  • 1 tbsp Sambal Oelek
  • 1 tsp sesame oil
  • 11 tbsp ginger
  • 1 tbsp garlic fresh minced
  • 1 tbsp brown sugar

Instructions

For the BBQ Sauce

  • Combine all ingredients in a 2-quart sauce pan and simmer for 5 minutes.

For the Chicken

  • Place chicken breast side down. Using a pair of kitchen shears, cut down each side of the back bone. Remove and save for making chicken stock.
  • Flip chicken over, using the heals of your hands, press down on the breast bone, breasts, and thighs to flatten as much as possible.
  • Using half the oil, salt, and pepper, rub oil all over 1 side and sprinkle with salt and pepper. Flip chicken over and repeat with the remaining oil, salt, and pepper.
  • Set chicken aside at room temperature and start the charcoal, you will need a full chimney.
  • Wrap a large patio brick, or 2 smaller bricks with foil.
  • Once grill is ready, place chicken, meat side down on the grill, directly over the charcoal, and put the foil wrapped brick(s) on top of the chicken. Close the lid and cook for 20 minutes.
  • Remove the brick(s), flip the chicken over, and replace brick(s). Close the lid and cook for another 20 minutes. Check the internal temperature of the chicken is 2 or 3 places on each side to ensure the chicken has reached 160 degrees.
  • Remove the brick and baste one side of the chicken with 1/3 of the BBQ sauce. Close the lid and cook for 3 minutes.
  • Flip the chicken over and baste the other side with 1/3 of the BBQ sauce. Close the lid and cook for 3 minutes.
  • Remove the chicken and let rest for 10 minutes. Cut the chicken off at the joints, removing the wings and drummies together. Remove the thighs and legs together then cut at the joint between the thigh and leg. Cut the breasts in half down the breast bone.
  • Drizzle the remaining BBQ sauce all over the chicken pieces.
  • Enjoy!

Nutrition

Calories: 84kcal | Carbohydrates: 12g | Protein: 1g | Fat: 4g | Saturated Fat: 3g | Cholesterol: 1mg | Sodium: 613mg | Potassium: 145mg | Fiber: 1g | Sugar: 8g | Vitamin A: 91IU | Vitamin C: 2mg | Calcium: 14mg | Iron: 1mg

Chile Lime Burgers

Chile Lime Burger

Nothing says summer more than lighting up that backyard barbeque. Of course, plain burgers are great, but if you are going to patty up your own burger, why not add other ingredients to the ground beef.

First make a quick condiment for your burger. Combine sour cream, lime juice and zest, cilantro, green chiles, and salsa. That’s it.

I also get my toppings ready to go.

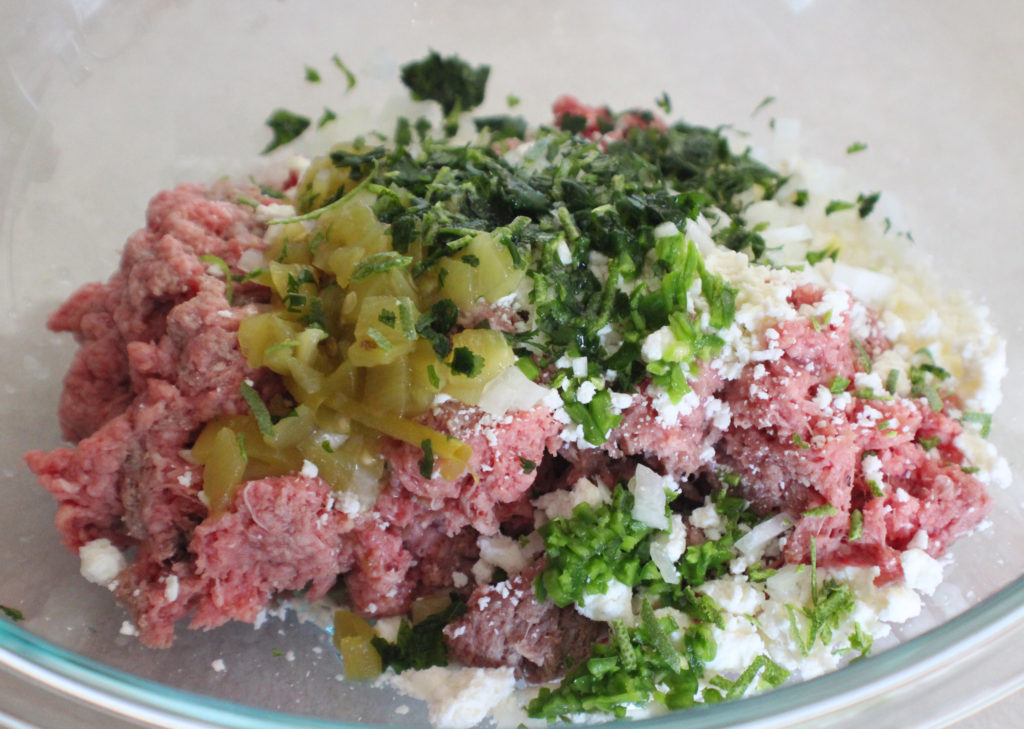
Now get your burgers ready. Mix ground beef with jalapenos, cilantro, onions, green chiles, taco seasoning, chipotle powder for a little kick, lime juice and zest, and some crumbled cotija cheese. Cotija cheese can be found with the other Mexican style cheeses in the cheese department. If you cannot find it, you could replace it with a mild feta or top your burgers with some sliced co-jack. Or omit the cheese all together.

Burgers plump when you cook them, so when forming the patties, make sure the center is thinner than the edges. This will help ensure an even thickness when cooked.

Time to get grilling. Gas or charcoal? Well, use whatever you have. I happen to have both and today it was quite windy. I have a small gas grill on a patio that is somewhat blocked from the wind, so that is what I used. Otherwise I certainly would have used charcoal for that extra little smoky flavor charcoal provides.

It only takes about 5 minutes per side over medium to medium low heat with the lid closed.

During the last couple of minutes, I like to toast the burger buns, and if I’m topping my burger with cheese, this is when I do that too.

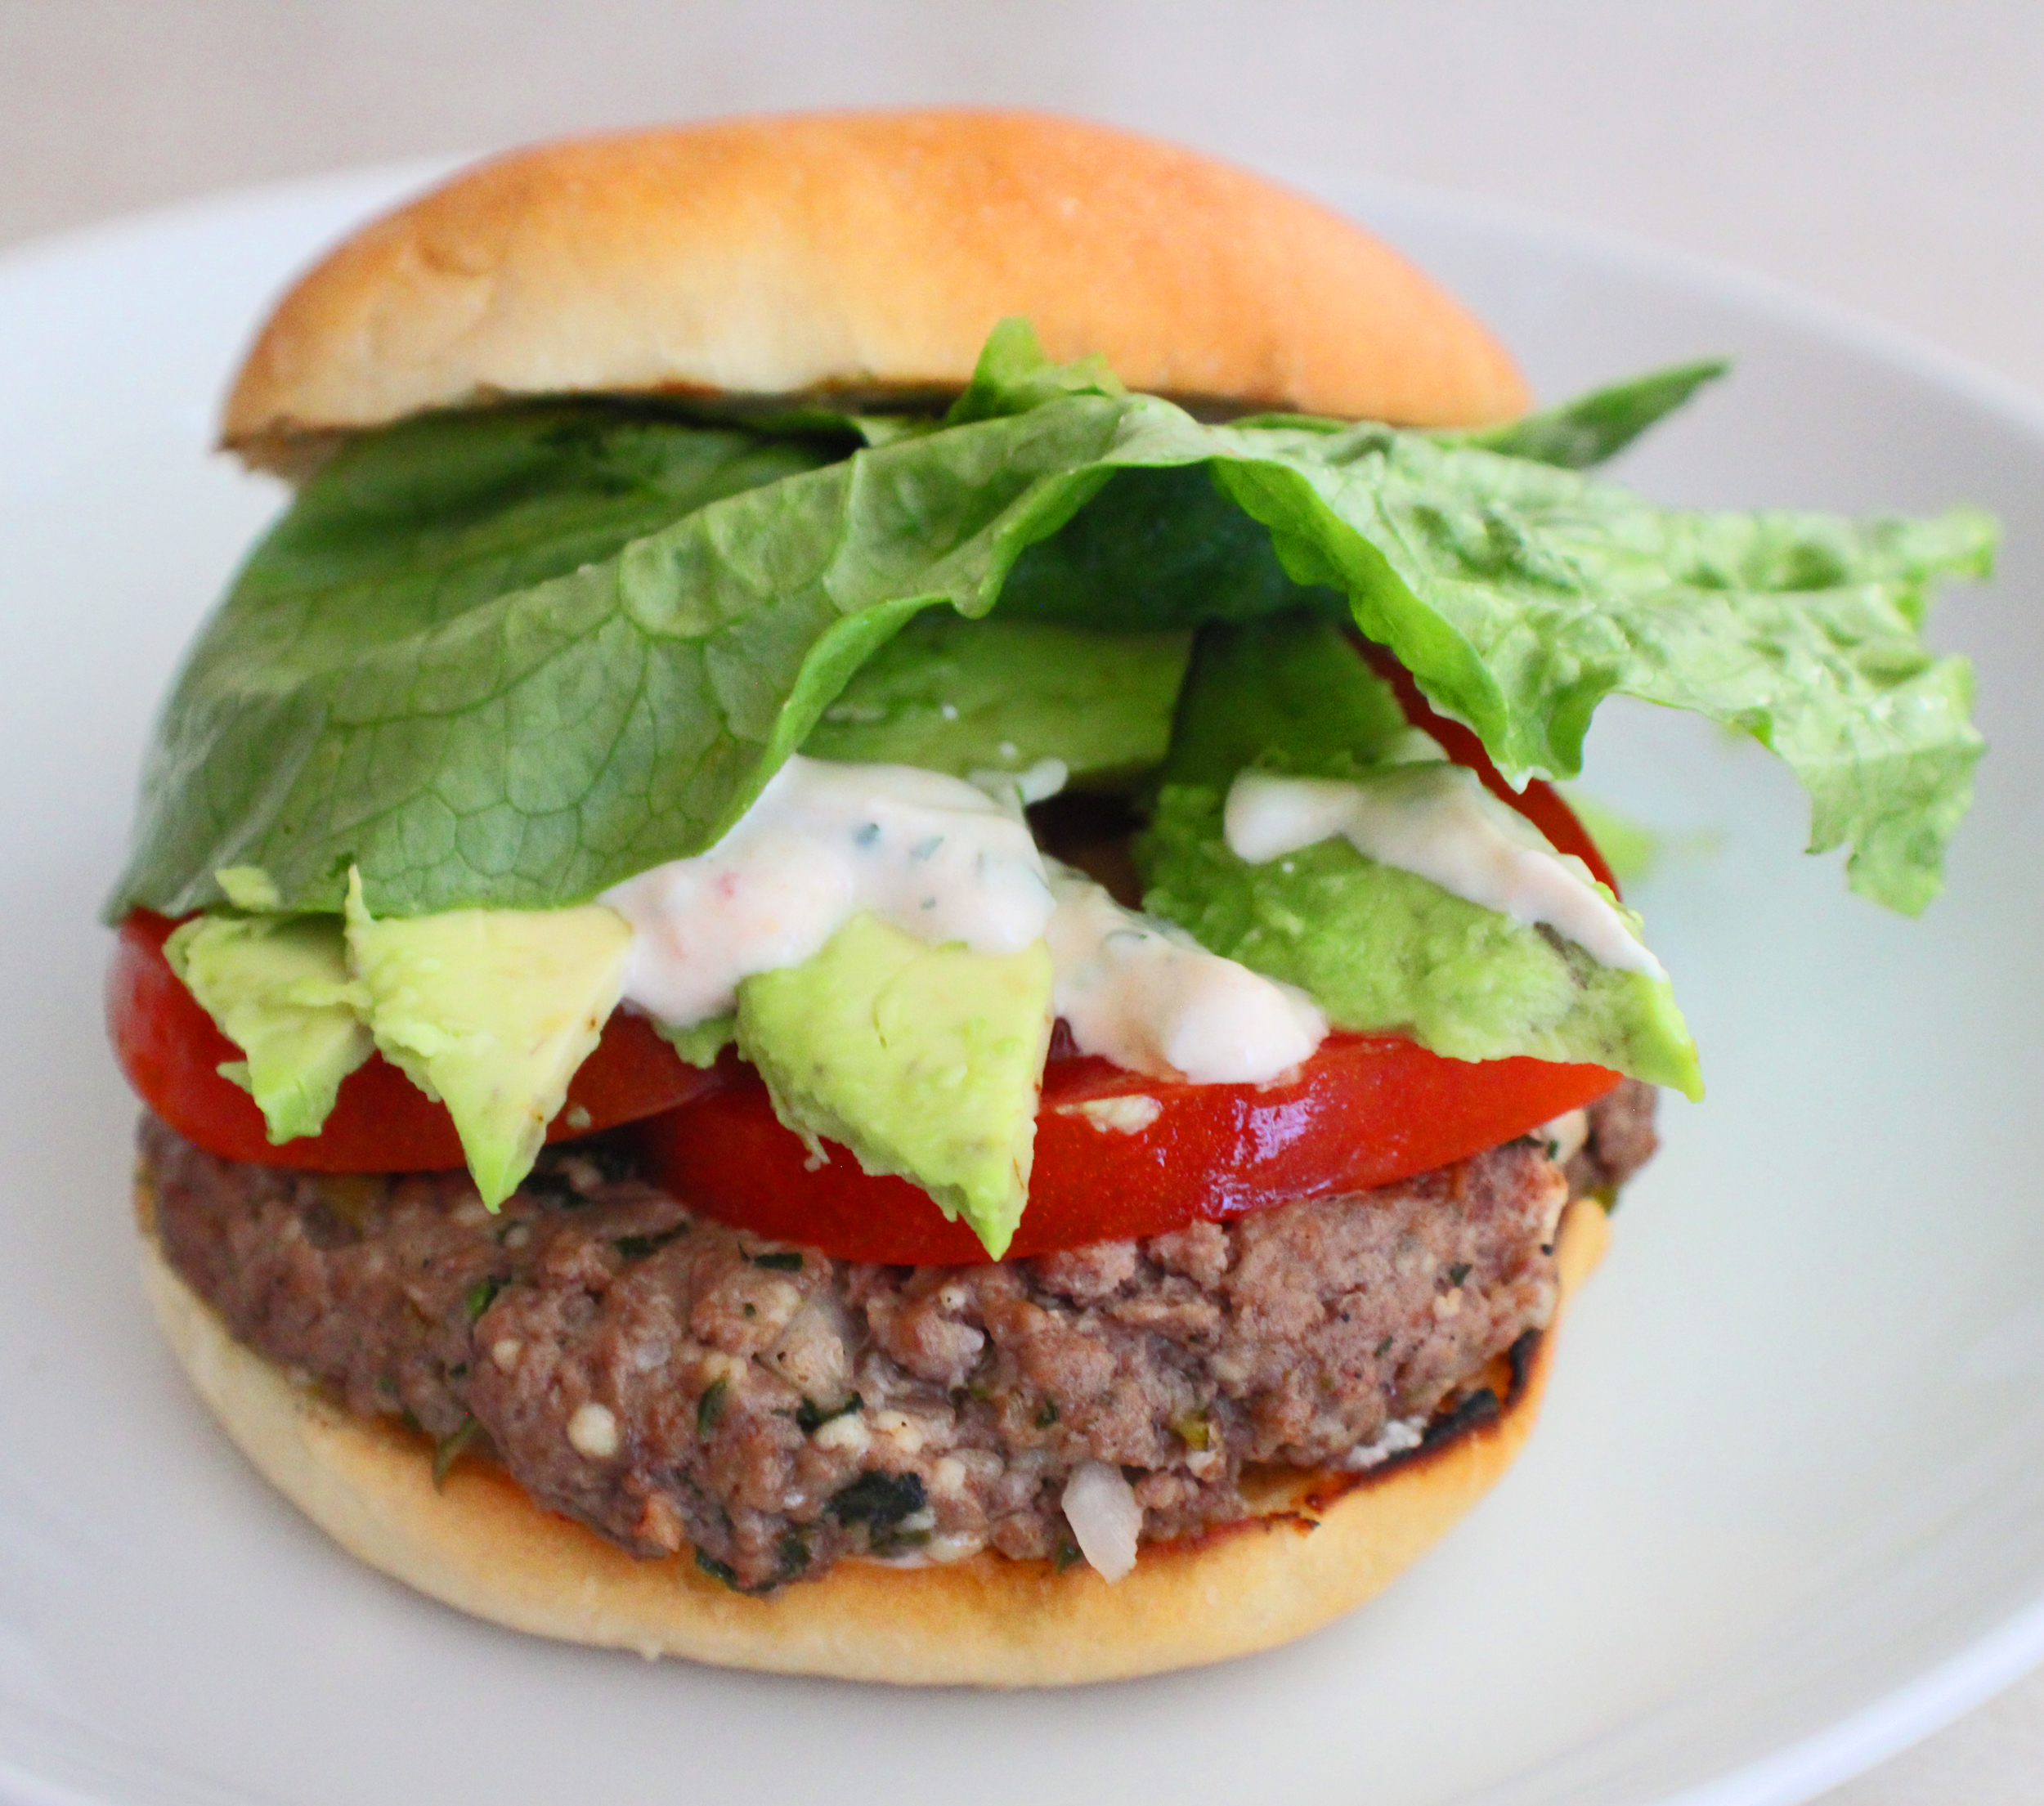
Now it’s time to build your burger however you desire.

Enjoy!

Chile Lime Burgers

This is a refreshing Tex-Mex style burger with lime, green chiles, and a little heat from a jalapeno and chipotle powder. Great for summer grilling.
Prep Time10 minutes
Cook Time10 minutes
Course: Dinner, Lunch
Cuisine: American, Tex-Mex
Keyword: Burgers, Grilling, Southwest Burgers, Whats for Dinner
Servings: 4 people
Calories: 369kcal
Author: Eating With Deb

Equipment

  • Large bowl
  • Small bowl and whisk
  • Barbeque (gas or charcoal)

Ingredients

  • 1 pound ground beef 80/20
  • 1/3 cup cotija cheese crumbled
  • 1 each jalapeno seeds and ribs removed, chopped
  • 2 tbsp cilantro chopped
  • 2 tbsp onion chopped
  • 2 tbsp green chiles
  • ½ tsp taco seasoning
  • ¼ tsp chipotle powder
  • ½ each lime juice and zest

Topping/Spread

  • 1/3 cup sour cream
  • ½ each lime juice and zest
  • 1 tbsp cilantro chopped
  • 1 tbsp green chiles
  • 2 tbsp salsa

Burger Toppings

  • 1 each avocado
  • 1 each tomato
  • 4 each leafs of lettuce
  • 4 each burger buns

Instructions

  • Combine burger ingredients until just mixed in. Do not overmix or your burgers will be tough. Divide into 4 and form 4 patties. Be sure to indent the center. When burgers cook, they plump. Forming an indent will help ensure you don’t have bloated burgers.
  • Combine topping/spread ingredients.
  • Slice tomato, wash and pat dry lettuce leaves, and slice burger buns.
  • Grill burgers over medium heat about 5 minutes per side until they reach an internal temperature of 155 degrees.
  • In the last minute or so, grill the burger buns.
  • Build your burger. I like to put sauce on both sides of the bun, then the burger, tomato, avocado, and lettuce.

Nutrition

Calories: 369kcal | Carbohydrates: 3g | Protein: 22g | Fat: 29g | Saturated Fat: 13g | Trans Fat: 1g | Cholesterol: 102mg | Sodium: 340mg | Potassium: 394mg | Fiber: 1g | Sugar: 2g | Vitamin A: 376IU | Vitamin C: 5mg | Calcium: 114mg | Iron: 3mg