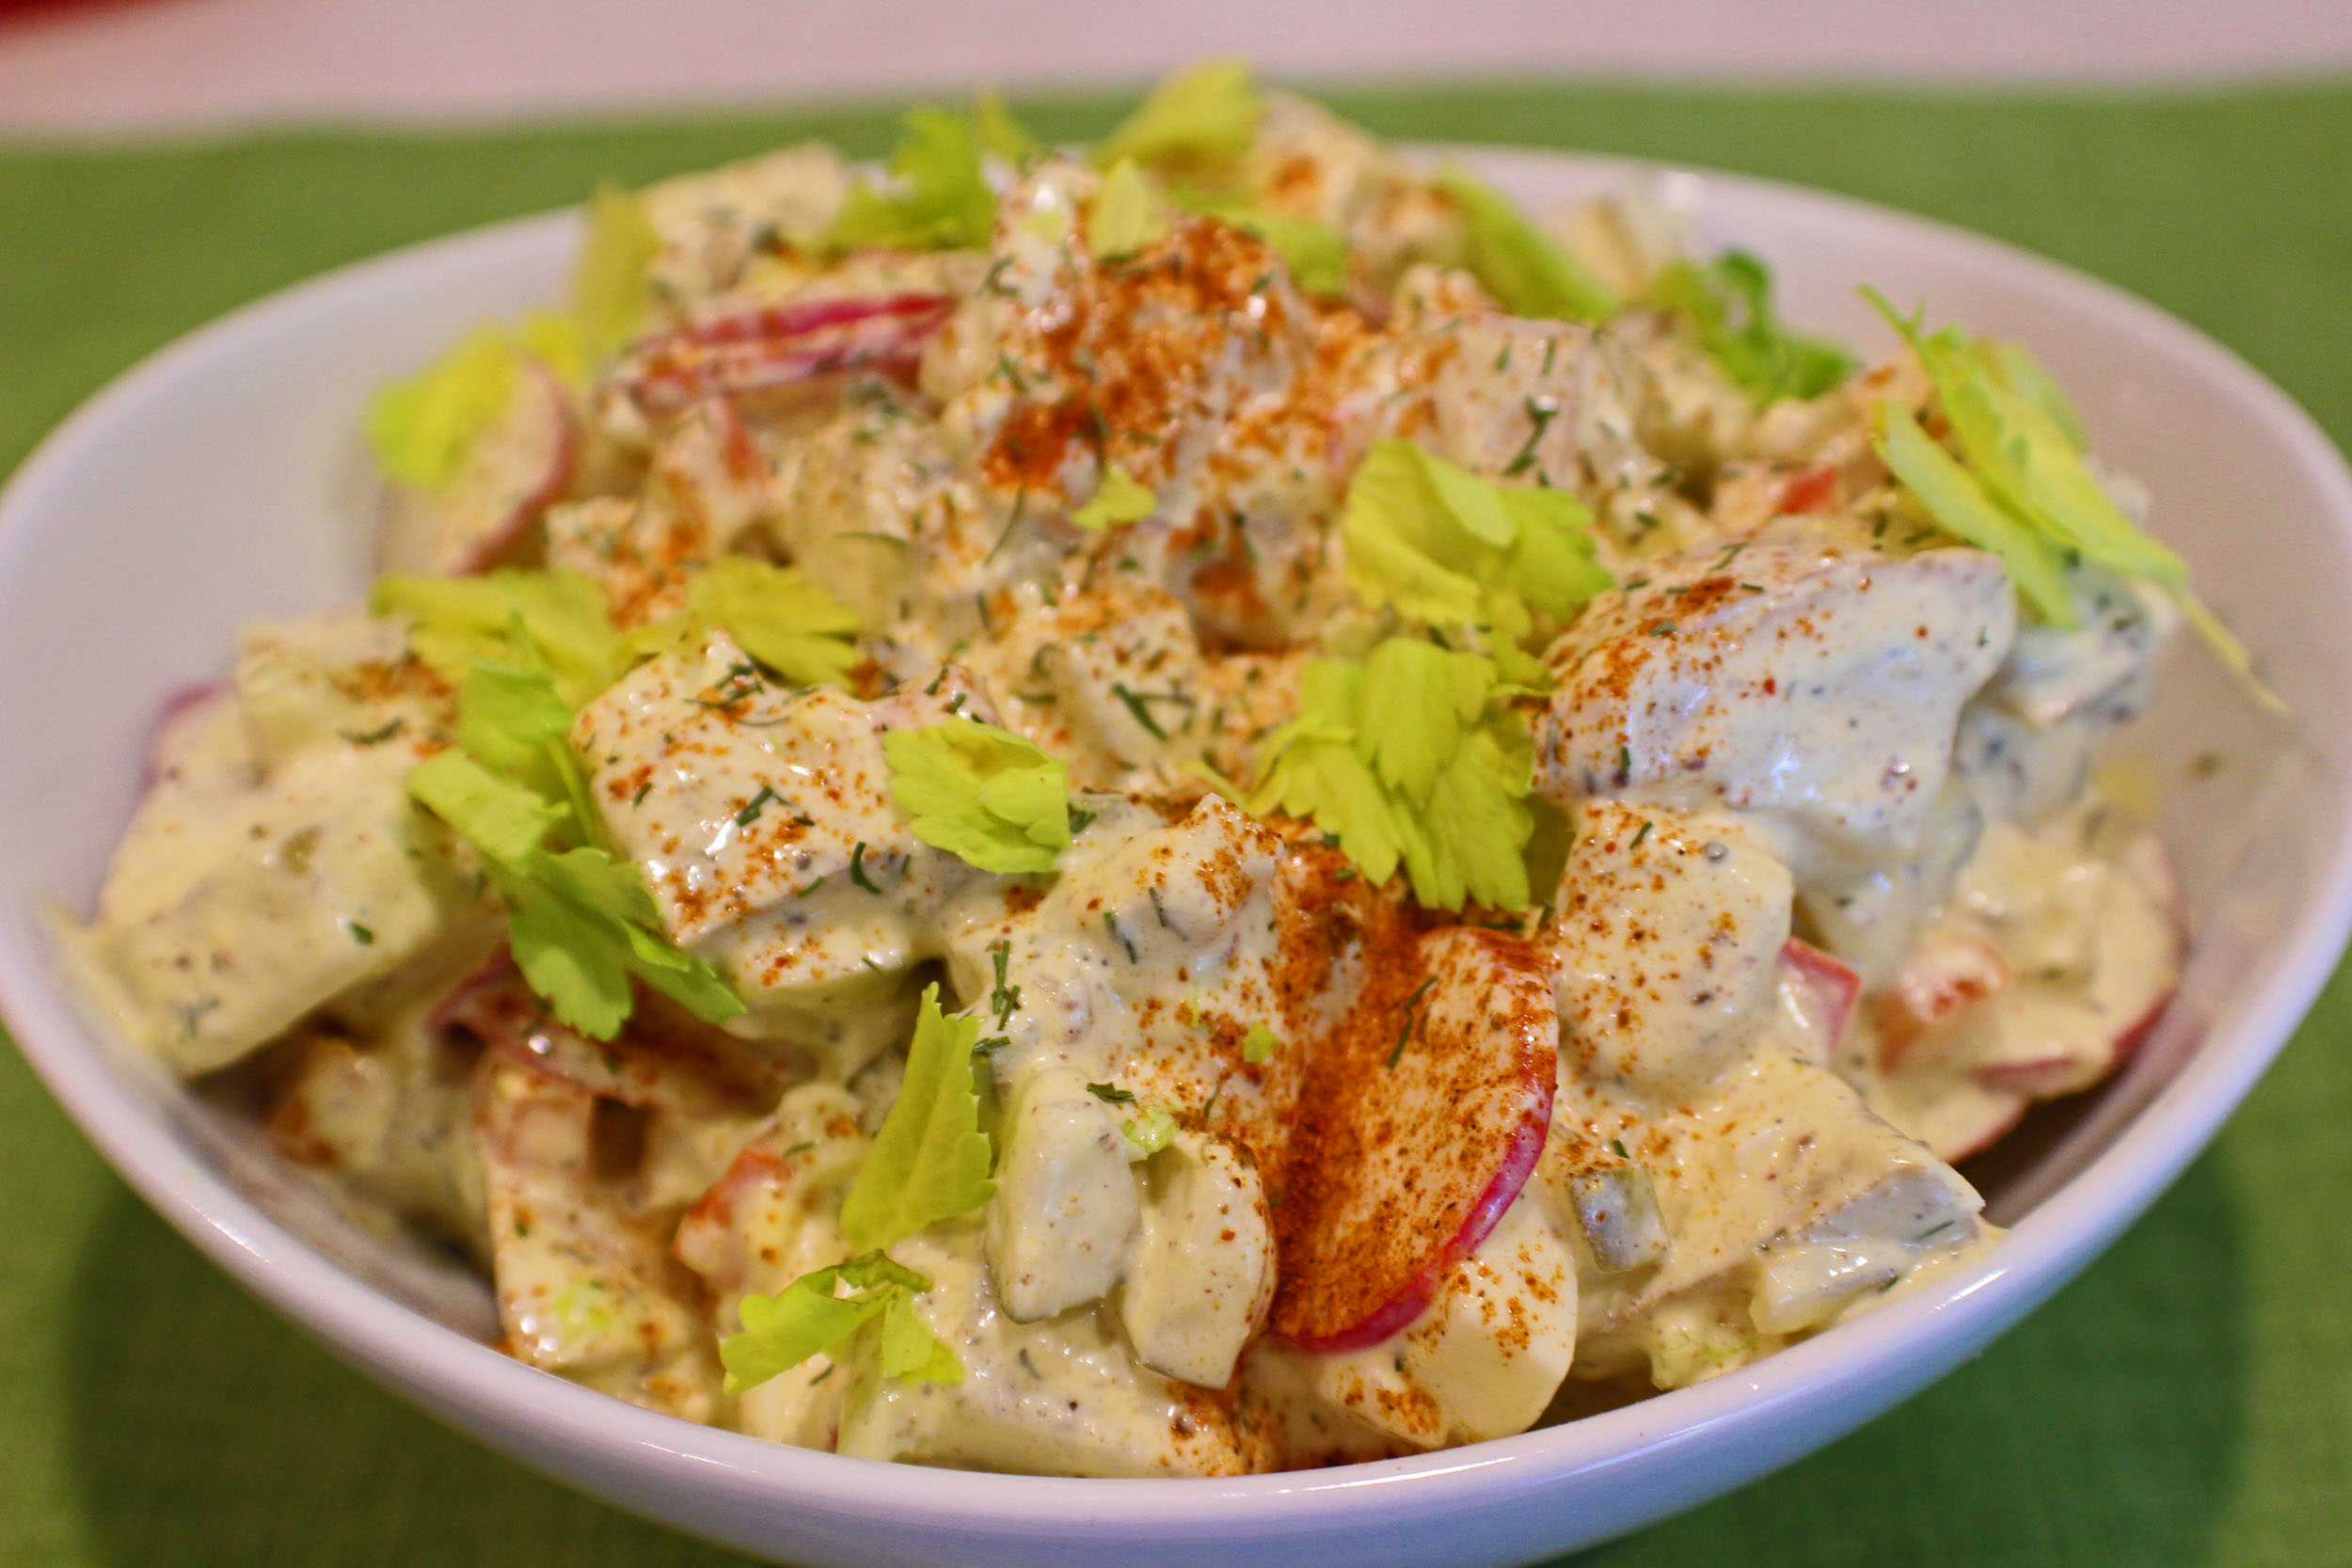
Dilly Potato Salad with Radishes

Dilly Potato Salad with Radishes

Summer is a time for lighter, fresher foods; a time to use the barbecue and smoker. Potato salad is a staple when it comes to summer picnics and outdoor barbecue meals.

I like adding different, fresh ingredients from my garden. Radishes add a little zip and crunch to a traditional potato salad.
Dilly Potato Salad Dressing

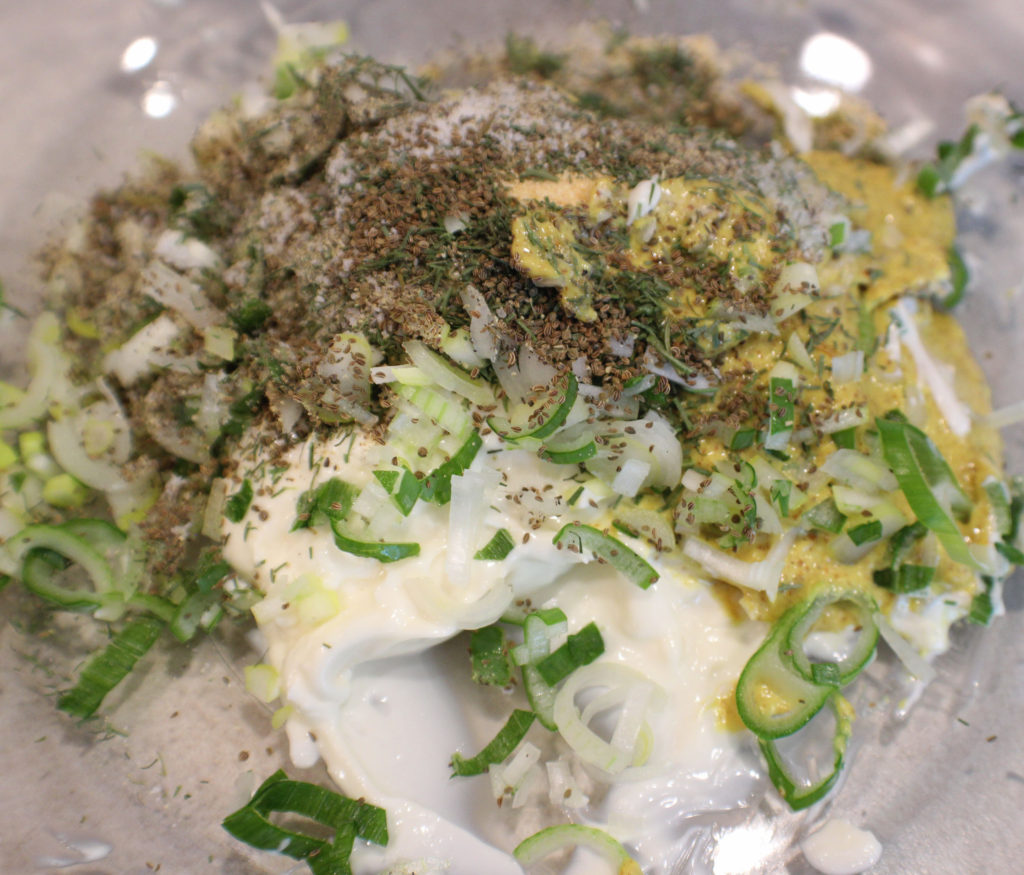
After you get the potatoes chopped and simmering, mix together the dressing ingredients. You want this ready to add the warm potatoes when they are done cooking.
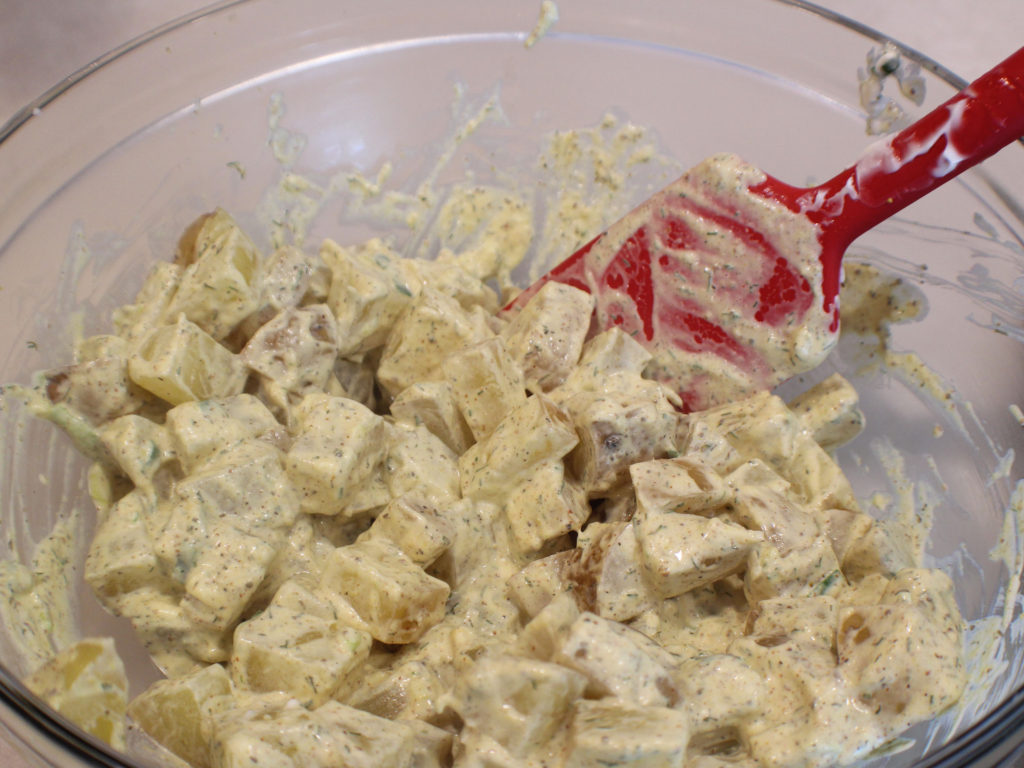
Potatoes Cooling in Dressing

Once the potatoes are done, but still firm, they will still cook a little bit while cooling in the dressing, drain and immediately mix into the dressing. The warm potatoes will absorb the flavors from the dressing.

Put this in the refrigerator for an hour. Potatoes are a high risk item for food poisoning, so you want to cool them right away.
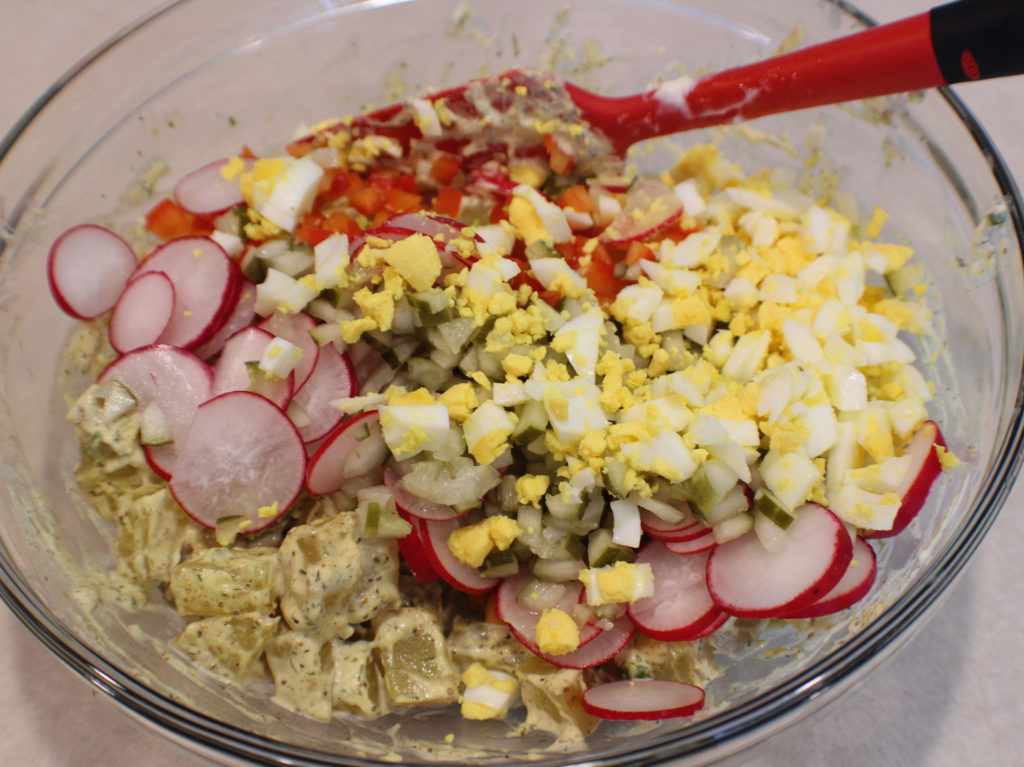
Dilly Potato Salad Ready to Mix

After about an hour, prepare the rest of the potato salad ingredients and mix into the salad. Put the potato salad back into the refrigerator for another hour or so until cold.

Try serving this with BBQ Rib Burgers.

Enjoy!

Dilly Potato Salad with Radishes

Creamy potato salad is a summertime staple for picnics and barbecues. Add in some fresh dill and radishes to enhance a summer favorite.
Prep Time15 minutes
Cook Time8 minutes
Cooling Time2 hours
Total Time2 hours 23 minutes
Course: Salad, Side Dish
Cuisine: American
Keyword: Dill, Potato Salad, Potatoes, Radishes, Side Salad
Servings: 6 cups
Calories: 204kcal
Author: Eating With Deb

Equipment

  • 4 to 6 quart sauce pot
  • Cutting board and knife
  • Large bowl and rubber spatula

Ingredients

  • 4 each potatoes red and/or yellow
  • ½ cup dill pickles diced
  • 1 each rib celery diced
  • ½ each red bell pepper diced
  • 8 each red radishes sliced
  • 2 each hard-boiled eggs diced (optional)

Dressing:

  • ¾ cup mayonnaise or plain yogurt or sour cream
  • 1/3 cup Dijon
  • ½ tsp granulated garlic
  • 1 tbsp fresh dill chopped, or 1 tsp dry dill
  • 1 tbsp fresh chives chopped
  • ½ tsp celery seeds
  • ½ tsp sea salt
  • ½ tsp black pepper

Instructions

  • Cut potatoes into bite size pieces. Place in cold water and then bring to a boil. Simmer until fork tender, about 8 to 10 minutes.
  • In the meantime, prepare dressing and veggies. When the potatoes are ready, drain and add to dressing. It will appear that there is a lot of sauce but the warm potatoes will soak up the sauce and absorb the flavor.
  • Place in the refrigerator to cool for about an hour, stirring a couple of times.
  • Stir in the rest of the ingredients.
  • Cool in the refrigerator for another hour before eating.
  • Enjoy!

Notes

Potatoes are a high-risk food; when not cooled right away, potatoes can create a food-borne sickness that you really don’t want to have.

Nutrition

Serving: 1cup | Calories: 204kcal | Carbohydrates: 2g | Protein: 1g | Fat: 22g | Saturated Fat: 3g | Trans Fat: 1g | Cholesterol: 13mg | Sodium: 634mg | Potassium: 52mg | Fiber: 1g | Sugar: 1g | Vitamin A: 83IU | Vitamin C: 1mg | Calcium: 21mg | Iron: 1mg

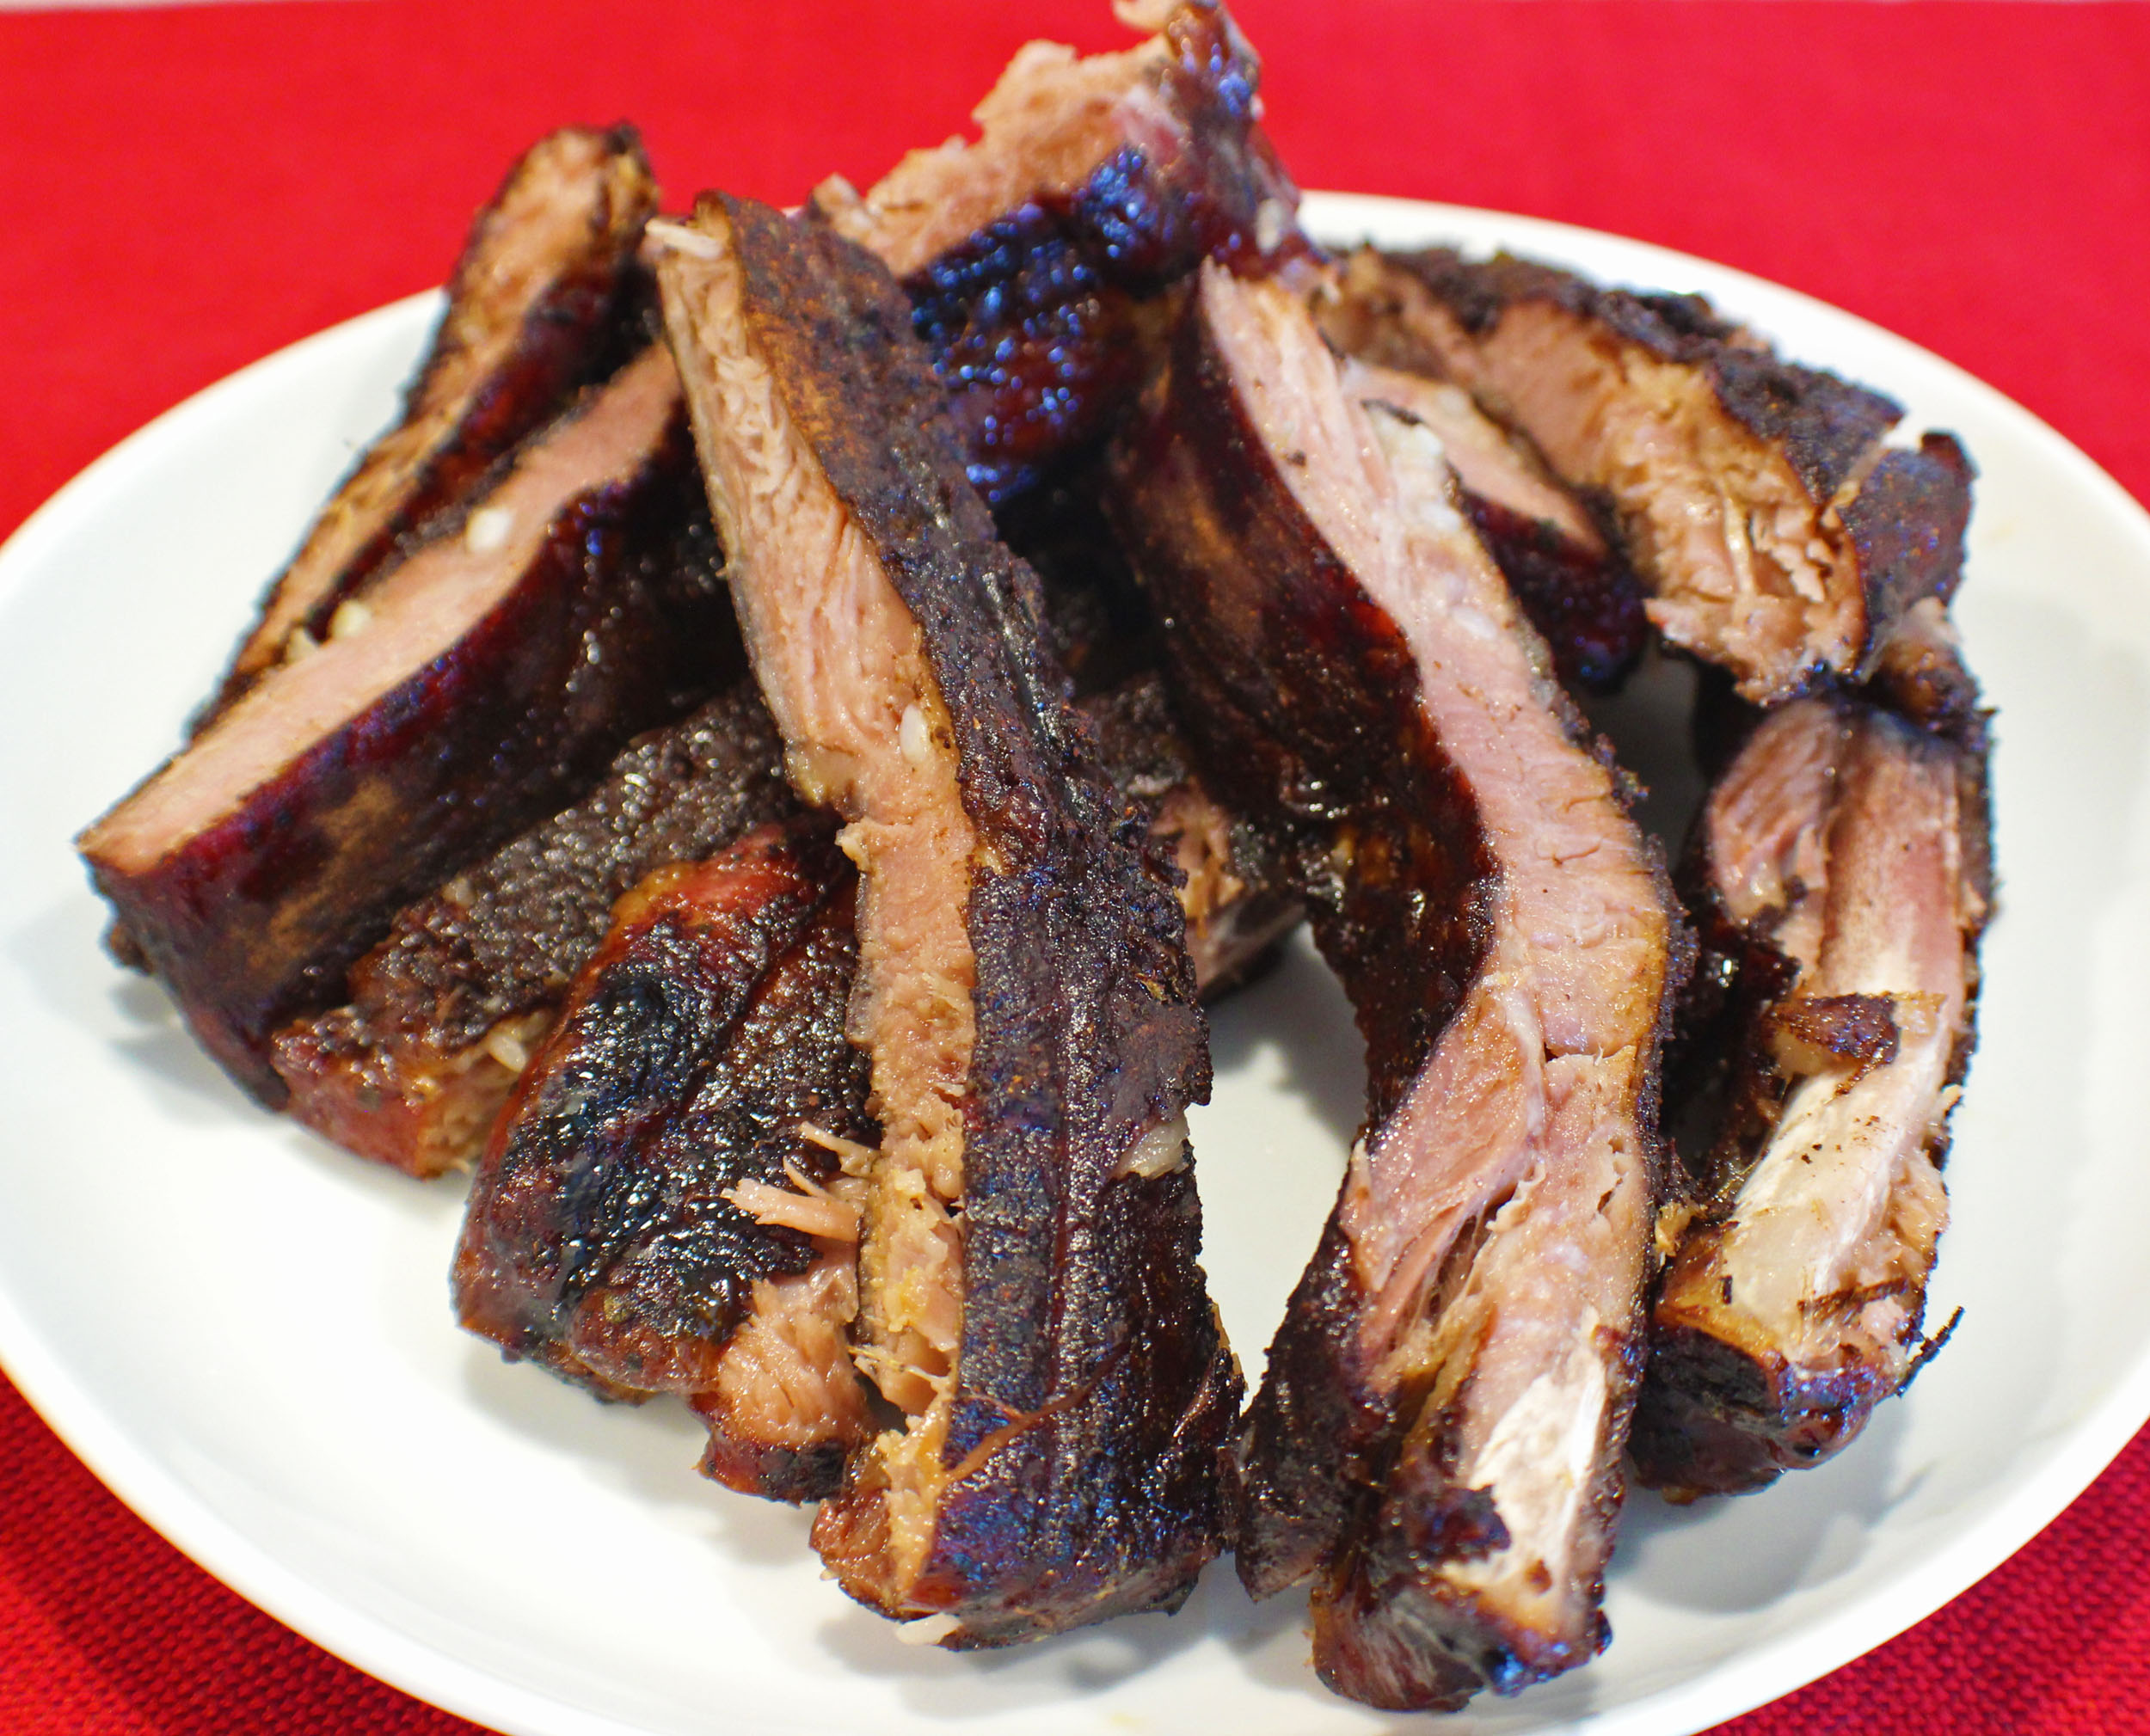
Smoked Ribs with a Cocoa Dry Rub

Cocoa Smoked Ribs

I love using my smoker. It’s an easy way to cook something and be able to do other things since you don’t have to watch it. Plus cooking meats in a smoker imparts some amazing flavors and keeps the meat moist and tender.

Ribs of course are a go to summer barbecue staple. They are simple to make and cooking them in a smoker is easy to do and frees you up to do other things while they are cooking.

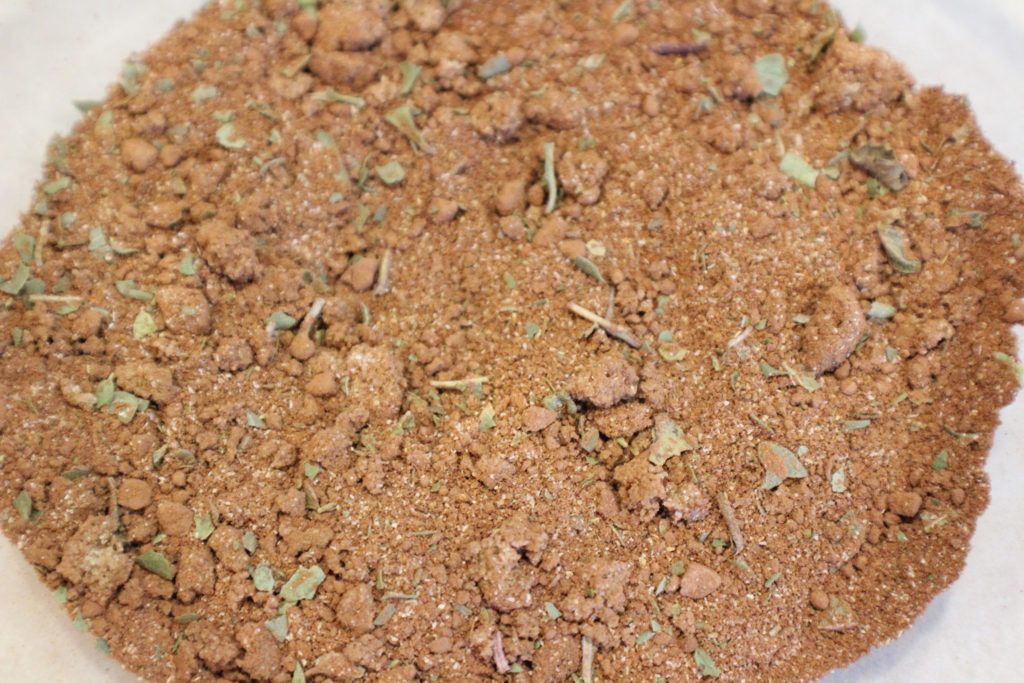
Cocoa Dry Rub

The cocoa dry rub takes just a few minutes to mix together and rub on the rack of ribs. Don’t worry about getting all the lumps out of the brown sugar, you are going to rub this into the ribs.

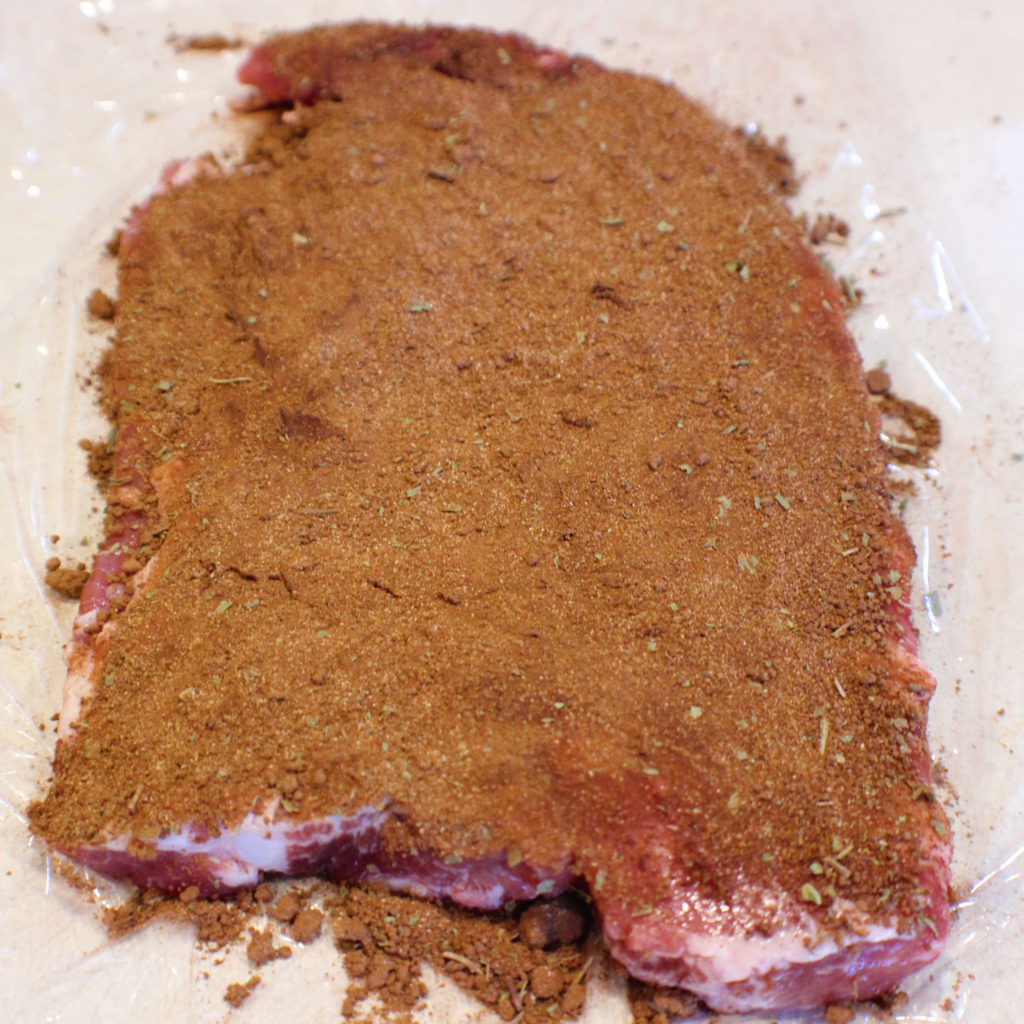
Ribs with Cocoa Dry Rub

Once you’ve trimmed the sinew and excess fat off the ribs, place them on a long piece of plastic wrap. Rub half the rub mixture into each side of the ribs.

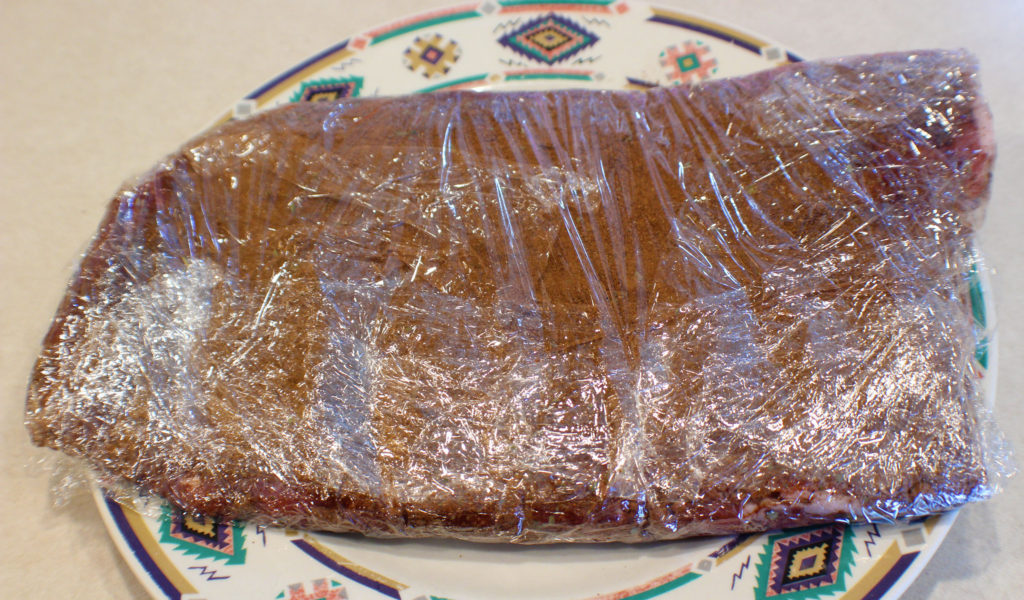
Now wrap the ribs up tight in plastic wrap, put them on a plate and refrigerate overnight.

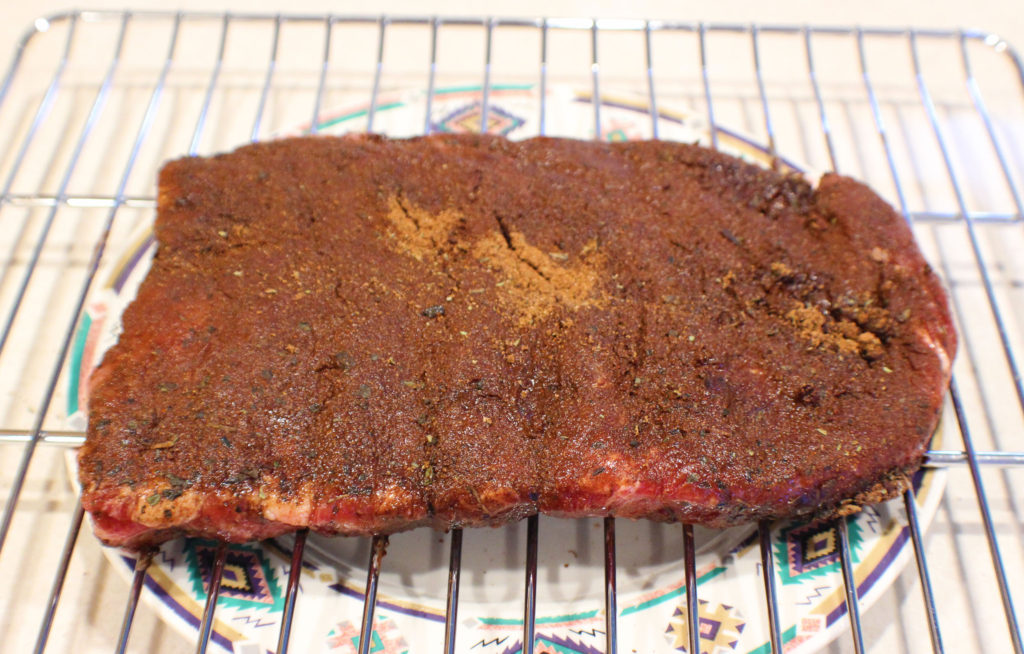
Ribs Ready to Smoke

The next day, remove the ribs from the refrigerator and the plastic wrap and place it bone side down on a smoker rack.

Now get your smoker ready according to manufacturer instructions, preheat it to 225 degrees and do a chip burn. Add the ribs when the smoker is ready.

I like to use hickory and cherry wood chips for my Cocoa Dry Rub Ribs, but use what wood you like. I also only fill my wood chip pan about half full. I like the smoke flavor, but I don’t want it overwhelming.

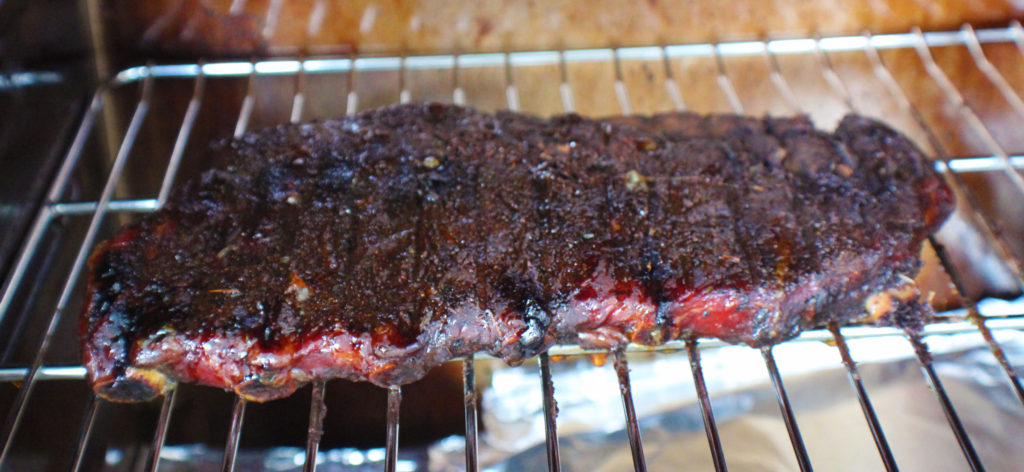
Smoked Ribs

After about 4 1/2 hours you will have deliciously smoked and tender ribs. These are tasty on there own, or try them with a sweet and tangy barbecue sauce.

I like to make Grilled Loaded Potatoes to eat with the ribs and leftovers I freeze until I’m ready to make Rib Burgers.

Enjoy!
Smoked Ribs with a Cocoa Dry Rub

Cocoa Dry Rub Smoked Ribs turn out a little smokey and a little spicy, and very moist and tender. Finger licking good!
Prep Time10 minutes
Cook Time4 hours 30 minutes
Resting Time12 hours
Total Time16 hours 40 minutes
Course: Entree, Main Course
Cuisine: American
Keyword: Cocoa Dry Rub Ribs, Ribs, Smoked Ribs
Servings: 6 people
Calories: 462kcal
Author: Eating With Deb

Equipment

  • Cutting board and knife
  • Small Bowl
  • Smoker

Ingredients

  • 1 rack St Louis or Baby Back Ribs
  • ½ pan hickory cherry, or apple wood chips

Cocoa Dry Rub

  • 2 tbsp unsweetened cocoa powder
  • 2 tbsp brown sugar
  • 2 tbsp oregano
  • 1 tbsp cumin
  • 1 tbsp paprika
  • 1 tbsp granulated garlic
  • ½ tbsp chili powder
  • ½ tbsp chipotle powder
  • ½ tbsp onion powder
  • 2 tsp cinnamon

Instructions

  • Trim ribs of excess fat and sinew.
  • Mix together dry rub ingredients.
  • Rub ribs with dry rub the night before, wrap in plastic wrap and put in the refrigerator.
  • Get smoker ready according to manufacture directions. I like to use ¼ pan hickory and ¼ pan cherry wood chips.
  • Pre-heat with a chip burn to 225 degrees.
  • Smoke bone side down for 4 ½ hours.
  • Remove from smoker, slice and serve immediately.
  • Enjoy!
Notes

The dry rub has a touch of heat to it. A sweeter or smoky barbecue sauce pairs well when serving the ribs.

Nutrition

Serving: 2ribs | Calories: 462kcal | Carbohydrates: 10g | Protein: 25g | Fat: 36g | Saturated Fat: 12g | Trans Fat: 1g | Cholesterol: 121mg | Sodium: 150mg | Potassium: 514mg | Fiber: 3g | Sugar: 4g | Vitamin A: 1013IU | Vitamin C: 1mg | Calcium: 81mg | Iron: 4mg

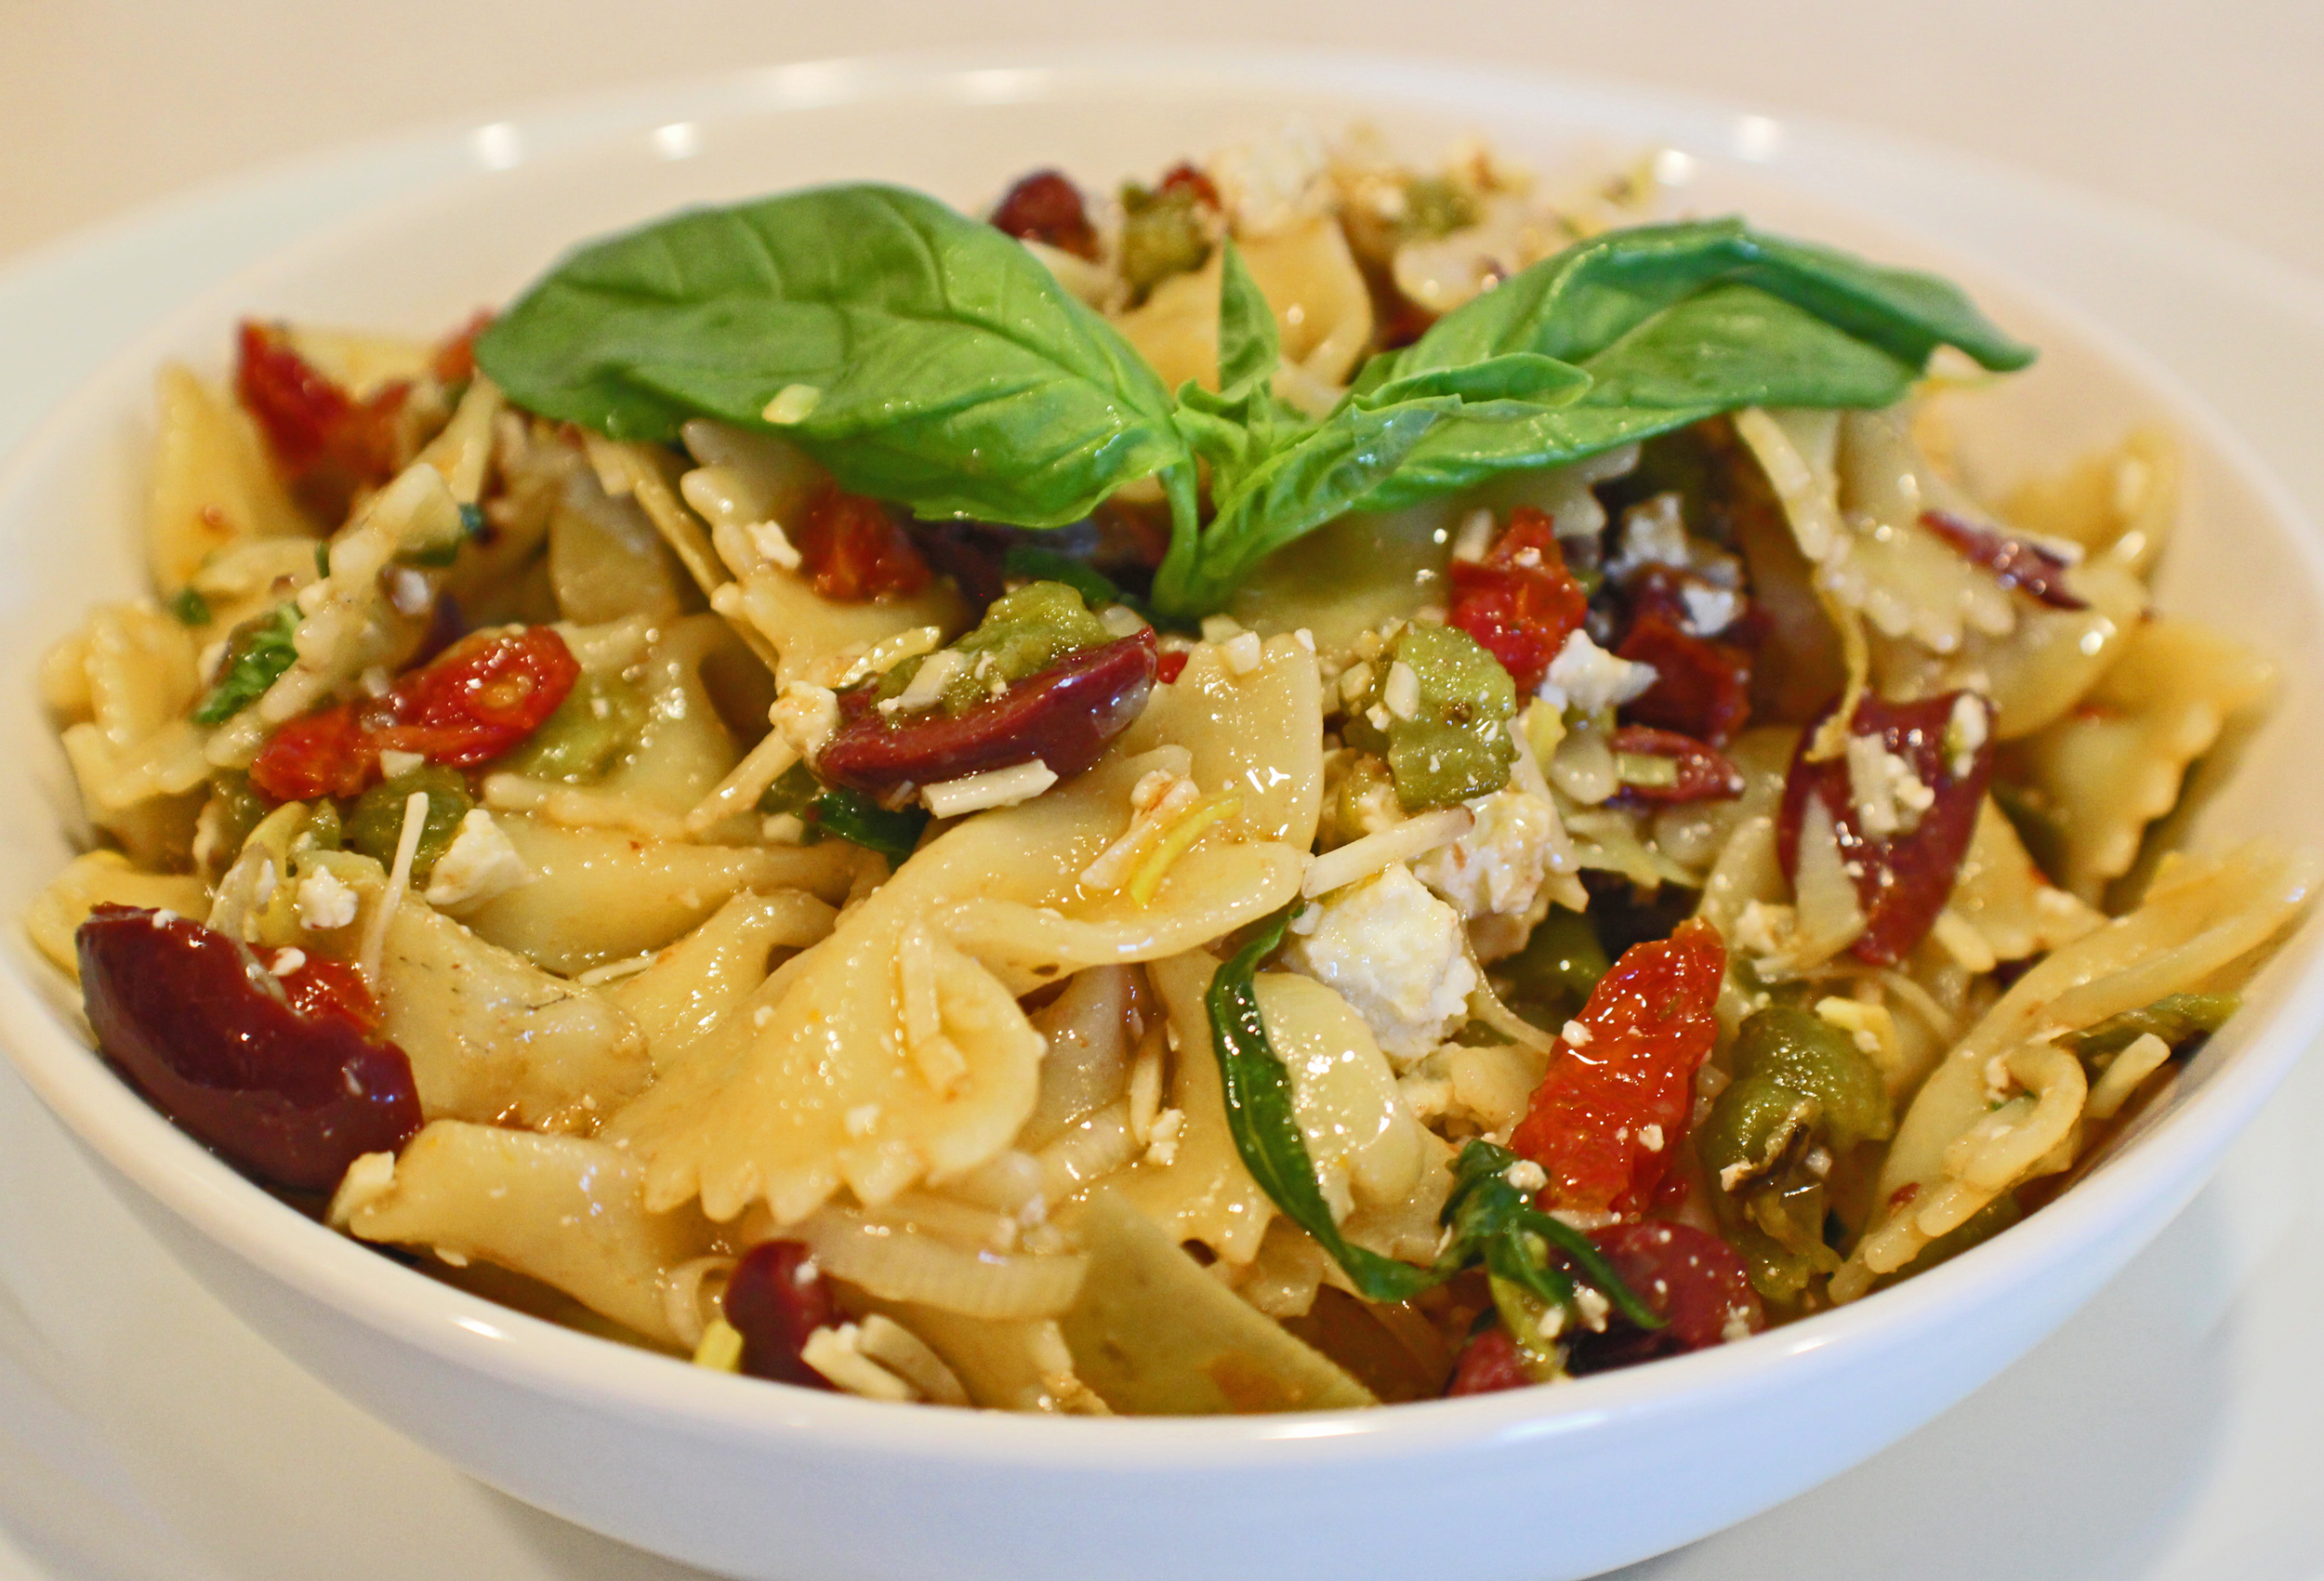
Mediterranean Pasta Salad

Mediterranean Pasta Salad

One of the things I love about summer is coming up with new side dishes to serve with whatever I am grilling. This pasta salad goes well with many different grilled meats, meat alternatives, and veggies.

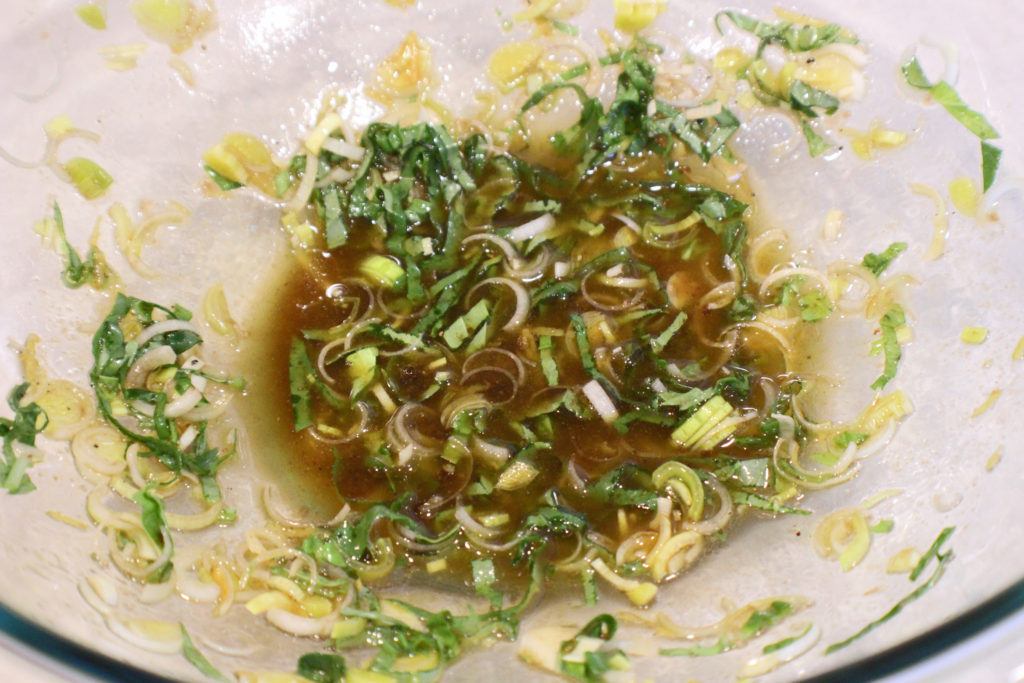
Start by getting your pasta cooking in boiling salted water. While the pasta is cooking, mix together the dressing ingredients so it is ready to add the pasta right when it is done.

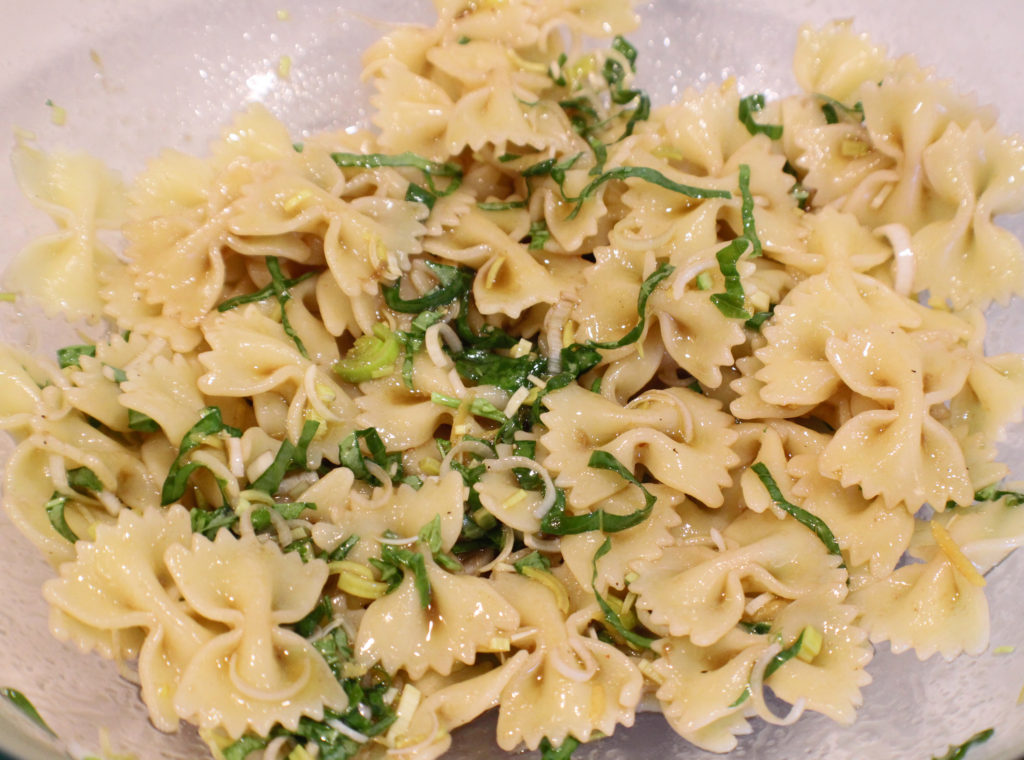
Once the pasta is cooked to al dente, drain and add directly to the dressing. Mix it in. The warm pasta will absorb the flavors of the dressing. Put this in the refrigerator to start cooling down.

I always made this with sundried tomatoes that I reconstituted, then one time I decided to make it a little easier and bought them packed in oil. I didn’t take into account the additional oil when I made the dressing and my dish turned out too oily. This recipe is adjusted for sundried tomatoes packed in oil. So, if you decide to use dried tomatoes that you add hot water to soften them, you may need a little more oil in the dressing, but wait until the end to determine that.

Also, I usually use roasted red bell peppers because they are easier to find in jars in the grocery store, but I happened to have some roasted green peppers from my garden in the freezer that I needed to use up, so that’s what I used this time.

Once you have your ingredients ready, mix them in with the pasta and dressing.

Refrigerate for about an hour to cool down completely. 

Enjoy!

Mediterranean Pasta Salad

This salad is slightly tangy from the olives, artichoke hearts, and lemon juice, yet very fresh tasting. Goes great with just about any outdoor BBQ meal, pairs well with many meat entrees.
Prep Time15 minutes
Cook Time10 minutes
Cooling Time1 hour
Total Time1 hour 25 minutes
Course: Salad, Side Dish
Cuisine: Mediterranean
Keyword: Artichoke Hearts, Kalamata Olives, Pasta
Servings: 4 people
Calories: 351kcal
Author: Eating With Deb

Equipment

  • large saucepan
  • 1 large bowl and whisk
  • Cutting board and knife

Ingredients

  • 2 cups bowtie pasta uncooked
  • ½ cup sun-dried tomatoes jarred in oil, rough chopped
  • ½ cup kalamata olives pitted, rough chopped
  • 1 each roasted bell pepper red or green, diced
  • ½ cup artichoke hearts rough chopped
  • ½ cup pepitas raw pumpkin seeds
  • ¼ cup feta cheese crumbled
  • ¼ cup parmesan cheese shredded

Dressing

  • 2 tbsp olive oil
  • 2 tbsp balsamic vinegar
  • ½ each lemon juice and zest
  • 1 each leek small, cut in ½ moons
  • 5 each basil leaves fresh, sliced
  • ½ tsp granulated garlic
  • 1 pinch black pepper

Instructions

  • ring 4 to 6 cups of water to a boil, add a couple tablespoons of sea salt and pasta. Cook to al dente, about 10 minutes. Drain.
  • While pasta is cooking, combine dressing ingredients and start preparing the rest of the salad ingredients.
  • After pasta is drained, add to the dressing, mix in and put in the refrigerator.
  • Finish preparing the rest of the ingredients and mix into the pasta and dressing.
  • Refrigerate for 1 hour, stirring a couple of times.

Nutrition

Serving: 1cup | Calories: 351kcal | Carbohydrates: 36g | Protein: 13g | Fat: 18g | Saturated Fat: 5g | Trans Fat: 1g | Cholesterol: 13mg | Sodium: 754mg | Potassium: 640mg | Fiber: 5g | Sugar: 8g | Vitamin A: 348IU | Vitamin C: 6mg | Calcium: 159mg | Iron: 3mg

Ginger Soy Pork Chops

Ginger Soy Pork Chops

I love spring, summer, and fall months because that means I use my barbeque a lot more. I like just about anything grilled, a good burger or brat, chicken, beef or pork, and many different grilled veggies.

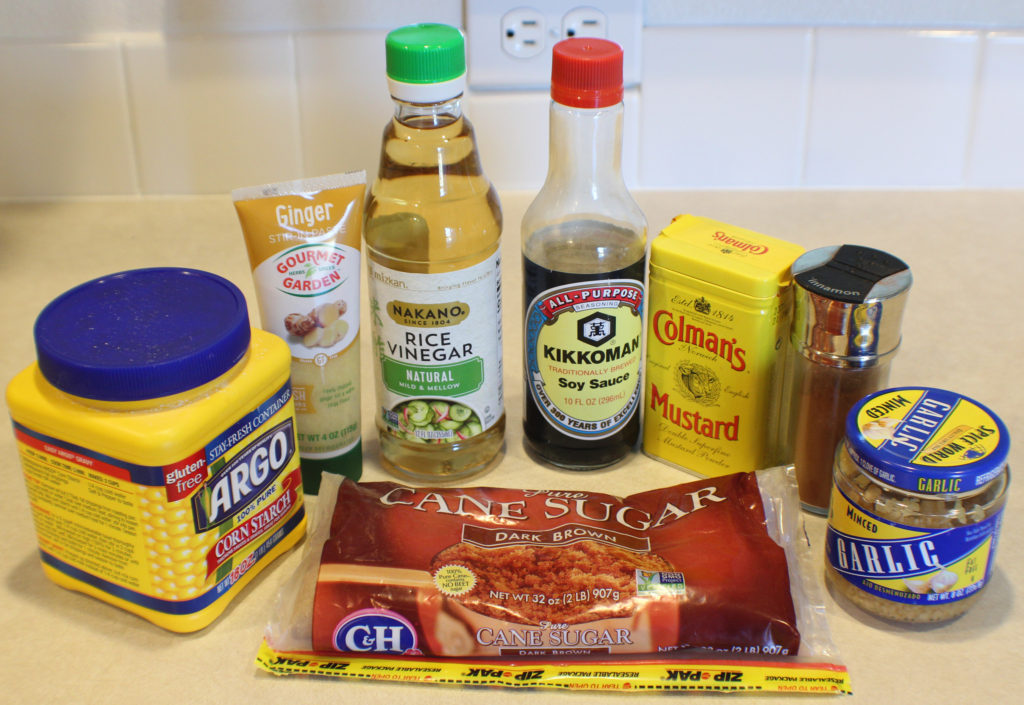
I created an Asian Slaw for my Asian Burgers and wondered what else could I make to serve with the Asian Slaw. That’s how I came up with this recipe.

Ginger Soy Pork Marinade

It’s as simple as whisking together a few ingredients, letting the pork marinate for a bit, then cooking them on the grill.

So, whisk together the marinade and set aside.

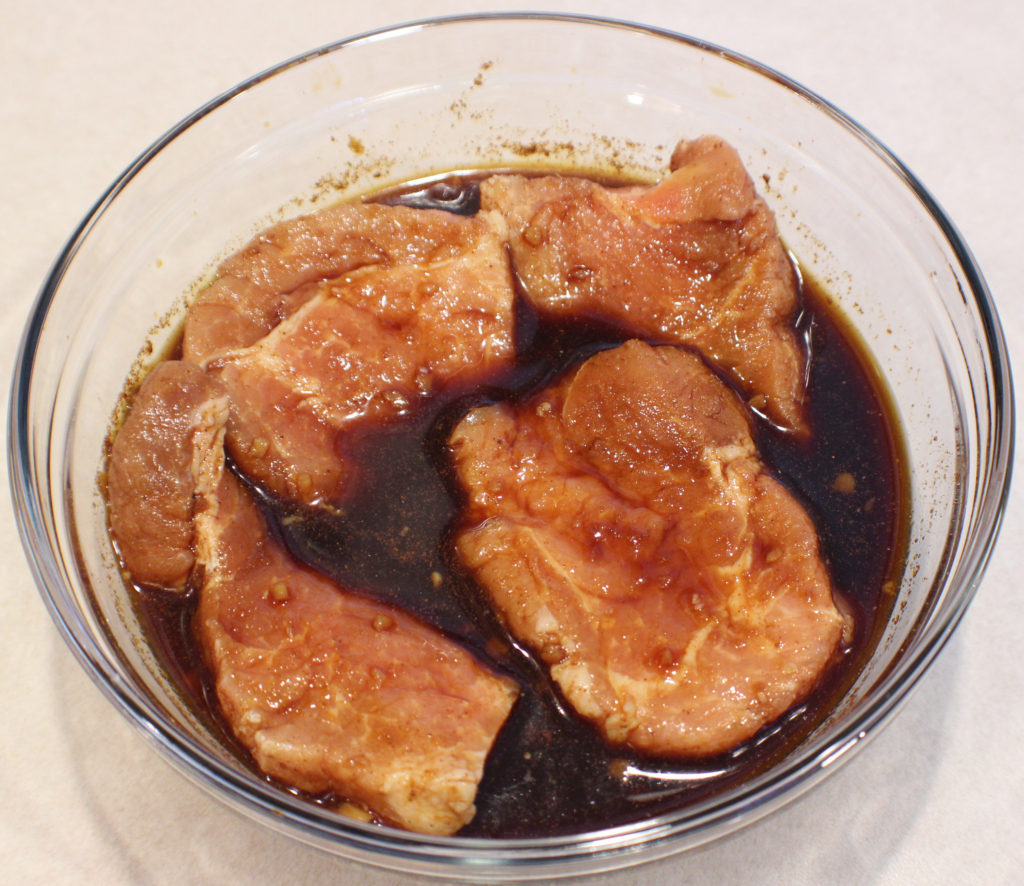
I used 2 pork chops that I had cut down from a large pork loin that I bought when it was on sale and froze. Use, whatever you want, but you will want to use a boneless pork chop since you will be cutting it in half. If you desire a whole pork chop, this marinate could handle up to 4 regular size pork chops.

I cut my 2 pork chops in half to make 4 servings then got it in the marinade and let it hang out for about 1/2 hour. You could go up to about an hour if you want.

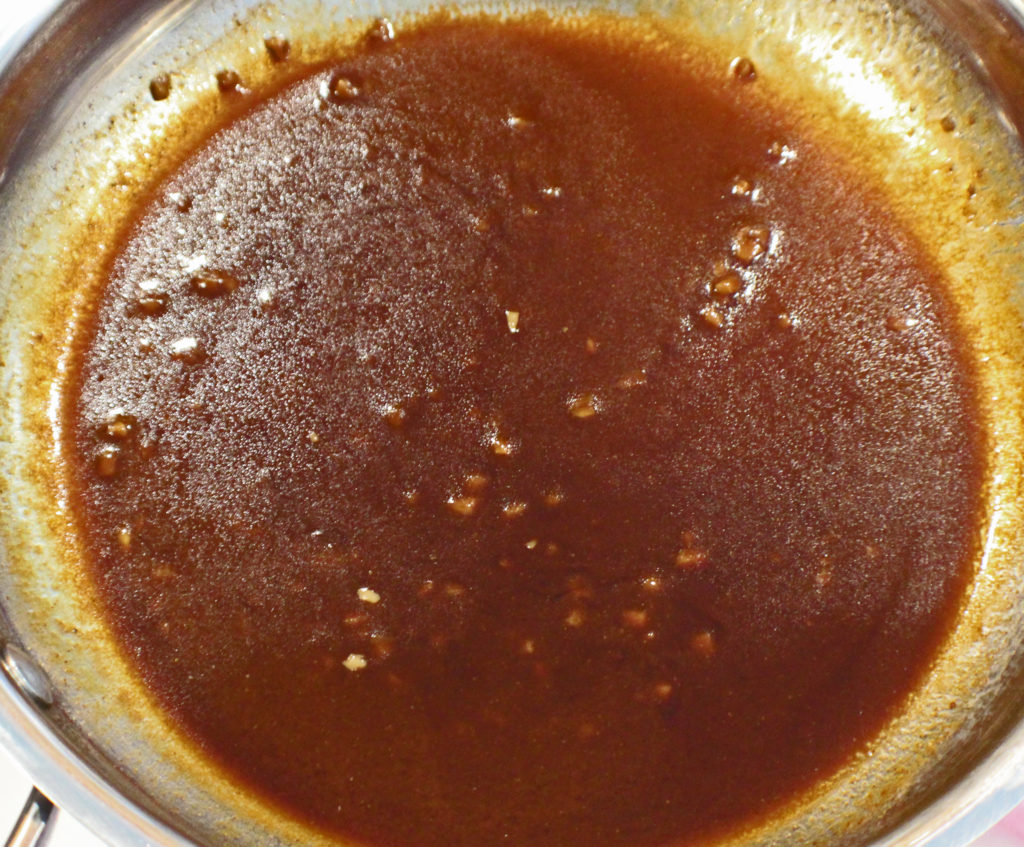
Ginger Soy Pork Chops Sauce

While the charcoal is getting ready, remove the pork from the marinade and set it on a plate ready to bring out to the grill.

Add the marinade to a saute pan with 1 tablespoon of brown sugar and 1 teaspoon of butter. You could omit the butter, but it gives the sauce a silkiness.

Heat up the sauce to a simmer and whisk it while simmering for a couple minutes. You are cooking out the raw pork juices as well as thickening the sauce. After a couple minutes, you will have a rich, dark sauce to pour over your pork chops when they are ready.

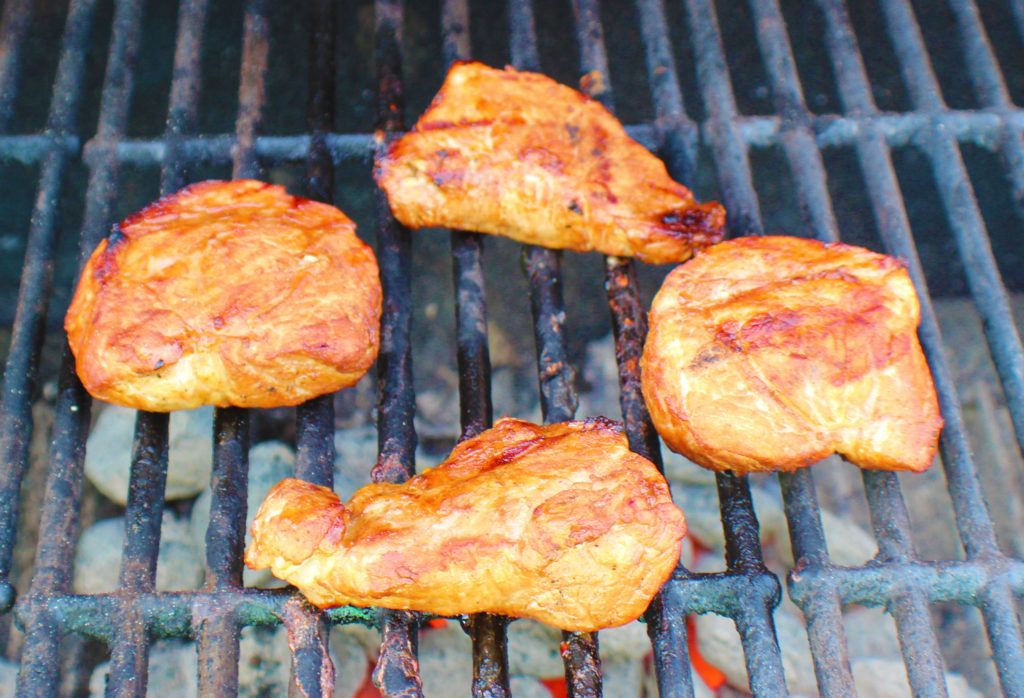
Ginger Soy Pork Chops Grilling

It’s time to grill. Over medium heat, grill the chops about 5 minutes per side, until the pork reaches an internal temperature of 145 degrees.

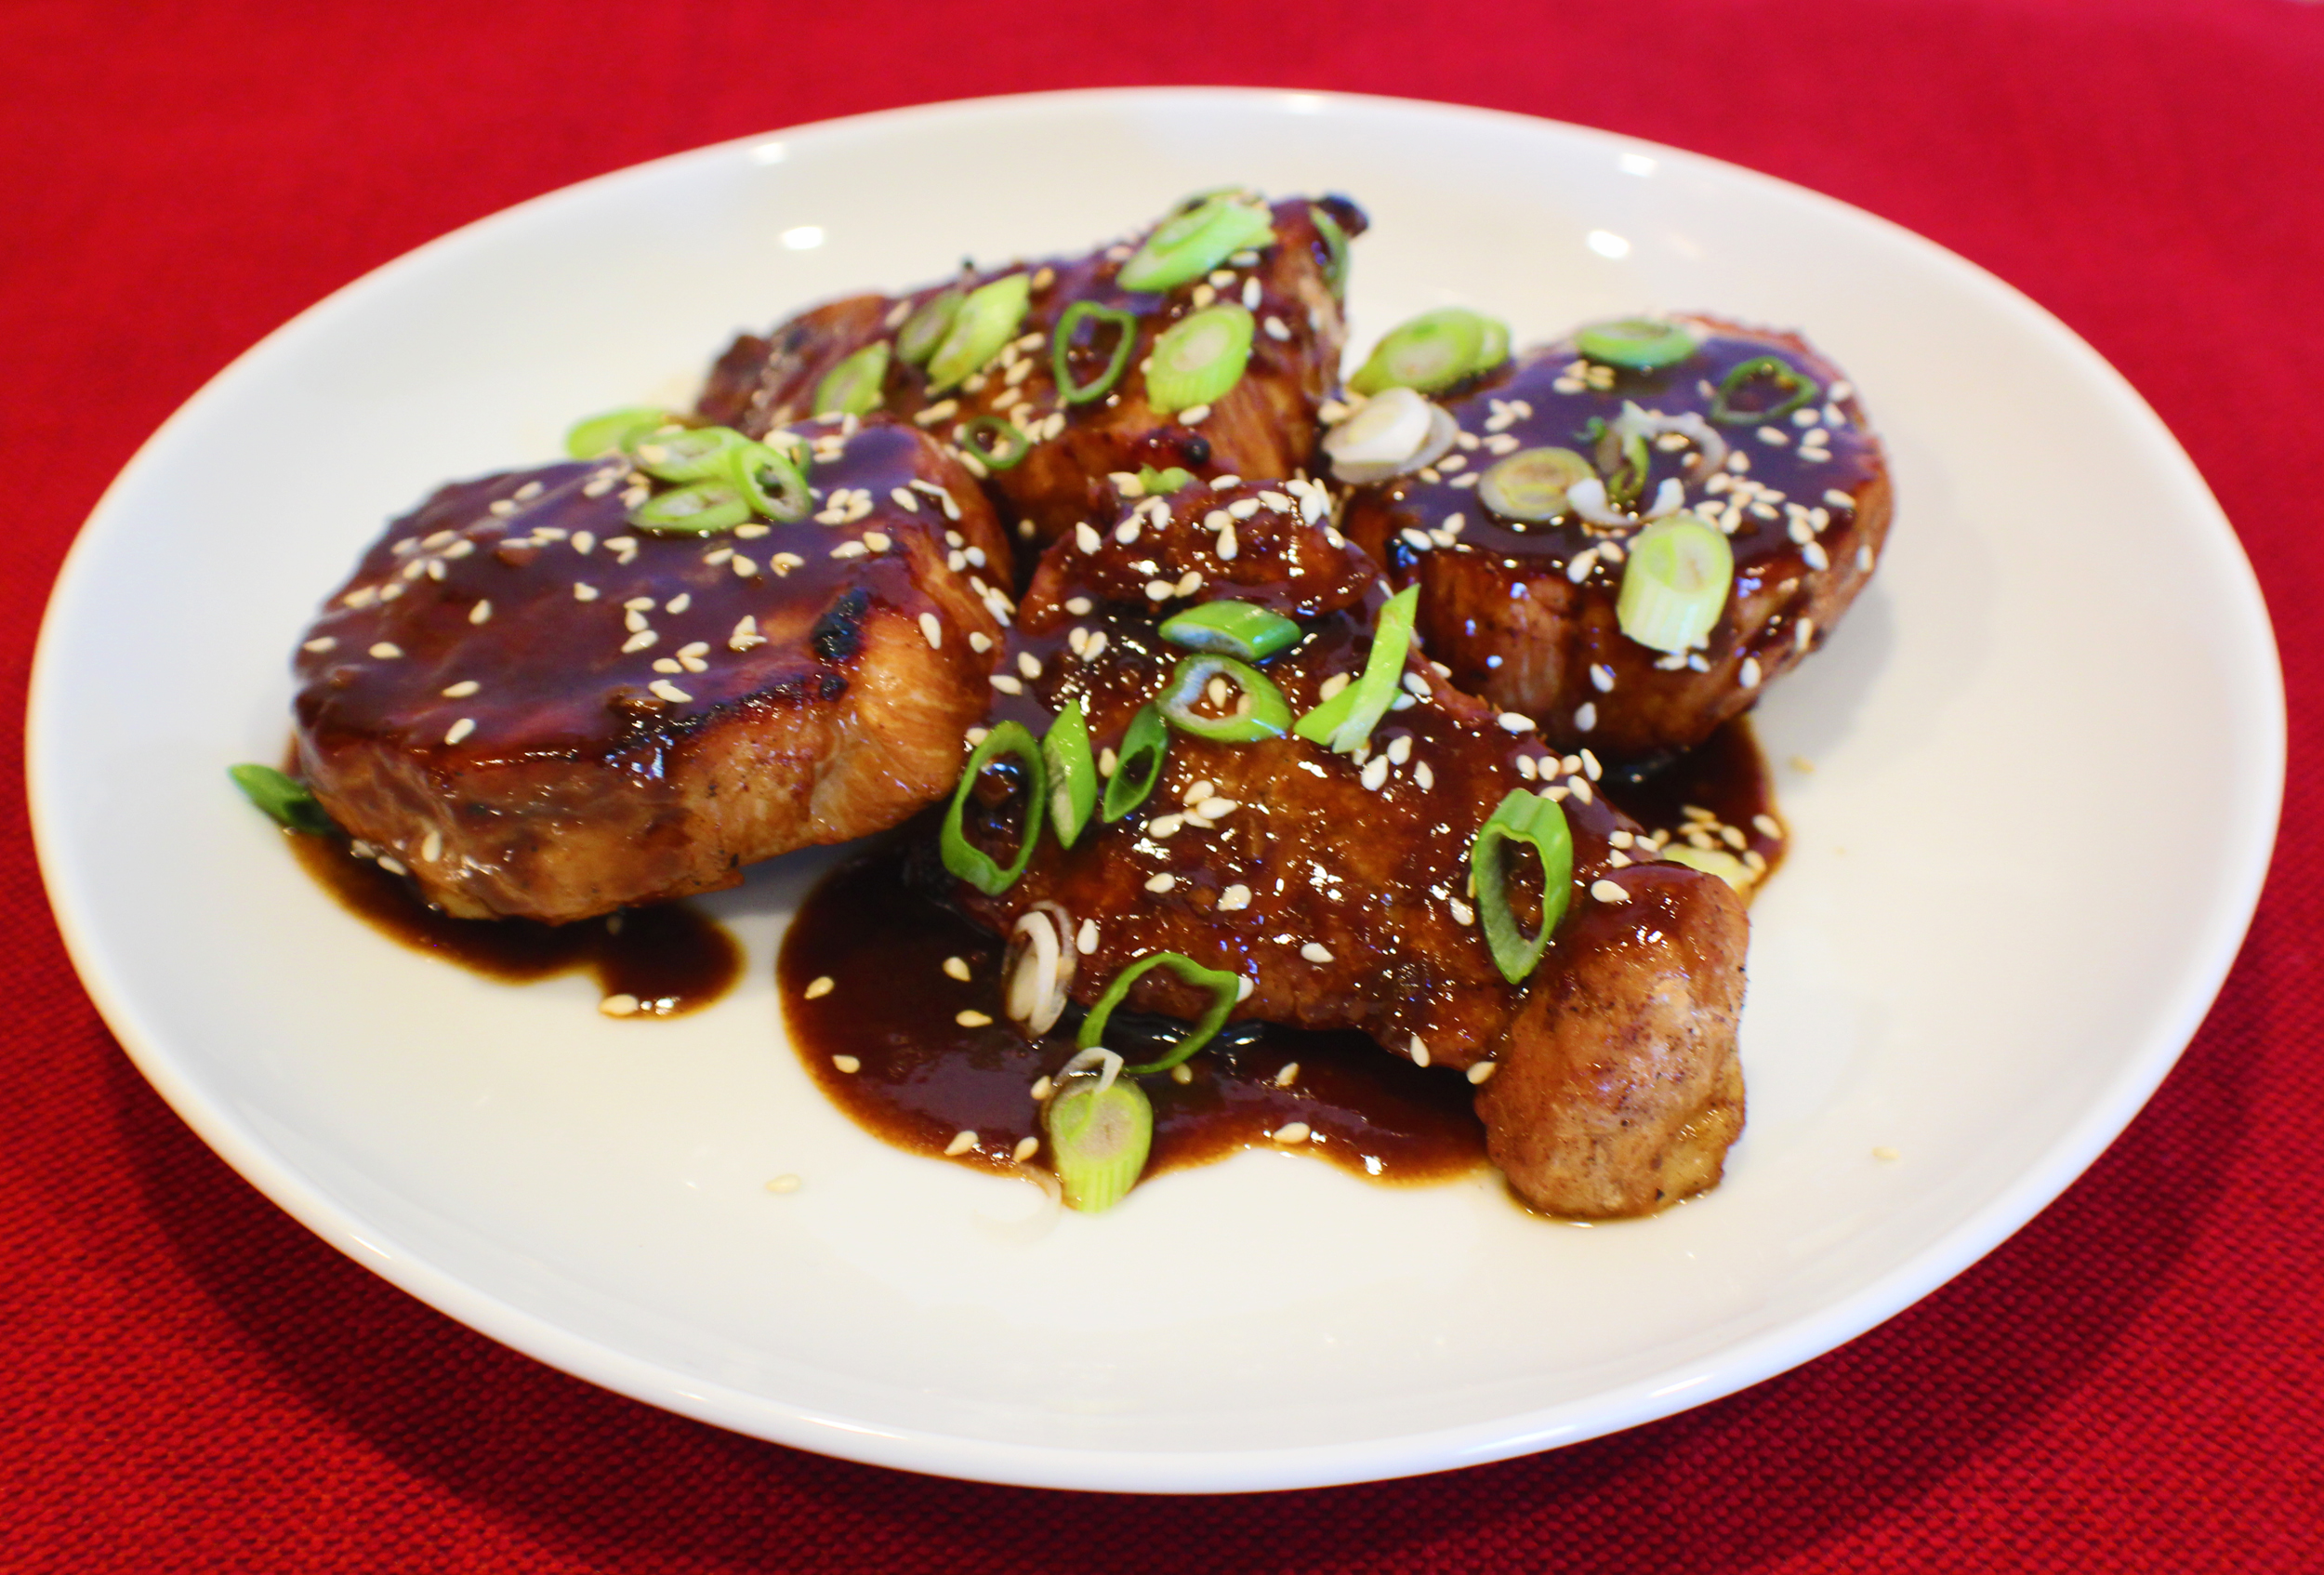
Top with the sauce, green onions, and toasted sesame seeds.

Try this with Asian Slaw and Fried Rice.

Enjoy!
Ginger Soy Pork Chops

Tender, juicy grilled pork chops with an Asian flair.
Prep Time5 minutes
Cook Time10 minutes
Resting Time30 minutes
Course: Dinner, Entree, Main Course
Cuisine: American, Asian
Keyword: Asian Pork Chops, Glutenfree, Pork, Pork Chops
Servings: 4 people
Calories: 58kcal
Author: Eating With Deb

Equipment

  • Medium bowl and whisk
  • Cutting board and knife
  • Small saute pan
  • Barbeque

Ingredients

  • 2 each pork chops boneless, cut in half, about 1 pound total

Marinade

  • 2 tbsp soy sauce or wheat-free tamari
  • 1 tbsp mirin or brown rice vinegar
  • ¼ tsp cornstarch or arrowroot
  • 1 tbsp brown sugar
  • 1 pinch cinnamon
  • ¼ tsp dry mustard
  • ½ tsp ginger fresh minced
  • ½ tsp garlic fresh minced

Sauce

  • Marinade from the pork
  • 1 tbsp brown sugar
  • 1 tsp butter

Toppings

  • 1 each green onion sliced
  • 1 tbsp sesame seeds toasted

Instructions

  • Whisk together soy sauce, mirin, and cornstarch. Then whisk in the rest of the marinade ingredients.
  • Trim the most of the fat off the pork chops and cut in half.
  • Add pork to the marinade and cover all sides with the marinade. Let sit for ½ hour.
  • While the grill is heating up, remove pork chops from the marinade and set aside.
  • Put marinade ingredients in a small saute pan with 1 tablespoon brown sugar and 1 teaspoon butter. Bring to a simmer and whisk for about 2 minutes until it thickens and turns a deep, rich brown color.
  • Grill pork chops over medium heat about 5 minutes per side to an internal temperature of 145 degrees.
  • Top with the sauce, green onions, and toasted sesame seeds.
  • Serve with Asian Slaw and Fried Rice or Fried Quinoa.
  • Enjoy!
Nutrition

Calories: 58kcal | Carbohydrates: 9g | Protein: 1g | Fat: 2g | Saturated Fat: 1g | Trans Fat: 1g | Cholesterol: 3mg | Sodium: 546mg | Potassium: 43mg | Fiber: 1g | Sugar: 7g | Vitamin A: 34IU | Vitamin C: 1mg | Calcium: 28mg | Iron: 1mg

Minty Barley Salad

Minty Barley Salad

Barley is one grain that I feel doesn’t get used enough. It is chewy, very nutritious, and full of fiber. Hulled barley has the outer hull removed, retaining more nutritional content, whereas pearled barley has the outer husk as well as the bran removed. Pearled barley still has nutrients, just less so than hulled barley.

Hulled barley takes about 20 to 30 minutes more time to cook than pearled barley. Use whatever is your preference or whatever you have time to cook.

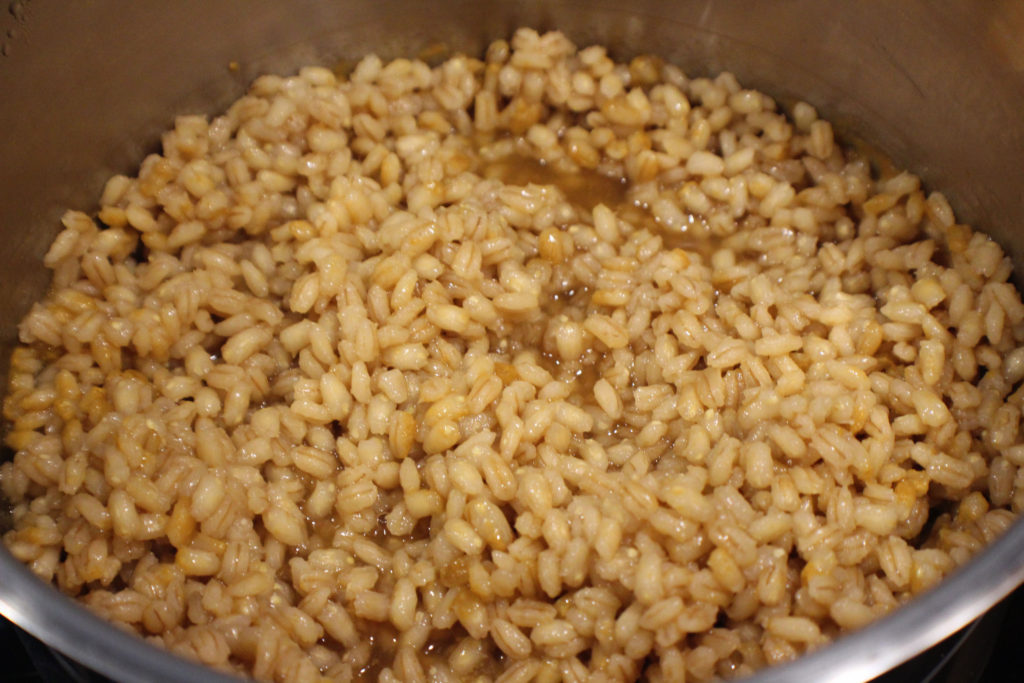
Cooked Barley

Start by cooking the barley. I like to cook it in vegetable or chicken stock to add additional flavor. Unfortunately, this adds additional sodium. so feel free to cook it in water. 

For pearled barley, start checking for doneness after about 20 minutes of simmering, and for hulled barley, about 40 minutes.

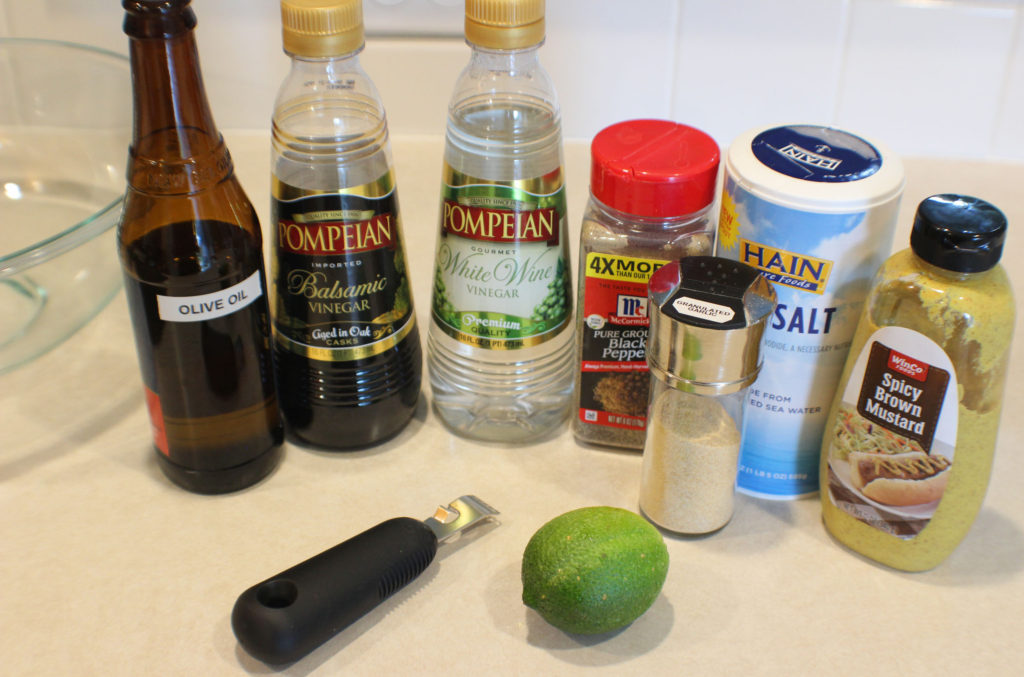
Minty Barley Salad Dressing Ingredients
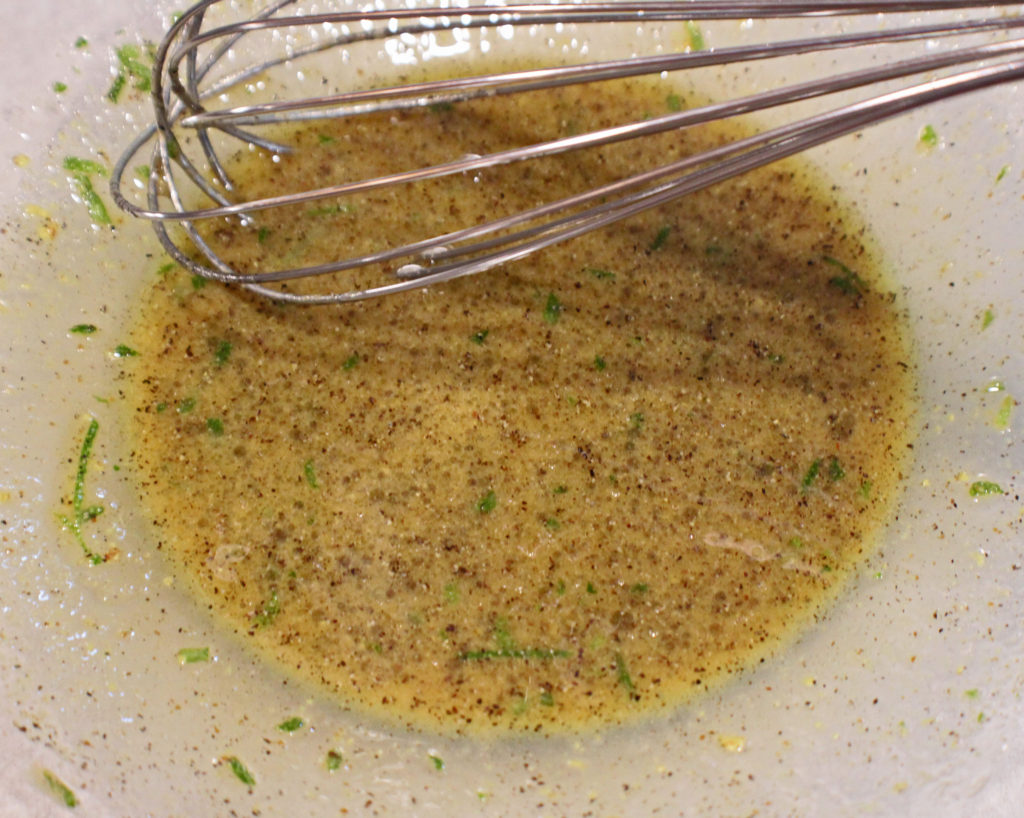
Minty Barley Salad Dressing

While the barley is cooking, whisk together the dressing. I like to use champagne vinegar, but I didn’t have any this time around so I substituted  white wine vinegar (not distilled white wine vinegar). You could also use apple cider vinegar.

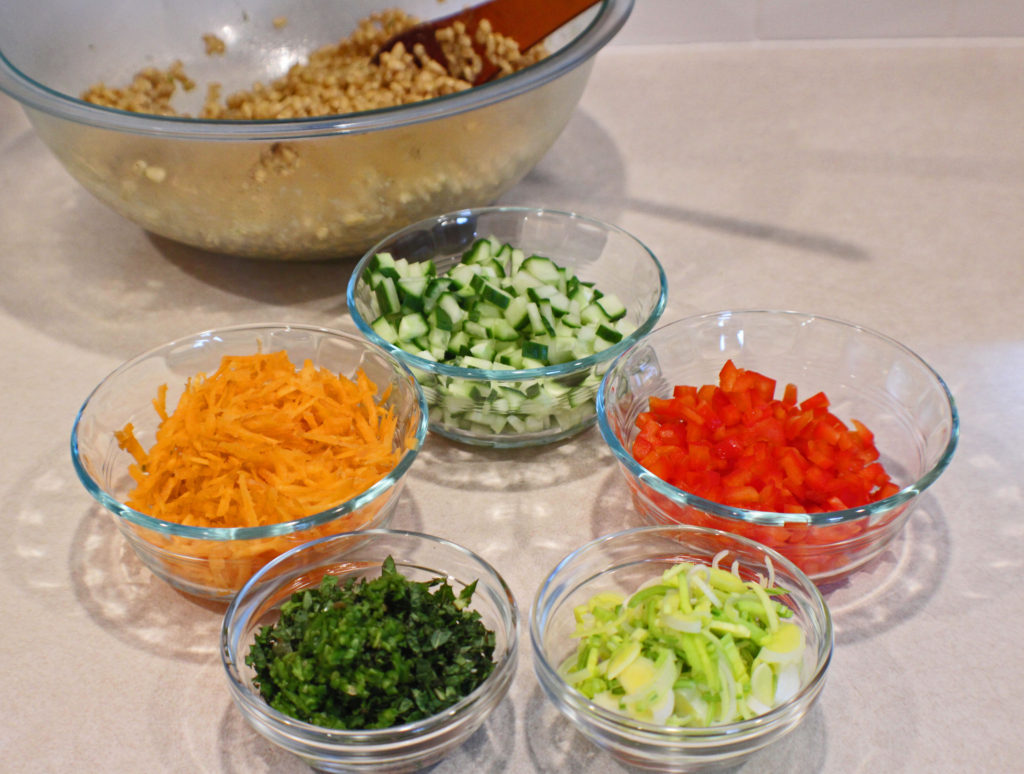
Minty Barley Salad Veggies

While the barley is cooking, you may have time to prepare the vegetables and herbs as well.

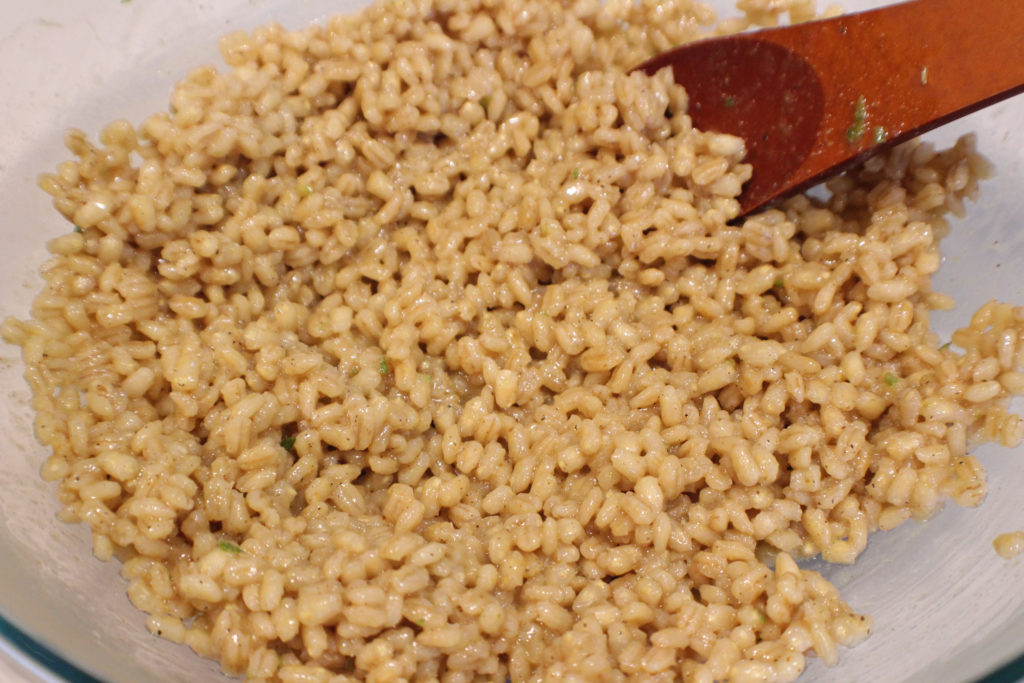
Once the barley is cooked, drain off any excess liquid and mix into the dressing. The warm barley will absorb more flavors from the dressing.

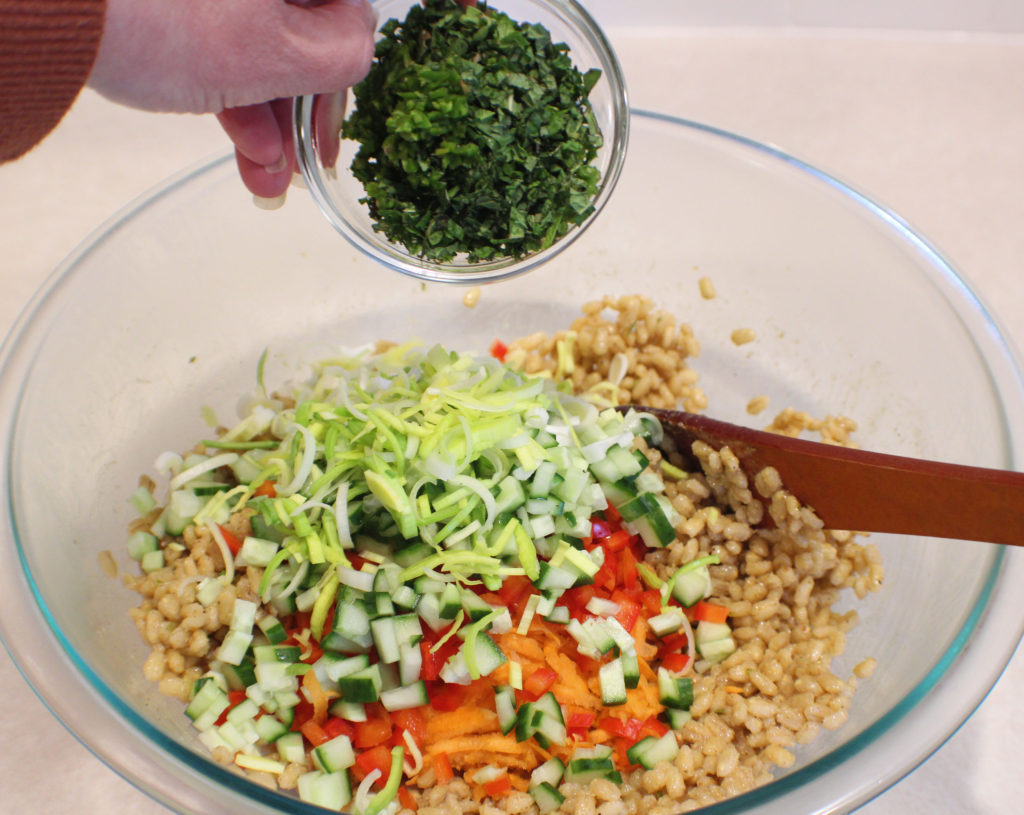
Adding all Veggies and Herbs

Add the veggies and herbs to the barley and put it in the refrigerator for about an hour to cool before serving.

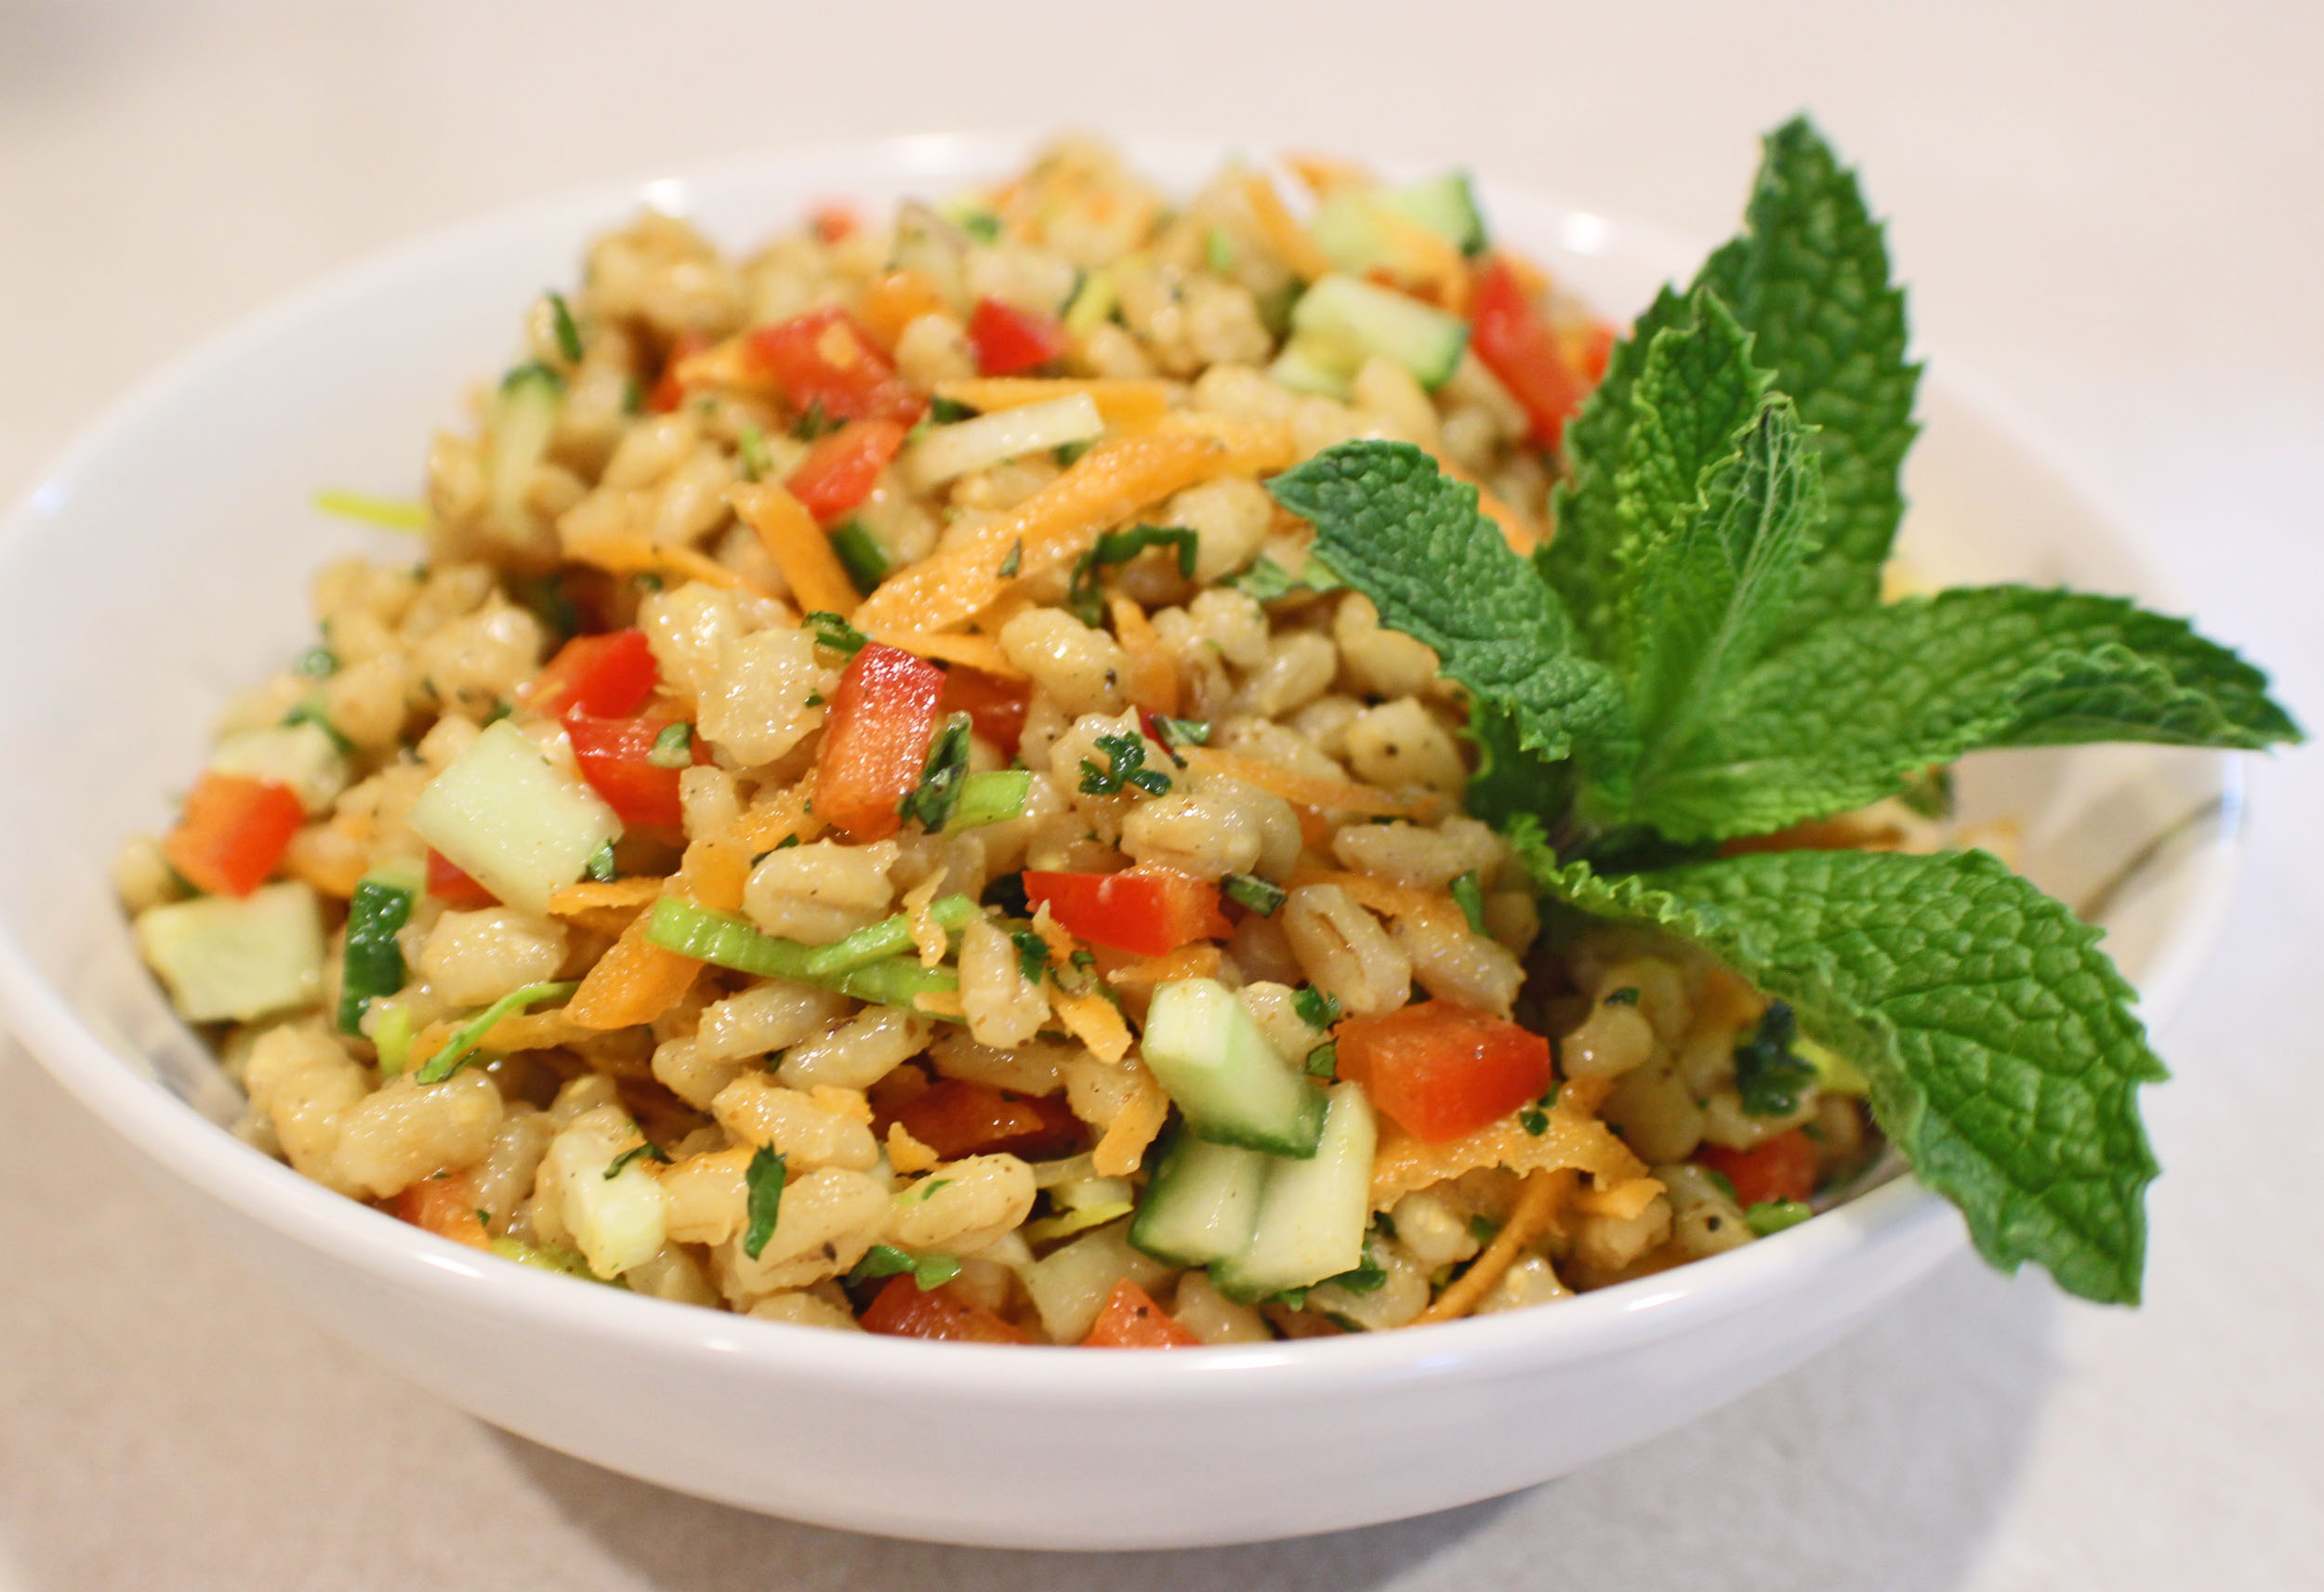
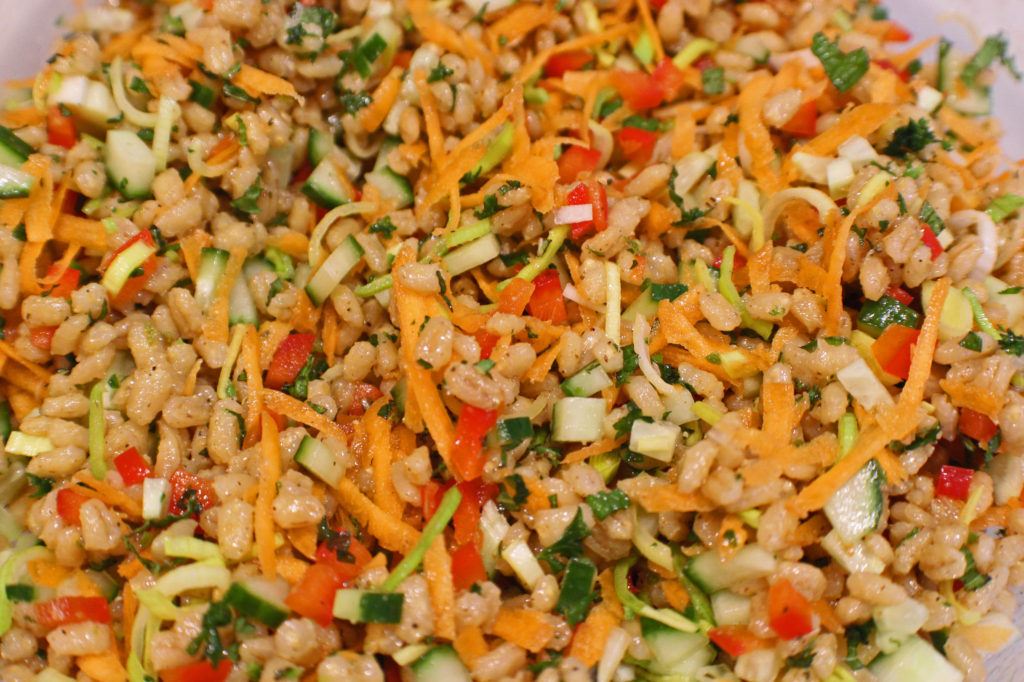
Minty Barley Salad

Now you have a delicious, and nutritious barley salad ready to eat.

Enjoy! 

Minty Barley Salad

Barley tastes a little nutty and is very nutritious. Try buying hulled barley as opposed to pearled barley for more taste and nutrition content.
Prep Time15 minutes
Cook Time40 minutes
Cooling Time1 hour
Total Time1 hour 55 minutes
Course: Salad, Side Dish
Cuisine: American
Keyword: Barley, Mint, Side Salad
Servings: 6 cups
Calories: 166kcal
Author: Eating With Deb

Equipment

  • 3 quart saucepan
  • Cutting board and knife
  • Box grater
  • Large bowl, whisk, and spoon

Ingredients

Barley

  • 1 cup barley uncooked
  • 3 cups vegetable stock or water

Dressing

  • 1 each lime juice and zest
  • 2 tbsp olive oil
  • 2 tbsp champagne vinegar or white wine vinegar
  • 2 tbsp balsamic vinegar
  • 1 tbsp Dijon or brown mustard
  • ½ tsp sea salt
  • ½ tsp black pepper
  • 1/2 tsp granulated garlic

Salad Ingredients

  • 1 each each leek
  • 1/2 each red bell pepper diced
  • 1 each small cucumber fine diced
  • 2 each small carrots grated
  • 2 tbsp fresh parsley minced
  • 2 tbsp fresh mint minced
  • 1 each jalapeno ribs and seeds remove, minced

Instructions

  • Put barley in vegetable stock or salted water and bring to a boil. Reduce heat, cover and simmer. For pearled barley check for doneness after 25 minutes. For hulled barley, check at 40 minutes. Drain off excess liquid and add to dressing.
  • While barley is cooking, combine dressing ingredients and prepare vegetables.
  • Once barley is stirred into the dressing, stir in the vegetables.
  • Put in refrigerator for about an hour to cool before serving.

Nutrition

Serving: 1cup | Calories: 166kcal | Carbohydrates: 26g | Protein: 4g | Fat: 6g | Saturated Fat: 1g | Sodium: 699mg | Potassium: 174mg | Fiber: 6g | Sugar: 2g | Vitamin A: 506IU | Vitamin C: 3mg | Calcium: 21mg | Iron: 1mg

Chile Lime Burgers

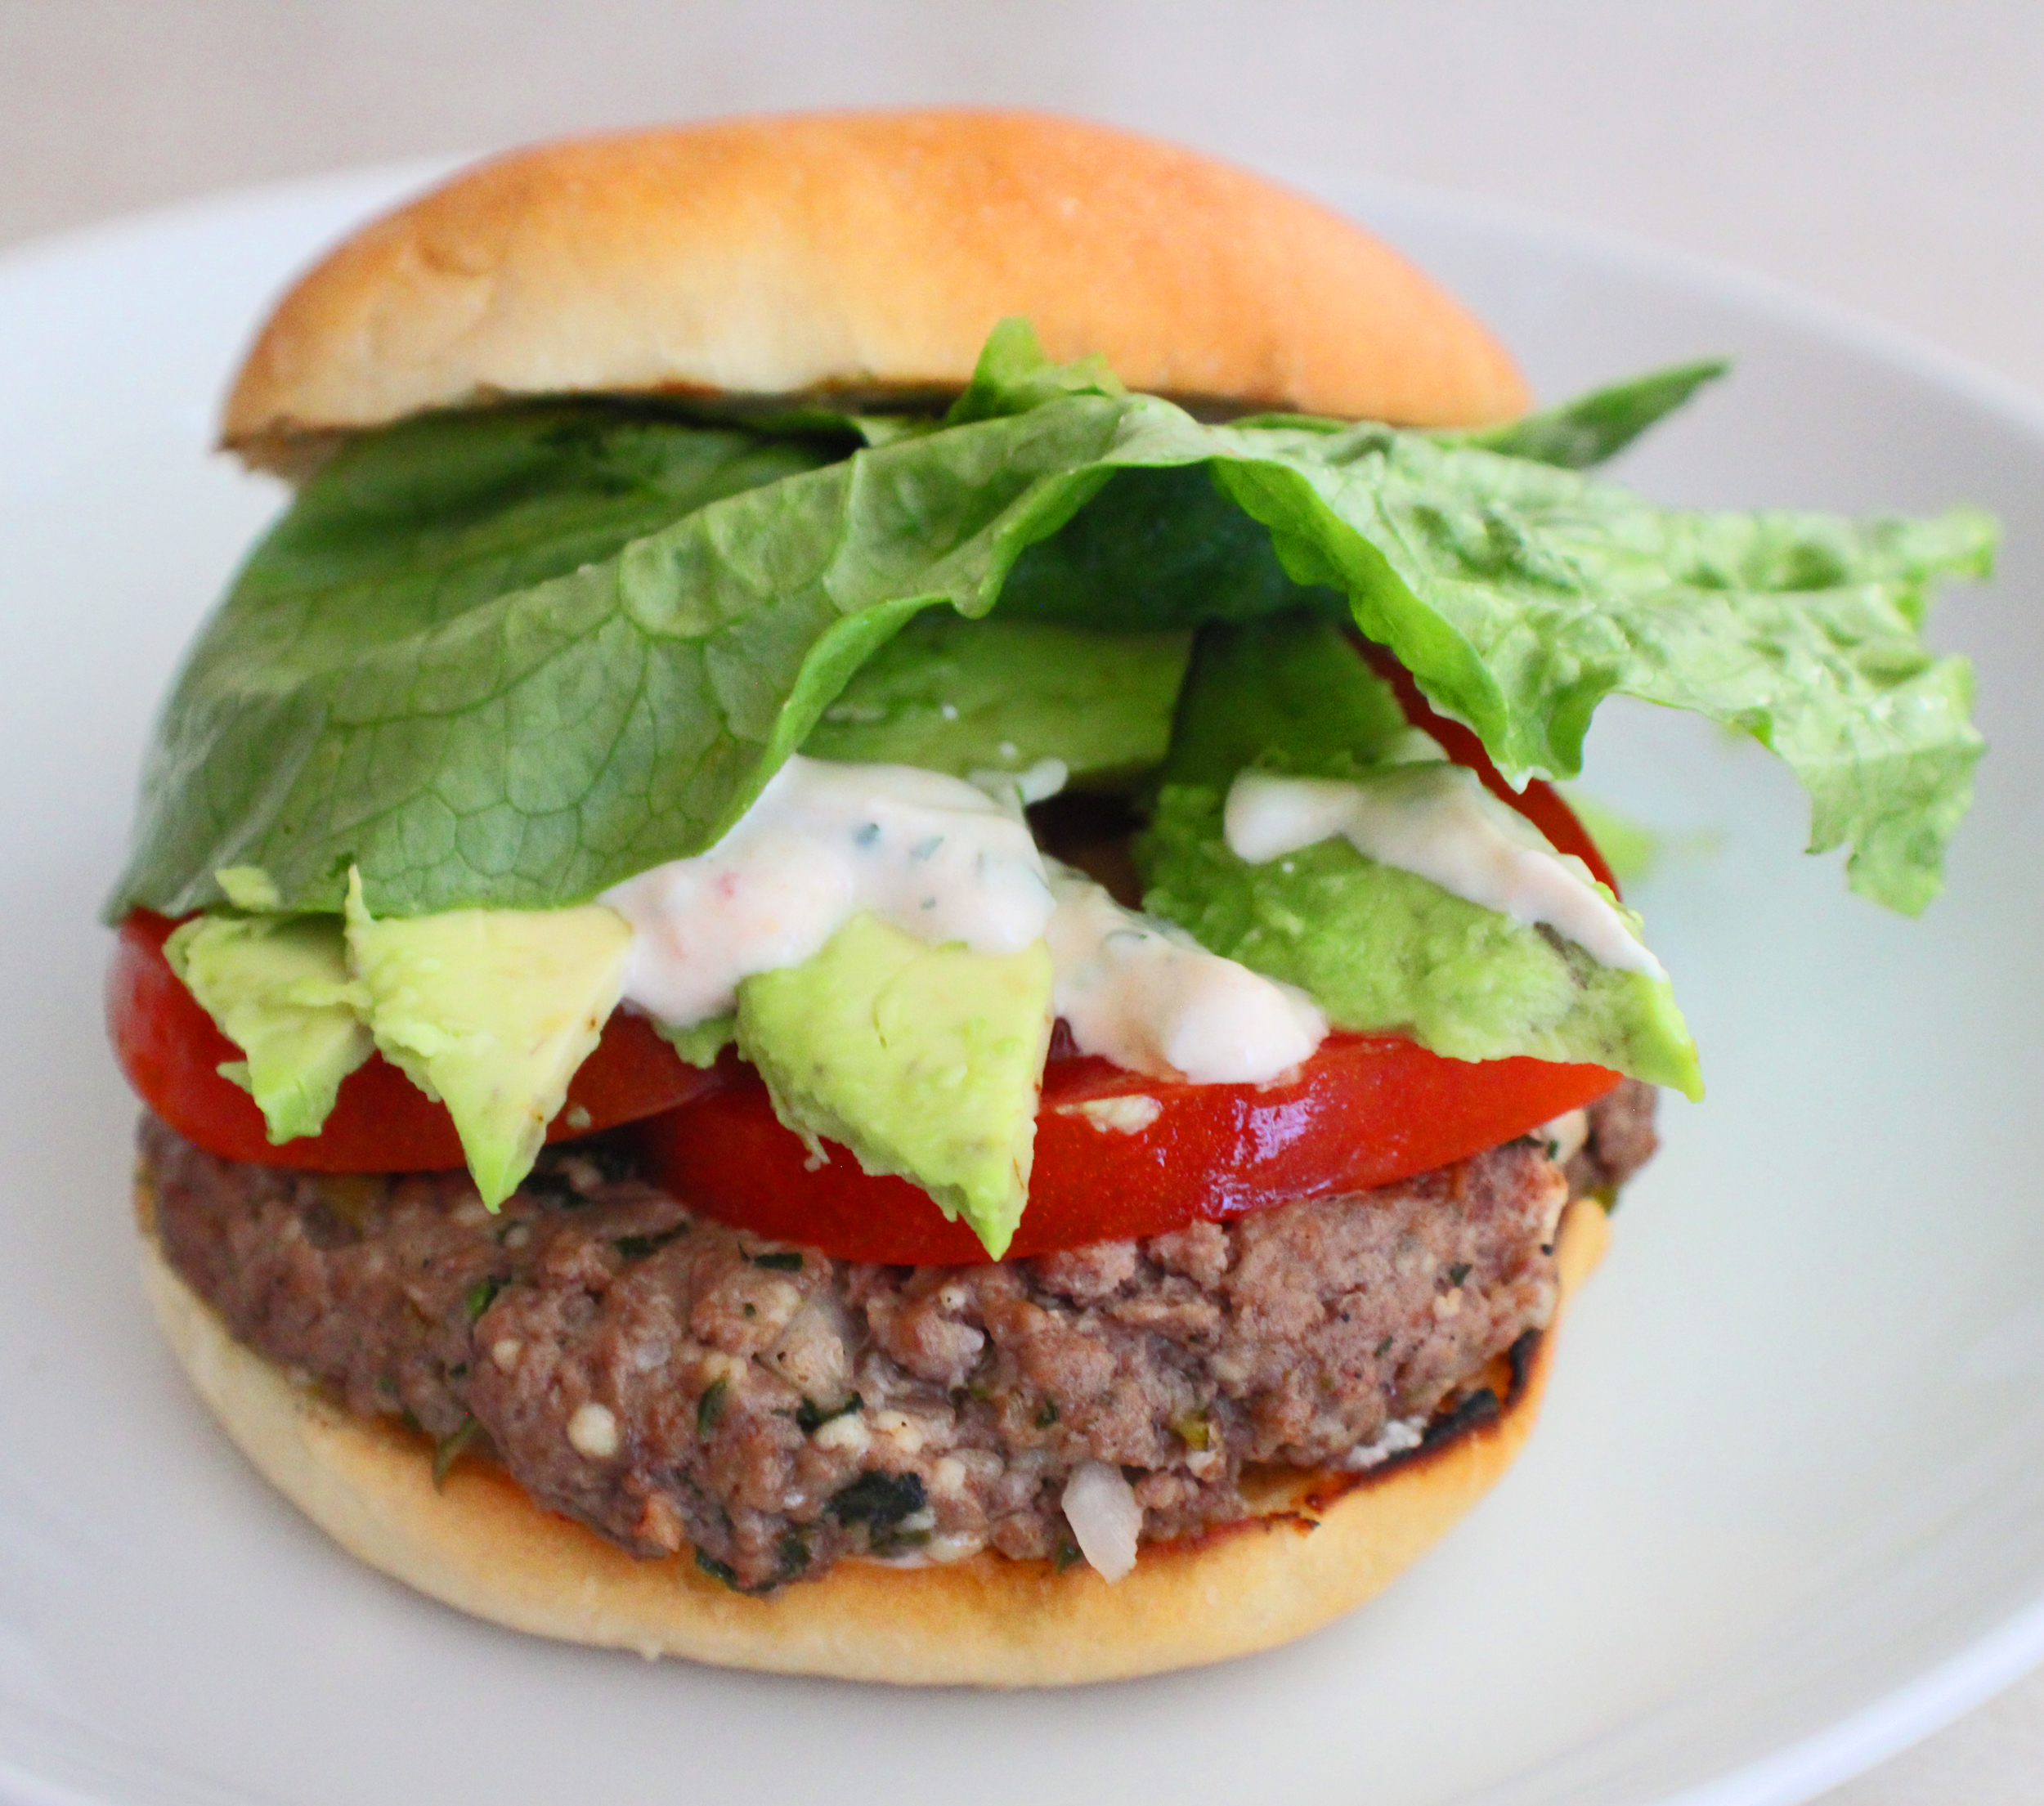
Chile Lime Burger

Nothing says summer more than lighting up that backyard barbeque. Of course, plain burgers are great, but if you are going to patty up your own burger, why not add other ingredients to the ground beef.

First make a quick condiment for your burger. Combine sour cream, lime juice and zest, cilantro, green chiles, and salsa. That’s it.

I also get my toppings ready to go.

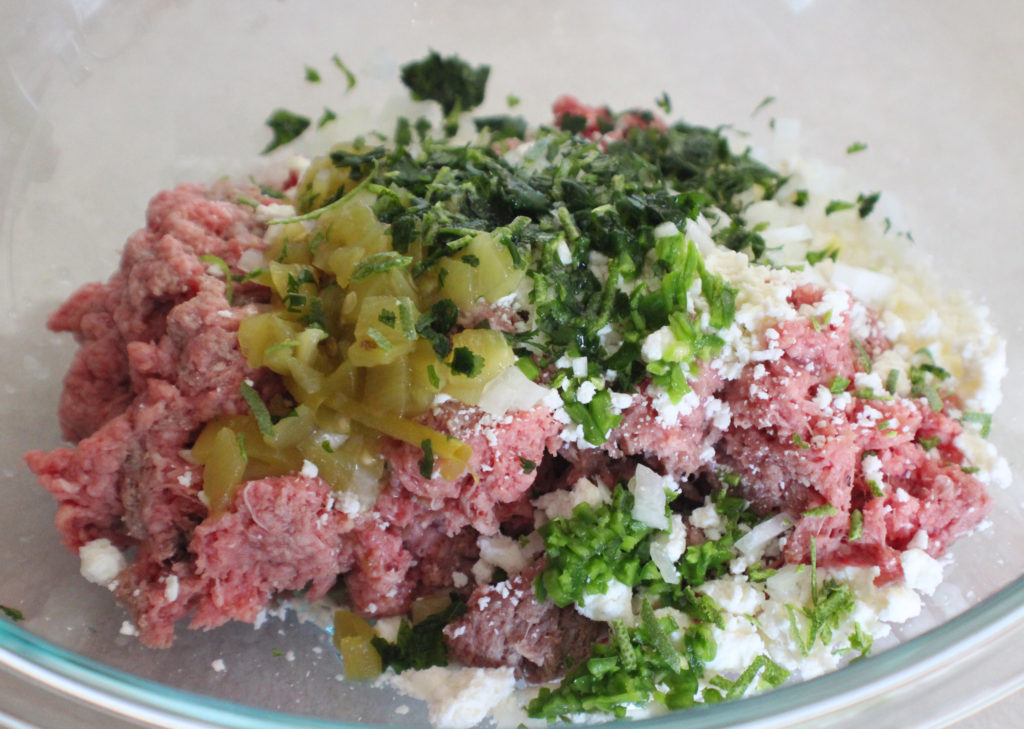
Now get your burgers ready. Mix ground beef with jalapenos, cilantro, onions, green chiles, taco seasoning, chipotle powder for a little kick, lime juice and zest, and some crumbled cotija cheese. Cotija cheese can be found with the other Mexican style cheeses in the cheese department. If you cannot find it, you could replace it with a mild feta or top your burgers with some sliced co-jack. Or omit the cheese all together.

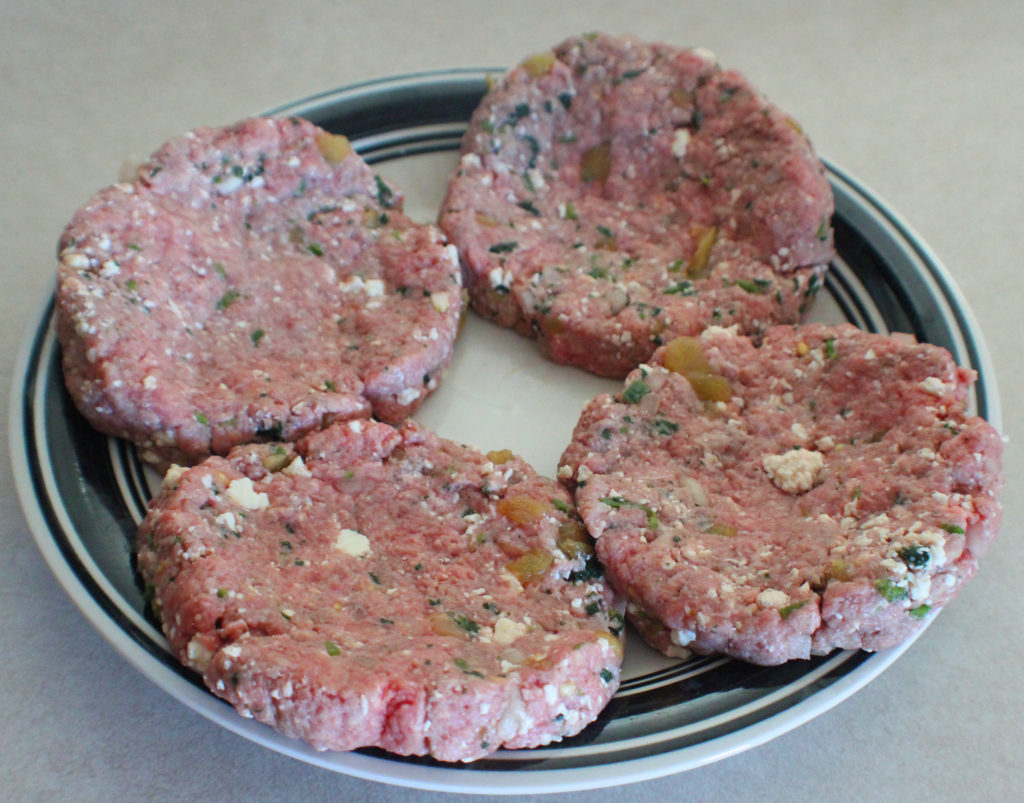
Burgers plump when you cook them, so when forming the patties, make sure the center is thinner than the edges. This will help ensure an even thickness when cooked.

Time to get grilling. Gas or charcoal? Well, use whatever you have. I happen to have both and today it was quite windy. I have a small gas grill on a patio that is somewhat blocked from the wind, so that is what I used. Otherwise I certainly would have used charcoal for that extra little smoky flavor charcoal provides.

It only takes about 5 minutes per side over medium to medium low heat with the lid closed.

During the last couple of minutes, I like to toast the burger buns, and if I’m topping my burger with cheese, this is when I do that too.

Now it’s time to build your burger however you desire.

Enjoy!

Chile Lime Burgers

This is a refreshing Tex-Mex style burger with lime, green chiles, and a little heat from a jalapeno and chipotle powder. Great for summer grilling.
Prep Time10 minutes
Cook Time10 minutes
Course: Dinner, Lunch
Cuisine: American, Tex-Mex
Keyword: Burgers, Grilling, Southwest Burgers, Whats for Dinner
Servings: 4 people
Calories: 369kcal
Author: Eating With Deb

Equipment

  • Large bowl
  • Small bowl and whisk
  • Barbeque (gas or charcoal)

Ingredients

  • 1 pound ground beef 80/20
  • 1/3 cup cotija cheese crumbled
  • 1 each jalapeno seeds and ribs removed, chopped
  • 2 tbsp cilantro chopped
  • 2 tbsp onion chopped
  • 2 tbsp green chiles
  • ½ tsp taco seasoning
  • ¼ tsp chipotle powder
  • ½ each lime juice and zest

Topping/Spread

  • 1/3 cup sour cream
  • ½ each lime juice and zest
  • 1 tbsp cilantro chopped
  • 1 tbsp green chiles
  • 2 tbsp salsa

Burger Toppings

  • 1 each avocado
  • 1 each tomato
  • 4 each leafs of lettuce
  • 4 each burger buns

Instructions

  • Combine burger ingredients until just mixed in. Do not overmix or your burgers will be tough. Divide into 4 and form 4 patties. Be sure to indent the center. When burgers cook, they plump. Forming an indent will help ensure you don’t have bloated burgers.
  • Combine topping/spread ingredients.
  • Slice tomato, wash and pat dry lettuce leaves, and slice burger buns.
  • Grill burgers over medium heat about 5 minutes per side until they reach an internal temperature of 155 degrees.
  • In the last minute or so, grill the burger buns.
  • Build your burger. I like to put sauce on both sides of the bun, then the burger, tomato, avocado, and lettuce.

Nutrition

Calories: 369kcal | Carbohydrates: 3g | Protein: 22g | Fat: 29g | Saturated Fat: 13g | Trans Fat: 1g | Cholesterol: 102mg | Sodium: 340mg | Potassium: 394mg | Fiber: 1g | Sugar: 2g | Vitamin A: 376IU | Vitamin C: 5mg | Calcium: 114mg | Iron: 3mg

Honey Orange Sriracha (HOS) BBQ Sauce

Honey Orange Sriracha BBQ Sauce

I love making my own barbecue sauces. They are easy to make and you can flavor them anyway you like. You can certainly use ketchup as the base but sometimes I like to use no salt added tomato sauce so I can control the amount of sodium and sugar.

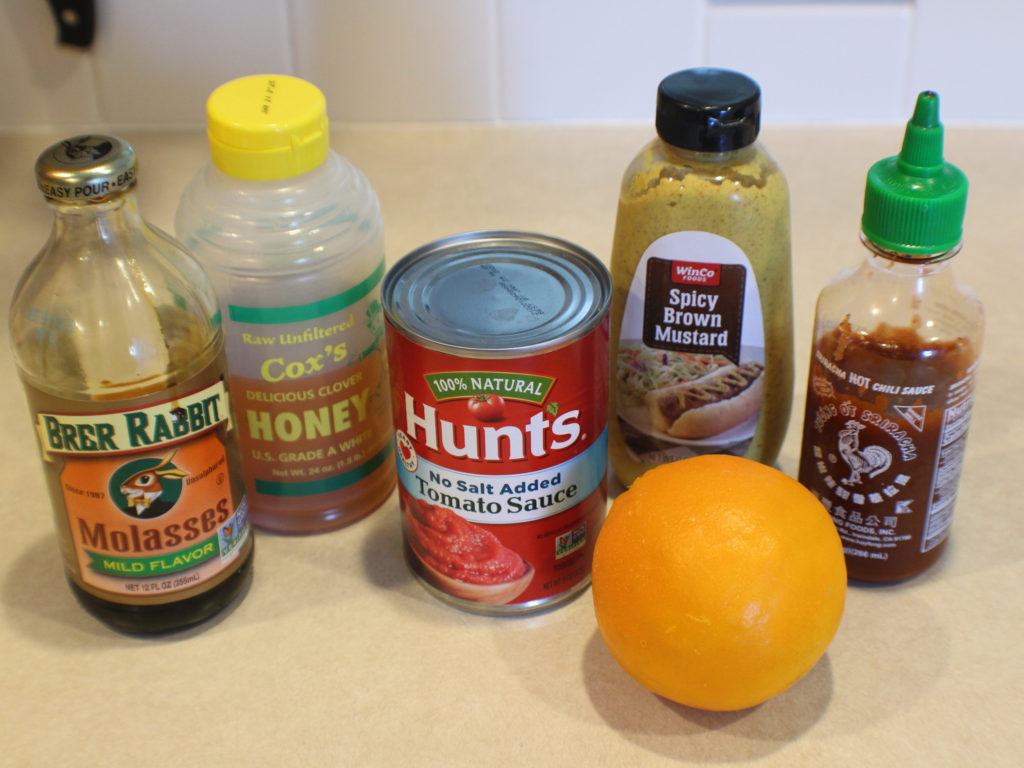
This is all you need. You could use already prepared orange juice right out of your refrigerator, but I like adding zest as well as juice and prefer the taste of fresh citrus juice. But it’s your choice. If you are going to use already made orange juice, you will need about 1/2 cup.

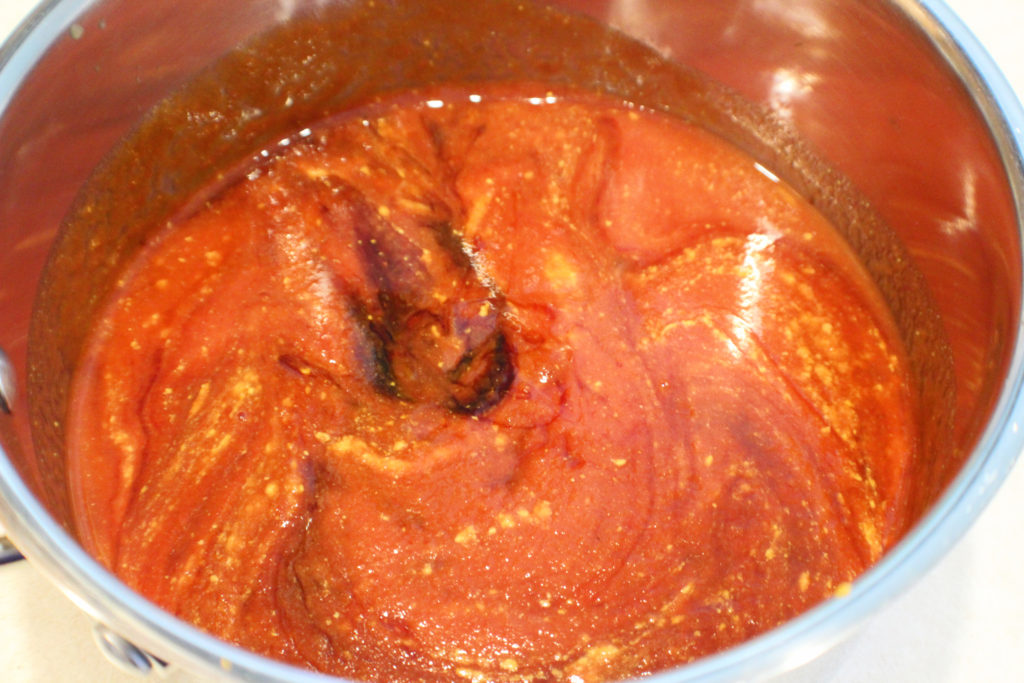
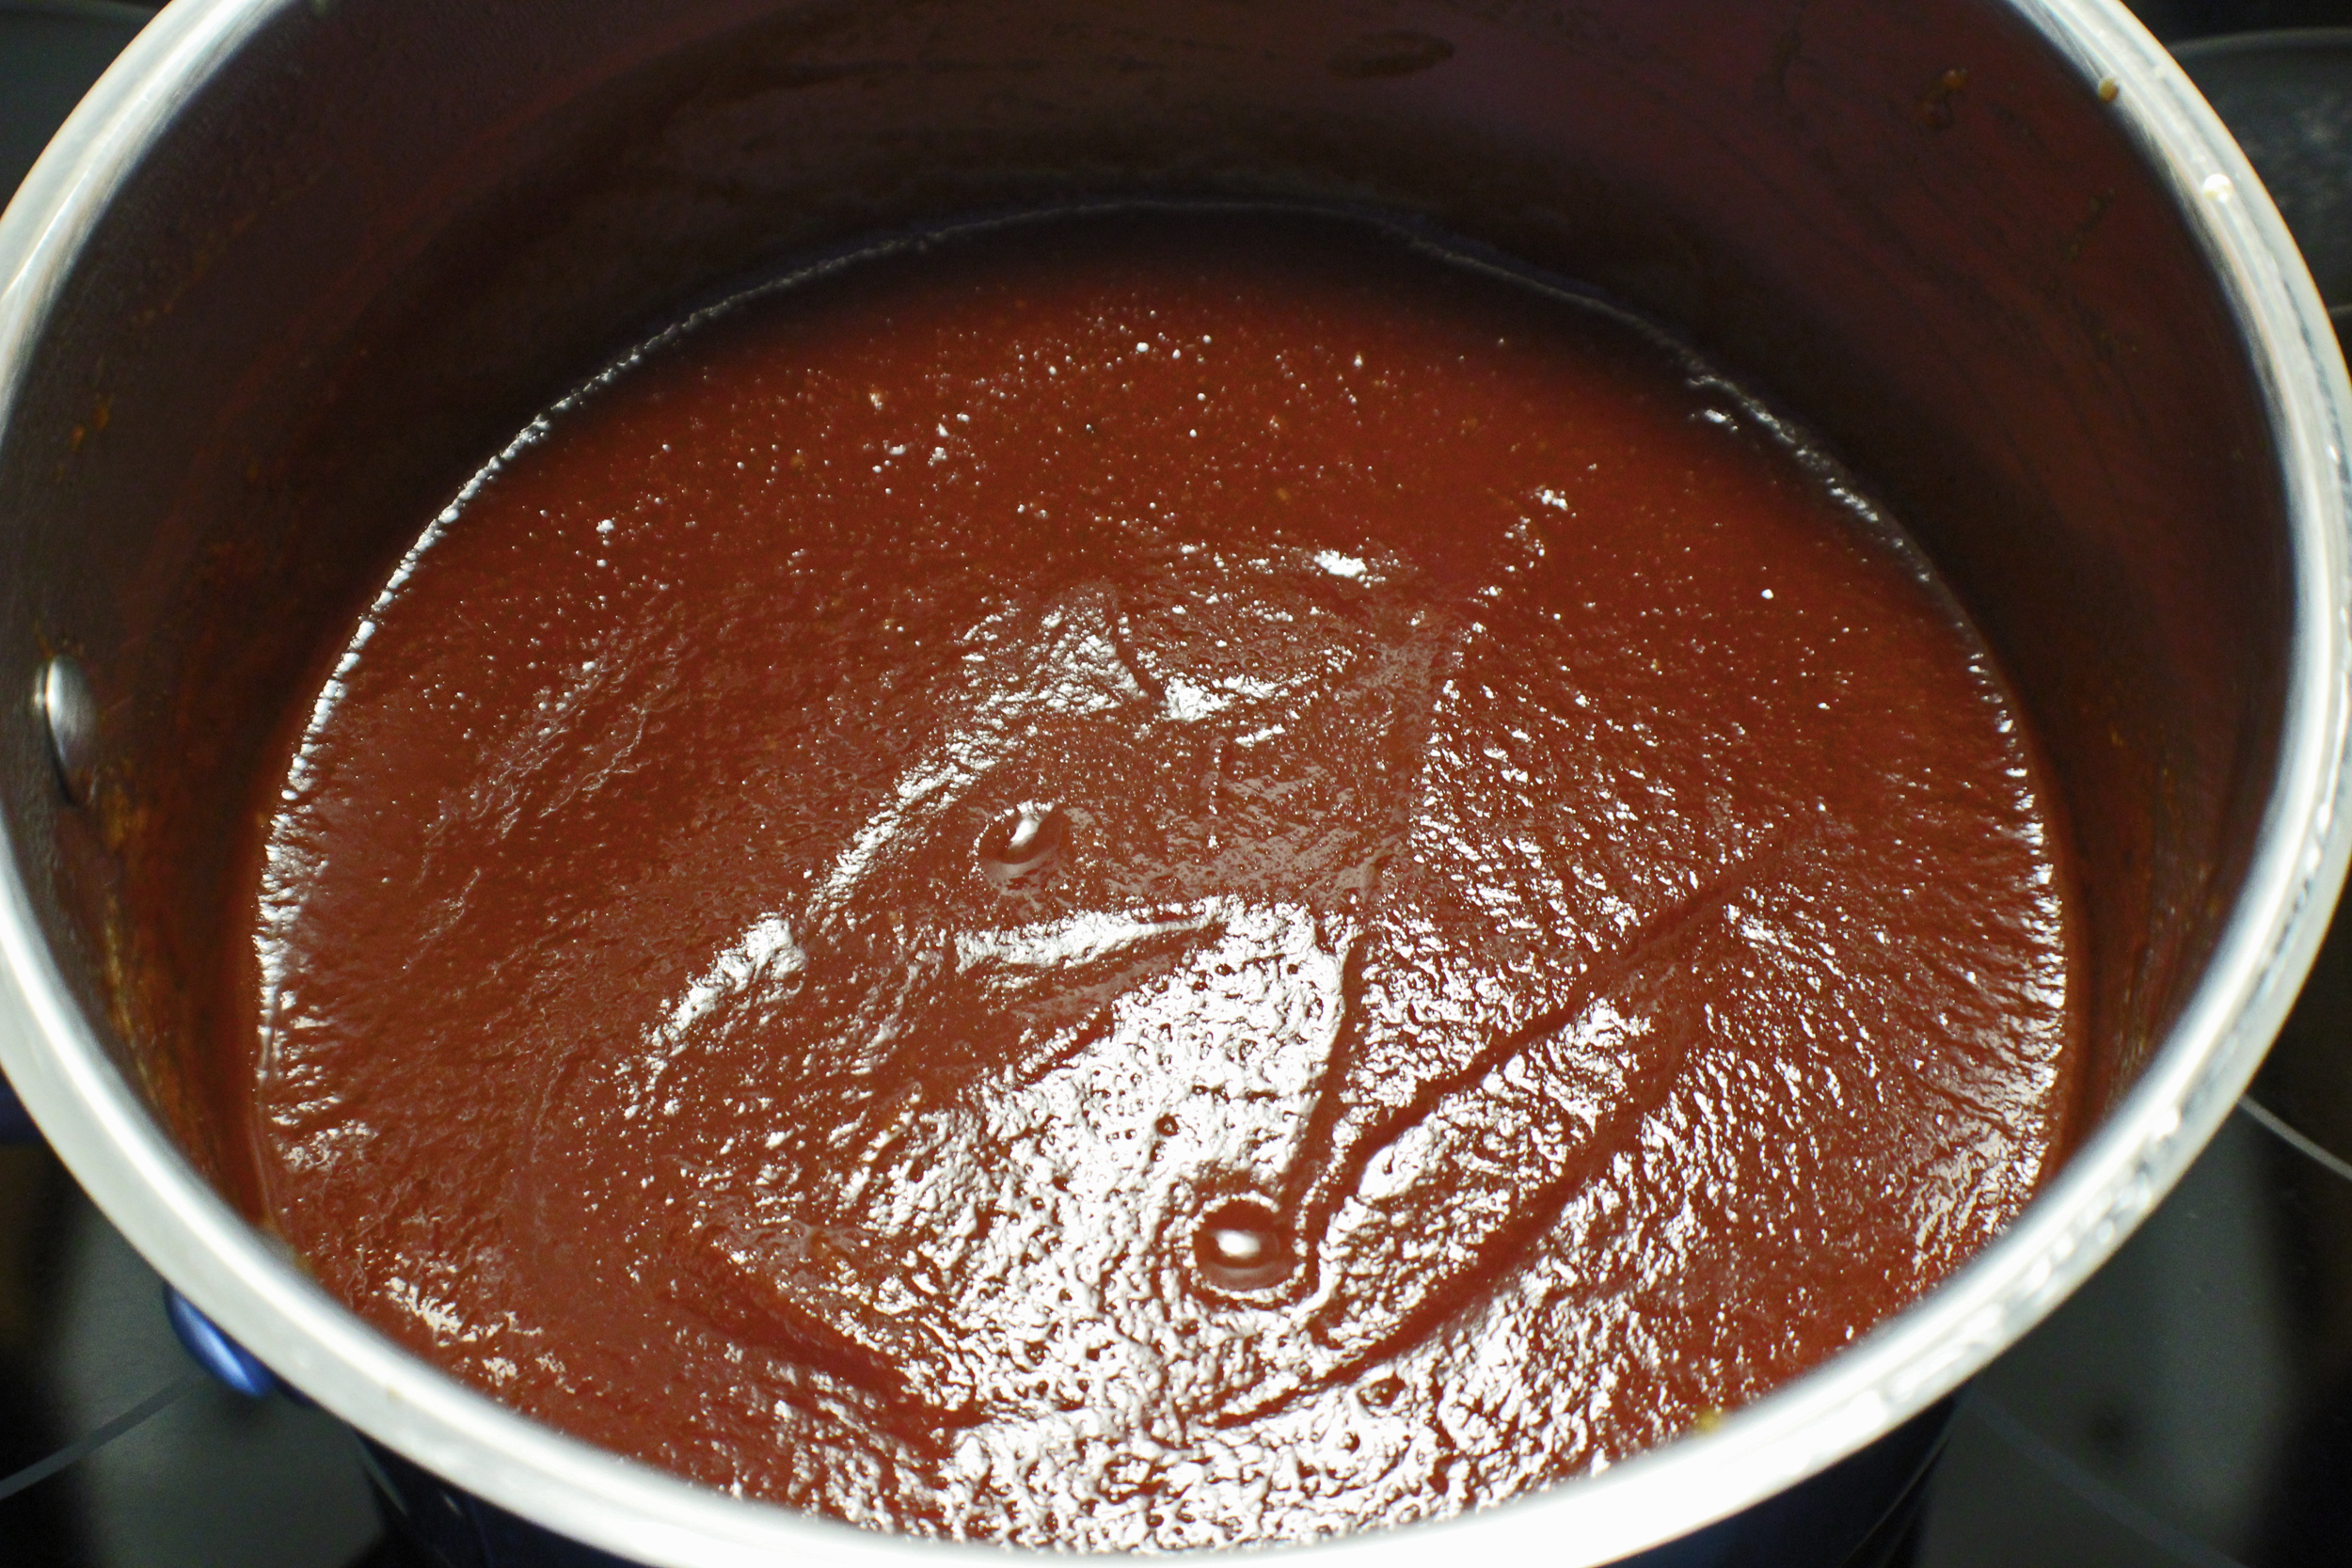
Combine all ingredients in a 4 quart sauce pan. You don’t want to use anything smaller, it will bubble and pop when it is simmering. You will simmer this for about 20 minutes until it reduces and thickens a bit. Stir it frequently because it will easily burn.

Cool and put in an old ketchup or barbecue sauce bottle or even a mason jar.

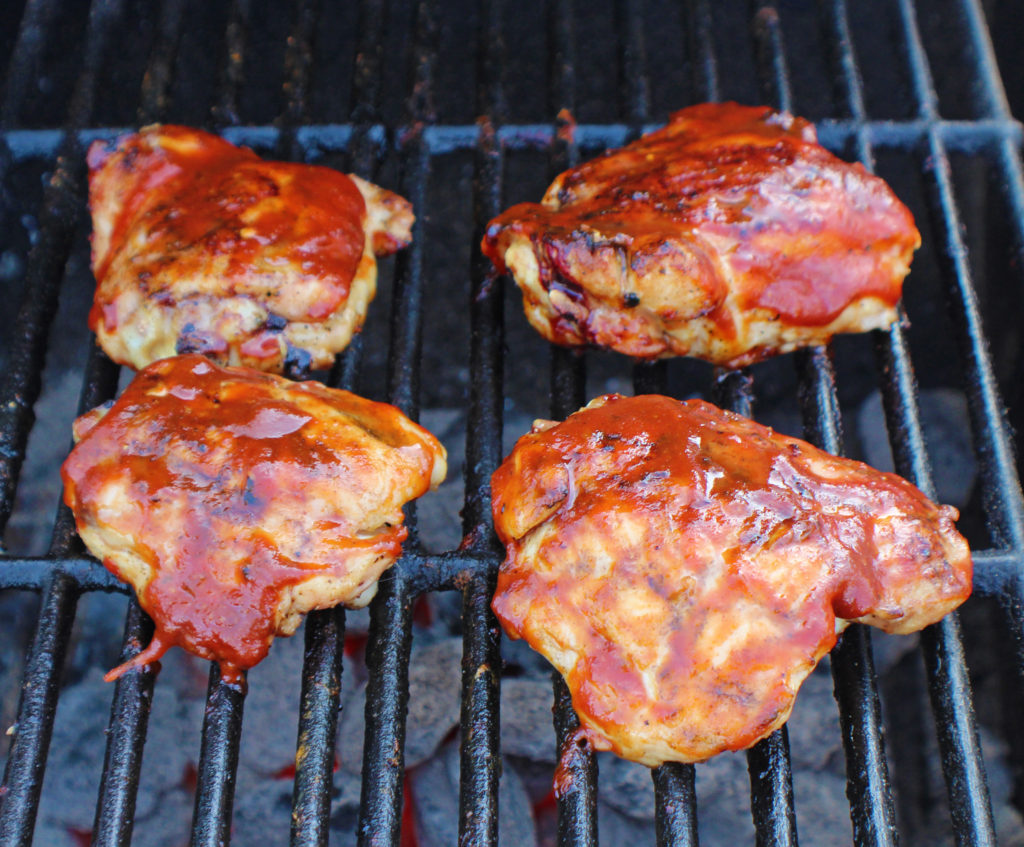
I couldn’t wait to use it and decided to grill up some chicken thighs. They take about 5 to 7 minutes per side over medium to medium low heat. In the last couple of minutes of cooking, I baste both sides with BBQ sauce and let it cook a bit. The heat will caramelize the sugars.

I have also grilled zucchini and portobello mushroom caps and baste them in the last minute or 2 with BBQ sauce.

Honey Orange Sriracha (HOS) BBQ Sauce

A little sweet, a little tangy, and a little spicy, this BBQ sauce tastes great on just about any grilled meat or vegetable.
Prep Time5 minutes
Cook Time20 minutes
Course: Condiments
Cuisine: American
Keyword: BBQ Sauce, Sriracha
Servings: 16 servings
Calories: 47kcal
Author: Eating With Deb

Equipment

  • 4 quart sauce pan
  • Heat resistant rubber spatula

Ingredients

  • 15 ounce can tomato sauce no salt added
  • 1/3 cup molasses
  • 1/3 cup Dijon or brown mustard
  • ¼ cup honey
  • 1 each orange juice and zest
  • 2 tbsp Sriracha sauce
  • ¼ tsp sea salt
  • ¼ tsp black pepper
  • ¼ tsp granulated garlic

Instructions

  • Combine all ingredients in a sauce pan and bring to a simmer. Reduce heat to low or medium low and simmer for 20 minutes stirring frequently. The sauce will reduce and thicken but can easily burn.
  • Remove from heat and let cool slightly. Taste while it’s still warm. If you need to add more honey because your orange wasn’t very sweet, add now. Adjust other seasonings to your desire.
  • Cool and put in an old ketchup or BBQ sauce bottle. or a mason jar.

Nutrition

Serving: 2tbsp | Calories: 47kcal | Carbohydrates: 11g | Protein: 1g | Fat: 1g | Saturated Fat: 1g | Trans Fat: 1g | Sodium: 280mg | Potassium: 204mg | Fiber: 1g | Sugar: 11g | Vitamin A: 122IU | Vitamin C: 3mg | Calcium: 22mg | Iron: 1mg

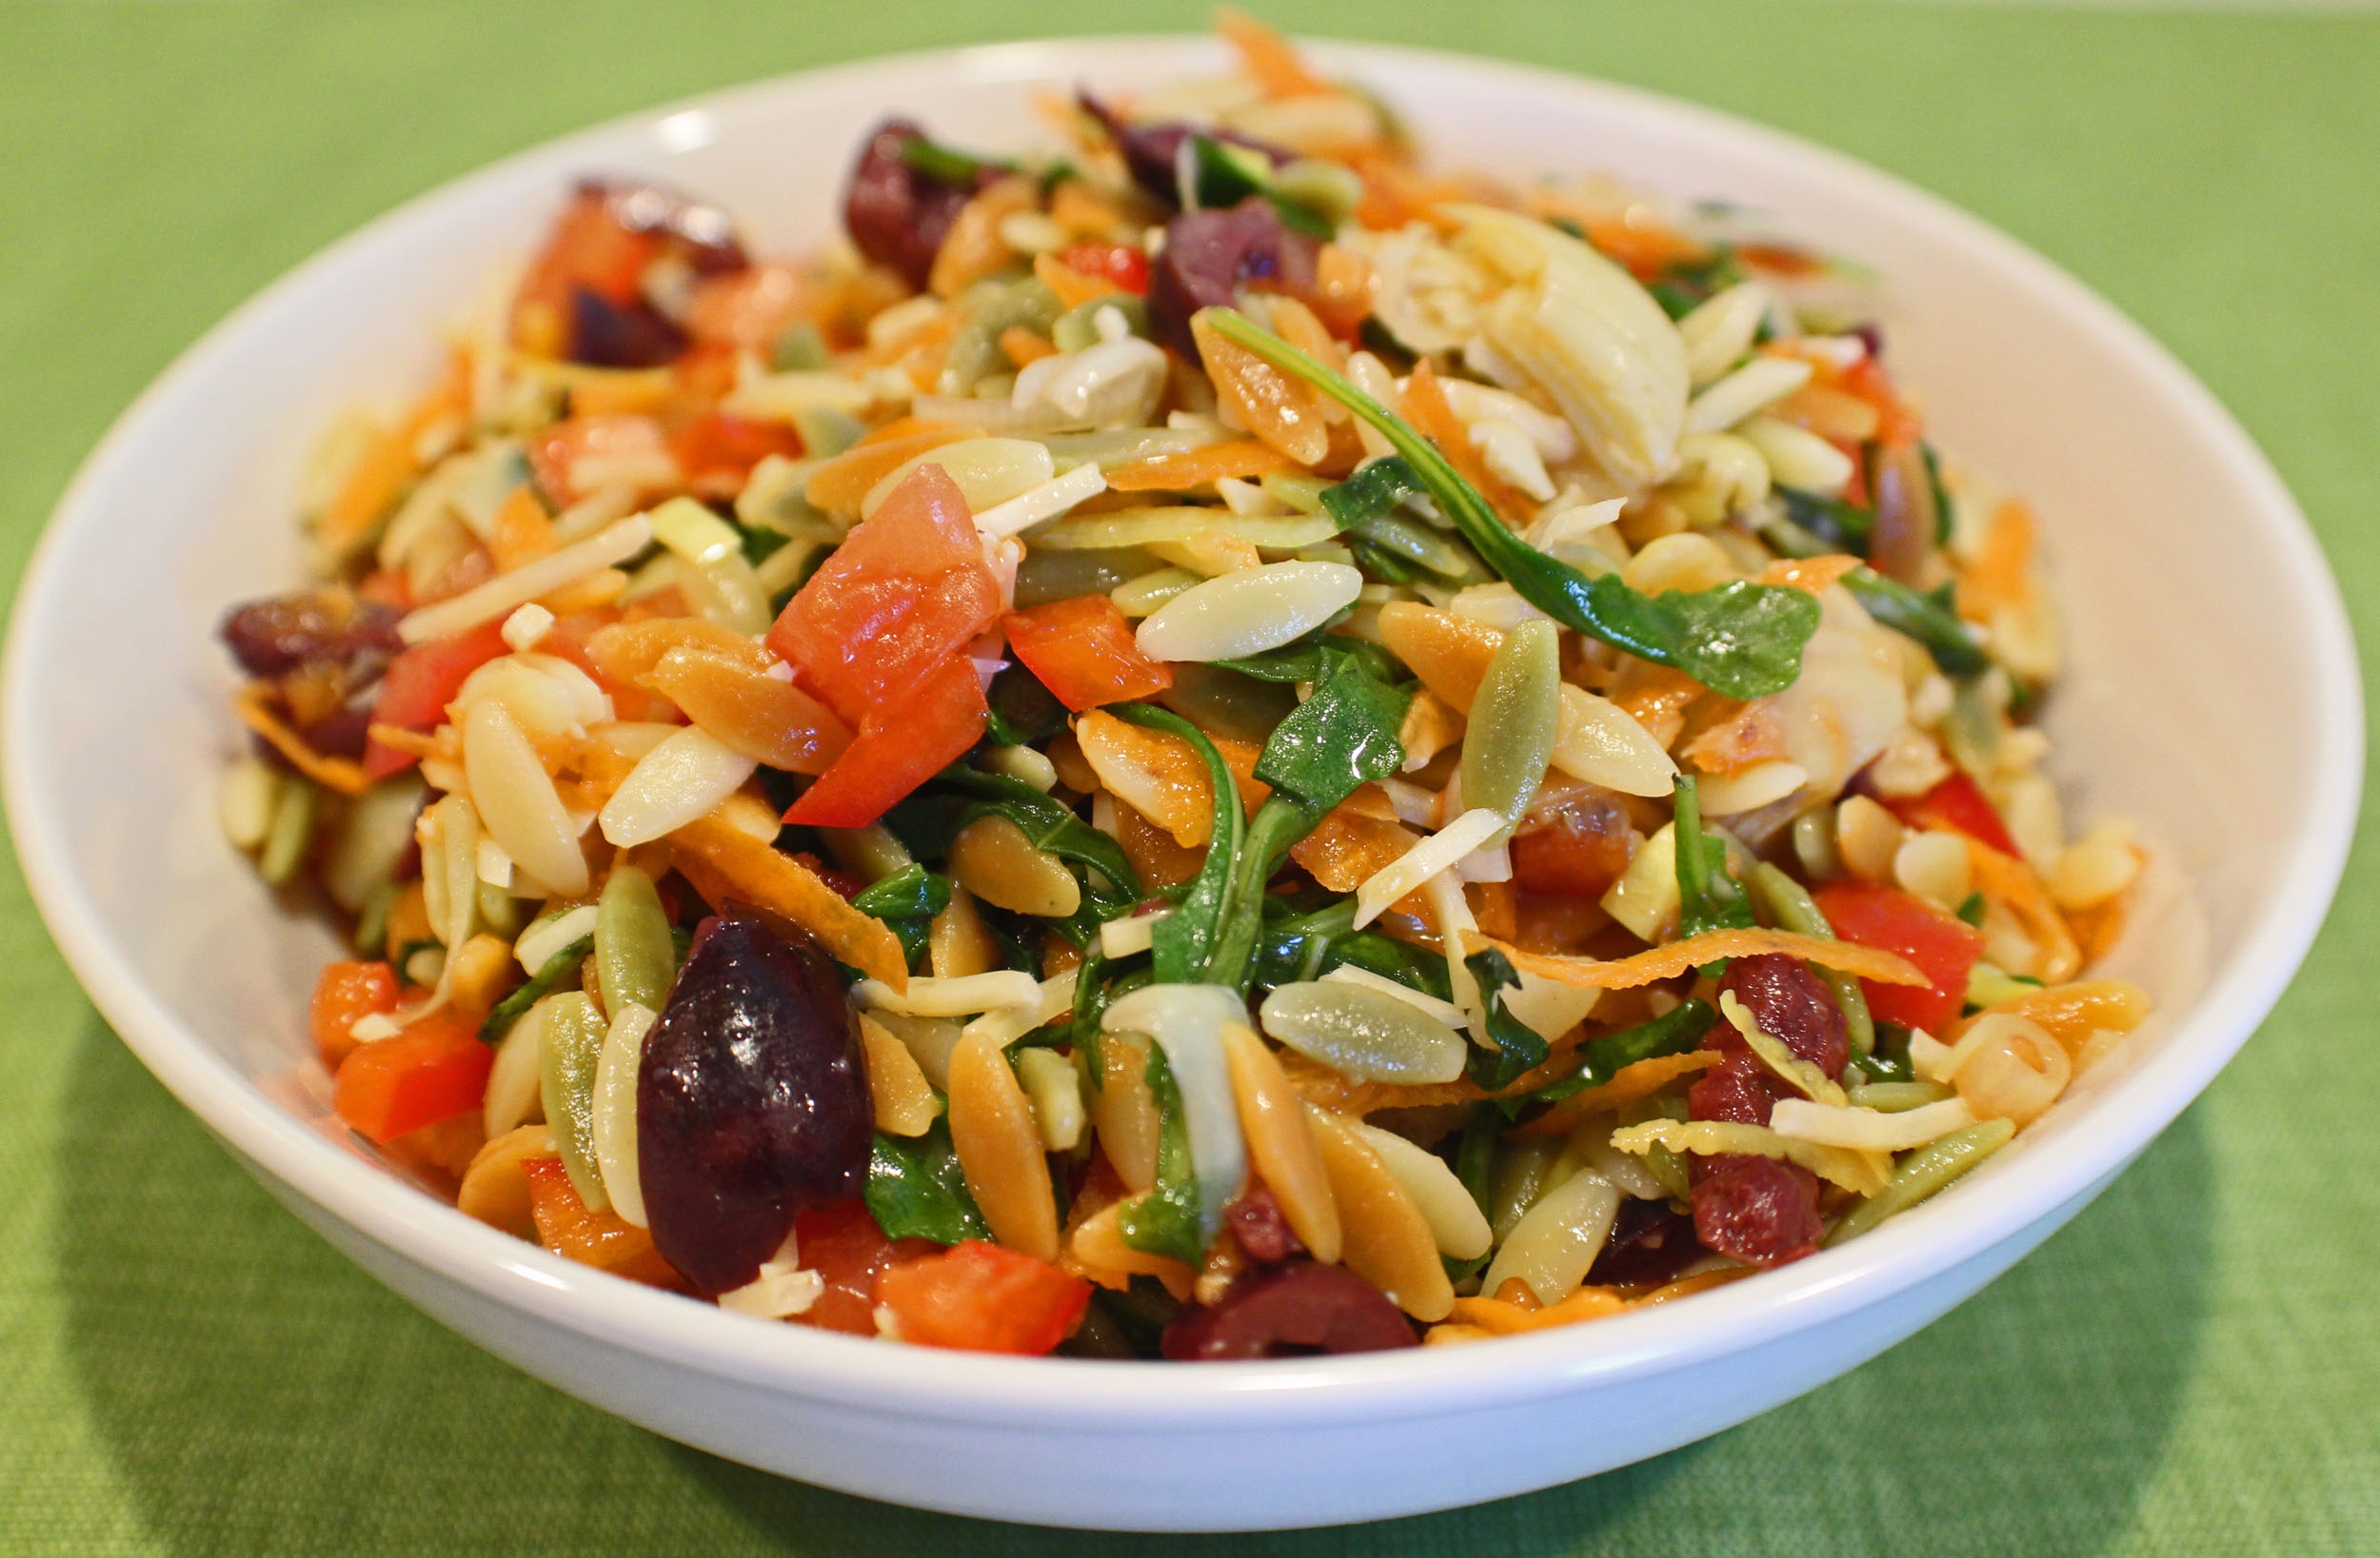
Italian Orzo Salad

Italian Orzo Salad

Orzo is a wonderful pasta to use when you don’t want a bulky pasta in a dish. It looks like flat rice and comes in plain or different colors. I try to always buy the tri-color orzo because it adds other colors to whatever dish I am making. I find it in the bulk section at my local grocery store. If not there, check the pasta aisle.

Start by bringing 2 cups of water to a boil, add the salt and orzo, reduce heat to a simmer and cook for 8 to 10 minutes. You want the orzo done, but not mushy. I find 9 minutes usually does the trick.

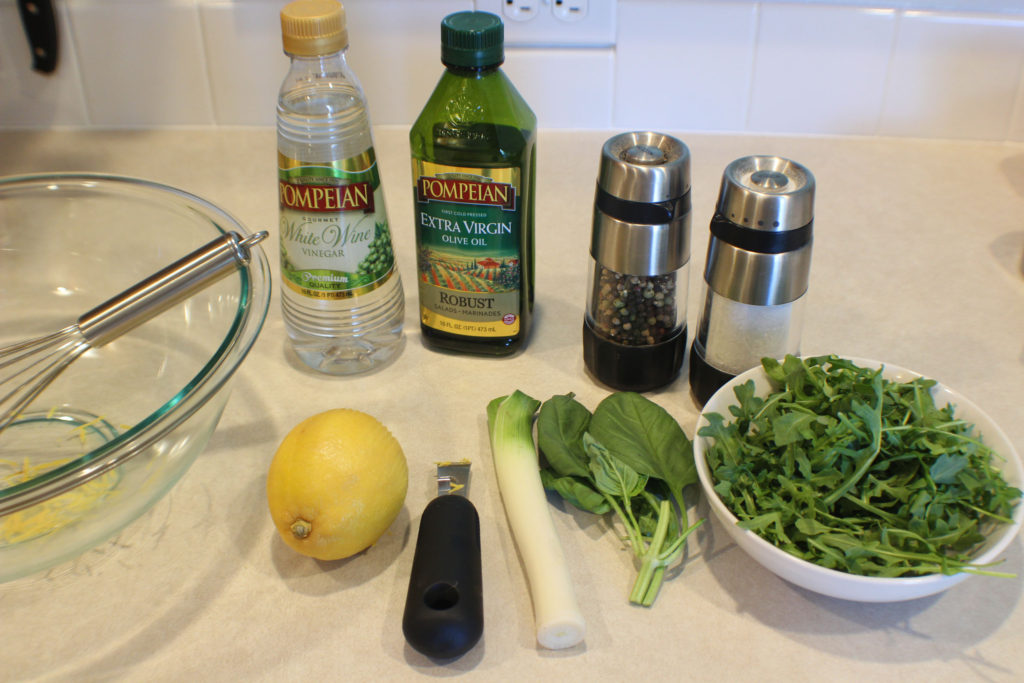
While the orzo is cooking, mix together the dressing ingredients.

When the orzo is done, drain the orzo but do not rinse and add it directly to the dressing. The warm orzo will wilt the arugula. Put this in the refrigerator while you are getting the rest of the ingredients ready.

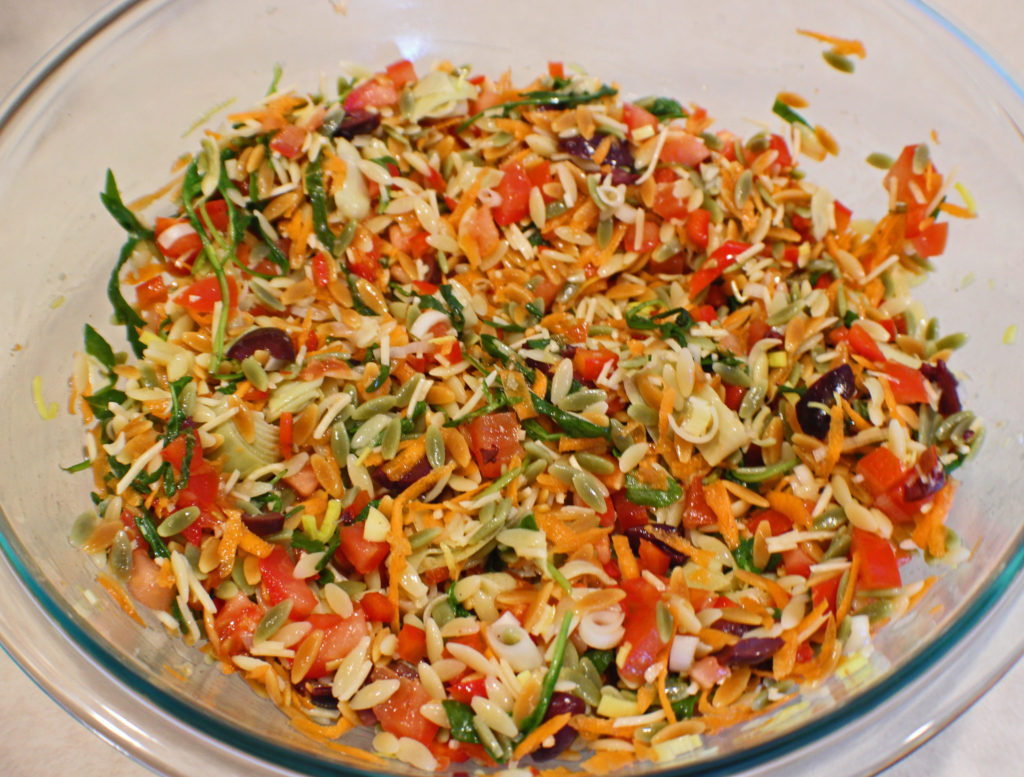
Once you have the other ingredients ready, add those to the orzo and dressing, and mix together.

You could use a green bell pepper instead of a red, I find the red sweeter, so I like it in this dish.


Taste and see if you want to add any sea salt or black pepper. I find it is salty enough, but I usually add 4 or 5 turns of my pepper mill to this.

Put this in the refrigerator for about 30 minutes to cool down before eating.

Italian Orzo Salad

This is a light and refreshing salad that goes great with about any summer meal or barbecue.
Prep Time10 minutes
Cook Time10 minutes
Cooling Time30 minutes
Total Time50 minutes
Course: Salad, Side Dish
Cuisine: American, Italian
Keyword: Artichoke Hearts, Kalamata Olives, Orzo Pasta
Servings: 6 cups
Calories: 174kcal
Author: Eating With Deb

Equipment

  • 3 quart sauce pan
  • Cutting board and knife
  • Large bowl and spoon

Ingredients

  • 1 cup orzo uncooked
  • 2 each roma tomatoes diced
  • ½ each red bell pepper diced
  • 1 each carrot grated
  • ¾ cups Kalamata olives chopped
  • 1 cup artichoke hearts chopped

Dressing

  • 1 each small leek cut in ½ moons, or ½ red onion, diced
  • 6 each large leaves of fresh basil sliced
  • 2 handfuls arugula
  • ½ each lemon zest and juice
  • 1 tbsp white wine vinegar or white balsamic or champagne vinegar
  • 2 tsp olive oil
  • 1/3 cup parmesan shredded
  • Salt and pepper to taste

Instructions

  • Bring 2 cups of water to a boil, add 1 teaspoon sea salt and orzo. Reduce heat to medium high and cook until firm but not hard, about 8 to 10 minutes. Drain and stir into the dressing and arugula mixture (the warm orzo will wilt the arugula and help blend it into the salad). Put in the refrigerator while you are prepping the rest of the salad ingredients.
  • While the orzo is cooking, whisk together the lemon juice and zest, vinegar, and olive oil.
  • Stir in the leek, basil and arugula.
  • Prepare the rest of the salad ingredients and add to the orzo and dressing. Taste and add salt or pepper if desired.
  • Put in the refrigerator for another 30 minutes to cool completely.
  • Enjoy!

Nutrition

Serving: 1cup | Calories: 174kcal | Carbohydrates: 23g | Protein: 6g | Fat: 6g | Saturated Fat: 2g | Cholesterol: 4mg | Sodium: 681mg | Potassium: 98mg | Fiber: 3g | Sugar: 2g | Vitamin A: 357IU | Vitamin C: 1mg | Calcium: 93mg | Iron: 1mg

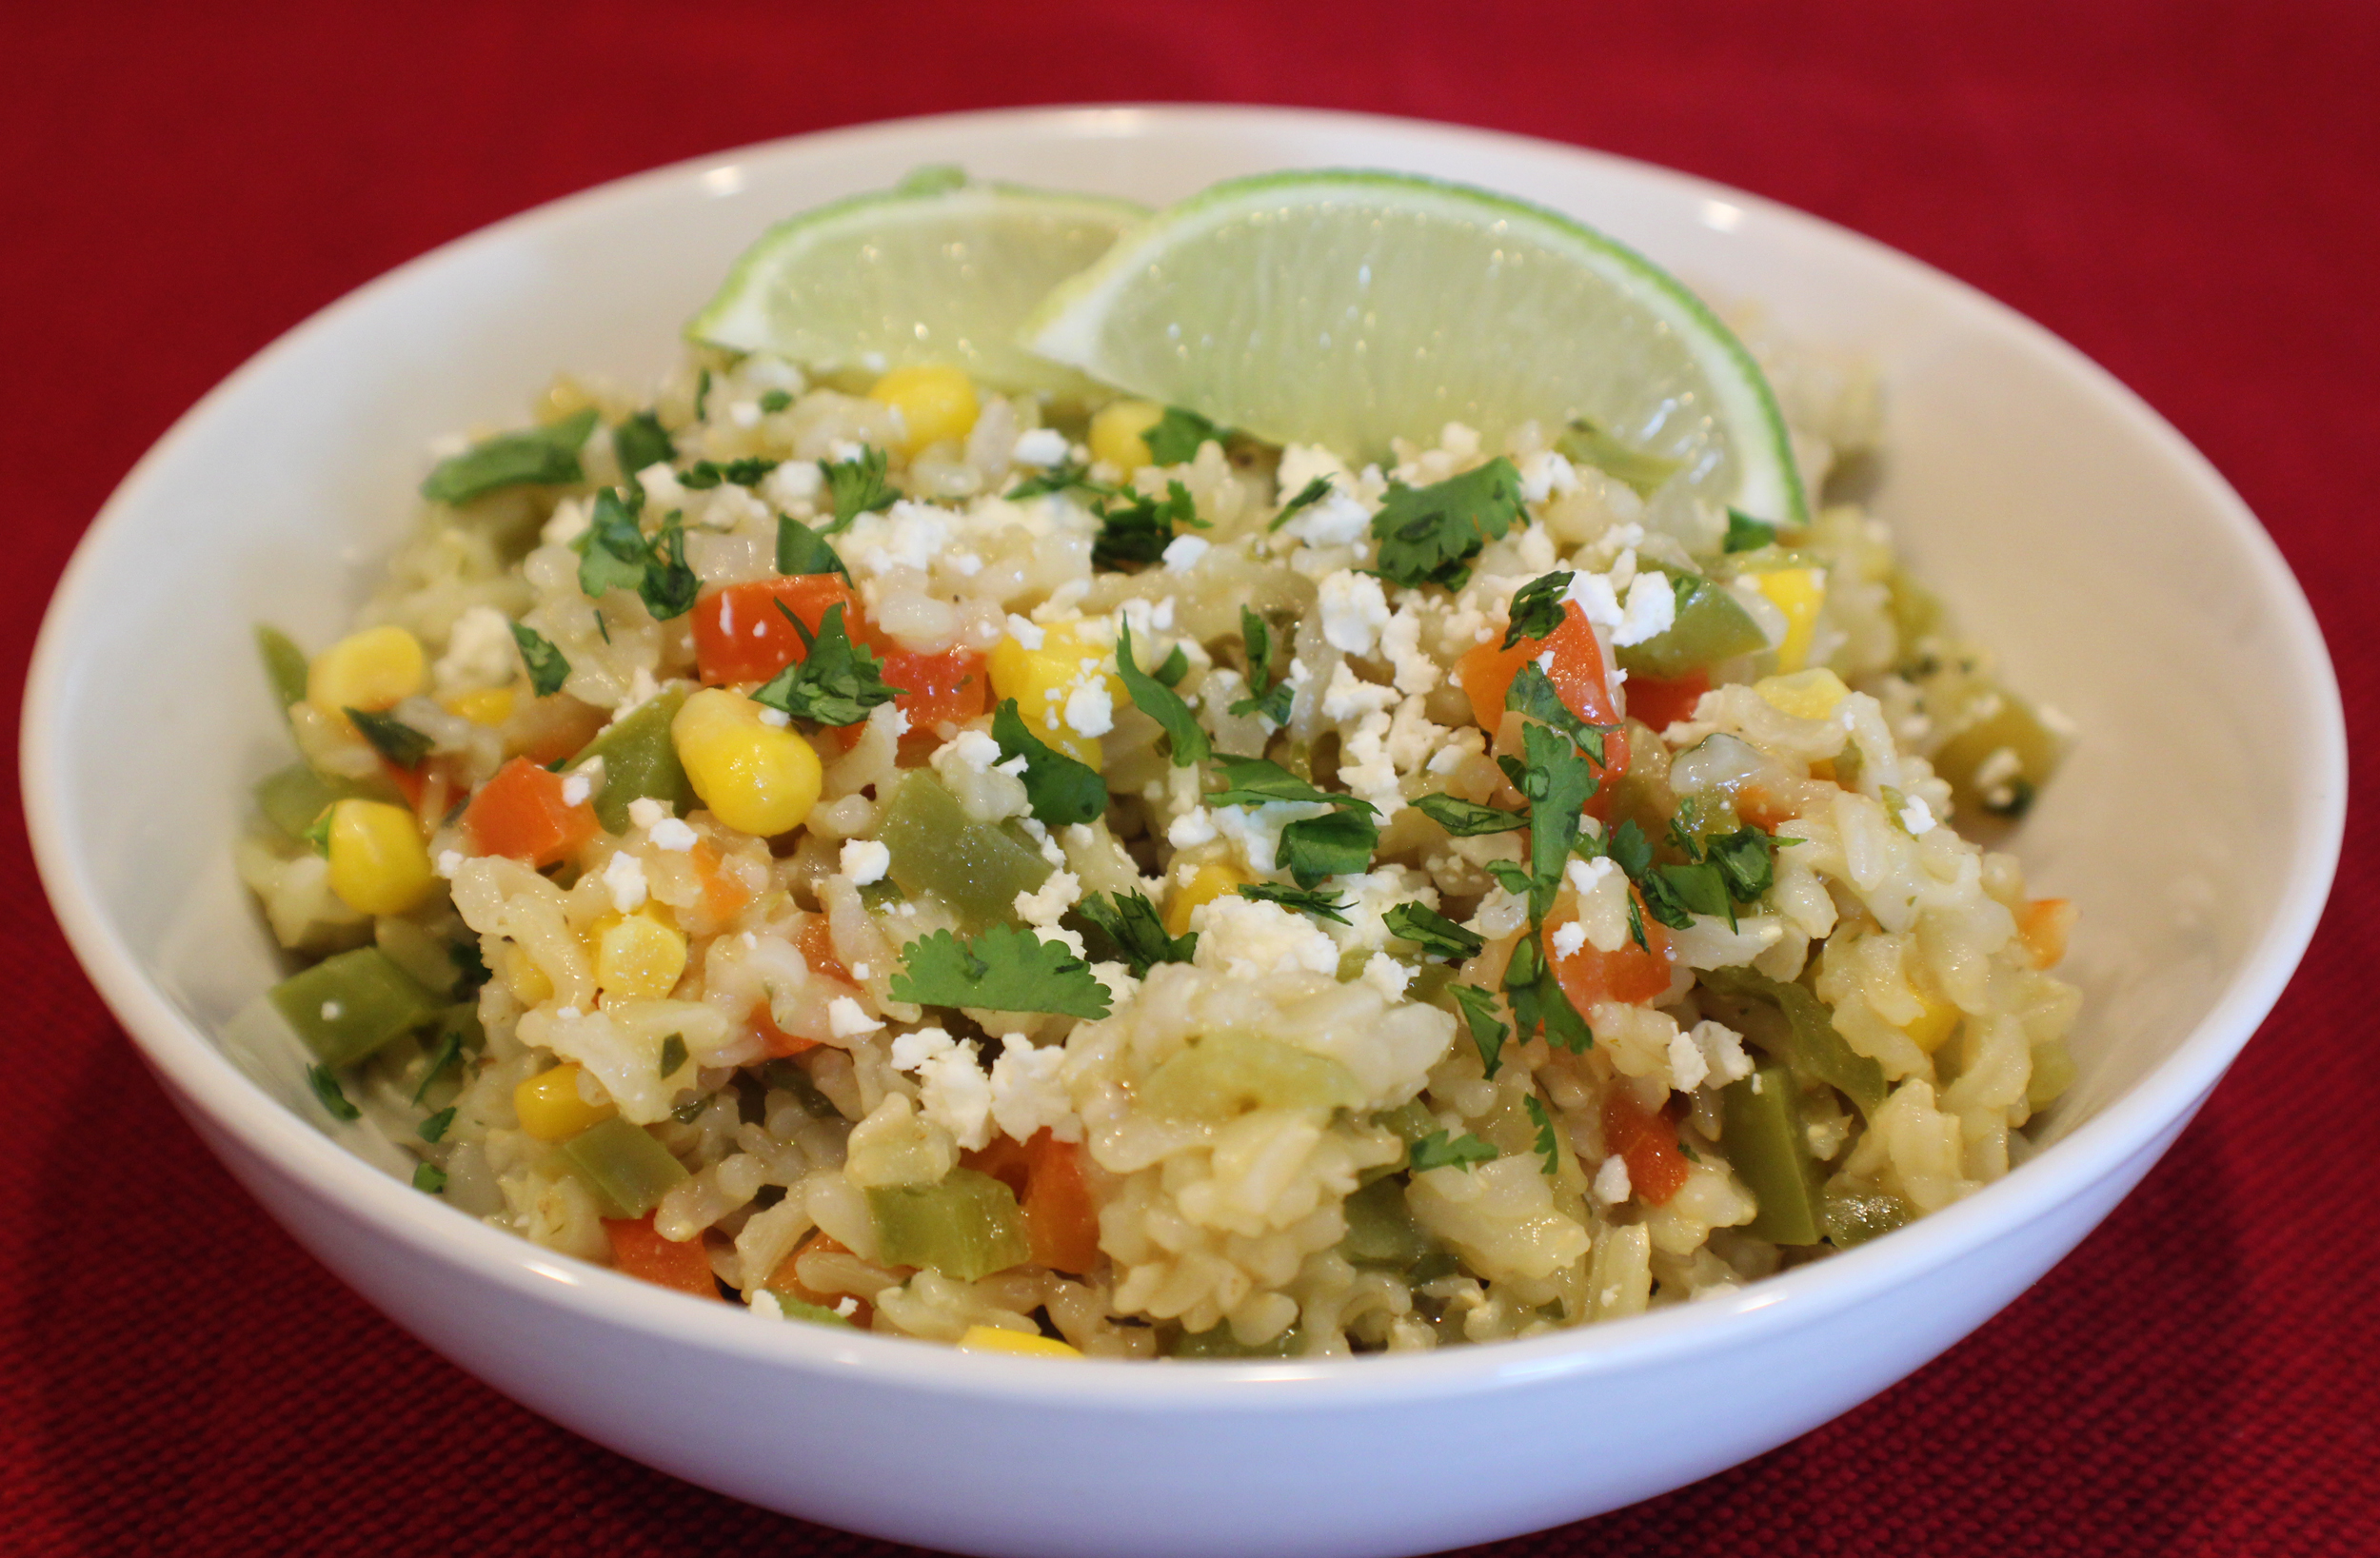
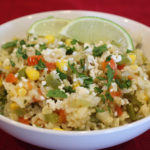
Cilantro Lime Rice

I don’t eat much rice, but when making a Tex-Mex or South of the Border meal, it is a necessity.

I usually use brown basmati rice if I am making a rice side dish. It cooks in about 30 minutes on the stovetop. I also use chicken or vegetable stock as my cooking liquid to infuse some flavor into the rice.

After you get the rice cooking, prepare the rest of the ingredients. This won’t take long to throw together once the rice is done.

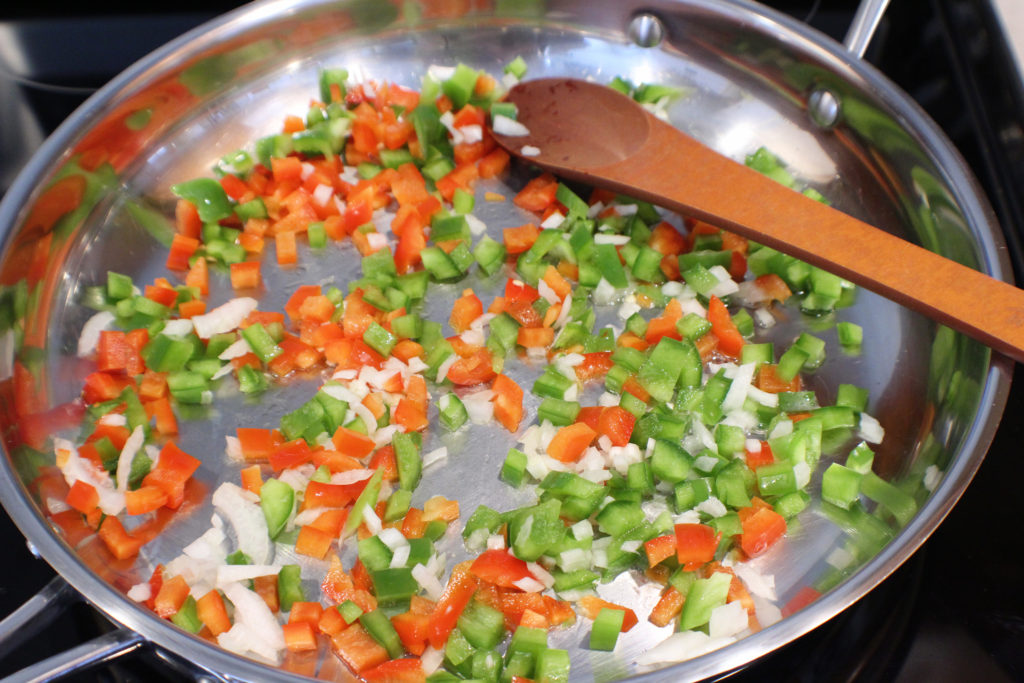
Once the rice is done, or almost done, heat a large stainless steel saute pan on medium heat. Add the oil, bell pepper, and onions. Saute for about 2 minutes.

Reduce the heat to medium low and stir in the green chiles, jalapeno, cilantro, garlic, and oregano. Cook for about 2 minutes.

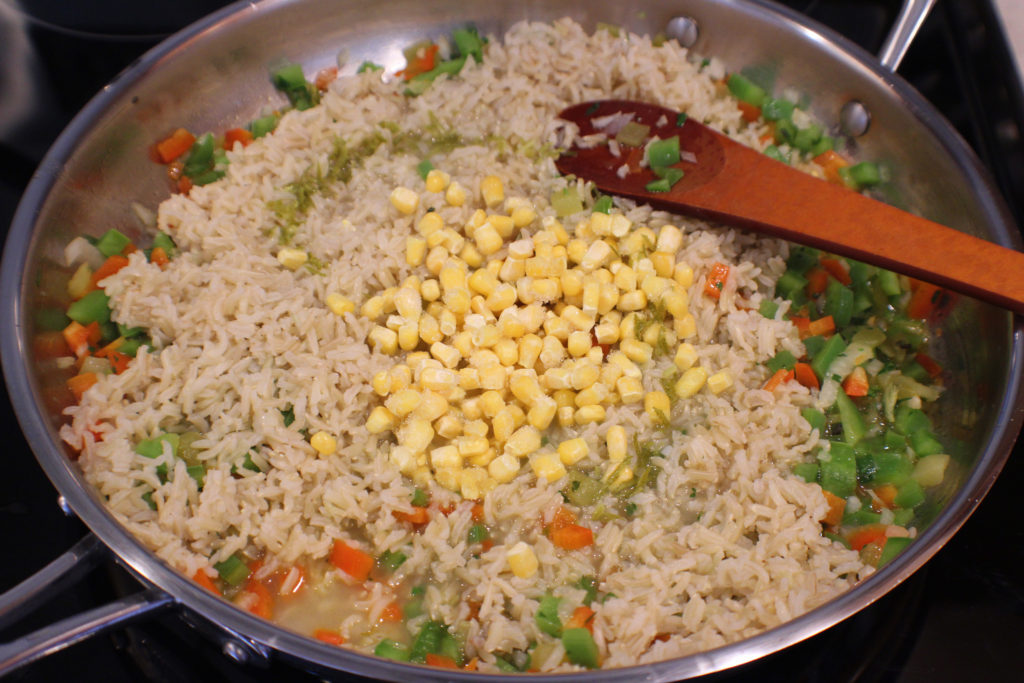
Now add the cooked rice, corn, lime juice and zest. Don’t worry if there is some cooking liquid left in the rice, add that too. It will just simmer down and add more flavor to the dish. Simmer for a couple minutes until the liquid is incorporated. Taste – be careful it’s hot – and add any salt or pepper you may desire. I usually do 3 or 4 turns of my pepper mill.

It’s ready to eat. I sprinkle on some crumble cotija cheese (it’s basically the Mexican style of feta cheese, technically Parmesan but it reminds me more of feta), some more fresh cilantro, and serve it with lime wedges.

Try this with Adobo Lime Chicken.

Enjoy!

Cilantro Lime Rice

A refreshing rice dish for any Tex-Mex meal.
Prep Time10 minutes
Cook Time35 minutes
Course: Dinner, Side Dish
Cuisine: Tex-Mex
Keyword: Cilantro, Lime, Rice
Servings: 4 people
Calories: 222kcal
Author: Eating With Deb

Equipment

  • 2 quart or larger sauce pan
  • Large stainless steel saute pan
  • Knife and cutting board

Ingredients

  • 2/3 cup brown basmati rice
  • 2 cups chicken or vegetable stock
  • 1 each red bell pepper chopped
  • 2 tbsp yellow onions fine chopped
  • 1 tbsp vegetable oil or canola or peanut oil
  • ½ can green chiles
  • 1 each jalapeno seeds and ribs removed, minced, optional
  • 1 tbsp cilantro fresh, chopped
  • 1 tsp garlic fresh, minced
  • ½ tsp oregano
  • 1 each lime zest and juice
  • ½ cup frozen corn thawed
  • Crumbled cotija cheese chopped cilantro and lime wedges for topping

Instructions

  • Put rice and stock in a sauce pan. Put on stove and bring to a boil. Reduce heat and add a lid. Cook for about 30 minutes, until done. Remove from heat and set aside. If there is broth left in the pot, you will simmer it down later.
  • While rice is cooking prep the veggies, cheese, lime and seasonings.
  • Heat a large stainless steel saute pan on medium heat. Add the oil, bell pepper, and onions. Cook for about 2 minutes.
  • Reduce heat to medium low and stir in the green chilies, jalapeno (if using), cilantro, garlic, and oregano and cook for 2 minutes.
  • Add the cooked rice, corn and lime juice and zest. Stir and cook for a minute or 2. Cook long enough to simmer out any stock that may have been left from cooking the rice. Taste and add any salt or pepper that you may desire. Do not add salt if you are topping with cotija or feta cheese.
  • Top with crumbled cotija (or feta) cheese, fresh cilantro and fresh squeezed lime juice.
  • Enjoy!

Notes

If I am serving this with something spicy, like Adobo Lime Chicken, I will omit the jalapeno pepper in the rice.

Nutrition

Serving: 1cup | Calories: 222kcal | Carbohydrates: 37g | Protein: 6g | Fat: 6g | Saturated Fat: 3g | Cholesterol: 4mg | Sodium: 299mg | Potassium: 287mg | Fiber: 3g | Sugar: 3g | Vitamin A: 26IU | Vitamin C: 8mg | Calcium: 22mg | Iron: 1mg

Sauerkraut

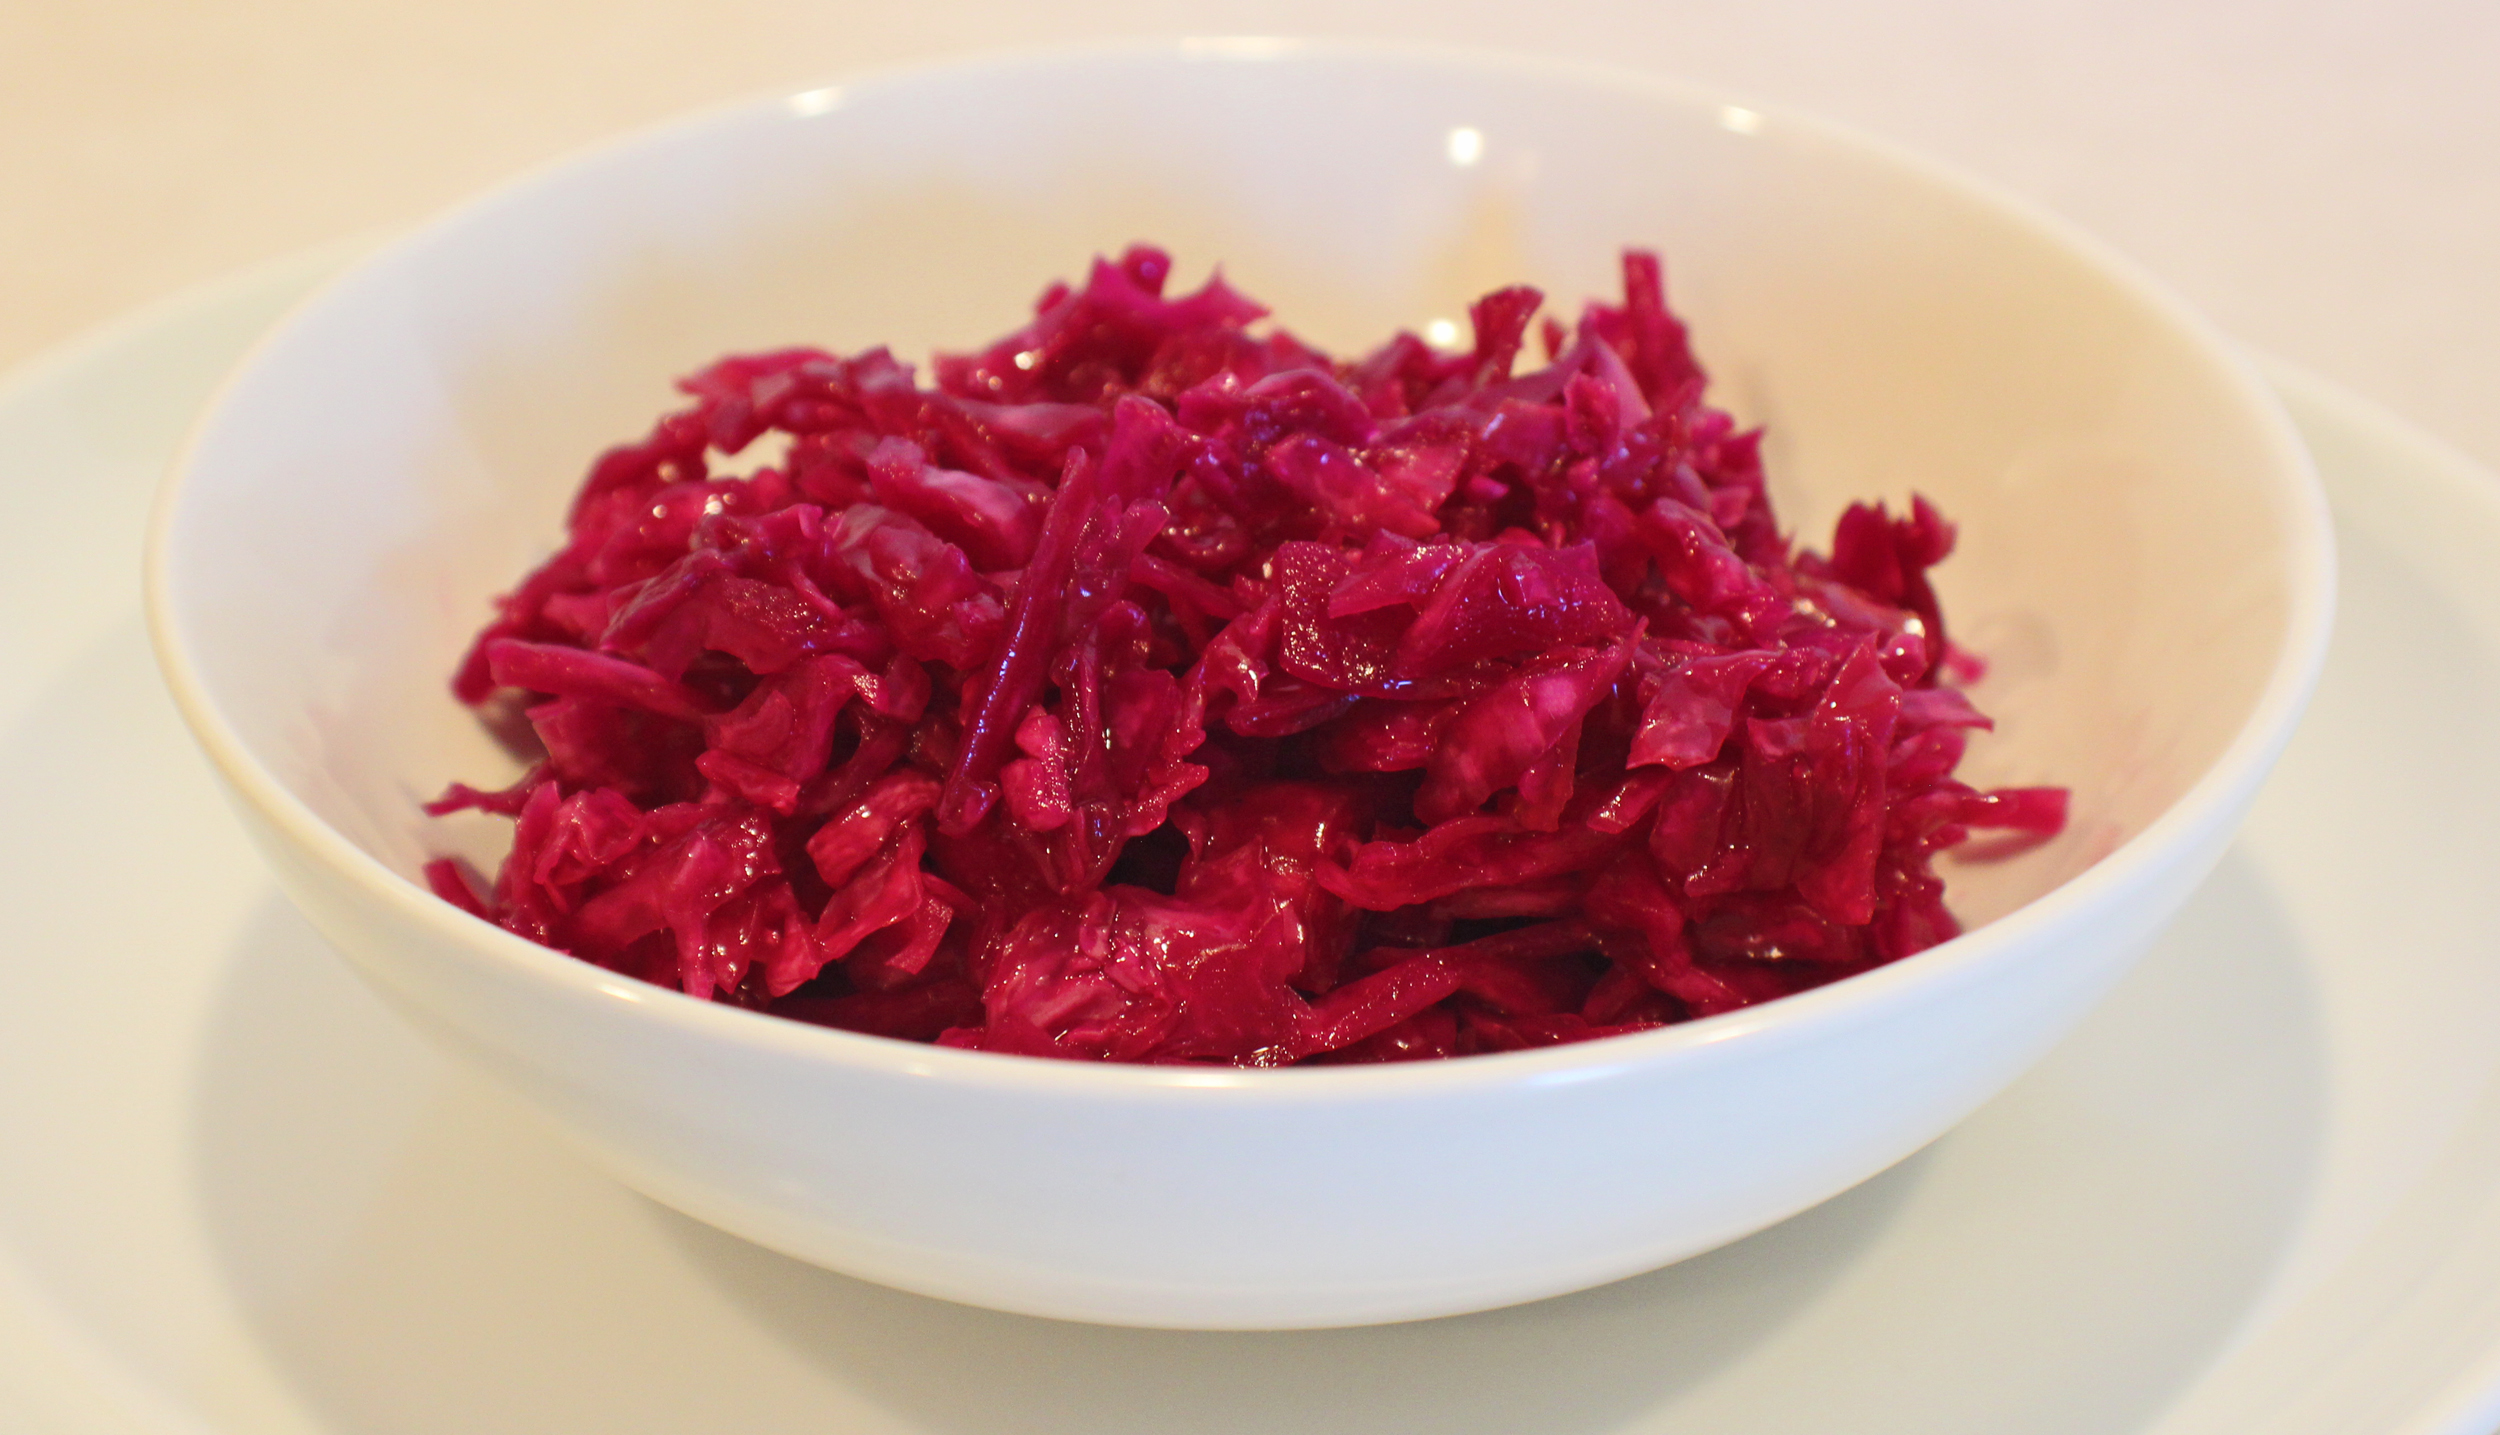
Purple Sauerkraut

With summer approaching, I get excited to start grilling more. So naturally, I need sauerkraut to go with a lot of the items that get grilled.

Making sauerkraut is very simple and doesn’t require any special tools. The fermenting process creates probiotics which are what is found in greek yogurt and helps maintain your gut health.

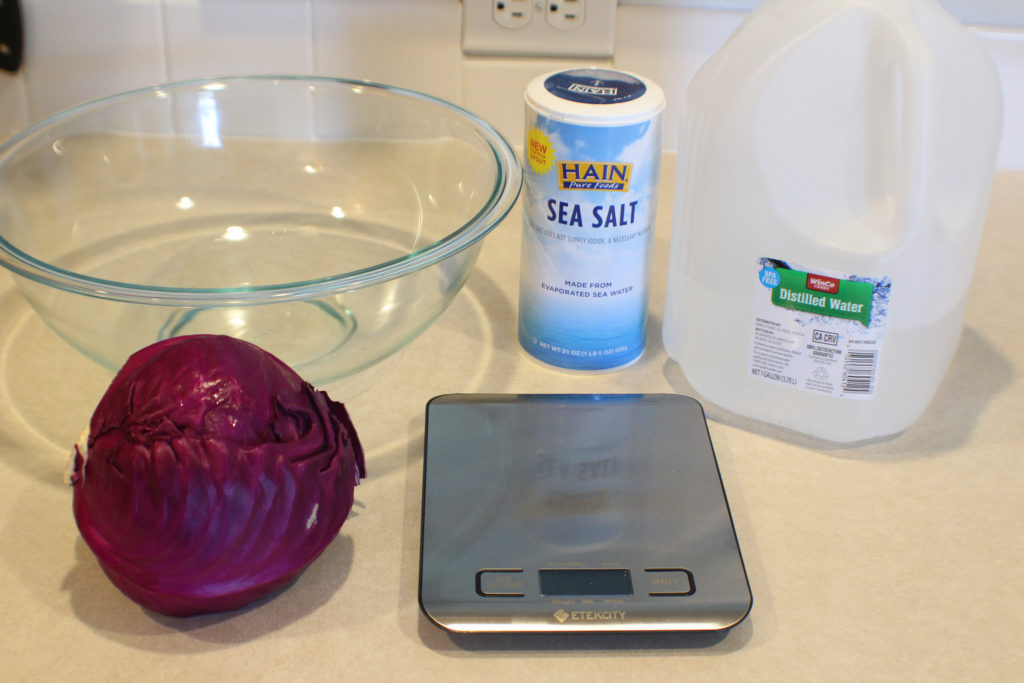
Kraut Ingredients

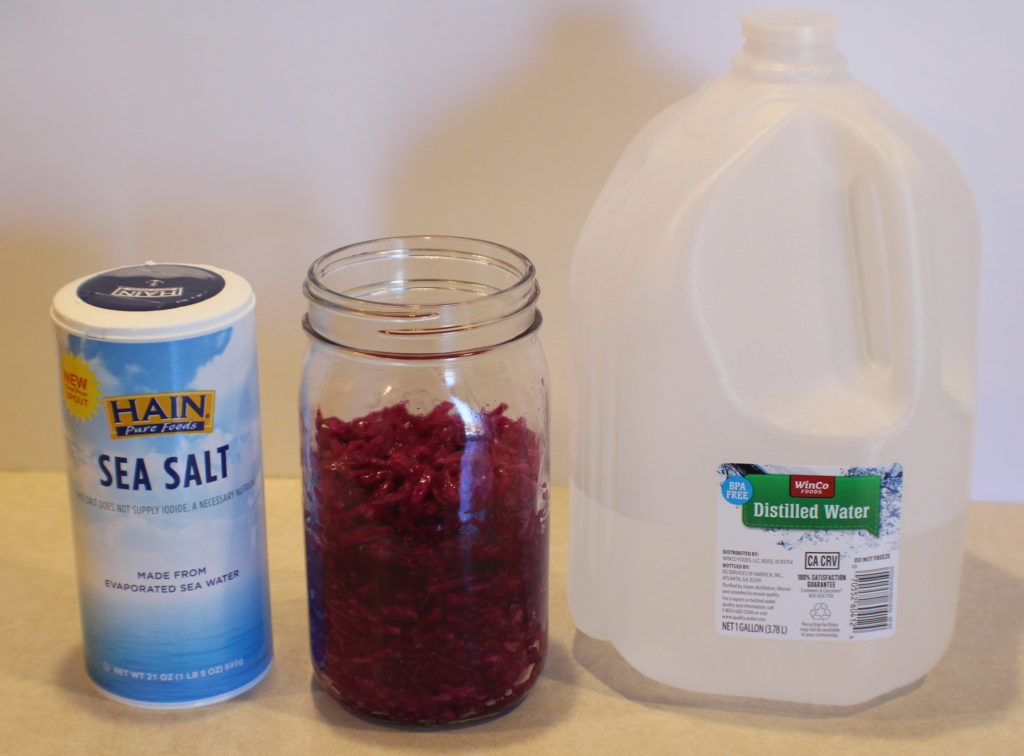
You need about 1 pound of cabbage, green or purple, sea salt, and potentially a little distilled water.

I like using purple cabbage over green because is stays firmer longer. I like the crunch. But use what you like best. It took some of my friends a bit to get used to the firmer sauerkraut because they never knew any different. They only had store bought kraut made from green cabbage.

Shred about 1 pound of cabbage. I use a knife, but you could use a food processor or mandolin if you desire.

Sprinkle in 2 teaspoons of sea salt and massage it into the cabbage. You can already see the water being pulled out of the cabbage.

Cabbage Resting

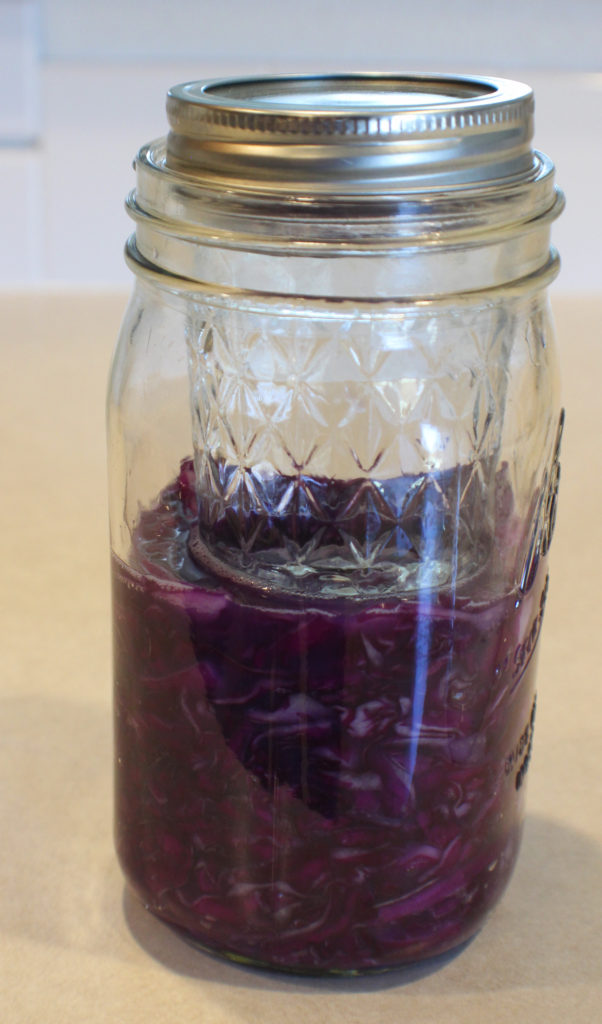
Push the cabbage together, top it with a plate and a weight. I fill the jar I’m going to put the kraut in with water and set that on top of the plate.

Now walk away for about an hour.

Smashing Cabbage in Jar

It’s time to fill the jar. For a long time I used my fist to smash the cabbage down in the jar. I finally broke down and bought a small fermenting kit that came with this handy pestle to smash the cabbage down.

Be sure all the cabbage is submerged in the brine. If not, you need to add more brine. If any cabbage is not submerged, mold will start growing during the fermenting process and ruin the sauerkraut.

If you don’t have a fermenting kit, a smaller jar filled with water will do the trick.

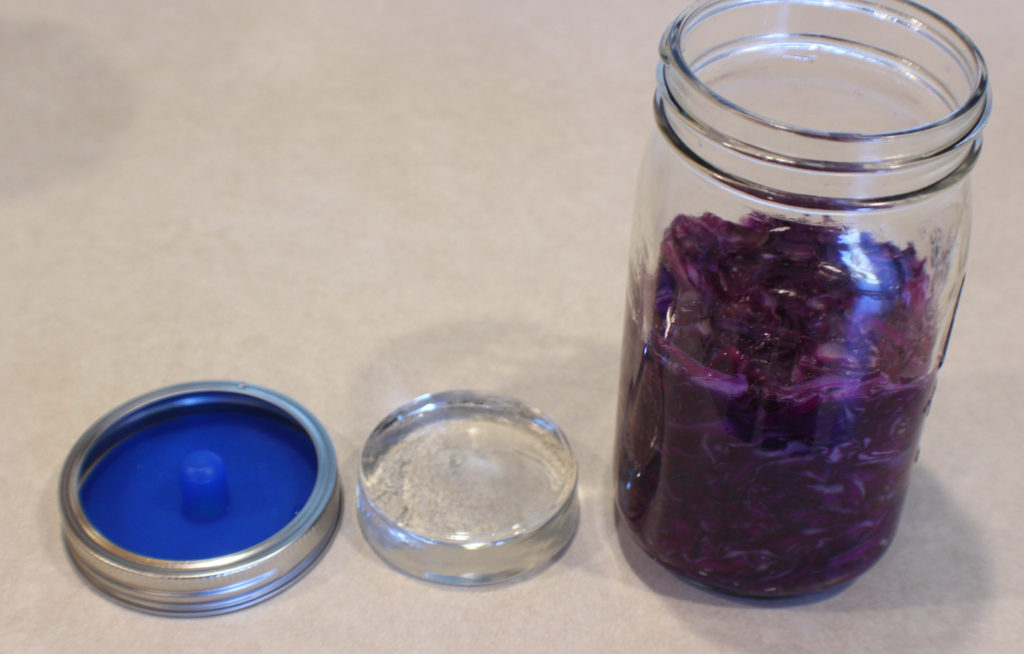
If you have a fermenting kit, you should have weights and fermenting lids in the kit. The fermenting lid allows gases to escape, but no air will be allowed in. This helps reduce the chances of mold growing.

Kraut Ready to Ferment

You are ready to store this away for a week. As the cabbage ferments, it produces more liquid so put it on a plate just in case water seeps out.

Store it away in a dark, cool spot. I put it in my pantry, that way I won’t forget to check on it daily to ensure there is enough water. It needs the dark to ferment properly, so don’t leave it out on a countertop.

Sauerkraut Ready

After a week, this is what you have. Mine produced a little foam during the fermentation process. I scrape that off with a spoon before I remove the weight.


Foam and Weight Removed

After the weight is removed, I need to add some more salt water to my jar to ensure the kraut stays fully submerged.

Salt Water Needed

I have plenty of room for a full cup of salt water. This way I make sure I have enough liquid. The sauerkraut is packed tight in the jar and as you start using it and loosening it up, you will need the additional liquid.

Salt Water Added

You now have a delicious, probiotic rich sauerkraut.

Time to get grilling!

Sauerkraut

Homemade sauerkraut is simple to make and tastes better than any store bought kraut. Using green or purple cabbage you can make a delicious kraut in a week.
Prep Time15 minutes
Resting Time7 days
Total Time7 days 15 minutes
Course: Condiments
Cuisine: German
Keyword: Cabbage, Fermenting, Probiotics, Sauerkraut
Servings: 8 servings
Calories: 14kcal
Author: Eating With Deb

Equipment

  • 1 quart jar
  • 1 pint jar or weight and fermenting lid
  • Pestle of some sort or your fist to smash the cabbage down in the jar
  • Cutting board and knife
  • Large bowl and plate that will fit in the bowl

Ingredients

  • 1 pound cabbage purple or green, shredded
  • 2 tsp sea salt

Additional Salt Water

  • 1 cup distilled water
  • 1 tsp sea salt

Instructions

  • In a large bowl, toss cabbage with salt, massaging the salt into the cabbage. Put a plate on it and weigh it down. I put water in the jar that I am going to use to put my sauerkraut in.
  • Let sit for an hour or up to 6 hours to wilt the cabbage and produce water.
  • Transfer to a jar and smash it down and be sure all of the cabbage is covered in brine. Add more salt water if needed (1 tsp sea salt to 1 cup distilled water).
  • If you have a weight and ferment lid, those work great. Otherwise fill a smaller jar with water and set that on top of the cabbage to weigh it down.
  • Put it on a plate and then in a cool, dark place. I use my pantry.
  • Check daily for water level (must stay above the cabbage so as not to produce mold).
  • Check for flavor starting at 7 days. Refrigerate when you have the flavor you want. It will continue to slowly ferment in the refrigerator over time.
  • Remove the weight and foam before refrigerating.
  • Add additional salt water to the jar to cover all the sauerkraut before refrigerating.

Notes

Makes about 3 cups of sauerkraut.
Use within 6 months. If it sits too long in the refrigerator, it starts turning mushy.

Nutrition

Calories: 14kcal | Carbohydrates: 3g | Protein: 1g | Fat: 1g | Saturated Fat: 1g | Sodium: 882mg | Potassium: 97mg | Fiber: 1g | Sugar: 2g | Vitamin A: 56IU | Vitamin C: 21mg | Calcium: 23mg | Iron: 1mg