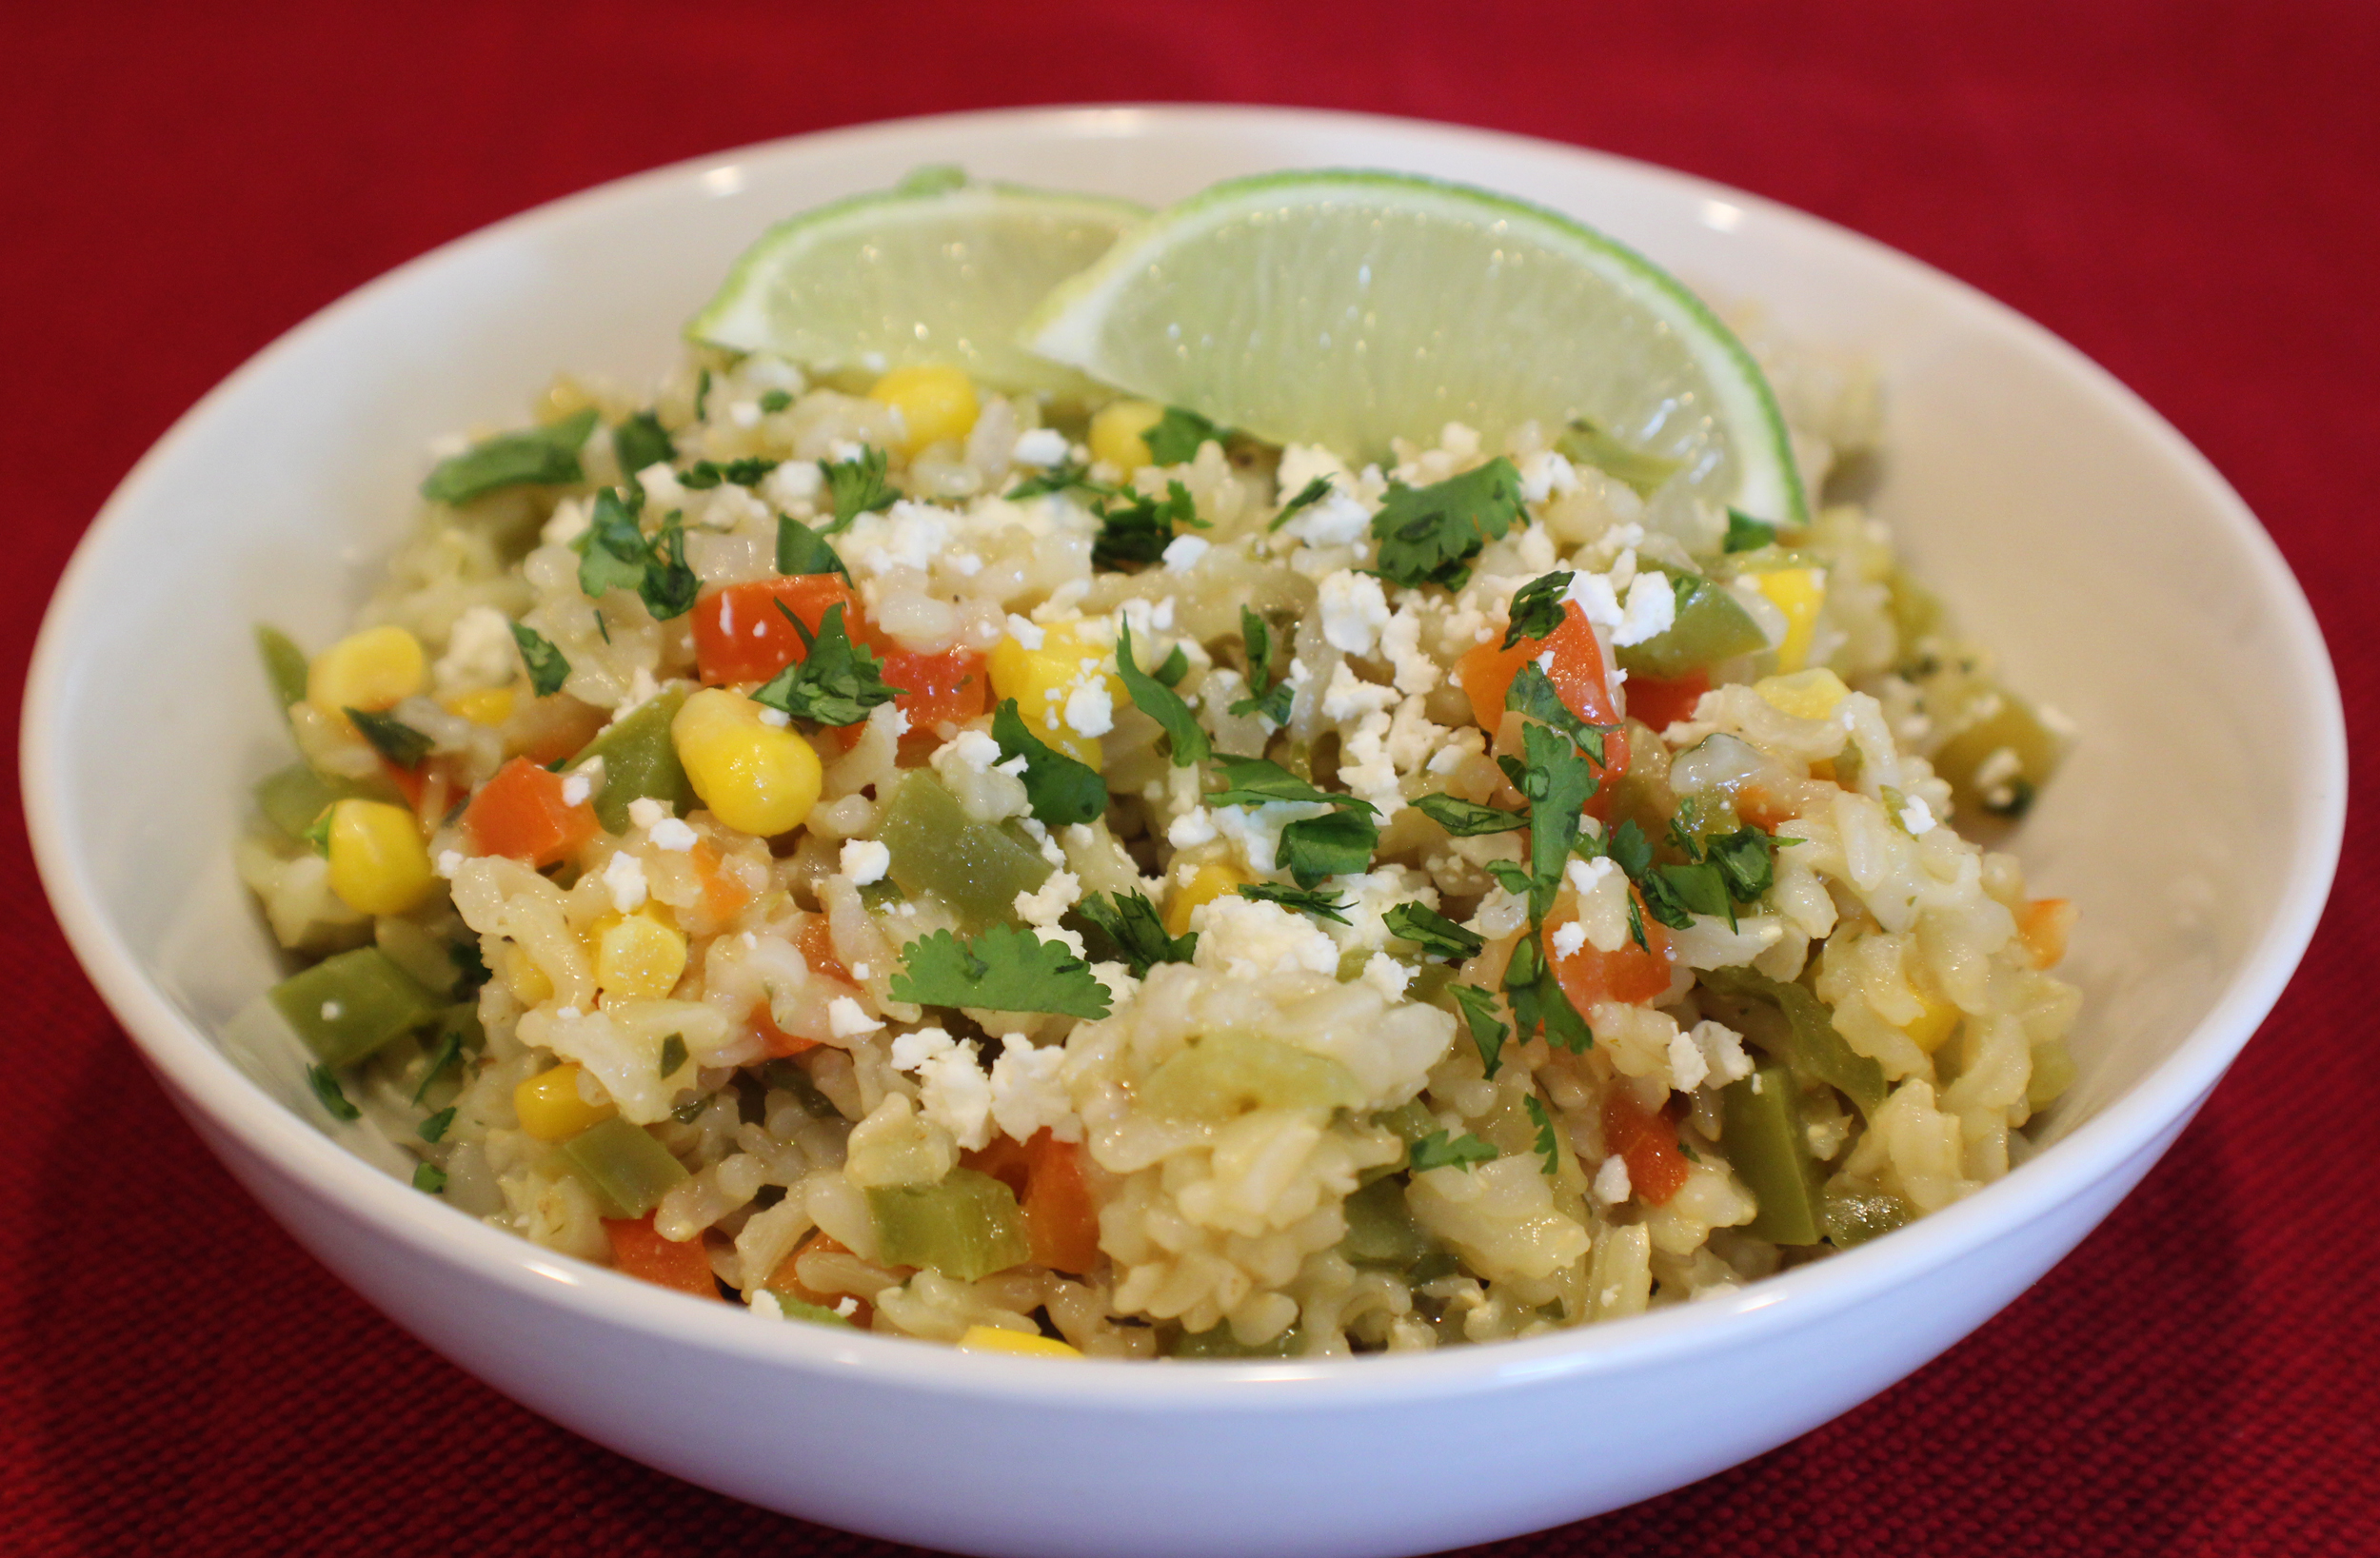
Cilantro Lime Rice

I don’t eat much rice, but when making a Tex-Mex or South of the Border meal, it is a necessity.

I usually use brown basmati rice if I am making a rice side dish. It cooks in about 30 minutes on the stovetop. I also use chicken or vegetable stock as my cooking liquid to infuse some flavor into the rice.

After you get the rice cooking, prepare the rest of the ingredients. This won’t take long to throw together once the rice is done.
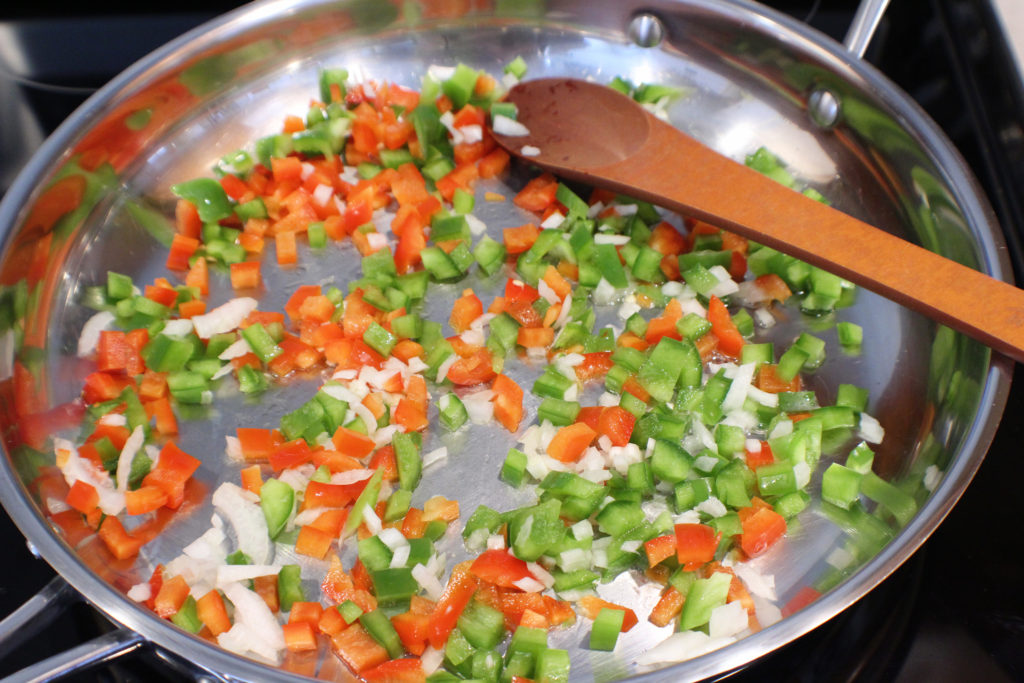
Once the rice is done, or almost done, heat a large stainless steel saute pan on medium heat. Add the oil, bell pepper, and onions. Saute for about 2 minutes.

Reduce the heat to medium low and stir in the green chiles, jalapeno, cilantro, garlic, and oregano. Cook for about 2 minutes.
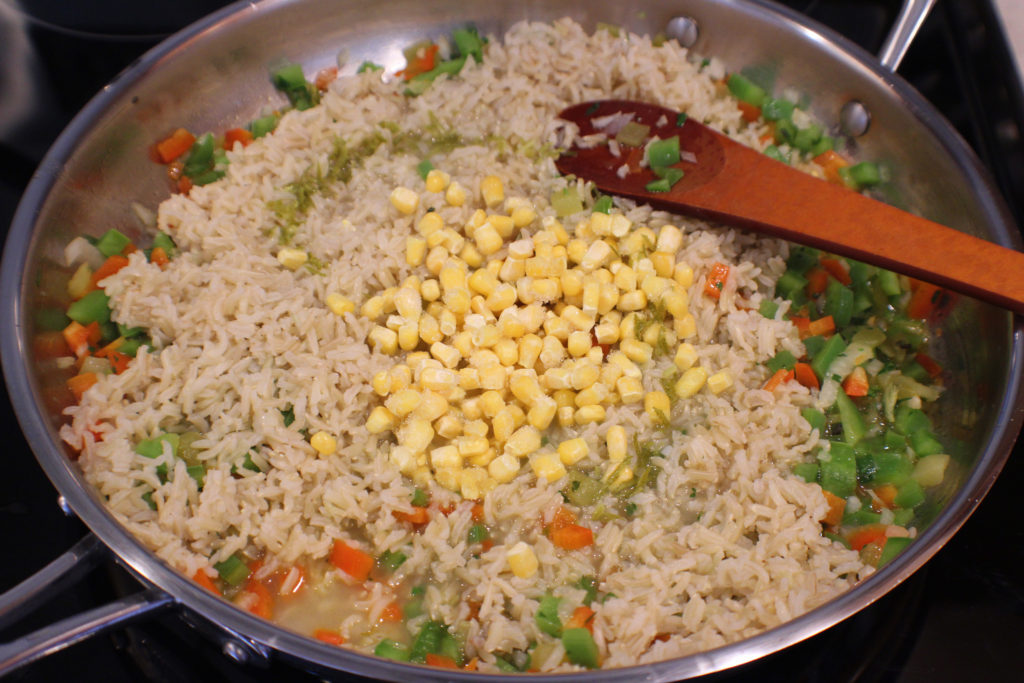
Now add the cooked rice, corn, lime juice and zest. Don’t worry if there is some cooking liquid left in the rice, add that too. It will just simmer down and add more flavor to the dish. Simmer for a couple minutes until the liquid is incorporated. Taste – be careful it’s hot – and add any salt or pepper you may desire. I usually do 3 or 4 turns of my pepper mill.

It’s ready to eat. I sprinkle on some crumble cotija cheese (it’s basically the Mexican style of feta cheese, technically Parmesan but it reminds me more of feta), some more fresh cilantro, and serve it with lime wedges.

Try this with Adobo Lime Chicken.

Enjoy!

Cilantro Lime Rice

A refreshing rice dish for any Tex-Mex meal.
Prep Time10 minutes
Cook Time35 minutes
Course: Dinner, Side Dish
Cuisine: Tex-Mex
Keyword: Cilantro, Lime, Rice
Servings: 4 people
Calories: 222kcal
Author: Eating With Deb

Equipment

  • 2 quart or larger sauce pan
  • Large stainless steel saute pan
  • Knife and cutting board

Ingredients

  • 2/3 cup brown basmati rice
  • 2 cups chicken or vegetable stock
  • 1 each red bell pepper chopped
  • 2 tbsp yellow onions fine chopped
  • 1 tbsp vegetable oil or canola or peanut oil
  • ½ can green chiles
  • 1 each jalapeno seeds and ribs removed, minced, optional
  • 1 tbsp cilantro fresh, chopped
  • 1 tsp garlic fresh, minced
  • ½ tsp oregano
  • 1 each lime zest and juice
  • ½ cup frozen corn thawed
  • Crumbled cotija cheese chopped cilantro and lime wedges for topping

Instructions

  • Put rice and stock in a sauce pan. Put on stove and bring to a boil. Reduce heat and add a lid. Cook for about 30 minutes, until done. Remove from heat and set aside. If there is broth left in the pot, you will simmer it down later.
  • While rice is cooking prep the veggies, cheese, lime and seasonings.
  • Heat a large stainless steel saute pan on medium heat. Add the oil, bell pepper, and onions. Cook for about 2 minutes.
  • Reduce heat to medium low and stir in the green chilies, jalapeno (if using), cilantro, garlic, and oregano and cook for 2 minutes.
  • Add the cooked rice, corn and lime juice and zest. Stir and cook for a minute or 2. Cook long enough to simmer out any stock that may have been left from cooking the rice. Taste and add any salt or pepper that you may desire. Do not add salt if you are topping with cotija or feta cheese.
  • Top with crumbled cotija (or feta) cheese, fresh cilantro and fresh squeezed lime juice.
  • Enjoy!

Notes

If I am serving this with something spicy, like Adobo Lime Chicken, I will omit the jalapeno pepper in the rice.

Nutrition

Serving: 1cup | Calories: 222kcal | Carbohydrates: 37g | Protein: 6g | Fat: 6g | Saturated Fat: 3g | Cholesterol: 4mg | Sodium: 299mg | Potassium: 287mg | Fiber: 3g | Sugar: 3g | Vitamin A: 26IU | Vitamin C: 8mg | Calcium: 22mg | Iron: 1mg

Sauerkraut

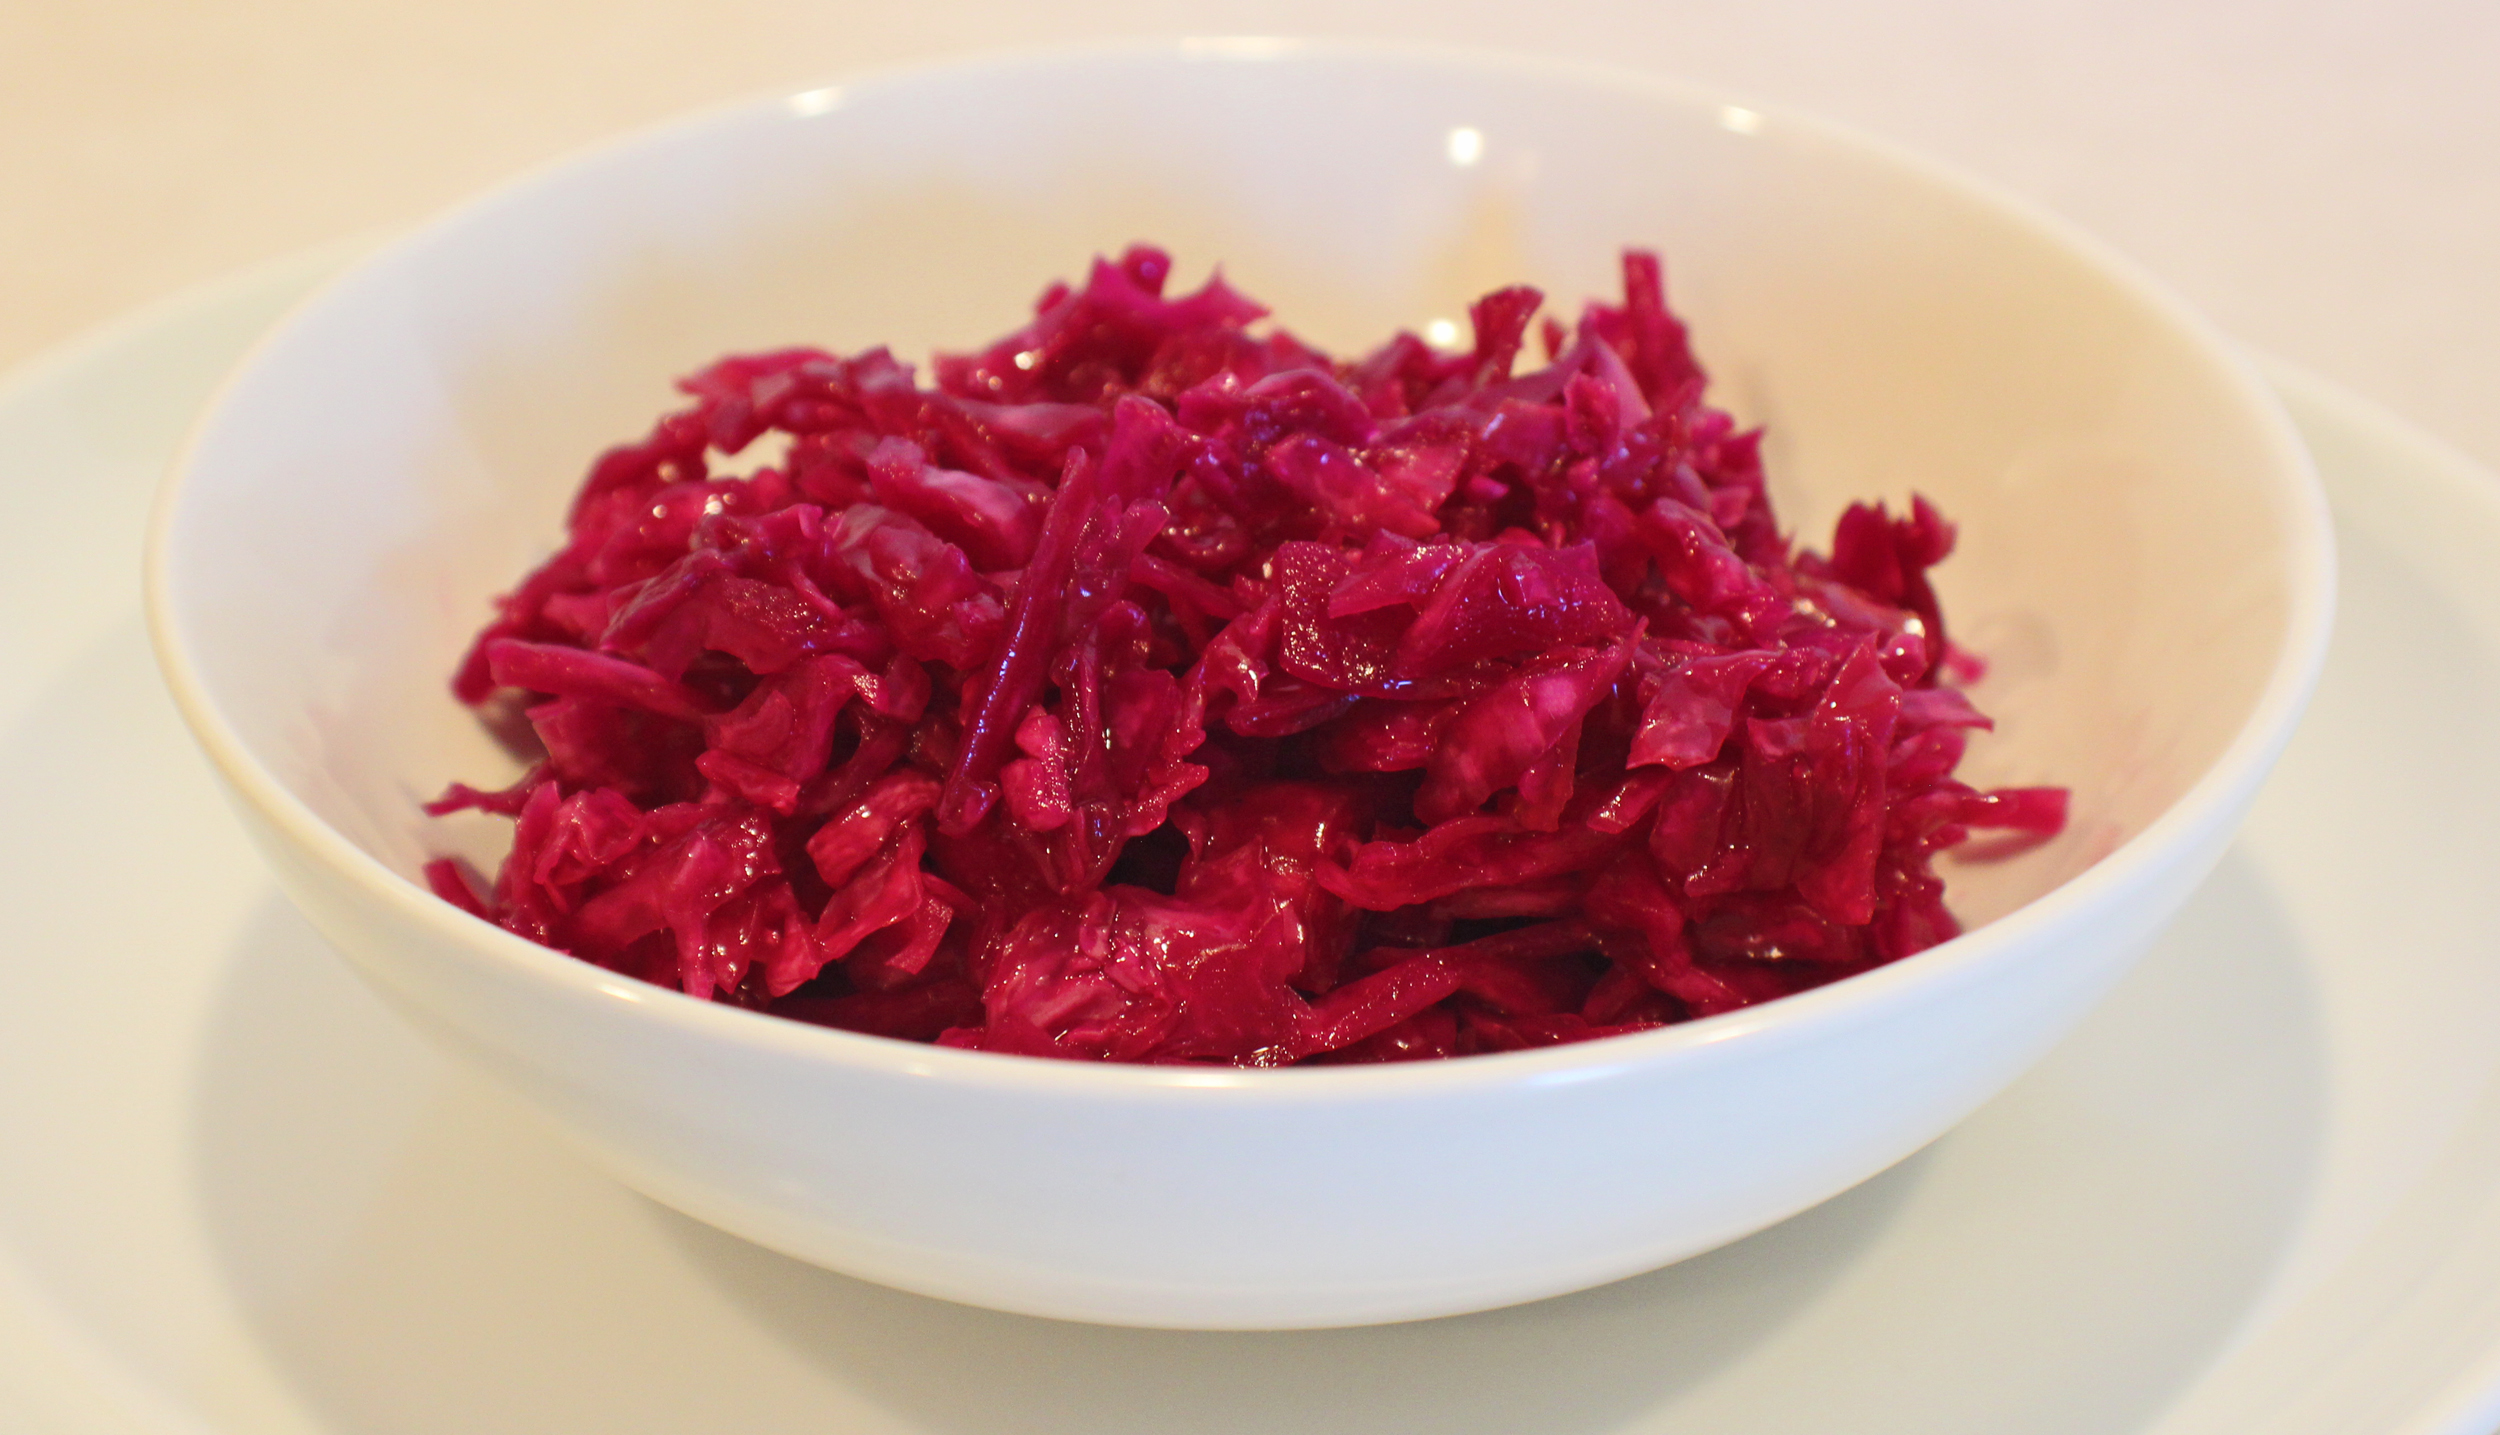
Purple Sauerkraut

With summer approaching, I get excited to start grilling more. So naturally, I need sauerkraut to go with a lot of the items that get grilled.

Making sauerkraut is very simple and doesn’t require any special tools. The fermenting process creates probiotics which are what is found in greek yogurt and helps maintain your gut health.

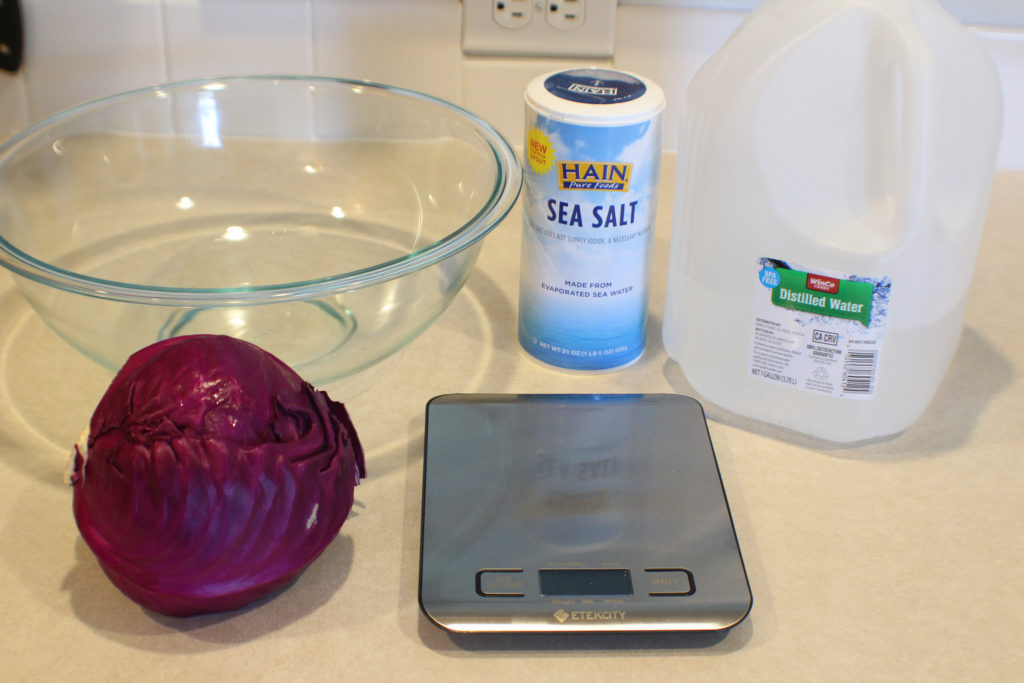
Kraut Ingredients

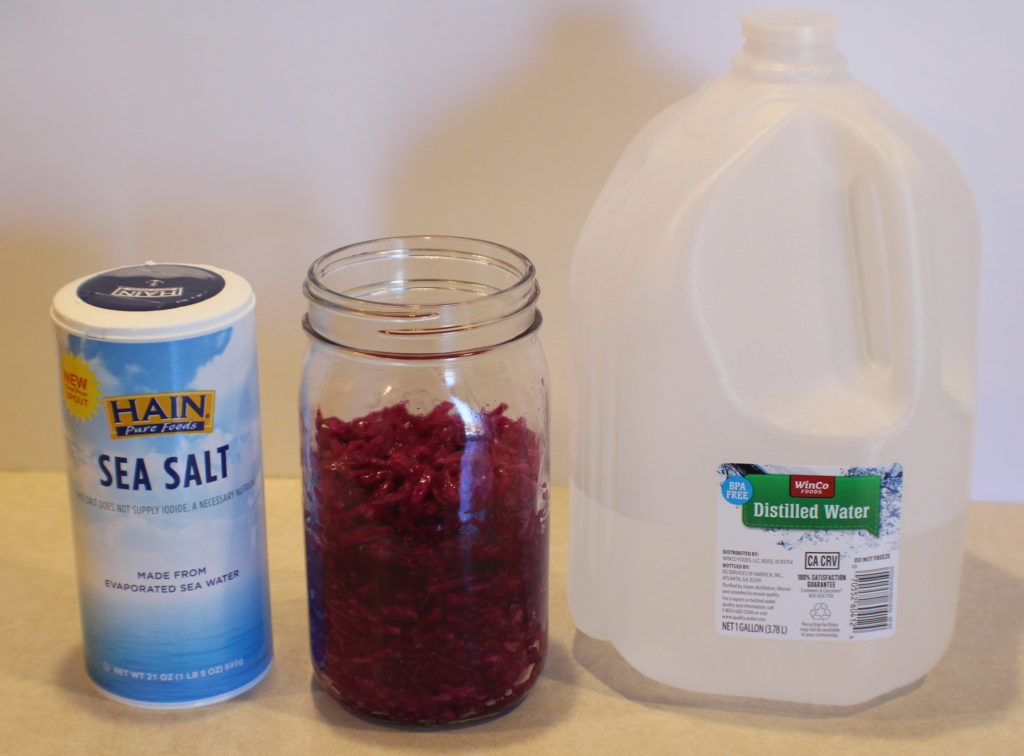
You need about 1 pound of cabbage, green or purple, sea salt, and potentially a little distilled water.

I like using purple cabbage over green because is stays firmer longer. I like the crunch. But use what you like best. It took some of my friends a bit to get used to the firmer sauerkraut because they never knew any different. They only had store bought kraut made from green cabbage.

Shred about 1 pound of cabbage. I use a knife, but you could use a food processor or mandolin if you desire.

Sprinkle in 2 teaspoons of sea salt and massage it into the cabbage. You can already see the water being pulled out of the cabbage.

Cabbage Resting

Push the cabbage together, top it with a plate and a weight. I fill the jar I’m going to put the kraut in with water and set that on top of the plate.

Now walk away for about an hour.

Smashing Cabbage in Jar

It’s time to fill the jar. For a long time I used my fist to smash the cabbage down in the jar. I finally broke down and bought a small fermenting kit that came with this handy pestle to smash the cabbage down.

Be sure all the cabbage is submerged in the brine. If not, you need to add more brine. If any cabbage is not submerged, mold will start growing during the fermenting process and ruin the sauerkraut.

If you don’t have a fermenting kit, a smaller jar filled with water will do the trick.

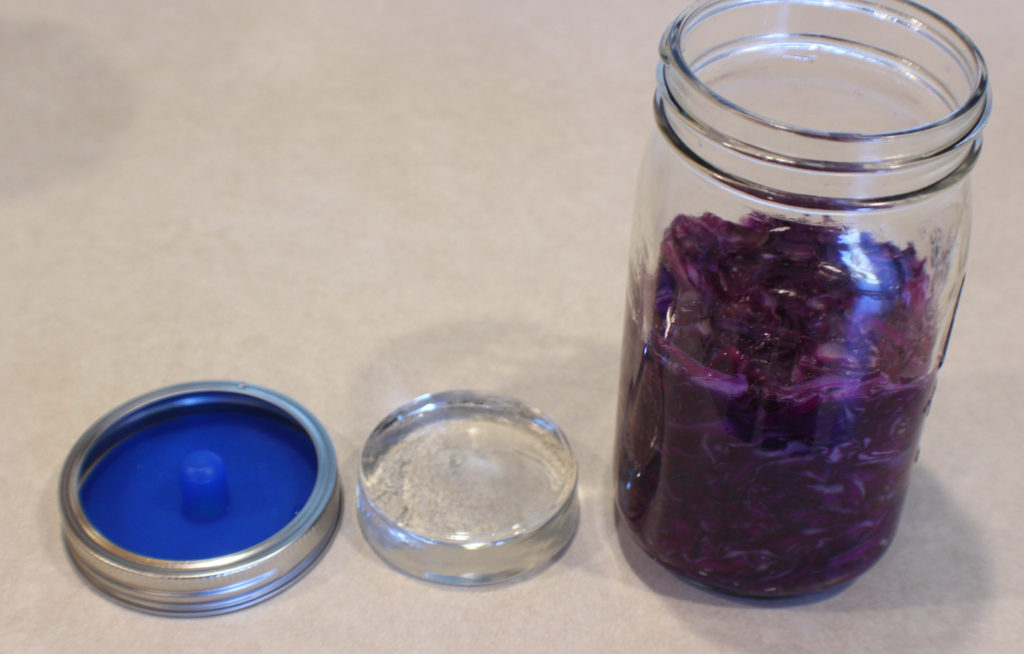
If you have a fermenting kit, you should have weights and fermenting lids in the kit. The fermenting lid allows gases to escape, but no air will be allowed in. This helps reduce the chances of mold growing.

Kraut Ready to Ferment

You are ready to store this away for a week. As the cabbage ferments, it produces more liquid so put it on a plate just in case water seeps out.

Store it away in a dark, cool spot. I put it in my pantry, that way I won’t forget to check on it daily to ensure there is enough water. It needs the dark to ferment properly, so don’t leave it out on a countertop.

Sauerkraut Ready

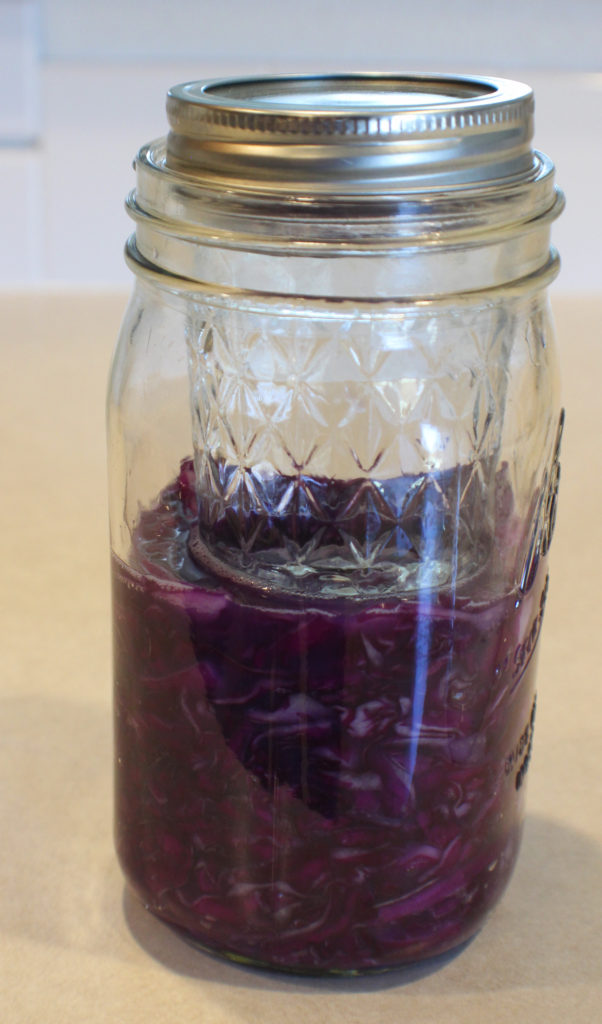
After a week, this is what you have. Mine produced a little foam during the fermentation process. I scrape that off with a spoon before I remove the weight.


Foam and Weight Removed

After the weight is removed, I need to add some more salt water to my jar to ensure the kraut stays fully submerged.

Salt Water Needed

I have plenty of room for a full cup of salt water. This way I make sure I have enough liquid. The sauerkraut is packed tight in the jar and as you start using it and loosening it up, you will need the additional liquid.

Salt Water Added

You now have a delicious, probiotic rich sauerkraut.

Time to get grilling!

Sauerkraut

Homemade sauerkraut is simple to make and tastes better than any store bought kraut. Using green or purple cabbage you can make a delicious kraut in a week.
Prep Time15 minutes
Resting Time7 days
Total Time7 days 15 minutes
Course: Condiments
Cuisine: German
Keyword: Cabbage, Fermenting, Probiotics, Sauerkraut
Servings: 8 servings
Calories: 14kcal
Author: Eating With Deb

Equipment

  • 1 quart jar
  • 1 pint jar or weight and fermenting lid
  • Pestle of some sort or your fist to smash the cabbage down in the jar
  • Cutting board and knife
  • Large bowl and plate that will fit in the bowl

Ingredients

  • 1 pound cabbage purple or green, shredded
  • 2 tsp sea salt

Additional Salt Water

  • 1 cup distilled water
  • 1 tsp sea salt

Instructions

  • In a large bowl, toss cabbage with salt, massaging the salt into the cabbage. Put a plate on it and weigh it down. I put water in the jar that I am going to use to put my sauerkraut in.
  • Let sit for an hour or up to 6 hours to wilt the cabbage and produce water.
  • Transfer to a jar and smash it down and be sure all of the cabbage is covered in brine. Add more salt water if needed (1 tsp sea salt to 1 cup distilled water).
  • If you have a weight and ferment lid, those work great. Otherwise fill a smaller jar with water and set that on top of the cabbage to weigh it down.
  • Put it on a plate and then in a cool, dark place. I use my pantry.
  • Check daily for water level (must stay above the cabbage so as not to produce mold).
  • Check for flavor starting at 7 days. Refrigerate when you have the flavor you want. It will continue to slowly ferment in the refrigerator over time.
  • Remove the weight and foam before refrigerating.
  • Add additional salt water to the jar to cover all the sauerkraut before refrigerating.

Notes

Makes about 3 cups of sauerkraut.
Use within 6 months. If it sits too long in the refrigerator, it starts turning mushy.

Nutrition

Calories: 14kcal | Carbohydrates: 3g | Protein: 1g | Fat: 1g | Saturated Fat: 1g | Sodium: 882mg | Potassium: 97mg | Fiber: 1g | Sugar: 2g | Vitamin A: 56IU | Vitamin C: 21mg | Calcium: 23mg | Iron: 1mg

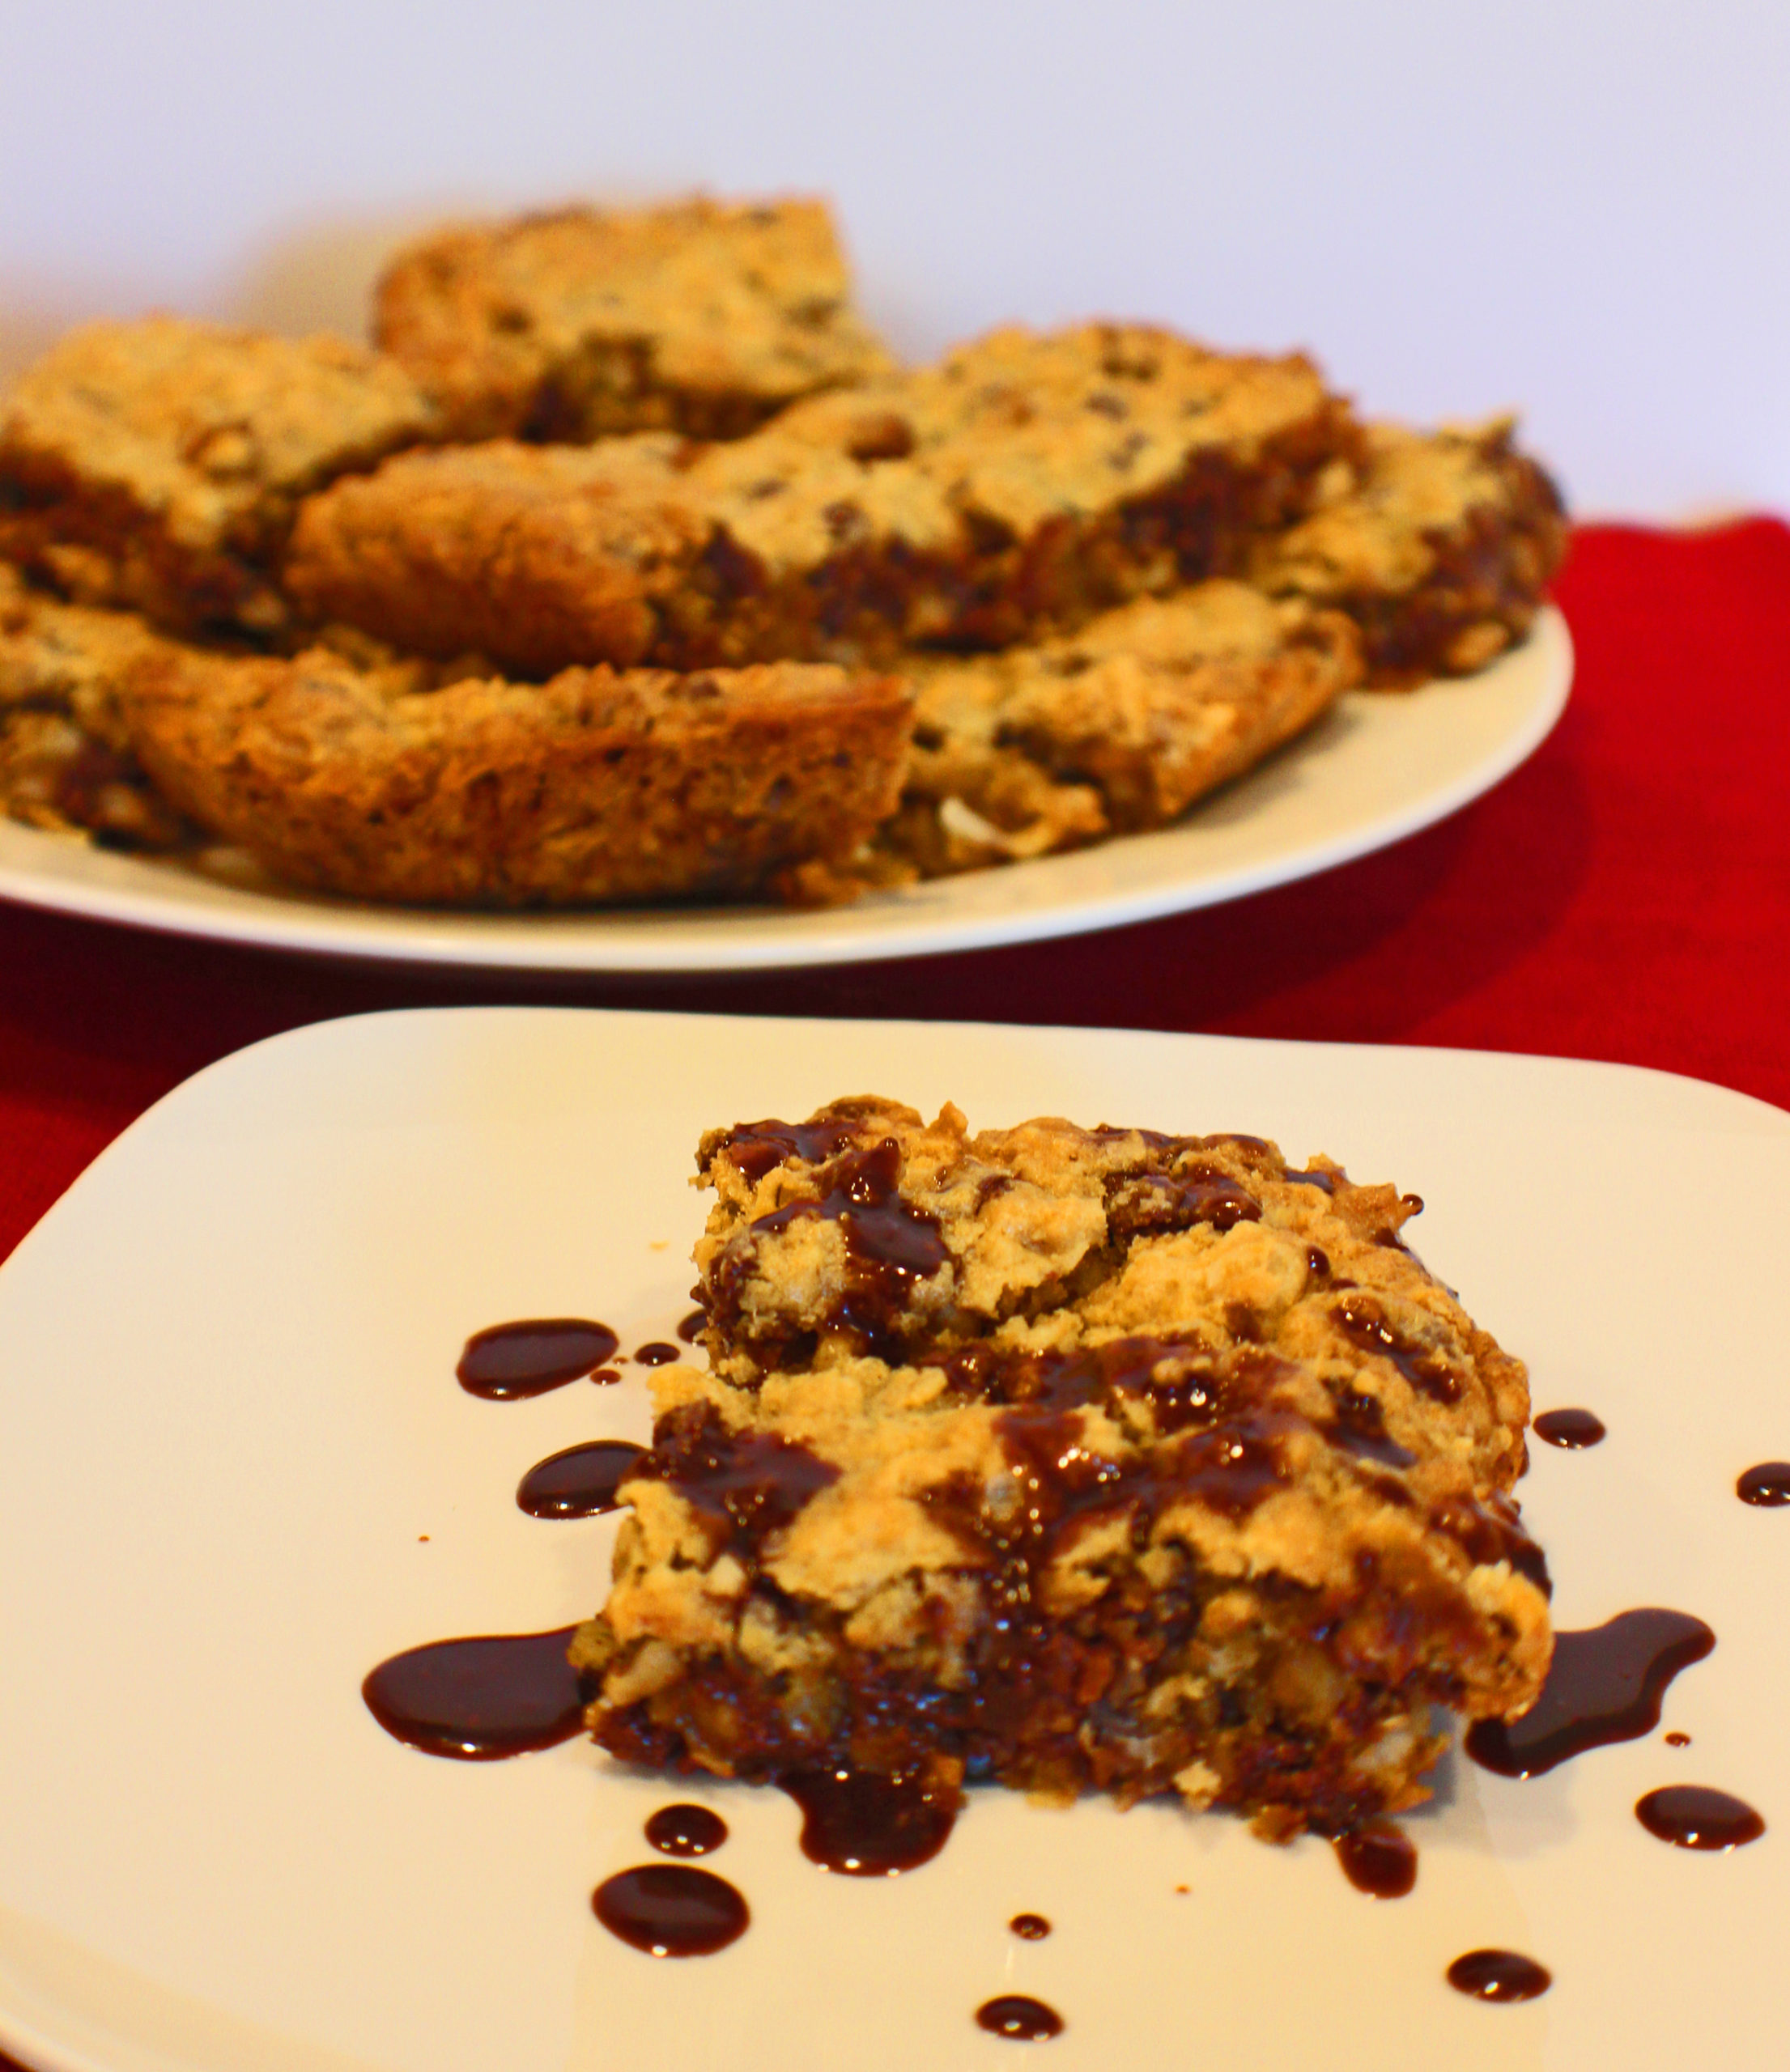
Peanut Butter Brookies

Peanut Butter Brookies

I love the smell of brownies and cookies baking and how it lingers in the house for several hours after. These brookies combine both scents with a little bit of peanut butter added in.

Need to make them gluten-free? I’ve tried it using Bob’s Red Mill 1 to 1 Baking Flour and they turn out great. 

I use my stand mixer with the paddle attachment, but if you don’t have one, beaters will work. 

Preheat oven to 350 degrees.

To make the batter, start by mixing the sugars, peanut butter, and butter together until well blended.

Then mix in the eggs and vanilla until just incorporated.

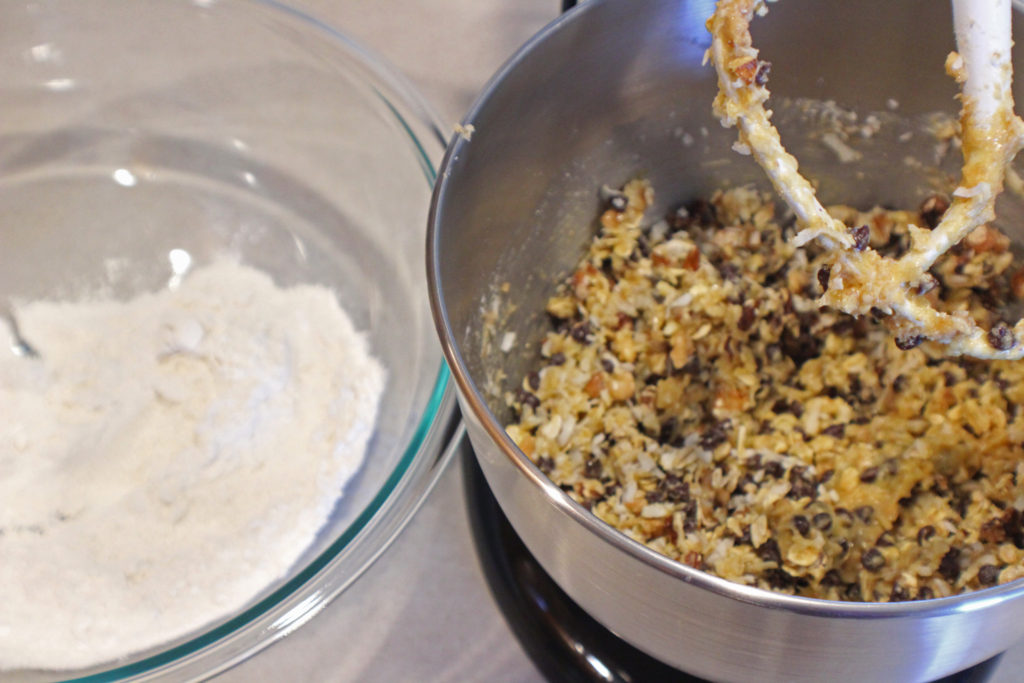
Then mix in the oats, chocolate chips, walnuts, and coconut flakes, if using.

Combine the flour and baking soda in a separate bowl.

Mix in the flour and baking soda. The dough has the consistency of a sticky cookie dough.

Spray a 9 x 13 inch baking dish with cooking spray and press batter into pan, spreading out evenly.

Bake for about 25 minutes, until a toothpick comes out clean of batter.

Now is the time to test your patience. The smells are amazing, but you need to wait to cut into them. I put them on a raised wire rack to cool. I recommend cooling for about 60 minutes, but I have been known to cut into them after about 30 minutes.

Enjoy!

Peanut Butter Brookies

This is a chewy, chocolatey brownie cookie that is rich and delicious warm with a scoop of vanilla ice cream and chocolate sauce.
Prep Time15 minutes
Cook Time25 minutes
Cooling Time1 hour
Total Time1 hour 40 minutes
Course: Dessert, Sweet Treats
Cuisine: American
Keyword: Bars, Brownies, Chocolate, Cookies, Peanut Butter
Servings: 15 bars
Calories: 329kcal
Author: Eating With Deb

Equipment

  • Mixing bowl and paddle attachment or beaters
  • 9 x 13 glass baking dish

Ingredients

  • ½ cup butter temp room, 1 stick
  • ½ cup white sugar
  • ½ cup brown sugar light or dark
  • ½ cup peanut butter creamy or chunky
  • 2 each eggs
  • 1 teaspoon vanilla extract
  • ½ cup oats
  • 1 cup chocolate chips
  • 1 cup sweetened coconut flakes optional
  • 1 cup chopped walnuts optional
  • 1 cup white flour
  • 1 teaspoon baking soda

Instructions

  • Pre-heat oven to 350°F.
  • Using a paddle attachment on a stand mixer or electric beaters, combine butter, sugars and peanut butter until the sugar is thoroughly mixed in.
  • Add the eggs and vanilla and mix until just blended in.
  • Add the oats, chocolate chips, coconut, and nuts (if using) and mix until just blended.
  • In a separate bowl combine the baking soda with the flour then add to the wet mixture and mix until combined. The dough is thick, like cookie dough.
  • Spray a 9 x 13” pan with cooking spray. Scrap dough into pan and smooth out.
  • Bake for 22 – 25 minutes until brown and a toothpick comes out clean. Bars should still be soft to the touch.
  • Let cool for 60 minutes before cutting.
  • Store in an air-tight container.

Notes

I like using the mini dark chocolate chips, but the larger milk or semi-sweet also work.
I have used Bob’s Red Mill 1 to 1 Gluten-free Baking Flour instead of regular flour and it works great.

Nutrition

Calories: 329kcal | Carbohydrates: 29g | Protein: 6g | Fat: 23g | Saturated Fat: 7g | Trans Fat: 1g | Cholesterol: 17mg | Sodium: 186mg | Potassium: 177mg | Fiber: 3g | Sugar: 17g | Vitamin A: 193IU | Vitamin C: 1mg | Calcium: 31mg | Iron: 1mg

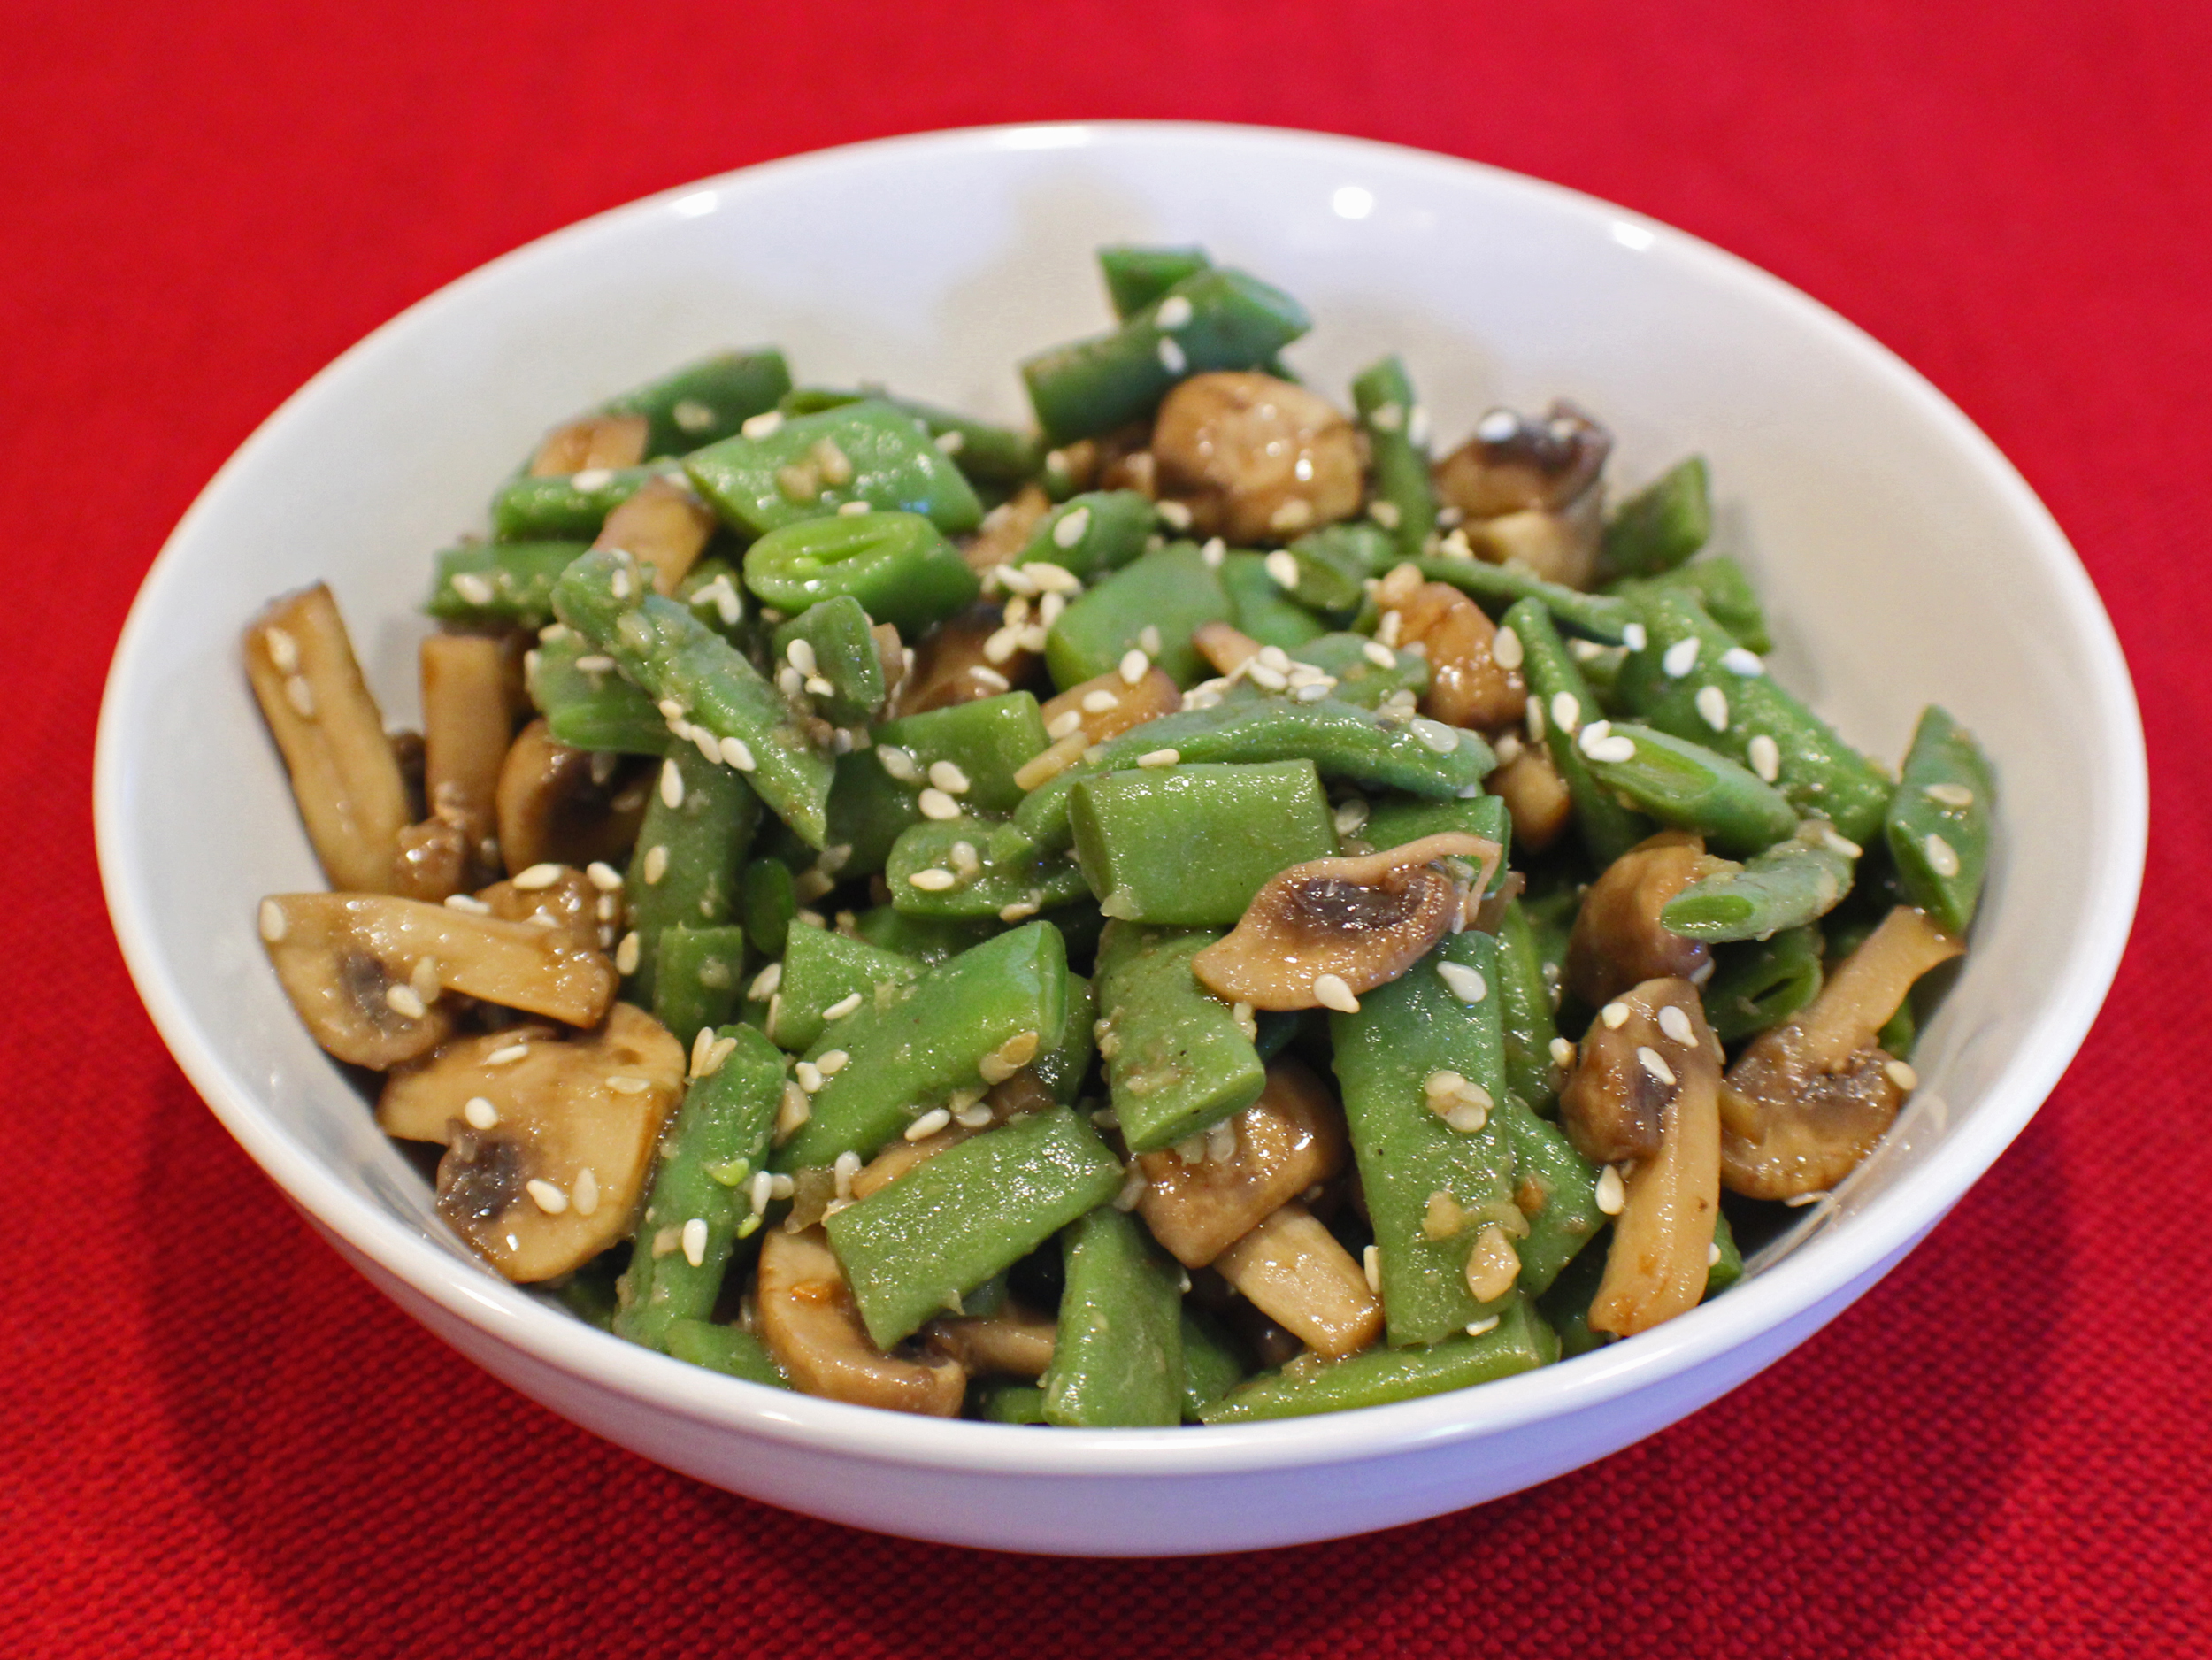
Gingery Beans and Mushrooms

Gingery Beans and Mushrooms

This is a very quick vegetable side dish that can be done in 10 minutes from gathering and preparing ingredients (using already prepared ginger and garlic) to finished cooking, using fresh or frozen green beans. Not a fan of green beans? Switch them out with broccoli or asparagus.

Frozen beans are ready, no need to thaw in advance, so all you need to do is quarter about 10 button mushrooms and you are ready to cook. I happen to have a package of beans from my garden last summer still in the freezer, so that’s what I used.

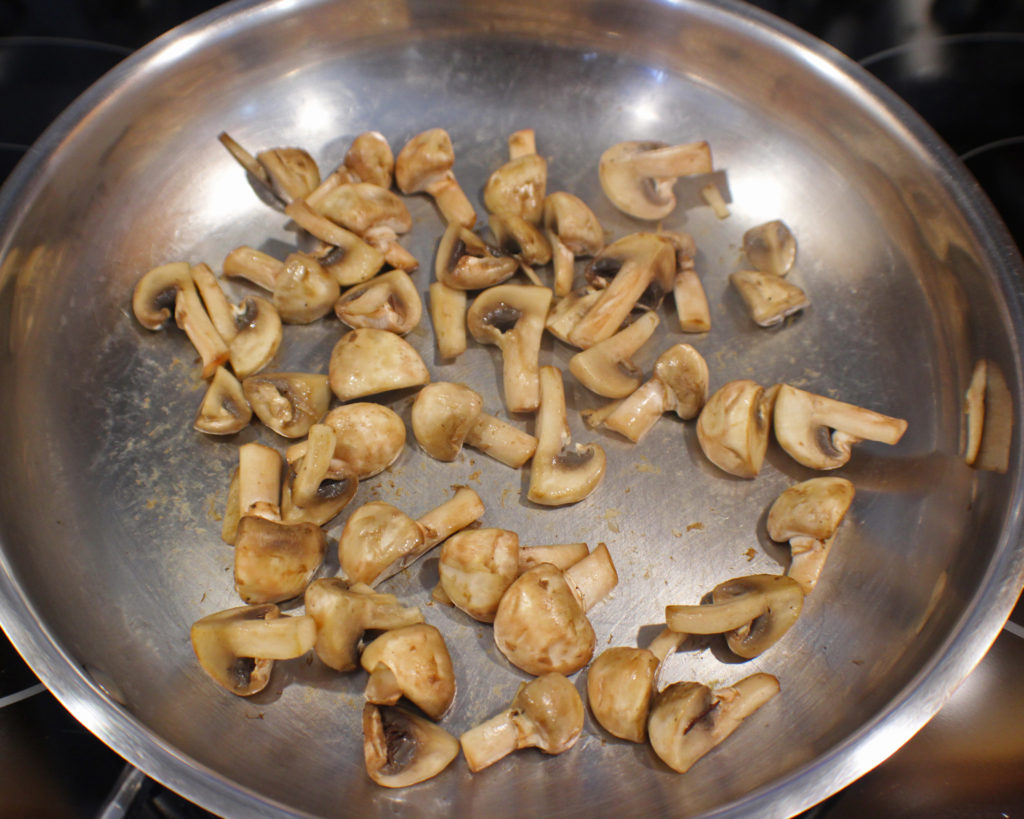
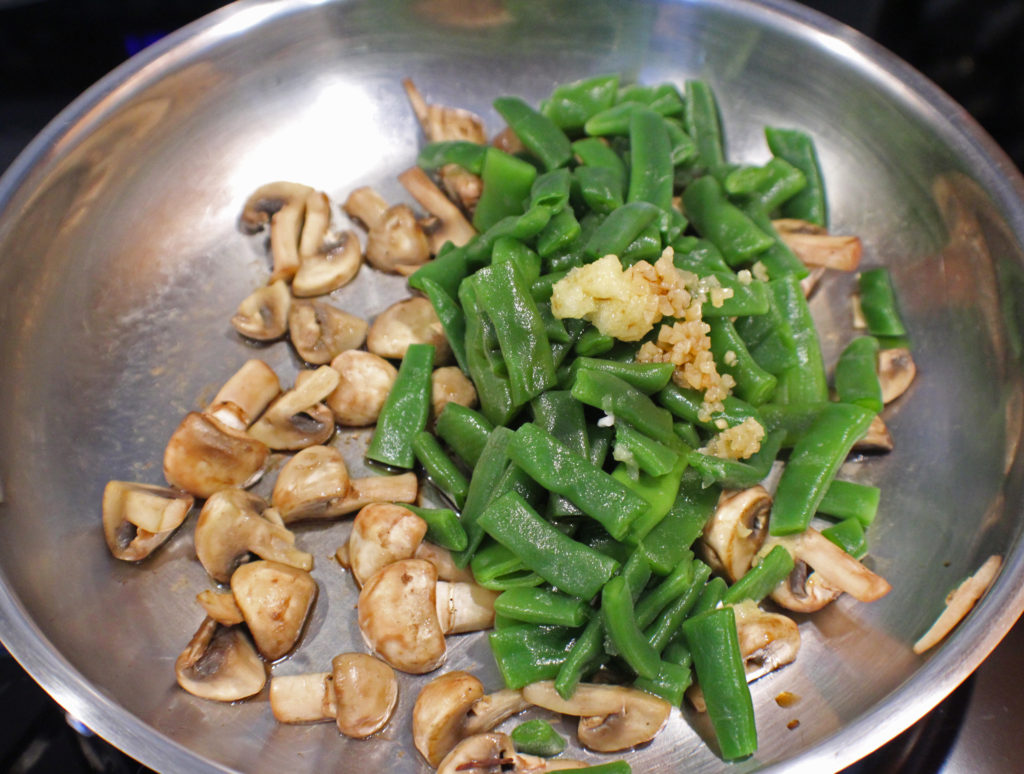
Heat a medium stainless steel saute pan on medium heat and add 1 teaspoon of the sesame oil and the mushrooms. Saute for about 3 minutes until they are nice and golden brown.

You could use a non-stick pan if that is your preference.

Gingery Beans and Mushrooms Sauteing

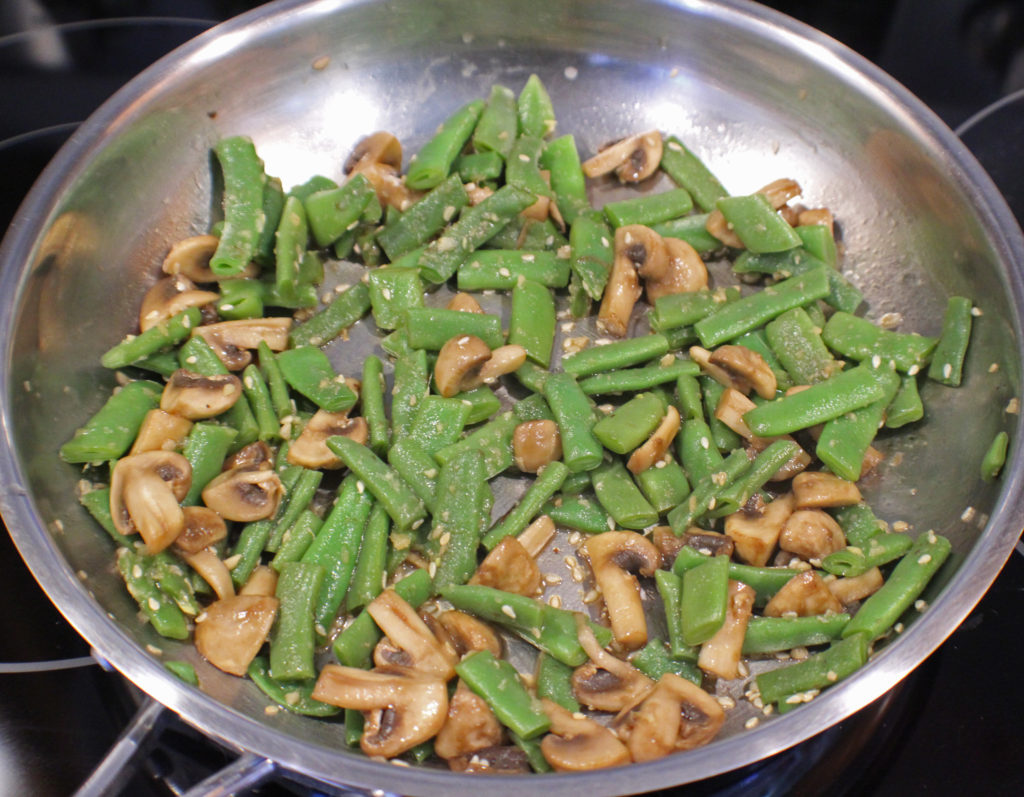
Now add the rest of the ingredients, including the other teaspoon of sesame oil. Saute for another couple of minutes, scraping up the bits that got stuck to the bottom of the pan.

Gingery Beans and Mushrooms Ready

That’s all there is to it.

Try this with Hazelnut Crusted Pork Medallions.

Enjoy!

Gingery Beans and Mushrooms

The refreshing flavor of ginger with a hint of sesame and soy permeate this delightful and quick vegetable side dish.
Prep Time5 minutes
Cook Time5 minutes
Course: Side Dish, Vegetable
Cuisine: American, Asian
Keyword: Ginger, Green Beans, Mushrooms
Servings: 4 people
Calories: 146kcal
Author: Eating With Deb

Equipment

  • Medium stainless steel saute pan and spoon
  • Cutting board and knife

Ingredients

  • 2 cups frozen beans
  • 2 cups button mushrooms quartered, about 10 mushrooms
  • 2 tsp toasted sesame oil
  • 2 tsp soy sauce or wheat free tamari
  • 2 tsp ginger fresh, minced
  • 1 tsp garlic fresh, minced
  • 2 tsp toasted sesame seeds

Instructions

  • Heat a medium stainless steel saute pan on medium heat. Add 1 teaspoon of the sesame oil and the mushrooms. Saute for about 3 minutes until the mushrooms are nice and golden brown.
  • Add the other teaspoon of sesame oil and the rest of the ingredients, scraping up the bits that are stuck to the bottom of the pan, and saute for another 2 or 3 minutes until the beans are heated through.
  • Enjoy!

Notes

For an alternative, switch out the beans with broccoli.

Nutrition

Calories: 146kcal | Carbohydrates: 23g | Protein: 8g | Fat: 3g | Saturated Fat: 1g | Sodium: 213mg | Potassium: 541mg | Fiber: 6g | Sugar: 1g | Vitamin A: 155IU | Vitamin C: 8mg | Calcium: 42mg | Iron: 2mg