Breaded Pork Bites

I originally started making this recipe using whole pork chops, which you can do, just follow all steps except cutting up the pork chops. After a friend tried it, she suggested cutting the pork chop into smaller bites so there was more crunchy breading to enjoy. Once I started cutting the pork chops down, I haven’t gone back. These are great as a main course or an appetizer, dipped in marinara sauce, or just eat them as is.

This is a very quick and easy recipe to make; quick enough to throw together on a busy week night. Just mix the marinade ingredients together – olive oil, mayonnaise, Dijon, and Worcestershire sauce. Cut your pork chops into cubes, or not, and marinate the pork for about 30 minutes. If you are in a hurry, marinate long enough to get your bread crumb mixture ready and your air fryer out.

Next, combine the bread crumbs and Parmesan cheese. If there are allergen issues, there are gluten-free bread crumbs available and if it’s a dairy issue, omit the Parmesan or use a dairy-free Parmesan. Remove the pork from the marinade and roll around in the bread crumb mixture, pressing it into the pork. I like to set the breaded pork on a rack for another 30 minutes. This helps the breading stick to the pork after it’s cooked and you cut into it. Again, this step is not 100 percent necessary, or you can do everything up to this point and put your breaded pork, uncovered, in your refrigerator overnight.

Now it’s time to pull out that air fryer. Spray the bottom of the pan with non-stick cooking oil. Arrange the pork so it is not touching each other – you may have to do this in 2 batches. If you are making 4 whole pork chops, you will probably be able to fit all 4 in at once. Spray the tops with the cooking oil. Turn on your air fryer and set it to 360 degrees for 4 minutes and cook. Turn everything over and repeat – 360 degrees for 4 minutes. I’ve made these many times and they are done at this point, but check the temperature and make sure they have reached 155 degrees.

If you have to do this in 2 batches, put the first batch on a pan lined with parchment paper in a warm oven or a warm toaster oven until the second batch is done.

I usually eat this as a dinner, not an appetizer, generally serving it with Rosemary Parmesan Roasted Potatoes and a vegetable. I steamed some chard this time around.

Breaded Pork Bites

Marinating and breading pork, then cooking it in an air fryer gives you moist, tender, crispy, and delicious bites of pork. These are great as an appetizer dipped in marinara sauce or as the main part of your meal.
Prep Time20 minutes
Cook Time8 minutes
Resting Time1 hour
Total Time1 hour 28 minutes
Course: Appetizer, Entree, Main Course
Cuisine: American
Keyword: Air Fryer, Pork
Servings: 4 people
Calories: 320kcal
Author: Eating With Deb

Equipment

  • Air Fryer

Ingredients

  • 4 each pork chops
  • ¼ cup Worcestershire
  • ¼ cup olive oil
  • 4 tsp Dijon mustard
  • 4 tsp mayonnaise
  • 1 cup bread crumbs Italian seasoned
  • ½ cup parmesan cheese shredded

Instructions

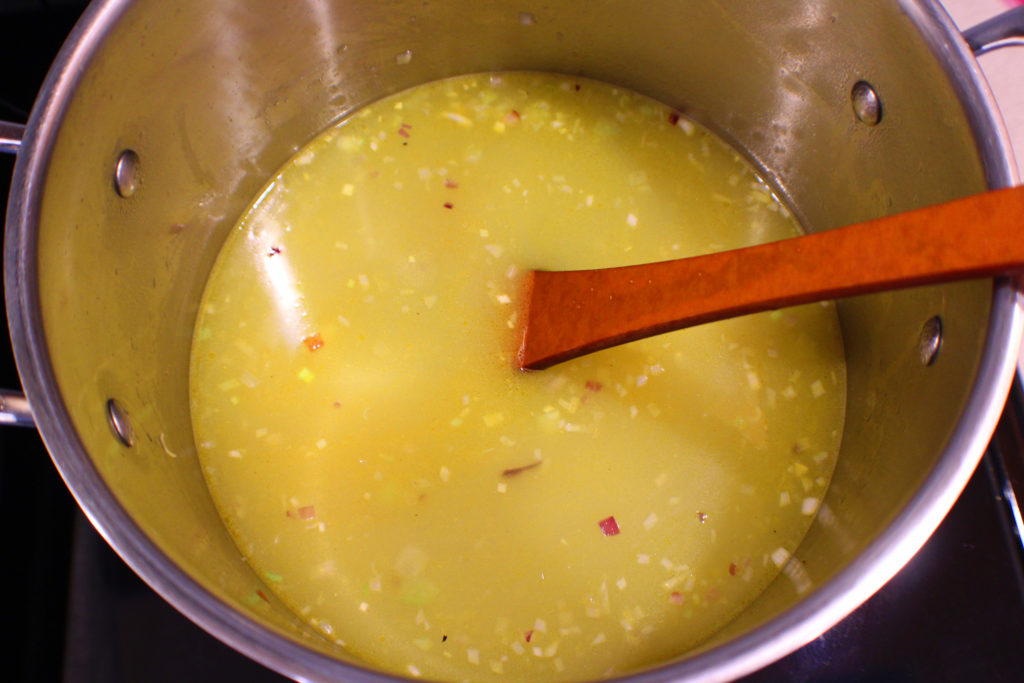
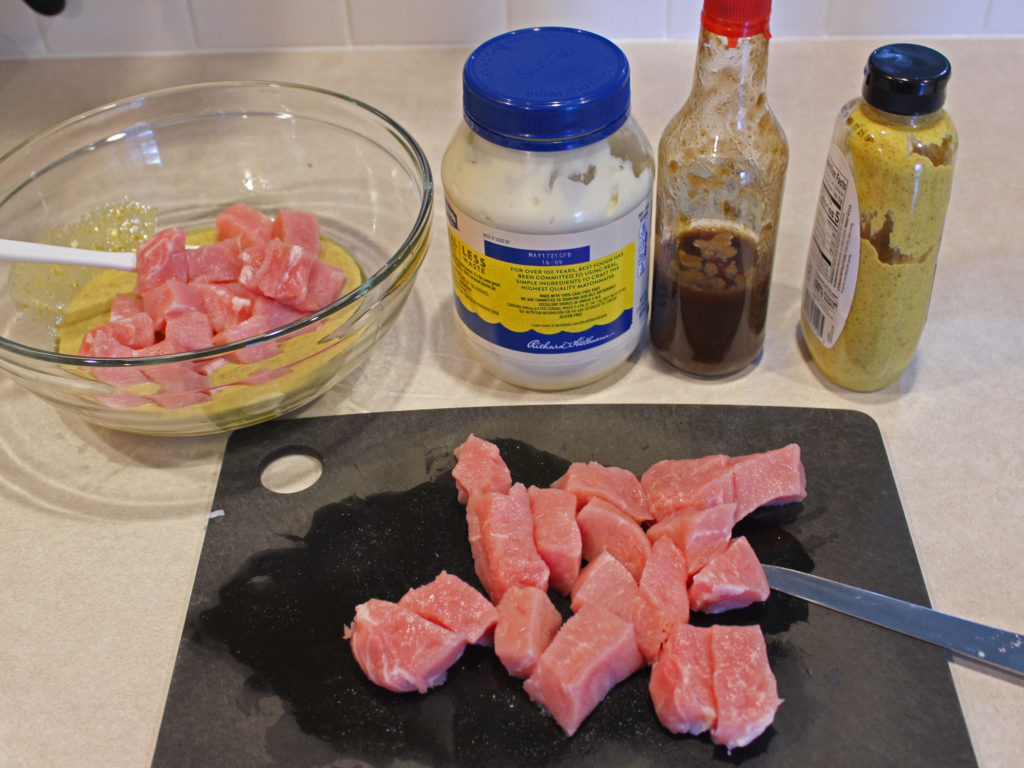
  • Mix together Worcestershire, olive oil, mustard, and mayonnaise. Cut pork chops into bite size pieces and mix into marinade. Let sit at room temperature for 30 minutes.
  • In a separate bowl, combine bread crumbs and parmesan cheese.
  • Remove pork bites from marinade and toss a few at a time into bread crumbs and parmesan. Set aside on a wire rack for 30 minutes (not completely necessary but the drying out process will help the breading stick to the pork when it is cut).
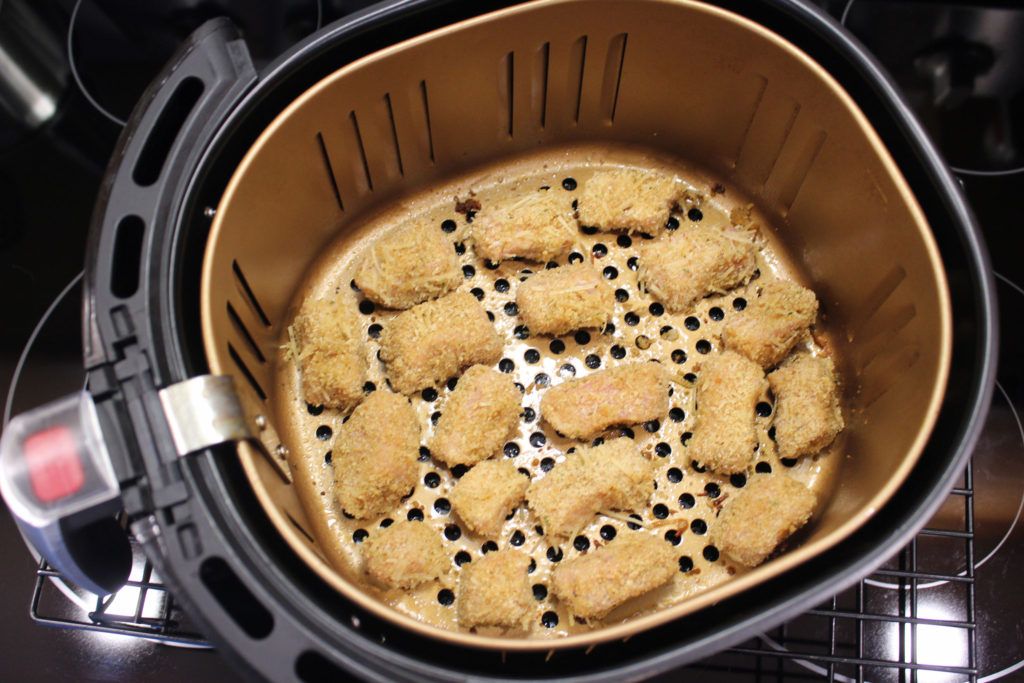
  • Get air fryer ready by spraying the bottom of the basket with cooking spray.
  • Arrange pork bites in bottom of the basket taking care to not over-crowd the basket. You may have to cook in 2 batches. You can put your first batch in a warm oven or toaster oven to keep hot while you are cooking the second batch.
  • Set air fryer to 360 degress and cook for 4 minutes. Turn pork bites over and cook at 360 degrees for another 4 minutes. They should be done and crispy at this point. Double check by making sure the pork has reached an internal temperature of 150 degrees.
  • Enjoy!

Nutrition

Serving: 1each | Calories: 320kcal | Carbohydrates: 23g | Protein: 9g | Fat: 21g | Saturated Fat: 5g | Cholesterol: 11mg | Sodium: 649mg | Potassium: 202mg | Fiber: 1g | Sugar: 4g | Vitamin A: 111IU | Vitamin C: 2mg | Calcium: 219mg | Iron: 2mg

Blended Beet Soup

I know you don’t like beets. They definitely aren’t for everyone, but I happen to love them. The nutritional benefits alone should be enough to convince you to at least give them a try. In this soup, I cut the beets with carrots and potatoes to remove some of the earthy flavors and add a little natural sweetness.

First, gather and prep all your ingredients. Depending on the size chunks you cut your vegetables in will depend on the cooking time, so smaller chunks equals less cook time. I also use beef stock instead of vegetable stock only because I like the flavor better, but use vegetable stock to keep this soup vegetarian, if that is your desire.

Prepping the vegetables is the hardest part of this soup. Once ready, add a little olive oil to a large, hot stock pot and add your onions. Saute for a couple minutes until they turn translucent, then add the garlic and saute for another minute or 2.

Add the rest of the vegetables, the stock and seasonings plus a little sea salt and black pepper. You can add more salt and pepper at the end if necessary.

Bring to a boil and reduce to a simmer. Cook until the vegetables are fork tender, probably 30 to 45 minutes depending on what size you cut your vegetables.

Now it’s time to blend. If you don’t have a stick blender, I recommend investing in one. You’ll be amazed how much easier these are to use than a food processor for many different blended foods. When deciding on one to purchase, make sure the blades are metal.

If you don’t have a stick blender, use a food processor or a stand blender. Just be careful not to overfill, the soup is hot!

Blend until you reach your desired consistency. I prefer not totally pureed, it needs to have some thickness, and a few chunks don’t hurt.

Taste it to see if you need more salt or pepper. I also like to stir in a few handfuls of greens, beet greens, kale, spinach or arugula. It doesn’t matter, just whatever I have on hand. This adds extra nutrients, texture, and flavor.

I like to blend a little prepared horseradish and black pepper with sour cream and top my bowl of soup with a dollop of the sour cream mixture and some fresh parsley or chives.

Any leftovers, I freeze in portion size containers.

A word of caution – don’t be alarmed the next day after your morning constitutional, beets turn things red!

Enjoy!

Blended Beet Soup

Beets are a hard sell for many people. By adding some potatoes and carrots to the beets, they cut the earthy taste and give this soup a little sweetness. Top it with some sour cream seasoned with horseradish and black pepper and you have a wonderful tasting and healthy fall/winter soup.
Prep Time20 minutes
Cook Time45 minutes
Course: Dinner, Soup
Cuisine: American
Keyword: Beets, Dairyfree, Glutenfree, soup, Vegetarian
Servings: 6 cups
Calories: 116kcal
Author: Eating With Deb

Equipment

  • Large Stock Pot
  • Stick Blender or Food Processor

Ingredients

  • 1 tbsp olive oil
  • ¼ cup yellow onion diced
  • 1 tbsp garlic minced, fresh
  • 2 cups beets peeled and diced
  • 2 cups potatoes diced (russets, yellow or red work)
  • 1 cup carrots diced
  • 4 cups vegetable stock or beef stock
  • 1 tsp thyme dry
  • 1 tsp oregano dry
  • Sea salt and black pepper to taste

Instructions

  • In a large stockpot heat olive oil. Add onions and cook for 2 to 3 minutes until translucent. Add the garlic, stir and cook for another 2 minutes.
  • Add in the vegetables, stock, and seasoning. Bring to a boil, reduce heat and simmer for 30 to 45 minutes until the vegetables are fork-tender. The time will vary depending on how big you cut your veggies.
  • Remove from heat and using a stick blender, blend until you reach your desired consistency. Taste and add more salt or pepper if desired.
  • I like to stir in a few handfuls of the beet greens if I have them or some spinach or kale. The heat will wilt the greens.
  • Serve with a dollop of sour cream mixed with prepared horseradish (to taste) and sprinkle on some parsley or chives if desired.
  • Enjoy!

Notes

If you do not have a stick blender you can use a blender or food processor. Just be careful not to overfill, the soup is hot!

Nutrition

Serving: 1cup | Calories: 116kcal | Carbohydrates: 22g | Protein: 3g | Fat: 3g | Saturated Fat: 1g | Sodium: 682mg | Potassium: 520mg | Fiber: 4g | Sugar: 6g | Vitamin A: 3913IU | Vitamin C: 18mg | Calcium: 28mg | Iron: 1mg

Garlic Cheddar Dinner Rolls

There is nothing better than homemade bread fresh out of the oven, well almost nothing, maybe chocolate, but fresh bread is way up on the list. These rolls are easy to make and well worth the wait.

Start by putting yeast, sugar, olive oil, and warm water in the bowl of a stand mixer. A few things to note in this step:

   – do not add the salt in this step, sugar activates yeast and salt kills it;

   – your water should be around 110 – 115 degrees, any cooler it will take longer to activate, if at all, and any warmer risks killing the yeast, I use my wrist to temp the water but until you get used to the feel, use a thermometer;

   – a stand mixer makes life easy, but if you don’t have one, just use a large bowl and a hefty wooden spoon to mix or a dough hook on a hand mixer.

Once your yeast is nice and bubbly, it’s time to add the rest of the ingredients. Add the garlic, salt, cheddar cheese, and 1 cup of flour. Mix until just combined. Add the other 2 cups of flour and mix for about 3 minutes. If it doesn’t for a ball, add more flour and little at a time until the dough forms a ball. Remove dough from the bowl, spray it with cooking spray and return dough to bowl. Cover and set aside.

After about an hour the dough should have about doubled in size and is nice and airy looking. Punch down the dough and put it on a clean, floured surface and mound it into a wide log.

Cut into 8 equal chunks. Just eyeball it, no need to get out a kitchen scale. I cut the dough log in half, each half in half, and each quarter in half. It usually comes out fairly even but it’s ok if they aren’t all exactly the same size. Roll each chunk into a ball.

Drizzle about 1 tablespoon of olive oil in the bottom of a 12 inch cast iron pan and spread it around the bottom and sides using a brush or a paper towel works too. Place the dough balls evenly around the pan, spray the top of the rolls, cover with some plastic wrap and set aside for about 30 minutes, until doubled.

When almost doubled, preheat the oven to 350 degrees.

When the rolls are ready for the oven, remove the cover and put in the oven for 15 minutes. Remove from the oven and add the rest of the cheddar cheese. Return to the oven for another 10 to 15 minutes until nice and golden brown.

Remove from oven to a raised wire rack or a wool hot pad. Learn from my mistake and don’t put a hot cast iron pan on a cotton or polyester hot pad, it will start it on fire!

Garlic Cheddar Dinner Rolls

Dinner rolls can be simple to make, especially when using a cast iron pan. Add a couple of different flavor ingredients, in this case, garlic and cheddar cheese, and you have a quick and tasty roll to add to your dinner.
Prep Time15 minutes
Cook Time30 minutes
Total Time2 hours 30 minutes
Course: Bread
Cuisine: American
Keyword: Bread, dinner rolls, rolls
Servings: 8 rolls
Calories: 304kcal
Author: Eating With Deb

Equipment

  • Stand Mixer
  • 12 inch Cast Iron Pan

Ingredients

  • 2 1/2 tsp active dry yeast
  • 1 cup warm water 110-115 degrees
  • 1 tbsp sugar
  • 2 tbsp olive oil
  • 1 tsp sea salt
  • ½ tsp granulated garlic
  • 1 ½ cups cheddar cheese grated
  • 3 cups bread flour

Instructions

  • In a large bowl or stand mixer with a dough hook add yeast, sugar, 1 tbsp olive oil, and water. Let it sit for 10 - 15 minutes until the yeast is bubbly. Add the granulated garlic, sea salt, 1 cup cheddar and 1 cup of flour – mix until combined. Add the other 2 cups of flour and mix for 3 minutes. If needed, slowly mix in more flour to form a soft dough. Remove from bowl.*
  • Spray mixing bowl with cooking spray and place dough back in your bowl, cover and let rise until doubled – about 1 hour.
  • Punch down dough and put on a floured surface. Shape into a log, using a pastry knife, cut into 8 equal pieces. I cut the log in half, then each half in half, then each quarter into half – this gives me fairly equal pieces.
  • Put 1 tbsp olive oil in the bottom of a 12 inch cast iron pan and spread around the bottom and sides.
  • Roll each dough piece into a ball and place evenly around the pan. Cover and let rise until doubled in size (about ½ hour – may take longer depending on how warm you kitchen is).
  • Preheat oven to 350°.
  • Remove cover from rolls and bake for 15 minutes. Remove from oven and add remainder of the cheddar cheese. Bake for another 10-15 minutes until golden brown.
  • Remove from oven to a raised baking sheet or place on a wool hot pad or a turret suitable for holding a hot cast iron pan. Let sit for about 15 minutes before removing from pan and eating.
  • Enjoy!

Notes

I have used whole wheat bread flour in this recipe and it turns out great, the only problem is I’ve had a difficult time finding whole wheat bread flour. But if you can get it and like whole wheat bread, I would recommend using it.
*If not using a mixer with a dough hook when doing the original mixing, place dough on a floured surface and knead until smooth and elastic – about 6 – 8 minutes.

Nutrition

Serving: 1roll | Calories: 304kcal | Carbohydrates: 37g | Protein: 12g | Fat: 12g | Saturated Fat: 5g | Cholesterol: 22mg | Sodium: 425mg | Potassium: 103mg | Fiber: 2g | Sugar: 2g | Vitamin A: 212IU | Calcium: 160mg | Iron: 1mg

Split Pea Soup

There’s something soothing about a hot bowl of split pea soup on a cool fall, winter or even spring day. Many a time I’ve come in from snow blowing and warmed up to a hot bowl of split pea soup.

One could spend the day boiling down a ham bone to make the stock but having good quality chicken or vegetable stock on hand and good ham, this soup is easy to make. It only takes about 2 hours for the split peas to be soft enough and the soup thick enough to eat.

First, prep your veggies, ham and split peas. This will only take about 15 minutes.

Chop your mirepoix (onions, carrots, and celery), garlic and ham.


Get the stock of your choice (chicken or veggie) and sort through your split peas to ensure there aren’t any dirt clods or rocks.

Heat a large stockpot and add olive oil, the mirepoix, and some black pepper (several turns of your pepper mill will do). Cook until the onion is translucent.

Then add the garlic, stir a few times, and add the split peas and the stock of your choice. Cover and cook for an hour stirring occasionally.

Next add the ham if you are using it. Stir it in and add more black pepper if desired. Don’t add any salt yet, the stock and ham will probably add enough salt for you. If not using ham, you will want to add some salt for flavor.

Leave pot uncovered and simmer for another 30 to 60 minutes until you reach your desired soup thickness. Stir occasionally and taste once or twice to adjust salt and pepper flavor.

Add a Parmesan Crisps or some chives or a dollop of sour cream.

Enjoy!

Split Pea Soup

Split pea soup doesn't have to take all day by boiling down a ham bone, although it is tasty when made that way. It can be a quick process and still taste just as good. It can also be made vegetarian by omitting the ham and using vegetable stock instead of chicken stock.
Prep Time15 minutes
Cook Time2 hours
Course: Main Course, Soup
Cuisine: American
Keyword: ham, soup, split pea
Servings: 10 cups
Calories: 315kcal
Author: Eating With Deb

Equipment

  • 4 - 5 quart stock pot

Ingredients

  • 1 cup yellow onion diced
  • 1 cup celery diced
  • 1 cup carrots diced
  • 2 tbsp olive oil
  • 2 tbsp fresh garlic minced
  • 1 pound dried split peas
  • 8 cups chicken stock or veggie stock
  • 3 cups cooked ham diced,
  • Sea salt and black pepper to taste

Instructions

  • Prep vegetables and ham. Sort through split peas to ensure there are no rocks or dirt clods.
  • Add oil to a hot stockpot and add the veggies and a little black pepper. When onion is translucent, add the garlic, and stir a couple times. Add the split peas and stock of your choice.
  • Bring to a boil, reduce to a simmer. Cover and cook for an hour stirring occasionally. After an hour, stir in the ham. Taste the soup to determine if you need more pepper. I usually wait until close to the end of the cooking process to determine if it needs salt. If using ham, you probably won’t need salt.
  • Leave uncovered and simmer, stirring occasionally for another 45 minutes to an hour to reach your desired thickness. I taste it every now and then and add more pepper if needed.
  • Serve as is or top with a peppered or plain Parmesan crisp, sour cream or chives.
  • Enjoy!

Notes

At the end of the cooking process you could throw in a couple handfuls of spinach, kale or arugula for some added nutrients.
Will make about 10 to 12 cups depending on how long you cook it to thicken the soup. I like a pretty thick split pea soup so I generally get about 10 cups.
This soup holds up well in the freezer. I save sour cream containers. They work perfect for putting soup in them and freezing.

Nutrition

Serving: 1cup | Calories: 315kcal | Carbohydrates: 38g | Protein: 23g | Fat: 8g | Saturated Fat: 2g | Cholesterol: 31mg | Sodium: 691mg | Potassium: 839mg | Fiber: 12g | Sugar: 8g | Vitamin A: 2257IU | Vitamin C: 12mg | Calcium: 48mg | Iron: 3mg